Table of Contents
Advertisement
Quick Links
Advertisement
Table of Contents

Subscribe to Our Youtube Channel
Related Manuals for Simons Voss Technologies Digital SmartHandle AX A0


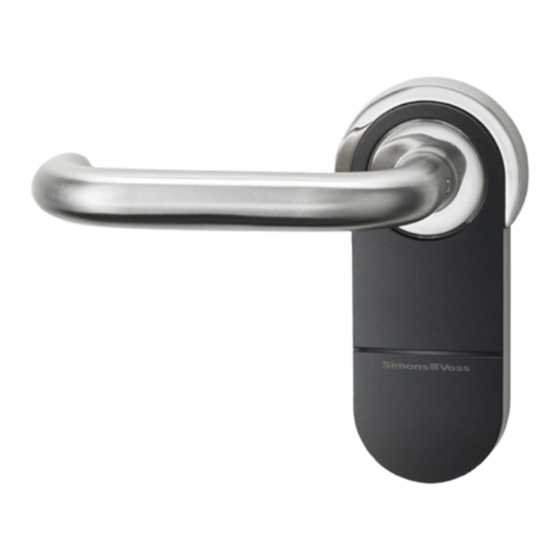
Summary of Contents for Simons Voss Technologies Digital SmartHandle AX A0
- Page 1 Digital SmartHandle AX Manual 23.01.2024...
-
Page 2: Table Of Contents
Contents Digital SmartHandle AX (Manual) 2 / 296 Contents Intended use.............................. 6 General................................ 7 General safety instructions ........................ 9 Product-specific safety instructions .................... 12 Meaning of the text formatting ...................... 13 Versions ............................... 14 Mechanical Override (MO) ........................ 14 Profiles ................................. 14 Fastening ................................ 14 Distances and door thicknesses ...................... - Page 3 Contents Digital SmartHandle AX (Manual) 3 / 296 Variant A1 and A2 (suspended installation) .................. 75 7.4.1 Glass door fitting .......................... 75 7.4.2 Product-specific safety instructions................... 76 7.4.3 Scope of delivery........................... 77 7.4.4 Design .............................. 77 7.4.5 Prepare door (drilling template) .................. 78 7.4.6 For door thickness X: prepare threaded rods and spindle ........
- Page 4 Contents Digital SmartHandle AX (Manual) 4 / 296 7.9.4 For door thickness X: prepare threaded rods and spindle ........ 202 7.9.5 For inner door handle, clockwise: prepare stud bolts .......... 203 7.9.6 Programming the fitting...................... 206 7.9.7 Installing the fitting........................ 207 7.10 Variant F1 (French 195 mm backplate) ..................... 217 7.10.1...
- Page 5 Contents Digital SmartHandle AX (Manual) 5 / 296 Signal ................................. 253 Battery warning ............................. 254 13.1 Warning level.............................. 254 14. Battery replacement.......................... 255 14.1 Instructions on battery replacement .................... 255 14.2 Procedure ............................... 255 15. Maintenance, cleaning and disinfection .................. 258 16.
-
Page 6: Intended Use
1.. Intended use Digital SmartHandle AX (Manual) 6 / 296 1. Intended use Products in the SmartHandle AX range consist of electronic door fittings. Users can engage SmartHandle AX and open the door onto which it is fitted with an authorised ID medium, such as a transponder. The corresponding authorisations need to be issued using an electronic locking plan. -
Page 7: General
2.. General Digital SmartHandle AX (Manual) 7 / 296 2. General The SmartHandle AX is an electronic fitting that can be used to open and close a door. Electronic fittings in the this range are available in the following models (also see Versions [ 14]... - Page 8 2.. General Digital SmartHandle AX (Manual) 8 / 296 Digital SmartHandle AX Description DS version Electronic door handle for mounting on prepared escutcheon holes for stationary installation Suitable for handle locks with Euro profile (A) or SwissRound (B) Outside and inside can only be operated with identification ...
-
Page 9: General Safety Instructions
3.. General safety instructions Digital SmartHandle AX (Manual) 9 / 296 3. General safety instructions Signal word: Possible immediate effects of non-compliance WARNING: Death or serious injury (possible, but unlikely) CAUTION: Minor injury IMPORTANT: Property damage or malfunction NOTE: Low or none WARNING Blocked access Access through a door may stay blocked due to incorrectly fitted and/or in-... - Page 10 3.. General safety instructions Digital SmartHandle AX (Manual) 10 / 296 IMPORTANT Damage resulting from electrostatic discharge (ESD) This product contains electronic components that may be damaged by electrostatic discharges. 1. Use ESD-compliant working materials (e.g. Grounding strap). 2. Ground yourself before carrying out any work that could bring you into contact with the electronics.
- Page 11 3.. General safety instructions Digital SmartHandle AX (Manual) 11 / 296 NOTE Intended use SimonsVoss-products are designed exclusively for opening and closing doors and similar objects. Do not use SimonsVoss products for any other purposes. Malfunctions due to poor contact or different discharge Contact surfaces that are too small/contaminated or different discharged batteries can lead to malfunctions.
-
Page 12: Product-Specific Safety Instructions
4.. Product-specific safety instructions Digital SmartHandle AX (Manual) 12 / 296 4. Product-specific safety instructions IMPORTANT Damage by drilling You drill at your own risk. SimonsVoss Technologies GmbH is not liable for damage caused by drilling. Please also observe the safety instructions of the drilling machine. ... -
Page 13: Meaning Of The Text Formatting
5.. Meaning of the text formatting Digital SmartHandle AX (Manual) 13 / 296 5. Meaning of the text formatting This documentation uses text formatting and design elements to facilitate understanding. The table explains the meaning of possible text formatting: Example button Example checkbox... -
Page 14: Versions
6.. Versions Digital SmartHandle AX (Manual) 14 / 296 6. Versions 6.1 Mechanical Override (MO) Profiles [ 14] You can also install a mechanical locking cylinder (see This enables you to open the door without using the electronics and open the door with a mechanical key. -
Page 15: Distances And Door Thicknesses
6.. Versions Digital SmartHandle AX (Manual) 15 / 296 Fastening Variant A0 (Standing installation) [ 23] Variant A1 and A2 (suspended installation) [ 75] You fasten the Smart- Variant DS (reader Rosette fastening with Handle AX through the on both sides) (optional) mechanical drill holes and holes... - Page 16 6.. Versions Digital SmartHandle AX (Manual) 16 / 296 Versions Centre distance Door thickness not relevant (standing S: 38 - 60 mm installation: handle M: 59 - 80 mm A0/B0 shaft axis and profile L: 79 - 100 mm cylinder axis not con- Stationary nected to the escut- X: 100 - 200 mm...
-
Page 17: Pas24
6.. Versions Digital SmartHandle AX (Manual) 17 / 296 Versions Centre distance Door thickness not relevant (standing S: 38 - 58 mm installation: handle M: 59 - 78 mm shaft axis and profile Double-sided scanning L: 79 - 99 mm cylinder axis not con- (Double-sided) nected to the escut- X: 100 - 200 mm... -
Page 18: Network
6.. Versions Digital SmartHandle AX (Manual) 18 / 296 Square size with sleeve attached to 8 mm (not included in delivery) 8.5 mm sold separately Order the fire-retardant version of 9 mm the SmartHandle AX or fire doors and emergency exit locks. With sleeve attached to 8 mm (already included in the scope of 10 mm... -
Page 19: Handle Variants
6.. Versions Digital SmartHandle AX (Manual) 19 / 296 6.9 Handle variants You can personalise your SmartHandle AX with the following handle variants: Letter Description L shape R (rounded) L shape G (mitred) U shape R (rounded) U shape G (mitred) U shape (round and offset) Supplied without handle (for use with adapter sets and third-party handles, see... -
Page 20: Surface Finishes
6.. Versions Digital SmartHandle AX (Manual) 20 / 296 6.10 Surface finishes Select your surface finish SmartHandle AX from: Silver/black-grey Silver/white Silver/deep black Brass/white... -
Page 21: Reader Technology
6.. Versions Digital SmartHandle AX (Manual) 21 / 296 6.11 Reader technology Depending on the equipment, your SmartHandle AX supports the following scanning methods: Active (25 kHz) - initial programming also possible passively Passive (MIFARE Classic, Plus, DESFire ) ... - Page 22 6.. Versions Digital SmartHandle AX (Manual) 22 / 296 can create up to 64000 different time zone plans in each G2 locking system or 100+1 time zone groups in each G2 lock. For detailed information on time zone control, see the LSM manual.
-
Page 23: Installation
7.. Installation Digital SmartHandle AX (Manual) 23 / 296 7. Installation You can programme the SmartHandle AX while it is still in the packaging (except MP) and then install it. You will also find information on installing the SmartHandle AX in the accompanying quick guide. -
Page 24: Scope Of Delivery
7.. Installation Digital SmartHandle AX (Manual) 24 / 296 NOTE Incorrect installation SimonsVoss Technologies GmbH accepts no liability for damage caused to doors or components due to incorrect fitting or installation. Effect on the mortise lock The SmartHandle AX acts exclusively on the latch of the mortise lock. Locking and insurances Insurance companies place increased demands on a closure. -
Page 25: Design
7.. Installation Digital SmartHandle AX (Manual) 25 / 296 7.2.3 Design... -
Page 26: Prepare Door (Drilling Template)
7.. Installation Digital SmartHandle AX (Manual) 26 / 296 7.2.4 Prepare door (drilling template) ü Pin or scriber at hand. ü Drill at hand. Suitable drill bit at hand (depending on mortise lock hole diameter: ü 8.5 mm/9.5 mm/10.5 mm). PH2 screwdriver at hand. ü... - Page 27 7.. Installation Digital SmartHandle AX (Manual) 27 / 296 2. Place the drilling template on the spindle. 3. Align the drill template vertically using the printed scale.
- Page 28 7.. Installation Digital SmartHandle AX (Manual) 28 / 296 4. Mark the points to be drilled on the door.
- Page 29 7.. Installation Digital SmartHandle AX (Manual) 29 / 296 5. Remove the drilling template.
- Page 30 7.. Installation Digital SmartHandle AX (Manual) 30 / 296 6. Remove the spindle.
- Page 31 7.. Installation Digital SmartHandle AX (Manual) 31 / 296 7. Remove the mortise lock (PH2). 8. Measure the diameter of the fastening holes.
- Page 32 7.. Installation Digital SmartHandle AX (Manual) 32 / 296 9. Determine the required drill bit based on the measured diameter. Ø fasten- Drill bits 10. Drill the required holes. ing holes required 5.5 mm– 8.5 mm 6.3 mm 6.4 mm– 8.5 mm 7.3 mm 7.4 mm– 9.5 mm 8.7 mm ≥...
- Page 33 7.. Installation Digital SmartHandle AX (Manual) 33 / 296 11. Fit the mortise lock (PH2).
-
Page 34: For Door Thickness X: Prepare Threaded Rods And Spindle
7.. Installation Digital SmartHandle AX (Manual) 34 / 296 7.2.5 For door thickness X: prepare threaded rods and spindle ü Saw at hand. ü Vernier calliper at hand. PH2 screwdriver at hand. ü 1. For X: measure the door thickness. 2. -
Page 35: Programming The Fitting
7.. Installation Digital SmartHandle AX (Manual) 35 / 296 Door thickness + 37 mm (±4 mm) 4. For X: use a suitable saw to cut the threaded rods and spindle. 7.2.6 Programming the fitting Programme the fitting before installation. You can use different programming devices, depending on the product family. -
Page 36: Installing The Fitting
7.. Installation Digital SmartHandle AX (Manual) 36 / 296 7.2.7 Installing the fitting ü Door pre-drilled. ü PH2 screwdriver at hand. TX15 screwdriver at hand. ü Vernier calliper at hand. ü ü Pincers at hand. 1. For S, M and L: measure the door thickness. 2. - Page 37 7.. Installation Digital SmartHandle AX (Manual) 37 / 296 3. For S, M and L: trim the cut-to-length screws L1 and L2. 4. For 7 mm spindle: place the adapter sleeve in the inner handle in such a way that the recess faces the grub screw. 5.
- Page 38 7.. Installation Digital SmartHandle AX (Manual) 38 / 296 6. Insert the interchangeable plate into the inner handle as required.
- Page 39 7.. Installation Digital SmartHandle AX (Manual) 39 / 296 7. Press the spring plate on one side against the interchangeable plate so that the spring is compressed. 8. At the same time, hook the spring plate tabs into the slot in the inner handle.
- Page 40 7.. Installation Digital SmartHandle AX (Manual) 40 / 296 10. For 7 mm spindle: insert the adapter sleeve onto the side of the spindle with the pin. 11. Insert the spindle with the pin side into the fitting. Pin will snap into position in the mount.
- Page 41 7.. Installation Digital SmartHandle AX (Manual) 41 / 296...
- Page 42 7.. Installation Digital SmartHandle AX (Manual) 42 / 296 12. For 8.5 mm and 10 mm spindle: slide the adapter sleeve into the centre of the spindle. Use a punch and hammer to make an indent in the ad- apter sleeve to prevent it from slipping.
- Page 43 7.. Installation Digital SmartHandle AX (Manual) 43 / 296 13. Insert the fitting with the spindle into the door. Use adapter sleeves if necessary. 14. Insert the escutcheon base into the door with the sleeve nuts. Ø mortise 15. Fasten both escutcheon bases together with the L2 screws (PH2, lock Adapter torque 1.1 Nm).
- Page 44 7.. Installation Digital SmartHandle AX (Manual) 44 / 296 16. Fasten the inner handle firmly with the L1 screws (PH2, torque 1.1 Nm). 17. Fasten the set screw on the inner handle firmly (TX15, torque 5.0 Nm). 18. For FH: insert the dummy cylinder.
- Page 45 7.. Installation Digital SmartHandle AX (Manual) 45 / 296 NOTE Feed the blank cylinder into the hole using a screwdriver It is difficult to position the blank cylinder correctly, especially in thick doors. 1. Insert a screwdriver into the hole in the blank cylinder. 2.
- Page 46 7.. Installation Digital SmartHandle AX (Manual) 46 / 296 19. For FH: screw the dummy cylinder firmly into place (PH2, torque 1.1 Nm). 20.Place the two cover plates with the notch facing downwards onto the escutcheon base and the inner handle.
- Page 47 7.. Installation Digital SmartHandle AX (Manual) 47 / 296 21. On the outside, place the cover with the notch facing downwards onto the escutcheon base. 22. Fit the outside handle into position on the fitting.
-
Page 48: Variant A0.Pas (Standing Assembly With Pas24)
7.. Installation Digital SmartHandle AX (Manual) 48 / 296 23. Firmly fasten the grub screw on the outside handle (TX15; torque: 5.0 Nm). Fitting is now installed. 7.3 Variant A0.PAS (Standing assembly with PAS24) 7.3.1 Product-specific safety instructions IMPORTANT Damage by drilling You drill at your own risk. -
Page 49: Scope Of Delivery
7.. Installation Digital SmartHandle AX (Manual) 49 / 296 NOTE Incorrect installation SimonsVoss Technologies GmbH accepts no liability for damage caused to doors or components due to incorrect fitting or installation. Effect on the mortise lock The SmartHandle AX acts exclusively on the latch of the mortise lock. Locking and insurances Insurance companies place increased demands on a closure. -
Page 50: Structure
7.. Installation Digital SmartHandle AX (Manual) 50 / 296 7.3.3 Structure... -
Page 51: Prepare Door (Drilling Template)
7.. Installation Digital SmartHandle AX (Manual) 51 / 296 7.3.4 Prepare door (drilling template) ü Pin or scriber at hand. ü Drill at hand. Suitable drill bit at hand (Ø 8.5 mm). ü PH2 screwdriver at hand. ü 1. Remove the mortise lock (PH2). - Page 52 7.. Installation Digital SmartHandle AX (Manual) 52 / 296 2. Measure the distance (= vertical gap between the centres of the fasten- ing holes).
- Page 53 7.. Installation Digital SmartHandle AX (Manual) 53 / 296 3. Fit the mortise lock (PH2).
- Page 54 7.. Installation Digital SmartHandle AX (Manual) 54 / 296 4. Insert the spindle into the mortise lock.
- Page 55 7.. Installation Digital SmartHandle AX (Manual) 55 / 296 5. Place the drilling template on the spindle. 6. Align the drill template vertically using the printed scale. 7. Use the distance you measured previously to determine where the points need to be drilled.
- Page 56 7.. Installation Digital SmartHandle AX (Manual) 56 / 296 8. Mark the points to be drilled on the door.
- Page 57 7.. Installation Digital SmartHandle AX (Manual) 57 / 296 9. Remove the drilling template.
- Page 58 7.. Installation Digital SmartHandle AX (Manual) 58 / 296 10. Remove the spindle.
- Page 59 7.. Installation Digital SmartHandle AX (Manual) 59 / 296 11. Remove the mortise lock (PH2).
- Page 60 7.. Installation Digital SmartHandle AX (Manual) 60 / 296 12. Drill the required holes.
-
Page 61: Programming The Fitting
7.. Installation Digital SmartHandle AX (Manual) 61 / 296 13. Fit the mortise lock (PH2). 7.3.5 Programming the fitting Programme the fitting before installation. You can use different programming devices, depending on the product family. -
Page 62: Installing The Fitting
7.. Installation Digital SmartHandle AX (Manual) 62 / 296 7.3.6 Installing the fitting ü Door pre-drilled. ü PH2 screwdriver at hand. TX15 screwdriver at hand. ü Vernier calliper at hand. ü ü Pincers at hand. 1. Measure the door thickness. - Page 63 7.. Installation Digital SmartHandle AX (Manual) 63 / 296 2. Identify the L1 screws you need. Door thick- Screw Size ness s (M4) M4x33 (mm) M4x43 38 – M4x53 49 – M4x63 59 – M4x73 69 – M4x83 79 – 89 –...
- Page 64 7.. Installation Digital SmartHandle AX (Manual) 64 / 296 5. For 7 mm spindle: place the adapter sleeve in the inner handle in such a way that the recess faces the grub screw. 6. Determine your inner handle’s direction rotation as viewed from the in- side: clockwise (clockwise = CW) or anti-clockwise (counter-clockwise = CCW).
- Page 65 7.. Installation Digital SmartHandle AX (Manual) 65 / 296 7. Insert the interchangeable plate into the inner handle as required. 8. Press the spring plate on one side against the interchangeable plate so that the spring is compressed.
- Page 66 7.. Installation Digital SmartHandle AX (Manual) 66 / 296 9. At the same time, hook the spring plate tabs into the slot in the inner handle. 10. Press down the spring plate bracket. The inner handle is now ready.
- Page 67 7.. Installation Digital SmartHandle AX (Manual) 67 / 296 11. For 7 mm spindle: insert the adapter sleeve onto the side of the spindle with the pin. 12. Insert the spindle with the pin side into the fitting. Pin will snap into position in the mount.
- Page 68 7.. Installation Digital SmartHandle AX (Manual) 68 / 296...
- Page 69 7.. Installation Digital SmartHandle AX (Manual) 69 / 296 13. For 8.5 mm and 10 mm spindle: slide the adapter sleeve into the centre of the spindle. Use a punch and hammer to make an indent in the ad- apter sleeve to prevent it from slipping.
- Page 70 7.. Installation Digital SmartHandle AX (Manual) 70 / 296 14. Insert the fitting with the spindle into the door. 15. Fasten the escutcheon base to the locking cylinder hole with the L2 screws (PH2, torque: 1.1 Nm).
- Page 71 7.. Installation Digital SmartHandle AX (Manual) 71 / 296 16. Fasten the inner handle firmly with the L1 screws (PH2, torque 1.1 Nm). 17. For FH: insert the dummy cylinder. NOTE Feed the blank cylinder into the hole using a screwdriver It is difficult to position the blank cylinder correctly, especially in thick doors.
- Page 72 7.. Installation Digital SmartHandle AX (Manual) 72 / 296 18. For FH: screw the dummy cylinder firmly into place (PH2, torque 1.1 Nm).
- Page 73 7.. Installation Digital SmartHandle AX (Manual) 73 / 296 19. Fasten the set screw on the inner handle firmly (TX15, torque 5.0 Nm). 20.Place the two cover plates with the notch facing downwards onto the escutcheon base and the inner handle.
- Page 74 7.. Installation Digital SmartHandle AX (Manual) 74 / 296 21. Fit the outside handle into position on the fitting. 22. Firmly fasten the grub screw on the outside handle (TX15; torque: 5.0 Nm). Fitting is now installed.
-
Page 75: Variant A1 And A2 (Suspended Installation)
7.. Installation Digital SmartHandle AX (Manual) 75 / 296 7.4 Variant A1 and A2 (suspended installation) 7.4.1 Glass door fitting You can also use the A1 version of SmartHandle AX with an optionally available lock case on glass doors. SimonsVoss glass door escutcheons require the glass door to have the following mounting holes (dimensions in mm):... -
Page 76: Product-Specific Safety Instructions
7.. Installation Digital SmartHandle AX (Manual) 76 / 296 7.4.2 Product-specific safety instructions IMPORTANT Damage by drilling You drill at your own risk. SimonsVoss Technologies GmbH is not liable for damage caused by drilling. Please also observe the safety instructions of the drilling machine. ... -
Page 77: Scope Of Delivery
7.. Installation Digital SmartHandle AX (Manual) 77 / 296 Sealing escutcheon holes Any escutcheon holes that exist may be used to manipulate the lock. 1. Seal any escutcheon holes with a blind cylinder, for example. 2. In the case of FH versions, you must be install a brass dummy cylinder or locking cylinder. 7.4.3 Scope of delivery SmartHandle AX (suspended installation) ... -
Page 78: Prepare Door (Drilling Template)
7.. Installation Digital SmartHandle AX (Manual) 78 / 296 7.4.5 Prepare door (drilling template) ü Pin or scriber at hand. ü Drill at hand. Suitable drill bit at hand (Ø 8.5 mm). ü PH2 screwdriver at hand. ü 1. Remove the mortise lock (PH2). - Page 79 7.. Installation Digital SmartHandle AX (Manual) 79 / 296 2. Measure the distance (= vertical gap between the centres of the fasten- ing holes).
- Page 80 7.. Installation Digital SmartHandle AX (Manual) 80 / 296 3. Fit the mortise lock (PH2).
- Page 81 7.. Installation Digital SmartHandle AX (Manual) 81 / 296 4. Insert the spindle into the mortise lock.
- Page 82 7.. Installation Digital SmartHandle AX (Manual) 82 / 296 5. Place the drilling template on the spindle. 6. Align the drill template vertically using the printed scale. 7. Use the distance you measured previously to determine where the points need to be drilled.
- Page 83 7.. Installation Digital SmartHandle AX (Manual) 83 / 296 8. Mark the points to be drilled on the door.
- Page 84 7.. Installation Digital SmartHandle AX (Manual) 84 / 296 9. Remove the drilling template.
- Page 85 7.. Installation Digital SmartHandle AX (Manual) 85 / 296 10. Remove the spindle.
- Page 86 7.. Installation Digital SmartHandle AX (Manual) 86 / 296 11. Remove the mortise lock (PH2).
- Page 87 7.. Installation Digital SmartHandle AX (Manual) 87 / 296 12. Drill the required holes.
- Page 88 7.. Installation Digital SmartHandle AX (Manual) 88 / 296 13. Fit the mortise lock (PH2).
-
Page 89: For Door Thickness X: Prepare Threaded Rods And Spindle
7.. Installation Digital SmartHandle AX (Manual) 89 / 296 7.4.6 For door thickness X: prepare threaded rods and spindle ü Saw at hand. ü Vernier calliper at hand. PH2 screwdriver at hand. ü 1. For X: measure the door thickness. 2. -
Page 90: Programming The Fitting
7.. Installation Digital SmartHandle AX (Manual) 90 / 296 Door thickness + 37 mm (±4 mm) 4. For X: use a suitable saw to cut the threaded rods and spindle. 7.4.7 Programming the fitting Programme the fitting before installation. You can use different programming devices, depending on the product family. -
Page 91: Installing The Fitting
7.. Installation Digital SmartHandle AX (Manual) 91 / 296 7.4.8 Installing the fitting ü Door pre-drilled. ü PH2 screwdriver at hand. TX15 screwdriver at hand. ü Vernier calliper at hand. ü ü Pincers at hand. 1. For S, M and L: measure the door thickness. 2. - Page 92 7.. Installation Digital SmartHandle AX (Manual) 92 / 296 3. For S, M and L: trim the cut-to-length screws L1 and L2. 4. For 7 mm spindle: place the adapter sleeve in the inner handle in such a way that the recess faces the grub screw. 5.
- Page 93 7.. Installation Digital SmartHandle AX (Manual) 93 / 296 6. Insert the interchangeable plate into the inner handle as required.
- Page 94 7.. Installation Digital SmartHandle AX (Manual) 94 / 296 7. Press the spring plate on one side against the interchangeable plate so that the spring is compressed. 8. At the same time, hook the spring plate tabs into the slot in the inner handle.
- Page 95 7.. Installation Digital SmartHandle AX (Manual) 95 / 296 10. For 7 mm spindle: insert the adapter sleeve onto the side of the spindle with the pin. 11. Insert the spindle with the pin side into the fitting. Pin will snap into position in the mount.
- Page 96 7.. Installation Digital SmartHandle AX (Manual) 96 / 296...
- Page 97 7.. Installation Digital SmartHandle AX (Manual) 97 / 296 12. For 8.5 mm and 10 mm spindle: slide the adapter sleeve into the centre of the spindle. Use a punch and hammer to make an indent in the ad- apter sleeve to prevent it from slipping.
- Page 98 7.. Installation Digital SmartHandle AX (Manual) 98 / 296 13. Insert the fitting with the spindle into the door. 14. Fasten the escutcheon base to the locking cylinder hole with the L2 screws (PH2, torque: 1.1 Nm).
- Page 99 7.. Installation Digital SmartHandle AX (Manual) 99 / 296 15. Fasten the inner handle firmly with the L1 screws (PH2, torque 1.1 Nm). 16. For FH: insert the dummy cylinder. NOTE Feed the blank cylinder into the hole using a screwdriver It is difficult to position the blank cylinder correctly, especially in thick doors.
- Page 100 7.. Installation Digital SmartHandle AX (Manual) 100 / 296 17. For FH: screw the dummy cylinder firmly into place (PH2, torque 1.1 Nm).
- Page 101 7.. Installation Digital SmartHandle AX (Manual) 101 / 296 18. Fasten the set screw on the inner handle firmly (TX15, torque 5.0 Nm). 19. Place the two cover plates with the notch facing downwards onto the escutcheon base and the inner handle.
- Page 102 7.. Installation Digital SmartHandle AX (Manual) 102 / 296 20.Fit the outside handle into position on the fitting. 21. Firmly fasten the grub screw on the outside handle (TX15; torque: 5.0 Nm). Fitting is now installed.
-
Page 103: Variant A3 (Tubular Frame)
7.. Installation Digital SmartHandle AX (Manual) 103 / 296 7.5 Variant A3 (tubular frame) 7.5.1 Product-specific safety instructions IMPORTANT Damage by drilling You drill at your own risk. SimonsVoss Technologies GmbH is not liable for damage caused by drilling. Please also observe the safety instructions of the drilling machine. ... -
Page 104: Scope Of Delivery
7.. Installation Digital SmartHandle AX (Manual) 104 / 296 Conditions for authorisation security Operation with Mifare Classic and/or PinCode keypad excludes authorisation security class D ac- cording to DIN EN 16867:2020. Sealing escutcheon holes Any escutcheon holes that exist may be used to manipulate the lock. 1. -
Page 105: Prepare Door (Drilling Template)
7.. Installation Digital SmartHandle AX (Manual) 105 / 296 7.5.4 Prepare door (drilling template) ü PH2 screwdriver at hand. ü Pin or scriber at hand. Drill at hand. ü Suitable drill bit at hand (Ø 7.2 mm). ü ü Countersink at hand. 1. - Page 106 7.. Installation Digital SmartHandle AX (Manual) 106 / 296 2. Place the drilling template on the spindle. 3. Align the drill template vertically using the printed scale.
- Page 107 7.. Installation Digital SmartHandle AX (Manual) 107 / 296 4. Mark the points to be drilled on the door.
- Page 108 7.. Installation Digital SmartHandle AX (Manual) 108 / 296 5. Remove the drilling template.
- Page 109 7.. Installation Digital SmartHandle AX (Manual) 109 / 296 6. Remove the spindle.
- Page 110 7.. Installation Digital SmartHandle AX (Manual) 110 / 296 7. Remove the mortise lock (PH2).
- Page 111 7.. Installation Digital SmartHandle AX (Manual) 111 / 296 8. Drill the required holes. 9. Countersink the holes with the countersink so that the blind rivet nuts can be pressed into a flush position later.
-
Page 112: For Door Thickness X: Prepare Spindle
7.. Installation Digital SmartHandle AX (Manual) 112 / 296 10. Fit the mortise lock (PH2). 7.5.5 For door thickness X: prepare spindle Saw at hand. ü ü Vernier calliper at hand. PH2 screwdriver at hand. ü 1. For X: measure the door thickness. 2. -
Page 113: Programming The Fitting
7.. Installation Digital SmartHandle AX (Manual) 113 / 296 3. For X: trim the spindle with a suitable saw. 7.5.6 Programming the fitting Programme the fitting before installation. You can use different programming devices, depending on the product family. -
Page 114: Installing The Fitting
7.. Installation Digital SmartHandle AX (Manual) 114 / 296 7.5.7 Installing the fitting ü Door pre-drilled. ü PH2 screwdriver at hand. TX15 screwdriver at hand. ü 1. Insert the supplied blind rivet nuts into the door frame. - Page 115 7.. Installation Digital SmartHandle AX (Manual) 115 / 296 2. Screw the mounting plate firmly into place on the outside so that the spring clips are facing the door (PH2, torque 1.1 Nm). 3. Screw the escutcheon base firmly to the outside (PH2, torque 1.1 Nm). 4.
- Page 116 7.. Installation Digital SmartHandle AX (Manual) 116 / 296 5. Insert the fitting into the mounts on the mounting plate.
- Page 117 7.. Installation Digital SmartHandle AX (Manual) 117 / 296 6. Push the fitting into the mounting plate until it locks into position.
- Page 118 7.. Installation Digital SmartHandle AX (Manual) 118 / 296 7. Screw the fitting firmly to the mounting plate (PH1, torque 0.8 Nm).
- Page 119 7.. Installation Digital SmartHandle AX (Manual) 119 / 296 8. Place a cover with the notch facing downwards on the escutcheon base. 9. Place the cover on the fitting.
- Page 120 7.. Installation Digital SmartHandle AX (Manual) 120 / 296 10. Fit the outside handle into position on the fitting. 11. Determine the required direction of rotation for your inner handle. 12. Insert the spring element appropriately. 13. Place the underlay in the inner handle unit.
- Page 121 7.. Installation Digital SmartHandle AX (Manual) 121 / 296 14. For 8.5 mm and 10 mm spindle: slide the adapter sleeve into the centre of the spindle. Use a punch and hammer to make an indent in the ad- apter sleeve to prevent it from slipping.
- Page 122 7.. Installation Digital SmartHandle AX (Manual) 122 / 296 15. Measure the total length of the spindle. 16. Locate the inside of the spindle (four-edge end up to the centre of the first groove = 26 mm). 17. Use the table to determine the position of the O-ring.
- Page 123 7.. Installation Digital SmartHandle AX (Manual) 123 / 296 18. Slide the O-ring onto the calculated groove. Spin Door thick- Ring leng Area ness pos- ition 40 - 40 - 43 - 19. Insert the spindle into the door with the ring-free side as far as it will go.
- Page 124 7.. Installation Digital SmartHandle AX (Manual) 124 / 296 Spin Door thick- Ring leng Area ness pos- ition 80 - 80 - 83 - 83 - 88 - 88 - 93 - 98 - O-ring is 30–35 mm from the - 184 cut end of the spindle.
- Page 125 7.. Installation Digital SmartHandle AX (Manual) 125 / 296...
- Page 126 7.. Installation Digital SmartHandle AX (Manual) 126 / 296 21. For FH: screw the dummy cylinder firmly into place (PH2, torque 1.1 Nm). 22. Screw the inner handle unit onto the spindle (PH2, torque 1.1 Nm).
- Page 127 7.. Installation Digital SmartHandle AX (Manual) 127 / 296 23. Screw the escutcheon base firmly into place on the inside (PH2, torque 1.1 Nm). 24.Fasten the grub screws firmly onto both handles (TX15, torque 5.0 Nm).
- Page 128 7.. Installation Digital SmartHandle AX (Manual) 128 / 296 25. Place the inner handle cover with the notch facing downwards onto the inner handle escutcheon. 26.Place a cover with the notch facing downwards on the escutcheon base. Fitting is now installed.
-
Page 129: Variant A4.P11 (Panic Bar Cisa)
7.. Installation Digital SmartHandle AX (Manual) 129 / 296 7.6 Variant A4.P11 (panic bar CISA) 7.6.1 Product-specific safety instructions IMPORTANT Damage by drilling You drill at your own risk. SimonsVoss Technologies GmbH is not liable for damage caused by drilling. Please also observe the safety instructions of the drilling machine. -
Page 130: Scope Of Delivery
7.. Installation Digital SmartHandle AX (Manual) 130 / 296 SmartHandle AX with self-locking panic lock The SmartHandle AX only offers full functionality with a self-locking panic lock. 1. Combine the SmartHandle AX with a self-locking panic lock. 2. Pay attention to the declarations of conformity of the lock manufacturers according to EN 179. -
Page 131: Preparing The Door For Cisa (Drilling Template)
7.. Installation Digital SmartHandle AX (Manual) 131 / 296 7.6.4 Preparing the door for CISA (drilling template) ü Pin or scriber at hand. ü Drill at hand. Suitable drill bits at hand (Ø6.5 mm and 8.0 mm). ü PH2 screwdriver at hand. ü... - Page 132 7.. Installation Digital SmartHandle AX (Manual) 132 / 296 2. Place the drilling template on the spindle. 3. Align the drill template vertically using the printed scale.
- Page 133 7.. Installation Digital SmartHandle AX (Manual) 133 / 296 4. Mark the points to be drilled on the door.
- Page 134 7.. Installation Digital SmartHandle AX (Manual) 134 / 296 5. Remove the drilling template.
- Page 135 7.. Installation Digital SmartHandle AX (Manual) 135 / 296 6. Remove the spindle.
- Page 136 7.. Installation Digital SmartHandle AX (Manual) 136 / 296 7. Remove the mortise lock (PH2).
- Page 137 7.. Installation Digital SmartHandle AX (Manual) 137 / 296 8. Drill the required holes.
- Page 138 7.. Installation Digital SmartHandle AX (Manual) 138 / 296 9. Countersink the lowest hole with a countersink.
-
Page 139: Programming The Fitting
7.. Installation Digital SmartHandle AX (Manual) 139 / 296 10. Fit the mortise lock (PH2). 7.6.5 Programming the fitting Programme the fitting before installation. You can use different programming devices, depending on the product family. -
Page 140: Installing The Fitting For Cisa
7.. Installation Digital SmartHandle AX (Manual) 140 / 296 7.6.6 Installing the fitting for CISA ü Door pre-drilled. ü PH2 screwdriver at hand. TX15 screwdriver at hand. ü Vernier calliper at hand. ü ü Saw at hand. 1. Measure the door thickness. 2. - Page 141 7.. Installation Digital SmartHandle AX (Manual) 141 / 296 3. Use a suitable saw to cut the screws and spindle. 4. Insert the sleeve nuts into the adapter plate.
- Page 142 7.. Installation Digital SmartHandle AX (Manual) 142 / 296 5. Place the adapter plate on the electronic fitting. 6. Align the holes in the adapter plate with the threads in the fitting. 7. Fasten the adapter plate firmly in a criss-cross sequence (PH2, torque 1.1 Nm).
- Page 143 7.. Installation Digital SmartHandle AX (Manual) 143 / 296 8. Insert the spindle with the pin side into the fitting.
- Page 144 7.. Installation Digital SmartHandle AX (Manual) 144 / 296 9. Insert the fitting with the adapter plate and spindle into the door.
- Page 145 7.. Installation Digital SmartHandle AX (Manual) 145 / 296 10. Screw the fitting firmly into place in the centre (PH2, torque 1.1 Nm).
- Page 146 7.. Installation Digital SmartHandle AX (Manual) 146 / 296 11. Screw the adapter plate firmly into place below the keyhole (PH2, torque 1.1 Nm).
- Page 147 7.. Installation Digital SmartHandle AX (Manual) 147 / 296 12. Fasten the wood screw as described in the CISA documentation. 13. Insert the dummy cylinder. NOTE Feed the blank cylinder into the hole using a screwdriver It is difficult to position the blank cylinder correctly, especially in thick doors. 1.
- Page 148 7.. Installation Digital SmartHandle AX (Manual) 148 / 296 14. Push the handle onto the outer fitting.
- Page 149 7.. Installation Digital SmartHandle AX (Manual) 149 / 296 15. Firmly fasten the grub screw on the outside handle (TX15; torque: 5.0 Nm). 16. Screw the dummy cylinder firmly into place (PH2, torque 1.1 Nm). Fitting is now installed.
-
Page 150: Variant A4.P1/A4.P2 (Bks Panic Bar)
7.. Installation Digital SmartHandle AX (Manual) 150 / 296 7.7 Variant A4.P1/A4.P2 (BKS panic bar) 7.7.1 Product-specific safety instructions IMPORTANT Damage by drilling You drill at your own risk. SimonsVoss Technologies GmbH is not liable for damage caused by drilling. Please also observe the safety instructions of the drilling machine. -
Page 151: Scope Of Delivery
7.. Installation Digital SmartHandle AX (Manual) 151 / 296 SmartHandle AX with self-locking panic lock The SmartHandle AX only offers full functionality with a self-locking panic lock. 1. Combine the SmartHandle AX with a self-locking panic lock. 2. Pay attention to the declarations of conformity of the lock manufacturers according to EN 179. -
Page 152: Preparing The Door For Bks (Drilling Template)
7.. Installation Digital SmartHandle AX (Manual) 152 / 296 7.7.4 Preparing the door for BKS (drilling template) ü Pin or scriber at hand. ü PH2 screwdriver at hand. Ruler at hand. ü Drill at hand. ü ü Suitable drill bits at hand (Ø6.5 mm and 8.0 mm). 1. - Page 153 7.. Installation Digital SmartHandle AX (Manual) 153 / 296 2. Measure the distance (= vertical gap between the centres of the fasten- ing holes).
- Page 154 7.. Installation Digital SmartHandle AX (Manual) 154 / 296 3. Fit the mortise lock (PH2).
- Page 155 7.. Installation Digital SmartHandle AX (Manual) 155 / 296 4. Insert the spindle into the mortise lock.
- Page 156 7.. Installation Digital SmartHandle AX (Manual) 156 / 296 5. Place the drilling template on the spindle. 6. Align the drill template vertically using the printed scale. 7. Use the distance you measured previously to determine where the points need to be drilled.
- Page 157 7.. Installation Digital SmartHandle AX (Manual) 157 / 296 8. Mark the points to be drilled on the door.
- Page 158 7.. Installation Digital SmartHandle AX (Manual) 158 / 296 9. Remove the drilling template.
- Page 159 7.. Installation Digital SmartHandle AX (Manual) 159 / 296 10. Remove the spindle.
- Page 160 7.. Installation Digital SmartHandle AX (Manual) 160 / 296 11. Remove the mortise lock (PH2).
- Page 161 7.. Installation Digital SmartHandle AX (Manual) 161 / 296 12. Drill the required holes.
-
Page 162: Programming The Fitting
7.. Installation Digital SmartHandle AX (Manual) 162 / 296 13. Fit the mortise lock (PH2). 7.7.5 Programming the fitting Programme the fitting before installation. You can use different programming devices, depending on the product family. -
Page 163: Installing The Fitting For Bks
7.. Installation Digital SmartHandle AX (Manual) 163 / 296 7.7.6 Installing the fitting for BKS ü Door pre-drilled. ü PH2 screwdriver at hand. TX15 screwdriver at hand. ü Vernier calliper at hand. ü ü Saw at hand. 1. Measure the door thickness. 2. - Page 164 7.. Installation Digital SmartHandle AX (Manual) 164 / 296 3. Mark the sawing points on the L2 screws. L2: door thickness + 12 mm (±3 mm) 4. Determine the length X, depending on the panic bar type. X = 32 mm X = 23 mm 5.
- Page 165 7.. Installation Digital SmartHandle AX (Manual) 165 / 296 7. Insert the sleeve nuts into the adapter plate. 8. Place the adapter plate on the electronic fitting. 9. Align the holes in the adapter plate with the threads in the fitting.
- Page 166 7.. Installation Digital SmartHandle AX (Manual) 166 / 296 10. Fasten the adapter plate firmly in a criss-cross sequence (PH2, torque 1.1 Nm).
- Page 167 7.. Installation Digital SmartHandle AX (Manual) 167 / 296 11. Insert the spindle with the pin side into the fitting. 12. Insert the fitting with adapter plate, spindle and escutcheon base into the door.
- Page 168 7.. Installation Digital SmartHandle AX (Manual) 168 / 296 13. Screw the fitting into place in the centre as described in the BKS docu- mentation (use the L1 screw and the wood screw ordered from BKS).
- Page 169 7.. Installation Digital SmartHandle AX (Manual) 169 / 296 14. Screw the escutcheon base to the assembly using the L2 screws (PH2, torque: 1.1 Nm). 15. Insert the dummy cylinder. NOTE Feed the blank cylinder into the hole using a screwdriver It is difficult to position the blank cylinder correctly, especially in thick doors.
- Page 170 7.. Installation Digital SmartHandle AX (Manual) 170 / 296 16. Place the escutcheon cover on the escutcheon base. 17. Push the handle onto the outer fitting.
- Page 171 7.. Installation Digital SmartHandle AX (Manual) 171 / 296 18. Firmly fasten the grub screw on the outside handle (TX15; torque: 5.0 Nm). 19. Screw the dummy cylinder firmly into place (PH2, torque 1.1 Nm). Fitting is now installed.
-
Page 172: Variant Ds (Reader On Both Sides)
7.. Installation Digital SmartHandle AX (Manual) 172 / 296 7.8 Variant DS (reader on both sides) 7.8.1 Product-specific safety instructions IMPORTANT Damage by drilling You drill at your own risk. SimonsVoss Technologies GmbH is not liable for damage caused by drilling. -
Page 173: Scope Of Delivery
7.. Installation Digital SmartHandle AX (Manual) 173 / 296 SmartHandle AX with self-locking panic lock The SmartHandle AX only offers full functionality with a self-locking panic lock. 1. Combine the SmartHandle AX with a self-locking panic lock. 2. Pay attention to the declarations of conformity of the lock manufacturers according to EN 179. -
Page 174: Design
7.. Installation Digital SmartHandle AX (Manual) 174 / 296 7.8.3 Design... -
Page 175: Prepare Door (Drilling Template)
7.. Installation Digital SmartHandle AX (Manual) 175 / 296 7.8.4 Prepare door (drilling template) ü Pin or scriber at hand. ü Drill at hand. Suitable drill bit at hand (depending on mortise lock hole diameter: ü 8.5 mm/9.5 mm/10.5 mm). PH2 screwdriver at hand. ü... - Page 176 7.. Installation Digital SmartHandle AX (Manual) 176 / 296 2. Place the drilling template on the spindle. 3. Align the drill template vertically using the printed scale.
- Page 177 7.. Installation Digital SmartHandle AX (Manual) 177 / 296 4. Mark the points to be drilled on the door.
- Page 178 7.. Installation Digital SmartHandle AX (Manual) 178 / 296 5. Remove the drilling template.
- Page 179 7.. Installation Digital SmartHandle AX (Manual) 179 / 296 6. Remove the spindle.
- Page 180 7.. Installation Digital SmartHandle AX (Manual) 180 / 296 7. Remove the mortise lock (PH2). 8. Measure the diameter of the fastening holes.
- Page 181 7.. Installation Digital SmartHandle AX (Manual) 181 / 296 9. Determine the required drill bit based on the measured diameter. Ø fasten- Drill bits 10. Drill the required holes. ing holes required 5.5 mm– 8.5 mm 6.3 mm 6.4 mm– 8.5 mm 7.3 mm 7.4 mm– 9.5 mm 8.7 mm ≥...
- Page 182 7.. Installation Digital SmartHandle AX (Manual) 182 / 296 11. Fit the mortise lock (PH2).
-
Page 183: For Door Thickness X: Prepare Threaded Rods And Spindle
7.. Installation Digital SmartHandle AX (Manual) 183 / 296 7.8.5 For door thickness X: prepare threaded rods and spindle ü Saw at hand. ü Vernier calliper at hand. PH2 screwdriver at hand. ü 1. For X: measure the door thickness. 2. -
Page 184: Programming The Fitting
7.. Installation Digital SmartHandle AX (Manual) 184 / 296 Door thickness + 24 mm (±2 mm) 4. For X: use a suitable saw to cut the threaded rods and spindle. 7.8.6 Programming the fitting Programme the fitting before installation. You can use different programming devices, depending on the product family. -
Page 185: Installing The Fitting
7.. Installation Digital SmartHandle AX (Manual) 185 / 296 7.8.7 Installing the fitting ü Door pre-drilled. ü PH2 screwdriver at hand. TX15 screwdriver at hand. ü Vernier calliper at hand. ü ü Pincers at hand. 1. For S, M and L: measure the door thickness. 2. - Page 186 7.. Installation Digital SmartHandle AX (Manual) 186 / 296 3. For S, M and L: shorten the cut-to-length screws. 4. For 7 mm spindle: insert the adapter sleeve onto the side of the spindle with the pin. 5. Insert the spindle with the pin side into the fitting. Pin will snap into position in the mount.
- Page 187 7.. Installation Digital SmartHandle AX (Manual) 187 / 296 6. For 8.5 mm, 9 mm and 10 mm spindles: slide the adapter sleeve into the centre of the spindle. Use a punch and hammer to make an indent in the adapter sleeve to prevent it from slipping.
- Page 188 7.. Installation Digital SmartHandle AX (Manual) 188 / 296 7. Insert the outer fitting, with adapter sleeves if necessary, into the door from the outside.
- Page 189 7.. Installation Digital SmartHandle AX (Manual) 189 / 296 8. Insert the escutcheon base into the door with the sleeve nuts on Ø mortise the outer side. lock Adapter fastening sleeves hole 5.5 mm– No adapter 6.3 mm sleeves 6.4 mm– 6.4 mm 7.3 mm 7.4 mm–...
- Page 190 7.. Installation Digital SmartHandle AX (Manual) 190 / 296 9. Position the adapter plate on the door. 10. Align the adapter plate so that the spindle is precisely centred and the adapter plate is perfectly perpendicular.
- Page 191 7.. Installation Digital SmartHandle AX (Manual) 191 / 296 11. Screw the adapter plate firmly into place (PH2, torque 1.1 Nm).
- Page 192 7.. Installation Digital SmartHandle AX (Manual) 192 / 296 12. Screw the escutcheon base into place on the inner side. 13. Insert the dummy cylinder. NOTE Feed the blank cylinder into the hole using a screwdriver It is difficult to position the blank cylinder correctly, especially in thick doors. 1.
- Page 193 7.. Installation Digital SmartHandle AX (Manual) 193 / 296...
- Page 194 7.. Installation Digital SmartHandle AX (Manual) 194 / 296 14. Screw the dummy cylinder firmly into place (PH2, torque 1.1 Nm). 15. Wait five hours for the anti-slip coating to set. NOTE Rest time for anti-slip surface The supplied adapter plate feature a non-slip surface. This requires a set- tling time for it to be fully effective.
- Page 195 7.. Installation Digital SmartHandle AX (Manual) 195 / 296 16. Remove the cover with the tool.
- Page 196 7.. Installation Digital SmartHandle AX (Manual) 196 / 296 17. For 7 mm spindle: attach the adapter sleeve to the spindle. 18. Insert the fitting into the adapter plate.
- Page 197 7.. Installation Digital SmartHandle AX (Manual) 197 / 296 19. Rotate the fitting until it is straight.
- Page 198 7.. Installation Digital SmartHandle AX (Manual) 198 / 296 20.Screw the fitting firmly onto the adapter plate to prevent it from twist- ing. 21. Place the cover on the fitting.
- Page 199 7.. Installation Digital SmartHandle AX (Manual) 199 / 296 22. Place the outside handles on the fittings. 23. Place the covers on the escutcheon bases. 24.Fasten the grub screws firmly onto both handles (TX15, torque 5.0 Nm). Fitting is now installed.
-
Page 200: Variants E0 And E1 (Scandinavian Oval)
7.. Installation Digital SmartHandle AX (Manual) 200 / 296 7.9 Variants E0 and E1 (Scandinavian Oval) 7.9.1 Product-specific safety instructions IMPORTANT Damage caused by unsuitable tools If you try to open the case with unsuitable tools, the case may be damaged. Use only the supplied SimonsVoss opening tool. -
Page 201: Scope Of Delivery
7.. Installation Digital SmartHandle AX (Manual) 201 / 296 7.9.2 Scope of delivery SmartHandle AX (Scandinavian Oval) Special tool Quick guide Depending on version: Adapter set, 7 mm spindle Adapter sleeve, 8.5 mm spindle Adapter sleeve, 10 mm spindle ... - Page 202 7.. Installation Digital SmartHandle AX (Manual) 202 / 296 7.9.4 For door thickness X: prepare threaded rods and spindle ü Saw at hand. ü Vernier calliper at hand. PH2 screwdriver at hand. ü 1. For X: measure the door thickness. 2.
- Page 203 7.. Installation Digital SmartHandle AX (Manual) 203 / 296 Door thickness + 37 mm (±4 mm) 4. For X: use a suitable saw to cut the threaded rods and spindle. 7.9.5 For inner door handle, clockwise: prepare stud bolts ü TX3 screwdriver at hand. 1.
- Page 204 7.. Installation Digital SmartHandle AX (Manual) 204 / 296 2. Unscrew the SmartHandle AX rear (TX8). 3. Unscrew the stud nuts.
- Page 205 7.. Installation Digital SmartHandle AX (Manual) 205 / 296 4. Re-fasten the stud nuts firmly in the new positions.
- Page 206 7.. Installation Digital SmartHandle AX (Manual) 206 / 296 5. Screw the SmartHandle AX rear firmly into place again (TX8, torque 1.1 Nm). Stud nuts are fastened through the SmartHandle AX rear again. 7.9.6 Programming the fitting Programme the fitting before installation. You can use different programming devices, depending on the product family.
- Page 207 7.. Installation Digital SmartHandle AX (Manual) 207 / 296 7.9.7 Installing the fitting ü Door pre-drilled. ü PH2 screwdriver at hand. TX15 screwdriver at hand. ü ü Vernier calliper at hand. ü Pincers at hand. 1. For S, M and L: measure the door thickness.
- Page 208 7.. Installation Digital SmartHandle AX (Manual) 208 / 296 2. For S, M and L: determine the separation points on the cut-to-length screws L1 and L2. 2× L1: door thickness + 10 mm (±3 mm) 2× L2: door thickness + 3 mm (±3 mm) 3.
- Page 209 7.. Installation Digital SmartHandle AX (Manual) 209 / 296 5. Determine your inner handle’s direction rotation as viewed from the in- side: clockwise (clockwise = CW) or anti-clockwise (counter-clockwise = CCW). 6. Insert the interchangeable plate into the inner handle as required.
- Page 210 7.. Installation Digital SmartHandle AX (Manual) 210 / 296 7. Press the spring plate on one side against the interchangeable plate so that the spring is compressed. 8. At the same time, hook the spring plate tabs into the slot in the inner handle.
- Page 211 7.. Installation Digital SmartHandle AX (Manual) 211 / 296 9. Press down the spring plate bracket. The inner handle is now ready. 10. For 7 mm spindle: insert the adapter sleeve onto the side of the spindle with the pin.
- Page 212 7.. Installation Digital SmartHandle AX (Manual) 212 / 296 11. For 8.5 mm and 10 mm spindle: slide the adapter sleeve into the centre of the spindle. Use a punch and hammer to make an indent in the ad- apter sleeve to prevent it from slipping. 12.
- Page 213 7.. Installation Digital SmartHandle AX (Manual) 213 / 296 13. Insert the fitting with the spindle into the door from the outside.
- Page 214 7.. Installation Digital SmartHandle AX (Manual) 214 / 296 14. Fasten the escutcheon base firmly with the L1 screws (PH2, torque 1.1 Nm).
- Page 215 7.. Installation Digital SmartHandle AX (Manual) 215 / 296 15. For non-MO: fasten the inner handle with the L2 screws (PH2, torque 1.1 Nm). 16. For non-MO: position the escutcheon cover on the escutcheon base.
- Page 216 7.. Installation Digital SmartHandle AX (Manual) 216 / 296 17. Fasten the set screw on the inner handle firmly (TX15, torque 5.0 Nm). 18. Fit the outside handle into position on the fitting.
- Page 217 7.. Installation Digital SmartHandle AX (Manual) 217 / 296 19. Firmly fasten the grub screw on the outside handle (TX15; torque: 5.0 Nm). Fitting is now installed. 7.10 Variant F1 (French 195 mm backplate) 7.10.1 Product-specific safety instructions IMPORTANT Damage caused by unsuitable tools If you try to open the case with unsuitable tools, the case may be damaged.
- Page 218 7.. Installation Digital SmartHandle AX (Manual) 218 / 296 Effect on the mortise lock The SmartHandle AX acts exclusively on the latch of the mortise lock. Locking and insurances Insurance companies place increased demands on a closure. 1. If you want to lock the door under insurance law, use a self-locking panic lock or a locking cylinder in addition to the SmartHandle AX.
- Page 219 7.. Installation Digital SmartHandle AX (Manual) 219 / 296 7.10.3 Design 7.10.4 Programming the fitting Programme the fitting before installation. You can use different programming devices, depending on the product family. 7.10.5 Installing the fitting Door pre-drilled. ü ü PH2 screwdriver at hand. ü...
- Page 220 7.. Installation Digital SmartHandle AX (Manual) 220 / 296 2. Determine the cutting points on the cut-to-length screws. 2×: door thickness - 15 mm (±3 mm) 3. Trim the cut-to-length screws. 4. For 7 mm spindle: insert the adapter sleeve onto the side of the spindle with the pin.
- Page 221 7.. Installation Digital SmartHandle AX (Manual) 221 / 296 5. Insert the spindle with the pin side into the fitting. 6. Screw the outer adapter plate to the fitting (PH2, torque 1.1 Nm). You can identify the outer adapter plate by the welded stud bolt nuts.
- Page 222 7.. Installation Digital SmartHandle AX (Manual) 222 / 296 7. Hold the countersunk nuts with the special tool and screw the escut- cheon base firmly to the outer adapter plate (PH2, torque 1.1 Nm). 8. For 7 mm spindle: place the adapter sleeve in the inner handle in such a way that the recess faces the grub screw.
- Page 223 7.. Installation Digital SmartHandle AX (Manual) 223 / 296 9. Hold the countersunk nuts firmly with the special tool and screw the in- ner handle and the escutcheon base tightly onto the inner adapter plate (PH2, torque: 1.1 Nm). 10. For 8.5 mm and 10 mm spindle: slide the adapter sleeve into the centre of the spindle.
- Page 224 7.. Installation Digital SmartHandle AX (Manual) 224 / 296 11. Insert the fitting with the adapter plate and the spindle into the door from the outside.
- Page 225 7.. Installation Digital SmartHandle AX (Manual) 225 / 296 12. Screw the inner handle and adapter plate firmly into place (PH2, torque 1.1 Nm). 13. For FH: insert the dummy cylinder. NOTE Feed the blank cylinder into the hole using a screwdriver It is difficult to position the blank cylinder correctly, especially in thick doors.
- Page 226 7.. Installation Digital SmartHandle AX (Manual) 226 / 296 14. For FH: screw the dummy cylinder firmly into place (PH2, torque 1.1 Nm).
- Page 227 7.. Installation Digital SmartHandle AX (Manual) 227 / 296 15. Fit the outside handle into position on the fitting. 16. Fasten the grub screws firmly onto both handles (TX15, torque 5.0 Nm).
- Page 228 7.. Installation Digital SmartHandle AX (Manual) 228 / 296 17. Place a cover with the notch facing downwards on the escutcheon base.
- Page 229 7.. Installation Digital SmartHandle AX (Manual) 229 / 296 18. Place the two cover plates with the notch facing downwards onto the escutcheon base and the inner handle. Fitting is now installed. 7.11 LockNode (LN) 7.11.1 Fitting the LockNode ü Special tool at hand.
- Page 230 7.. Installation Digital SmartHandle AX (Manual) 230 / 296 2. Slide the cover downwards and remove it completely. 3. Insert the LockNode circuit board into the slot provided. SmartHandle AX will bleep and flash red four times.
- Page 231 7.. Installation Digital SmartHandle AX (Manual) 231 / 296...
- Page 232 7.. Installation Digital SmartHandle AX (Manual) 232 / 296 4. Insert the corner of the extension piece under the transparent plastic ring.
- Page 233 7.. Installation Digital SmartHandle AX (Manual) 233 / 296 5. Place the cover on the fitting.
- Page 234 7.. Installation Digital SmartHandle AX (Manual) 234 / 296 6. Press the cover firmly until it clicks into place. The LockNode is now installed. 7.12 FSB adapter 7.12.1 Scope of delivery Washers for use with the Adapter sleeve for the Black plastic disc for the M4 screws in the M5 outer side incl.
- Page 235 7.. Installation Digital SmartHandle AX (Manual) 235 / 296 ASL bearing: direction-independent FSB handles in various designs Rosettes and trim panels SmartHandle AX FSB-AGL bearing for inner side with L marking: 7.12.2 Structure...
- Page 236 7.. Installation Digital SmartHandle AX (Manual) 236 / 296 7.12.3 Install FSB handle with adapter Preparation for assembly The SmartHandle AX must be dismantled to replace the outer side handle SmartHandle AX (alternative: order without handle). It must also be dismantled if the mounting holes in the door need to be customised.
- Page 237 7.. Installation Digital SmartHandle AX (Manual) 237 / 296 1. Remove the rubber ring from the outer square spindle of the Smart- Handle AX. 2. Place the black plastic disc on the outer square spindle. 3. Align the FSB adapter so that the hole for the handle grub screw is fur- ther inwards in the direction of the door.
- Page 238 7.. Installation Digital SmartHandle AX (Manual) 238 / 296 4. Mount the FSB adapter on the outer square spindle. 5. Tighten the FSB adapter with the short grub screw.
- Page 239 7.. Installation Digital SmartHandle AX (Manual) 239 / 296 6. Place the FSB outer side handle including pre-assembled grub screw on the adapter. 7. Fasten the half cylinder with the fastening screw. 8. Push the FSB bearing onto the square spindle.
- Page 240 7.. Installation Digital SmartHandle AX (Manual) 240 / 296 9. Fasten the FSB bearing with the previously used screws and washers. It may be necessary to customise the length of the screws. 10. Place the FSB rosette cover on the FSB bearing. 11.
- Page 241 7.. Installation Digital SmartHandle AX (Manual) 241 / 296 12. Fasten the FSB inner side lever handle with the grub screw. The SmartHandle AX is supplied with an FSB handle set.
- Page 242 8.. Programming Digital SmartHandle AX (Manual) 242 / 296 8. Programming The configuration is described in the LSM, but is also included in the AXM in a similar form. Current version of LSM/AXM installed. ü NOTE Compatibility between driver and firmware To use MIFARE DESFire ident media with a SmartHandle AX with firmware version 1.1.604 or higher, the SV driver 7.27 (from LSM 3.5) or higher is re- quired.
- Page 243 8.. Programming Digital SmartHandle AX (Manual) 243 / 296 NOTE Duration of initial programming A large amount of data is transferred during initial programming. The data transfer speed is significantly higher with a SmartStick AX or a SmartCD.MP (and the programming time is therefore shorter). If possible, use a SmartStick AX or a SmartCD.MP for initial ...
- Page 244 9.. Configuration Digital SmartHandle AX (Manual) 244 / 296 9. Configuration 9.1 Set the pulse length SmartHandle is pre-set to engage for about 5 seconds. The time that it engages can be freely configured between 1 and 25 seconds for each lock in the software.
- Page 245 9.. Configuration Digital SmartHandle AX (Manual) 245 / 296 NOTE These settings are only available in the .ZK version. LSM open. ü Add time zone plan (see LSM manual). ü 1. Double-click on the SmartHandle AX entry in the matrix to open the settings.
- Page 246 9.. Configuration Digital SmartHandle AX (Manual) 246 / 296 activated using a transponder/SmartCard. This mode is suitable for situations such as when a door needs to be used freely without a transponder/SmartCard to allow visitors to enter, for instance 9.6 Close range mode A reduced reader range is required in some situations.
- Page 247 9.. Configuration Digital SmartHandle AX (Manual) 247 / 296 Activating time zone control and time change-over Whereas time zone control itself can only influence identification media authorisations, the time change-over also activates time-dependent switching of the relay in the controller. Both need to be enabled. ü...
- Page 248 9.. Configuration Digital SmartHandle AX (Manual) 248 / 296 ü LSM open. 1. Double-click on the SmartHandle AX entry in the matrix to open the settings. 2. Change to the [Configuration/Data] tab. 3. Enable the Ignore activation or expiry date checkbox. 4.
- Page 249 9.. Configuration Digital SmartHandle AX (Manual) 249 / 296 Unlock in the authorised time period SmartHandle AX: SmartHandle AX: engages to open SmartHandle AX: SmartHandle AX: engages to open as soon as identi- engages to open engages to open as soon as identi- fication medium as soon as au- as soon as au-...
- Page 250 9.. Configuration Digital SmartHandle AX (Manual) 250 / 296 3. Click on the Extended configuration button. The "Extended configuration" window will open. Turn off LED/beeper LSM open. ü ü "Extended configuration" window open. 1. Enable the Turn off LED checkbox or the Turn off beeper check- box.
- Page 251 10.. Operation Digital SmartHandle AX (Manual) 251 / 296 10. Operation The SmartHandle AX can be operated in different ways, depending on the programming. NOTE The size of the gap affects the wireless connection. 1. If you use a transponder, you must position it between five and thirty centimetres away.
- Page 252 11.. Status messages Digital SmartHandle AX (Manual) 252 / 296 11. Status messages 11.1 Battery status feedback Batteries OK. You do not need to do anything. Batteries low. Change the batteries. Batteries very low. Replace the bat- Very low teries immediately. 11.2 Emergency release 11.3 Deactivated If SmartHandle is deactivated via a SimonsVoss Block Lock or the SV...
- Page 253 12.. Signal Digital SmartHandle AX (Manual) 253 / 296 12. Signal Signal Meaning 2x short before engaging to open Identification medium accepted – (green) normal activation Identification medium not author- 1 x short (red) ised Flip-flop mode: Locking device is 1×...
- Page 254 13.. Battery warning Digital SmartHandle AX (Manual) 254 / 296 13. Battery warning You or the user will be warned of a failure of the SmartHandle AX by flat Battery replacement [ 255] batteries. Replace the batteries in time (see The electronic part with the batteries is located on the outside.
- Page 255 14.. Battery replacement Digital SmartHandle AX (Manual) 255 / 296 14. Battery replacement 14.1 Instructions on battery replacement Only specialists may replace the batteries. Do not touch electronics/components; do not allow them to come into contact with oil, paint, moisture, alkali or acids. Only use batteries approved by SimonsVoss.
- Page 256 14.. Battery replacement Digital SmartHandle AX (Manual) 256 / 296 5. Press the end of the battery clip inwards until it pops out. IMPORTANT Loss of the battery clip The battery clip is plugged in. If both ends of the clip are pushed inwards and released from the holder at the same time, the battery clip may fall out.
- Page 257 14.. Battery replacement Digital SmartHandle AX (Manual) 257 / 296 12. Slide the cover back onto the SmartHandle AX. 13. Press the cover firmly in the area of the recesses for the mounting tool until it snaps into place. 14. Read off the battery status (see LSM Handbook). Batteries are replaced.
- Page 258 15.. Maintenance, cleaning and disinfec- tion Digital SmartHandle AX (Manual) 258 / 296 15. Maintenance, cleaning and disinfection If necessary, clean the SmartHandle AX with a soft and, if necessary, damp cloth. When disinfecting the SmartHandle AX, only use agents that are ...
- Page 259 16.. Disassembly Digital SmartHandle AX (Manual) 259 / 296 16. Disassembly You will also find information on disassembly in the supplied quick guides. 16.1 Variante A0 (Standing/PAS24) The following tools are required for disassembly: TX-15 screwdriver Slotted-head screwdriver PH-2 screwdriver ...
- Page 260 16.. Disassembly Digital SmartHandle AX (Manual) 260 / 296 Remove handle from assembly 1. Insert the hex key into the hole provided in the square socket. 2. Push the hex key towards the closest edge and hold it down. 3. Pull the handle off the assembly. SmartHandle AX is now removed.
- Page 261 16.. Disassembly Digital SmartHandle AX (Manual) 261 / 296 Remove escutcheons 1. Disassemble electronic cylinders if necessary. 2. Unscrew the headless screws of both handles. 3. If necessary, remove the escutcheon covers with a slotted screwdriver. 4. If necessary, remove the escutcheon covers. 5.
- Page 262 16.. Disassembly Digital SmartHandle AX (Manual) 262 / 296 3. Pull the handle off the assembly. SmartHandle AX is now removed. 16.3 Variant A3 (steel frame) Remove fittings 1. Disassemble electronic cylinders if necessary. 2. Unscrew the headless screws of both handles. 3.
- Page 263 16.. Disassembly Digital SmartHandle AX (Manual) 263 / 296 Removing the handle from the assembly 1. Insert the Allen wrench into the hole provided in the square socket. 2. Push the Allen wrench towards the nearer edge and hold it pressed. 3.
- Page 264 16.. Disassembly Digital SmartHandle AX (Manual) 264 / 296 NOTE Third party product with own documentation The panic bar holder is a third-party product. Please follow the manufacturer's instructions and safety instructions. 2. Remove the covers of the escutcheons with a slotted screwdriver. 3.
- Page 265 16.. Disassembly Digital SmartHandle AX (Manual) 265 / 296 2. Push the Allen wrench towards the nearer edge and hold it pressed. 3. Remove the handle from the assembly. SmartHandle AX is disassembled. 16.4.2 CISA 1. Remove the panic bar as described in the manufacturer's documenta- tion except for the adapter plate.
- Page 266 16.. Disassembly Digital SmartHandle AX (Manual) 266 / 296 Removing the handle from the assembly 1. Insert the Allen wrench into the hole provided in the square socket. 2. Push the Allen wrench towards the nearer edge and hold it pressed. 3.
- Page 267 16.. Disassembly Digital SmartHandle AX (Manual) 267 / 296 5. If necessary, unscrew the escutcheon bases. 6. Remove the cover of the SmartHandles AX that is attached to the ad- apter plate. 7. Unscrew the screw above the card reader. 8.
- Page 268 16.. Disassembly Digital SmartHandle AX (Manual) 268 / 296 3. Remove the handle from the assembly. SmartHandle AX is disassembled. 16.6 Variant E0 and E1 (Scandinavian Oval) You need the following tools for disassembly: TX-15 screwdriver Slotted-head screwdriver PH-2 screwdriver ...
- Page 269 16.. Disassembly Digital SmartHandle AX (Manual) 269 / 296 Removing the handle from the assembly 1. Insert the Allen wrench into the hole provided in the square socket. 2. Push the Allen wrench towards the nearer edge and hold it pressed. 3.
- Page 270 16.. Disassembly Digital SmartHandle AX (Manual) 270 / 296 1.5 mm hex key Remove escutcheons 1. If necessary, remove the electronic cylinder. 2. Use the grub screws to tighten both handle. 3. If necessary, lever off the rosette covers with a flat-blade screwdriver. 4.
- Page 271 16.. Disassembly Digital SmartHandle AX (Manual) 271 / 296 3. Pull the handle off the assembly. SmartHandle AX is now removed.
- Page 272 17.. Accessories Digital SmartHandle AX (Manual) 272 / 296 17. Accessories Networking Order code Description LockNode can be integrated into your SmartHandle AX for direct net- working (with auto-configuration). WNM.LNI.S2 See also Network [ 18] Lock- Node (LN) [ 229] Third-party handle adapter Order code Description...
- Page 273 17.. Accessories Digital SmartHandle AX (Manual) 273 / 296 Handle and square spindle Order code Description Inner side and outer side handle for Handle variants retrofitting (see 19] Please specify variant: В S2.LEVER.x.x Please specify square spindle (see Spindle [ 17] 7 mm...
- Page 274 17.. Accessories Digital SmartHandle AX (Manual) 274 / 296 Cover Black-grey White Deep black Order code Description Cover for variant A0/B0 (standing), S2.COVER.0.SG RR (tubular frame) and DS (both sides) in black-grey Cover for variant A0/B0 (standing), S2.COVER.0.W RR (tubular frame) and DS (both sides) in white Cover for variant A0/B0 (standing), S2.COVER.0.TS...
- Page 275 17.. Accessories Digital SmartHandle AX (Manual) 275 / 296 Order code Description Cover for variant E0 (Scandinavian S2.COVER.E0.TS Oval without locking cylinder break- out) in deep black Cover for variant E1 (Scandinavian S2.COVER.E1.SG Oval with locking cylinder break- out) in black-grey Cover for variant E1 (Scandinavian S2.COVER.E1.W Oval with locking cylinder break-...
- Page 276 17.. Accessories Digital SmartHandle AX (Manual) 276 / 296 Blank cylinder Order code Description Dummy cylinder (15-15 mm) to fill DUMMY CYLINDER.PZ the locking cylinder opening (Euro profile cylinder) Dummy cylinder (15-15 mm) to fill DUMMY CYLINDER.SR the locking cylinder opening (Swiss Round cylinder)
- Page 277 18.. Technical specifications Digital SmartHandle AX (Manual) 277 / 296 18. Technical specifications 18.1 Electronics Scanning methods and reading ranges Active Reader systems Passive Bluetooth Low Energy (BLE) Active 5 cm to 30 cm Read ranges Passive Near field Up to 300 cm Power supply Battery type...
- Page 278 18.. Technical specifications Digital SmartHandle AX (Manual) 278 / 296 868.000 MHz - 868.600 MHz <25 mW ERP Only for item numbers: SV-S2.*LN* 2402 MHz - 2480 MHz 2.5 mW 18.2 Mechanical system Dimensions The dimensions refer to the side with the electronic escutcheon. A0 (standing) ...
- Page 279 18.. Technical specifications Digital SmartHandle AX (Manual) 279 / 296 A0 (standing) A1 (suspended, short) 21 mm A2 (suspended, long) E0/E1 (Scandinavian Oval) 26 mm Depth A3 (tubular frame) (information with ad- apter plate) 25 mm A4 (panic bar) (information with ad- apter plate) 21 mm (side without...
- Page 280 18.. Technical specifications Digital SmartHandle AX (Manual) 280 / 296 Versions Centre distance Door thickness S: 38 - 60 mm M: 59 - 80 mm A1/B1 70 - 79 mm Suspended, short L: 79 - 100 mm X: 100 - 200 mm S: 38 - 60 mm M: 59 - 80 mm A2/B2 70 - 110 mm...
- Page 281 18.. Technical specifications Digital SmartHandle AX (Manual) 281 / 296 Handle turning angle and colours Handle turning angle 48° effective Traffic white (similar to RAL 9016) Dark grey (similar to RAL 7021) Deep black (similar to Cover RAL 9005) Brass ...
- Page 282 18.. Technical specifications Digital SmartHandle AX (Manual) 282 / 296 Suspended installation 20,5 65,6 52,2 Door thickness...
- Page 283 18.. Technical specifications Digital SmartHandle AX (Manual) 283 / 296 Stationary installation 20,5 65,6 53,2 Door thickness...
- Page 284 18.. Technical specifications Digital SmartHandle AX (Manual) 284 / 296 Scandinavian Oval 20,5 65,6 52,2 Door thickness...
- Page 285 18.. Technical specifications Digital SmartHandle AX (Manual) 285 / 296 Metal frame 20,5 13,5 65,6 52,2 33,4 32,8 32,8 Door thickness...
- Page 286 18.. Technical specifications Digital SmartHandle AX (Manual) 286 / 296 Panic bars (CISA) 65,6 20,5 52,2 54,0 Door thickness...
- Page 287 18.. Technical specifications Digital SmartHandle AX (Manual) 287 / 296 Panic bar (BKS) 65,6 20,5 52,2 Door thickness 54,0...
- Page 288 18.. Technical specifications Digital SmartHandle AX (Manual) 288 / 296 PAS24 20,5 65,6 53,2 Door thickness...
- Page 289 18.. Technical specifications Digital SmartHandle AX (Manual) 289 / 296 Reader on both sides 20,5 20,5 65,6 52,2 Door thickness...
- Page 290 18.. Technical specifications Digital SmartHandle AX (Manual) 290 / 296 French 195 mm backplate 20,5 65,0 52,2 58,0 58,0 Door thickness...
- Page 291 18.. Technical specifications Digital SmartHandle AX (Manual) 291 / 296 18.2.2 Dimensional drawings handles Shape A (Outside/Inside) Shape B (Outside/Inside) Shape C (Outside/Inside)
- Page 292 18.. Technical specifications Digital SmartHandle AX (Manual) 292 / 296 Shape D (Outside/Inside) Shape L (Outside/Inside) 18.3 Configuration Administration and settings Loggable access events max. 3,000 Time zone groups 100+1 Max. Transponder per SH AX max. 64,000 max. 64,000 (depending on card config- Max.
- Page 293 19.. EU/UK Declaration of conformity Digital SmartHandle AX (Manual) 293 / 296 19. EU/UK Declaration of conformity The company SimonsVoss Technologies GmbH hereby declares that article (SV-S2.*A*, SV-S2.*AM*, SV-S2.*LN*) complies with the following guidelines: 2014/53/EU "Radio equipment" as well as the corresponding UK statutory 2017 No. 1206 "Radio equipment"...
- Page 294 20.. Help and other information Digital SmartHandle AX (Manual) 294 / 296 20. Help and other information Information material/documents You will find detailed information on operation and configuration and other documents on the website: https://www.simons-voss.com/en/documents.html Declarations of conformity You will find declarations of conformity and other certificates on the website: https://www.simons-voss.com/en/certificates.html Information on disposal...
- Page 295 20.. Help and other information Digital SmartHandle AX (Manual) 295 / 296 Address SimonsVoss Technologies GmbH Feringastr. 4 D-85774 Unterfoehring Germany...
- Page 296 This is SimonsVoss SimonsVoss, the pioneer in remote-controlled, cable-free locking technology provides system solutions with a wide range of products for SOHOs, SMEs, major companies and public institutions. SimonsVoss locking systems combine intelligent functionality, high quality and award- winning design Made in Germany. As an innovative system provider, SimonsVoss focuses on scalable systems, high security, reliable components, powerful software and simple operation.
Need help?
Do you have a question about the Digital SmartHandle AX A0 and is the answer not in the manual?
Questions and answers