Table of Contents

Related Manuals for Simons Voss Technologies Digital SmartHandle AX


Summary of Contents for Simons Voss Technologies Digital SmartHandle AX
- Page 1 Kurzanleitung Digital SmartHandle AX Quick Guide Downward installation Guide abrégé Korte handleiding Guida breve Kort vejledning Snabbguide BS21.990601 08.03.2024...
- Page 2 Digital SmartHandle AX Downward installation Abbildungen/Images ................. deutsch ......................english ......................français ......................nederlands ..................... italiano ......................dansk ....................... svensk......................2 / 56...
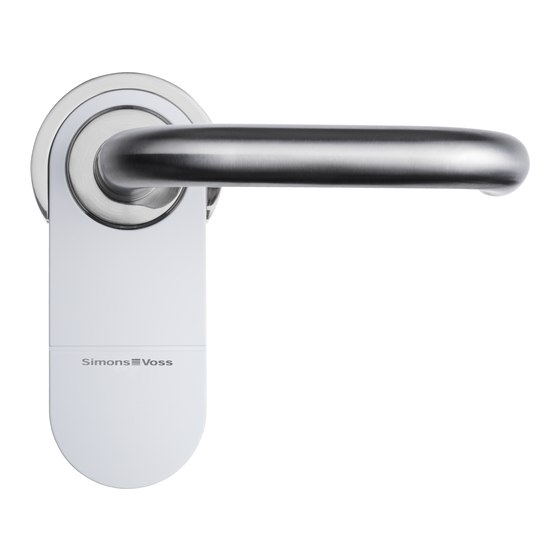
- Page 3 5. Design Digital SmartHandle AX Downward installation 5. Design Inside Outside 6. Prepare door (drilling template) Ø8.5 Abbildungen/Images 3 / 56...
- Page 4 6. Prepare door (drilling template) Digital SmartHandle AX Downward installation 4 / 56 Abbildungen/Images...
- Page 5 6. Prepare door (drilling template) Digital SmartHandle AX Downward installation Abbildungen/Images 5 / 56...
- Page 6 6. Prepare door (drilling template) Digital SmartHandle AX Downward installation Ø8.5 6 / 56 Abbildungen/Images...
- Page 7 7. For door thickness X: prepare threaded rods and spindle Digital SmartHandle AX Downward installation 7. For door thickness X: prepare threaded rods and spindle Abbildungen/Images 7 / 56...
- Page 8 8. Programming the fitting Digital SmartHandle AX Downward installation 2× L1: door thickness - 8 mm (±3 mm) 2× L2: door thickness + 8 mm (±3 mm) Door thickness + 37 mm (±4 mm) 8. Programming the fitting *System3060 8 / 56 Abbildungen/Images...
-
Page 9: Installing The Fitting
9. Installing the fitting Digital SmartHandle AX Downward installation *SI-WO *SI-VCN 9. Installing the fitting TX15 *S/M/L Abbildungen/Images 9 / 56... - Page 10 9. Installing the fitting Digital SmartHandle AX Downward installation *S/M/L 2× L1: door thickness - 8 mm (±3 mm) *S/M/L 2× L2: door thickness + 8 mm (±3 mm) *S/M/L *7 mm 10 / 56 Abbildungen/Images...
- Page 11 9. Installing the fitting Digital SmartHandle AX Downward installation *CW (clockwise) *CCW (counter-clockwise) *CW (clockwise) Abbildungen/Images 11 / 56...
- Page 12 9. Installing the fitting Digital SmartHandle AX Downward installation *CCW (counter-clockwise) 12 / 56 Abbildungen/Images...
- Page 13 9. Installing the fitting Digital SmartHandle AX Downward installation *7 mm Abbildungen/Images 13 / 56...
- Page 14 9. Installing the fitting Digital SmartHandle AX Downward installation *8,5 mm/10 mm *8,5 mm/10 mm 14 / 56 Abbildungen/Images...
- Page 15 9. Installing the fitting Digital SmartHandle AX Downward installation 1.1 Nm ±10% 1.1 Nm ±10% Abbildungen/Images 15 / 56...
- Page 16 9. Installing the fitting Digital SmartHandle AX Downward installation 1.1 Nm ±10% 16 / 56 Abbildungen/Images...
- Page 17 9. Installing the fitting Digital SmartHandle AX Downward installation TX15 5.0 Nm ±20% Abbildungen/Images 17 / 56...
- Page 18 10. Removing the fitting Digital SmartHandle AX Downward installation TX15 5.0 Nm ±20% 10. Removing the fitting SW1.5 SW1.5 18 / 56 Abbildungen/Images...
-
Page 19: Replacing The Batteries
11. Replacing the batteries Digital SmartHandle AX Downward installation SW1.5 11. Replacing the batteries Abbildungen/Images 19 / 56... - Page 20 11. Replacing the batteries Digital SmartHandle AX Downward installation 20 / 56 Abbildungen/Images...
- Page 21 11. Replacing the batteries Digital SmartHandle AX Downward installation Abbildungen/Images 21 / 56...
- Page 22 11. Replacing the batteries Digital SmartHandle AX Downward installation 22 / 56 Abbildungen/Images...
- Page 23 11. Replacing the batteries Digital SmartHandle AX Downward installation Abbildungen/Images 23 / 56...
-
Page 24: Help And Other Information
14. Help and other information Digital SmartHandle AX Downward installation 14. Help and other information 24 / 56 Abbildungen/Images... -
Page 25: Bestimmungsgemäßer Gebrauch
1. Bestimmungsgemäßer Gebrauch Digital SmartHandle AX Downward installation Beschädigung durch Öle, Fette, Farben und Säuren 1. Bestimmungsgemäßer Gebrauch Dieses Produkt enthält elektronische und/oder mechanische Bauteile, die Bei den Produkten der SmartHandle AX-Serie handelt es sich um durch Flüssigkeiten aller Art beschädigt werden können. -
Page 26: Produktspezifische Sicherheitshinwei- Se
3. Produktspezifische Sicherheitshinweise Digital SmartHandle AX Downward installation 3. Produktspezifische Sicherheitshinwei- Blindzylinder 5. Aufbau ACHTUNG 6. Tür vorbereiten (Bohrschablone) Beschädigung durch Bohren Stift oder Anreißnadel vorhanden. ü Sie bohren auf eigene Gefahr. Für Schäden, die durch das Bohren entstanden Bohrmaschine vorhanden. -
Page 27: Batterien Wechseln
8. Beschlag programmieren Digital SmartHandle AX Downward installation 14. Schrauben Sie mit den L2-Schrauben die Rosettenbasis an der Schließ- 8. Beschlag programmieren zylinder-Öffnung fest (PH2, Drehmoment: 1,1 Nm). Programmieren Sie den Beschlag vor der Montage. Je nach Produktfamilie können Sie verschiedene Programmiergeräte verwenden. -
Page 28: Technische Daten
12. Technische Daten Digital SmartHandle AX Downward installation Stecken Sie das Spezialwerkzeug in das Cover-Inlay des Beschlags. Der vollständige Text der EU-Konformitätserklärung ist unter der folgenden Internetadresse verfügbar: www.simons-voss.com/de/zertifikate.html Der vollständige Text der UK-Konformitätserklärung ist unter der folgenden Nehmen Sie das Cover mit dem Werkzeug ab. -
Page 29: Intended Use
1. Intended use Digital SmartHandle AX Downward installation Damage as a result of mechanical impact 1. Intended use This product contains electronic components that may be damaged by Products in the SmartHandle AX range consist of electronic door fittings. mechanical impacts of any kind. - Page 30 4. Scope of delivery Digital SmartHandle AX Downward installation Loss of the precise guidance of the handle Insert the spindle into the mortise lock. It may be difficult to install on mortise locks with a retaining nut. Do not mechanically alter the locking nut. The handle would then lose ...
- Page 31 10. Removing the fitting Digital SmartHandle AX Downward installation For S, M and L: trim the cut-to-length screws L1 and L2. 19. Place the two cover plates with the notch facing downwards onto the escutcheon base and the inner handle.
-
Page 32: Technical Data
12. Technical data Digital SmartHandle AX Downward installation 10. Replace the cover on the fitting. SimonsVoss Technologies GmbH, Feringastr. 4, D-85774 Unterfoehring, Germany Snap the cover back into place. Batteries are now replaced. 12. Technical data Operating temperature range -25 °C to +50 °C... -
Page 33: Utilisation Conforme
1. Utilisation conforme Digital SmartHandle AX Downward installation Endommagement lié à des liquides 1. Utilisation conforme Ce produit contient des composants électroniques et/ou mécaniques sus- Les produits de la série SmartHandle AX sont des béquilles électroniques. Au ceptibles d’être endommagés par tout type de liquide. - Page 34 3. Consignes de sécurité spécifiques au produit Digital SmartHandle AX Downward installation 3. Consignes de sécurité spécifiques au Douille d’adaptation carré 10 mm Cylindre borgne produit 5. Construction ATTENTION Dommages causés par le perçage 6. Préparation de la porte (gabarit de Vous percez à...
-
Page 35: Remplacement Des Piles
8. Programmation de la ferrure Digital SmartHandle AX Downward installation 14. Vissez la base de la rosace sur l’ouverture du cylindre de fermeture à 8. Programmation de la ferrure l’aide des vis L2 (PH2, couple : 1,1 Nm). Programmez la ferrure avant le montage. En fonction de la famille de produits, vous pouvez utiliser différents appareils de programmation. -
Page 36: Données Techniques
12. Données techniques Digital SmartHandle AX Downward installation Retirez le cache de protection à l’aide de l’outil. Le texte intégral de la déclaration de conformité CE est disponible à l'adresse Internet suivante : www.simons-voss.com/fr/certificats.html Le texte intégral de la déclaration de conformité UK est disponible à... -
Page 37: Beoogd Gebruik
1. Beoogd gebruik Digital SmartHandle AX Downward installation Beschadiging door bijtende reinigingsmiddelen 1. Beoogd gebruik Het oppervlak van dit product kan worden beschadigd door ongeschikte rei- Bij de producten uit de SmartHandle AX-serie gaat het om elektronische nigingsmiddelen. deurbeslagen. Met behulp van een bevoegd identificatiemedium kan de Maak uitsluitend gebruik van reinigingsmiddelen die geschikt zijn voor SmartHandle AX activeren en de betreffende deur openen. - Page 38 4. Leveromvang Digital SmartHandle AX Downward installation Schade veroorzaakt door ongeschikt gereedschap Demonteer het insteekslot (PH2). Als u de koffer probeert te openen met ongeschikt gereedschap, kan de kof- fer beschadigd raken. Meet de verticale afstand tussen de middelpunten van de bevestigings- Gebruik uitsluitend de meegeleverde SimonsVoss-openingstool.
-
Page 39: Batterijen Vervangen
10. Beslag demonteren Digital SmartHandle AX Downward installation ü Schuifmaat aanwezig. OPMERKING Nijptang beschikbaar. ü Voor S, M en L: meet de deurdikte. Blinde cilinder met schroevendraaier in het gat leiden In het bijzonder bij dikke deuren is het moeilijk om de blinde cilinder correct te Voor S, M en L: bepaal de snijpunten op de inkortschroeven L1 en L2. -
Page 40: Technische Gegevens
12. Technische gegevens Digital SmartHandle AX Downward installation Conformiteitsverklaringen https://www.simons-voss.com/nl/certificaten.html Open de batterijklem. Informatie over verwijdering Trek de batterijklem eruit. Voer het apparaat (SV-S2.*A*, SV-S2.*AM*, SV-S2.*LN*, SI- S2.*M.WO*, SI-S2.*M.VCN*) niet af als huishoudelijk afval, maar overeenkomstig de Europese Richtlijn 2012/19/EU bij een gemeentelijke Verwijder de oude batterijen. -
Page 41: Uso Conforme
1. Uso conforme Digital SmartHandle AX Downward installation Danni dovuti a detergenti aggressivi 1. Uso conforme La superficie di questo prodotto può essere danneggiata da detergenti non I prodotti della serie SmartHandle AX sono maniglie elettroniche. Con idonei. l’ausilio di un mezzo di identificazione autorizzato SmartHandle AX può... -
Page 42: Oggetto Di Fornitura
3. Avvertenze di sicurezza specifiche del prodotto Digital SmartHandle AX Downward installation 3. Avvertenze di sicurezza specifiche del Manicotto adattatore quadro maniglia di 10 mm Cilindro cieco prodotto 5. Struttura AVVISO Danni da perforazione 6. Preparazione della porta (maschera di Esercitate a vostro rischio e pericolo. -
Page 43: Montaggio Della Maniglia
8. Programmare la maniglia Digital SmartHandle AX Downward installation Per X: accorciare le aste filettate e il quadro maniglia con una sega adatta. Inserire la maniglia con il quadro maniglia nella porta. 8. Programmare la maniglia 14. Avvitare saldamente con le viti L2 il portarosetta all’apertura del cilindro di chiusura (PH2, coppia: 1,1 Nm). -
Page 44: Sostituzione Delle Batterie
11. Sostituzione delle batterie Digital SmartHandle AX Downward installation 11. Sostituzione delle batterie 868,000 MHz - 868,600 MHz / 869,700 MHz - 870,000 MHz <25 mW ERP Solo per i codici articolo: SV- NOTA S2.*LN*, SI-S2.*M.WO* 2402 MHz - 2480 MHz... -
Page 45: Generelle Sikkerhedshenvisninger
1. Anvendelsesområder Digital SmartHandle AX Downward installation Beskadigelse på grund af aggressive rengøringsmidler 1. Anvendelsesområder Produktets overflade kan blive beskadiget på grund af uegnede rengørings- Ved SmartHandle AX-seriens produkter drejer det sig om elektroniske midler. dørbeslag. SmartHandle AX kan koble ind og åbne den pågældende dør ved Brug kun rengøringsmidler, der er velegnede til kunststof- og metalover-... - Page 46 3. Produktspecifikke sikkerhedsanvisninger Digital SmartHandle AX Downward installation 3. Produktspecifikke sikkerhedsanvisnin- 6. Forbered døren (boreskabelon) ü Blyant eller ridsenål til stede. Boremaskine til rådighed. ü Der er et passende bor (Ø 8,5 mm) til rådighed. ü OPMÆRKSOMHED PH2-skruetrækker til rådighed.
-
Page 47: Udskiftning Af Batterier
9. Monter beslaget Digital SmartHandle AX Downward installation 9. Monter beslaget BEMÆRK ü Døren er forboret. PH2-skruetrækker til rådighed. ü Før blindcylinderen med skruetrækker i hullet TX15-skruetrækker til rådighed. ü Især ved tykke døre er det svært at placere blindecylinderen korrekt. -
Page 48: Tekniske Data
12. Tekniske data Digital SmartHandle AX Downward installation Åbn batteriklemmen. Oplysninger om bortskaffelse Enheden (SV-S2.*A*, SV-S2.*AM*, SV-S2.*LN*, SI-S2.*M.WO*, SI- S2.*M.VCN*) må ikke bortskaffes med husholdningsaffaldet, men skal Træk batteriklemmen ud. afleveres på den kommunale affaldsplads, jf. det europæiske direktiv 2012/19/EU. -
Page 49: Avsedd Användning
1. Avsedd användning Digital SmartHandle AX Downward installation Skada på grund av aggressiva rengöringsmedel 1. Avsedd användning Ytan på den här produkten kan skadas om olämpliga rengöringsmedel an- Produkterna i SmartHandle AX-serien gäller elektroniska dörrhandtag. Med vänds. hjälp av ett behörigt identifikationsmedium kan man aktivera SmartHandle Använd endast rengöringsmedel som lämpar sig för plast- och metally-... - Page 50 4. Leveransomfång Digital SmartHandle AX Downward installation Skador på grund av olämpligt verktyg Mät det vertikala avståndet mellan fästhålens centrum. Att försöka öppna ärendet med ett felaktigt verktyg kan skada fallet. Använd endast det medföljande SimonsVoss-öppningsverktyget. Montera instickslåset (PH2).
- Page 51 10. Demontera handtag Digital SmartHandle AX Downward installation För S, M och L: Bestäm var skruvarna L1 och L2 ska kapas. 18. Skruva fast innerhandtagets stoppskruv (TX15, åtdragningsmoment 5,0 Nm). 19. Sätt på de båda skydden med ursparningen nedåt på rosettbasen och För S, M och L: Korta skruvarna L1 och L2.
-
Page 52: Tekniska Data
12. Tekniska data Digital SmartHandle AX Downward installation Haka i batteriklämmorna igen. support-simonsvoss@allegion.com si-support-simonsvoss@allegion.com SimonsVoss Technologies GmbH, Feringastr. 4, D-85774 Unterföhring, 10. Sätt tillbaka kåpan på handtaget. Tyskland Knäpp fast kåpan igen. Batterierna är bytta. 12. Tekniska data Temperaturområde (drift) –25 °C till +50 °C... - Page 53 14. Hjälp och ytterligare information Digital SmartHandle AX Downward installation 53 / 56...
- Page 54 14. Hjälp och ytterligare information Digital SmartHandle AX Downward installation 54 / 56...
- Page 55 14. Hjälp och ytterligare information Digital SmartHandle AX Downward installation 55 / 56...
- Page 56 © 2024, SimonsVoss Technologies GmbH, Unterföhring All rights are reserved. Text, images and diagrams are protected under copyright law. The content of this document must not be copied, distributed or modified. You can find more information on our website. Subject to technical changes. SimonsVoss and MobileKey are registered brands belonging to SimonsVoss.
Need help?
Do you have a question about the Digital SmartHandle AX and is the answer not in the manual?
Questions and answers