Table of Contents
Advertisement
Quick Links
Advertisement
Table of Contents

Related Manuals for Simons Voss Technologies ALLEGION 3061


Summary of Contents for Simons Voss Technologies ALLEGION 3061
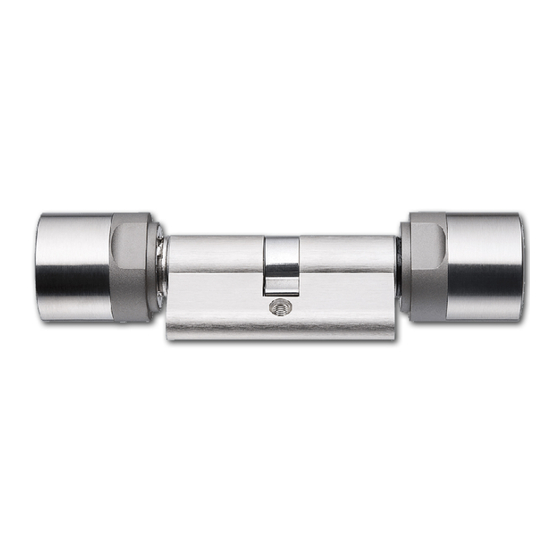
- Page 1 Manual Digital Locking Cylinder 3061 08.2017...
-
Page 2: Table Of Contents
Contents 2 / 44 SimonsVoss Manual Digital Locking Cylinder 3061 Contents 1 Intended use ............................ 4 2 Safety instructions.......................... 5 3 General information on System 3060.................... 7 Product description......................... 7 Locking cylinder design ...................... 8 Half cylinder design ........................ 9 Opening and locking from the outside.................. 9 Opening and locking from the inner side ................ - Page 3 Contents 3 / 44 SimonsVoss Manual Digital Locking Cylinder 3061 Installation variants....................... 19 5.3.1 Installation of double thumb-turn cylinders (except types .AP/.SKG/.VdS) .... 19 5.3.2 Fitting an anti-panic cylinder.................. 21 5.3.3 Installation of SKG/VdS cylinders................ 24 5.3.4 Half Cylinder DK/MR .................... 25 5.3.5 Installing Swiss Round .................... 27 6 System 3060 audible signals ....................... 28 Battery warnings........................
-
Page 4: Intended Use
1 | Intended use 4 / 44 SimonsVoss Manual Digital Locking Cylinder 3061 1 Intended use Digital SimonsVoss Locking Cylinder are installed in designated door locks, such as DIN mortise locks, to integrate them into a digital locking system. Digital half cylinders can also be operated in optionally available SimonsVoss padlocks. -
Page 5: Safety Instructions
2 | Safety instructions 5 / 44 SimonsVoss Manual Digital Locking Cylinder 3061 2 Safety instructions Warning: – Access through a door may be blocked due to an incorrectly installed or incorrectly programmed Locking Cylinder. SimonsVoss Technologies GmbH is not liable for consequences of incorrect installation, such as denied access to injured persons, physical damage or any other losses. - Page 6 2 | Safety instructions 6 / 44 SimonsVoss Manual Digital Locking Cylinder 3061 – When used outdoors, the anti-panic cylinder is no longer guaranteed to function at temperatures under - 20 °C or over + 50 °C. – A functional test must be performed without fail after installing the anti-panic cylinder or replacing its batteries.
-
Page 7: General Information On System 3060
3 | General information on System 3060 7 / 44 SimonsVoss Manual Digital Locking Cylinder 3061 3 General information on System 3060 3.1 Product description The SimonsVoss Digital Locking System 3060 is an electronic version of a mechanical locking system with the functions of a typical access control system. -
Page 8: Locking Cylinder Design
3 | General information on System 3060 8 / 44 SimonsVoss Manual Digital Locking Cylinder 3061 The locking cylinders are provided with two different firmware generations – G1 and G2. G2 features a more efficient communication protocol than G1. It will allow you to create larger, more efficient locking systems. Authorisations are written both on the locking cylinder and the transponder, thus delivering greater flexibility for programming. -
Page 9: Half Cylinder Design
3 | General information on System 3060 9 / 44 SimonsVoss Manual Digital Locking Cylinder 3061 3.3 Half cylinder design 1. Actuator 2. Electronics 3. Batteries 4. Thumb-turn 3.4 Opening and locking from the outside With freely rotating The outer and inside thumb-turn rotate freely when not activated in the freely rotating Locking Cylinder, meaning it is not possible to open locking cylinders (FD) or lock the door without a valid ID medium. -
Page 10: Opening And Locking From The Inner Side
3 | General information on System 3060 10 / 44 SimonsVoss Manual Digital Locking Cylinder 3061 3.5 Opening and locking from the inner side The outer and inside thumb-turn rotate freely when not activated in With freely rotating the freely rotating Locking Cylinder, Doors can also only be opened or locking cylinders (FD) locked on the outside using an ID medium on the inside thumb-turn. -
Page 11: System 3060 Designs
4 | System 3060 designs 11 / 44 SimonsVoss Manual Digital Locking Cylinder 3061 4 System 3060 designs Different versions of the digital Locking Cylinder are offered to cover the different needs of the market. The different versions are indicated by a code. -
Page 12: Fd Version (Standard)
4 | System 3060 designs 12 / 44 SimonsVoss Manual Digital Locking Cylinder 3061 Standard Euro profile cylinder as per DIN 18252/EN1303 Scandinavian Oval British oval Swiss Round Locking Cylinders are also offered in mortise and rim cylinder models for American door profiles. -
Page 13: Ts Version
4 | System 3060 designs 13 / 44 SimonsVoss Manual Digital Locking Cylinder 3061 It must be ensured that any locking devices or sealing strips do not impede the orderly operation of the MC. 4.6 TS version Design as for standard version, but with the additional option of allowing the cylinder to engage without an identification medium. -
Page 14: Ap Version
4 | System 3060 designs 14 / 44 SimonsVoss Manual Digital Locking Cylinder 3061 4.10 AP version A cylinder with an anti-panic function must be fitted to all doors where the lock's panic function may be adversely affected by the position of the cam. This version contains an integrated spring mechanism which places the locking cam in a non-critical position, meaning a panic lock's panic function cannot be blocked. -
Page 15: Ap2 Version
4 | System 3060 designs 15 / 44 SimonsVoss Manual Digital Locking Cylinder 3061 The following aspects should be taken into consideration for doors along rescue routes which have been installed after April 1, 2003 (exit devices as per DIN EN 179 or DIN EN 1125): All Locking Cylinder models may be used for all exit devices where their approval states that the Locking Cylinder has no impact on the lock's function. -
Page 16: Wp Version (Hz/Co/Ap)
4 | System 3060 designs 16 / 44 SimonsVoss Manual Digital Locking Cylinder 3061 Anti-panic cylinder: The WP version is specifically designed for outdoor areas and should be fitted if the outer thumb-turn comes into contact with water (e.g. rainwater). The WP version features greater resistance to water, meaning the cam should not come into contact with water. -
Page 17: Hybrid-Version
4 | System 3060 designs 17 / 44 SimonsVoss Manual Digital Locking Cylinder 3061 4.20 Hybrid-Version With the hybrid version of the digital locking cylinder, active identification media (e.g., transponders) and passive identification media (e.g., MIFARE or DESFire cards) can be used. 4.21 Extra lengths All double knob cylinders are available with an overall length of up to 140 mm or a maximum of 90 mm on one side. -
Page 18: Installation Instructions
5 | Installation instructions 18 / 44 SimonsVoss Manual Digital Locking Cylinder 3061 5 Installation instructions 5.1 General instructions When installing the digital Locking Cylinder, ensure that there are no sources of low-frequency radio interference in the surrounding area. The profile cylinder housing should be fitted flush in outside areas; it should project a maximum of 3 mm and a profile cylinder escutcheon or security fitting should be installed if necessary. -
Page 19: Installation Variants
5 | Installation instructions 19 / 44 SimonsVoss Manual Digital Locking Cylinder 3061 5.3 Installation variants 5.3.1 Installation of double thumb-turn cylinders (except types .AP/.SKG/.VdS) 1. Installation key 2. Side marking 3. Recessed grip ring 4. Inside thumb-turn 5. Battery replacement key 6. - Page 20 5 | Installation instructions 20 / 44 SimonsVoss Manual Digital Locking Cylinder 3061 5.3.1.2 Fastening the digital cylinder into the locking device Turn the cam until it is vertical and pointing downwards. Insert the digital locking cylinder through the locking device in such a way that the inside thumb-turn (see diagram above) is facing the inner side of the door.
-
Page 21: Fitting An Anti-Panic Cylinder
5 | Installation instructions 21 / 44 SimonsVoss Manual Digital Locking Cylinder 3061 Place the installation key on the outer thumb-turn in such a way that its two teeth engage into the outer thumb-turn (if necessary, turn the thumb-turn until both teeth lock into the locking disc). Lock the thumb-turn into position again by rotating it 30°... - Page 22 5 | Installation instructions 22 / 44 SimonsVoss Manual Digital Locking Cylinder 3061 The locking cam is always in a pre-defined position in the AP cylinder when disengaged. This prevents accidental blocking. Unlike other cylinder versions, the AP cylinder is installed the other way round (inserted into the lock from the inside to the outside).
- Page 23 5 | Installation instructions 23 / 44 SimonsVoss Manual Digital Locking Cylinder 3061 U section: No restore force on the cam R section: Restore force section towards U section Top dead point in deadbolt throw - no restore force on O section: the cam Top threshold section...
-
Page 24: Installation Of Skg/Vds Cylinders
5 | Installation instructions 24 / 44 SimonsVoss Manual Digital Locking Cylinder 3061 4. Lock the door and check that the locking device functions correctly by pressing the door fitting or panic bar in the direction of escape. ð The dead bolt must spring back and it must be possible to open the door easily. -
Page 25: Half Cylinder Dk/Mr
5 | Installation instructions 25 / 44 SimonsVoss Manual Digital Locking Cylinder 3061 6. Place the installation key on the outside thumb-turn in such a way that its two teeth engage into the outside thumb-turn (if necessary, turn the thumb-turn until both teeth lock into the locking disc). Lock the thumb- turn into position again by rotating it 30°... - Page 26 5 | Installation instructions 26 / 44 SimonsVoss Manual Digital Locking Cylinder 3061 If you need to disassemble the half cylinder, please proceed as follows: 1. Using a tool such as a screwdriver, grip into the two slots in the plastic disc between the thumb-turn and the profile cylinder housing and turn the tool while applying a little pressure.
-
Page 27: Installing Swiss Round
5 | Installation instructions 27 / 44 SimonsVoss Manual Digital Locking Cylinder 3061 When installing, ensure that only one plastic disc and the same number of metal discs are on the inner tube as when you took it apart. The plastic disc must be placed directly on the thumb-turn. -
Page 28: System 3060 Audible Signals
6 | System 3060 audible signals 28 / 44 SimonsVoss Manual Digital Locking Cylinder 3061 6 System 3060 audible signals The Locking Cylinder emits an audible signal to indicate its status and an authorisation. The table below lists what the audible signals mean. 2 short audible signals before engaging and a Normal activation... - Page 29 6 | System 3060 audible signals 29 / 44 SimonsVoss Manual Digital Locking Cylinder 3061 The battery warning levels between G1 and G2 differ after Battery Warning Level 2 if the battery capacity falls under the emergency battery warning threshold values. –...
-
Page 30: Battery Warning For Transponders
6 | System 3060 audible signals 30 / 44 SimonsVoss Manual Digital Locking Cylinder 3061 Battery change: Up to 15,000 Up to 50 access activate with access events or events or up to 30 battery up to 9 months on days replacement standby... -
Page 31: System 3060 Battery Replacement
7 | System 3060 battery replacement 31 / 44 SimonsVoss Manual Digital Locking Cylinder 3061 7 System 3060 battery replacement 7.1 General instructions Only trained personnel may replace the batteries. You must wear clean gloves made of cloth and free of fat or grease when replacing the batteries to prevent the batteries being contaminated by fingerprints. -
Page 32: Storage Mode (G1)
7 | System 3060 battery replacement 32 / 44 SimonsVoss Manual Digital Locking Cylinder 3061 7.3.1 Storage mode (G1) If the locking cylinder is in emergency battery storage mode, proceed as follows to open the door to change the battery and reset the cylinder. 1. -
Page 33: Procedure
7 | System 3060 battery replacement 33 / 44 SimonsVoss Manual Digital Locking Cylinder 3061 7.4 Procedure 1. Place the installation/battery key on the inside thumb-turn in such a way that the two teeth lock into the openings in the locking disc; if necessary, turn the thumb-turn until both teeth engage into the locking disc. -
Page 34: Procedure For Outer Thumb Turn (Mh Cylinder)
7 | System 3060 battery replacement 34 / 44 SimonsVoss Manual Digital Locking Cylinder 3061 9. For MH cylinders only: Lock antenna back into place. 10. Replace the thumb-turn (align the triangle mark as in the diagram), hold the recessed grip ring firmly and fasten the inside thumb-turn by turning in a clockwise direction (about 10°). - Page 35 7 | System 3060 battery replacement 35 / 44 SimonsVoss Manual Digital Locking Cylinder 3061 1. Use the battery replacement key to detach the outer thumb-turn. To do so, face the outer thumb-turn and place the battery replacement key on the bayonet mount and turn in a clockwise direction until you can remove the thumb-turn easily.
-
Page 36: Maintenance, Cleaning And Disinfection
8 | Maintenance, cleaning and disinfection 36 / 44 SimonsVoss Manual Digital Locking Cylinder 3061 8 Maintenance, cleaning and disinfection Digital locking cylinders MUST not come into contact with oil, grease, paint NOTICE or acids. The use of unsuitable or aggressive disinfectants can damage the locking NOTICE cylinder. -
Page 37: Areas Of Use
9 | Areas of use 37 / 44 SimonsVoss Manual Digital Locking Cylinder 3061 9 Areas of use 9.1 General The digital locking cylinder is compatible with locks for Euro profile cylinder as per DIN 18252 and EN1303. 9.2 Fire doors As a general rule, this cylinder can be fitted into fire doors. -
Page 38: Accessories
10 | Accessories 38 / 44 SimonsVoss Manual Digital Locking Cylinder 3061 10 Accessories 10.1 Thumb-turns The following special thumb-turns are available as accessories: – Outer thumb-turn in a TN4 design – Outer thumb-turn, 42 mm in diameter with recessed grips –... -
Page 39: Battery Set
10 | Accessories 39 / 44 SimonsVoss Manual Digital Locking Cylinder 3061 10.6 Battery set A new set of batteries can be ordered, which contains ten CR2450 batteries. Only ever use batteries approved by SimonsVoss. -
Page 40: Data Sheets
11 | Data sheets 40 / 44 SimonsVoss Manual Digital Locking Cylinder 3061 11 Data sheets 11.1 Locking cylinder Profile cylinder Outside 30 mm, internal 30 mm Basic length: (AP/WP 35mm) Installation lengths in 5 mm increments, overall length up to 140 mm (max. -
Page 41: Half Cylinder
11 | Data sheets 41 / 44 SimonsVoss Manual Digital Locking Cylinder 3061 37 mm (from front surface of Length: profile) AP cylinder thumb- Outside thumb-turn: identical to Material: turns standard cylinders: Aluminium Outside thumb-turn: Brushed Colours: stainless steel; internal thumb- turn: Nickel-coated aluminium Diameter: 30 mm... - Page 42 11 | Data sheets 42 / 44 SimonsVoss Manual Digital Locking Cylinder 3061 Features – 3,000 access events can be logged (ZK) – Network-ready with integrated LockNode (WN) – LockNode can be retrofitted – Time zone groups: G1: 5 / G2: 100 –...
-
Page 43: Declaration Of Conformity
12 | Declaration of conformity 43 / 44 SimonsVoss Manual Digital Locking Cylinder 3061 12 Declaration of conformity You can access documents such as declarations of conformity and other certificates online at www.simons-voss.com. -
Page 44: Help & Contact
13 | Help & Contact 44 / 44 SimonsVoss Manual Digital Locking Cylinder 3061 13 Help & Contact Instruction manuals You will find detailed information on operation and configuration online under INFOCENTER > DOWNLOADS on our homepage at www.simons-voss.de If you have any questions, the SimonsVoss Service Hotline will be Hotline happy to help you on +49 (0)89 99 228 333 (German fixed network;...
Need help?
Do you have a question about the ALLEGION 3061 and is the answer not in the manual?
Questions and answers