Intermec Trakker Antares 2400 User Manual
Handheld terminal
Hide thumbs
Also See for Trakker Antares 2400:
- User manual (134 pages) ,
- Quick start manual (9 pages) ,
- Quick reference manual (2 pages)
Table of Contents
Advertisement
Quick Links
This manual contains information about the terminal's features, installing the terminal, learning about
the menu system, operating the terminal in a network, and troubleshooting problems.
If you need to learn how to configure the terminal, develop and use applications, run diagnostics, use
reader commands and configuration commands, or use default and optional applications, you also need to
download the
Trakker Antares 2400 Family System Manual
Myriad Pro Black
AGaramond
Read This First!
(P/N 071389).
Advertisement
Table of Contents

Related Manuals for Intermec Trakker Antares 2400


Summary of Contents for Intermec Trakker Antares 2400
-
Page 1: Read This First
If you need to learn how to configure the terminal, develop and use applications, run diagnostics, use reader commands and configuration commands, or use default and optional applications, you also need to download the Trakker Antares 2400 Family System Manual Read This First! (P/N 071389). - Page 3 User's Manual ® Trakker Antares 241X Handheld Terminal...
- Page 4 The information contained herein is proprietary and is provided solely for the purpose of allowing customers to operate and service Intermec-manufactured equipment and is not to be released, reproduced, or used for any other purpose without written permission of Intermec.
- Page 5 Important Data Collection Browser Information Sheet (P/N 070012-002). Removed these documents, because this information is included in the system manual: the Trakker Antares 2400 Family User’s Manual Addendum (P/N 070451), the Trakker Antares 2400 Family Firmware V6.15 Instruction Sheet (P/N 071388), and the Trakker Antares 2400 Family Firmware V6.20 Instruction Sheet (P/N 071867).
- Page 6 Trakker Antares 241X Handheld Terminal User’s Manual...
-
Page 7: Table Of Contents
Contents Before You Begin...ix Safety Summary...ix Safety Icons ...x Global Services and Support ...x Who Should Read This Document? ...xi Related Documents ... xii Learning About the Terminals What Are the Trakker Antares 241X Terminals?... 2 Learning About the Terminal’s Features ... 3 Options for the Terminals ... - Page 8 Choosing a Communications Protocol ... 45 Using RF Communications on the 2415 ... 48 Planning the Network Connection ... 49 Configuring the Intermec Gateway or DCS 30X ... 49 Configuring the Access Points... 50 Configuring the 2415 Network Parameters... 51 Configuring the 802.1x Security Parameters ...
- Page 9 Problems Transmitting Data Through the Intermec Gateway or DCS 30X ... 69 Problems While Scanning Bar Codes ... 70 Booting and Resetting the Terminal ... 71 Booting the Terminal ... 71 Resetting the Terminal ... 73 Cleaning the Scanner Window and Terminal Screen ... 74 Specifications ...
- Page 10 Contents viii Trakker Antares 241X Handheld Terminal User’s Manual...
-
Page 11: Before You Begin
Safety Summary Your safety is extremely important. Read and follow all warnings and cautions in this document before handling and operating Intermec equipment. You can be seriously injured, and equipment and data can be damaged if you do not follow the safety warnings and cautions. -
Page 12: Safety Icons
Global Services and Support Warranty Information To understand the warranty for your Intermec product, visit the Intermec web site at http://www.intermec.com and click Service & Support. The Intermec Global Sales & Service page appears. From the Service & Support menu, move your pointer over Support, and then click Warranty. -
Page 13: Who Should Read This Document
This manual provides you with information about the features of the Trakker Antares configure, operate, maintain, and troubleshoot them. Use this manual in conjunction with the Trakker Antares 2400 Family System Manual (P/N 071389), which contains detailed information about configuring, operating, and programming all terminals in the 2400 Family. -
Page 14: Related Documents
Related Documents The Intermec web site at http://www.intermec.com contains our current documents that you can download in PDF format. To order printed versions of the Intermec manuals, contact your local Intermec representative or distributor. Trakker Antares 241X Handheld Terminal User’s Manual... -
Page 15: Learning About The Terminals
Learning About the Terminals ® This chapter introduces the Trakker Antares 2410 and 2415 handheld terminals and their features including the batteries, memory, drives, and input devices. It also describes how to start using the 241X. This chapter covers these topics: •... -
Page 16: What Are The Trakker Antares 241X Terminals
(RF) network. Because it can communicate using RF, the 2415 provides real-time communications to a host either through the access points and the Intermec Gateway or DCS 30X, or directly through the access points. The 2415 can also run client/server applications, TE 2000™... -
Page 17: Learning About The Terminal's Features
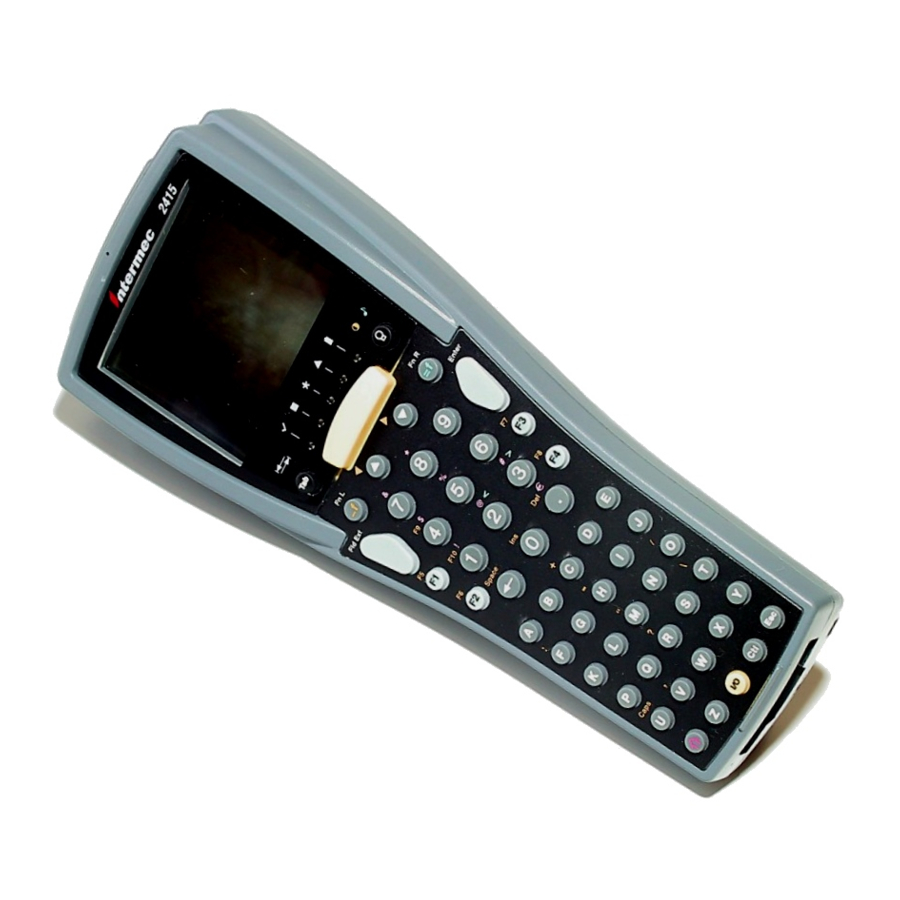
nugget Learning About the Terminal’s Features The 241X is designed to make data collection easy and includes the following features. 241X features: This illustration points out the key features of the 241X. See the next table for a description of each feature. 241X Features Feature CGA-compatible... -
Page 18: Options For The Terminals
37-key function key with large numeric keypads • Trakker Antares ROM-DOS™ support • UDP Plus (Intermec Gateway or DCS 30X to host), WTP (Intermec Gateway or DCS 30X to host), or TCP/IP (direct connect to host) communication protocols •... -
Page 19: Accessories For The Terminals
nugget For additional help using terminal emulation, see the appropriate TE 2000 guide: • TE 2000 5250 Terminal Emulation Programmer’s Guide (P/N 977-055-004) • TE 2000 3270 Terminal Emulation Programmer’s Guide (P/N 977-055-003) • TE 2000 VT/ANSI Terminal Emulation Programmer’s Guide (P/N 977-055-005) For additional help using dcBrowser, see the online help that ships with the dcBrowser gateway software, or see the Data Collection Browser Client... -
Page 20: What's New
Chapter 2, “Configuring and Managing the Terminals,” in the 2400 Family System manual. • Information from the Trakker Antares 2400 Family System Manual Addendum was incorporated: 802.1X security enhancements to provide new functionality to the current TTLS security and support for Cisco’s LEAP security. -
Page 21: Unpacking The Terminal
Check the contents of the box against the invoice for completeness and contact your local Intermec service representative if there is a problem. Using the Terminal’s Battery Pack The lithium-ion battery pack that is used in this device may present a fire or chemical burn hazard if it is mistreated. -
Page 22: Determining When The Battery Pack Is Low
Chapter 1— Learning About the Terminals • If the terminal turns off due to a low battery charge, do not turn the terminal back on. Replace or charge the battery pack before you continue using the terminal. Note: Do not press _ when there is no battery pack installed in the terminal. - Page 23 069428, réf. n° 069429, réf. n° 073929, ou réf. n° 073930 seulement. L’utilisation de tout autre bloc-batterie présente un risque d’incendie ou d’explosion. Contact your local Intermec sales representative for a replacement battery pack. DISPOSE OF USED BATTERY PACKS PROMPTLY. KEEP THEM AWAY FROM CHILDREN.
-
Page 24: Removing The Battery Pack
Chapter 1— Learning About the Terminals Removing the Battery Pack Removing the battery pack while the terminal is on may cause loss of data. Attention: Ne détachez pas le paquet de piles pendant que le terminal est actif car cela pourrait entraîner la perte de données. To remove the battery pack 1 Press _ to turn off the terminal. -
Page 25: Using The Keypad
nugget Managing Battery Power (continued) Situation You are not using the terminal for 5 minutes or longer. You are going to store the terminal for more than a day. Using the Keypad This table lists the 241X’s keypad options and overlays. 241X Keypad Options and Overlays Programmable International... -
Page 26: Typing The Characters Printed On The Keypad
Chapter 1— Learning About the Terminals Function left key Shift 241X with 37-Key Alphanumeric Keypad and Programmable Overlay Typing the Characters Printed on the Keypad Characters, symbols, and functions are printed in four places on or above the keys. The keys are also color-coded to make it easier to remember key combinations. -
Page 27: Using The Suspend/Resume Key
nugget Typing Characters on the Keypad Position on the Keypad Middle of the key Left side above the key Centered above the key Right side above the key You can also use the arrow keys to move the cursor around an application screen. -
Page 28: Using The Modifier Keys
Chapter 1— Learning About the Terminals Using the Modifier Keys The keypad does not have a physical key for every character and function available. You use the Function Left ((), Function Right ()), and Shift (?) keys to access characters or perform functions that do not have a physical key on the keypad. -
Page 29: Using The International Keypad
nugget To disable Caps Lock 1 Press (. 2 (37-key function key/numeric) Press d. (37-key alphanumeric/numeric) Press G. (55-key alphanumeric) Press U. 3 Type an alphabetic character. The letter appears as a lowercase letter on the terminal’s screen. The Modifier LED turns off. Using the International Keypad Whether your terminal has an alphanumeric or a numeric keypad, you can order it with an international overlay. -
Page 30: Using The Te 2000 Keypads
Chapter 1— Learning About the Terminals The character/diacritical mark appears on the screen and the Modifier LED turns off. If you try to mark a character and the resulting character is not supported on the terminal, the plain (unmarked) character displays on the terminal screen. -
Page 31: Learning About The Status Leds
nugget To turn the backlight on and off • Press +. Turn the backlight on to see the terminal’s screen more easily in dimly lit environments. The backlight stays on for the length of time set in the Display Backlight Timeout command as long as there is no keypad or scanning activity or until you press + again. -
Page 32: Learning About The Audio Signals
LED Off LED Blinks Nothing. connected. Connected to an access point, connected. but not to an Intermec Gateway or DCS 30X. Trakker Antares 241X Handheld Terminal User’s Manual LED On Connected to an access point. Connected to an Intermec Gateway or DCS 30X. -
Page 33: Using The Terminal's Serial Port
• Use the TRAKKER Antares 2400 Menu System. From the Main Menu, choose Configuration Menu, then Terminal Menu, and then Beeper. • Use the Beep Volume command. For help, see “Beep Volume” in Chapter 6 of the 2400 Family system manual. -
Page 34: Using The Terminal's Scanner
Chapter 1— Learning About the Terminals COM Port Descriptions Port COM1 RF (NET) You can also connect input devices to the serial port using special cables. For help, see “Connecting an Input Device” on page 22. Using the Terminal’s Scanner Do not look directly into the window area or at a reflection of the laser beam while the laser is scanning. - Page 35 nugget To scan a bar code label with the scanner 1 Press _ to turn on the terminal. 2 Hold the terminal at a slight angle a few inches from the bar code label. The scanner must be pointing toward the label. 3 Push the Scan button on the keypad.
-
Page 36: Connecting An Input Device
You can either use the special cable for the input device or you can use a standard cable with special adapter cables (P/N 069591 or P/N 069589). For an updated list of available input devices, contact your local Intermec representative. -
Page 37: Defining The Terminal's Drives
nugget • Scanner Redundancy • Scanner Selection • Scanner Timeout • Scanner Trigger For more information on these commands, see Chapter 6, “Configuration Command Reference,” in the 2400 Family system manual. Defining the Terminal’s Drives The terminal comes with two flash drives and a configurable RAM drive. An optional extended storage drive is available for the 2410. - Page 38 Chapter 1— Learning About the Terminals Note: : If you have a terminal with the 802.1x TTLS security option, drive D is not available to store files or double-byte fonts. For more information about configuring 802.1x TTLS security, see “Configuring 802.1x TTLS Security”...
-
Page 39: Configuring The Terminals
This chapter explains the different methods that you can use to configure the 241X and its memory and drives. It also explains how to configure the terminals using the TRAKKER Antares 2400 Menu System. This chapter covers these topics: • How to configure the terminal •... -
Page 40: How To Configure The Terminal
You can configure the terminals by using any of the following methods. Use the TRAKKER Antares 2400 Menu System You can use the menus and screens of the TRAKKER Antares 2400 Menu System to view the current configuration and change the configuration parameters. -
Page 41: About The Configurations
The TRAKKER Antares 2400 Menu System lets you configure the terminal, manage files, view system information, and run diagnostics. You can access the TRAKKER Antares 2400 Menu System while running any application. When you are using the menu system, you may not see a parameter until you set a value for another key field. - Page 42 Chapter 2— Configuring the Terminals To access the TRAKKER Antares 2400 Menu System • Press ( \ 2 4 8 or scan this bar code: TRAKKER Antares 2400 Menu System *..-.* *..-.* The Main Menu appears, displaying four menu options.
-
Page 43: Accessing Online Help
Code Verify The TRAKKER Antares 2400 Menu System at a Glance Accessing Online Help The TRAKKER Antares 2400 Menu System provides online help for the menus and commands. To access a help screen • Press ! to access a help screen. -
Page 44: Selecting Menus And Commands
Chapter 2— Configuring the Terminals Selecting Menus and Commands A menu consists of a list of secondary menu items or commands. From the Main Menu, you can press = or > or ; to select a menu and then press \ or [. -
Page 45: Marking Check Boxes
Entering ASCII Control Characters You can include ASCII control characters in a postamble or preamble by using the TRAKKER Antares 2400 Menu System. For a definition of the postamble or preamble, see Chapter 6, “Configuration Command Reference,” in the 2400 Family system manual. - Page 46 Ü (the 5250 Field Exit code) in the table has the hexadecimal value 9A. 2 Use the TRAKKER Antares 2400 Menu System to configure a preamble or postamble. Choose Main Menu > Configuration Menu > Terminal Menu > Preamble/Postamble.
-
Page 47: Exiting Screens And Saving Changes
Exiting the Menu System 1 Press % until you exit the TRAKKER Antares 2400 Menu System. If you have made any changes to the current configuration, this screen prompts you to save the configuration parameters that are currently enabled on the terminal to RAM. - Page 48 Or, choose Cancel and press \ to return to the Main Menu. TRAKKER Antares 2400 6 Choose OK and press \ to exit the TRAKKER Antares 2400 Menu System. Or, choose Cancel and press \ to return to the Main Menu.
-
Page 49: Configuring Drives And Memory On The Terminal
nugget Configuring Drives and Memory on the Terminal The 241X comes with a 750K flash drive(C), 512K RAM reserved for applications, and an additional 2MB extended flash memory. You can customize the terminal to your needs by configuring • up to 256K of the 512K RAM as a RAM drive. •... - Page 50 Chapter 2— Configuring the Terminals If you are not using double-byte fonts, you can configure the 2MB flash memory as a storage drive (D). If you configure the flash memory as drive D, use this drive to store large lookup tables and data files (up to 128 files). You can only configure the 2MB flash memory as a drive or to store fonts.
-
Page 51: Operating The Terminals In A Network
This chapter explains how the terminals fit into a data collection network and what parameters to configure for your serial or RF network. This chapter covers these topics: • How the terminals fit into your network • Using serial communications on the terminal •... -
Page 52: How The Terminals Fit Into Your Network
Chapter 3— Operating the Terminals in a Network How the Terminals Fit Into Your Network The Trakker Antares terminals that you can easily add to your network or distributed data collection system. You use these terminals as end devices in your wired or RF network. - Page 53 nugget You can also use the serial port to connect to a 900 MHz RF network via the 9189 RF Gateway. The terminal communicates with the 900 MHz RF network using Polling Mode D protocol. 241X in a 900 MHz RF Network Trakker Antares 241X Handheld Terminal User’s Manual Chapter 3—...
- Page 54 Chapter 3— Operating the Terminals in a Network UDP Plus or WTP Network In a UDP Plus or WTP network, 2415s communicate with a host computer through the G4000. The UDP Plus or WTP packets are translated on the RF network into TCP/IP packets on the wired network and vice versa.
- Page 55 39 AGaramond nugget Chapter 3— Operating the Terminals in a Network TCP/IP Direct Connect Network In a TCP/IP network, 2415s communicate with a host computer directly using TCP/IP for the RF protocol. The access point acts as a bridge between the wired network and the RF network. Host 2415s Access point...
- Page 56 Chapter 3— Operating the Terminals in a Network Multiple Subnetworks (UDP Plus) In a UDP Plus network, you can install 2415s, access points, and the G4000 as shown in the next illustration. All the terminals and access points in this illustration communicate with the G4000 at IP address 192.9.175.7.
- Page 57 39 AGaramond nugget Chapter 3— Operating the Terminals in a Network Multiple Subnetworks (TCP/IP) In a TCP/IP network, you can install the 2415s and access points as shown in the illustration below. All the terminals and access points in this illustration communicate with the host at IP address 192.9.175.7.
-
Page 58: Using Serial Communications On The Terminal
Chapter 3— Operating the Terminals in a Network Communicating Across Subnetworks (UDP Plus) You can install 2415s and access points in one subnetwork and install the G4000 or host in another subnetwork. If the 2415s are communicating across a subnetwork, you must configure additional network parameters (subnet mask and default router). -
Page 59: Choosing A Communications Protocol
nugget 2 Choose a communications protocol. For help, see the next section, “Choosing a Communications Protocol.” 3 Configure the serial port parameters. For help, see Chapter 2, “Configuring the Terminals.” Depending on the protocol you chose in Step 2, you must set some or all of the serial port parameters to have the terminal communicate with a host computer or serial device in a wired network. -
Page 60: Configurable Protocol
Chapter 3— Operating the Terminals in a Network Configurable Protocol Configurable protocol is based on Intermec’s Polling Mode D protocol except that you have the option to change some of the serial port protocol parameters or remove specific events from the protocol, such as poll or handshake. -
Page 61: Master Polling Protocol
39 AGaramond nugget Chapter 3— Operating the Terminals in a Network Master Polling Protocol Master Polling Mode D protocol requires the terminal to ask the downline serial device for data it may have (polling) and to request to send data to the serial device (selecting). -
Page 62: Using Rf Communications On The 2415
2400 Family System Manual (P/N 071389). The set of network parameters you need to configure depends on whether you install the terminal on the same subnetwork as the Intermec Gateway or DCS 30X (UDP Plus or WTP) or host (TCP/IP) or on a different subnetwork. -
Page 63: Planning The Network Connection
In a UDP Plus network, the terminals communicate using a reliable RF protocol (UDP Plus) through the access points to the Intermec Gateway or DCS 30X. The Intermec Gateway or DCS 30X translates UDP Plus to a reliable wired protocol (TCP/IP) and sends the data to the host. For more information, see the Intermec Gateway User’s Guide (P/N 072245) or the... -
Page 64: Configuring The Access Points
Chapter 3— Operating the Terminals in a Network To allow the 2415 to communicate with the Intermec Gateway or DCS 30X, you need to perform these tasks on the server: • Define the host communications parameters, which includes the physical connection (network adapter cards) to the host. -
Page 65: Openair Radio
The set of network parameters you need to configure depends on whether you install the terminal on the same subnetwork as the Intermec Gateway, DCS 30X, or host (TCP/IP) or on a different subnetwork. You need to configure: •... -
Page 66: Configuring The 802.1X Security Parameters
• (UDP Plus) Controller IP Address. • (TCP/IP) Host IP Address. • Terminal IP Address (Non-DHCP environment only). • Network Port. • Default Router (Intermec Gateway, DCS 30X, or host on different subnetwork). • Subnet Mask (Intermec Gateway, DCS 30X, or host on different subnetwork). -
Page 67: Configuring 802.1X Ttls Security
1.80 or later as an authentication server. For help, see the MobileLAN access System Manual. • an Intermec MobileLAN access point with an 802.11b radio and software release 1.80 or later that serves as an authenticator. The authenticator knows the IP address and secret key of the authentication server and translates EAP-TTLS frames to RADIUS frames and vice versa. -
Page 68: Configuring 802.1X Leap Security
Chapter 3— Operating the Terminals in a Network 2 Set the User Name and Password parameters. Scan this bar code label to access the TRAKKER Antares 2400 Menu System: TRAKKER Antares 2400 Menu System *..-.* *..-.* The Main Menu appears. - Page 69 nugget Note: Unlike TTLS security, LEAP security only requires the standard 2MB of memory on the terminal. It does not require the additional 4MB memory option. To enable 802.1x LEAP security on the terminal 1 Make sure that: • your authentication server is properly configured. For help, see the documentation for your authentication server.
-
Page 70: Monitoring Rf Communications Using The Status Leds
Chapter 3— Operating the Terminals in a Network Click OK. 3 On your Trakker Antares terminal, set the User Name and Password parameters. Scan this bar code to access the TRAKKER Antares 2400 Menu System: TRAKKER Antares 2400 Menu System *..-.* *..-.*... -
Page 71: Troubleshooting And Maintenance
This chapter explains how to solve problems while using the terminals. You will also find information on booting and resetting the terminals and keeping the scanner window clean. This chapter covers these topics: • Problems and solutions • Booting and resetting the terminal •... -
Page 72: Problems And Solutions
You can also use the error numbers and messages table and the terminal diagnostics to help analyze and solve problems. For help, see Chapter 4, “Running Diagnostics,” in the Trakker Antares 2400 Family System Manual (P/N 071389). If you have problems with the TE 2000 terminal emulation applications, see the appropriate TE 2000 guide. - Page 73 • (2415 only) Wait at least 10 seconds and try again. If the 2415 is still connecting to the Intermec Gateway or DCS 30X or the host, it ignores any input from the keypad or scanner. Make sure the Connect LED is on before continuing.
-
Page 74: Problems While Configuring The Terminal
Chapter 4— Troubleshooting and Maintenance Problems While Configuring the Terminal If you have problems configuring the terminal, check these possible problems and solutions. Problems While Configuring the Terminal Problem You are configuring the serial port and see this error message when exiting the Configuration Menu: Serial port configuration error. - Page 75 nugget Problems While Configuring the Terminal (continued) Problem You scan a configuration command, such as Keypad Caps Lock, and nothing happens. You are configuring the serial port and see this error message when exiting the Configuration Menu: PG command failed. Configuration was not updated.
- Page 76 GHz RF network before you can save any changes to the security ID command. If you are working in the TRAKKER Antares 2400 Menu System, you cannot scan configuration commands. Use the Configuration Menu to change the terminal’s configuration, or exit the menu system to scan configuration commands.
- Page 77 Choose Advanced Network from the Communications Menu. The terminal and Intermec Gateway or DCS 30X (UDP Plus or WTP network), or host (TCP/IP network) are on different networks, and the terminal is not on the same network as the default router.
-
Page 78: Problems While Configuring 802.1X Security
2400 Family system manual. This section references error numbers that are displayed on the Error Logger screen in the TRAKKER Antares 2400 Menu System. To view the Error Logger screen, from the Main Menu, choose Diagnostics Menu, Software Diagnostics, and then Error Logger. - Page 79 BASEDATE.TXT and LOADER.EXE on your PC. These files are available as part of the firmware upgrade that can be downloaded at no charge from the Intermec Web site at www.intermec.com. Follow Steps 1 through 5 of the procedure To transfer applications and files to the terminal using LOADER.EXE in Chapter 3,...
-
Page 80: Problems With Rf Connectivity (2415 Only)
Change the font type to a value other than 5x6, 6x8, or 12x16. For help, see “Display Font Type” or “Display Spacing” in Chapter 6 of the 2400 Family system manual. If the terminal continues to operate slowly, contact your local Intermec service representative for help. Trakker Antares 241X Handheld Terminal User’s Manual... - Page 81 In a UDP Plus or WTP network, the terminal is communicating with an access point, but it is not connected to the Intermec Gateway or DCS 30X. You may need to check the 2415 configuration, or make sure the Intermec Gateway or DCS 30X is running and that data collection is started.
-
Page 82: Problems While Running Applications
Intermec Gateway or DCS 30X and the host computer. Make sure the terminal is correctly configured for your network. In a UDP Plus or WTP network, make sure the Intermec Gateway or DCS 30X is configured and data collection is started. In a TCP/IP network, make sure the host computer is configured and running. -
Page 83: Problems Transmitting Data Through The Serial Port
The transaction just sent to the Intermec Gateway or DCS 30X was not received. Try sending the transaction again. There is an error transmitting data to the Intermec Gateway or DCS 30X. XX represents the status code error. Note the error code listed in the message and contact your local Intermec service representative for help. -
Page 84: Problems While Scanning Bar Codes
Make sure the bar code symbology you are scanning is enabled. Use the TRAKKER Antares 2400 Menu System to check the symbologies. On the Symbologies Menu, each symbology that is enabled has an asterisk (*) next to the name of the symbology. If your bar code symbology is disabled, enable it and then try scanning the bar code label again. -
Page 85: Booting And Resetting The Terminal
You can also enable or disable reader commands with the TRAKKER Antares 2400 Menu System. For help, see “Command Processing” in Chapter 6 of the 2400 Family system manual. When you are finished, remember to disable the override so that your data is not interpreted as a command. -
Page 86: Booting The Terminal On Resume
You can configure the Resume Execution command by using the TRAKKER Antares 2400 Menu System or by scanning these bar code labels. For help, see “Resume Execution” in Chapter 6 of the 2400 Family system manual. -
Page 87: Resetting The Terminal
1 Press _ to turn off the terminal. Press _ to turn on the terminal. 2 Use the TRAKKER Antares 2400 Menu System to reboot the terminal. Press ( \ 2 4 8 to enter the TRAKKER Antares 2400 Menu System. -
Page 88: Cleaning The Scanner Window And Terminal Screen
4 Press 1 to boot the terminal. Once the terminal has finished booting, your application appears. 5 Set the time and date. For help using the TRAKKER Antares 2400 Menu System, see “Configuring the Terminal With the Menu System” on page 27. -
Page 89: Specifications
Specifications This appendix lists the terminal’s physical and environmental specifications and contains these topics: • Terminal dimensions • Power and electrical specifications • Temperature specifications • Screen • Keypad options • Application options • Connectivity options • Memory • Radio specifications •... -
Page 90: Physical And Environmental Specifications
nugget Appendix A— Specifications Physical and Environmental Specifications Terminal Dimensions Length: Height: Width: Weight: 2410 2415 Power and Electrical Specifications Operating Backup Electrical Rating Temperature Specifications Type of Operation Charging the battery pack Operating the terminal Storing the terminal (with or without batteries installed) Relative Humidity Screen... - Page 91 • (37-key) Function keys with large numeric keypad, available with programmable, international, 5250 TE, 3270 TE, VT/ANSI TE, or dcBrowser overlays Application Options • Programmable • (2415) TE 2000 • (2415) Data Collection Browser (dcBrowser) Connectivity Options • RS-232 • (2415) TCP/IP with DHCP and TFTP support •...
- Page 92 nugget Appendix A— Specifications Integrated I/O Connector (Serial Communications) • 16-pin AMP pocket phone connector • RS-232C, up to 38400 baud • full-duplex asynchronous • XMODEM, XMODEM1K, or YMODEM protocol for data transfer • Protocols: Binary, Configurable Serial Protocol, Master Polling, and Polling Mode D Bar Code Symbologies •...
- Page 93 Long-Range Scanner Optical Parameters (650 nm) Bar Code Specification 10 mil code 20 mil code 30 mil code 40 mil code 70 mil code, retroreflective 100 mil code, retroreflective Advanced Long-Range Scanner Optical Parameters Bar Code Specification 13 mil code** 15 mil code 30 mil code 55 mil code...
- Page 94 nugget Appendix A— Specifications High-Density Scanner Optical Parameters Bar Code Specification 2 mil code 3 mil code 4 mil code 5 mil code 7.5 mil code 13 mil code PDF417 Scanner Optical Parameters Bar Code Specification 5 mil code 7.5 mil code 10 mil code 20 mil code 40 mil code...
-
Page 95: Pin Assignments For Com1
Pin Assignments for COM1 The next table lists the pin assignments for COM1 using the TD2410 communications dock. Pin Assignments for COM1 Cables for the Terminal To connect the terminal to a PC, host computer, or another RS-232 serial device, use these cables. Cable/Adapter 16-pin, 5-wire, 183 cm (6 ft) cable 16-pin, adapter cable... -
Page 96: Cables For The Communications Dock
nugget Appendix A— Specifications Cables for the Communications Dock To connect the communications dock to a host computer or another RS- 232 serial device, use this cable: • 9-pin, null modem RS-232 connector (P/N 059167) Trakker Antares 241X Handheld Terminal User’s Manual... -
Page 97: Index
Index Trakker Antares 241X Handheld Terminal User’s Manual... - Page 98 64 to 66 TTLS enabling on the terminal, 53 requirements, 53 See also the Trakker Antares 2400 Family System Manual. 900 MHz RF network, illustrated, 39 About TRAKKER Antares 2400 screen, described, 28 AC power supply, terminal accessory, 5...
- Page 99 20 pin assignments, 81 See also serial port. commands TRAKKER Antares 2400 Menu System, selecting, 30 See also the Trakker Antares 2400 Family System Manual. communications 802.11b radio specifications, 77 cable specifications, 81, 82 OpenAir radio specifications, 77 protocols...
- Page 100 68 unable to connect to controller, 68 error numbers configuring 802.1x security, troubleshooting, 65, 66 how to view, 64 See also the Trakker Antares 2400 Family System Manual. escape characters, entering in screens, 32 Ethernet network, illustrated, 44 exiting...
- Page 101 Master Polling protocol, described, 47 memory described, 23 flash, saving configuration changes, 33 RAM, saving configuration changes, 33 specifications, 77 menu system, See TRAKKER Antares 2400 Menu System menus Configuration Menu, described, 28 Diagnostics Menu, described, 28 System Menu, described, 28...
- Page 102 Index saving configuration changes Configuration Menu, exiting, 33 TRAKKER Antares 2400 Menu System, exiting, 33 Scan button troubleshooting, 70 using, 21 scanner advanced long-range optical parameters, 79 connecting to terminal, 22 high-density optical parameters, 80 high-visibility optical parameters, 79 linear imager optical parameters, 80...
- Page 103 Guide wands, connecting to terminal, 22 warm boot, 73 Wavelink Avalanche, using to configure the terminal, See the Trakker Antares 2400 Family System Manual. what’s new in this revision, 6 white keys, using, 13 Trakker Antares 241X Handheld Terminal User’s Manual...
- Page 104 Index Trakker Antares 241X Handheld Terminal User’s Manual...
- Page 106 Corporate Headquarters 6001 36th Avenue West Everett, Washington 98203 U.S.A. tel 425.348.2600 fax 425.355.9551 www.intermec.com Trakker Antares 241X Handheld Terminal User's Manual *069538-006* P/N 069538-006...
- Page 107 Addendum ® Trakker Antares Firmware Version 8.02...
- Page 108 The information contained herein is proprietary and is provided solely for the purpose of allowing customers to operate and service Intermec-manufactured equipment and is not to be released, reproduced, or used for any other purpose without written permission of Intermec.
- Page 109 Contents How to Use This Addendum... 5 File System Enhancements... 6 Flash Memory Configuration Command... 6 Double-Byte Font Support ... 7 Font Test Diagnostic Update... 8 Wavelink Avalanche Update ... 9 802.1x LEAP Security Change... 9 Time Zone Configuration Command... 10 Keypad Type Configuration Command...
- Page 110 Contents Trakker Antares Firmware Version 8.02 Addendum...
-
Page 111: How To Use This Addendum
If you have an earlier version of firmware, you can download version 8.02 at no charge from the Intermec web site at www.intermec.com. If you are using firmware version 8.01 or earlier and you are not going to upgrade to firmware version 8.02, use your Trakker Antares user’s manual and system... -
Page 112: Flash Memory Configuration Command
File System Enhancements Previously, on Trakker Antares terminals you could use the optional 2MB extended flash memory: • for 802.1x TTLS security. • to store double-byte fonts. • as a storage drive (drive D) for files. With firmware version 8.02, these options are no longer mutually exclusive. -
Page 113: Double-Byte Font Support
To use double-byte fonts with 802.1x TTLS security, you need to order one of the following compatible double-byte fonts. For help ordering fonts, contact your local Intermec representative. Trakker Antares Firmware Version 8.02 Addendum Configure Flash Memory... - Page 114 Double-Byte Fonts Compatible With 802.1x TTLS Security Language Simplified Chinese, VT Simplified Chinese, 5250 Big 5 Chinese, VT Big 5 Chinese, 5250 Japanese EUC (unix), VT Japanese, 5250 Korean, VT Korean, 5250 Note: If you are using the VT Simplified Chinese, VT Big 5 Chinese, or VT Japanese fonts, there is not enough flash memory to configure a drive D.
-
Page 115: Wavelink Avalanche Update
Wavelink Avalanche Update The Wavelink Avalanche configuration package has been renamed. The name has been changed from 24xxRCD.AVA to 24xxCFG.AVA. 802.1x LEAP Security Change 802.1x LEAP security now requires Network EAP instead of Open as an authentication type. To enable 802.1x LEAP security on the terminal 1 Make sure that: •... -
Page 116: Time Zone Configuration Command
Check the Network-EAP check box for Accept Authentication Type. Click OK. 3 On your Trakker Antares terminal, set the User Name and Password parameters. Scan this bar code to access the TRAKKER Antares 2400 Menu System: TRAKKER Antares 2400 Menu System *..-.* *..-.* The Main Menu appears. - Page 117 Keypad Type Configuration Command Terminals: 243X Description: The keypad type is initially configured in the terminal’s firmware at the Intermec factory. If you change the keypad overlay, you need to configure the keypad type to match the new keypad overlay. Syntax: KTdata where acceptable values for data are listed in the next table.
- Page 118 Corporate Headquarters 6001 36th Avenue West Everett, Washington 98203 U.S.A. tel 425.348.2600 fax 425.355.9551 www.intermec.com Trakker Antares Firmware Version 8.02 Addendum *941-000-001* P/N 941-000-001...
Need help?
Do you have a question about the Trakker Antares 2400 and is the answer not in the manual?
Questions and answers