Sign In
Upload
Manuals
Brands
Intermec Manuals
PDA
Trakker Antares 2410
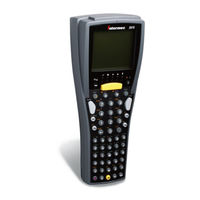
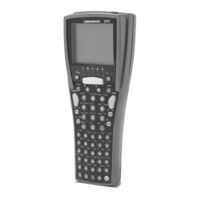
Intermec Trakker Antares 2410 Manuals
Manuals and User Guides for Intermec Trakker Antares 2410. We have
8
Intermec Trakker Antares 2410 manuals available for free PDF download: System Manual, Supplementary Manual, User Manual, Quick Start Manual
Intermec Trakker Antares 2410 System Manual (374 pages)
Intermec Trakker Antares 2410: User Guide
Brand:
Intermec
| Category:
PDA
| Size: 2 MB
Table of Contents
Read this First
1
Table of Contents
7
Before You Begin
17
Safety Summary
17
Safety Icons
18
Global Services and Support
18
Who Should Read this Document
19
Related Documents
20
Introducing the Trakker Antares 2400 Family
21
What Is the Trakker Antares 2400 Family
22
Trakker Antares 241X Terminals
22
Trakker Antares 242X Terminals
23
Trakker Antares 243X Terminals
23
Trakker Antares 2455 Terminal
24
Trakker Antares 246X Terminals
24
Trakker Antares 2475 Terminal
25
Trakker Antares 248X Terminals
25
What's New in Firmware Version 8.01
26
About Network Connectivity and Protocols
26
Flash Memory Configuration Command
26
Configuring and Managing the Terminals
31
How to Configure the Terminals
32
About the Configurations
33
Configuring the Terminal by Scanning Bar Code Labels
33
Configuring the Terminal through the Serial Port
35
Configuring the Terminal through the Network
37
Sending a Command from the DCS 300
38
Sending a Command from the Host
39
Configuring the Terminal in a UDP Plus Network
39
Configuring the Terminal in a TCP/IP Direct Connect Network
40
Configuring the Terminal with the Clone Application
43
Transferring Files and Data in a TCP/IP Direct Connect Network
44
Saving Configuration Changes in Flash Memory
49
Restoring the Terminal's Default Configuration
50
Upgrading the Terminal
51
Upgrading the Firmware
51
Loading Double-Byte Fonts
56
Managing Your Terminals with Wavelink Avalanche
58
Learning about Wavelink Avalanche
58
Wavelink Avalanche Files
59
Synchronization Properties and Selection Criteria
61
Learning about Intermec Settings (ICCU)
62
Developing and Using Applications
65
About the Trakker Antares Programmable Terminals
66
Creating Applications for the Terminal
68
Using the PSK or Ezbuilder to Develop Applications
69
Developing Applications Using the PSK
69
Developing Applications Using Ezbuilder
69
Converting JANUS Applications and IRL Programs
70
Converting Applications between JANUS and Trakker Antares
70
Converting IRL Programs between the 95XX and Trakker Antares
71
Converting the Application to a Binary File
71
Creating a Custom Logo
72
How to Download Applications
73
Using the Serial Port to Transfer Applications and Files
75
Using the DCS 300 to Download Applications and Files
80
Copying Applications and Files to the DCS 300
81
Downloading Applications and Files to the Terminal
82
Running Applications on the Terminal
85
Running Diagnostics
87
What Diagnostics Are Available
88
Running Diagnostics from the Menu System
89
Defining the Diagnostics Screens
91
Access Point
92
Application Efficiency
92
Application Events
93
Battery/Pic Status
93
241X, 242X, and 243X Terminals
93
2455, 2475, and 248X Terminals
95
Beeper Test
96
Clear Task Profiles
96
Code Verify
97
Display Test
97
Error Logger
98
Font Test
99
Hardware Configuration
100
Keypad Table
100
Keypad Test
102
Malloc Application Information
102
Malloc Firmware Information
103
Radio Test
103
Scanner Test
104
Serial Port Test
105
Subsystem Versions
106
Task Status
106
Error Numbers and Messages
107
Reader Command Reference
115
Using Reader Commands
116
Reader Commands Listed by Category
116
Using Accumulate Mode
117
Defining the Reader Commands
119
Abort Program
119
Backlight on and off
120
Backspace
120
Boot Terminal
120
Change Configuration
121
Clear
121
Default Configuration
121
Delete File
122
Enter
123
Enter Accumulate Mode
123
Exit Accumulate Mode
124
List Files
124
TRAKKER Antares 2400 Menu System
124
Multiple-Read Labels
124
Receive File
125
Receive File through the Serial Port
125
Receive and Convert 7-Bit ASCII Files to 8-Bit Binary Files
127
Receive File through Network Communications
129
Rename File
130
Reset Firmware
131
Run Program
132
Save Configuration in Flash Memory
133
Scanner Trigger on and off
133
Set Time and Date
134
Status Lights Control
135
Transmit File
136
Transmit File through the Serial Port
137
Transmit and Convert 8-Bit Binary Files to 7-Bit ASCII Files
138
Transmit File through Network Communications
140
Configuration Command Reference
143
Using Configuration Commands
144
Configuration Commands Listed by Category
145
Entering Variable Data in a Configuration Command
148
Entering ASCII Characters
149
Acknowledgement Delay Lower Limit
151
Acknowledgement Delay Upper Limit
152
AP Density
153
AP MAC Address
154
Append Time
154
Automatic Shutoff
155
Baud Rate
156
Beep Duration
158
Beep Frequency
159
Beep Volume
160
Character Set
161
Codabar
163
Code 11
164
Code 2 of 5
165
Code 39
166
Code 93
169
Code 128
170
UCC/EAN Code 128
171
ISBT Code 128
172
Command Processing
178
Using the Override Options
181
Configuration Commands Via Serial Port
181
Controller Connect Check Receive Timer
183
Controller Connect Check Send Timer
184
Controller IP Address
186
Data Bits
187
Decode Security
188
Default Router
189
Device Management
190
Device Manager IP Address
191
DHCP (Controller)
193
DHCP (Terminal)
194
Display Backlight Timeout
195
Display Contrast
196
Display Font Type
198
Display Row Spacing
199
Display Spacing
200
Display Video Mode
202
Domain
203
End of Message (EOM)
204
Flash Memory Configuration
206
Flow Control
207
GTIN Compliance
209
Handshake
210
Host IP Address
212
ICMP (Internet Control Message Protocol)
213
Inactivity Timeout
213
Interleaved 2 of 5
215
Keypad Caps Lock
216
Keypad Clicker
217
Keypad Control
217
Keypad Type
218
Longitudinal Redundancy Check (LRC)
221
Maximum Retries
222
Maximum Sleep Duration
223
Medium Reservation
224
Microwave Robustness
225
Modem Dial Sequence
225
Modem Initialization Sequence
226
Msi
228
Multi-Drop Address
229
Network Activate
230
Network Loopback
231
Network Name
231
Network Port
233
Parity
234
Password
235
Pdf417
236
Plessey
237
Poll (Polling)
238
Postamble
239
Power Management
240
Preamble
241
Radio MAC Address
242
RAM Drive Size
243
Receive All Multicast
244
Reservation Threshold
245
Resume Execution
246
RS-232 or RS-422/485 COM2 Interface
246
Roaming Flag
247
Scan Ahead
248
Scanner Mode
248
Scanner Port (COM4)
249
Scanner Redundancy
250
Scanner Selection
251
Scanner Timeout
253
Scanner Trigger
255
Security Identification
256
Serial Port Protocol
257
Server Certificate Common Name (Server Cert CN)
259
Start of Message (SOM)
260
Station Name
262
Stop Bits
262
Subnet Mask
263
Suspend/Resume Control
265
Symbology Identifiers
265
TCP Maximum Retries
270
TCP/IP Maximum Transmit Timeout
271
Terminal IP Address
272
Terminal Port
274
Time and Date
275
Time in Seconds
276
Time Zone
276
Timeout Delay
277
Transmit Mode
279
Transmit Rate
280
Transmit Rate Fallback
281
Upc/Ean
281
User Name
285
Wakeup on Broadcast
286
WEP Encryption
286
WEP Key
287
WEP Transmit Key
289
Default Configurations and Command Syntax
291
Default Configuration
292
Configuration Commands by Syntax
296
Full ASCII Charts
301
Full ASCII Table
302
Full ASCII Bar Code Chart
304
Control Characters
304
Symbols and Punctuation Marks
305
Numbers
306
Uppercase Letters
307
Lowercase Letters
308
International Character Support
309
Trakker Antares Terminal Font Set
310
English and Western European Font Set
310
Japanese Katakana Font Set
318
Using Default and Optional Applications
321
About the Applications Shipped on the Terminal
322
Identifying the Default Applications
322
TE 2000 Terminal Emulation
322
Dcbrowser Client
323
Defining APPTSK.BIN and EM9560.BIN
323
Defining the Emulation Features of EM9560.BIN
324
Using Display Control Codes
325
Using Display Modes
326
Using Accumulate Mode
327
Setting Preambles and Postambles
328
Full ASCII Mode for Code 39
329
Using Message Length Headers
330
Unsupported 95XX Features
331
Running APPTSK.BIN and EM9560.BIN
331
Using DOS on the Terminal
333
Starting DOS on the Terminal
335
Running DOS Applications and Using ROM-DOS Commands
336
Using ROM-DOS Commands
337
Using the PM.COM Command
340
Stopping DOS and Running a .BIN Application
341
Customizing DOS Drives and Commands
341
Trakker Antares DOS Software Tools
341
Customizing Drive a
342
Changing DOS Files on Drive a
343
Customizing Drive B
344
Configuring a DOS RAM Drive
345
Limitations of ROM-DOS
347
DOS Architecture on the Terminal
348
Index
349
How to Use this Addendum
367
File System Enhancements
368
Double-Byte Font Support
369
Font Test Diagnostic Update
370
Wavelink Avalanche Update
371
802.1X LEAP Security Change
371
Time Zone Configuration Command
372
Keypad Type Configuration Command
373
Keypad Table Diagnostic
373
Advertisement
Intermec Trakker Antares 2410 User Manual (118 pages)
Handheld terminal
Brand:
Intermec
| Category:
PDA
| Size: 2 MB
Table of Contents
Read this First
1
Table of Contents
7
Before You Begin
11
Safety Summary
11
Safety Icons
12
Global Services and Support
12
Who Should Read this Document
13
Related Documents
14
Learning about the Terminals
15
What Are the Trakker Antares 241X Terminals
16
Learning about the Terminal's Features
17
Options for the Terminals
18
Accessories for the Terminals
19
What's New
20
Using the Terminal for the First Time
20
File System Enhancements
20
Unpacking the Terminal
21
Using the Terminal's Battery Pack
21
Determining When the Battery Pack Is Low
22
Charging and Installing the Battery Pack
22
Font Test Diagnostic Update
22
Removing the Battery Pack
24
Managing Battery Power
24
Using the Keypad
25
Finding the Special Keys
25
Keypad Type Configuration Command
25
Keypad Table Diagnostic
25
Typing the Characters Printed on the Keypad
26
Using the Suspend/Resume Key
27
Using the Modifier Keys
28
Capitalizing All Characters
28
Using the International Keypad
29
Using the te 2000 Keypads
30
Using the Screen
30
Adjusting the Screen with the Backlight Key
30
Learning about the Status Leds
31
Learning about the Audio Signals
32
Using the Terminal's Serial Port
33
Using the Terminal's Scanner
34
Connecting an Input Device
36
Scanning Options
36
Defining the Terminal's Drives
37
Configuring the Terminals
39
How to Configure the Terminal
40
About the Configurations
41
Configuring the Terminal with the Menu System
41
Accessing Online Help
43
Selecting Menus and Commands
44
Filling in Fields
44
Marking Check Boxes
45
Entering ASCII Control Characters
45
Exiting Screens and Saving Changes
47
Exiting the Menu System
47
Configuring Drives and Memory on the Terminal
49
Configuring the RAM Drive
49
Configuring Flash Memory
49
Operating the Terminals in a Network
51
How the Terminals Fit into Your Network
52
Using Serial Communications on the Terminal
58
Choosing a Communications Protocol
59
Binary Protocol
59
Configurable Protocol
60
Master Polling Protocol
61
Point-To-Point Protocol
61
Polling Mode D Protocol
61
Using RF Communications on the 2415
62
Planning the Network Connection
63
Configuring the Intermec Gateway or DCS 30X
63
Configuring the Access Points
64
Openair Radio
65
802.11B Radio
65
Configuring the 2415 Network Parameters
65
Configuring the 802.1X Security Parameters
66
Learning about BASEDATE.TXT
66
Configuring 802.1X TTLS Security
67
Configuring 802.1X LEAP Security
68
Monitoring RF Communications Using the Status Leds
70
Troubleshooting and Maintenance
71
Problems and Solutions
72
Problems While Operating the Terminal
72
Problems While Configuring the Terminal
74
Problems While Configuring 802.1X Security
78
Problems with RF Connectivity (2415 Only)
80
Problems While Running Applications
82
Problems Transmitting Data through the Serial Port
83
Problems Transmitting Data through the Intermec Gateway or DCS 30X
83
Problems While Scanning Bar Codes
84
Booting and Resetting the Terminal
85
Booting the Terminal
85
Booting the Terminal on Resume
86
Using the Boot Menu
86
Resetting the Terminal
87
Cleaning the Scanner Window and Terminal Screen
88
Specifications
89
Physical and Environmental Specifications
90
Pin Assignments for COM1
95
Cables for the Terminal
95
Cables for the Communications Dock
96
Index
97
How to Use this Addendum
111
Flash Memory Configuration Command
112
Double-Byte Font Support
113
Wavelink Avalanche Update
115
802.1X LEAP Security Change
115
Time Zone Configuration Command
116
Intermec Trakker Antares 2410 Supplementary Manual (123 pages)
GLOBAL LIST OF AVAILABLE DOCUMENTS
Brand:
Intermec
| Category:
PDA
| Size: 0 MB
Table of Contents
1650 Mah Battery Pack 068979
2
Instruction Sheet
2
2200 Mah Battery Pack
2
Instructions
6
Handle Instruction Sheet 068980
6
Maintenance Manual
7
CD-Rom 068263)
7
Started Guide
7
Instruction Sheet
8
Table of Contents
12
Not Available for Download from the Intermec Web
12
Not Available for Download from the Intermec Web
13
Site. You May be Able to Order a Printed Version
13
From Http://Www.intermec.com, Click Service
13
From Http://Www.intermec.com, Click Service
14
Not Available for Download from the Intermec Web
14
Site. You May be Able to Order a Printed Version
14
Advertisement
Intermec Trakker Antares 2410 Quick Start Manual (20 pages)
Handheld Terminal
Brand:
Intermec
| Category:
PDA
| Size: 0 MB
Table of Contents
Table of Contents
3
About this Guide
5
Introducing the Trakker Antares 241X Terminals
5
Equipment You Need to Get Started
6
Using the Terminal for the First Time
6
Unpack the Terminal
7
Charge and Install the Battery Pack
7
Turn on the Terminal
8
Set the Time and Date
10
(Optional) Configure the Serial Port Parameters
11
(2435 Only) Configure the Network Parameters
12
(2415 Only) Configure the Radio Parameters
13
Choosing Your te 2000 Configuration
14
Using the Keypad
15
Learning about the Bar Code Symbologies
16
Learning about the Status Leds
16
Changing the Beep Volume
17
Useful Bar Codes
18
Specifications
18
Where to Go from here
19
Intermec Trakker Antares 2410 Quick Start Manual (9 pages)
Hand-Held Terminal
Brand:
Intermec
| Category:
Touch terminals
| Size: 0 MB
Table of Contents
Table of Contents
2
About this Guide
3
Introducing the Trakker Antares 241X Terminals
3
Equipment You Need to Get Started
3
Using the Terminal for the First Time
4
Unpack the Terminal
4
Charge and Install the Battery Pack
4
Turn on the Terminal
4
Set the Time and Date
5
Optional) Configure the Serial Port Parameters
5
2415 Only) Configure the Network Parameters
5
2415 Only) Configure the Radio Parameters
6
Choosing Your te 2000 Configuration
7
Using the Keypad
7
Learning about the Bar Code Symbologies
7
Understanding the Status Leds
7
Changing the Beep Volume
8
General Bar Codes
8
Specifications
8
Where to Go from here
9
Intermec Trakker Antares 2410 Quick Start Manual (9 pages)
Oracke Ready Terminal
Brand:
Intermec
| Category:
PDA
| Size: 0 MB
Table of Contents
Table of Contents
2
Introducing the Trakker Antares Oracle-Ready Terminal
3
Installing the 2455, 2475, and 2481/6
3
(Overview of Steps)
3
Installing and Connecting Power and Battery Packs
4
Turning on the Terminal
4
Configuring the Operations Parameters
4
Configuring the Network Parameters
5
Configuring the Radio Parameters
6
Keyboard Shortcuts
6
Intermec Trakker Antares 2410 User Manual (2 pages)
4-Pack Battery Charger
Brand:
Intermec
| Category:
Battery Charger
| Size: 0 MB
Table of Contents
Specifications
1
Ordering Power Cords for the Battery Charger
1
Choosing a Location for the Battery Charger
1
Connecting the Power Supply
1
Charging a Battery Pack
1
Battery Pack Charging Times
2
Loading and Unloading a Battery Pack into the Charger
2
Interpreting the Status Leds
2
Important Recommendations
2
Troubleshooting
2
Intermec Trakker Antares 2410 Supplementary Manual (1 page)
Belt Clip
Brand:
Intermec
| Category:
Computer Accessories
| Size: 0 MB
Advertisement
Related Products
Intermec Trakker Antares 2415
Intermec Trakker Antares 241 Series
Intermec Trakker Antares 2430
Intermec Trakker Antares 2435
Intermec Trakker Antares 2400
Intermec Trakker Antares 2420
Intermec Trakker Antares 2425
Intermec Trakker Antares 2425DS
Intermec Trakker Antares 2455
Intermec Trakker Antares 2460
Intermec Categories
Printer
Handhelds
PDA
Barcode Reader
Printer Accessories
More Intermec Manuals
Login
Sign In
OR
Sign in with Facebook
Sign in with Google
Upload manual
Upload from disk
Upload from URL