Precor Discovery Selectorized Series Assembly Manual
Shoulder press
Hide thumbs
Also See for Discovery Selectorized Series:
- Assembly manual (68 pages) ,
- Owner's manual (64 pages) ,
- Getting started manual (2 pages)
Table of Contents
Advertisement
Quick Links
Advertisement
Chapters
Table of Contents

Related Manuals for Precor Discovery Selectorized Series


Summary of Contents for Precor Discovery Selectorized Series
- Page 1 力量健身设备用户手册 Discovery™ Series Selectorized Line...
-
Page 3: 用户重要安全指南
不得将设备放置在户外或潮湿表面上。 显眼位置张贴一份用户重要安全信息。 确保设备稳固,放置在坚固表面上。 设备为独立式设计;但可用螺钉 安全认证 固定在地面上,增加稳定性。 Precor 必确强烈建议用螺钉将设备固定 在地面上, 以减少因使用不当造成设备翻倒的风险。 由于地面构造各异, 所有 Precor Discovery Selectorized 力量健身设备均按照 EN957 和相关的 请咨询专业建筑工程师以进行正确固定。 ASTM 标准设计和测试。 放置设备时, 设备的每个侧面与墙壁或家具应至少相距 1 米 (40 英寸) , 与其背面的物体也应至少相距 1 米 (40 英寸) 。 对于功能训练设备而言, 确保操作空间足够大,以便线缆可朝任何可能方向完全延伸。 Discovery Selectorized 精选系列用户手册... -
Page 4: 用户重要安全信息
用户重要安全信息 检查所有紧固件是否牢固拧紧。 线缆应在两端的端部连接处固定,并 开始任何健身计划前,应由您的医生进行一次全面的身体检查。 正确穿入插孔。 配重应固定好,且能够正常工作。 手柄附件应正确连 使用健身设备时,务必采取基本的预防措施,当中包括以下各项: 接。特别注意线缆和线缆末端的情况。如发现线缆末端松散或线缆或线 缆套管有任何磨损,则不得使用该产品,并立即联系健身中心人员。 如不明白如何操作一台设备,可请健身中心人员(如教练)示范使用方 使用前务必检查设备。如发现潜在问题,立即联系健身中心人员。健身 法及解释任何安全说明。 中心验证设备正常工作前,不得使用该设备。不得尝试修理损坏或卡塞 不得让儿童在设备上或周围逗留。不得将无人看管的儿童留在器材周 的设备。 围。 不得在户外或潮湿表面上使用设备。 只能按预期用途来使用设备。不得使用非制造商建议的配套附件,因为 不得在锻炼时丢下或使劲扔配重。 这类附件或会导致受伤。 确保选择销完全插入。仅使用制造商提供的销钉。如不确定,联系健身 穿着适合您运动项目的运动服和运动鞋—不要穿着宽松衣服。 中心人员。 切勿用力过猛或操练过度。进行负重运动时需要合理判断。避免负重过 切勿把配重块钉在一个高架位置。若顶部配重块或配重钉在一个上升位 度,导致受伤。 置,则不得使用该设备。通知健身中心人员维修设备,确保设备正常工 如果感到疼痛、虚弱、头晕或异常症状,请立即停止健身,并咨询您的... -
Page 5: Table Of Contents
目录 用户重要安全指南 ..............1 保养维护 .................. 29 安全认证 ....................1 使用前 ....................29 每天检查 ....................31 用户重要安全信息 ..............2 每周检查 ....................36 每月检查 ....................39 产品规格和用途 ................. 4 年度维护 ....................40 重要安全指南 ..................4 二头肌弯曲锻炼指南 ................5 胸部推举锻炼指南 ................6 肩膊推举锻炼指南 ................7 下拉锻炼指南... -
Page 6: 产品规格和用途
产品规格和用途 重要安全指南 警告:使用健身设备前,请阅读各项相关说明和标签。否则可能导致严重受 伤。 请勿让小孩或不熟悉本健身设备的人员使用或靠近。 在进行健身锻炼前,请让医生为您进行全面体检。向医生了解与您的年 龄和身体状况相符的目标心率。 如果您感到疼痛、虚弱或头晕,请立即停止锻炼。 本章提供各款健身设备的以下信息: 锻炼设定姿势 设备用户说明 锻炼提示 设备规格 Discovery Selectorized 精选系列用户手册 产品规格和用途... -
Page 7: 二头肌弯曲锻炼指南
二头肌弯曲锻炼指南 动作描述 二头肌肌肉有多种功能, 从帮助您弯曲肘部, 到转动小臂以将手臂举过头顶。 双手握住手柄。 强壮的二头肌将帮助您更容易地提起物件,且在游泳、搬箱子、网球和保龄 开始做动作前,微微弯曲手肘。 球等多种体育运动和活动中需要运用到二头肌。 屈肘向上弯起收缩手臂。 设定姿势 缓慢返回到开始位置,各组重复动作之间保持手肘微微弯曲。 锻炼提示 保持上臂平放在护板上,脊椎始终保持自然挺直。 每组重复动作均维持均匀速度,每次数两个数。 规格 设备尺寸 长 x 宽 x 高:119 cm x 112 cm x 150 cm (47” x 44” x 59”) 锻炼区域... -
Page 8: 胸部推举锻炼指南
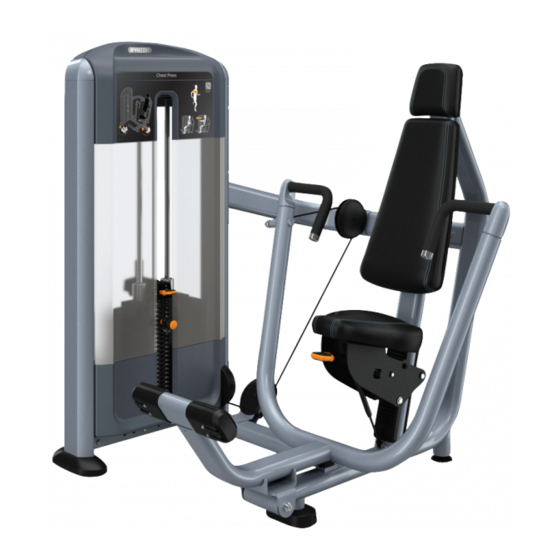
胸部推举锻炼指南 动作描述 胸部推举训练上身做推举动作时用到的肌肉,包括胸肌和三头肌。强化这类 缓慢伸展手臂。 肌肉将帮助锻炼者提高游泳或美式足球等运动, 及从地上爬起来或开门等日 缓慢返回到开始位置。 常活动的效率。 使用脚部辅助踏板将手柄回复到静止位置。 设定姿势 锻炼提示 避免肘部被固定。 尝试双手柄位置,改变锻炼方式。 规格 设备尺寸 长 x 宽 x 高:147 cm x 150 cm x 150 cm (58” x 59” x 59”) 锻炼区域 长 x 宽:163 cm x 150 cm (64” x 59”) 配重... -
Page 9: 肩膊推举锻炼指南
肩膊推举锻炼指南 动作描述 由于肩膀活动范围惊人,参与托举、搬运、推拉等活动,因此肩膀力量对完 双手握住手柄。 成体育运动和日常生活至关重要。肩膀推举特别针对三角肌,同时也锻炼了 缓慢向上伸展手臂,保持背部紧贴护板。 三头肌和上背等其他支撑肌肉群。 缓慢返回到开始位置,避免在重复动作之间撞击配重。 设定姿势 锻炼提示 锻炼过程中始终保持手腕处于自然适中的位置。 避免肘部被固定在活动范围的极限。 规格 设备尺寸 长 x 宽 x 高:170 cm x 132 cm x 150 cm (67” x 52” x 59”) 锻炼区域 长 x 宽:226 cm x 158 cm (89" x 62") 配重... -
Page 10: 下拉锻炼指南
下拉锻炼指南 动作描述 手臂伸展,肘部稍微弯曲。 如设备名称所示,下拉训练设计用于专门加强背阔肌。该大型肌肉帮助手臂 转动,向下拉伸肩膀和背部。 缓慢将手柄下拉至下巴位置。 缓慢返回到开始位置。 设定姿势 锻炼提示 保持正确姿势,且脊椎保持自然挺立。 避免将手柄拉至颈部后方。 推举重负时避免摇晃身体,以产生动力。 规格 设备尺寸 长 x 宽 x 高:170 cm x 155 cm x 196 cm (67” x 61” x 77”) 锻炼区域 长 x 宽:201 cm x 160 cm (79" x 63") 配重... -
Page 11: 坐式划船锻炼指南
坐式划船锻炼指南 动作描述 双手握住手柄。 坐式划船针对上身进行拉伸运动时用到的肌肉,包括背阔肌、斜方肌、二头 肌、三角肌和菱形肌。该练习不仅有助于训练背部力量,还有助保持正确姿 开始做动作前,微微弯曲手肘。 势。练习时,胸垫可让用户保持适当稳定,并专门针对这些肌肉,以保证集 中力量训练。 缓慢将手柄向身体内侧拉动。 缓慢返回到开始位置,各组重复动作之间保持手肘微微弯曲。 设定姿势 锻炼提示 保持头部位于中心位置,保持胸部紧贴护板。 做动作时避免抬肩。 规格 设备尺寸 长 x 宽 x 高:130 cm x 125 cm x 150 cm (51” x 49” x 59”) 锻炼区域 长... -
Page 12: 三角肌后拉/蝴蝶式扩胸锻炼指南
三角肌后拉/蝴蝶式扩胸锻炼指南 动作描述 握住上部手柄(后三角肌锻炼),或下部手柄(蝴蝶式夹胸器锻炼)。 该两用设备通过改变您的坐姿,可让您训练胸部和三角肌/上背肌肉。在功 能上,这些动作形成互补;当您的胸肌收缩时,上背和三角肌会伸展,以减 手臂展开,肘部微微弯曲,缓慢伸展至极限。 缓该动作。当后肌收缩时,道理也一样。强化这些肌肉群将提高上身推拉力 量以及肩膀的稳定性。 缓慢返回到开始位置。 锻炼提示 设定姿势 避免肘部被固定。 对于蝴蝶式扩胸动作,开始位置设定在身体中间线前方。 做动作时避免抬肩。 规格 设备尺寸 长 x 宽 x 高:137 cm x 142 cm x 213 cm (54” x 56” x 84”) 锻炼区域 长... -
Page 13: 坐式三头肌下压锻炼指南
坐式三头肌下压锻炼指南 动作描述 该练习针对三头肌和胸肌群。坐式三头肌下压锻炼是一组支撑式的引导运 缓慢向下压。 动,在双杠上重复常见的下压运动路径。 完全伸展后,稍停。 设定姿势 缓慢返回到开始位置。 锻炼提示 锻炼时保持头部位于中心位置。 锻炼时保持肘部靠近身体两侧。 做动作时保持紧贴护板。 规格 设备尺寸 长 x 宽 x 高:119 cm x 125 cm x 150 cm (47” x 49” x 59”) 锻炼区域 长 x 宽:170 cm x 125 cm (67" x 49") 配重... -
Page 14: 三头肌屈伸锻炼指南
三头肌屈伸锻炼指南 动作描述 双手握住手柄。 三头肌屈伸锻炼专门针对三头肌。这些肌肉主要帮助伸直手臂,对完成扔和 拿的动作非常重要。 缓慢伸展手臂。 完全伸展后,稍停。 设定姿势 缓慢返回到开始位置。 锻炼提示 保持上臂平放在护板上。 到达活动范围极限时保持肘部微微弯曲。 规格 设备尺寸 长 x 宽 x 高:119 cm x 112 cm x 150 cm (47” x 44” x 59”) 锻炼区域 长 x 宽:125 cm x 122 cm (49" x 48") 配重... -
Page 15: 前腿肌伸展锻炼指南
前腿肌伸展锻炼指南 动作描述 双手握住手柄。 前腿肌伸展锻炼专门针对四头肌,这是主要用于完成膝盖伸展动作的肌肉 组。行走、跑步和从椅子上站起来均是日常活动中用到四头肌的例子。 缓慢伸展腿部。 完全伸展后,稍停。 设定姿势 缓慢返回到开始位置。 锻炼提示 避免膝部完全伸展而被固定住。 做动作时保持紧贴背垫。 规格 设备尺寸 长 x 宽 x 高:135 cm x 125 cm x 150 cm (53” x 49” x 59”) 锻炼区域 长 x 宽:168 cm x 127 cm (66” x 50”) 配重... -
Page 16: 坐式后腿肌屈接锻炼指南
坐式后腿肌屈接锻炼指南 动作描述 坐式后腿肌屈接锻炼专门针对腿后肌,这是完成屈膝和伸髋等动作的肌肉 双手握住手柄。 群。 缓慢弯曲双腿。 设定姿势 完全收缩后,稍停。 缓慢返回到开始位置。 锻炼提示 避免将膝部锁定在开始位置。 做动作时保持紧贴背垫。 规格 设备尺寸 长 x 宽 x 高:155 cm x 125 cm x 150 cm (61” x 49” x 59”) 锻炼区域 长 x 宽:201 cm x 127 cm (79" x 50") 配重... -
Page 17: 大腿内侧锻炼指南
大腿内侧锻炼指南 动作描述 大腿内侧锻炼专门针对外展肌, 这是支撑髋部和膝部稳定性及协助完成下肢 双手握住手柄。 动作的重要内侧肌肉群。 该肌肉群用于完成下肢动作, 将腿部向身体中心拉, 缓慢向内用力压大腿。 如翘腿或向旁边挪脚。 完全收缩后,稍停。 设定姿势 缓慢返回到开始位置。 锻炼提示 选择您觉得髋部最舒适但活动范围最广的开始位置。 可将活动臂向外侧调整。使用调整手柄可将活动臂向内调整。 规格 设备尺寸 长 x 宽 x 高:168 cm x 76 cm x 150 cm (66” x 30” x 59”) 锻炼区域... -
Page 18: 大腿外侧锻炼指南
大腿外侧锻炼指南 动作描述 大腿外侧锻炼专门针对髋关节外展肌(俗称胯部)。这些肌肉在站立或步行 双手握住手柄。 时支撑髋部、 膝部和脚踝的稳定性, 用于完成横向运动和髋关节旋转的动作。 缓慢向外压大腿。 设定姿势 完全收缩后,稍停。 缓慢返回到开始位置。 锻炼提示 可将活动臂向内侧调整。使用调整手柄可将活动臂向外侧调整。 做该练习时避免猛烈动作。 做练习时保持紧贴背垫。 规格 设备尺寸 长 x 宽 x 高:168 cm x 76 cm x 150 cm (66” x 30” x 59”) 锻炼区域... -
Page 19: 坐式腿部屈伸锻炼指南
坐式腿部屈伸锻炼指南 动作描述 坐式腿部屈伸锻炼是另一种或是补充式深蹲练习。该练习训练胯部、腿筋和 缓慢伸展腿部。 四头肌,以提高下肢力量和发力。初学者和高水平运动员都可从中获得训练 完全收缩后,稍停。 效果。 缓慢返回到开始位置。 设定姿势 锻炼提示 避免膝部被固定。 背部始终保持紧贴护板。 改变双脚位置会有不同的训练效果。 规格 设备尺寸 长 x 宽 x 高:196 cm x 122 cm x 150 cm (77” x 48” x 59”) 锻炼区域 长 x 宽:221 cm x 122 cm (87” x 48”) 编号... -
Page 20: 臀肌伸展锻炼指南
臀肌伸展锻炼指南 动作描述 缓慢抬脚。 臀肌伸展锻炼专门针对臀大肌,而较少关注其他臀肌和腿筋。臀大肌是我们 身体最强壮的肌肉之一,帮助我们站立、抬举、步行和伸展,同时还稳定盆 完全伸展后,稍停。 腔。 缓慢返回到开始位置。 设定姿势 换一只脚重复相同的动作。 锻炼提示 锻炼时保持头部位于中心位置。 为了锻炼身体不同部位的肌群,请调整活动臂与身体的位置。 每组更换开始腿。 规格 设备尺寸 长 x 宽 x 高:135 cm x 102 cm x 150 cm (53” x 40” x 59”) 锻炼区域... -
Page 21: 俯卧屈腿锻炼指南
俯卧屈腿锻炼指南 动作描述 俯卧屈腿锻炼专门针对腿后肌,这是完成屈膝和伸髋等动作的肌肉群。 双手握住手柄。 缓慢弯曲双腿。 设定姿势 完全收缩后,稍停。 缓慢返回到开始位置。 锻炼提示 锻炼时,如果踝部护板与小腿一起移动,应重新调整身体位置,使膝部 与转动枢轴相适合。 要更好地锻炼腿后肌,则勾脚。 要更好地锻炼小腿肌肉,则弯脚。 规格 设备尺寸 编号 动作描述 长 x 宽 x 高:155 cm x 122 cm x 150 cm (61” x 48” x 59”) 选择适当的重量。... -
Page 22: 躯体旋转锻炼指南
动作描述 躯体旋转锻炼指南 用手臂和双手固定住上身,缓慢向所需的方向旋转身体。 躯体旋转锻炼专门针对内部和外部斜肌,而较少关注腹直肌。这些肌肉基本 参与完成转体动作和在体内传递力量。从棒球投手投球到铲雪,这些都是现 完全收缩后,稍停。 实生活中运用腹直肌完成动作的例子。 缓慢返回到开始位置。 设定姿势 从另一个开始位置重复相同的动作。 锻炼提示 使用较轻的重量多次重复本锻炼动作。 锻炼时保持双手轻握手柄。 每次做转体动作前,脊椎保持自然挺立,并运用您的腹肌。 规格 设备尺寸 长 x 宽 x 高:127 cm x 137 cm x 150 cm (50” x 54” x 59”) 锻炼区域... -
Page 23: 背肌伸展锻炼指南
背肌伸展锻炼指南 动作描述 该设备注重下背肌肉,帮助拉伸脊椎和帮助完成转体动作。腹部运动中的背 胸前交叉双臂。 肌伸展动作强化肌肉训练。 缓慢伸展后背,且脊椎保持自然挺立。 设定姿势 完全收缩后,稍停。 缓慢返回到开始位置。 锻炼提示 保持背部下方贴住背护板。 避免过度伸展。 初学者应从较小的动作幅度开始。 规格 设备尺寸 长 x 宽 x 高:122 cm x 109 cm x 150 cm (48” x 43” x 59”) 锻炼区域 长... -
Page 24: 侧平举锻炼指南
侧平举锻炼指南 动作描述 侧平举锻炼主要针对肩膀的三角肌。 强大的三角肌几乎参与所有上身抬举和 双手握住手柄,将上臂放在臂部护杆上。 搬运的动作,尤其是侧举动作。 缓慢上抬手臂至水平位置。 设定姿势 完全伸展后,稍停。 缓慢返回到开始位置。 锻炼提示 锻炼时,如果臂部护杆与上臂一起移动,应调整坐垫高度,使肩部与转 动枢轴的位置相适合。 为降低肩膀受夹挤的风险,应避免将臂垫抬高过肩膀高度。 规格 设备尺寸 长 x 宽 x 高:135 cm x 125 cm x 150 cm (53” x 49” x 59”) 锻炼区域 长... -
Page 25: 腹部锻炼指南
腹部锻炼指南 动作描述 收紧腹部,胸部向前压。 腹部锻炼专门针对斜肌和腹直肌。 这些肌肉大量参与完成体后屈动作和在体 内传递力量。强大的腹肌有助改善姿势、运动效率和提高运动效果。 完全收缩后,稍停。 缓慢返回到开始位置。 设定姿势 锻炼提示 开始锻炼时注意使用腹肌力量,而不是手臂力量。 规格 设备尺寸 长 x 宽 x 高:132 cm x 127 cm x 150 cm (52” x 50” x 59”) 锻炼区域 长 x 宽:158 cm x 140 cm (62" x 55") 配重... -
Page 26: 宽握背部下拉锻炼指南
宽握背部下拉锻炼指南 动作描述 如设备名称所示,下拉训练设计用于专门加强背阔肌。该大型肌肉帮助手臂 开始伸展手臂,肘部微微弯曲。 转动,向下拉伸肩膀和背部。 缓慢将手柄下拉至下巴位置。 设定姿势 缓慢返回到开始位置,避免在重复动作之间撞击配重。 锻炼提示 旋转手柄,改变开始位置,从而改变锻炼方式。 通过双侧、单侧或交替的手臂动作强化您的肌肉。 推举重负时避免摇晃身体,以产生动力。 避免将手柄拉至颈部后方。 锻炼过程中脊椎保持自然挺立。 规格 设备尺寸 长 x 宽 x 高:147 cm x 125 cm x 206 cm (58” x 49” x 81”) 锻炼区域... -
Page 27: 集中肩部推举锻炼指南
集中肩部推举锻炼指南 动作描述 由于肩膀活动范围惊人,参与托举、搬运、推拉等活动,因此肩膀力量对完 双手握住手柄。 成体育运动和日常生活至关重要。集中肩部推举锻炼特别针对三角肌,同时 缓慢向上伸展手臂,保持背部紧贴护板。 也锻炼了三头肌和上背等其他支撑肌肉群。 缓慢返回到开始位置,避免在重复动作之间撞击配重。 设定姿势 锻炼提示 通过双侧、单侧或交替的手臂动作强化您的肌肉。 使用垂直手柄改变锻炼方式。 锻炼过程中始终保持手腕处于自然适中的位置 避免肘部被固定在活动范围的极限。 规格 设备尺寸 长 x 宽 x 高:155 cm x 153 cm x 155 cm (61” x 60” x 61”) 锻炼区域... -
Page 28: 集中胸部推举锻炼指南
集中胸部推举锻炼指南 动作描述 集中胸部推举训练上身做推举动作时用到的肌肉,包括胸肌和三头肌。强化 缓慢伸展手臂。 这类肌肉将帮助锻炼者提高游泳或美式足球等运动, 及从地上爬起来或开门 等日常活动的效率。 缓慢返回到开始位置。 锻炼提示 设定姿势 避免肘部被固定在活动范围的极限。 通过双侧、单侧或交替的手臂动作强化您的肌肉。 选择肩关节舒适的开始位置。 规格 设备尺寸 长 x 宽 x 高:127 cm x 160 cm x 186 cm (50” x 63” x 73”) 锻炼区域 长 x 宽:127 cm x 178 cm (50” x 70”) 配重... -
Page 29: 宽握低拉划船锻炼指南
宽握低拉划船锻炼指南 动作描述 宽握低拉划船针对上身进行拉伸运动时用到的肌肉,包括背阔肌、斜方肌、 开始伸展手臂,肘部微微弯曲。 二头肌、三角肌和菱形肌。该练习不仅有助于训练背部力量,还有助保持正 确姿势。锻炼时,用户必须保持中心稳定,以适当调整脊椎。 缓慢将手柄拉至胸部位置。 缓慢返回到开始位置。 设定姿势 锻炼提示 保持正确姿势,避免前后摇晃,以应付重负。 旋转手柄,改变开始位置,从而改变锻炼方式。 通过双侧、单侧或交替的手臂动作强化您的肌肉。 规格 设备尺寸 长 x 宽 x 高:201 cm x 120 cm x 150 cm (79” x 47” x 59”) 锻炼区域 长 x 宽:201 cm x 150 cm (79" x 59") 编号... -
Page 30: 坐姿提踵锻炼指南
坐姿提踵锻炼指南 动作描述 坐姿提踵锻炼专门针对日常动作和体育运动中提起脚后跟用到的肌肉。 促使 双手握住手柄。 跳跃、跑步和爬楼梯等动作是这些肌肉的部分主要功能。 缓慢伸展双脚。 设定姿势 完全伸展后,稍停。 缓慢返回到开始位置。 锻炼提示 对于单侧训练,把双脚放在踏板上,但仅伸展一只脚进行推蹬。 规格 设备尺寸 长 x 宽 x 高:135 cm x 112 cm x 150 cm (53” x 44” x 59”) 锻炼区域 长 x 宽:165 cm x 137 cm (65” x 54”) 配重... -
Page 31: 保养维护
保养维护 使用前 推荐工具 我们建议您使用以下工具检查和维护健身设备: Precor 必确 建议按照本手册中的说明由合格的维护人员对设备进行全方 位的维护,包括常规安全检查。 ¹⁄₂ 英寸至 ¹⁵⁄₁₆ 英寸全套组合套筒扳手 本手册介绍 Precor Discovery Selectorized 系列商用力量健身设备的维 ¹⁄₂ 英寸至 ¹⁵⁄₁₆ 英寸全套套筒 护方法,提供每天、每周、每月、每年需要检查和维护的项目的信息。请按 六角螺帽起子:¹⁄₄ 英寸 照说明定期对设备进行相应的检查和维护。 可调式 12 英寸扳手 本手册中包含健身设备的基本维护步骤。不过,如果设备需要进行本手册维 护步骤之外的维修服务,请参阅“获取服务”。 请参阅 获取服务 。 ⁵⁄₆₄ 英寸至 ³⁄英寸全套内六角扳手... - Page 32 获取服务 型号: 序列号: 除了执行本手册所述的维护任务之外,切不可尝试维修健身设备。如有任何 零部件缺失,请与经销商联系。如果需要客服中心电话号码或 Precor 授权 购买日期: 服务中心列表的更多信息,请访问 Precor 必确 网站 www.precor.com。 如有关于设备的任何问题,请找到其序列号并与 Precor 客服中心联系。 型号: 序列号: Precor 必确 使用序列号查找型号和产品制造年份。 通常可以在坐椅下方 找到序列号。 购买日期: 在提供的空白处写下您的 Precor 必确力量训练设备的序列号、型号和购买 日期,以备未来参考。您可在下方列出所有设备信息,以便参考。 型号: 序列号: 型号: 序列号: 购买日期: 购买日期: 型号: 序列号: 型号: 序列号: 购买日期: 购买日期:...
-
Page 33: 每天检查
每天检查 清洁护罩 小心: 为免损坏护罩, 请按照本节说明进行清洁。 使用干净的抗磨损布轻拭, 您每天需要执行以下任务,以维护设备并保持其顺利运转: 以免刮花表面。 清洁饰面材料。 清洁护罩时,Precor 必确建议在 3.7 8 升(1 加仑)水加入几滴温和的洗洁 清洁护罩。 精,用软布沾湿擦拭设备。用另一块软布和清水擦干净皂水。 检查衬垫是否磨损。 若清洁方法不当,护罩很容易刮花或损坏。为避免问题发生,经常用干净的 清洁和检查机架。 无绒布轻拭护罩。避免揉擦污垢或沙粒以免磨损表面。 检查所有紧固件。 重要信息:不得使用酮、芳烃、酯类、窗户清洁喷剂、酒精、厨房洗涤用品、 氨类清洁溶液或溶剂(如丙酮、苯、汽油、四氯化碳或稀释剂)。 检查线缆和端部连接。 检查警告和说明标签。 执行您所维护设备的相关任务,跳过不适合的任务。 清洁饰面材料 每天用装有中性肥皂水溶液的喷瓶清洁饰面材料,去除表面的脏物和汗水。 轻轻向饰面材料喷洒清洁剂,然后用干净的布擦干。 重要信息: 清洁护板时不得使用含有以下任何成份的清洁产品: 溶剂、 酒精、... - Page 34 检查衬垫是否磨损 检查所有紧固件 检查衬垫的饰面材料是否有裂纹,螺钉和螺栓是否松脱。根据需要更换衬垫 紧固件可能会在正常使用中而松动。请检查所有螺母、螺栓、螺钉及其它紧 获取服务 (请参见 购买新衬垫)。 固件,确保其紧固并且安装正确。 重要信息:不得重新装上衬垫或使用未经Precor必确批准的衬垫。 务必要检查联接点的紧固件,确保连接稳固。如果紧固件松动但状况良好, 请重新紧固它。 如果担心紧固件的完整性, 请清洁螺纹, 并检查其是否损坏, 例如是否有裂纹、 坏螺纹、 腐蚀或生锈。 如果紧固件状况良好, 请重新装回。 清洁和检查机架 否则暂停使用设备,直到正确安装新的紧固件为止。您可以向客服中心订购 每天用装有中性肥皂水溶液的喷剂清洁机架,去除表面的油脂和脏物。用湿 获取服务 新的紧固件。有关附加信息,请参见 。 布擦拭设备,并让其彻底风干。确保擦拭上漆的部件和镀铬部件。 为恢复并保持镀铬部件的光泽,请用商用铬清洁剂。 在清洁时,检查机架是否有破裂、生锈或其它损坏。确保焊接点牢固且紧固 件已正确固定。 Discovery Selectorized 精选系列用户手册 保养维护...
- Page 35 检查线缆和端部连接 明显的线缆损坏迹象包括: 内部线缆外露、保护层被拉伸或有切口, 小心:应定期仔细检查缆索、滑轮、紧固件及其它相关附件。一旦发现缆索 或经过滑轮位置的保护层破损 有明显磨损, 请立即用 Precor必确 提供的修补件更换。在频繁使用条件下 缆索将会磨损以至失效。磨损的缆索突然失效可能给用户造成严重的伤害。 呈锯齿形或波浪形 请参阅 获取服务 购买备件。 扭结,可能表示内部受损 每天检查线缆和端部连接, 如有损坏, 立即更换。 检查扭结处、 磨损的线缆, 或线缆保护层是否老化。查看是否有磨损的迹象,特别是在线缆的卷曲端部 外层收缩 和滑轮附近。 重要信息:若线缆损坏,则必须立即更换,以免造成用户受伤。 外层“膨胀” Figure 1: 线缆损坏迹象 Discovery Selectorized 精选系列用户手册 保养维护...
- Page 36 除检查线缆和端部连接是否损坏外,还要做以下检查: 检查警告和说明标签 确保每根缆索均已正确调节并固定在重量块顶部。 每天检查警告和说明标签,确保所有信息都清晰易读。如果标签有任何部分 不可见或未正确贴上,请立即更换该标签(请参阅 获取服务 以获取购买信 检查缆索滑轮、端部连接和端部装配。确保所有连接牢固,按需要调整 息)。 缆索松紧度。 确保锚索上至少有七股或至少有 13 毫米(¹ ₂ 英寸)线绳接入选择器杆。 在喷瓶中装入中性的肥皂水溶液, 根据需要清洁标签, 然后用软布彻底擦干。 所示距离应不超过 19 毫米(³ ₄ 英寸)。将锁紧螺母拧紧至 68 牛顿-米 下图所示为用户说明标签的示例。 (600 磅-英寸)。参见下图。 Figure 2: 锚索上必须至少有六股线绳接入选择器 Figure 3: Discovery Series Selectorized Line 力量健身设备用户说明标签 样本...
- Page 37 Precor 产品附有许多标准的警告标签。以下两图列举两种设备上会用到的 警告标签, 具体应用取决于产品的种类和型号。 Figure 4: 已有缆索螺栓拧入选择阀杆的重量块上或其附近可能贴有警告标签 Figure 5: 这种警告标签将出现在设备机架上 Discovery Selectorized 精选系列用户手册 保养维护...
-
Page 38: 每周检查
每周检查 清洁和润滑导杆 本节介绍每周应执行的设备维护任务。 请根据您维护的设备执行以下相应的 检查导杆外露部分,使其保持清洁。使用干布擦掉积聚在导杆上的污垢或油 任务: 脂。 调节和彻底清洁饰面材料。 注意:必须拆下 Discovery Selectorized 力量健身设备的护罩才能检查、 护罩拆卸 清洁和润滑导杆(请参阅 清洁和润滑导杆。 喷上薄薄一层硅油喷剂,润滑导杆暴露在外的部分。在布上喷洒硅油喷剂, 检查线缆、连接处和张力。 在喷洒润滑剂时要小心,以免弄脏地毯和衣服。 然后用布擦拭导杆。 检查滑轮。 小心:切勿在设备使用过程中尝试润滑导杆。 如果在没有完全拆卸重量块时 检查配重和选择销。 润滑重量板之间的位置,将会导致严重的伤害。 检查和润滑轴承和套管。 切勿使用石油润滑剂。这些润滑剂通常会导致重量板上快速堆积 重要提示: 检查和润滑座椅调节。 脏物和毛发,可能使重量板粘在一起。 调节和彻底清洁饰面材料 每周用羊毛脂洗手剂或饰面材料清洁剂调节和彻底清洁饰面材料。 重要信息: 清洁护板时不得使用含有以下任何成份的清洁产品: 溶剂、 酒精、 氨水或汽油,而应使用温和的洗涤型清洁剂... - Page 39 不超过 19 毫米(³ ₄ 英寸)。检查并作相应调整。 该立即更换。 在选择器杆上 。 确保轮子在设备使用时能够自由转动。检查每个滑轮左右摇摆幅度是否过 检查线缆,特别是滑轮、轮子和凸轮周围的线缆。 大,这往往是轴承破损或固定螺栓松脱的表现。如果发现摇摆幅度过大,请 卸下滑轮,检查轴承并在必要时更换整个滑轮。 检查端接凸轮的线缆(在大部分设备上是固定不动的)。检查穿过凸轮 末端的螺栓,该螺栓用于确保两个锁紧螺母相互拧紧。另外,检查整个 布线,确认没有阻碍任何结构。 检查配重和选择销 检查在 U 形壳内连接的线缆的球形端。 配重由精密加工的配重块组成,为精准配重的单一机械装置设计。仅使用 Precor 必确提供的附加配重块和配重块选择销。 确保每根缆索均已正确调节并固定在重量块顶部。 每周检查配重和选择销。如有需要,用湿布擦拭各配重块。检查所有配重块 检查缆索滑轮、端部连接和端部装配。确保所有连接牢固,按需要调整 是否有锋利的毛刺或损坏。擦拭导杆的污垢和灰尘。 缆索松紧度。 确保设备仅使用原装 Precor 必确选择销。另外,确保选择销可完全插入, 并固定在各配重块内。 Discovery Selectorized 精选系列用户手册 保养维护...
- Page 40 检查和润滑轴承和套管 检查和润滑座椅调节 Precor 使用专为力量训练而设计的轴承,质量优良,经久耐用。每周应对 座椅调节机构 很少需要维护。但是,由于座椅安全对于锻炼的安全非常重 健身设备的轴承和套管进行以下维护: 要,因此应定期检查座椅调整杆以确认其在使用时是否会卡住。 铜质套管:Precor 推荐使用少量硅胶喷雾润滑剂来润滑这些经常用于 要测试座椅调整杆是否需要润滑, 请稍微升高座椅, 同时按下并释放调整杆。 支撑旋转轴的套管。首先将其直接喷洒在旋转轴上,然后将旋转轴完全 调整杆应能轻松地卡入。 如果调整杆卡住, 请用硅油喷剂润滑其枢轴销。 用 使用喷雾润滑剂时请小 旋转数周即可。检查套管是否过度磨损或损坏。 布擦掉所有多余的润滑剂。 心,防止弄脏地毯和衣物。 用布擦掉所有多余的润滑剂。 检查座椅调节的气体辅助减震器是否漏气。如有需要,进行更换。 尼龙套管:先在导杆的尼龙套管上喷洒薄薄一层 Teflon®润滑喷剂,以 润滑套管。然后将硅胶润滑剂喷于布上,用布擦拭整个导杆。 重要提示:切勿在尼龙套管上使用石油润滑剂。 密封轴承枢轴点:这些枢轴点处于密封状态,不与外界环境接触,无需 润滑。在清洁健身设备时,用布擦拭旋转轴和轴承外表面,防止灰尘和 汗渍积聚。 直线套管:直线套管可以让附加的配重总成和其他机械部件沿导杆平滑 地移动。检查每根导杆端部,确保其正确固定且所有螺栓都处于紧固状 态。 在导杆上喷洒少量硅胶喷雾润滑剂,从上至下擦拭导杆,以清除灰尘、 毛发和污垢。...
-
Page 41: 每月检查
本节介绍每月应执行的设备维护任务。 请根据您维护的设备执行以下相应的 (参见下图。) 任务: 小心:拉出弹出销可能会使设备突然变换位置。为避免受伤,请确保您的手 检查机架和移动臂。 和头远离移动部件。 润滑弹出销。 测试弹出销能否正常运作和插入每个调节孔。 检查机架和移动臂 每月检查机架和移动臂的完整性及其能否正确运作。检查其是否破裂、脱漆 或生锈。根据需要对暗淡和脱漆的地方进行补漆。更换有明显磨损的任何组 件。 获取服务 注意:可以致电 Precor 客服中心订购修补用的漆。 请参见 检查机架是否有破裂,特别是联接点。如果发现任何破裂,立即停止使该设 用户重要安全指南 备,并且要让合格的维护技术人员进行维修。请参见 和 获取服务 。 要去除机架表面的铁锈,请用细纹湿/干沙纸或细纹钢丝绒轻轻擦掉。必要 使用 Precor 补漆。请用中性的汽车打蜡产品保持漆面的光泽。 要维护粉末喷涂和镀铬部件,请使用中性的洗涤剂去除轻微的脏物和污垢。 如果要去除厚重的脏物和油脂并且进行抛光,请使用上等汽车抛光剂。如果 某些刮痕和污点无法用上述方法去除,请使用细砂清洁剂。切勿使用溶剂、 Figure 6: 将弹出销拉出进行润滑 漆冲淡剂、丙酮或指甲油去除剂。 Discovery Selectorized 精选系列用户手册... -
Page 42: 年度维护
年度维护 重量块年度维护 Precor 建议每年拆卸一次重量块,进行彻底的清洁和检查。 每年对您的设备执行以下适当的维护: 请小心地从重量块上拆下缆索和导杆。在一个通风良好、远离锻炼场所 护罩拆卸。 的位置完全拆解重量块。 重量块年度维护。 检查重量板并彻底清洁,如有破裂或损坏,应立即更换(请参见 获取 检查和润滑弹出销。 服务 购买备件。单独清洁各配重块,然后检查导杆的套管。 润滑直线滚珠轴承。 检查顶部配重块的套管和各配重块,如配重块有严重磨损或损坏,则进 行更换。 护罩拆卸 清洁选择器杆,并检查是否磨损和损坏。 Discovery Selectorized 系列力量健身设备配有一个配重塔护罩,必须先 重装安装配重。 将其拆卸后才能进行本手册中的维护操作。 如有需要,用湿布擦拭配重外壳(护罩)。检查所有紧固件,确保护罩 。 重要事项:请勿在使用健身设备的时候拆卸护罩 安装牢固。 护罩组装指南 拆卸护罩前,请参阅本手册中的... - Page 43 检查和润滑弹出销 润滑直线滚珠轴承 松开销盖后卸下弹出销组件。 一些力量健身设备安装有直线滚珠轴承。 使用 NLGI 2 级润滑油润滑直线滚珠轴承,在轴承下面的轴上涂一层薄薄的 小心:拉出弹出销可能会使设备突然变换位置。为避免受伤,请确保您的手 润滑油。移动轴承,并在另一面也涂上润滑油。 和头远离移动部件。 检查棘齿和弹簧是否过度磨损,并根据需要进行更换。 向弹簧和销子喷洒少量硅油喷剂,然后重新安装整个组件。拧紧销盖。用布 擦掉所有多余的润滑剂。 Figure 7: 检查弹出销(弹出销以爆炸视图清晰地显示) Discovery Selectorized 精选系列用户手册 保养维护...
- Page 44 注释 Discovery Selectorized 精选系列用户手册 注释...
- Page 45 注释 Discovery Selectorized 精选系列用户手册 注释...
- Page 46 注释 Discovery Selectorized 精选系列用户手册 注释...
- Page 48 规格如有变动,恕不另行通知。 www.precor.com Precor Incorporated 20031 142nd Ave NE 通告: P.O. Box 7202 Precor 凭借其 屡获嘉奖的创新性健身设备设计 而得到广泛认可。Precor 积极 在美国和国外 为其产品 Discovery™ Series Selectorized Line 用户手册 Woodinville, WA USA 98072-4002 设计的机械结构和外观申请 专利。特此事先警告任何打算使用 Precor 产品设计的第三方,Precor 严禁 CW39037-522 rev B, zh 1-800-347-4404 任何人擅自使用 其所有权,并且会严厉追究所有剽窃其 所有权的行为。...
- Page 49 Assembly Guide Discovery™ Series Selectorized Line Shoulder Press...
- Page 51 Table of Contents Getting Started ................2 Installation Requirements ..............2 Required Tools..................2 Assembling the Equipment ............3 Attaching the Weight Tower to the Movement Frame ..... 4 Tightening All Frame Fasteners ............6 Stabilizing the Equipment ..............6 Routing the Cable Assembly ............7 Routing the Cable on the Weight Tower ........9 Adjusting the Cable Tension ............
-
Page 52: Getting Started
Getting Started Required Tools Assembly of each piece of Discovery Selectorized equipment takes about 30 minutes. If this is your first time assembling this equipment, allow more time. Torque wrench that can be fitted with the following hex bits: Installation Requirements ... -
Page 53: Assembling The Equipment
Make sure the equipment is stable and placed on a solid surface. The equipment is designed to be freestanding; however, it can be bolted to the floor for extra stability. Precor highly recommends that the equipment be bolted to the floor to reduce the risk of toppling the equipment due to improper use. -
Page 54: Attaching The Weight Tower To The Movement Frame
Attaching the Weight Tower to the 4. Attach the cross support to the weight tower using the fasteners removed Movement Frame previously. Partially tighten the fasteners. Note: Be sure to orient the dome washers as shown in the following figure. Note: Do not tighten fasteners until instructed to do so. - Page 55 To attach the movement arm to the movement frame: 2. Attach the movement arm to the bearing hub using two bolts, two split washers and two washers. Tighten the bolts to 500 in-lbs (about 56 Nm). 1. Remove the fasteners from the bearing hub and position the movement arm onto the bearing hub.
-
Page 56: Tightening All Frame Fasteners
Tightening All Frame Fasteners Stabilizing the Equipment Once you have completed assembly, make sure all loose bolts are tightened. CAUTION: To prevent damage to the equipment foot, tighten it all the way Use the following procedure to fully tighten the bolts that apply to the into the frame before moving the equipment. -
Page 57: Routing The Cable Assembly
Routing the Cable Assembly To route the cable on the movement frame pulleys: The cable is wrapped in packing material and attached to the equipment frame for shipment. Proper cable routing is shown in the following figure. 1. Using a Phillips screwdriver, remove the screws holding the plastic covers on the pulleys. - Page 58 3. Route the cable through the pulley bracket and around the pulley. Reattach the pulley using the fasteners previously removed and tighten the nut using a ³ ₄-inch wrench. 4. Note: You will need to adjust the tension on the cable after it is attached to the weight tower.
-
Page 59: Routing The Cable On The Weight Tower
Routing the Cable on the Weight Tower 2. Grasp the kick cover on either side (see arrows in the following figure) and press inward slightly so that the notches on the back of the kick cover The weight tower ships with the kick cover and pulley cover attached. unlock from their mounts. - Page 60 4. Using a ⁵ ₃₂-inch hex bit, remove the shoulder bolt next to the pulley. Route the cable around the pulley, then replace and tighten the shoulder bolt. Figure 12: Cable and shoulder bolt position 5. Replace the kick cover and then the pulley cover using a ⁵ ₃₂-inch hex bit. Shoulder Press Assembly Guide: Routing the Cable Assembly...
- Page 61 Threading the Cable Through the Top Frame of the To route the cable through the weight tower: Weight Tower 1. Locate the pulley positioned over the opening where the cable will thread up through the weight tower. Using a ³ ₄-inch socket wrench and a ³ ₄-inch The cable passes through an opening in the top of the weight tower frame, open-end wrench, remove the bolt, and then remove the pulley and cable over the pulleys and then back down through the frame to the weight stack.
- Page 62 3. Using a ³ ₄-inch socket wrench and a ³ ₄-inch open-end wrench, remove the 2. Thread the cable up through the weight tower frame. Replace the pulley nut and cable retainer on the second pulley. and cable retainer making sure that the cable is positioned in the pulley trough and under the cable retaining bracket.
- Page 63 5. Thread the cable down through the opening under the second pulley, as 6. Guide the cable down to the weight stack. Remove and discard the shown in the following figure. temporary bolt threaded into the selector stem on the weight stack. 7.
-
Page 64: Adjusting The Cable Tension
Adjusting the Cable Tension 5. Make sure the cable bolt is threaded at least seven threads (turns). The To adjust the cable tension: distance from the underside of the bolt head to the top of the weight selector stem should be no more than 1¹ ₄-inch (32 mm). Refer to the 1. -
Page 65: Completing Assembly
Once assembly is complete, verify safe operation by checking the following CAUTION: Do not use power tools to tighten screws attaching the weight points: stack shroud components. Using power tools may void the Precor warranty. Cable tension is correct and the cable is moving smoothly on its pulleys. - Page 66 Notes Shoulder Press Assembly Guide: Notes...
- Page 68 U.S. and foreign patents for both the mechanical construction and the visual aspects of its Discovery™ Series Selectorized Line AG P.O. Box 7202 product design. Any party contemplating the use of Precor product designs is hereby forewarned that Precor Shoulder Press Woodinville, WA USA 98072-4002 considers the unauthorized appropriation of its proprietary rights to be a very serious matter.
Need help?
Do you have a question about the Discovery Selectorized Series and is the answer not in the manual?
Questions and answers