Precor Discovery Series Selectorized Line Owner's Manual
Fitness equipment
Hide thumbs
Also See for Discovery Series Selectorized Line:
- Assembly manual (68 pages) ,
- Owner's manual (45 pages) ,
- Getting started manual (2 pages)
Table of Contents
Advertisement
Advertisement
Chapters
Table of Contents

Related Manuals for Precor Discovery Series Selectorized Line


Summary of Contents for Precor Discovery Series Selectorized Line
- Page 1 Owner’s Manual Discovery Series Selectorized Line...
-
Page 3: Important Safety Guidelines For Owners
Do not place the equipment outdoors or on wet surfaces. equipment is designed to be freestanding; however, it can be bolted to the floor for extra stability. Precor highly recommends that the equipment be Safety Approval bolted to the floor to reduce the risk of toppling the equipment due to improper use. -
Page 4: Important Safety Information For Users
Important Safety Information for Users Before beginning any fitness program, you should obtain a complete physical Never drop or insert objects into any opening in the equipment. examination from your physician. Check that all fasteners are securely tightened. Cables should be secured French equivalent of the preceding paragraph, for the Canadian market: Il est at both end connections and properly threaded. -
Page 5: Table Of Contents
Product Specifications and Use ..........4 Annual Maintenance ................. 40 Important Safety Guidelines .............. 4 Biceps Curl User’s Guide ..............5 Precor Commercial Strength Equipment Limited Warranty ... 42 Chest Press User’s Guide ..............6 Shoulder Press User’s Guide .............. 7 Lat Pulldown User’s Guide ..............8 Seated Row User’s Guide ..............9... -
Page 6: Product Specifications And Use
Product Specifications and Use Important Safety Guidelines CAUTION: Before using the equipment, read these instructions and all labels. Failure to do so may result in serious injury. Do not allow children, or those unfamiliar with the operation of this unit, on or near it. -
Page 7: Biceps Curl User's Guide
Biceps Curl User’s Guide Action The biceps brachii muscles serve a variety of functions, from helping you bend Grasp both handles. at the elbow to rotating your forearm to raising your arm overhead. Strong Bend your elbows slightly prior to starting the movement. biceps will help you lift items with greater confidence, and are involved in a variety of sports and activities such as swimming, carrying boxes, tennis, and ... -
Page 8: Chest Press User's Guide
Chest Press User’s Guide Action The Chest Press trains the muscles involved in upper body pushing Extend your arms in a controlled motion. movements, including the pectoral muscles and triceps. Strengthening these muscles will help exercisers become more efficient in sports such as ... -
Page 9: Shoulder Press User's Guide
Shoulder Press User’s Guide Action Given the shoulder’s incredible range of motion and involvement in activities Grasp both handles. such as lifting, carrying, pushing and pulling, strength in the shoulder is critical Extend your arms in a controlled motion while keeping your back pressed for success in activities of sport and daily living. -
Page 10: Lat Pulldown User's Guide
Lat Pulldown User’s Guide Action As the equipment name suggests, the lat pulldown is designed to specifically Begin with your arms extended, elbows slightly bent. strengthen your latissimus dorsi muscles (more commonly known as your Pull the handles to chin level in a controlled motion. lats). -
Page 11: Seated Row User's Guide
Seated Row User’s Guide Action The Seated Row targets the muscles involved in upper body pulling Grasp both handles. movements, including the lats, trapezius, biceps, deltoids, and the rhomboids. Bend your elbows slightly prior to starting the movement. Not only will this exercise help you develop back strength, but it also supports proper posture. -
Page 12: Rear Delt / Pec Fly User's Guide
Rear Delt / Pec Fly User’s Guide Action This dual equipment allows you to train both your chest and deltoid/upper Grasp the upper handles (Rear Delt), or the lower handles (Pec Fly). back muscles by varying your seated position. Functionally, these movements ... -
Page 13: Seated Dip User's Guide
Seated Dip User’s Guide Action This exercise targets the triceps and pectoral muscle groups. The Seated Dip Press down in a controlled motion. offers a supported, guided motion that replicates the movement path of the Pause at full extension. popular dip movement performed on parallel bars. -
Page 14: Triceps Extension User's Guide
Triceps Extension User’s Guide Action The Triceps Extension isolates the triceps. These muscles primarily help to Grasp both handles. straighten the arm and are essential in throwing and reaching movements. Extend your arms in a controlled motion. Setup ... -
Page 15: Leg Extension User's Guide
Leg Extension User’s Guide Action The Leg Extension isolates the quadriceps, a group of muscles that are Grasp both handles. primarily involved in knee extension movements. Walking, running and moving from a seated to a standing position are just a few of the ways the quadriceps ... -
Page 16: Seated Leg Curl User's Guide
Seated Leg Curl User’s Guide Action The Seated Leg Curl targets the hamstrings, a muscle group that is involved in Grasp both handles. actions that bend the knee and extend the hip. Curl your legs in a controlled motion. Setup ... -
Page 17: Inner Thigh User's Guide
Inner Thigh User’s Guide Action The Inner Thigh targets your adductors, an important group of medial muscles Grasp both handles. that support hip and knee stability and aid lower body motion. This muscle Squeeze thighs inward in a controlled motion. group is involved in lower body movements that involve pulling your legs toward the center of your body, such as crossing your legs or side shuffling. -
Page 18: Outer Thigh User's Guide
Outer Thigh User’s Guide Action The Outer Thigh targets your hip abductor muscles, more commonly known as Grasp both handles. your glutes. These muscles support hip, knee and ankle stability while standing or walking, and are involved in lateral motion and hip rotation. ... -
Page 19: Leg Press User's Guide
Leg Press User’s Guide Action The Leg Press offers an alternative or complement to the squat exercise. It Extend your legs in a controlled motion. trains the glutes, hamstring and quadriceps to increase lower body strength Pause at full contraction. and force production, and offers conditioning benefits for beginners and performance athletes alike. -
Page 20: Glute Extension User's Guide
Glute Extension User’s Guide Action The Glute Extension targets the gluteus maximus muscle, with a lesser degree Rotate leg upward in a controlled manner. of focus on the other gluteals and hamstrings. The gluteus maximus is one of Pause at full extension. -
Page 21: Prone Leg Curl User's Guide
Prone Leg Curl User’s Guide Action The Prone Leg Curl targets the hamstrings, a muscle group that is involved in Grasp both handles. actions that bend the knee and extend the hip. Curl your legs in a controlled motion. Setup ... -
Page 22: Rotary Torso User's Guide
Rotary Torso User’s Guide Action The Rotary Torso targets the internal and external obliques, with a lesser While bracing your upper body with your arms and hands, rotate in the degree of emphasis on the rectus abdominis muscle. These muscles are desired direction using a slow, controlled motion. -
Page 23: Back Extension User's Guide
Back Extension User’s Guide Action This equipment focuses on the muscles of the lower back that help to extend Cross your arms in front of your chest. the spine and aid in rotational movements. The Back Extension movement compliments the muscles trained during abdominal exercises. ... -
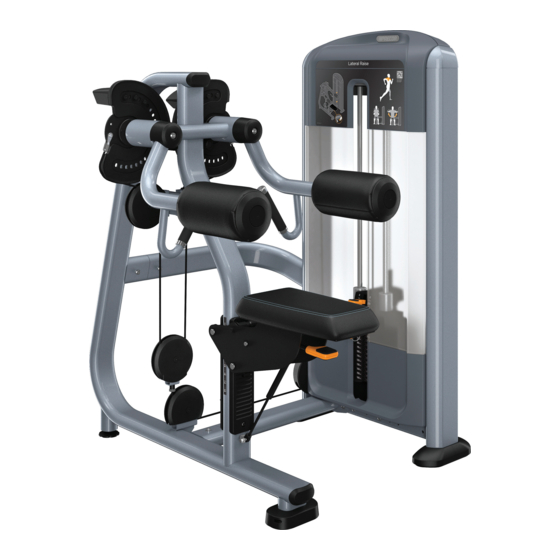
Page 24: Lateral Raise User's Guide
Lateral Raise User’s Guide Action The Lateral Raise primarily targets the deltoid muscles of the shoulder. Strong Grasp both handles and position your upper arms against the arm pads. deltoid muscles are engaged in nearly every upper body lifting and carrying motion, especially lateral lifting motions. -
Page 25: Abdominal User's Guide
Abdominal User’s Guide Action The Abdominal targets the obliques and the rectus abdominis muscles. These Squeeze your abdominals and move your chest down toward your hips. muscles are critically involved in trunk bending and force transfer across the Pause at full contraction. -
Page 26: Diverging Lat Pulldown User's Guide
Diverging Lat Pulldown User’s Guide Action As the equipment name suggests, the lat pulldown is designed to specifically Begin with your arms extended, with a slight bend in the elbow. strengthen your latissimus dorsi muscles (more commonly known as your ... -
Page 27: Converging Shoulder Press User's Guide
Converging Shoulder Press User’s Guide Action Given the shoulder’s incredible range of motion and involvement in activities Grasp both handles. such as lifting, carrying, pushing and pulling, strength in the shoulder is critical Extend your arms in a controlled motion while keeping your back pressed for success in activities of sport and daily living. -
Page 28: Converging Chest Press User's Guide
Converging Chest Press User’s Guide Action The Converging Chest Press trains the muscles involved in upper body pushing Extend your arms in a controlled motion. movements, including the pectoral muscles and triceps. Strengthening these muscles will help exercisers become more efficient in sports such as ... -
Page 29: Diverging Low Row User's Guide
Diverging Low Row User’s Guide Action The Diverging Low Row targets the muscles involved in upper body pulling Begin with your arms extended while maintaining a slight bend in the movements, including the lats, trapezius, biceps, deltoids, and the rhomboids. elbow. -
Page 30: Seated Calf Extension User's Guide
Seated Calf Extension User’s Guide Action The Seated Calf Extension targets the muscles involved in lifting your heel up Grasp both handles. for everyday motion and sport. Propelling motion for jumping, running and climbing stairs are just a few of the essential functions of these muscles. ... -
Page 31: Maintenance
³⁄₁₆-inch hex key wrench (ball end or T-handle) parts are tested and manufactured specifically for Precor commercial strength equipment. If you use parts not approved by Precor, you could void the Precor Limited Warranty. Use of parts not approved by Precor may cause injury. -
Page 32: Obtaining Service
If any items are missing, contact Date purchased: your dealer. If you need more information regarding customer support numbers or a list of Precor authorized service centers, visit the Precor website Model #: Serial #: at www.precor.com. -
Page 33: Daily Inspection
Clean any upholstery on the equipment. To clean the shrouds, Precor recommends mixing a few drops of mild Inspect pads for wear. dishwashing liquid in a gallon of water and using it to wipe the equipment with ... -
Page 34: Inspect Pads For Wear
Be sure to check fasteners at bolted joints to make sure the connections are Important: Do not reupholster pads or use pads not approved by Precor. secure. If a fastener is loose but in good condition, retighten it. If you are... -
Page 35: Inspect Cables And End Connections
Replace any cable at the first sign of wear using only broken coating in the area that passes over a pulley Precor-supplied replacement parts. With regular use, a cable can become worn and might fail. Sudden failure of a worn cable can cause severe injury A zigzag or wavy pattern to a user. -
Page 36: Check Warning And Instructional Labels
Check Warning and Instructional Labels In addition to inspecting the cables and end connections for damage, check the following: Inspect warning and instructional labels daily to make sure that all the information can be clearly read. If any portion is not visible or part of the label ... - Page 37 Precor products come equipped with a number of standard warning labels. The following two figures show sample warning labels you may see on the equipment depending on the model and product line: Figure 4: A warning label may appear on or near weight stacks where a cable...
-
Page 38: Weekly Inspection
Weekly Inspection Clean and Lubricate Guide Rods This section covers the tasks you should perform each week to maintain the Inspect the exposed areas of the guide rods for cleanliness. Using a dry cloth, equipment. Perform the following tasks as appropriate for the unit you are wipe any buildup of dirt or grease from the rods. -
Page 39: Inspect Pulleys
Inspect Pulleys Each week, give the cables and connections a thorough inspection and check Precor uses precision ball bearing idler pulleys to guide the cable smoothly. cable tensions. The following lists the specific things you need to inspect: Inspect each pulley for damage, including hairline cracks, chips, or missing ... -
Page 40: Inspect And Lubricate Bearings And Bushings
Inspect and Lubricate Bearings and Bushings Check and Lubricate Seat Adjustment Precor uses high quality bearings designed for strength applications and long The seat adjustment mechanism requires little maintenance. However, service life. Each week, do the following to maintain the bearings and bushings... -
Page 41: Monthly Inspection
Check for cracks, chipped paint, or rust. Touch up dings and chips in the paint as needed. Replace any component at first signs of wear. Note: You can order touch-up paint from Precor by calling Customer Support. Refer to Obtaining Service. -
Page 42: Annual Maintenance
Annual Maintenance Weight Stack Annual Maintenance Perform these tasks on an annual basis, as appropriate for your equipment. Once a year, Precor recommends disassembling the weight stack to clean and inspect it thoroughly. Shroud Removal Carefully remove the cable and guide rods from the weight stack. -
Page 43: Inspect And Lubricate Pop Pins
Inspect and Lubricate Pop Pins Lubricate Linear Ball Bearings Remove the pop pin assembly by loosening the cap. Some of the strength equipment contains linear ball bearings. CAUTION: Pulling out the pop pin may cause the unit to adjust position Lubricate the linear ball bearings with an NLGI grade 2 grease by applying a suddenly. -
Page 44: Precor Commercial Strength Equipment Limited Warranty
Structural frame parts and weldments: 10 years position adjustments, and so on). 7. This limited warranty does not cover and Precor does not warrant the work or All surface areas to include painted and plated surfaces: 1 year product of third party companies (for example, welding and other such work). - Page 45 3. Repairs performed on Precor equipment missing a serial number or with a serial not apply to you. PRECOR ALSO HEREBY DISCLAIMS AND EXCLUDES ALL OTHER tag that has been altered or defaced.
-
Page 46: Exclusive Remedies
Exclusion of Consequential and Incidental Damages For any product described above that fails to conform to its warranty, Precor will provide, at their option, one of the following: (1) repair; (2) replacement; or (3) refund PRECOR AND/OR ITS SUPPLIERS SHALL HAVE NO OBLIGATION OR LIABILITY, of the purchase price. - Page 48 Discovery Series Selectorized Line Owner’s Manual P.O. Box 7202 product design. Any party contemplating the use of Precor product designs is hereby forewarned that Precor CW39037-102 rev B, en Woodinville, WA USA 98072-4002 considers the unauthorized appropriation of its proprietary rights to be a very serious matter. Precor will...
-
Page 49: Assembly Guide
Assembly Guide Discovery™ Series Selectorized Line Glute Extension... - Page 51 Table of Contents Getting Started ................2 Installation Requirements ..............2 Required Tools..................2 Assembling the Equipment ............3 Attaching the Weight Tower to the Movement Frame ..... 4 Tightening All Frame Fasteners ............6 Stabilizing the Equipment ..............6 Routing the Cable Assembly ............7 Routing the Cable on the Weight Tower ........
-
Page 52: Getting Started
Getting Started Required Tools Assembly of each piece of Discovery Selectorized equipment takes about 30 minutes. If this is your first time assembling this equipment, allow more time. Torque wrench that can be fitted with the following hex bits: Installation Requirements ... -
Page 53: Assembling The Equipment
Make sure the equipment is stable and placed on a solid surface. The equipment is designed to be freestanding; however, it can be bolted to the floor for extra stability. Precor highly recommends that the equipment be bolted to the floor to reduce the risk of toppling the equipment due to improper use. -
Page 54: Attaching The Weight Tower To The Movement Frame
Attaching the Weight Tower to the 3. Locate the point where the cross support attaches to the weight tower. Movement Frame Using a ⁵ ₁₆-inch hex bit and a 1-inch socket, remove the four bolts and two domed washers. Note: Do not tighten fasteners until instructed to do so. Have your assistant hold the equipment frame in an upright, balanced position while you complete the following procedure. - Page 55 To attach the weight tower to the seat frame: To attach the glute extension to the weight tower: 1. Locate the point where the seat frame attaches to the weight tower. Using 1. Locate the point where the base support attaches to the weight tower. a ⁵...
-
Page 56: Tightening All Frame Fasteners
Tightening All Frame Fasteners Stabilizing the Equipment Once you have completed assembly, make sure all loose bolts are tightened. CAUTION: To prevent damage to the equipment foot, tighten it all the way Use the following procedure to fully tighten the bolts that apply to the into the frame before moving the equipment. -
Page 57: Routing The Cable Assembly
Routing the Cable Assembly Routing the Cable on the Weight Tower The cable is wrapped in packing material and attached to the equipment frame for shipment. Proper cable routing is shown in the following figure. The weight tower ships with the kick cover and pulley cover attached. To route the cable on the weight tower: 1. - Page 58 2. Grasp the kick cover on either side (see arrows in the following figure) and Threading the Cable Through the Top Frame of the press inward slightly so that the notches on the back of the kick cover Weight Tower unlock from their mounts.
- Page 59 To route the cable through the weight tower: 3. Using a ³ ₄-inch socket wrench and a ³ ₄-inch open-end wrench, remove the 1. Locate the pulley positioned over the opening where the cable will thread nut and cable retainer on the second pulley. up through the weight tower.
- Page 60 5. Thread the cable down through the opening under the second pulley, as 6. Guide the cable down to the weight stack. Remove and discard the shown in the following figure. temporary bolt threaded into the selector stem on the weight stack. 7.
-
Page 61: Adjusting The Cable Tension
Adjusting the Cable Tension 5. Make sure the cable bolt is threaded at least seven threads (turns). The distance from the underside of the bolt head to the top of the weight To adjust the cable tension: selector stem should be no more than 1¹ ₄-inch (32 mm). Refer to the 1. -
Page 62: Completing Assembly
Once assembly is complete, verify safe operation by checking the following CAUTION: Do not use power tools to tighten screws attaching the weight points: stack shroud components. Using power tools may void the Precor warranty. Cable tension is correct and the cable is moving smoothly on its pulleys. - Page 64 U.S. and foreign patents for both the mechanical construction and the visual aspects of its Discovery™ Series Selectorized Line AG P.O. Box 7202 product design. Any party contemplating the use of Precor product designs is hereby forewarned that Precor Glute Extension Woodinville, WA USA 98072-4002 considers the unauthorized appropriation of its proprietary rights to be a very serious matter.
Need help?
Do you have a question about the Discovery Series Selectorized Line and is the answer not in the manual?
Questions and answers