
Subscribe to Our Youtube Channel
Related Manuals for Sirona Orthophos XG 3D/Ceph


Summary of Contents for Sirona Orthophos XG 3D/Ceph
- Page 1 NMKOMNR kÉï=~ë=çÑW= loqelmelp=ud=Pa=L=`ÉéÜ fåëí~ää~íáçå=j~åì~ä båÖäáëÜ båÖäáëÜ Cover page...
-
Page 3: Table Of Contents
Sirona Dental Systems GmbH Table of contents Installation Manual ORTHOPHOS XG 3D / Ceph Table of contents About these Installation Instructions................. Scope ......................Other documentation required ..............Structure of the document................1.3.1 Identification of the danger levels............. 1.3.2 Formats and symbols used .............. - Page 4 Table of contents Sirona Dental Systems GmbH Installation Manual ORTHOPHOS XG 3D / Ceph 4.1.2 Ceph arm ..................4.1.2.1 Accessories ............... 4.1.2.2 Hygienic protection............4.1.3 Adjustment sets................Transport to the installation site ..............4.2.1 ORTHOPHOS .................. 4.2.1.1 Transport with packaging attached (normal case) ....
- Page 5 Sirona Dental Systems GmbH Table of contents Installation Manual ORTHOPHOS XG 3D / Ceph Electrical connection ....................Connecting the control cables ............... Connecting the line voltage ................8.2.1 Connecting the unit ................8.2.2 Connecting the media converter ............Safety checks ......................
- Page 6 Table of contents Sirona Dental Systems GmbH Installation Manual ORTHOPHOS XG 3D / Ceph 11.10 Service routines for startup ................121 11.10.1 Service menu and service routines ..........121 11.10.1.1Displays and symbols in the service menu ....... 121 11.10.2 Basic operating procedures in the service menu ......123 11.10.2.1Activating the service menu ..........
- Page 7 Sirona Dental Systems GmbH Table of contents Installation Manual ORTHOPHOS XG 3D / Ceph Startup, measurements and tests (for USA/Canada only) ........178 12.1 Safety ......................178 12.2 Operation notes..................... 179 12.3 Auxiliary devices required ................180 12.4 Checking the power supply connection............181 12.5...
- Page 8 Table of contents Sirona Dental Systems GmbH Installation Manual ORTHOPHOS XG 3D / Ceph 13.2.2 3D adjustment/calibration..............248 13.2.2.1 Sensor ................248 13.2.2.2 Aperture................250 13.2.2.3 Shading ................252 13.2.2.4 Shading (5x5) ..............253 13.2.2.5 Geometry................254 13.2.2.6 Dosimetry ................255 13.2.3 Saving adjustment/calibration data ..........
-
Page 9: About These Installation Instructions
About these Installation Instructions Scope These installation instructions describe the installation of the Scope of installation instructions: XG 3D ORTHOPHOS XG 3D/Ceph digital volume tomograph. They are intended for use exclusively by trained and authorized distributors and service technicians. Other documentation required... -
Page 10: Structure Of The Document
1 About these Installation Instructions Sirona Dental Systems GmbH 1.3 Structure of the document Installation Manual ORTHOPHOS XG 3D / Ceph Structure of the document 1.3.1 Identification of the danger levels To prevent personal injury and material damage, please observe the warning and safety information provided in the present operating instructions. -
Page 11: Safety Instructions
Sirona Dental Systems GmbH 2 Safety instructions Installation Manual ORTHOPHOS XG 3D / Ceph 2.1 Information on the unit Safety instructions Information on the unit The following symbols are applied to the unit: Accompanying documents Accompanying documents This symbol is affixed next to the unit rating plate. -
Page 12: Qualifications Of Service Personnel
For reasons of product safety, this product may be operated only with original Sirona accessories or third-party accessories expressly approved by Sirona. The user is responsible for any damage resulting from the use of non-approved accessories. 2.10... -
Page 13: Electromagnetic Compatibility
Sirona Dental Systems GmbH 2 Safety instructions Installation Manual ORTHOPHOS XG 3D / Ceph 2.11 Electromagnetic compatibility 2.11 Electromagnetic compatibility The unit complies with the requirements of standard IEC 60601-1-2. Medical electrical equipment is subject to special EMC preventive measures. It must be installed and operated as specified in the document "Installation Requirements". -
Page 14: Unit Description
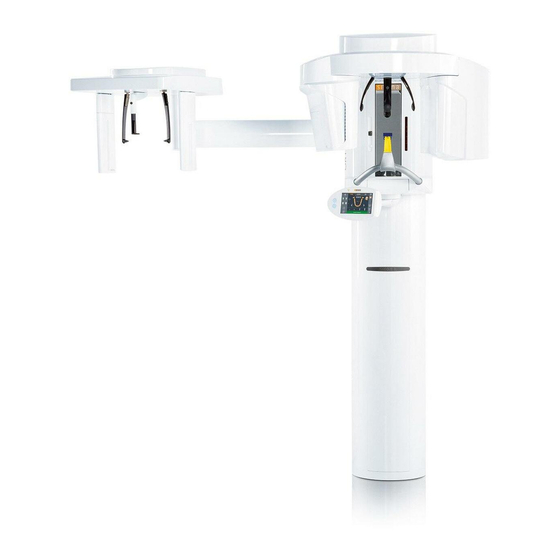
3 Unit description Sirona Dental Systems GmbH 3.1 System versions Installation Manual ORTHOPHOS XG 3D / Ceph Unit description System versions XG3D device version ORTHOPHOS XG 3D, digital volume tomograph ORTHOPHOS XG 3D/Ceph, digital volume tomograph with cephalometer, left-arm version ORTHOPHOS XG 3D/Ceph,... -
Page 15: Dimensions/Space Requirements
Sirona Dental Systems GmbH 3 Unit description Installation Manual ORTHOPHOS XG 3D / Ceph 3.2 Dimensions/Space requirements Dimensions/Space requirements 3.2.1 Front view NOTICE Unit can travel to the ceiling. The minimum ceiling height should be 2.10 m (82 3/4"). If the ceiling height is lower than 2.27 m (89 1/2") (max. -
Page 16: Top View
3 Unit description Sirona Dental Systems GmbH 3.2 Dimensions/Space requirements Installation Manual ORTHOPHOS XG 3D / Ceph 3.2.2 Top view IMPORTANT The measurements on the drawings are specified in both mm and inches. Top view: XG 3D min. 23 5/8” 20 1/2“... -
Page 17: Top View Of Floor Stand
Sirona Dental Systems GmbH 3 Unit description Installation Manual ORTHOPHOS XG 3D / Ceph 3.2 Dimensions/Space requirements 3.2.3 Top view of floor stand IMPORTANT The measurements on the drawings are specified in both mm and inches. Top view of floor stand: XG 3 / 5 / 3D / 3D ready min. -
Page 18: Mounting Options
3 Unit description Sirona Dental Systems GmbH 3.3 Mounting options Installation Manual ORTHOPHOS XG 3D / Ceph Mounting options Mounting options: XG 3D Standard version Wall-mounted installation with 1 wall holder (short) and floor fastening if both wall and floor installation are possible on-site (see section "Standard version [ →... -
Page 19: Installation Versions
Sirona Dental Systems GmbH 3 Unit description Installation Manual ORTHOPHOS XG 3D / Ceph 3.4 Installation versions Installation versions Installation versions: XG 3D Standard installation without remote control with release button on the coiled cable Unit in the treatment room. Installation version 1... -
Page 20: Delivery And Transport
4 Delivery and transport Sirona Dental Systems GmbH 4.1 Delivery Installation Manual ORTHOPHOS XG 3D / Ceph Delivery and transport Delivery NOTICE Damage following delivery Possible transport damage If the shipment was damaged during transport, document all damage carefully and contact the responsible carrying agent immediately. - Page 21 Make a note on the delivery slip that the indicator is activated. Ensure that the driver from the transport company confirms this on the delivery slip. Fax the delivery slip to the Sirona Customer Service Center (CSC). Enter the state of the indicators in the startup report in the case of warranty claims.
-
Page 22: Orthophos Xg 3D
4 Delivery and transport Sirona Dental Systems GmbH 4.1 Delivery Installation Manual ORTHOPHOS XG 3D / Ceph 4.1.1 ORTHOPHOS XG 3D Dimensions and weight Dimensions Length Width Height in cm in inches 78 3/4 27 1/8 Weight in kg in lbs Scope of supply The packaging of the X-ray unit is designed both for protection during transport and as an installation aid. - Page 23 Sirona Dental Systems GmbH 4 Delivery and transport Installation Manual ORTHOPHOS XG 3D / Ceph 4.1 Delivery Installation aid (please save the two lateral Styrofoam packaging parts) Scope of supply: ● Software 2D / 3D ● Accessories and hygienic protective sleeves [ → 27] ●...
-
Page 24: Accessories
4 Delivery and transport Sirona Dental Systems GmbH 4.1 Delivery Installation Manual ORTHOPHOS XG 3D / Ceph Accessories 4.1.1.1 Forehead support and (1x) Temple support (2x) Buttons for forehead and temple support (3x) TMJ supports 1 and (1x) TMJ support 2 (1x) - Page 25 Sirona Dental Systems GmbH 4 Delivery and transport Installation Manual ORTHOPHOS XG 3D / Ceph 4.1 Delivery Contact segment blue (1x) Bite block part blue (1x) Contact segment standard yellow (1x) Bite block part standard yellow (1x) Rigid bite block (1x) Bite block plate holder OK (upper jaw)
-
Page 26: Sirona Dental Systems Gmbh
4 Delivery and transport Sirona Dental Systems GmbH 4.1 Delivery Installation Manual ORTHOPHOS XG 3D / Ceph Occlusal bite block (1x) Universal bite block (1x) Bite block foam (100x) 63 03 452 D3352 D3352.031.05.08.02 10.2015... -
Page 27: Hygienic Protection
Sirona Dental Systems GmbH 4 Delivery and transport Installation Manual ORTHOPHOS XG 3D / Ceph 4.1 Delivery Hygienic protection 4.1.1.2 Forehead and temple supports (500x) Bite block (500x) Chin rest and bar (100x) Bite block parts and (500x) contact segments Rigid bite block... - Page 28 4 Delivery and transport Sirona Dental Systems GmbH 4.1 Delivery Installation Manual ORTHOPHOS XG 3D / Ceph 3D module 4.1.1.3 3D module delivery Dimensions and weight Dimensions Length Width Height in cm in inches 15 3/4 14 1/8 Weight in kg in lbs...
-
Page 29: Ceph Arm
Sirona Dental Systems GmbH 4 Delivery and transport Installation Manual ORTHOPHOS XG 3D / Ceph 4.1 Delivery 4.1.2 Ceph arm Dimensions and weight Dimensions (cm) 175 x 78 x 73 (inches) 68 7/8 x 30 3/4 x 28 3/4 Weight (kg) (lbs) -
Page 30: Accessories
4 Delivery and transport Sirona Dental Systems GmbH 4.1 Delivery Installation Manual ORTHOPHOS XG 3D / Ceph Accessories 4.1.2.1 Nose support (1x) Ear plug holders with ear plug fixation (2x) Carpus support plate (1x) Hygienic protection 4.1.2.2 Hygienic protective sleeves for nose support... -
Page 31: Adjustment Sets
Sirona Dental Systems GmbH 4 Delivery and transport Installation Manual ORTHOPHOS XG 3D / Ceph 4.1 Delivery 4.1.3 Adjustment sets 2D adjustment: Panoramic Heading: 2D adjustment sets for XG 3D OP XG needle phantom Set of Torx offset screwdrivers Heading: 2D adjustment sets for ceph XG 3D... -
Page 32: Sirona Dental Systems Gmbh
4 Delivery and transport Sirona Dental Systems GmbH 4.1 Delivery Installation Manual ORTHOPHOS XG 3D / Ceph 3D adjustment/calibration 3D adjustment set: XG 3D Geometry phantom Acceptance and constancy test XG 3D new constancy test phantom OP XG 3D constancy test phantom; worldwide, Germany up to 06.2015... -
Page 33: Transport To The Installation Site
Sirona Dental Systems GmbH 4 Delivery and transport Installation Manual ORTHOPHOS XG 3D / Ceph 4.2 Transport to the installation site Transport to the installation site 4.2.1 ORTHOPHOS NOTICE Possible transport damage Leave the packaging attached to the unit during the entire transport to the installation site. -
Page 34: Transport Without Pallet (Exception)
4 Delivery and transport Sirona Dental Systems GmbH 4.2 Transport to the installation site Installation Manual ORTHOPHOS XG 3D / Ceph Transport without pallet (exception) 4.2.1.2 If the pallet is too wide for transport to the installation site, you may unscrew the pallet from the wooden support (A) and transport the unit by means of the wooden supports without the pallet. -
Page 35: Module
Sirona Dental Systems GmbH 4 Delivery and transport Installation Manual ORTHOPHOS XG 3D / Ceph 4.2 Transport to the installation site 4.2.2 3D module NOTICE Transport of 3D module Possible transport damage The 3D module is a sensitive instrument. Only remove the packaging immediately prior to installing the 3D module on the unit. -
Page 36: Installation: X-Ray Unit
5 Installation: X-ray unit Sirona Dental Systems GmbH 5.1 Installation material Installation Manual ORTHOPHOS XG 3D / Ceph Installation: X-ray unit Installation material 5.1.1 Standard version For installation on wooden stud frame structures 63 03 452 D3352 D3352.031.05.08.02 10.2015... - Page 37 Sirona Dental Systems GmbH 5 Installation: X-ray unit Installation Manual ORTHOPHOS XG 3D / Ceph 5.1 Installation material Wall/floor mounting Hexagon wood screw 8x80 (5/16x3") 4 pc. Standard installation material: XG Plastic wall plug S10 2 pc. Screw M8x30 2 pc. Washer Ø 8.4 6 pc.
-
Page 38: Option 1: With Second Wall Holder
5 Installation: X-ray unit Sirona Dental Systems GmbH 5.1 Installation material Installation Manual ORTHOPHOS XG 3D / Ceph 5.1.2 Option 1: with second wall holder for installation on wooden stud frame structures Additional wall holder (for bottom wall mounting) Wall holder (long): 1 pc. -
Page 39: Option 2: Floor Stand Installation
Sirona Dental Systems GmbH 5 Installation: X-ray unit Installation Manual ORTHOPHOS XG 3D / Ceph 5.1 Installation material 5.1.3 Option 2: Floor stand installation Floor stand installation material: XG 3D Mounting hardware Floor stand Floor stand covers Slide cover 63 03 452 D3352... - Page 40 5 Installation: X-ray unit Sirona Dental Systems GmbH 5.1 Installation material Installation Manual ORTHOPHOS XG 3D / Ceph Floor stand installation Floor stand 1 pc. Floor stand cover 1 pc. Wood screw 10x160 (3/8x6") 5 pc. Plastic wall plug S12 5 pc.
-
Page 41: Tools, Materials, And Measurement Tools You Will Need
Sirona Dental Systems GmbH 5 Installation: X-ray unit Installation Manual ORTHOPHOS XG 3D / Ceph 5.2 Tools, materials, and measurement tools you will need Tools, materials, and measurement tools you will need 5.2.1 Tools and materials ● Masonry drill bit 10mm (3/8") -
Page 42: Measurement Tools
● Multimeter or ammeter (battery-operated) ● Test unit for measuring the leakage current of the unit: For measurements, Sirona recommends an automatic tester (example Automatic tester in accordance with IEC 62353 illustration) which complies with standard IEC 62353. If you do not use an automatic tester, please pay attention to the specifications in the standard IEC 62353. -
Page 43: Wall Mounting (Standard And Option 1)
Sirona Dental Systems GmbH 5 Installation: X-ray unit Installation Manual ORTHOPHOS XG 3D / Ceph 5.3 Wall mounting (standard and option 1) Wall mounting (standard and option 1) NOTICE Reduced image quality Note the wall and ground conditions. If a carpet is present at the unit installation site, it must be removed. -
Page 44: Sirona Dental Systems Gmbh
5 Installation: X-ray unit Sirona Dental Systems GmbH 5.3 Wall mounting (standard and option 1) Installation Manual ORTHOPHOS XG 3D / Ceph 3. Set up the unit by tilting the transport pallet upward. Tip: If you have transported the unit on the wooden support without a pallet, set the unit upright with the wooden support. - Page 45 Sirona Dental Systems GmbH 5 Installation: X-ray unit Installation Manual ORTHOPHOS XG 3D / Ceph 5.3 Wall mounting (standard and option 1) Mounting the first (upper) wall holder (standard) ➢ Mount the upper wall holder. Mounting the second (lower) wall holder (option 1) ➢...
- Page 46 5 Installation: X-ray unit Sirona Dental Systems GmbH 5.3 Wall mounting (standard and option 1) Installation Manual ORTHOPHOS XG 3D / Ceph Mounting the unit on the wall holder (standard and option 1) NOTICE Note on moving the unit by the bar: XG 3 / 5 / 3D / 3D ready...
- Page 47 Sirona Dental Systems GmbH 5 Installation: X-ray unit Installation Manual ORTHOPHOS XG 3D / Ceph 5.3 Wall mounting (standard and option 1) Leveling the unit and fastening it to the floor (standard and option 1) 1. Remove the transport safety device (G).
- Page 48 5 Installation: X-ray unit Sirona Dental Systems GmbH 5.3 Wall mounting (standard and option 1) Installation Manual ORTHOPHOS XG 3D / Ceph 5. Drill through the recesses of the stand into the floor. 6. Insert plugs (K) and check the alignment of the stand again.
-
Page 49: Installing The Floor Stand (Option 2)
Sirona Dental Systems GmbH 5 Installation: X-ray unit Installation Manual ORTHOPHOS XG 3D / Ceph 5.4 Installing the floor stand (option 2) Installing the floor stand (option 2) NOTICE Reduced image quality Even when the unit is installed using the floor stand it must be secured with the upper wall holder. -
Page 50: Sirona Dental Systems Gmbh
5 Installation: X-ray unit Sirona Dental Systems GmbH 5.4 Installing the floor stand (option 2) Installation Manual ORTHOPHOS XG 3D / Ceph Installing the floor stand NOTICE Possible transport damage Leave the center styrofoam packaging attached to the unit for protection. NOTICE... - Page 51 Sirona Dental Systems GmbH 5 Installation: X-ray unit Installation Manual ORTHOPHOS XG 3D / Ceph 5.4 Installing the floor stand (option 2) 6. Loosen the screws and remove the holder (F). 7. Remove the cables from the stand and pull them out toward the rear.
- Page 52 5 Installation: X-ray unit Sirona Dental Systems GmbH 5.4 Installing the floor stand (option 2) Installation Manual ORTHOPHOS XG 3D / Ceph 11. Screw the support (L) firmly onto the base plate (N) using the 4 4x Ø 10,5 screws and washers (M).
- Page 53 Sirona Dental Systems GmbH 5 Installation: X-ray unit Installation Manual ORTHOPHOS XG 3D / Ceph 5.4 Installing the floor stand (option 2) Setting up and leveling the unit Setting up the unit and leveling the floor stand installation: XG 3 / 5 / 3D / 3D ready 1.
- Page 54 5 Installation: X-ray unit Sirona Dental Systems GmbH 5.4 Installing the floor stand (option 2) Installation Manual ORTHOPHOS XG 3D / Ceph 6. Loosen screws (P) and adjusting nuts (O) again slightly. 7. Level the unit in both directions with the help of the spirit level by...
- Page 55 Sirona Dental Systems GmbH 5 Installation: X-ray unit Installation Manual ORTHOPHOS XG 3D / Ceph 5.4 Installing the floor stand (option 2) Attaching to the wall and floor IMPORTANT Use the long wall holder for the floor stand installation [ → 39].
-
Page 56: Remove The Transport Safety Device
5 Installation: X-ray unit Sirona Dental Systems GmbH 5.5 Remove the transport safety device Installation Manual ORTHOPHOS XG 3D / Ceph Remove the transport safety device 1. Remove transport safety devices (A) on board DX32 before starting up the unit. 2. Keep transport safety devices (A) in a safe place. You will need them should the unit be moved again. -
Page 57: Installation: Combisensor
Sirona Dental Systems GmbH 6 Installation: Combisensor Installation Manual ORTHOPHOS XG 3D / Ceph 6.1 Installation material Installation: Combisensor The combisensor consists of the 3D module and a 2D sensor (panoramic). Installation material Required tools ® ● Screwdriver, Torx / T10 Screwdriver, Torx/TX10 Screwdriver, Torx/TX20 ®... -
Page 58: Installing The 3D Module
6 Installation: Combisensor Sirona Dental Systems GmbH 6.3 Installing the 3D module Installation Manual ORTHOPHOS XG 3D / Ceph Installing the 3D module NOTICE Damage to the flat panel The flat panel of the 3D module is a sensitive component. Be careful not to touch the flat panel during assembly. -
Page 59: Sirona Dental Systems Gmbh
Sirona Dental Systems GmbH 6 Installation: Combisensor Installation Manual ORTHOPHOS XG 3D / Ceph 6.3 Installing the 3D module The diaphragm and the sensor move into the starting position for volume exposures. 7. Switch the unit off again. 8. Attach the "top 3D module" cover: Loosen the screw (B) (approx. - Page 60 6 Installation: Combisensor Sirona Dental Systems GmbH 6.3 Installing the 3D module Installation Manual ORTHOPHOS XG 3D / Ceph 10. Hook the 3D module (C) onto the rotation unit (D) and secure it immediately with the 3 screws (E). 11. Attach the sheet metal bracket (F) (incl. cables and strain reliefs) to the 3D module using the 3 screws (G).
- Page 61 Sirona Dental Systems GmbH 6 Installation: Combisensor Installation Manual ORTHOPHOS XG 3D / Ceph 6.3 Installing the 3D module 13. Reattach the EMC cover (A) and fasten it with the 4 screws (H). 14. Screw the retaining bracket (I) onto the 3D module with the 4 screws (J).
-
Page 62: Inserting The 2D Sensor
Insert the 2D sensor carefully into the sensor holder from below and avoid any unnecessary leverage. ➢ NOTICE! The lock must engage audibly. Insert the 2D sensor (K) (included in the ORTHOPHOS XG 3D/Ceph scope of supply) into the sensor holder of the 3D module. 63 03 452 D3352... -
Page 63: Final Installation Work
Sirona Dental Systems GmbH 6 Installation: Combisensor Installation Manual ORTHOPHOS XG 3D / Ceph 6.5 Final installation work Final installation work ➢ Attach the "bottom 3D module" covers (A). The installation of the combisensor is now complete. 63 03 452 D3352 D3352.031.05.08.02 10.2015... -
Page 64: Installation: Remote Control
7 Installation: Remote control Sirona Dental Systems GmbH 7.1 Installation material Installation Manual ORTHOPHOS XG 3D / Ceph Installation: Remote control IMPORTANT For operation with a remote control, the unit must be configured accordingly. Check the configuration after startup via the service routine S017: Test step 6. -
Page 65: Installation
Sirona Dental Systems GmbH 7 Installation: Remote control Installation Manual ORTHOPHOS XG 3D / Ceph 7.3 Installation Installation The cable for the remote control can be installed on the surface or concealed installation beneath the surface (concealed). For , the control surface installation cable is drawn into the chassis from the rear. - Page 66 7 Installation: Remote control Sirona Dental Systems GmbH 7.3 Installation Installation Manual ORTHOPHOS XG 3D / Ceph surface installation ➢ Fasten the chassis firmly to the wall with the three screws (C). 3x 4x30 Shortening the cable 1. Shorten cable L117 to the desired length.
- Page 67 Sirona Dental Systems GmbH 7 Installation: Remote control Installation Manual ORTHOPHOS XG 3D / Ceph 7.3 Installation Attaching the strain relief Left: concealed installation; right: surface installation ➢ Attach cable L117 to the strain relief in the chassis. The cable length between the strain relief and the stripped wire ends should be 200 mm (8").
-
Page 68: Connecting The Control Cables (Remote)
7 Installation: Remote control Sirona Dental Systems GmbH 7.4 Connecting the control cables (REMOTE) Installation Manual ORTHOPHOS XG 3D / Ceph Connecting the control cables (REMOTE) 7.4.1 Installation version 1: Without coiled cable 15 m X108 590“ L117 L117 X108 XRAY WHGN... -
Page 69: Installation Version 2: With Spiral Cable
Sirona Dental Systems GmbH 7 Installation: Remote control Installation Manual ORTHOPHOS XG 3D / Ceph 7.4 Connecting the control cables (REMOTE) 7.4.2 Installation version 2: With spiral cable CAUTION Operation of the remote control via the membrane keyboard is prohibited when installing the remote control with release button. -
Page 70: Connecting The X-Ray Warning Lamp
7 Installation: Remote control Sirona Dental Systems GmbH 7.5 Connecting the X-ray warning lamp Installation Manual ORTHOPHOS XG 3D / Ceph Connecting the X-ray warning lamp You can activate an X-ray warning lamp via the remote control. NOTICE A maximum load of 50W is permissible. No additional circuit may be connected. -
Page 71: Final Installation Work
Sirona Dental Systems GmbH 7 Installation: Remote control Installation Manual ORTHOPHOS XG 3D / Ceph 7.6 Final installation work Final installation work 1. Reassemble the remote control. 2. NOTICE! Make sure that no cables are pulled off when you clip the cover on. Hang the release button (if available) in the holder. -
Page 72: Connecting A Door Contact Switch
7 Installation: Remote control Sirona Dental Systems GmbH 7.7 Connecting a door contact switch Installation Manual ORTHOPHOS XG 3D / Ceph Connecting a door contact switch X108 X108 WHGN WHBN BU/WHOG DX42 WHBU/OG Door contact switch Code Appearance WHGN White/green Green Brown... -
Page 73: Electrical Connection
Sirona Dental Systems GmbH 8 Electrical connection Installation Manual ORTHOPHOS XG 3D / Ceph 8.1 Connecting the control cables Electrical connection Connecting the control cables X108 X101 L117 X103 SIDEXIS Kat.5 SC1:1 RJ45 0 0 0 0 0 Wagoklemme Media converter Switch (not included in the... -
Page 74: Connecting The Line Voltage
8 Electrical connection Sirona Dental Systems GmbH 8.2 Connecting the line voltage Installation Manual ORTHOPHOS XG 3D / Ceph Connecting the line voltage IMPORTANT When operating the unit at exhibitions and trade fairs, read the chapter entitled Using demo mode – operation without radiation release [ → 173]. -
Page 75: Connecting The Media Converter
Sirona Dental Systems GmbH 8 Electrical connection Installation Manual ORTHOPHOS XG 3D / Ceph 8.2 Connecting the line voltage Power connection: XG 3 / 5 / 3D / 3D ready CAUTION Incorrectly connected units can pose a risk to patients Building installation with 3x1.5 mm² or 3x2.5 mm² (16 AWG or 14 AWG) and a 16 A/20 A overcurrent circuit breaker. -
Page 76: Safety Checks
9 Safety checks Sirona Dental Systems GmbH 9.1 Checking the protective ground wires Installation Manual ORTHOPHOS XG 3D / Ceph Safety checks Checking the protective ground wires DANGER General - Ground wire test Perilous shock hazard! It is essential to switch the unit off and to wait at least one more 1 minute before beginning the check! 1. - Page 77 Sirona Dental Systems GmbH 9 Safety checks Installation Manual ORTHOPHOS XG 3D / Ceph 9.1 Checking the protective ground wires Check whether the ground wire A and B GNYE wire 0.1 Ω resistance complies with the A and C 2. Protective ground 0.1 Ω...
- Page 78 9 Safety checks Sirona Dental Systems GmbH 9.1 Checking the protective ground wires Installation Manual ORTHOPHOS XG 3D / Ceph Measuring point A: Central ground wire Measuring point A - Ground wire test XG 63 03 452 D3352 D3352.031.05.08.02 10.2015...
- Page 79 Sirona Dental Systems GmbH 9 Safety checks Installation Manual ORTHOPHOS XG 3D / Ceph 9.1 Checking the protective ground wires Measuring points B and C: GNYE power connection and 2nd ground Checking measuring points B and C - protective ground wire wire...
-
Page 80: Checking The Device Leakage Current
DIN VDE 0100-710 applies in Germany. For measurements, Sirona recommends an automatic tester (example Automatic tester in accordance with IEC 62353 illustration) which complies with standard IEC 62353. If you do not use an automatic tester, please pay attention to the specifications in the standard IEC 62353. -
Page 81: Installation: Ceph Arm
Sirona Dental Systems GmbH 10 Installation: Ceph arm Installation Manual ORTHOPHOS XG 3D / Ceph 10.1 Installation material Installation: Ceph arm NOTICE Reduced image quality For operation of the unit with floor stand and Ceph, an additional mounting using the upper wall holder is absolutely necessary. -
Page 82: Required Tools
10 Installation: Ceph arm Sirona Dental Systems GmbH 10.2 Required tools Installation Manual ORTHOPHOS XG 3D / Ceph 10.2 Required tools Graphics: Open-end wrench, neutral ● Open-end wrench, 8 mm A/F Open-end wrench, 8 mm A/F ● Open-end wrench, 10 mm A/F... -
Page 83: Installation
Sirona Dental Systems GmbH 10 Installation: Ceph arm Installation Manual ORTHOPHOS XG 3D / Ceph 10.3 Installation 10.3 Installation 10.3.1 Ceph arm mounted on left-hand side Preparing the unit 1. Loosen the screws (A). 2. Detach the cover (B). 3. Remove the cover (C) by pulling it upwards. - Page 84 10 Installation: Ceph arm Sirona Dental Systems GmbH 10.3 Installation Installation Manual ORTHOPHOS XG 3D / Ceph Positioning the ceph arm 1. Position the cardboard support next to the unit. 2. Position the ceph arm with the styrofoam packaging on top. 3. Remove the adhesive tape and the cover (E) from the ceph packaging.
- Page 85 Sirona Dental Systems GmbH 10 Installation: Ceph arm Installation Manual ORTHOPHOS XG 3D / Ceph 10.3 Installation 9. Use the arrow keys (I) on the control panel to lower the unit until the bearing bolts on the unit are at the same height as the drillings on the ceph support arm.
-
Page 86: Ceph Arm Mounted On Right-Hand Side
10 Installation: Ceph arm Sirona Dental Systems GmbH 10.3 Installation Installation Manual ORTHOPHOS XG 3D / Ceph 10.3.2 Ceph arm mounted on right-hand side Preparing the unit 1. Loosen the screws (A). 2. Detach the cover (B). 3. Remove the cover (C) by pulling it upwards. - Page 87 Sirona Dental Systems GmbH 10 Installation: Ceph arm Installation Manual ORTHOPHOS XG 3D / Ceph 10.3 Installation Positioning the ceph arm 1. Position the cardboard support next to the unit. 2. Position the ceph arm with the styrofoam packaging on top. 3. Remove the adhesive tape and the cover (E) from the ceph packaging.
- Page 88 10 Installation: Ceph arm Sirona Dental Systems GmbH 10.3 Installation Installation Manual ORTHOPHOS XG 3D / Ceph 9. Use the arrow keys (I) on the control panel to lower the unit until the bearing bolts on the unit are at the same height as the drillings on the ceph support arm.
- Page 89 Sirona Dental Systems GmbH 10 Installation: Ceph arm Installation Manual ORTHOPHOS XG 3D / Ceph 10.3 Installation 4. NOTICE! Never crush the cables. Ensure that the cover can be easily attached. Attach the cover (B). 5. Remove the styrofoam packaging from the ceph arm.
-
Page 90: Installing The Secondary Diaphragm
10 Installation: Ceph arm Sirona Dental Systems GmbH 10.3 Installation Installation Manual ORTHOPHOS XG 3D / Ceph 10.3.3 Installing the secondary diaphragm 1. Remove the secondary diaphragm from the packaging. 2. Remove the safety cable tie (A) for the screws. 3. Guide the secondary diaphragm beneath the ceph arm and slide the connector upward through the opening. -
Page 91: Connecting Control Cables
Sirona Dental Systems GmbH 10 Installation: Ceph arm Installation Manual ORTHOPHOS XG 3D / Ceph 10.4 Connecting control cables 10.4 Connecting control cables Device Ceph arm LAN coupling IMPORTANT Use the LAN coupling supplied (C) to connect cables L37 and L40. 1. Connect the unit and the Ceph arm as shown in the connection diagram above. -
Page 92: Running The Cables For The Left-Hand Arm
10 Installation: Ceph arm Sirona Dental Systems GmbH 10.4 Connecting control cables Installation Manual ORTHOPHOS XG 3D / Ceph 5. Roll the cable into a loop and stow it away in the tube. 6. Close the tube by attaching the cover (D). -
Page 93: Running The Cables For The Right-Hand Arm
Sirona Dental Systems GmbH 10 Installation: Ceph arm Installation Manual ORTHOPHOS XG 3D / Ceph 10.4 Connecting control cables 10.4.2 Running the cables for the right-hand arm 1. Guide the cable on the unit through the groove (A). Running the arm cables 2. -
Page 94: Final Installation Work
10 Installation: Ceph arm Sirona Dental Systems GmbH 10.5 Final installation work Installation Manual ORTHOPHOS XG 3D / Ceph 10.5 Final installation work The following steps apply to both left-handed and right-handed arms. 1. Use the spirit level to check that the secondary diaphragm is vertical. - Page 95 Sirona Dental Systems GmbH 10 Installation: Ceph arm Installation Manual ORTHOPHOS XG 3D / Ceph 10.5 Final installation work 8. Insert both ear plug holders and fasten them securely using the screws (E). 9. Press the button (F) and insert the nose support.
-
Page 96: Initial Startup
11 Initial startup Sirona Dental Systems GmbH 11.1 Attaching the covers Installation Manual ORTHOPHOS XG 3D / Ceph Initial startup 11.1 Attaching the covers IMPORTANT Attaching cover parts: XG 3 / 5 / 3D / 3D ready Only attach these covers (B and C) if the unit is installed with the floor stand and is not standing against a wall. -
Page 97: Inserting The Forehead And Temple Supports
Sirona Dental Systems GmbH 11 Initial startup Installation Manual ORTHOPHOS XG 3D / Ceph 11.2 Inserting the forehead and temple supports 4. Use the 4 screws (A) to fasten the assembled housing cover to the unit. For installation with floor stand only: Place the four spring clips (E) on the base plate. -
Page 98: Inserting The Ceph Sensor (For Ceph Versions)
11 Initial startup Sirona Dental Systems GmbH 11.3 Inserting the ceph sensor (for ceph versions) Installation Manual ORTHOPHOS XG 3D / Ceph 11.3 Inserting the ceph sensor (for ceph versions) NOTICE Damage to the sensor The sensor is a sensitive component, and therefore must be handled with special care. -
Page 99: Installing The It Package
Sirona Dental Systems GmbH 11 Initial startup Installation Manual ORTHOPHOS XG 3D / Ceph 11.4 Installing the IT package 11.4 Installing the IT package Information on the connection of the Reconstruction and Control Unit (RCU) and the software installations can be found in the separate GALILEOS / ORTHOPHOS XG 3D Software installation Instructions (REF 61 42 389). -
Page 100: Switching The Unit On
11 Initial startup Sirona Dental Systems GmbH 11.5 Switching the unit on Installation Manual ORTHOPHOS XG 3D / Ceph 11.5 Switching the unit on WARNING X-rays Be sure to observe the radiation protection regulations applicable in your country. ➢ No person may be positioned in the unit when it is switched on. -
Page 101: Factory Setting After Switch-On
Sirona Dental Systems GmbH 11 Initial startup Installation Manual ORTHOPHOS XG 3D / Ceph 11.5 Switching the unit on IMPORTANT After switch-on, the unit requires approx. 1 min. of warm-up time. At the same time, the self-adjustment routine for the mechanics and the electronics of the unit is performed. -
Page 102: Performing A Mechanical Function Test
11 Initial startup Sirona Dental Systems GmbH 11.6 Performing a mechanical function test Installation Manual ORTHOPHOS XG 3D / Ceph 11.6 Performing a mechanical function test The mechanical function of the rotation unit is checked via a test cycle. The test cycle is executed without radiation. The test cycle is used to check that the unit is functioning correctly and to ensure that a complete, uninterrupted cycle is possible. - Page 103 Sirona Dental Systems GmbH 11 Initial startup Installation Manual ORTHOPHOS XG 3D / Ceph 11.6 Performing a mechanical function test Performing a 3D (volume) test cycle ✔ The unit must be switched on. 1. Touch the 3D symbol at the top of the touchscreen.
-
Page 104: Setting Up The X-Ray Component Via The Sixabcon Program
11 Initial startup Sirona Dental Systems GmbH 11.7 Setting up the X-ray component via the SIXABCon program Installation Manual ORTHOPHOS XG 3D / Ceph 11.7 Setting up the X-ray component via the SIXABCon program Since it is addressable via the network, the X-ray component can in principle be activated for X-ray image acquisition by any of the PCs connected to the network. -
Page 105: Starting Sixabcon
Sirona Dental Systems GmbH 11 Initial startup Installation Manual ORTHOPHOS XG 3D / Ceph 11.7 Setting up the X-ray component via the SIXABCon program 11.7.1 Starting SIXABCon SiXABConProgram 63 03 452 D3352 D3352.031.05.08.02 10.2015... - Page 106 11 Initial startup Sirona Dental Systems GmbH 11.7 Setting up the X-ray component via the SIXABCon program Installation Manual ORTHOPHOS XG 3D / Ceph ✔ When using SIDEXIS XG SIDEXIS XG is installed. (Version 2.0 or later) 1. Start the SIDEXIS Manager via “start/Program Files/SIDEXIS XG/ SIDEXIS Manager”.
- Page 107 Sirona Dental Systems GmbH 11 Initial startup Installation Manual ORTHOPHOS XG 3D / Ceph 11.7 Setting up the X-ray component via the SIXABCon program ✔ When using SIDEXIS 4 is installed. SIDEXIS 4 1. Start SIDEXIS 4. 2. In SIDEXIS 4, call the “SIDEXIS Tools/Devices” configuration menu.
-
Page 108: Selecting An X-Ray Component
11 Initial startup Sirona Dental Systems GmbH 11.7 Setting up the X-ray component via the SIXABCon program Installation Manual ORTHOPHOS XG 3D / Ceph 11.7.2 Selecting an X-ray component 1. Switch all networkable X-ray components off. 2. Start the SiXABCon program. 3. Select the "Attributes"... - Page 109 Sirona Dental Systems GmbH 11 Initial startup Installation Manual ORTHOPHOS XG 3D / Ceph 11.7 Setting up the X-ray component via the SIXABCon program 5. Enter the service password [ → 196] and confirm your input by clicking "OK" button. "Device configuration"...
- Page 110 11 Initial startup Sirona Dental Systems GmbH 11.7 Setting up the X-ray component via the SIXABCon program Installation Manual ORTHOPHOS XG 3D / Ceph Boot service IMPORTANT Automatic addition and setup of the X-ray component via the boot service functions properly only if the unit is started with the default factory-set IP address.
- Page 111 Sirona Dental Systems GmbH 11 Initial startup Installation Manual ORTHOPHOS XG 3D / Ceph 11.7 Setting up the X-ray component via the SIXABCon program "Sirona Control Server" 4. Select the desired RCU in the drop-down menu. "Save values" 5. Confirm the settings by clicking on the button.
- Page 112 11 Initial startup Sirona Dental Systems GmbH 11.7 Setting up the X-ray component via the SIXABCon program Installation Manual ORTHOPHOS XG 3D / Ceph Alternatives to the boot service As an alternative to adding new X-ray components via the boot service, "Automatic search"...
- Page 113 Sirona Dental Systems GmbH 11 Initial startup Installation Manual ORTHOPHOS XG 3D / Ceph 11.7 Setting up the X-ray component via the SIXABCon program Adding the component manually "Add component manually" 1. Select the element. 2. Enter the values in the menu input fields manually.
-
Page 114: Approval Of The X-Ray Component
11 Initial startup Sirona Dental Systems GmbH 11.7 Setting up the X-ray component via the SIXABCon program Installation Manual ORTHOPHOS XG 3D / Ceph 11.7.3 Approval of the X-ray component ✔ The X-ray component must have been selected [ → 108] via the "Device configuration"... - Page 115 Sirona Dental Systems GmbH 11 Initial startup Installation Manual ORTHOPHOS XG 3D / Ceph 11.7 Setting up the X-ray component via the SIXABCon program "Device info" Checking enablement ➢ To check the communication with the unit, click the button. If the unit is communicating, a logfile with information on the unit configuration appears.
-
Page 116: Checking The Data Paths
11 Initial startup Sirona Dental Systems GmbH 11.8 Checking the data paths Installation Manual ORTHOPHOS XG 3D / Ceph 11.8 Checking the data paths The 2D and 3D data paths can be checked by creating panoramic, ceph and sensor (3D) test images. To create test images, proceed as follows: ✔... - Page 117 Sirona Dental Systems GmbH 11 Initial startup Installation Manual ORTHOPHOS XG 3D / Ceph 11.8 Checking the data paths Panoramic test image Ceph test image 63 03 452 D3352 D3352.031.05.08.02 10.2015...
-
Page 118: Creating A 3D Test Image
11 Initial startup Sirona Dental Systems GmbH 11.8 Checking the data paths Installation Manual ORTHOPHOS XG 3D / Ceph 11.8.2 Creating a 3D test image ✔ "Test exposures/test images" menu is called [ → 116]. "Test exposures 3D" "Test 1. In the structure tree, under , select the image Sensor"... - Page 119 Sirona Dental Systems GmbH 11 Initial startup Installation Manual ORTHOPHOS XG 3D / Ceph 11.8 Checking the data paths 63 03 452 D3352 D3352.031.05.08.02 10.2015...
-
Page 120: Checking The Unit Configuration
11 Initial startup Sirona Dental Systems GmbH 11.9 Checking the unit configuration Installation Manual ORTHOPHOS XG 3D / Ceph 11.9 Checking the unit configuration Room and travel height 1. Check the room height before you raise the unit using the UP/DOWN keys. -
Page 121: Service Routines For Startup
Sirona Dental Systems GmbH 11 Initial startup Installation Manual ORTHOPHOS XG 3D / Ceph 11.10 Service routines for startup 11.10 Service routines for startup 11.10.1 Service menu and service routines You can use the service routines to check the function of certain unit components and modules, as well as to set important unit parameters. - Page 122 11 Initial startup Sirona Dental Systems GmbH 11.10 Service routines for startup Installation Manual ORTHOPHOS XG 3D / Ceph X RAY Radiation can be released. X RAY Active! Caution! Radiation is being released. Selection field 1 Display fields for service routines, test steps, values, unit parameters, etc.
-
Page 123: Basic Operating Procedures In The Service Menu
Sirona Dental Systems GmbH 11 Initial startup Installation Manual ORTHOPHOS XG 3D / Ceph 11.10 Service routines for startup 11.10.2 Basic operating procedures in the service menu Activating the service menu 11.10.2.1 11.10.2.1.1 Easypad The structure of the touchscreen user interface on the control panel is subdivided into 4 levels: ●... - Page 124 11 Initial startup Sirona Dental Systems GmbH 11.10 Service routines for startup Installation Manual ORTHOPHOS XG 3D / Ceph 3. To select level 4 (service menu/access), touch the wrench symbol (C). 4. Switch to the service menu: Press and hold down the Service key (D) until the patient symbol keys light up (E-H) (approx.
-
Page 125: 2Selecting Service Routines And Test Steps
Sirona Dental Systems GmbH 11 Initial startup Installation Manual ORTHOPHOS XG 3D / Ceph 11.10 Service routines for startup Selecting service routines and test steps 11.10.2.2 11.10.2.2.1 Selecting a service routine ✔ The service menu must be selected [ → 123]. ➢ Select the desired service routine via the arrow keys in the selection field 1 (A) and confirm the selection via the service key (B). - Page 126 11 Initial startup Sirona Dental Systems GmbH 11.10 Service routines for startup Installation Manual ORTHOPHOS XG 3D / Ceph 11.10.2.2.2 Selecting a test step ✔ The service menu must be selected [ → 123]. Selecting a test step in XG 3D ✔...
- Page 127 Sirona Dental Systems GmbH 11 Initial startup Installation Manual ORTHOPHOS XG 3D / Ceph 11.10 Service routines for startup 11.10.2.2.3 Service routines with security access A security code is required for accessing service routines involving functions such as radiation release or editing of configuration data or stored values.
-
Page 128: 3Select Parameters
11 Initial startup Sirona Dental Systems GmbH 11.10 Service routines for startup Installation Manual ORTHOPHOS XG 3D / Ceph Following this double selection and confirmation via the Service key, the service routine is activated. 11.10.2.3 Select parameters If arrow keys are displayed in the selection fields once the required... -
Page 129: 4Saving Parameters
Sirona Dental Systems GmbH 11 Initial startup Installation Manual ORTHOPHOS XG 3D / Ceph 11.10 Service routines for startup Saving parameters 11.10.2.4 Once one or a number of parameters have been selected via a service routine, the current selection must be saved so that it is applied in the unit. -
Page 130: S017: Configuration Service
11 Initial startup Sirona Dental Systems GmbH 11.10 Service routines for startup Installation Manual ORTHOPHOS XG 3D / Ceph 11.10.3 S017: Configuration service SA** Function S017 XG 3D S017 Unit configuration S017.2 Configuring the hardware version S017.3 Enter the country group code S017.4... - Page 131 Sirona Dental Systems GmbH 11 Initial startup Installation Manual ORTHOPHOS XG 3D / Ceph 11.10 Service routines for startup 1. Call service routine S017.2 [ → 125]. Once the service routine has been selected, the code for the current setting is displayed in selection field 1.
- Page 132 11 Initial startup Sirona Dental Systems GmbH 11.10 Service routines for startup Installation Manual ORTHOPHOS XG 3D / Ceph Checking the jumper position on board DX1 S017_2 XG 3 / 5 ➢ Check the jumper positions of the sockets on board DX1:...
- Page 133 Sirona Dental Systems GmbH 11 Initial startup Installation Manual ORTHOPHOS XG 3D / Ceph 11.10 Service routines for startup 0001 = Panoramic digital Jumper inside: Cephalometer not connected, i.e. connector not plugged 0003 and 0005 = Panoramic digital, ceph Jumper outside: Cephalometer connected, i.e. connector plugged in.
-
Page 134: 2S017: Test Step 3
11 Initial startup Sirona Dental Systems GmbH 11.10 Service routines for startup Installation Manual ORTHOPHOS XG 3D / Ceph S017: Test step 3 11.10.3.2 Enter the country group code Selection field Code Function Worldwide* Asia * Factory settings: 1. Call service routine S017.3 [ → 125]. -
Page 135: 3S017: Test Step 4
Sirona Dental Systems GmbH 11 Initial startup Installation Manual ORTHOPHOS XG 3D / Ceph 11.10 Service routines for startup S017: Test step 4 11.10.3.3 Select a language Selection field Code Function* English German French Italian Dutch Spanish Russian Portuguese Chinese (PRC) Korean... - Page 136 11 Initial startup Sirona Dental Systems GmbH 11.10 Service routines for startup Installation Manual ORTHOPHOS XG 3D / Ceph 2. Use the arrow keys (A) to select the code for the required language in selection field 1 (see table). Once the language has been selected, the Memory key (B) lights 3.
-
Page 137: 4S017: Test Step 5
Sirona Dental Systems GmbH 11 Initial startup Installation Manual ORTHOPHOS XG 3D / Ceph 11.10 Service routines for startup S017: Test step 5 11.10.3.4 Select a language set IMPORTANT A software update must be performed every time the language set changes, in order to install the corresponding languages in the system. -
Page 138: 5S017: Test Step 6
11 Initial startup Sirona Dental Systems GmbH 11.10 Service routines for startup Installation Manual ORTHOPHOS XG 3D / Ceph S017: Test step 6 11.10.3.5 Enable/disable the remote control Selection field Code Function Remote control disabled* Remote control enabled * Factory setting 1. Call service routine S017.6 [ → 125]. -
Page 139: 6S017: Test Step 8
Sirona Dental Systems GmbH 11 Initial startup Installation Manual ORTHOPHOS XG 3D / Ceph 11.10 Service routines for startup S017: Test step 8 11.10.3.6 Selecting the kV/mA level series Selection field Code Function 16 mA series for pan 16 mA series for ceph... -
Page 140: 7S017: Test Step 9
11 Initial startup Sirona Dental Systems GmbH 11.10 Service routines for startup Installation Manual ORTHOPHOS XG 3D / Ceph S017: Test step 9 11.10.3.7 Activate/deactivate operation with board DX41 This service routine is used to configure operation of the system with or without module DX41. -
Page 141: 8S017: Test Step 12
Sirona Dental Systems GmbH 11 Initial startup Installation Manual ORTHOPHOS XG 3D / Ceph 11.10 Service routines for startup S017: Test step 12 11.10.3.8 Enabling/disabling the preview image IMPORTANT The preview image is automatically disabled for volume exposures, regardless of the setting in service routine S017.12. -
Page 142: 9S017: Test Step 13
11 Initial startup Sirona Dental Systems GmbH 11.10 Service routines for startup Installation Manual ORTHOPHOS XG 3D / Ceph S017: Test step 13 11.10.3.9 Enable/disable the welcome screen Selection field Code Function Welcome screen disabled Welcome screen enabled* * Factory setting 1. Call service routine S017.13 [ → 125]. -
Page 143: 10S017: Test Step 14
Sirona Dental Systems GmbH 11 Initial startup Installation Manual ORTHOPHOS XG 3D / Ceph 11.10 Service routines for startup S017: Test step 14 11.10.3.10 Enable/disable certain lines of the welcome screen Selection field Code Meaning/Function First name Last name Date of birth... - Page 144 11 Initial startup Sirona Dental Systems GmbH 11.10 Service routines for startup Installation Manual ORTHOPHOS XG 3D / Ceph 3. Use the arrow keys (B) to select the code for the required state of the line selected in selection field 1 in selection field 2 (see table).
-
Page 145: 11S017: Test Step 15
Sirona Dental Systems GmbH 11 Initial startup Installation Manual ORTHOPHOS XG 3D / Ceph 11.10 Service routines for startup S017: Test step 15 11.10.3.11 Selection field Code Function Acoustic signal indicating the end of the exposure is disabled Acoustic signal indicating the end of the... -
Page 146: 12S017: Test Step 17
11 Initial startup Sirona Dental Systems GmbH 11.10 Service routines for startup Installation Manual ORTHOPHOS XG 3D / Ceph S017: Test step 17 11.10.3.12 Trigger save/restore function for DX61 data Selection field Parameter/Display Meaning/Range of values FILTER Type of filter* MECHANICS Type of mechanics For FILTER setting: 0.8 mm Cu (worldwide) - Page 147 Sirona Dental Systems GmbH 11 Initial startup Installation Manual ORTHOPHOS XG 3D / Ceph 11.10 Service routines for startup The code for the standard setting (filter, and mechanics type) is displayed in selection field 2 (see table). The transfer direction for the subsequent recovery (adjustment) of the data is displayed in selection field 3 (see table).
- Page 148 11 Initial startup Sirona Dental Systems GmbH 11.10 Service routines for startup Installation Manual ORTHOPHOS XG 3D / Ceph The filter or mechanics type If there is not a valid configuration on either of the two modules, use the configuration is not valid on either arrow keys (A) to select the filter or mechanics type manually in selection module, DX11 or DX61.
-
Page 149: 13S017: Test Step 18 (Occlusal Bite Block Only)
Sirona Dental Systems GmbH 11 Initial startup Installation Manual ORTHOPHOS XG 3D / Ceph 11.10 Service routines for startup S017: Test step 18 (occlusal bite block only) 11.10.3.13 Activation of occlusal bite block function When the occlusal bite block function is activated, all previously existing calibration values are overwritten with default data (factory setting) where applicable. - Page 150 11 Initial startup Sirona Dental Systems GmbH 11.10 Service routines for startup Installation Manual ORTHOPHOS XG 3D / Ceph 2. Use arrow keys (A) to select the required setting in selection field 1 (see table). Once the required setting has been selected, the Memory key lights up.
-
Page 151: 14S017: Test Step 21
Sirona Dental Systems GmbH 11 Initial startup Installation Manual ORTHOPHOS XG 3D / Ceph 11.10 Service routines for startup S017: Test step 21 11.10.3.14 Configuration of angle pre-selection (temporomandibular joint) for the TM1 and TM2 user programs Selection field Parameters Function Angle pre-selection... -
Page 152: S018: Service For Height Adjustment
11 Initial startup Sirona Dental Systems GmbH 11.10 Service routines for startup Installation Manual ORTHOPHOS XG 3D / Ceph 11.10.4 S018: Service for height adjustment SHZ** Function S018 XG 3D / XG 3D ready S018 Service for height adjustment S018.2 Setting the maximum travel height S018.3... -
Page 153: 1S018: Test Step 2
Sirona Dental Systems GmbH 11 Initial startup Installation Manual ORTHOPHOS XG 3D / Ceph 11.10 Service routines for startup S018: Test step 2 11.10.4.1 Set the maximum travel height 1. Move the unit to the required maximum travel height by pressing the S018_2 XG 3D / XG 3D ready Up/Down keys in the user mode on the control panel. -
Page 154: 2S018: Test Step 3
11 Initial startup Sirona Dental Systems GmbH 11.10 Service routines for startup Installation Manual ORTHOPHOS XG 3D / Ceph S018: Test step 3 11.10.4.2 Undo the maximum travel height setting 1. Call service routine S018.3 [ → 125]. S018_3 XG 3D / 3D ready ... -
Page 155: 3S018: Test Step 4
Sirona Dental Systems GmbH 11 Initial startup Installation Manual ORTHOPHOS XG 3D / Ceph 11.10 Service routines for startup S018: Test step 4 11.10.4.3 Check the height adjustment sensor system This service routine is used to move the unit up or down as far as the limit switches using the Up/Down keys on the control panel. -
Page 156: 4S018: Test Step 5
11 Initial startup Sirona Dental Systems GmbH 11.10 Service routines for startup Installation Manual ORTHOPHOS XG 3D / Ceph S018: Test step 5 11.10.4.4 Setting the minimum travel height Setting the minimum travel height is possible only for a unit height that is below the lower correction switch level (<... -
Page 157: 5S018: Test Step 6
Sirona Dental Systems GmbH 11 Initial startup Installation Manual ORTHOPHOS XG 3D / Ceph 11.10 Service routines for startup S018: Test step 6 11.10.4.5 Undoing the minimum travel height setting 1. Call service routine S018.6 [ → 125]. Undoing the minimum travel height: XG 3D ... -
Page 158: 6S018: Test Step 7 (Occlusal Bite Block Only)
11 Initial startup Sirona Dental Systems GmbH 11.10 Service routines for startup Installation Manual ORTHOPHOS XG 3D / Ceph S018: Test step 7 (occlusal bite block only) 11.10.4.6 Setting the nominal angle for the occlusal bite block (as required by the customer) - Page 159 Sirona Dental Systems GmbH 11 Initial startup Installation Manual ORTHOPHOS XG 3D / Ceph 11.10 Service routines for startup 2. Use the arrow keys (H) to set the required nominal angle in selection field 1 (possible range: -17° to +22°). Tip: You can also set the required angle manually on the occlusal bite block and transfer this angle setting to selection field 1 by pressing the T key (I).
-
Page 160: 7S018: Test Step 8 (Occlusal Bite Block Only)
11 Initial startup Sirona Dental Systems GmbH 11.10 Service routines for startup Installation Manual ORTHOPHOS XG 3D / Ceph S018: Test step 8 (occlusal bite block only) 11.10.4.7 Functional test of the occlusal bite block Symbol on the control Status Meaning panel... - Page 161 Sirona Dental Systems GmbH 11 Initial startup Installation Manual ORTHOPHOS XG 3D / Ceph 11.10 Service routines for startup 11.10.4.7.1 Codes of possible error modes Display Error Troubleshooting measures Normal state No action Plug X1000 is not plugged in on Check plug for occlusal bite block on board DX1.
-
Page 162: 8S018: Test Step 9 (Occlusal Bite Block Only)
11 Initial startup Sirona Dental Systems GmbH 11.10 Service routines for startup Installation Manual ORTHOPHOS XG 3D / Ceph S018: Test step 9 (occlusal bite block only) 11.10.4.8 Adjustment of the AD acceptance angle values and the zero point In the adjustment of the AD acceptance angle values, three AD values... - Page 163 Sirona Dental Systems GmbH 11 Initial startup Installation Manual ORTHOPHOS XG 3D / Ceph 11.10 Service routines for startup ZP: Adjusting and saving the zero point 1. Take the occlusal bite block out of the bite block holder. "ZP" (for zero point) is displayed in selection field 1.
-
Page 164: 9S018: Test Step 10 (Occlusal Bite Block Only)
11 Initial startup Sirona Dental Systems GmbH 11.10 Service routines for startup Installation Manual ORTHOPHOS XG 3D / Ceph S018: Test step 10 (occlusal bite block only) 11.10.4.9 Setting the PWM values for the height adjustment creep speed In user mode, check whether a correction is required for the speed for upward and downward movement (creep speed). -
Page 165: S037: Network Service
Sirona Dental Systems GmbH 11 Initial startup Installation Manual ORTHOPHOS XG 3D / Ceph 11.10 Service routines for startup 11.10.5 S037: Network service SA** Function S037 Network service S037.1 Displaying the network data S037.2 Delete network addresses or set them to factory defaults S037.3... - Page 166 11 Initial startup Sirona Dental Systems GmbH 11.10 Service routines for startup Installation Manual ORTHOPHOS XG 3D / Ceph 1. Call service routine S037.1 [ → 125]. Once the service routine has been selected, the IP address of the unit is displayed in selection field 1 (see table).
-
Page 167: 2S037: Test Step 2
Sirona Dental Systems GmbH 11 Initial startup Installation Manual ORTHOPHOS XG 3D / Ceph 11.10 Service routines for startup S037: Test step 2 11.10.5.2 Setting the default IP address, default gateway address and default subnet mask IMPORTANT S037.2 XG 3D The network address can only be restored to the factory setting (default value) in fixed address boot mode (STATIC or no DHCP). - Page 168 11 Initial startup Sirona Dental Systems GmbH 11.10 Service routines for startup Installation Manual ORTHOPHOS XG 3D / Ceph 3. To reset the network data, press the Memory key (E) (R key lights up) followed by the R key (F). The default network data (factory default setting) is displayed. To toggle the display of the various items of network data, proceed as in test step 1 [ →...
-
Page 169: 3S037: Test Step 3
Sirona Dental Systems GmbH 11 Initial startup Installation Manual ORTHOPHOS XG 3D / Ceph 11.10 Service routines for startup S037: Test step 3 11.10.5.3 Configuring boot mode Selection field Parameters Meaning S037.3 XG 3D DYNAMIC Automatic address assignment (DHCP/AutoIP) STATIC Fixed address* * Factory setting 1. -
Page 170: 4S037: Test Step 4
11 Initial startup Sirona Dental Systems GmbH 11.10 Service routines for startup Installation Manual ORTHOPHOS XG 3D / Ceph S037: Test step 4 11.10.5.4 Manual input of static network settings (IP address, default gateway address, and subnet mask) This service routine cannot run in DYNAMIC mode (T key is blocked). - Page 171 Sirona Dental Systems GmbH 11 Initial startup Installation Manual ORTHOPHOS XG 3D / Ceph 11.10 Service routines for startup 1. Call service routine S037.4 [ → 125]. Once the service routine has been selected, the IP address of the unit is displayed in selection field 1.
- Page 172 11 Initial startup Sirona Dental Systems GmbH 11.10 Service routines for startup Installation Manual ORTHOPHOS XG 3D / Ceph 5. Use arrow keys (E) to select the digit to be changed in selection field 1 ("Digit No. 12" in the example). The corresponding patient symbol key (D) lights up.
-
Page 173: Using Demo Mode - Operation Without Radiation Release
Sirona Dental Systems GmbH 11 Initial startup Installation Manual ORTHOPHOS XG 3D / Ceph 11.11 Using demo mode – operation without radiation release 11.11 Using demo mode – operation without radiation release If the unit is to be presented as a demo unit at trade fairs or exhibitions, it XG 3 / 5 / 3D / 3D ready must be ensured that radiation release is blocked. -
Page 174: Switching Off Demo Mode
11 Initial startup Sirona Dental Systems GmbH 11.11 Using demo mode – operation without radiation release Installation Manual ORTHOPHOS XG 3D / Ceph 11.11.2 Switching off demo mode 1. Switch off the unit. Switching off XG 3D / XG 3D ready DANGER... -
Page 175: Important Information For Repacking And Transport
Sirona Dental Systems GmbH 11 Initial startup Installation Manual ORTHOPHOS XG 3D / Ceph 11.11 Using demo mode – operation without radiation release 11.11.3 Important information for repacking and transport IMPORTANT If a used carton on which one of the shockwatch or tiltwatch indicators has already been tripped is used to package the unit, please make an entry to that effect on the delivery note. - Page 176 11 Initial startup Sirona Dental Systems GmbH 11.11 Using demo mode – operation without radiation release Installation Manual ORTHOPHOS XG 3D / Ceph Packing the panoramic unit Panoramic: XG3D IMPORTANT The bottom edge of the slide cover must be at the same height as the markings A in the column.
- Page 177 Sirona Dental Systems GmbH 11 Initial startup Installation Manual ORTHOPHOS XG 3D / Ceph 11.11 Using demo mode – operation without radiation release Dismantling and packaging the X-ray detector Packing the X-ray detector XG 3D IMPORTANT For transport, pack the X-ray detector in its original packaging (for packing condition see section "Delivery"...
-
Page 178: Startup, Measurements And Tests (For Usa/Canada Only)
12 Startup, measurements and tests (for USA/Canada only) Sirona Dental Systems GmbH 12.1 Safety Installation Manual ORTHOPHOS XG 3D / Ceph Startup, measurements and tests (for USA/ Canada only) 12.1 Safety NOTICE Qualifications of service personnel Installation and startup may be carried out only by personnel specifically authorized by Sirona. -
Page 179: Operation Notes
Sirona Dental Systems GmbH 12 Startup, measurements and tests (for USA/Canada only) Installation Manual ORTHOPHOS XG 3D / Ceph 12.2 Operation notes 12.2 Operation notes Nominal line voltage The unit operates in the following nominal line voltage ranges: ● 200 – 240 V ●... -
Page 180: Auxiliary Devices Required
12 Startup, measurements and tests (for USA/Canada only) Sirona Dental Systems GmbH 12.3 Auxiliary devices required Installation Manual ORTHOPHOS XG 3D / Ceph 12.3 Auxiliary devices required Digital multimeter USA CAUTION Only use a battery-operated digital multimeter with safety sockets. It is essential that you observe the safety and operating notes provided in the operating instructions of the multimeter. -
Page 181: Checking The Power Supply Connection
Sirona Dental Systems GmbH 12 Startup, measurements and tests (for USA/Canada only) Installation Manual ORTHOPHOS XG 3D / Ceph 12.4 Checking the power supply connection 12.4 Checking the power supply connection line voltage drop To check the line voltage, the must be determined while creating an X-ray. - Page 182 12 Startup, measurements and tests (for USA/Canada only) Sirona Dental Systems GmbH 12.4 Checking the power supply connection Installation Manual ORTHOPHOS XG 3D / Ceph Performing and analyzing a measurement 1. Set the highest kV/mA level, e.g. 90kV/12mA (see Operating Instructions). 2. Make ready for exposure in SIDEXIS.
-
Page 183: Testing The Tube Voltage (Tube Assembly 2.0)
Sirona Dental Systems GmbH 12 Startup, measurements and tests (for USA/Canada only) Installation Manual ORTHOPHOS XG 3D / Ceph 12.5 Testing the tube voltage (tube assembly 2.0) 12.5 Testing the tube voltage (tube assembly 2.0) Preparing the measurement 1. Attach the Mult-O-Meter sensor in the middle of the combisensor (on 2D sensor side). -
Page 184: Checking The Radiation Time
12 Startup, measurements and tests (for USA/Canada only) Sirona Dental Systems GmbH 12.6 Checking the radiation time Installation Manual ORTHOPHOS XG 3D / Ceph 12.6 Checking the radiation time Preparing the measurement 1. Attach the Mult-O-Meter sensor in the middle of the combisensor (on 2D sensor side). -
Page 185: Checking The Tube Current
Sirona Dental Systems GmbH 12 Startup, measurements and tests (for USA/Canada only) Installation Manual ORTHOPHOS XG 3D / Ceph 12.7 Checking the tube current 12.7 Checking the tube current NOTICE Damage to the measuring unit The ring assembly and the tube assembly move during the measurement. - Page 186 12 Startup, measurements and tests (for USA/Canada only) Sirona Dental Systems GmbH 12.7 Checking the tube current Installation Manual ORTHOPHOS XG 3D / Ceph 63 03 452 D3352 D3352.031.05.08.02 10.2015...
- Page 187 Sirona Dental Systems GmbH 12 Startup, measurements and tests (for USA/Canada only) Installation Manual ORTHOPHOS XG 3D / Ceph 12.7 Checking the tube current 4. DANGER! After switching off the unit, wait at least 4 minutes (LED V500 on the DX6 must no longer be on) before removing jumper H from the DX6 board.
- Page 188 12 Startup, measurements and tests (for USA/Canada only) Sirona Dental Systems GmbH 12.7 Checking the tube current Installation Manual ORTHOPHOS XG 3D / Ceph 2. Loosen the screw (D) and remove the lid of the tube assembly cover (E). 3. DANGER! After switching off the unit, wait at least 4 minutes before...
-
Page 189: Checking The Laser Light Localizers
Sirona Dental Systems GmbH 12 Startup, measurements and tests (for USA/Canada only) Installation Manual ORTHOPHOS XG 3D / Ceph 12.8 Checking the laser light localizers 12.8 Checking the laser light localizers CAUTION Risk of injury to eyes. The unit contains lasers of Class 1. - Page 190 12 Startup, measurements and tests (for USA/Canada only) Sirona Dental Systems GmbH 12.8 Checking the laser light localizers Installation Manual ORTHOPHOS XG 3D / Ceph Checking the vertical laser beam (MS) Checking the MS laser: XG 3D 1. Affix a piece of white cardboard between the temple supports.
- Page 191 Sirona Dental Systems GmbH 12 Startup, measurements and tests (for USA/Canada only) Installation Manual ORTHOPHOS XG 3D / Ceph 12.8 Checking the laser light localizers Checking the horizontal laser beam (FH/ Pan) 1. Touch the 3D symbol at the top of the touchscreen.
- Page 192 12 Startup, measurements and tests (for USA/Canada only) Sirona Dental Systems GmbH 12.8 Checking the laser light localizers Installation Manual ORTHOPHOS XG 3D / Ceph 5. Move the lower horizontal laser beam by moving the bottom slider (D) into the lower area of the 3D sensor area.
-
Page 193: Adjusting And Calibrating The Unit
Sirona Dental Systems GmbH 13 Adjusting and calibrating the unit Installation Manual ORTHOPHOS XG 3D / Ceph Adjusting and calibrating the unit DANGER X-rays When performing the following tests, be sure to observe the radiation protection regulations applicable in your country (see Operating Instructions). -
Page 194: General Information About Unit Adjustment And Calibration
13 Adjusting and calibrating the unit Sirona Dental Systems GmbH 13.1 General information about unit adjustment and calibration Installation Manual ORTHOPHOS XG 3D / Ceph As of unit software version V 03.04.00, you can even adjust the height of Adjusting the height of the unit during calibration: XG the unit during the calibration procedure. -
Page 195: Displays And Help Messages During Adjustment/Calibration
Sirona Dental Systems GmbH 13 Adjusting and calibrating the unit Installation Manual ORTHOPHOS XG 3D / Ceph 13.1 General information about unit adjustment and calibration 13.1.1 Displays and help messages during adjustment/ calibration The most frequent help and status messages during calibration are listed below. -
Page 196: Adjustment/Calibration" Menu
13 Adjusting and calibrating the unit Sirona Dental Systems GmbH 13.1 General information about unit adjustment and calibration Installation Manual ORTHOPHOS XG 3D / Ceph 13.1.2 "Adjustment/Calibration" menu The menu guides you through the procedure to adjust and calibrate the unit. 13.1.2.1 Calling the "Adjustment/Calibration"... -
Page 197: Menu Structure
Sirona Dental Systems GmbH 13 Adjusting and calibrating the unit Installation Manual ORTHOPHOS XG 3D / Ceph 13.1 General information about unit adjustment and calibration Menu structure 13.1.2.2 The menu is divided into five areas. Navigation area Structure tree for adjustment and calibration [ →... - Page 198 13 Adjusting and calibrating the unit Sirona Dental Systems GmbH 13.1 General information about unit adjustment and calibration Installation Manual ORTHOPHOS XG 3D / Ceph 13.1.2.2.1 Navigation area The navigation area contains a structure tree similar to the one you will be familiar with from your Windows interface. The structure tree contains all stages of the adjustment and calibration procedure you need to complete in order to adjust and calibrate your system.
- Page 199 Sirona Dental Systems GmbH 13 Adjusting and calibrating the unit Installation Manual ORTHOPHOS XG 3D / Ceph 13.1 General information about unit adjustment and calibration or alternatively: ● Geometry (unit SW version V04.07.00 and higher) – Center of rotation (8x8) 1 – Center of rotation (8x8) 2 –...
- Page 200 13 Adjusting and calibrating the unit Sirona Dental Systems GmbH 13.1 General information about unit adjustment and calibration Installation Manual ORTHOPHOS XG 3D / Ceph Validity of existing adjustment/calibration settings The elements of the structure tree used for adjusting (calibrating) the device are prefixed by symbols indicating the current status of the corresponding adjustment or calibration operation.
- Page 201 Sirona Dental Systems GmbH 13 Adjusting and calibrating the unit Installation Manual ORTHOPHOS XG 3D / Ceph 13.1 General information about unit adjustment and calibration 13.1.2.2.2 Coarse and precision adjustment "Pan - Sensor Adjustment" "Pan - Diaphragm" "Ceph - Fixed , and point of rotation"...
- Page 202 13 Adjusting and calibrating the unit Sirona Dental Systems GmbH 13.1 General information about unit adjustment and calibration Installation Manual ORTHOPHOS XG 3D / Ceph Examples of image acquisition with precision and coarse adjustment Pan - Sensor Adjustment Sensor adjustment can usually be performed directly via precision adjustment.
- Page 203 Sirona Dental Systems GmbH 13 Adjusting and calibrating the unit Installation Manual ORTHOPHOS XG 3D / Ceph 13.1 General information about unit adjustment and calibration Pan - Diaphragm Diaphragm adjustment can usually be performed directly via precision adjustment. Only in exceptional cases, e.g. if the exposed image area is completely outside the image section in an image acquired with the "Precision adjustment"...
- Page 204 13 Adjusting and calibrating the unit Sirona Dental Systems GmbH 13.1 General information about unit adjustment and calibration Installation Manual ORTHOPHOS XG 3D / Ceph Ceph - Fixed point of rotation Adjustment of the fixed point of rotation can usually be performed directly via precision adjustment.
- Page 205 Sirona Dental Systems GmbH 13 Adjusting and calibrating the unit Installation Manual ORTHOPHOS XG 3D / Ceph 13.1 General information about unit adjustment and calibration 13.1.2.2.3 Shifting direction of the exposed image area The menus contain a pictographic representation of the expected adjustment image to help you perform software-based adjustment and calibration.
-
Page 206: Enabling Exposure Readiness
13 Adjusting and calibrating the unit Sirona Dental Systems GmbH 13.1 General information about unit adjustment and calibration Installation Manual ORTHOPHOS XG 3D / Ceph 13.1.3 Enabling exposure readiness To take an exposure in SIDEXIS XG, the system must first be made ready for exposure. -
Page 207: Test Phantoms For Adjustment And Calibration
Sirona Dental Systems GmbH 13 Adjusting and calibrating the unit Installation Manual ORTHOPHOS XG 3D / Ceph 13.1 General information about unit adjustment and calibration 13.1.6 Test phantoms for adjustment and calibration OP XG needle phantom for panoramic adjustment 13.1.6.1 NOTICE Risk of damage to unit... - Page 208 13 Adjusting and calibrating the unit Sirona Dental Systems GmbH 13.1 General information about unit adjustment and calibration Installation Manual ORTHOPHOS XG 3D / Ceph When fitting the needle phantom, make sure that it is correctly oriented. For the panorama adjustment of the unit, the phantom must be fitted so that the needles (C) point upward.
-
Page 209: Op Xg 3D Ceph Adjustment Phantom For The Adjustment
Sirona Dental Systems GmbH 13 Adjusting and calibrating the unit Installation Manual ORTHOPHOS XG 3D / Ceph 13.1 General information about unit adjustment and calibration OP XG 3D ceph adjustment phantom for the adjustment of the 13.1.6.2 cephalometer For ceph diaphragm and ceph main X-ray beam direction 2D adjustment, you must insert the OP XG ceph adjustment phantom (A) into the cover of the dual sensor. -
Page 210: Geometry Phantom For Volume Calibration
13 Adjusting and calibrating the unit Sirona Dental Systems GmbH 13.1 General information about unit adjustment and calibration Installation Manual ORTHOPHOS XG 3D / Ceph Geometry phantom for volume calibration 13.1.6.3 NOTICE Risk of damage to unit Make absolutely sure that the geometry phantom is inserted in the bite... - Page 211 Sirona Dental Systems GmbH 13 Adjusting and calibrating the unit Installation Manual ORTHOPHOS XG 3D / Ceph 13.1 General information about unit adjustment and calibration 1. Insert the geometry phantom (A) into the pan bite block holder (B) on the unit and secure it with the screw (C).
-
Page 212: Adjustment And Calibration Via The "Unit Adjustment/Calibration" Menu
13 Adjusting and calibrating the unit Sirona Dental Systems GmbH 13.2 Adjustment and calibration via the "Unit adjustment/calibration" menu Installation Manual ORTHOPHOS XG 3D / Ceph 13.2 Adjustment and calibration via the "Unit adjustment/calibration" menu IMPORTANT After every adjustment or calibration of the unit, the reference values for the constancy measurement must be recalculated and entered in the "Test results"... - Page 213 Sirona Dental Systems GmbH 13 Adjusting and calibrating the unit Installation Manual ORTHOPHOS XG 3D / Ceph 13.2 Adjustment and calibration via the "Unit adjustment/calibration" menu Adjustment OK ● The three needle images must lie in the center and inside the auxiliary lines.
- Page 214 13 Adjusting and calibrating the unit Sirona Dental Systems GmbH 13.2 Adjustment and calibration via the "Unit adjustment/calibration" menu Installation Manual ORTHOPHOS XG 3D / Ceph 13.2.1.1.2 Manual adjustment: Panoramic sensor The manual adjustment procedure is similar to the one for automatic adjustment [ →...
- Page 215 Sirona Dental Systems GmbH 13 Adjusting and calibrating the unit Installation Manual ORTHOPHOS XG 3D / Ceph 13.2 Adjustment and calibration via the "Unit adjustment/calibration" menu 3. Overwrite the adjustment values for S1, S2 and S3 in the text boxes "Pan - Sensor Adjustment"...
-
Page 216: Pan Diaphragm
13 Adjusting and calibrating the unit Sirona Dental Systems GmbH 13.2 Adjustment and calibration via the "Unit adjustment/calibration" menu Installation Manual ORTHOPHOS XG 3D / Ceph Pan diaphragm 13.2.1.2 13.2.1.2.1 Automatic adjustment: Pan diaphragm (standard) IMPORTANT If a message window indicating that the diaphragm is tilted appears in "Pan - Diaphragm"... - Page 217 Sirona Dental Systems GmbH 13 Adjusting and calibrating the unit Installation Manual ORTHOPHOS XG 3D / Ceph 13.2 Adjustment and calibration via the "Unit adjustment/calibration" menu 63 03 452 D3352 D3352.031.05.08.02 10.2015...
- Page 218 13 Adjusting and calibrating the unit Sirona Dental Systems GmbH 13.2 Adjustment and calibration via the "Unit adjustment/calibration" menu Installation Manual ORTHOPHOS XG 3D / Ceph Adjustment OK ● The exposed diaphragm area must lie horizontally centered in the image section as well as inside the auxiliary lines.
- Page 219 Sirona Dental Systems GmbH 13 Adjusting and calibrating the unit Installation Manual ORTHOPHOS XG 3D / Ceph 13.2 Adjustment and calibration via the "Unit adjustment/calibration" menu 2. Once you have taken the exposure, measure distances Sx and Sy with the SIDEXIS XG measuring ruler.
-
Page 220: Pan Symmetry
13 Adjusting and calibrating the unit Sirona Dental Systems GmbH 13.2 Adjustment and calibration via the "Unit adjustment/calibration" menu Installation Manual ORTHOPHOS XG 3D / Ceph Pan symmetry 13.2.1.3 13.2.1.3.1 Automatic adjustment: Pan symmetry ✔ The OP XG needle phantom is in the pan bite block holder on the unit. - Page 221 Sirona Dental Systems GmbH 13 Adjusting and calibrating the unit Installation Manual ORTHOPHOS XG 3D / Ceph 13.2 Adjustment and calibration via the "Unit adjustment/calibration" menu 63 03 452 D3352 D3352.031.05.08.02 10.2015...
- Page 222 13 Adjusting and calibrating the unit Sirona Dental Systems GmbH 13.2 Adjustment and calibration via the "Unit adjustment/calibration" menu Installation Manual ORTHOPHOS XG 3D / Ceph Adjustment OK ● The shadow of the center needle, the needle image, and the auxiliary lines must be coincident and located one behind the other.
- Page 223 Sirona Dental Systems GmbH 13 Adjusting and calibrating the unit Installation Manual ORTHOPHOS XG 3D / Ceph 13.2 Adjustment and calibration via the "Unit adjustment/calibration" menu 2. After taking the exposure, measure the distances S1, S2 and S3 with the SIDEXIS XG measuring ruler.
-
Page 224: Ceph - Primary Diaphragm
13 Adjusting and calibrating the unit Sirona Dental Systems GmbH 13.2 Adjustment and calibration via the "Unit adjustment/calibration" menu Installation Manual ORTHOPHOS XG 3D / Ceph Ceph - Primary diaphragm 13.2.1.4 13.2.1.4.1 Automatic adjustment: Ceph - Primary diaphragm (standard) NOTICE Adjustment 1... - Page 225 Sirona Dental Systems GmbH 13 Adjusting and calibrating the unit Installation Manual ORTHOPHOS XG 3D / Ceph 13.2 Adjustment and calibration via the "Unit adjustment/calibration" menu 63 03 452 D3352 D3352.031.05.08.02 10.2015...
- Page 226 ● Distance S3 must be approx. 60 Adjustment not OK IMPORTANT! If S3 is>70mm, please contact the Sirona Customer Service Center. 4. Repeat the procedure starting at Step 2 until the values in the menu's text boxes are equal to "zero". This means that adjustment was performed successfully.
- Page 227 Sirona Dental Systems GmbH 13 Adjusting and calibrating the unit Installation Manual ORTHOPHOS XG 3D / Ceph 13.2 Adjustment and calibration via the "Unit adjustment/calibration" menu 3. Overwrite the adjustment values for S1, S2, S3, and S4 in the text "Ceph - Primary diaphragm"...
-
Page 228: Ceph - Fixed Point Of Rotation
13 Adjusting and calibrating the unit Sirona Dental Systems GmbH 13.2 Adjustment and calibration via the "Unit adjustment/calibration" menu Installation Manual ORTHOPHOS XG 3D / Ceph Ceph - Fixed point of rotation 13.2.1.5 13.2.1.5.1 Automatic adjustment: Ceph - Fixed point of rotation (standard) - Page 229 Sirona Dental Systems GmbH 13 Adjusting and calibrating the unit Installation Manual ORTHOPHOS XG 3D / Ceph 13.2 Adjustment and calibration via the "Unit adjustment/calibration" menu At the bottom of the action area, the two values (L)x and (L)y are suggested for adjusting the ceph secondary diaphragm.
- Page 230 13 Adjusting and calibrating the unit Sirona Dental Systems GmbH 13.2 Adjustment and calibration via the "Unit adjustment/calibration" menu Installation Manual ORTHOPHOS XG 3D / Ceph 63 03 452 D3352 D3352.031.05.08.02 10.2015...
- Page 231 Sirona Dental Systems GmbH 13 Adjusting and calibrating the unit Installation Manual ORTHOPHOS XG 3D / Ceph 13.2 Adjustment and calibration via the "Unit adjustment/calibration" menu Adjustment OK ● The exposed diaphragm area must lie centered and straight in the image section as well as inside the superimposed auxiliary lines.
- Page 232 13 Adjusting and calibrating the unit Sirona Dental Systems GmbH 13.2 Adjustment and calibration via the "Unit adjustment/calibration" menu Installation Manual ORTHOPHOS XG 3D / Ceph 2. Once you have taken the exposure, measure distances S1, S2, and S3 with the SIDEXIS XG measuring ruler.
- Page 233 Sirona Dental Systems GmbH 13 Adjusting and calibrating the unit Installation Manual ORTHOPHOS XG 3D / Ceph 13.2 Adjustment and calibration via the "Unit adjustment/calibration" menu 3. Overwrite the adjustment values for S1, S2, and S3 in the text boxes "Ceph - Fixed point of rotation"...
-
Page 234: Ceph - Main X-Ray Beam Direction
13 Adjusting and calibrating the unit Sirona Dental Systems GmbH 13.2 Adjustment and calibration via the "Unit adjustment/calibration" menu Installation Manual ORTHOPHOS XG 3D / Ceph Ceph - Main X-ray beam direction 13.2.1.6 13.2.1.6.1 Automatic adjustment: Ceph - Main X-ray beam direction (standard) - Page 235 Sirona Dental Systems GmbH 13 Adjusting and calibrating the unit Installation Manual ORTHOPHOS XG 3D / Ceph 13.2 Adjustment and calibration via the "Unit adjustment/calibration" menu Adjustment OK ● A horizontal bar must be visible in the center of the image. If this bar is visible,...
- Page 236 13 Adjusting and calibrating the unit Sirona Dental Systems GmbH 13.2 Adjustment and calibration via the "Unit adjustment/calibration" menu Installation Manual ORTHOPHOS XG 3D / Ceph 4. Repeat the procedure starting at Step 2 until the value in the menu's text box is equal to "zero". This means that adjustment was performed successfully.
- Page 237 Sirona Dental Systems GmbH 13 Adjusting and calibrating the unit Installation Manual ORTHOPHOS XG 3D / Ceph 13.2 Adjustment and calibration via the "Unit adjustment/calibration" menu 4. Continue with the adjustment procedure as described in the chapter entitled "Automatic adjustment: Ceph - Main X-ray beam direction (standard) [ →...
-
Page 238: Ceph - Fixed Point Of Rotation For Quickshot
13 Adjusting and calibrating the unit Sirona Dental Systems GmbH 13.2 Adjustment and calibration via the "Unit adjustment/calibration" menu Installation Manual ORTHOPHOS XG 3D / Ceph Ceph - Fixed point of rotation for QuickShot 13.2.1.7 13.2.1.7.1 Automatic adjustment: Ceph - QuickShot fixed point of rotation... - Page 239 Sirona Dental Systems GmbH 13 Adjusting and calibrating the unit Installation Manual ORTHOPHOS XG 3D / Ceph 13.2 Adjustment and calibration via the "Unit adjustment/calibration" menu 63 03 452 D3352 D3352.031.05.08.02 10.2015...
- Page 240 13 Adjusting and calibrating the unit Sirona Dental Systems GmbH 13.2 Adjustment and calibration via the "Unit adjustment/calibration" menu Installation Manual ORTHOPHOS XG 3D / Ceph Adjustment OK ● The exposed image section must lie centered and straight in the image section as well as inside the superimposed auxiliary lines.
- Page 241 Sirona Dental Systems GmbH 13 Adjusting and calibrating the unit Installation Manual ORTHOPHOS XG 3D / Ceph 13.2 Adjustment and calibration via the "Unit adjustment/calibration" menu 63 03 452 D3352 D3352.031.05.08.02 10.2015...
- Page 242 13 Adjusting and calibrating the unit Sirona Dental Systems GmbH 13.2 Adjustment and calibration via the "Unit adjustment/calibration" menu Installation Manual ORTHOPHOS XG 3D / Ceph 2. Once you have taken the exposure, measure distance S1 with the SIDEXIS XG measuring ruler.
-
Page 243: Ear Plug Alignment
Sirona Dental Systems GmbH 13 Adjusting and calibrating the unit Installation Manual ORTHOPHOS XG 3D / Ceph 13.2 Adjustment and calibration via the "Unit adjustment/calibration" menu Ear plug alignment 13.2.1.8 13.2.1.8.1 Checking the ear plug alignment ✔ "Ceph" operating mode is selected on the control panel. - Page 244 13 Adjusting and calibrating the unit Sirona Dental Systems GmbH 13.2 Adjustment and calibration via the "Unit adjustment/calibration" menu Installation Manual ORTHOPHOS XG 3D / Ceph 63 03 452 D3352 D3352.031.05.08.02 10.2015...
- Page 245 Sirona Dental Systems GmbH 13 Adjusting and calibrating the unit Installation Manual ORTHOPHOS XG 3D / Ceph 13.2 Adjustment and calibration via the "Unit adjustment/calibration" menu 13.2.1.8.2 Adjusting the ear plug alignment ➢ Unscrew the cover from the cephalometer. 63 03 452 D3352...
- Page 246 13 Adjusting and calibrating the unit Sirona Dental Systems GmbH 13.2 Adjustment and calibration via the "Unit adjustment/calibration" menu Installation Manual ORTHOPHOS XG 3D / Ceph Horizontal correction 1. Loosen the screws (A) slightly (approx. 2 - 3 turns). Tip: Do not unscrew them fully! 2.
- Page 247 Sirona Dental Systems GmbH 13 Adjusting and calibrating the unit Installation Manual ORTHOPHOS XG 3D / Ceph 13.2 Adjustment and calibration via the "Unit adjustment/calibration" menu 3. Adjust the ear plugs in the vertical direction by turning the knurled nut (F). The direction of rotation for left-arm (G) and right-arm (H) versions is shown in the drawing below.
-
Page 248: Adjustment/Calibration
13 Adjusting and calibrating the unit Sirona Dental Systems GmbH 13.2 Adjustment and calibration via the "Unit adjustment/calibration" menu Installation Manual ORTHOPHOS XG 3D / Ceph 13.2.2 3D adjustment/calibration Sensor 13.2.2.1 1. Insert the geometry phantom in the pan bite block holder of the unit [ →... - Page 249 Sirona Dental Systems GmbH 13 Adjusting and calibrating the unit Installation Manual ORTHOPHOS XG 3D / Ceph 13.2 Adjustment and calibration via the "Unit adjustment/calibration" menu A message is displayed in the action window to indicate that the values have been successfully saved.
-
Page 250: Aperture
13 Adjusting and calibrating the unit Sirona Dental Systems GmbH 13.2 Adjustment and calibration via the "Unit adjustment/calibration" menu Installation Manual ORTHOPHOS XG 3D / Ceph Aperture 13.2.2.2 ✔ is not The geometry phantom in the pan bite block holder on the unit. - Page 251 Sirona Dental Systems GmbH 13 Adjusting and calibrating the unit Installation Manual ORTHOPHOS XG 3D / Ceph 13.2 Adjustment and calibration via the "Unit adjustment/calibration" menu 5. When adjustment is OK, save the values. A message is displayed in the action window to indicate that the values have been successfully saved.
-
Page 252: Shading
13 Adjusting and calibrating the unit Sirona Dental Systems GmbH 13.2 Adjustment and calibration via the "Unit adjustment/calibration" menu Installation Manual ORTHOPHOS XG 3D / Ceph Shading 13.2.2.3 ✔ is not The geometry phantom in the pan bite block holder on the unit. -
Page 253: Shading (5X5)
Sirona Dental Systems GmbH 13 Adjusting and calibrating the unit Installation Manual ORTHOPHOS XG 3D / Ceph 13.2 Adjustment and calibration via the "Unit adjustment/calibration" menu Shading (5x5) 13.2.2.4 ✔ is not The geometry phantom in the pan bite block holder on the unit. -
Page 254: Geometry
13 Adjusting and calibrating the unit Sirona Dental Systems GmbH 13.2 Adjustment and calibration via the "Unit adjustment/calibration" menu Installation Manual ORTHOPHOS XG 3D / Ceph Geometry 13.2.2.5 1. Insert the geometry phantom in the pan bite block holder of the unit [ → 207]. -
Page 255: Dosimetry
Sirona Dental Systems GmbH 13 Adjusting and calibrating the unit Installation Manual ORTHOPHOS XG 3D / Ceph 13.2 Adjustment and calibration via the "Unit adjustment/calibration" menu Dosimetry 13.2.2.6 A dosimeter for pulsed radiation (e.g. Mult-O-Meter 512L) is required for dosimetry. "3D Adjustment/calibration"... -
Page 256: Saving Adjustment/Calibration Data
13 Adjusting and calibrating the unit Sirona Dental Systems GmbH 13.2 Adjustment and calibration via the "Unit adjustment/calibration" menu Installation Manual ORTHOPHOS XG 3D / Ceph 13.2.3 Saving adjustment/calibration data "Backup" menu offers the option of saving the adjustment/calibration data to a freely selectable directory or importing saved adjustment/ calibration data to the unit from a directory. -
Page 257: Resetting Adjustment/Calibration
You must make a note of the values displayed in the text boxes of the menus before changing them. If necessary, you can then reset the adjustment values to the factory settings. Contact the Sirona Customer Service Center for more information (or to enable the menu). Reset panoramic adjustment "Panorama Reset... - Page 258 13 Adjusting and calibrating the unit Sirona Dental Systems GmbH 13.2 Adjustment and calibration via the "Unit adjustment/calibration" menu Installation Manual ORTHOPHOS XG 3D / Ceph Resetting 3D adjustment IMPORTANT "3D Reset adjustment" "Sensor " With the function, only the "Diaphragm" adjustments are reset. The calibration values from the "Shading"...
-
Page 259: Checking And Adjusting The Touchscreen
Sirona Dental Systems GmbH 13 Adjusting and calibrating the unit Installation Manual ORTHOPHOS XG 3D / Ceph 13.3 Checking and adjusting the touchscreen 13.3 Checking and adjusting the touchscreen 1. Switch the unit on. Once the unit software has started up, the start screen is displayed on the touchscreen. - Page 260 13 Adjusting and calibrating the unit Sirona Dental Systems GmbH 13.3 Checking and adjusting the touchscreen Installation Manual ORTHOPHOS XG 3D / Ceph 6. Touch the center of the green square in the bottom left corner of the screen. The fifth adjustment screen appears on the display.
-
Page 261: Mechanical Adjustments
Sirona Dental Systems GmbH 13 Adjusting and calibrating the unit Installation Manual ORTHOPHOS XG 3D / Ceph 13.4 Mechanical adjustments 13.4 Mechanical adjustments 13.4.1 Mechanical adjustment: Ceph secondary diaphragm 1. Loosen screw (A) and remove the cover of the secondary diaphragm by pulling it downward. - Page 262 13 Adjusting and calibrating the unit Sirona Dental Systems GmbH 13.4 Mechanical adjustments Installation Manual ORTHOPHOS XG 3D / Ceph 3. Set the diaphragm tilt via screw (C) (Lx in mm) and the diaphragm height via screw (D) (Ly in mm). Screw (C):...
-
Page 263: Final Work
Sirona Dental Systems GmbH 14 Final work Installation Manual ORTHOPHOS XG 3D / Ceph 14.1 Attaching the profile cover Final work 14.1 Attaching the profile cover 1. Screw the holder (A) to the column with the screw (B). 2. Clip on the profile (C). -
Page 264: Calling "Extended Details
14 Final work Sirona Dental Systems GmbH 14.2 Calling "Extended Details" Installation Manual ORTHOPHOS XG 3D / Ceph 14.2 Calling "Extended Details" "SIDEXIS Manager" 1. Start the under "Start"/"Programs"/"SIDEXIS"/ Opening extended details XG 3 / 5 / 3D / 3D ready "SIDEXIS XG"... - Page 265 Sirona Dental Systems GmbH 14 Final work Installation Manual ORTHOPHOS XG 3D / Ceph 14.2 Calling "Extended Details" 63 03 452 D3352 D3352.031.05.08.02 10.2015...
-
Page 266: Filling In The Certificate Of Conformity
14 Final work Sirona Dental Systems GmbH 14.3 Filling in the certificate of conformity Installation Manual ORTHOPHOS XG 3D / Ceph 14.3 Filling in the certificate of conformity ➢ Fill in the certificate of conformity. The system integrator uses the compatibility list as evidence of the installed SIDEXIS system's EC-conformity. -
Page 267: Unit Handover
Sirona Dental Systems GmbH 14 Final work Installation Manual ORTHOPHOS XG 3D / Ceph 14.4 Unit handover 14.4 Unit handover ➢ Give the customer all of the patient positioning aids, test phantoms Unit handover and special tools included in delivery, including packaging. These are important components of the unit and must be stored carefully. - Page 268 tÉ=êÉëÉêîÉ=íÜÉ=êáÖÜí=íç=ã~âÉ=~åó=~äíÉê~íáçåë=ïÜáÅÜ=ã~ó=ÄÉ=êÉèìáêÉÇ=ÇìÉ=íç=íÉÅÜåáÅ~ä=áãéêçîÉãÉåíëK «=páêçå~=aÉåí~ä=póëíÉãë=dãÄe=OMNR péê~ÅÜÉW ÉåÖäáëÅÜ mêáåíÉÇ=áå=dÉêã~åó aPPROKMPNKMRKMUKMO NMKOMNR ûKJkêKW= NON=NOS páêçå~=aÉåí~ä=póëíÉãë=dãÄe `çåí~Åí=áå=íÜÉ=rp^W SP=MP=QRO=aPPRO c~Äêáâëíê~≈É=PN páêçå~=aÉåí~äI=fåÅK lêÇÉê=kç aJSQSOR=_ÉåëÜÉáã QUPR=páêçå~=aêáîÉ dÉêã~åó `Ü~êäçííÉI=k`=OUOTP ïïïKëáêçå~KÅçã...
Need help?
Do you have a question about the Orthophos XG 3D/Ceph and is the answer not in the manual?
Questions and answers