
Related Manuals for Lucent Technologies DSLPipe/CellPipe Series

Summary of Contents for Lucent Technologies DSLPipe/CellPipe Series
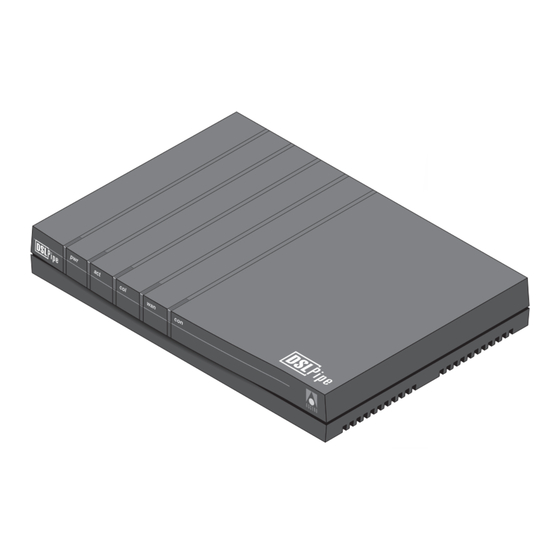
- Page 1 DSLPipe/CellPipe Quick Setup Part Number: 7820-0597-003 For software version 8.0 October 1999...
- Page 2 This material is protected by the copyright laws of the United States and other countries. It may not be reproduced, distributed, or altered in any fashion by any entity (either internal or external to Lucent Technologies), except in accordance with applicable agreements, contracts, or licensing, without the express written consent of Lucent Technologies.
-
Page 3: Customer Service
Customer Service Customer Service Customer Service provides a variety of options for obtaining information about Lucent products and services, software upgrades, and technical assistance. Finding information and software on the Internet Visit the Web site at http://www.ascend.com for technical information, product information, and descriptions of available services. - Page 4 Customer Service Priority Technical Assistance If you need to talk to an engineer right away, call (900) 555-2763 to reach the Priority Call queue. The charge of $2.95 per minute does not begin to accrue until you are connected to an engineer. Average wait times are less than three minutes. Other telephone numbers For a menu of Lucent’s services, call (800) 272-363).
-
Page 5: Important Safety Instructions
Fax—(510) 814-2312 • Customer Support BBS (by modem)—(510) 814-2302 Write to Lucent at the following address: Attn: Customer Service Lucent Technologies 1701 Harbor Bay Parkway Alameda, CA 94502-3002 Important safety instructions A. GENERAL Read and follow all warning notices and instructions marked on the product or included in the manual. - Page 6 Important safety instructions The power source has to be adequately rated to assure safe operation of the equipment. The building installation and/or power source must provide overload protection. Protective earth (PE) connection is essential to ensure safe operation before connecting to the power supply and telecommunication network. Do not defeat the purpose of the grounding-type plug by modifying the plug or using an adapter.
- Page 7 Important safety instructions 16 When installed in the final configuration, the product must comply with the applicable safety standards and regulatory requirements of the country in which it is installed. If necessary, consult with the appropriate regulatory agencies and inspection authorities to ensure compliance. 17 A rare phenomenon can create a voltage potential between the earth grounds of two or more buildings.
- Page 8 Important safety instructions Warning: The battery can explode if incorrectly replaced. Replace the battery only with the same or equivalent type recommended by the manufacturer. Dispose of used batteries according to the manufacturer’s instructions. Avertissement: Il y a danger d'explosion si la batterie n'est pas remplacée correctement.
-
Page 9: Table Of Contents
Contents Customer Service ..................... iii Important safety instructions ..................v Installing the unit ..............1-1 What is the DSLPipe/CellPipe? ................1-1 Checking box contents ..................1-2 Other items you need for installation ..............1-4 Steps to setting up your DSLPipe/CellPipe unit ............ 1-7 Checking DSLPipe/CellPipe model name ............. - Page 10 Contents Changing parameters with text entries ............. 2-6 Setting parameters with predefined values ..........2-6 Saving or discarding your changes ............2-6 Configuring the unit ............3-1 Configuring the DSLPipe units ................3-2 Plug and Play capability ................3-3 Changing default configuration of DSLPipe units ......... 3-3 Creating a connection profile for a Frame Relay connection ....
- Page 11 Contents DSL-Cell-50S as CPE .................. 3-29 DSLPipe/CellPipe Quick Setup...
- Page 12 Contents DSLPipe/CellPipe Quick Setup...
-
Page 13: Installing The Unit
Installing the unit What is the DSLPipe/CellPipe? ........... . 1-1 Checking box contents . -
Page 14: Checking Box Contents
Installing the unit DSLPipe/CellPipe Quick Setup standard telephone line to the unit. The other end connects to DSL equipment at the phone company. Your DSL circuit is dedicated to your DSLPipe/CellPipe unit. With DSL, you have the capacity to transfer data at very high rates. The actual rate can vary according to the type of DSLPipe/CellPipe you use, the distance between the DSLPipe/CellPipe and the DSL equipment, and the line quality of the connection. - Page 15 Installing the unit DSLPipe/CellPipe Quick Setup If you want to set up a DSL-ACAP or DSL-DMT for voice traffic, you must obtain a separate voice splitter package. For details on setting up the voice splitter with your DSLPipe, see the DSLPipe/CellPipe User’s Guide. Table 1-1.
-
Page 16: Other Items You Need For Installation
Installing the unit DSLPipe/CellPipe Quick Setup Other items you need for installation In addition to the items provided with the DSLPipe/CellPipe unit, you will also need the following: An Ethernet interface For the DSLPipe to transmit data to and receive data from your computer, you need a properly configured Ethernet interface for your computer. - Page 17 Installing the unit DSLPipe/CellPipe Quick Setup Straight-through Ethernet cables With the exception of the DSL-HST and the DSL-HS, all DSLPipes/CellPipes ship with one crossover Ethernet cable. The DSL-HST and the DSL-HS ship with one straight-through cable. Note: If you’re connecting a single computer to the DSLPipe/CellPipe and the computer has a 10Base-T (twisted-pair) Ethernet interface, you don’t need any additional Ethernet cabling.
- Page 18 Installing the unit DSLPipe/CellPipe Quick Setup If possible, you should set aside a serial port for a permanent connection to the DSLPipe/CellPipe. If there are not enough serial ports for all the devices that need serial connections, consider adding another serial port if you can. With a permanent serial connection, you can monitor the DSLPipe at any time, manually connect to and disconnect from remote networks, and make configuration changes whenever necessary.
-
Page 19: Steps To Setting Up Your Dslpipe/Cellpipe Unit
Installing the unit DSLPipe/CellPipe Quick Setup Steps to setting up your DSLPipe/CellPipe unit To set up your DSLPipe/CellPipe, perform the following steps: Step Description Go to page Check DSLPipe/CellPipe model. The model name page 1-8 is printed on the bottom of the DSLPipe/CellPipe box. -
Page 20: Checking Dslpipe/Cellpipe Model Name
Installing the unit DSLPipe/CellPipe Quick Setup Step Description Go to page For additional information, refer to the DSLPipe/CellPipe User’s Guide and the DSLPipe/CellPipe Reference Guide Checking DSLPipe/CellPipe model name Before setting up the DSLPipe/CellPipe, check which DSLPipe/CellPipe model you have. The model number is printed on the back of the DSLPipe/CellPipe. Your setup procedure will vary slightly according to the model. - Page 21 Installing the unit DSLPipe/CellPipe Quick Setup Table 1-2. Checking DSLPipe/CellPipe model (continued) DSLPipe/CellPipe Description Voice? model DSL-HS SDSL High Performance1.5 MB Go to page 1-12 Multi-rate DSLPipe DSL-S SDSL DSLPipe, Go to page 1-16 1-port DSL-2S SDSL DSLPipe, Go to page 1-18 2-port DSL-ACAP RADSL-CAP DSLPipe...
-
Page 22: Connecting Dsl-Cell-50A Or Dsl-Cell-20A Cables
Installing the unit DSLPipe/CellPipe Quick Setup Connecting DSL-Cell-50A or DSL-Cell-20A cables Description Illustration 1 Connect the yellow crossover Ethernet cable from the port labeled 10BT or LAN on the CellPipe to the Ethernet adapter in your computer. To connect the CellPipe to an Ethernet hub, use your own IN A straight-through Ethernet cable. - Page 23 Installing the unit DSLPipe/CellPipe Quick Setup Connecting DSL-Cell-50A or DSL-Cell-20A cables (continued) Description Illustration 3 Connect the power cable to the CellPipe and plug the other end into a wall outlet. Connect to the wall outlet last. There is no power switch. Connecting the power cable turns on the CellPipe.
-
Page 24: Connecting Dsl-Hst Or Dsl-Hs Cables
Installing the unit DSLPipe/CellPipe Quick Setup Connecting DSL-HST or DSL-HS cables Description Illustration 1 Connect the yellow straight-through Ethernet cable to one of the Ethernet ports on the DSLPipe and plug the other end to an Ethernet hub. Only one straight-through cable is provided with this unit. - Page 25 Installing the unit DSLPipe/CellPipe Quick Setup Connecting DSL-HST or DSL-HS cables (continued) Description Illustration 3 Connect the power cable to the DSLPipe and plug the other end into a wall outlet. Connect to the wall outlet last. There is no power switch. Connecting the power cable turns on the DSLPipe.
-
Page 26: Connecting Dsl-Acap Or Dsl-Dmt Cables
Installing the unit DSLPipe/CellPipe Quick Setup Connecting DSL-ACAP or DSL-DMT cables Description Illustration 1 Connect the yellow crossover Ethernet cable from the port labeled 10BT on the DSLPipe to the Ethernet adapter in your computer. To connect the DSLPipe to an L IT L IT Ethernet hub, use your own... - Page 27 Installing the unit DSLPipe/CellPipe Quick Setup Connecting DSL-ACAP or DSL-DMT cables (continued) Description Illustration 3 Connect the power cable to the DSLPipe and plug the other end into a wall outlet. Connect to the wall outlet last. There is no power switch. Connecting the power cable L IT turns on the DSLPipe.
-
Page 28: Connecting The Dsl-Cell-50S Or The Dsl-S Cables
Installing the unit DSLPipe/CellPipe Quick Setup Connecting the DSL-Cell-50S or the DSL-S cables Description Illustration 1 Connect the yellow crossover Ethernet cable from the port labeled 10BT on the DSLPipe/CellPipe to the Ethernet adapter in your computer. To connect the IN A IN A DSLPipe/CellPipe to an Ethernet... - Page 29 Installing the unit DSLPipe/CellPipe Quick Setup Connecting the DSL-Cell-50S or the DSL-S cables (continued) Description Illustration 3 Connect the power cable to the DSLPipe/CellPipe and plug the other end into a wall outlet. Connect to the wall outlet last. There is no power switch. Connecting the power cable turns on the DSLPipe/CellPipe.
-
Page 30: Connecting Dsl-2S Cables
Installing the unit DSLPipe/CellPipe Quick Setup Connecting DSL-2S cables Description Illustration 1 Connect the yellow crossover Ethernet cable from the port labeled 10BT on the DSLPipe to the Ethernet adapter in your computer. To connect the DSLPipe to an Ethernet hub, use your own IN A straight-through Ethernet cable. - Page 31 Installing the unit DSLPipe/CellPipe Quick Setup Connecting DSL-2S cables (continued) Description Illustration 3 Connect the power cable to the DSLPipe and plug the other end into a wall outlet. Connect to the wall outlet last. There is no power switch. Connecting the power cable turns on the DSLPipe.
-
Page 32: Connecting Dsl-Hstb Cables
Installing the unit DSLPipe/CellPipe Quick Setup Connecting DSL-HSTB cables Description Illustration 1 Connect the yellow crossover Ethernet cable from the port labeled LAN on the DSLPipe to the Ethernet adapter in your computer. Note: To connect the DSLPipe to an Ethernet hub, use your own straight-through Ethernet cable. - Page 33 Installing the unit DSLPipe/CellPipe Quick Setup Connecting DSL-HSTB cables Description Illustration 3 Connect the power cable to the DSLPipe and plug the other end into a wall outlet. Connect to the wall outlet last. There is no power switch. Connecting the power cable turns on the DSLPipe.
-
Page 34: Checking The Activity Of Dslpipe/Cellpipe Led Lights
Installing the unit DSLPipe/CellPipe Quick Setup Checking the activity of DSLPipe/CellPipe LED lights Observe the activity pattern of the lights at the front of the DSLPipe/CellPipe to verify that your unit is connected properly. When all the cables are connected, verify that: •... -
Page 35: Getting Ready To Configure
Getting ready to configure Getting ready to configure the DSLPipe or CellPipe unit....... . . 2-1 The DSLPipe/CellPipe main window . -
Page 36: Connecting Serial Cable And Setting Up Communications Software
Getting ready to configure DSLPipe/CellPipe Quick Setup Connecting serial cable and setting up communications software To establish a serial connection, proceed as follows: Use a serial cable to connect your computer’s serial (or modem) port to the terminal port on the back of the DSLPipe/CellPipe. Use a communications program (such as HyperTerm, PROCOMM PLUS, Zterm, or any other program that supports VT100 terminal emulation) to open a session directly with the port to which the DSLPipe/CellPipe is connected. -
Page 37: What's Next
Getting ready to configure DSLPipe/CellPipe Quick Setup Your communications program should now display the DSLPipe/CellPipe main window (see page page 2-3). If it does not, press Ctrl-L to reload or refresh the screen. The part of the screen you use to configure the DSLPipe/CellPipe is on the left and looks like this: Configure... -
Page 38: Status Windows
Getting ready to configure DSLPipe/CellPipe Quick Setup The DSLPipe/CellPipe main window allows you to monitor the status of your DSLPipe/CellPipe as well as configure all the connection profiles. Note: To learn how to configure your DSLPipe/CellPipe, see the examples on the next few pages. -
Page 39: Opening A Menu
Getting ready to configure DSLPipe/CellPipe Quick Setup Follow these guidelines to navigate the DSLPipe/CellPipe menu system. Use the Up and Down arrow keys to navigate up and down through the menus. A v at the end of the bottom line of a menu or status window listing indicates that more lines follow. -
Page 40: Changing Parameters With Text Entries
Getting ready to configure DSLPipe/CellPipe Quick Setup With the exception of parameters designated N/A (not applicable), you can edit all parameters in any menu. N/A indicates that a parameter does not apply, based on the value of parameter it is subordinate to; or based on a service not currently available on your system. -
Page 41: Configuring The Unit
Configuring the unit Configuring the DSLPipe units ........... . . 3-2 Configuring the DSL-Cell-50A and the DSL-Cell-50S units . -
Page 42: Configuring The Dslpipe Units
Configuring the unit DSLPipe/CellPipe Quick Setup The DSL-Cell-20A ships with a default configuration. The unit is set up to bridge with ATM-LLC encapsulation. The VPI is set to 8 and the VCI is set to 35. If you want to change these defaults, see “Configuring the DSL-Cell-20A” on page 3-8. Configuring the DSLPipe units All DSLPipe units ship with a default configuration. -
Page 43: Plug And Play Capability
Configuring the unit DSLPipe/CellPipe Quick Setup Plug and Play capability The Ascend Plug and Play is a set of features that allows you to set up your DSLPipe quickly and easily. The Plug and Play feature is automatically enabled in your DSLPipe. -
Page 44: Creating A Connection Profile For A Ppp Connection
Configuring the unit DSLPipe/CellPipe Quick Setup FR Prof = [name of the Frame Relay Profile] DLCI = [DLCI number for this profile] Note: You can set up multiple Frame Relay profiles or use the same Frame Relay profile in multiple connection profiles. Choose Ethernet >... - Page 45 Configuring the unit DSLPipe/CellPipe Quick Setup (Optional) You may need to choose Ethernet > Mod Config > Ether Options and turn Proxy Mode to Off. Check with your service provider. Save all your settings before you exit the DSLPipe main menu. DSLPipe/CellPipe Quick Setup...
-
Page 46: Configuring The Dsl-Cell-50A And The Dsl-Cell-50S Units
Configuring the unit DSLPipe/CellPipe Quick Setup Configuring the DSL-Cell-50A and the DSL-Cell-50S units The CellPipes do not ship with a default configuration. You must set up the CellPipes by choosing parameters available in the Configure menu. When you choose values in the Configure menu, you are choosing values that apply to the first connection profile. -
Page 47: Traffic Shaping Options For The Cellpipes
Configuring the unit DSLPipe/CellPipe Quick Setup Identifier). In LLC encapsulation, the LLC header specifies the protocol being transmitted. Traffic shaping options for the CellPipes The traffic shaping feature in the CellPipes allows you to specify the transmit rate and priority for each VC you define. You specify traffic shaping by choosing a Service Type and Service Rate for each connection profile. -
Page 48: Configuring The Dsl-Cell-20A
Configuring the unit DSLPipe/CellPipe Quick Setup Configuring the DSL-Cell-20A The DSL-Cell-20A unit performs bridging over ATM with LLC encapsulation. It ships with a default VPI of 8 and a default VCI of 35. If you do not need to change these default settings, just plug in the cables and you are ready to use the DSL-Cell-20A unit. -
Page 49: Displaying Atm Status
Configuring the unit DSLPipe/CellPipe Quick Setup The following list appears: show atm ? Display help information show atm help Display help information show atm stats Display ATM information Displaying ATM status To see statistics on the ATM connection, type the following: lucent% show atm stats The following list displays: VPI=8 VCI=35... -
Page 50: Displaying Adsl Status
Configuring the unit DSLPipe/CellPipe Quick Setup Table 3-2. Fields in the ATM status screen Fields Description Virtual Circuit Identifier. The default is 35. input pkts/ Number of packets received by the unit since the input OK pkts connection became active. The input pkts value should match the input OK pkts value. -
Page 51: Changing Configuration Information
Configuring the unit DSLPipe/CellPipe Quick Setup Downstream Speed: < Kbps> Table 3-3. Fields in the ADSL Status screen Fields Description Version number of the chipset. ADSL Chipset Version ANSI version number. ANSI Version Up or Down. Up if the connection is active. Down if the Line Status connection is inactive. -
Page 52: Changing The Mux Type
Configuring the unit DSLPipe/CellPipe Quick Setup lucent% set atm vpi <number> (Press the Enter key) Press the Enter key lucent% set atm vci <number> ( This changes the VPI or VCI number. Changing the MUX type The DSL-Cell-20A ships with the LLC encapsulation as the default. To change the LLC encapsulation (default) to VC multiplexing, type the following: lucent% set atm mux vc (Press the Enter key) To return to LLC, type the following:... -
Page 53: Configuring The Dsl-Hstb Unit
Configuring the unit DSLPipe/CellPipe Quick Setup Configuring the DSL-HSTB unit The DSL-HSTB unit performs bridging over a Frame Relay connection. It supports symmetrical transmission of 2.3 Mbps. It ships with the DLCI set to 16. If you do not need to change these default settings, just plug in the cables and you are ready to use the DSL-HSTB unit DSL-HSTB command-line interface After you connect the cables, and set up the communications software (see “Getting... -
Page 54: Displaying Frame Relay Status
Configuring the unit DSLPipe/CellPipe Quick Setup The following list appears: show fr ? Display help information show fr help Display help information show fr stats Display Frame Relay information show fr dlci Display all DLCI information Displaying Frame Relay status To see statistics on the Frame Relay connection, type the following: lucent% show fr stats The following list displays:... -
Page 55: Displaying The Frame Relay Dlci
Configuring the unit DSLPipe/CellPipe Quick Setup Table 3-4. Frame Relay status screen Fields Description The number of packets sent by the unit since the OutFrame connection came up. Displaying the Frame Relay DLCI To display the Frame Relay DLCI, type the following: lucent% show fr dlci The following list displays: DLCI = 16... -
Page 56: Displaying Sdsl Rate
Configuring the unit DSLPipe/CellPipe Quick Setup Table 3-5. Frame Relay DLCI status screen Fields Description Number of bytes sent by the unit since the connection output octets became active. Displaying SDSL rate To display the SDSL line rate, type the following: lucent% show sdsl stats The current SDSL rate displays in the screen. -
Page 57: Changing The Sdsl Rate
Configuring the unit DSLPipe/CellPipe Quick Setup Changing the SDSL rate The DSL-HSTB unit ships with the default SDSL rate of 2320 Kbps. You can use any one of the following rates: • 144 Kbps • 272 Kbps • 400 Kbps •... -
Page 58: Example Configurations
Configuring the unit DSLPipe/CellPipe Quick Setup Example configurations Since only parameters that you are changing are shown in these examples, the display you see on the screen will not match the parameters shown in the examples. The values shown are examples. Obtain the actual values from the telephone company providing you with DSL access. -
Page 59: Dsl-Hst As Cpe
Configuring the unit DSLPipe/CellPipe Quick Setup DSL-HST as CPE Table 3-6. Configuring the DSL-HST as CPE Example Scenarios, as CPE DSL-HST Configuration 1. Assume you are setting up a Configure > DSL-HST for Frame Relay with Chan Usage = Leased/Unused only IP routing enabled. - Page 60 Configuring the unit DSLPipe/CellPipe Quick Setup Table 3-6. Configuring the DSL-HST as CPE (continued) Example Scenarios, as CPE DSL-HST Configuration 2. Assume you are setting up a Configure > DSL-HST for a bridged Frame Chan Usage = Leased/Unused Relay connection. My Name = CPE My Addr = 204.215.204.215 Note: When you set up a...
-
Page 61: Dsl-Hst As Coe
Configuring the unit DSLPipe/CellPipe Quick Setup DSL-HST as COE Table 3-7. Configuring the DSL-HST as COE Example Scenarios, as COE DSL-HST Configuration 1. Assume you are setting up a Configure > DSL-HST for Frame Relay with Chan Usage = Leased/Unused only IP routing enabled. - Page 62 Configuring the unit DSLPipe/CellPipe Quick Setup Table 3-7. Configuring the DSL-HST as COE (continued) Example Scenarios, as COE DSL-HST Configuration 2. Assume you are setting up a Configure > DSL-HST for bridged Frame Chan Usage = Leased/Unused Relay connection. My Name = COE My Addr = 192.168.200.1/24 Note: When you set up a Rem Name = CPE...
-
Page 63: Dsl-Acap As Cpe
Configuring the unit DSLPipe/CellPipe Quick Setup DSL-ACAP as CPE Table 3-8. Configuring the DSL-ACAP as CPE Example Scenario, as CPE DSL-ACAP Configuration Assume you are setting up the Configure > RADSL-CAP DSLPipe for a Chan Usage = Leased/Unused bridged Frame Relay My Name = CPE connection. -
Page 64: Dsl-Acap As Coe
Configuring the unit DSLPipe/CellPipe Quick Setup DSL-ACAP as COE Table 3-9. Configuring the DSL-ACAP as COE Example Scenario, as COE DSL-ACAP Configuration Assume you are setting up the Configure > RADSL-CAP DSLPipe for a Chan Usage = Leased/Unused bridged Frame Relay My Name = COE connection. -
Page 65: Dsl-Cell-50A As Cpe
Configuring the unit DSLPipe/CellPipe Quick Setup DSL-Cell-50A as CPE Table 3-10.Confiuging the CellPipe 50A as CPE Example Scenarios CellPipe Configuration 1. Assume you are setting up ATM Configure > over ADSL with VPI = 1, VCI = 10. Chan Usage = Leased/Unused Assume you will be using a VC My Addr = 204.215.204.215 connection with IP routing. - Page 66 Configuring the unit DSLPipe/CellPipe Quick Setup Table 3-10.Confiuging the CellPipe 50A as CPE Example Scenarios CellPipe Configuration 2. Assume you are setting up ATM Configure > over ADSL with VPI = 5, VCI = 20. Chan Usage = Leased/Unused Assume you will be using a LLC My Addr = 204.215.204.215 connection with bridging.
- Page 67 Configuring the unit DSLPipe/CellPipe Quick Setup Table 3-10.Confiuging the CellPipe 50A as CPE Example Scenarios CellPipe Configuration 3. Assume you are setting up nailed Configure > PPP over ATM with VPI = 5, VCI = Chan Usage = Leased/Unused 20. Assume you will be using a LLC My Addr = 204.215.204.215 connection with IP routing.
- Page 68 Configuring the unit DSLPipe/CellPipe Quick Setup Table 3-10.Confiuging the CellPipe 50A as CPE Example Scenarios CellPipe Configuration 4. Assume you are setting up Configure > on-demand PPP over ATM with VPI Chan Usage = Switch/Unused = 5, VCI = 20. Assume you will be My Addr = 204.215.204.215 using a LLC connection with IP Encaps = PPP...
- Page 69 Configuring the unit DSLPipe/CellPipe Quick Setup DSL-Cell-50S as CPE Table 3-11.Configuring the DSLPipe 50S as CPE Scenario DSL-Cell-50S configuration 1. Assume you are setting up only Configure > one Connection profile with the Data Chan Usage = Rate parameter set to 144 Kbps. The Leased/Unused unit is functioning as CPE.
- Page 70 Configuring the unit DSLPipe/CellPipe Quick Setup Table 3-11.Configuring the DSLPipe 50S as CPE Scenario DSL-Cell-50S configuration 2. Assume you are setting up ATM Configure > over SDSL with Vpi set to 1 and Vci Chan Usage = set to 10. The Data Rate parameter is Leased/Unused set to 528 Kbps and you are using the My Name=...
- Page 71 Configuring the unit DSLPipe/CellPipe Quick Setup Table 3-11.Configuring the DSLPipe 50S as CPE Scenario DSL-Cell-50S configuration 3. Assume you are setting up ATM Configure > over SDSL with VPI = 5, VCI = 20. Chan Usage = The data rate is set to 144 Kbps and Leased/Unused you are using the unit as CPE.
- Page 72 Configuring the unit DSLPipe/CellPipe Quick Setup Table 3-11.Configuring the DSLPipe 50S as CPE Scenario DSL-Cell-50S configuration 3. (Continued) Ethernet > Connections > Station = ex3 (already assigned in the Configure menu) Active = Yes (set to Yes when saved in the Config- ure menu) Encaps = ATM (already assigned in the Configure...
- Page 73 Configuring the unit DSLPipe/CellPipe Quick Setup Table 3-11.Configuring the DSLPipe 50S as CPE Scenario DSL-Cell-50S configuration 4. Assume you are setting up nailed Configure > PPP over ATM with Vpi set to 5 and * Chan Usage = VCI set to 20. The Data Rate parame- Leased/Unused ter is set to 784 Kbps and you are * My Name = Bob...
- Page 74 Configuring the unit DSLPipe/CellPipe Quick Setup Table 3-11.Configuring the DSLPipe 50S as CPE Scenario DSL-Cell-50S configuration 5. Assume you are setting up Configure > on-demand PPP over ATM with Vpi * Chan Usage = set to 5 and Vci set to 20. The Data Switch/Unused Rate parameter is set to 2320 Kbps * My Name = Bob...
- Page 75 Configuring the unit DSLPipe/CellPipe Quick Setup Table 3-11.Configuring the DSLPipe 50S as CPE Scenario DSL-Cell-50S configuration 6. Assume you are using NAT. Configure > 10.10.10.10 is the gateway address. Chan Usage = You are setting up ATM over SDSL Leased/Unused with Vpi set to and Vci set to 10.
- Page 76 Configuring the unit DSLPipe/CellPipe Quick Setup Table 3-11.Configuring the DSLPipe 50S as CPE Scenario DSL-Cell-50S configuration 6. (Continued) Ethernet > NAT * Routing = Yes * Profile = ex6 * VC address = 10.10.10.100 (use the static address assigned by your service provider) LAN = N/A Static Mappings...
Need help?
Do you have a question about the DSLPipe/CellPipe Series and is the answer not in the manual?
Questions and answers