Sign In
Upload
Download
Table of Contents
Contents
Add to my manuals
Delete from my manuals
Share
URL of this page:
HTML Link:
Bookmark this page
Add
Manual will be automatically added to "My Manuals"
Print this page
×
Bookmark added
×
Added to my manuals
Manuals
Brands
Biotek Manuals
Laboratory Equipment
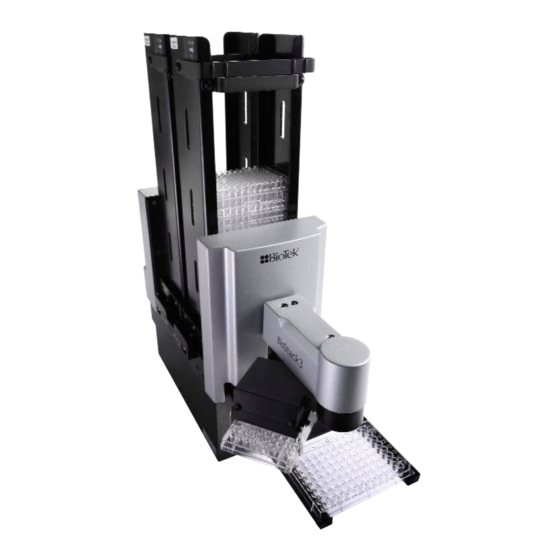
BioStack 4
Operator's manual
Biotek BioStack 4 Operator's Manual
Microplate stacker
Hide thumbs
1
2
3
4
Table Of Contents
5
6
7
8
9
10
11
12
13
14
15
16
17
18
19
20
21
22
23
24
25
26
27
28
29
30
31
32
33
34
35
36
37
38
39
40
41
42
43
44
45
46
47
48
49
50
51
52
53
54
55
56
57
58
59
60
61
62
63
64
65
66
67
68
69
70
71
72
73
74
75
76
77
78
79
80
81
82
83
84
85
86
87
88
89
90
91
92
93
94
95
96
97
98
99
100
101
102
103
104
105
106
107
108
109
110
111
112
113
114
115
116
117
118
119
120
121
122
123
124
125
126
127
page
of
127
Go
/
127
Contents
Table of Contents
Troubleshooting
Bookmarks
Table of Contents
Notices
Table of Contents
Notices| V
Contact Information
Global Service and Support
Customer Service and Sales
Service/Technical Assistance Center (TAC)
European Coordination Center/Authorized European Representative
Revision History
Document Conventions
Intended Use Statement
Quality Control
Warranty and Product Registration
Warnings
Hazards
Precautions
CE Mark
Directive 2014/30/EU: Electromagnetic Compatibility
Directive 2014/35/EU Low Voltage (Safety)
Directive 2012/19/EU: Waste Electrical and Electronic Equipment
Directive 98/79/EC: in Vitro Diagnostics (if Labeled for this Use)
Electromagnetic Interference and Susceptibility
Usa Fcc Class a
Canadian Department of Communications Class a XVII
User Safety
Safety Symbols
Biostack 3 and Biostack 4: Secure Gripper before Moving
Introduction
Introducing the Biostack
Product Description
Biostack 4: Notes about Handling Lidded Plates
Package Contents
Optional Accessories
Specifications
Stay-On Lid Mode (Biostack 4 Only)
Installation
Upgrade Scenarios
Unpack and Inspect the Instrument
Setting up the Biostack
Remove the Shipping Hardware-BIOSTACK2WR
Remove the Shipping Hardware-Biostack 3
Remove the Shipping Hardware-Biostack 3
Remove the Shipping Hardware—Biostack 4
Wrist Angle Setting Requirements
Degree Orientation for Liquid Handlers
Dip Switch Settings
Change Setting for Wrist Angle
Change Setting for 50-Plate Stacks
Test Plates for Compatibility-Biostack 4 Only
Connect to Power
Connect to Computer
Connect to Liquid Handler
Where to Go Next
Repacking the Biostack
Install the Shipping Hardware-Biostack2Wr
Install the Shipping Hardware-Biostack 3
Install the Shipping Hardware—Biostack 4
Repacking-Install Shipping Panel
Operation
Before You Start
Load Plates into Input Stack
Load Plates Using the Pedestal
Supported Microplate Types and Dimensions
Processing Microplates
Controlling the Biostack
Stopping Plate Processing
Restack the Plates
Processing Plates with Lids
Plate De-Lidding: How It Works
Prevent Condensation on Plate Lids
Plate Lid Definition Files
Microplate and Lid Dimensions
Plate Lid Advanced Dimensions
Start up the Biostack
Maintenance
Overview
Recommended Maintenance Schedule
Warnings and Precautions
Required Materials
Routine Cleaning Procedure
Decontamination
Tools and Supplies
Decontaminate the Biostack
Cleaning and Lubricating the Linear Ways
Qualification
Overview
Recommended Qualification Schedule
Installation Qualification
Operational Qualification Procedure
Troubleshooting & Error Codes
Troubleshooting
Communication Error Codes
Biostack Instrument Errors
Plate Lid Definition Errors
Washer or Dispenser Communication Error Codes
Biostack Sensor Numbers
Biostack Motor Numbers
Interfacing Instrument Numbers
Plate Stacked Height
Change Setting for Low-Profile Plates
Loosen Plate Carrier Set Screws - Biostack 4 Only
Adjust the Stack Dogs
Install the Barcode Scanner
Barcode Scanner Overview
Install the Barcode Scanner
Change Dip Switch Setting for Barcode Scanner
Install the Scanner Cable Duct
Preparing and Attaching Barcode Labels
Scanner Test with Readers
To Report Barcodes with Reader Results
Scanner Test with Precision/Xs
To Report Scanned Codes with Precision/Xs
Advertisement
Quick Links
1
Setting up the Biostack
2
Troubleshooting & Error Codes
3
Communication Error Codes
4
Biostack Instrument Errors
Download this manual
Microplate Stacker
BioStack
™
Operator's Manual
Table of
Contents
Previous
Page
Next
Page
1
2
3
4
5
Advertisement
Table of Contents
Troubleshooting
Troubleshooting & Error Codes
95
Troubleshooting
96
Need help?
Do you have a question about the BioStack 4 and is the answer not in the manual?
Ask a question
Questions and answers
Related Manuals for Biotek BioStack 4
Laboratory Equipment Biotek 405 TS Getting Started Manual
Microplate washer (123 pages)
Laboratory Equipment Biotek BioStack 3 Operator's Manual
Microplate stacker (127 pages)
Laboratory Equipment Biotek ELx808 Operator's Manual
Absorbance microplate reader (172 pages)
Laboratory Equipment Biotek Synergy HTX Operator's Manual
Multi-mode microplate reader (184 pages)
Laboratory Equipment Biotek Synergy HT Operator's Manual
Multi-mode microplate reader (240 pages)
Laboratory Equipment Biotek MultiFlo FX Operator's Manual
Multi-mode dispenser. microplate dispenser (330 pages)
Laboratory Equipment Biotek Synergy H1 Operator's Manual
Hybrid multi-mode microplate reader (184 pages)
Laboratory Equipment Biotek ELx800 Operator's Manual
(218 pages)
Laboratory Equipment Biotek 800TSI Instructions For Use Manual
Absorbance reader (61 pages)
Laboratory Equipment Biotek Epoch 2 Instructions For Use Manual
Microplate spectrophotometer (43 pages)
Laboratory Equipment Biotek Epoch Operator's Manual
Microplate spectrophotometer (88 pages)
Laboratory Equipment Biotek Synergy H1 Operator's Manual
Hybrid multi-mode microplate reader (190 pages)
Laboratory Equipment Biotek Synergy LX User Manual
Multi-mode microplate reader (198 pages)
Laboratory Equipment Biotek ELx50 Operator's Manual
(188 pages)
Laboratory Equipment Biotek OM-1000 Owner's Manual
Dissolved ozone monitor (9 pages)
This manual is also suitable for:
Biostack series
Biostack 3
Biostack 2wr
Table of Contents
Save PDF
Print
Rename the bookmark
Delete bookmark?
Delete from my manuals?
Login
Sign In
OR
Sign in with Facebook
Sign in with Google
Upload manual
Upload from disk
Upload from URL


Need help?
Do you have a question about the BioStack 4 and is the answer not in the manual?
Questions and answers