Magtek DynaPro Go Installation And Operation Manual
Handheld pin pad device with msr/contact/contactless
Hide thumbs
Also See for DynaPro Go:
- Programmer's manual (247 pages) ,
- Installation and operation manual (60 pages) ,
- Quick installation manual (4 pages)
Table of Contents
Advertisement
Advertisement
Table of Contents

Related Manuals for Magtek DynaPro Go


Summary of Contents for Magtek DynaPro Go
- Page 1 DynaPro Go Handheld PIN Pad Device with MSR/Contact/Contactless Installation and Operation Manual February 2019 Document Number: D998200129-20 REGISTERED TO ISO 9001:2015 MagTek I 1710 Apollo Court I Seal Beach, CA 90740 I Phone: (562) 546-6400 I Technical Support: (888) 624-8350 www.magtek.com...
- Page 2 Some device icons courtesy of https://icons8.com/, used under the Creative Commons Attribution- NoDerivs 3.0 license. All other system names and product names are the property of their respective owners. DynaPro Go| Handheld PIN Pad Device with MSR/Contact/Contactless | Installation and Operation Manual Page 2 of 77 (D998200129-20)
- Page 3 (add sections 4, 7.3.1; modify other sections throughout); Add section 7.3.4 and clarify power button and device states throughout section 7.3; Misc. clarifications and corrections. DynaPro Go| Handheld PIN Pad Device with MSR/Contact/Contactless | Installation and Operation Manual Page 3 of 77 (D998200129-20)
-
Page 4: Limited Warranty
MagTek’s published specifications. This warranty shall be provided only for a period of one year from the date of the shipment of the product from MagTek (the “Warranty Period”). This warranty shall apply only to the “Buyer” (the original purchaser, unless that entity resells the product as authorized by MagTek, in which event this warranty shall apply only to the first repurchaser). - Page 5 THE CONTRACT PRICE FOR THE GOODS. MAGTEK’S SOLE LIABILITY AND BUYER’S EXCLUSIVE REMEDIES ARE STATED IN THIS SECTION AND IN THE SECTION RELATING TO MAGTEK’S LIMITED WARRANTY. DynaPro Go| Handheld PIN Pad Device with MSR/Contact/Contactless | Installation and Operation Manual Page 5 of 77 (D998200129-20)
-
Page 6: Fcc Information
(2) L'utilisateur de l'appareil doit accepter tout brouillage radioélectrique subi, même si le brouillage est susceptible d'en compromettre le fonctionnement. CUR/UR This product is recognized per Underwriter Laboratories and Canadian Underwriter Laboratories 1950. DynaPro Go| Handheld PIN Pad Device with MSR/Contact/Contactless | Installation and Operation Manual Page 6 of 77 (D998200129-20) -
Page 7: Ce Standards
SSC. All rights and remedies regarding products and services which have received PCI SSC approval shall be provided by the party providing such products or services, and not by PCI SSC. DynaPro Go| Handheld PIN Pad Device with MSR/Contact/Contactless | Installation and Operation Manual Page 7 of 77 (D998200129-20) -
Page 8: Table Of Contents
How to Connect DynaPro Go to a Host via 802.11 Wireless .......... 25 5.3.3 How to Connect DynaPro Go to a Host via the Bluetooth LE Connection ..... 26 Configuration ............................28 DynaPro Go| Handheld PIN Pad Device with MSR/Contact/Contactless | Installation and Operation Manual... - Page 9 How to Insert Contact Chip Cards ..................65 7.6.3 How to Tap Contactless Cards / Devices ................67 7.6.4 How to Enter Card Information Manually ................69 DynaPro Go| Handheld PIN Pad Device with MSR/Contact/Contactless | Installation and Operation Manual Page 9 of 77 (D998200129-20)
- Page 10 Mechanical Maintenance ......................73 Updates to Firmware, Documentation, Security Guidance............73 Developing Custom Software ....................... 74 Appendix A Technical Specifications ....................... 75 DynaPro Go| Handheld PIN Pad Device with MSR/Contact/Contactless | Installation and Operation Manual Page 10 of 77 (D998200129-20)
-
Page 11: Introduction
Introduction About DynaPro Go MagTek’s DynaPro Go is a handheld secure PIN entry device that is ideal for credit, prepaid, gift, and debit cards for mobile point of sale applications where you need unmatched convenience and security. Reduce your interchange rates, reduce chargebacks, and increase your customer satisfaction and sales with DynaPro Go. - Page 12 DYNAPRO GO, PCI, BLACK, 30056216 micro-USB 802.11 WIRELESS DYNAPRO GO, TST, BLACK, 30056221 micro-USB BLUETOOTH LE DYNAPRO GO, PCI, BLACK, 30056222 micro-USB BLUETOOTH LE DynaPro Go| Handheld PIN Pad Device with MSR/Contact/Contactless | Installation and Operation Manual Page 12 of 77 (D998200129-20)
-
Page 13: Protection For All Points Within The Payment Infrastructure
LCD display. Security and Ease of Integration by Design DynaPro Go is a durable device designed for easy connection and integration. MagTek is your partner in development, and provides a comprehensive platform of drivers, APIs, and Software Development Kits (SDKs). -
Page 14: 10-Digit Backlit Numeric Keypad With Function Keys
Right Function Key Low-Power Standby Modes To conserve battery power, DynaPro Go enters a low-power mode or powers off in response to a variety of events, including screen timeouts (“Powered Off Mode”), USB Suspend directives from a connected USB host, critically low battery power, and periodic maintenance resets. Details about how DynaPro Go manages and conserves battery power can be found in section 7.3 Power Management. -
Page 15: Major Components
2.10 About Terminology In this document, DynaPro Go is referred to as the device. It is designed to be connected to a host, which is a piece of general-purpose electronic equipment which can send commands and data to, and receive data from, the device. -
Page 16: Planning And Preparation
Logistical Planning Determine what type of host DynaPro Go will connect to. For a list of supported device types and operating systems, see Appendix A Technical Specifications. When planning, be sure to include any additional support or devices required by the host and DynaPro Go, such as physical locations, mounting, power connections, and charging cradles. - Page 17 Charging cradles and accessories are available directly from MagTek. Make sure there is an adequate number of USB wall chargers and / or USB ports available for the number of devices you are charging together, and make sure the electrical socket-outlet at a given charging location can support the total load.
-
Page 18: Network Planning
2) Determine how the IP addresses of all DynaPro Go devices and the host will be allocated, and plan a way to share the plan with the advanced operators who will be configuring devices. - Page 19 Supported TLS Cipher Suites TLS_ECDHE_ECDSA_WITH_AES_256_GCM_SHA384 TLS_ECDHE_ECDSA_WITH_AES_128_GCM_SHA256 TLS_ECDHE_ECDSA_WITH_AES_128_CBC_SHA256 TLS_ECDHE_ECDSA_WITH_AES_256_CBC_SHA TLS_ECDHE_ECDSA_WITH_AES_128_CBC_SHA TLS_ECDHE_ECDSA_WITH_3DES_EDE_CBC_SHA TLS_ECDHE_RSA_WITH_AES_128_GCM_SHA256 TLS_ECDHE_RSA_WITH_AES_128_CBC_SHA256 TLS_ECDHE_RSA_WITH_AES_256_CBC_SHA TLS_ECDHE_RSA_WITH_AES_128_CBC_SHA TLS_ECDHE_RSA_WITH_3DES_EDE_CBC_SHA TLS_RSA_WITH_AES_256_GCM_SHA384 TLS_RSA_WITH_AES_128_GCM_SHA256 TLS_RSA_WITH_AES_256_CBC_SHA256 TLS_RSA_WITH_AES_128_CBC_SHA256 TLS_RSA_WITH_AES_256_CBC_SHA TLS_RSA_WITH_AES_128_CBC_SHA TLS_RSA_WITH_3DES_EDE_CBC_SHA DynaPro Go| Handheld PIN Pad Device with MSR/Contact/Contactless | Installation and Operation Manual Page 19 of 77 (D998200129-20)
- Page 20 TCP Inbound requests from host TCP Port 26 (configurable) IGMP IPv4 ICMP Gedday DNS Service Discovery (Only when using Device Initiated mode) DynaPro Go| Handheld PIN Pad Device with MSR/Contact/Contactless | Installation and Operation Manual Page 20 of 77 (D998200129-20)
-
Page 21: Handling And Storage
Do not attempt to disassemble the device. Do not expose the device to excessive heat or cold (see Appendix A Technical Specifications). DynaPro Go| Handheld PIN Pad Device with MSR/Contact/Contactless | Installation and Operation Manual Page 21 of 77 (D998200129-20) -
Page 22: Installation
Before the device is deployed, it is also important to inspect the packaging to make sure it has not been tampered with in storage or in transit. MagTek provides details for inspecting the integrity of the device’s packaging in D998200134 DYNAPRO GO PACKAGE INSPECTION. -
Page 23: About Software
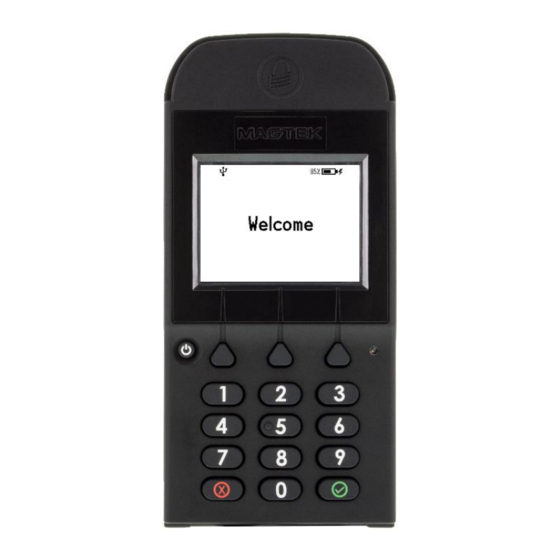
2) As soon as DynaPro Go starts receiving power through USB, it automatically powers on. 3) If you want DynaPro Go to communicate with the host via USB (as opposed to merely using it as a power source to charge the battery), make sure its active connection is set to USB. See section 6.3 How to Change the Active Connection. - Page 24 6) After successfully connecting to the host operating system via USB, the device shows Welcome the display (see section 7.2 How to Read Device Status). DynaPro Go| Handheld PIN Pad Device with MSR/Contact/Contactless | Installation and Operation Manual Page 24 of 77 (D998200129-20)
-
Page 25: How To Connect Dynapro Go To A Host Via 802.11 Wireless
5.3.2 How to Connect DynaPro Go to a Host via 802.11 Wireless To connect DynaPro Go to a host or charger using the 802.11 wireless connection, follow these steps: 1) Make sure the wireless access point, network, device, and host are set up properly and tested according to the steps in section 6.4 How to Configure Network Settings (ADVANCED). -
Page 26: How To Connect Dynapro Go To A Host Via The Bluetooth Le Connection
Bluetooth Core Specification version 4.2. 2) On the host, install and configure the software you intend to use with DynaPro Go. 3) Power on the device and make sure the battery is charged. Note that it is not always necessary to explicitly turn on the device before using it;... - Page 27 To conserve power, make sure the device is powered off either automatically or manually when it is not in use. DynaPro Go| Handheld PIN Pad Device with MSR/Contact/Contactless | Installation and Operation Manual Page 27 of 77 (D998200129-20)
-
Page 28: Configuration
Displays a page showing information about the EMV functions of the device. See section 7.2.4 EMV Show EMV details 7 8 3 Details. Right Function Key DynaPro Go| Handheld PIN Pad Device with MSR/Contact/Contactless | Installation and Operation Manual Page 28 of 77 (D998200129-20) - Page 29 Toggle Network 4 5 9 Connection Mode Modes. See section 6.4.4 How to Configure the Right Function Key Device for 802.11 Wireless. DynaPro Go| Handheld PIN Pad Device with MSR/Contact/Contactless | Installation and Operation Manual Page 29 of 77 (D998200129-20)
-
Page 30: How To Configure The Lcd Display Brightness
To exit without saving changes, press the Cancel key or wait 10 seconds for the device to return to the Welcome screen. DynaPro Go| Handheld PIN Pad Device with MSR/Contact/Contactless | Installation and Operation Manual Page 30 of 77 (D998200129-20) -
Page 31: Lcd Display Brightness Auto Mode
To exit without saving changes, press the key or wait 10 seconds Enter Cancel for the device to return to the screen. Welcome DynaPro Go| Handheld PIN Pad Device with MSR/Contact/Contactless | Installation and Operation Manual Page 31 of 77 (D998200129-20) -
Page 32: How To Configure The Keypad Backlight
Table 6-3 - Keypad Backlight Brightness Levels Light Level Keypad Brightness Level High Off (0%) Medium Medium (33%) High (67%) Very Low Maximum (100%) DynaPro Go| Handheld PIN Pad Device with MSR/Contact/Contactless | Installation and Operation Manual Page 32 of 77 (D998200129-20) -
Page 33: How To Change The Active Connection
6 - Configuration How to Change the Active Connection DynaPro Go supports multiple connection types, but only one interface can be active at a time. Initial configuration requires the host to use the USB port, but after configuration, generally a live deployed solution will not require changing the Active Connection. -
Page 34: How To Configure Network Settings (Advanced)
6.4.1 How to Configure the Network to Support 802.11 Wireless Connections To prepare the network for DynaPro Go and the host to communicate via the 802.11 wireless connection, network and device administrators should do the following before deployment: 1) Perform all steps in section 3.2 Network Planning. -
Page 35: How To Configure The Host For 802.11 Wireless
To set up the host to communicate with the device via 802.11 wireless, follow these steps: 1) Talk to your reseller or MagTek Support Services to request a .p12 file containing certificate chains and a private key to install on the host, and a password to decrypt the .p12 file. -
Page 36: About Configuring The Device For 802.11 Wireless
6.4.3 About Configuring the Device for 802.11 Wireless DynaPro Go ships from the manufacturer with TLS Enabled. This setting can be set to Disabled by the customer, which may be useful for initial network setup and testing. MagTek strongly recommends that TLS always be Enabled when it is deployed in the field. -
Page 37: How To Configure The Device For 802.11 Wireless
Left Function Key 4 5 6 Right Function Key 7) Connect the device to the host’s USB port (see section 5.3.1 How to Connect DynaPro Go to a Host or Charger via USB). At the end, the device drivers are installed on the test workstation, and the... - Page 38 11) Use the right and left arrow buttons in the tab bar to scroll the tab bar, then select the tab. Wireless 12) In the group, press the button. Wireless Host Configuration Enable Wireless Configure DynaPro Go| Handheld PIN Pad Device with MSR/Contact/Contactless | Installation and Operation Manual Page 38 of 77 (D998200129-20)
- Page 39 15) Enter the Service Set ID ( ) of the wireless access point you are connecting to. SSID 16) Enter the Password/Key for the wireless access point. DynaPro Go| Handheld PIN Pad Device with MSR/Contact/Contactless | Installation and Operation Manual Page 39 of 77 (D998200129-20)
- Page 40 Device Initiated mode and Always Listening mode, and press the function key below to accept or reject the change. DynaPro Go| Handheld PIN Pad Device with MSR/Contact/Contactless | Installation and Operation Manual Page 40 of 77 (D998200129-20)
- Page 41 802.11 wireless connection. 25) Write down the IP Address and press the Cancel key to return to the Welcome screen. DynaPro Go| Handheld PIN Pad Device with MSR/Contact/Contactless | Installation and Operation Manual Page 41 of 77 (D998200129-20)
- Page 42 MagTek PCI PED Host App Simulator window open and follow the steps in section 6.4.5 How to Test the 802.11 Wireless Connection. DynaPro Go| Handheld PIN Pad Device with MSR/Contact/Contactless | Installation and Operation Manual Page 42 of 77 (D998200129-20)
-
Page 43: How To Test The 802.11 Wireless Connection
6.4.5.1 How to Test an Always Listening Wireless Connection. If the device is configured for Device Initiated, continue testing by following the steps in section 6.4.5.2 How to Test a Device Initiated Wireless Connection. DynaPro Go| Handheld PIN Pad Device with MSR/Contact/Contactless | Installation and Operation Manual Page 43 of 77 (D998200129-20) -
Page 44: How To Test An Always Listening Wireless Connection (Tls Enabled)
If the key was installed correctly, the export utility will ask if the private key should also be exported. If no key exists, the utility will not show the export key prompt. DynaPro Go| Handheld PIN Pad Device with MSR/Contact/Contactless | Installation and Operation Manual Page 44 of 77 (D998200129-20) - Page 45 MagTek PCI PED Host App Simulator window to send commands to the device through the wireless connection or to receive transaction data. DynaPro Go| Handheld PIN Pad Device with MSR/Contact/Contactless | Installation and Operation Manual Page 45 of 77 (D998200129-20)
-
Page 46: How To Test A Device Initiated Wireless Connection
Received Signal Strength Indicator level ( ) is greater than RSSI 3) Follow the steps in section 7.4 How to Start a Handheld Transaction Using 802.11 Wireless. DynaPro Go| Handheld PIN Pad Device with MSR/Contact/Contactless | Installation and Operation Manual Page 46 of 77 (D998200129-20) -
Page 47: Operation
DynaPro Go| Handheld PIN Pad Device with MSR/Contact/Contactless | Installation and Operation Manual Page 47 of 77 (D998200129-20) - Page 48 7 - Operation Figure 7-2 - Typical Transaction Sequence DynaPro Go| Handheld PIN Pad Device with MSR/Contact/Contactless | Installation and Operation Manual Page 48 of 77 (D998200129-20)
-
Page 49: How To Read Device Status
Battery is low, between 10% and 20% charged. Battery is critically low, between 3% and 10% charged. Battery is empty, below 3% charged. Battery is charging. DynaPro Go| Handheld PIN Pad Device with MSR/Contact/Contactless | Installation and Operation Manual Page 49 of 77 (D998200129-20) - Page 50 DYNAPRO GO PROGRAMMER'S MANUAL (COMMANDS) provides detailed explanations of every individual numerical code, geared toward solution designers. Figure 7-4 - Welcome Screen Showing OFFLINE DynaPro Go| Handheld PIN Pad Device with MSR/Contact/Contactless | Installation and Operation Manual Page 50 of 77 (D998200129-20)
- Page 51 EMF source; if the error persists, the device should be repaired or replaced. An offline code beginning with indicates an issue or a transient condition pertaining to the device’s 802.11 wireless connection. DynaPro Go| Handheld PIN Pad Device with MSR/Contact/Contactless | Installation and Operation Manual Page 51 of 77 (D998200129-20)
-
Page 52: Firmware Version
Note that in PCI listings, lowercase “x” is a wildcard meaning ‘any single character.’ Figure 7-5 - Firmware Version Screen for 802.11 Wireless Devices Figure 7-6 - Firmware Version Screen for Bluetooth LE Devices DynaPro Go| Handheld PIN Pad Device with MSR/Contact/Contactless | Installation and Operation Manual Page 52 of 77 (D998200129-20) -
Page 53: Contactless And Other Details
Right function key . To return to Welcome screen, press the Cancel key. Figure 7-7 - Examples of Contactless and Other Device Details Screens DynaPro Go| Handheld PIN Pad Device with MSR/Contact/Contactless | Installation and Operation Manual Page 53 of 77 (D998200129-20) -
Page 54: Emv Details
To see information pertinent to the device’s EMV certification, on the Welcome screen, press the sequence . To return to the screen, press Left function key Right function key Welcome key. Cancel DynaPro Go| Handheld PIN Pad Device with MSR/Contact/Contactless | Installation and Operation Manual Page 54 of 77 (D998200129-20) -
Page 55: Health And Safety Information
To return to the screen, press the key, or wait Welcome Cancel 10 seconds. Figure 7-8 - Health and Safety Screen 1 DynaPro Go| Handheld PIN Pad Device with MSR/Contact/Contactless | Installation and Operation Manual Page 55 of 77 (D998200129-20) -
Page 56: Connection Status Screen
It is normal for the device to stop advertising after the host has established a connection. The value is reserved for future use. Error DynaPro Go| Handheld PIN Pad Device with MSR/Contact/Contactless | Installation and Operation Manual Page 56 of 77 (D998200129-20) -
Page 57: Power Management
(see Appendix A Technical Specifications; below 77°F / 25°C is optimal). Temperature is the most critical factor in extending battery life. Store the device with the battery charged to less than 100% (40% is optimal). DynaPro Go| Handheld PIN Pad Device with MSR/Contact/Contactless | Installation and Operation Manual Page 57 of 77 (D998200129-20) -
Page 58: How To Charge The Battery
7.3.2 How to Charge the Battery DynaPro Go has an onboard rechargeable battery to supply its own power when it is not powered through its USB port. The battery must be periodically recharged by connecting it to the available charging cradle, or to a USB port or stand-alone USB charger. -
Page 59: How To Power On / Power Off
Power button it to USB power. Figure 7-12 - Device Powering Off Automatically After Timeout DynaPro Go| Handheld PIN Pad Device with MSR/Contact/Contactless | Installation and Operation Manual Page 59 of 77 (D998200129-20) -
Page 60: How To Reset The Device
How to Reset the Device for information about device behavior in the reset state. Figure 7-13 – Battery Level is LOW Warning / Battery Critically Low DynaPro Go| Handheld PIN Pad Device with MSR/Contact/Contactless | Installation and Operation Manual Page 60 of 77 (D998200129-20) -
Page 61: About Usb Suspend
When the device is connected to a host via USB and its Active Connection is set to USB (see section 6.3 How to Change the Active Connection and section 5.3.1 How to Connect DynaPro Go to a Host or Charger via USB), the host can use standard USB functions to put the device into mode. -
Page 62: How To Start A Handheld Transaction Using 802.11 Wireless
How to Start a Handheld Transaction Using 802.11 Wireless DynaPro Go models that provide an 802.11 wireless connection can be configured to start transactions in one of two ways: Always Listening, where an operator would generally initiate a transaction from a point of sale or similar host, or Device-Initiated, where an operator initiates a transaction from the device keypad. -
Page 63: How To Start A Handheld Transaction Using The Bluetooth Le Connection
3) Upon completion of the transaction, the host software should close the Bluetooth LE connection. After a short period of time, the device powers off automatically to conserve power. DynaPro Go| Handheld PIN Pad Device with MSR/Contact/Contactless | Installation and Operation Manual Page 63 of 77 (D998200129-20) -
Page 64: Card Reading
Figure 7-15 - Example Card Swipe Screens Figure 7-16 - Swiping a Magnetic Stripe Card DynaPro Go| Handheld PIN Pad Device with MSR/Contact/Contactless | Installation and Operation Manual Page 64 of 77 (D998200129-20) -
Page 65: How To Insert Contact Chip Cards
(see section 7.6.4 How to Enter Card Information Manually). Figure 7-17 - Example Card Insertion Screens DynaPro Go| Handheld PIN Pad Device with MSR/Contact/Contactless | Installation and Operation Manual Page 65 of 77 (D998200129-20) - Page 66 7 - Operation Figure 7-18 - Inserting a Chip Card DynaPro Go| Handheld PIN Pad Device with MSR/Contact/Contactless | Installation and Operation Manual Page 66 of 77 (D998200129-20)
-
Page 67: How To Tap Contactless Cards / Devices
(see section 7.6.4 How to Enter Card Information Manually). Figure 7-19 - Example Contactless Transaction Screens DynaPro Go| Handheld PIN Pad Device with MSR/Contact/Contactless | Installation and Operation Manual Page 67 of 77 (D998200129-20) - Page 68 7 - Operation Figure 7-20 – Tapping a Contactless Card / Smartphone Figure 7-21 - Tap Read Is Complete DynaPro Go| Handheld PIN Pad Device with MSR/Contact/Contactless | Installation and Operation Manual Page 68 of 77 (D998200129-20)
-
Page 69: How To Enter Card Information Manually
Debit). For example, Figure 7-23 shows the device is prompting the cardholder to press a function key on the keypad to select Credit Debit Figure 7-23 - Example of User Screen to Select Card Type DynaPro Go| Handheld PIN Pad Device with MSR/Contact/Contactless | Installation and Operation Manual Page 69 of 77 (D998200129-20) -
Page 70: How To Verify The Transaction Amount
Figure 7-24. Figure 7-24 - Example User Screen to Verify Amount DynaPro Go| Handheld PIN Pad Device with MSR/Contact/Contactless | Installation and Operation Manual Page 70 of 77 (D998200129-20) -
Page 71: How To Enter Pins
, cardholders should use the tips of their fingers to press and glide against SIGN HERE the screen. Do not use a stylus or other hard object. DynaPro Go| Handheld PIN Pad Device with MSR/Contact/Contactless | Installation and Operation Manual Page 71 of 77 (D998200129-20) -
Page 72: How To Enter Passcodes
Clear start over, and the button cancels the operation that required the passcode. Cancel Figure 7-26 - Passcode Prompt Screens DynaPro Go| Handheld PIN Pad Device with MSR/Contact/Contactless | Installation and Operation Manual Page 72 of 77 (D998200129-20) -
Page 73: Maintenance
Maintenance Mechanical Maintenance Periodic cleaning of DynaPro Go’s exterior may be required. To clean the outside of DynaPro Go, including the LCD display, wipe down the device with a soft, damp cloth and then wipe with a dry cloth. To avoid damaging the read head, only clean the card path with approved cleaning cards. -
Page 74: Developing Custom Software
9 - Developing Custom Software Developing Custom Software Custom host software can communicate with DynaPro Go using the same command set across all available connection types. The host must wrap device commands slightly differently depending on the connection type. MagTek produces software development kits (SDKs) with API libraries that provide higher-level functions wrapped around the direct communication protocols like USB and TCP/IP. -
Page 75: Appendix A Technical Specifications
10 digits, 2 data entry keys, 3 multi-purpose function keys Magnetic Stripe Reader: Triple Track (TK1/2/3), encrypting reader with MagnePrint Contact Chip Card Reader: EMVCo Contact L1 & L2 DynaPro Go| Handheld PIN Pad Device with MSR/Contact/Contactless | Installation and Operation Manual Page 75 of 77 (D998200129-20) - Page 76 Frequency range: 13.553 MHz to 13.567MHz Exempt from SAR requirements due to radiated power RF Exposure: substantially below regulatory thresholds. Flash Memory: 256 MBit DynaPro Go| Handheld PIN Pad Device with MSR/Contact/Contactless | Installation and Operation Manual Page 76 of 77 (D998200129-20)
- Page 77 2-3 years or 300 full discharge cycles, 500 cycles or more if Battery Cycle Life: device is not run to complete discharge DynaPro Go| Handheld PIN Pad Device with MSR/Contact/Contactless | Installation and Operation Manual Page 77 of 77 (D998200129-20)
Need help?
Do you have a question about the DynaPro Go and is the answer not in the manual?
Questions and answers