Table of Contents
Advertisement
Quick Links
Advertisement
Table of Contents

Subscribe to Our Youtube Channel
Related Manuals for Mocon CheckPoint 3

Summary of Contents for Mocon CheckPoint 3
- Page 1 CheckPoint 3 User Guide P/N 340486-B 09/2017...
- Page 2 This blank page has been inserted to enable double sided printing of the document!
-
Page 3: Checkpoint 3 En User Guide
CheckPoint 3 User Guide CheckPoint 3 User Guide Published by: MOCON Europe A/S Rønnedevej 18 4100 Ringsted, Denmark Tel +45 57 66 00 88 info.eu@mocon.com www.dansensor.com P/N 340486-B 09/2017 DANSENSOR... - Page 4 User Guide CheckPoint 3 P/N 340486-B 09/2017 DANSENSOR...
-
Page 5: Table Of Contents
CheckPoint 3 ........ - Page 6 User Guide CheckPoint 3 Cleaning and Maintenance ........42 General .
- Page 7 CheckPoint 3 User Guide Consumable parts and options ....... 74 Ordering items .
- Page 8 User Guide CheckPoint 3 P/N 340486-B 09/2017 DANSENSOR...
-
Page 9: Introduction
1. Introduction Register your product Thank you for purchasing the CheckPoint 3, we hope that it will fullfil your needs. In order to learn more about our customers and the markets we serve, we kindly ask you to fill out the product registration form available on-line at www.dansensor.com/register... -
Page 10: Notes, Cautions And Warnings
User Guide CheckPoint 3 Notes, cautions and warnings! Throughout the manual notes, cautions, and warnings are indicated with various icons and written in bold like the example below: CAUTION! Never use hard tools or abrasive materials when cleaning any part of the device. -
Page 11: Checkpoint 3
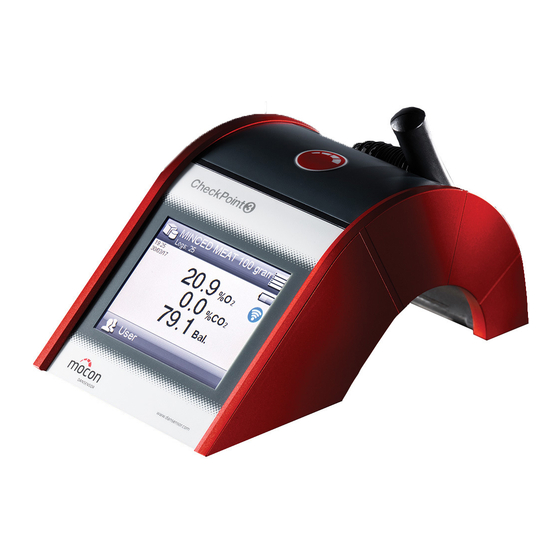
User Guide CheckPoint 3 CheckPoint 3 is a portable headspace gas analyzer for MAP packages. The device is based on an all-in-one concept, and together with MOCON Dansensor’s new and innovative sensor technology it ensures accurate and reliable measurements every time. -
Page 12: Overview
User Guide CheckPoint 3 Overview Sample gas hose w/needle Needle retainer A small magnet in the needle retainer makes the needle snap into it and keeps it in place. WARNING! Due to safety considerations the needle should always be placed in the retainer after measuring. -
Page 13: Accessories
CheckPoint 3 User Guide Accessories The following accessories are included with CheckPoint 3: Power supply w/ interchangeable plugs Plug: Type: Area/Country*: North America Europe Australia United Kingdom Thailand New Zealand Singapore Taiwan Malaysia * Compatibility is not limited to the indicated areas/countries. -
Page 14: Setting Up
User Guide CheckPoint 3 Setting up Assembling the sample gas hose 1. Equip the needle holder with a filter and a needle then place the needle in the retainer WARNING! Due to safety considerations the needle should always be placed in the retainer after measuring. -
Page 15: Operation And Maintenance
CheckPoint 3 User Guide 2. Operation and Maintenance Basics Switching on/off To switch the device on, simply press the button. To switch the device off, press and hold the button. The display will show..and then the device shuts down. -
Page 16: Navigation
User Guide CheckPoint 3 Navigation The graphic interface offers various elements for navigating through the menu structure and for making device settings. Icons For easy function recognition. Some icons work as buttons. Screen buttons The various types of screen buttons and their functions are listed below:... -
Page 17: Typing
CheckPoint 3 User Guide Parameters Setting up of products and various device settings involves the following parameter types: Parameter type Tap item to... Edit parameter. An onscreen keyboard appears for input of text and/or numbers - see "Typing" on page 15 for details. -
Page 18: Splash Screen
User Guide CheckPoint 3 Splash screen When the device is switched on, the splash screen is displayed for a few seconds while device is initializing. The splash screen displays the following: Device model (on basic models field is empty) ... -
Page 19: Login And Access Levels
CheckPoint 3 User Guide Login and access levels (Premium models only) Login levels Different levels of login can be set up: At start-up the device initializes and when finished it changes No login to show the measuring screen, ready for measuring. Current (default setting) user is the default User. -
Page 20: The Measuring Screen
User Guide CheckPoint 3 The Measuring screen Items marked with an asterisk (*) are not available in the basic models. Active product * Currently selected product. To select another product, tap Products icon Logs * Number of data logs in the database for the selected product. - Page 21 CheckPoint 3 User Guide Wi-Fi status * Shows Wi-Fi connection type and/or Wi-Fi signal strength: ..Wi-Fi set to “Connect to Network”. Icon indicates signal strength. Wi-Fi set to “Connect to Network”, but Wi-Fi module is off. Wi-Fi set to “Create Network”...
-
Page 22: Charging And Monitoring The Battery
User Guide CheckPoint 3 Power saving (Premium models only) To save battery, the device has a 2-step power saving function: 1. After a certain time of inactivity, the device switches into power save mode by reducing the display’s back light intensity. - Page 23 CheckPoint 3 User Guide Battery charging 1. Assemble the power supply with the appropriate plug - see page 11 for plug compatibility details. Fit the plug onto the connector and then turn it 1/4 of a turn clockwise to lock it (see detail).
-
Page 24: Pop-Up Messages
User Guide CheckPoint 3 Pop-up messages Three types of messages may occur: • Informations • Warnings • Errors Generally the Information and Warning messages are self explanatory and relates to user interface interaction. They must be acknowledged by tapping OK or by tapping Yes or NO to decide how to proceed. -
Page 25: Get Started
CheckPoint 3 User Guide Get started When you start the device for the first time and before you start making measurements, it is recommended that you perform some basic device settings. Select language Go to Menu -> Language to select the language in which you want to view the different menus and messages - see "Language"... -
Page 26: Measuring
User Guide CheckPoint 3 Measuring Selecting a product for measuring (Premium models only) 1. In the measuring screen..tap the icon in the top left corner. This will bring up the Active Product screen. (This screen can also be reached by tapping the icon in the top right corner, and then select Products ->... -
Page 27: Performing A Measurement
CheckPoint 3 User Guide Performing a measurement 1. Select appropriate product - see "Selecting a product for measuring" on page 2. Place a septum on the product/package to be measured/analysed. This ensures leak-free gas extraction and thus accurate measuring. - Page 28 User Guide CheckPoint 3 6. If, for some reason, you wish to mark the measurement as invalid (if needle has fallen out of the package or if a wrong product has been selected, etc.), tap the icon. Now the measurement has been marked as invalid in the data log and the icon changes to Please note that you have to do this within 30 s.
-
Page 29: Webgui
CheckPoint 3 User Guide WebGUI (Premium models only) The built-in Wi-Fi module enables wireless access to the data on the device via the WebGUI interface. The WebGUI should primarily be seen as a web based version of the device's interface offering access by means of a larger screen and a keyboard that makes data administration much easier. -
Page 30: Network Connection
Create Network Connect to Network Requirements: An active “Access point” (Wi-Fi router) within the reach of CheckPoint 3. A computer or tablet connected to the active “Access Point” (via LAN or WLAN). On CheckPoint 3: 1. Login as Supervisor. - Page 31 CheckPoint 3 User Guide 5. Select Wi-Fi setup. 6. Change Device name in order to create a unique name, e.g. CP3 Lab. The device name is displayed when you connect with a browser. The name can be used to identify a specific device, if more than one device is connected on the same network.
- Page 32 3. Save the connection as a “Favorite” for later use (depending on the local network setup it may change). Create Network Requirements: A computer or tablet with active Wi-Fi within the reach of CheckPoint 3. On CheckPoint 3: 1. Login as Supervisor.
- Page 33 CheckPoint 3 User Guide 5. Select Wi-Fi setup. 6. Change Device name (SSID) in order to create a unique name, e.g. CP3 Lab. NOTE! It is very important that the created SSID is unique to make sure that no other device is creating an access point with the same SSID.
-
Page 34: Using The Webgui
User Guide CheckPoint 3 Using the WebGUI Once you have established a proper connection as described in "Network connection" on page 28, you can start the application. NOTE! The device’s current “Power save” settings have a great influence on the network connection, as this will be interrupted if the device turns off. - Page 35 CheckPoint 3 User Guide Home Home screen shows the following information about the connected device: If the below message appears, you should go to the Date/Time/Units tab on the Setup screen to synchronize the device time to the PC time - see "Setup"...
- Page 36 User Guide CheckPoint 3 Products Products screen displays a list of all products and their settings. You can sort the products by Name, ID, Data Coll. or Last used Date by clicking in the respective header field. The product with orange text is the product currently selected on the device.
- Page 37 CheckPoint 3 User Guide Data log Products tab displays the same product list as described in "Products" on page Only difference is that you are not able to select multiple products. Select a product to Delete data or to Export data collections for this product. Export and import of data is described in "Export/Import"...
- Page 38 User Guide CheckPoint 3 Collected data tab shows the logged data in list form, with the latest entry on top. When changing from the Collected data tab to the Collected data tab, the rightmost entry from the graphs on the...
- Page 39 CheckPoint 3 User Guide Diagnostics To use the Start test measurement function from here, the Test measurement must also be selected on the device. P/N 340486-B 09/2017 DANSENSOR...
- Page 40 Shows User list in “Last used” order, no sorting possible. Date/Time/Units Check CheckPoint 3 time against PC time when connected: If difference exceeds value as set in Notify if difference is bigger than, a warning pops up on the Home screen when launching the application.
- Page 41 CheckPoint 3 User Guide Access It is possible to have Supervisor access in the WebGUI while having only User access on the device (and vice versa). P/N 340486-B 09/2017 DANSENSOR...
- Page 42 User Guide CheckPoint 3 Export/Import The export/import functions are only available in the WebGUI. From here you are able to export and import products, users, measurement data, log data, and device settings. All files are saved as semicolon separated CSV files.
- Page 43 CheckPoint 3 User Guide Language When selecting a language all text throughout the WebGUI will be displayed in this language. P/N 340486-B 09/2017 DANSENSOR...
-
Page 44: Cleaning And Maintenance
User Guide CheckPoint 3 Cleaning and Maintenance General Performing cleaning and maintenance regularly reduces the chances of equipment failure. CAUTION! Personnel performing any maintenance or cleaning must familiarize themselves with the information in "Safety and handling instructions" on page 75 before attempting any of these procedures. - Page 45 CheckPoint 3 User Guide Replacing the hose To replace the hose, do the following: 1. Push downwards on the sleeve to release the hose , then pull the hose upwards and out of the connector. 2. Insert the new hose by pushing it as far as possible into the connector. Check for proper connection by pulling the hose slightly upwards.
- Page 46 User Guide CheckPoint 3 P/N 340486-B 09/2017 DANSENSOR...
-
Page 47: Menus And Settings
CheckPoint 3 User Guide 3. Menus and Settings Main menu Tapping the icon in the measuring screen brings up the main Menu. On Premium models the menu items marked with an asterisk (*) are only available in Supervisor access level. -
Page 48: Alarm
User Guide CheckPoint 3 Alarm (Basic models only) Selecting Alarm from the Menu will display the list of available concentration alarm settings. Please note that the CO alarms are only available on devices with a CO sensor. O2 Alarm limit Set the appropriate value for the O concentration (0.1 - 100%). -
Page 49: Products
CheckPoint 3 User Guide Products (Premium models only) Selecting Products from the main Menu will display a menu with the available product options. The total number of products that can be created depends on the device model - see "Models" on page 9 for details. -
Page 50: Active Product
User Guide CheckPoint 3 Copy Product Use this function to create a new product that is similar to an existing product. Make required changes to the new product, and when finished, a warning appears when exiting the function: Tap Yes to save the new product and return to the Products menu. -
Page 51: New Product
CheckPoint 3 User Guide New product Creates a new, blank product. The following parameters can be set for a product: TIP! If a new product will be very similar to an existing product, you might want to use the “Copy Product” function. -
Page 52: Find
User Guide CheckPoint 3 Find Find function in the bottom of the various products lists can be helpful if you have a large number of products thus making scrolling through the list quite time consuming. 1. Tap the Find key to bring up the Find Product screen. -
Page 53: Data Log
CheckPoint 3 User Guide Data log (Premium models only) From the Data log menu you can read out and manage measurement data and event log and error log data for selected products. The total number of data collections depends on the device model - see "Models"... -
Page 54: Collected Data
User Guide CheckPoint 3 Delete all data * Deletes log data for all products. The action must be confirmed before the data is deleted. Event log Displays an internal log file listing the last 2000 events. The log file can be exported for service use - see "Export/... - Page 55 CheckPoint 3 User Guide The graph bar colours indicate the following: Green The measurement is within limits. The measurement is outside limits. Grey The measurement has been marked as invalid by user or an error occurred while measuring. Yellow The measurement has been performed, even though sensor calibration interval has been exceeded.
-
Page 56: Diagnostics
User Guide CheckPoint 3 Diagnostics Diagnostics menu holds the following items: Test measurement A test measurement can be performed to check the various measurement parameters. A test measurement runs exactly as a normal measurement, but there will be no data logging. - Page 57 CheckPoint 3 User Guide About Displays a screen showing device information such as device serial no., CPU ID no., SW version and counters for next calibration, measurements, O sensor and pump. Regulatory Displays a screen showing the compliance information for the built-in Wi-Fi module.
-
Page 58: Setup
User Guide CheckPoint 3 Setup Selecting Setup from the Menu will display a menu with available set-up parameters. The menu holds the following items: Items marked with an asterisk are only available on Premium models. Data log * Opens the Data log setup screen "Data log"... -
Page 59: Data Log
CheckPoint 3 User Guide Data log This is where you make basic settings for the logging of data. Log measurements Select whether or not measurements should be logged. Stop meas. if log is full Select whether or not measurements can be performed when data log is full. -
Page 60: Network
User Guide CheckPoint 3 Network Selecting Network from the Setup menu will display a screen showing the network set- up parameters. Info/Status Opens the Info/Status screen displaying information about the currently selected network. See also "Network connection" on page 28 for details. -
Page 61: Users
CheckPoint 3 User Guide Users From here the user database is maintained. You can see a list of existing users, edit the settings for an existing user, create new users or delete users. The total number of users that can be created depends on the device model - see "Models"... - Page 62 User Guide CheckPoint 3 New User Creates a new, blank user profile. "New User" on page 60 for details. Delete User Delete user. The action must be confirmed before the user is deleted. User login required Select the required type of login.
-
Page 63: Date/Time/Units
CheckPoint 3 User Guide Date/Time/Units Selecting Date/Time/Units from the Setup menu will display a screen showing the various setup parameters for output formats and units. Items marked with an asterisk are only available on Premium models. Time * Setting of current time (hh:mm:ss) Date * Setting of current date (using “Date format”) -
Page 64: Power Save
User Guide CheckPoint 3 Power save Selecting Power save from the Setup menu will display a screen showing the various setup parameters for the device’s power save function. Restore defaults Resets the settings of the 3 power save parameters below to the factory settings. -
Page 65: Supervisor Pin Code
CheckPoint 3 User Guide Supervisor PIN code Use this function to change the PIN code required for changing from User access level to Supervisor access level. To change the PIN code do the following: 1. In the Setup menu select Supervisor PIN code. -
Page 66: Display
User Guide CheckPoint 3 Display Display parameters are all related to the display readability. Restore defaults Resets the settings of the 3 display parameters below to the factory settings. Brightness Adjust display brightness (1-10). Contrast Adjust display contrast (1-10). Backlight Adjust display background light (1-10). -
Page 67: Access Level
CheckPoint 3 User Guide Access level When device is switched on (after power off ) it is locked in User access level. User access only gives access to a limited number of functions and does not allow for parameter set-up. -
Page 68: Calibration
User Guide CheckPoint 3 Calibration In addition to the annual factory calibration, the device normally does not require further calibration. If, though, the device measurements deviates more than +/- 3% when measuring gas with a known CO content, the calibration function should be used. -
Page 69: Calibrate: 0% Co2
CheckPoint 3 User Guide Calibrate: 0% CO2 1. Select Calibrate: 0% CO2. The following warning appears: Tap Yes. 2. When the next warning appears..make sure that the needle is exposed to the appropriate calibration gas, and then tap Yes. -
Page 70: Calibrate: 100% Co2
User Guide CheckPoint 3 4. Now the calibration is saved..and the following message appears. 5. Tap OK to confirm and return to the Calibration start screen. Calibrate: 100% CO2 NOTE! Before calibrating with 100% CO you must calibrate with 0% CO 1. -
Page 71: Language
CheckPoint 3 User Guide Language Selecting Language from the Menu will display a screen listing the available languages. When selecting a language all text throughout the menus will be displayed in this language. P/N 340486-B 09/2017 DANSENSOR... - Page 72 User Guide CheckPoint 3 P/N 340486-B 09/2017 DANSENSOR...
-
Page 73: Technical Information
CheckPoint 3 User Guide 4. Technical Information Technical specifications Electrical specifications Power supply Input: 100 - 240 VAC, 50 - 60 Hz, 0.4 A Output: 5 V - 2 A, max. 10 W Battery Type: Lithium-Ion (LiOn) 5200 mAh Expected life Approx. -
Page 74: Sensors
User Guide CheckPoint 3 Sensors Sensor Sensor type Ceramic solid-state Range 0 - 85%, measurements >85% will be cut off Resolution 0.1% absolute Accuracy ±0.1% absolute ±2% of readout Measuring time Min. 9 s. Startup time 5 s. Service calibration interval... -
Page 75: Standard Factory Calibration Specification
CheckPoint 3 User Guide Standard factory calibration specification Calibration gasses (O 0%, 20,946% (balance N ), 20% (balance CO Calibration gasses (CO 0%, 25%, 60%, 100% (balance N Ambient temperature (CO 5, 15, 25, 35 °C Calibration gas accuracy < 2%... -
Page 76: Consumable Parts And Options
Consumable parts Kit, Standard Consumables, CheckPoint 3, Ser. Cpl......P/N 360408 ... -
Page 77: Appendix
Failure to follow the safety instructions could result in fire, electric shock, injury, or damage to CheckPoint 3 or other property. NOTE! The manufacturer cannot be held responsible for any damage caused by incorrect operation or maintenance of the device. -
Page 78: Battery And Charging
Do not attempt to replace the lithium-ion battery yourself - you may damage the battery, which could cause overheating and injury. The battery should be replaced only by your authorized MOCON service provider. Charge the device with the included power supply, power plugs, and USB cable. ... -
Page 79: Operating/Storing Temperatures
CheckPoint 3 User Guide Operating/storing temperatures The device is designed to be operated and stored in the temperatures ranges as specified in "Mechanical specifications" on page 71. The device can be damaged and battery life shortened if stored or operated outside of these temperature ranges. - Page 80 User Guide CheckPoint 3 P/N 340486-B 09/2017 DANSENSOR...
- Page 81 This blank page has been inserted to enable double sided printing of the document!
- Page 82 MOCON Europe A/S Rønnedevej 18 4100 Ringsted, Denmark Tel +45 57 66 00 88 info.eu@mocon.com www.dansensor.com DANSENSOR...
Need help?
Do you have a question about the CheckPoint 3 and is the answer not in the manual?
Questions and answers