Leica FlexLine plus User Manual
Hide thumbs
Also See for FlexLine plus:
- Quick manual (198 pages) ,
- Manual (44 pages) ,
- Frequently asked questions manual (18 pages)

Related Manuals for Leica FlexLine plus


Summary of Contents for Leica FlexLine plus
- Page 1 Leica FlexLine plus User Manual Version 5.0 English...
- Page 2 Product identifica- The model and serial number of your product are indicated on the type plate. tion Always refer to this information when you need to contact your agency or Leica Geosystems authorised service workshop. Trademarks • Windows is a registered trademark of Microsoft Corporation.
- Page 3 Add all products that you and your company own and explore your world of Leica Geosystems: View detailed information on your prod- ucts and update your products with the latest software and keep up- to-date with the latest documentation.
-
Page 4: Table Of Contents
Distance Measurements - Guidelines for Correct Results Settings Work Settings Regional Settings Data Settings Screen & Audio Settings EDM Settings Interface Settings Programs - Getting Started Overview Starting a Program Setting the Job Station Setup FlexLine plus, Table of Contents... - Page 5 Creating or Uploading Alignment Files 7.13.4 Stake 7.13.5 Check 7.13.6 Stake Slope 7.13.7 Check Slope 7.14 Traverse 7.14.1 Overview 7.14.2 Starting and Configuring Traverse 7.14.3 Measuring Traverse 7.14.4 Moving ahead 7.14.5 Closing a Traverse 7.15 Tunnel FlexLine plus, Table of Contents...
- Page 6 Adjusting Line-of-Sight and Vertical Index Error 14.4 Adjusting the Compensator 14.5 Adjusting the Tilting Axis Error 14.6 Adjusting the Circular Level of the Instrument and Tribrach 14.7 Inspecting the Laser Plummet of the Instrument 14.8 Servicing the Tripod FlexLine plus, Table of Contents...
- Page 7 17.5.2 Products with Communication side cover 17.5.3 Dangerous Goods Regulations 17.6 General Technical Data of the Instrument 17.7 Scale Correction 17.8 Reduction Formulas Software Licence Agreement Glossary Appendix A Menu Tree Appendix B Directory Structure FlexLine plus, Table of Contents...
-
Page 8: Safety Directions
Important paragraphs which must be adhered to in practice as they enable the product to be used in a technically correct and efficient manner. FlexLine plus, Safety Directions... -
Page 9: Definition Of Use
• To ensure that it is used in accordance with the instructions. • To be familiar with local regulations relating to safety and accident prevention. • To inform Leica Geosystems immediately if the product and the application becomes unsafe. • To ensure that the national laws, regulations and conditions for the operation of e.g. -
Page 10: Hazards Of Use
Avoid subjecting the product to mechanical stress. If the product is used with accessories, for example masts, staffs, poles, you may WARNING increase the risk of being struck by lightning. Precautions: Do not use the product in a thunderstorm. FlexLine plus, Safety Directions... - Page 11 Product-specific treatment and waste management information can be downloaded from the Leica Geosystems home page at http://www.leica-geosystems.com/treatment or received from your Leica Geosystems distributor. Only Leica Geosystems authorised service centres are entitled to repair these prod- WARNING ucts. FlexLine plus, Safety Directions...
-
Page 12: Laser Classification
400 ps 800 ps Pulse repetition frequency 320 MHz 100 MHz Maximum average radiant power 0.33 mW 0.34 mW Beam divergance 1.5 mrad x 3 mrad 1.5 mrad x 3 mrad Labelling a) Laser beam 001918_003 FlexLine plus, Safety Directions... -
Page 13: Distancer, Measurements Without Reflectors (Non-Prism Mode)
2) Do not look through or beside the optical sight at prisms or reflecting objects when the laser is switched on, in laser pointer or distance measurement mode. Aiming at prisms is only permitted when looking through the telescope. FlexLine plus, Safety Directions... - Page 14 (1) This device may not cause harmful interference, and (2) This device must accept any interference received, including interference that may cause undesired operation. λ = 660nm Pav = 4.8mW tp = 400ps IEC 60825-1:2014 009328_001 FlexLine plus, Safety Directions...
-
Page 15: Red Laser Pointer
2) Do not look through or beside the optical sight at prisms or reflecting objects when the laser is switched on, in laser pointer or distance measurement mode. Aiming at prisms is only permitted when looking through the telescope. FlexLine plus, Safety Directions... - Page 16 (1) This device may not cause harmful interference, and (2) This device must accept any interference received, including interference that may cause undesired operation. λ = 660nm Pav = 4.8mW tp = 400ps IEC 60825-1:2014 009328_001 FlexLine plus, Safety Directions...
-
Page 17: Electronic Guide Light Egl
From a safety perspective, class 2 laser products are not inherently safe for the eyes. CAUTION Precautions: 1) Avoid staring into the beam or viewing it through optical instruments. 2) Avoid pointing the beam at other people or at animals. FlexLine plus, Safety Directions... - Page 18 Labelling 001923_002 a) Laser beam b) Exit for laser beam FlexLine plus, Safety Directions...
-
Page 19: Electromagnetic Compatibility Emc
Precautions: Although the product meets in combination with radio or digital cellular phone devices recommended by Leica Geosystems the strict regulations and standards which are in force in this respect, Leica Geosystems cannot completely exclude the possibility that other equipment may be disturbed or that humans or animals may be affected. -
Page 20: Fcc Statement, Applicable In U
• Connect the equipment into an outlet on a circuit different from that to which the receiver is connected. • Consult the dealer or an experienced radio/TV technician for help. Changes or modifications not expressly approved by Leica Geosystems for compliance WARNING could void the user's authority to operate the equipment. - Page 21 Labelling Internal Battery GEB212, GEB222 008611_001 008610_001 FlexLine plus, Safety Directions...
-
Page 22: Description Of The System
Data transfer Data can be always transferred between a FlexLine plus instrument and a computer via a data transfer cable. For instruments equipped with a Communication side cover data can also be transferred via USB memory stick, USB cable, or Bluetooth. -
Page 23: Container Contents
- for instruments with a Communication side cover* p) GEB212/GEB211/GEB221/GEB222 battery* q) Tip for mini prism pole* r) Counterweight for diagonal eyepiece* s) Manuals* and USB documentation card t) GLS115 mini prism pole* * Optional FlexLine plus, Description of the System... -
Page 24: Instrument Components
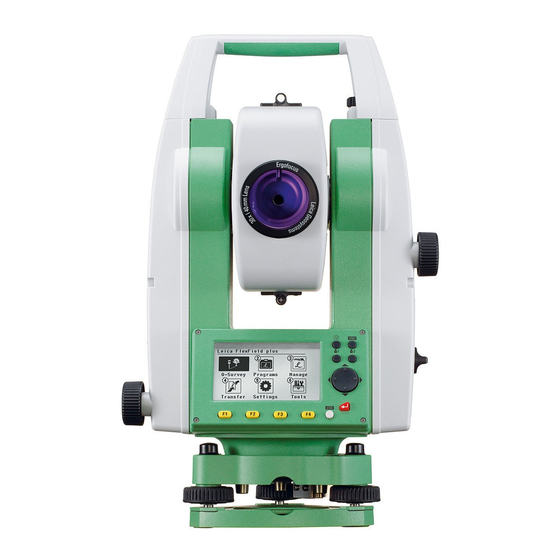
* Optional for TS02 plus 002724_002 Instrument components part 2 of 2 j) Focusing telescope image k) Eyepiece; focusing graticule l) Battery cover m) Serial interface RS232 n) Foot screw o) Display p) Keyboard 002725_002 FlexLine plus, Description of the System... - Page 25 Communication side A Communication side cover is included for TS06 plus/TS09 plus. cover a) Bluetooth antenna b) Compartment lid c) USB memory stick cap storage d) USB host port e) USB device port TSOX_130 FlexLine plus, Description of the System...
-
Page 26: User Interface
Returns to next higher level. Pressing ESC short: Returns to next higher level. Quits a screen or edit mode without saving changes. Pressing ESC long: Returns to the Main Menu. Quits a screen or edit mode without saving changes. FlexLine plus, User Interface... -
Page 27: Screen
Fields e) Softkeys S_TSOX_001 Color&Touch screen: a) Status icons b) Title of screen c) Focus in screen. Active field d) Fields e) Softkeys 002873_002 Tap on an icon, field or tab to run a function. FlexLine plus, User Interface... -
Page 28: Status Icons
For C&T: Tapping the icon opens the EDM Settings screen. Leica mini prism is selected. For C&T: Tapping the icon opens the EDM Settings screen. Leica mini 0 prism is selected. For C&T: Tapping the icon opens the EDM Settings screen. Leica 360° prism is selected. - Page 29 Indicates that horizontal angle is set to left side angle meas- urement (anticlockwise). To take a screenshot from the current screen. The screenshot is displayed and can be edited by sketching. The screenshot can be linked with stations or points manually. FlexLine plus, User Interface...
-
Page 30: Softkeys
To display the coordinate and job details of the selected point. -> ABC To change the keypad operation to alphanumerical. -> 345 To change the keypad operation to numerical. To display the next softkey level. To return to the first softkey level. FlexLine plus, User Interface... -
Page 31: Operating Principles
In the alphanumeric character set "+" and "-" are treated as normal alphanumeric characters with no mathematical function. "+" / "-" only appear in front of an entry. In this example selecting 2 on an alphanu- meric keyboard would start the Survey program. FlexLine plus, User Interface... -
Page 32: Pointsearch
A* All points starting with "A" are found, for example, A9, A15, ABCD, A2A. *1 All points containing only one "1" are found, for example, 1, A1, AB1. A*1 All points starting with "A" and containing only one "1" are found, for example, A1, AB1, A51. FlexLine plus, User Interface... -
Page 33: Graphic Symbols
Extension of reference line/arc, straight, curve or spiral Perpendicular distance to the reference line/arc, straight, curve or spiral Boundary of an area Connection between last measured/selected point and first point of an area Boundary of breaklines Breaklines of an area FlexLine plus, User Interface... -
Page 34: Operation
TSOX_012a Careful handling of tripod. • Check all screws and bolts for correct fit. • During transport, always use the cover supplied. • Use the tripod only for surveying tasks. TSOX_012c FlexLine plus, Operation... - Page 35 When levelled correctly, checkmarks are displayed. For the Color&Touch display only: If the instrument is not levelled to one axis, then the icons for the single axis bubble tube and the circular bubble are framed red, else they are black. FlexLine plus, Operation...
- Page 36 Under some circumstances the laser dot is or holes not visible, for example over pipes. In this case, using a transparent plate enables the laser dot to be seen and then easily aligned to the centre of the pipe. TSOX_014 FlexLine plus, Operation...
-
Page 37: Working With The Battery
+10°C to +20°C/+50°F to +68°F if possible. • It is normal for the battery to become warm during charging. Using the chargers recommended by Leica Geosystems, it is not possible to charge the battery if the temperature is too high. -
Page 38: Data Storage
To change EDM configurations, communication parameters and general instrument settings. Refer to "5 Settings". Settings To access instrument-related tools such as check and adjust, personal startup settings, PIN code settings, licence keys, system information Tools and firmware upload. Refer to "12 Tools". FlexLine plus, Operation... -
Page 39: Q-Survey Program
To set the horizontal angle reading to the left (anticlockwise) or to the right (clockwise). Code To find/enter codes. Refer to "9.1 Coding". Available on page 4/4 or Code. Or, on any page, press the FNC/Favourites key and select Coding. FlexLine plus, Operation... -
Page 40: Distance Measurements - Guidelines For Correct Results
Distance Measurements - Guidelines for Correct Results Description An EDM is incorporated into the FlexLine plus instruments. In all versions, the distance can be determined by using a visible red laser beam which emerges coaxially from the telescope objective. There are two EDM modes: •... -
Page 41: Settings
Slope dist. Display only field for the height difference between Height diff. station and reflector. Easting Display only field for Easting coordinate of meas- ured point. Display only field for Northing coordinate of meas- Northing ured point. FlexLine plus, Settings... - Page 42 The clock is always displayed. The position of the clock cannot be changed. The ID of the icons increases from left to right. Tilt and horizontal Setting Correction corrections Tilt Horizontal Incline Incline Horizontal Tilting axis correction correction longitudinal transversal collimation FlexLine plus, Settings...
-
Page 43: Regional Settings
The vertical angle value that is recorded is the value Hold that was in the vertical angle field at the time Dist was pressed. Running The vertical angle value that is recorded is the value in the vertical angle field at the time Store is pressed. FlexLine plus, Settings... - Page 44 Displays distance with three decimals. Displays distance with four decimals. Sets the units shown for all temperature fields. Temp. Unit Degree Celsius. °C °F Degree Fahrenheit. Press.Unit Sets the units shown for all pressure fields. Hecto Pascal. Millibar. mbar FlexLine plus, Settings...
- Page 45 Vertical : Horizontal, for example 1 : 5. (v/h x 100), for example 20 %. The current time. Time (24h) Shows an example of the selected date format. Date How the date is shown in all date-related fields. Format dd.mm.yyyy, mm.dd.yyyy or yyyy.mm.dd FlexLine plus, Settings...
-
Page 46: Data Settings
StationID, E, N, H, hi (Station). Mask 3 StationID, Ori, E, N, H, hi (Station Result). PtID, E, N, H (Control). PtID, Hz, V (Set Azimuth). PtID, Hz, V, SD, ppm+mm, hr, E, N, H (Measure- ment). FlexLine plus, Settings... -
Page 47: Screen & Audio Settings
The method descriptions for programs with different methods, for example COGO, cannot be switched off. The beep is an acoustic signal after each key stroke. Beep Normal volume. Normal Loud Increased volume. Beep is deactivated. FlexLine plus, Settings... - Page 48 The instrument beeps when the distance from the Stakeout Beep On current position to the point to be staked is 0.5 m. The closer the prism is to the point to be staked the faster the beeps will be. Beep is deactivated. FlexLine plus, Settings...
-
Page 49: Edm Settings
Leica Const.: +34.4 mm None User 1 / For any prism modes, the user can define two of their own prisms. User 2 Constants can be entered in mm in either Leica Const. or Abs. Const.. For example: FlexLine plus, Settings... - Page 50 No. of Meas. The number of repeated measurements. Limit value: 2 to 99 Leica Const. This field displays the Leica prism constant for the selected Prism Type. Where Prism Type is User 1 or User 2 this field becomes editable to set a user defined constant.
- Page 51 Refer to "17.7 Scale Correction" for the application of the values entered in this screen. When PPM=0 is selected, the Leica standard atmosphere of 1013.25 mbar, 12°C, and 60% relative humidity is applied. Field Description Temp.Meas.
- Page 52 To import and use the measurements into LGO, the distances recorded in LandXML differ from the distances on the instrument. Handling of Geom. ppm Atmos. ppm Indiv. ppm ppm tag Slope distance Not applied Applied Not applied Available Horizontal distance Applied Applied Applied Unavailable Coordinates Applied Applied Applied Unavailable FlexLine plus, Settings...
-
Page 53: Interface Settings
Communication side cover. The default Bluetooth PIN is ’0000’. Default To reset the fields to the default Leica standard settings. Available for RS232. Field Description Instrument port. If a Communication side cover is fitted the options are Port : selectable. - Page 54 Leica standard When Default is selected the communication parameters are reset to the default Leica settings standard settings: • 115200 Baud, 8 Databit, No Parity, CR/LF Endmark, 1 Stopbit. Interface plug connections a) External battery b) Not connected / inactive...
-
Page 55: Programs - Getting Started
Programs are predefined programs, that cover a wide spectrum of surveying duties and facilitate daily work in the field. The following programs are available, although program packages for each FlexLine plus instrument may vary from that stated below: Program TS02 plus... -
Page 56: Starting A Program
To define the job where data will be saved. Refer to "6.3 Setting F1 Set Job the Job". F2 Station Setup To determine the station coordinates and station orientation. Refer to "6.4 Station Setup". Starts the selected program. F4 Start FlexLine plus, Programs - Getting Started... -
Page 57: Setting The Job
If no job was defined and a program was started, or if in Q-Survey and a measurement was recorded, then the system automatically creates a new job and names it "Default". Next step Press Cont to confirm the job and return to the Config. screen. FlexLine plus, Programs - Getting Started... -
Page 58: Station Setup
Station Setup process. If no station was set and a program was started, then the last station is set as the current station and the current horizontal direction is set as the orientation. FlexLine plus, Programs - Getting Started... -
Page 59: Programs
Vertical angle to the point. Horizontal distance to the point. Slope distance to the point. Height to the point. East Easting coordinate of the point. Northing coordinate of the point. North Height coordinate of the point. Height FlexLine plus, Programs... -
Page 60: Station Setup
• To the origin (E = 0, N = 0, H = 0) of the coor- dinate system • To a point the North or East direction of the coordinate system Scale and standard deviation are not calculated. Each setup method requires different input data and a different number of target points. FlexLine plus, Programs... - Page 61 Enter Target Point: Enter the PtID of the target. Press Cont to search for the point in the current job. Select the desired point or enter new coordinates and continue to the Sight target point! screen. Refer to "7.2.2 Measuring the target points", "Sight target point". FlexLine plus, Programs...
-
Page 62: Measuring The Target Points
If the standard deviation for the Hz Orientation angle is calculated, a Accur. Hz checkbox is displayed. The checkbox is checked if the calculated Hz Orientation is within the standard deviation limits or crossed if it is not. FlexLine plus, Programs... -
Page 63: Station Setup Results
Available for Method: H-Trans or Ori. with Coord. with only 1 target point. Difference between the calculated and measured horizontal distance from the station to the design target. Scale Available for Method: Resection and Method: Res.Helm.. The calcu- lated scale, if available. FlexLine plus, Programs... - Page 64 • If the scale is calculated, then the standard deviation of the position with two targets is 0.0000. With flexible scale, the resection is fitted perfectly into the geometry without redundancy. Therefore the standard deviation is 0.000. FlexLine plus, Programs...
-
Page 65: Surveying
Survey from the Programs Menu. Complete program pre-settings. Refer to "6 Programs - Getting Started". Survey Q-Code To activate quick coding. Refer to "9.2 Quick Coding". IndivPt To switch between individual and current point numbers. Manage To view measurement data. FlexLine plus, Programs... -
Page 66: Stakeout
∆Trav.: Difference in perpendicular distance d3+ ∆Height: Difference in height TSOX_028 Cartesian Stakeout mode P0 Instrument station P1 Current position P2 Point to be staked ∆East: Difference in Easting coordinate ∆North: Difference in Northing coordinate ∆Height: Difference in height TSOX_032 FlexLine plus, Programs... - Page 67 ID. The point to which the radius is applied. Center Point The radius of the circle within which the points are shown. Radius The first point to be displayed. From The last point to be displayed. FlexLine plus, Programs...
- Page 68 Height offset: Positive if stake out point is higher than the measured point. ∆E Easting offset: Positive if stake out point is to the right of the measured point. ∆N Northing offset: Positive if stake out point is further away than the meas- ured point FlexLine plus, Programs...
-
Page 69: Reference Line
TSOX_088 Define the base line by measuring or selecting the start and end points of the line. Next step After defining the base line the Reference Line - Info screen will appear for defining the reference line. FlexLine plus, Programs... -
Page 70: Defining The Reference Line
Height differences are computed relative to the height Point 2 of the second reference point. Height differences are computed along the reference Interpolated line. No Height Height differences are not computed or shown. FlexLine plus, Programs... - Page 71 Rotation of the reference line clockwise around the reference point (P3). Available on page 2/2 for Black&White display or on page Shifts for Color&Touch display. Next step Select a softkey option, Meas Pt, Stake, Grid or Segment, to proceed to a subpro- gram. FlexLine plus, Programs...
-
Page 72: Measure Line & Offset
Calculated distance perpendicular from the reference line. ∆H Calculated height difference relative to the defined reference height. Next step • Either, press Meas to measure and record. • Or, press Back to return to the Reference Line - Info screen. FlexLine plus, Programs... -
Page 73: Stakeout
Perpendicular offset: Positive if stake out point is to the right of the Offs reference line. Height Height offset: Positive if stake out point is higher than the reference line. Next step Press Cont to proceed to measurement mode. FlexLine plus, Programs... - Page 74 Height difference from the measured point to the stake out point. Positive if the stake out point is higher than the measured point. Next step • Either, press Meas to measure and record. • Or, press Back to return to the Reference Line - Info screen. FlexLine plus, Programs...
-
Page 75: Grid Stakeout
Start Chain Distance from the reference line start point to the beginning grid start point. Length of incrementation. Increment Offset distance from the reference line. Offset Next step Press Cont to proceed to the Reference Grid - Stakeout screen. FlexLine plus, Programs... - Page 76 Next step • Either, press Meas to measure and record. • Or, press ESC to return to the Enter start chainage of grid! screen and from there, press Back to return to the Reference Line - Info screen. FlexLine plus, Programs...
-
Page 77: Line Segmentation
The misclosure will be equally distributed between all Equal segments. StartEnd The misclosure is equally distributed at the start and at the end of the segment line. Next step Press Cont to proceed to the Line Segment - Stakeout screen. FlexLine plus, Programs... - Page 78 • Either, press Meas to measure and record. • Or, press ESC to return to the Define Line Segment screen and from there, press Back to return to the Reference Line screen. • Or, continue selecting ESC to exit the program. FlexLine plus, Programs...
-
Page 79: Reference Arc
Radius of the arc. Radius A positive value, for example 100 m, is for a clockwise direction of the reference arc. A negative value, for example -100 m, is for an anticlock- wise direction of the reference arc. FlexLine plus, Programs... - Page 80 Heights are computed relative to the height of the end End Point point of the line. Interpolated Heights are computed along the line. No Height Heights are ignored Next step Select Cont and then Meas Pt or Stake to proceed to a subprogram. FlexLine plus, Programs...
-
Page 81: Measure Line & Offset
Calculated distance perpendicular from the reference arc. ∆H Calculated height difference relative to the start point of reference arc. Next step • Either, press Meas to measure and record. • Or, press Back to return to the Reference Arc - Info screen. FlexLine plus, Programs... -
Page 82: Stakeout
P2 Stake out point P3 Stake out point P4 End point of arc Radius of arc Angle TSOX_045 Access 1) Press Stake from the Reference Arc - Info screen. 2) Select one of the four methods of stake out available. FlexLine plus, Programs... - Page 83 Next step • Either, press Meas to measure and record. • Or, press Back to return to the Reference Arc - Info screen. • Or, continue selecting ESC to exit the program. FlexLine plus, Programs...
-
Page 84: Reference Plane
Complete program pre-settings. Refer to "6 Programs - Getting Started". Measure plane and Once the plane has been defined by three points, the Measure target point! target points screen appears. Measure and record the target point. The results are displayed in the Reference Plane Result screen. FlexLine plus, Programs... - Page 85 Perpendicular distance from the intersection point to the local Z-axis. ∆ Z Perpendicular distance from the intersection point to the local X-axis. East Easting coordinate of the intersection point. Northing coordinate of the intersection point. North Height of the intersection point. Height FlexLine plus, Programs...
-
Page 86: Tie Distance
Programs from the Main Menu. Select Tie Dist. from the Programs Menu. Complete program pre-settings. Refer to "6 Programs - Getting Started". Select Polygonal or Radial. Tie distance After completing the measurements required, the Tie Distance Result screen will measurements appear. FlexLine plus, Programs... - Page 87 Grade between point 1 and point 2. Slope distance between point 1 and point 2. Horizontal distance between point 1 and point 2. Height difference between point 1 and point 2. Next step Press ESC to exit the program. FlexLine plus, Programs...
-
Page 88: Area & Dtm Volume
• for stations. • for points defining the reference plane. The graphic on the Plot page shows additionally the area projected onto the reference plane, the horizontal distance between the points the perimeter and the area. FlexLine plus, Programs... -
Page 89: 2D / 3D Area
In the 2D / 3D Area Results screen. • View the area in ha and m as well as the perimeter of the area. • Press NewArea to define a new area. • Or, press End to exit the program. FlexLine plus, Programs... -
Page 90: Area To Reference Plane
In the Area to Ref. Plane Results screen. • View the area in ha and m as well as the perimeter of the area. • Press NewArea to define a new area. • Or, press End to exit the program. FlexLine plus, Programs... -
Page 91: Dtm Volume
The perimeter of the area. Volume as calculated by by Triangulated Irregular Network (TIN). DTM-V Area defined by ground points, calculated by TIN. DTM-Grd.Area Area defined by breakline points, calculated by TIN. BreakLn Area DTM-Volume I Volume as calculated by TIN. FlexLine plus, Programs... - Page 92 1.15 - 1.25 2.1 t Sand 1.20 - 1.40 1.5 - 1.8 t Clay 1.20 - 1.50 2.1 t Topsoil, humus 1.25 1.5 - 1.7 t Sandstone 1.35 - 1.60 2.6 t Granite 1.35 - 1.60 2.8 t FlexLine plus, Programs...
-
Page 93: Area Division
The area is divided by a line rotated around an existing point of the area. The division is calculated using a defined percentage split. P0 Selected rotation point P1 New point on swing line α Azim. ALeft 007473_001 FlexLine plus, Programs... - Page 94 The first intersection point of the new boarder with the original Ptn1 area. Ptn2 The first intersection point of the new boarder with the original area. The angle of the new border from rotation point to the new point. Azim. FlexLine plus, Programs...
-
Page 95: Remote Height
• Either, press Cont to save the measurement and record the calculated coordinates of the remote point. • Or, press Base to enter and measure a new base point. • Or, press ESC to exit the program. FlexLine plus, Programs... -
Page 96: Cogo
Distance between P1 and P2 d2 Positive offset to the right d3 Negative offset to the left Unknown P2 COGO point without offset P3 COGO point with positive offset P4 COGO point with negative offset TSOX_099 FlexLine plus, Programs... -
Page 97: Intersections
Color&Touch display. + indicates a shift to the right. - indicates a shift to the left. Known P1 First known point P2 Second known point P3 Third known point P4 Fourth known point Line from P1 to P2 Line from P3 to P4 Unknown P5 COGO point TSOX_103 FlexLine plus, Programs... -
Page 98: Offsets
Known P1 Point 1 which defines plane P2 Point 2 which defines plane P3 Point 3 which defines plane P4 Offset point Unknown P5 COGO (intersection) point d1 Offset TSOX_106 FlexLine plus, Programs... -
Page 99: Line - Extension
Use the Line - Extension subprogram to calculate the extended point from a known Line - Extension base line. Known Δ L1 Baseline start point Baseline end point Δ L2 L1, L2Distance Unknown P2, P4 Extended COGO points TSOX_107 FlexLine plus, Programs... -
Page 100: Road 2D
Select the element type: • Straight • Curve • Spiral Elements d = 155.000 d = 132.000 Straight d = 122.000 Spiral Curve Radius d = 112.000 Perpendicular offset left Perpendicular offset right Increment d = 102.000 Chainage TSOX_119 FlexLine plus, Programs... - Page 101 • Check: to measure, or select points from memory, to calculate the chainage, line and offset from the defined element. Enter stakeout values Next step • If in stakeout mode, press Cont to begin staking out. • Or, if in measurement mode, press Meas to measure and record. FlexLine plus, Programs...
-
Page 102: Road 3D
• The uploaded or created road alignments are permanent and stored even if the program is closed. • Road alignments can be deleted onboard or via Instrument Tools Data Exchange Manager. • Road alignments cannot be edited onboard. This needs to be done via Instrument Tools Road Line Editor. FlexLine plus, Programs... -
Page 103: Basic Terms
A circular curve has to be defined by: • Start point (P1) and end point (P2) with known Easting and Northing coordinates. • Radius (R). • Direction: Clockwise (b) or Anticlockwise (a). P1 Start point P2 End point Radius Anticlockwise direction TSOX_090 Clockwise direction FlexLine plus, Programs... - Page 104 • Start chainage and start height of P1. • End chainage and end height of P2. • Radius (R). • Type: Convex (crest) or Concave (sag). Convex Concave P1 Start point P2 End point Radius TSOX_051 FlexLine plus, Programs...
- Page 105 Partial spiral with R1 and R2 b5 Straight a4 Curve with R2 ∞ a5 Spiral out with R2 and R= a6 Straight • Tangent point Start and end chainage and tangent points can be different for the horizontal and vertical alignments. FlexLine plus, Programs...
- Page 106 Natural surface, is the undisturbed surface before project construction. Cut / Fill Description Cut situation Horizontal alignment b) Hinge point Slope d) Catch point e) Natural surface TSOX_117 Fill situation Horizontal alignment b) Hinge point Slope d) Catch point e) Natural surface TSOX_118 FlexLine plus, Programs...
-
Page 107: Creating Or Uploading Alignment Files
The height reference for height calculations is the selected vertical alignment file. Hgt. Height to be used for Manual Height. Manual Ht. Next step Select a softkey option, Stake, Check, Stk Slp or Ch Slp, to proceed to a subpro- gram. FlexLine plus, Programs... -
Page 108: Stake
Calculated North coordinate of the stake out point. Def.North Def.Hght Calculated Height of the stake out point. Next step • Either, press Meas to measure and record. • Or, press ESC to return to the Define Stake/Check/Slope values screen. FlexLine plus, Programs... -
Page 109: Check
∆North Calculated difference in Northing coordinate between the measured point and the alignment element. Next step • Either, press Meas to measure and record. • Or, press ESC to return to the Define Stake/Check/Slope values screen. FlexLine plus, Programs... -
Page 110: Stake Slope
Left down Creates a downward plane extending to the left of the defined hinge point. Right down TSOX_120 Left down Right down Creates a downward plane extending to the right of the defined hinge point. FlexLine plus, Programs... - Page 111 ∆H Aln Height difference to the alignment. The vertical offset between defined height at the current chainage, and the measured position, excluding the defined height difference. Slope distance from the measured point to the alignment. FlexLine plus, Programs...
- Page 112 P1 Measured point P2 Catch point Horizontal alignment Hinge point Fill Offset to catch point TSOX_058 Next step • Either, press Meas to measure and record. • Or, press ESC to return to the Define Stake/Check/Slope values screen. FlexLine plus, Programs...
-
Page 113: Check Slope
Slope distance from the measured point to the alignment. Next step • Either, press Meas to measure and record. • Or, press ESC to return to the Define Stake/Check/Slope values screen. • Or, continue selecting ESC to exit the application. FlexLine plus, Programs... -
Page 114: Traverse
• It is also possible to observe sideshots and check points during the traverse, however, check points are not included in the traverse adjustment. • At the end of the traverse, results are displayed and an adjustment may be calcu- lated if desired. FlexLine plus, Programs... -
Page 115: Starting And Configuring Traverse
Stat.ID Height of the instrument. Desc. Description of the station, if desired. Every Traverse must start on a known point. Next step Press Cont to confirm station data and proceed to the Traverse - Select screen. FlexLine plus, Programs... -
Page 116: Measuring Traverse
Refer to "7.14.5 Closing a Traverse". If using the current system azimuth, for example from the Stn.Setup program, then simply confirm the suggested Hz-value in the Set Horizontal Angle screen. FlexLine plus, Programs... - Page 117 The number of sets and the face are indicated in the top right corner of the screen. For example 1/I means set 1 in face I. FlexLine plus, Programs...
-
Page 118: Moving Ahead
A message will appear if the tolerances defined in the Traverse configuration are exceeded. Next step Close the traverse by selecting Close in the Sight Foresight! screen after a backsight point measurement, but before the foresight point measurement. FlexLine plus, Programs... -
Page 119: Closing A Traverse
2) The results are displayed. F4 …Leave To leave the traverse open. There is no last traverse station. Open 1) The results are displayed. Next step Select an option, from the Close Traverse… menu to proceed to the Traverse Results screen. FlexLine plus, Programs... - Page 120 For surveys where angles and distances were meas- Compass ured with equal precision. Transit For surveys where angles were measured with a higher precision than the distances. The height error can be distributed equally, by distance or not at all. Height-Distr FlexLine plus, Programs...
-
Page 121: Tunnel
Traverse points are re- calcu- An information message displayed while the adjust- lated and newly stored… ment is calculated. 7.15 Tunnel Refer to the separate manual "Leica FlexLine plus Tunnel Application". FlexLine plus, Programs... -
Page 122: Favourites
Illumin. Color&Touch display. To deactivate/activate the touch screen. Available for Touch Color&Touch display. Sets the distance measurement unit. Available for the user keys. Distance Unit Sets the angle measurement unit. Available for the user keys. Angular Unit FlexLine plus, Favourites... -
Page 123: Target Offset
The corrected angle and distances are displayed as soon as a valid distance measurement has been triggered or exists. • Or, press Cylindr to enter cylindrical offsets. Refer to "8.2.2 Cylindrical Offset Subprogram". FlexLine plus, Favourites... -
Page 124: Cylindrical Offset Subprogram
PrismOffset Prism offset distance between the centre of the prism and the surface of the object to be measured. If the EDM mode is Non-Prism, the value is set to zero automatically. Next step Once ∆Hz is zero, press Meas to complete the measurement and display the results. FlexLine plus, Favourites... - Page 125 Easting coordinate of the centre point. East North Northing coordinate of the centre point. Height of the point measured with the reflector. Height This is not the calculated height of the centre point. Radius Radius of the cylinder. FlexLine plus, Favourites...
-
Page 126: Hidden Point
Hidden Point Result screen is displayed. Displays Easting, Northing and Height coordinates of the hidden point. Hidden Point Result To return to the Hidden Point screen. To record results and return to program where the FNC/Favourites key was selected. FlexLine plus, Favourites... -
Page 127: Check Tie
Difference in height between the two points. Messages The following are important messages or warnings that may appear. Messages Description Two measurements The values cannot be calculated as there are less than two valid measurements. required! FlexLine plus, Favourites... -
Page 128: Edm Tracking
Refer to "7.4 Stakeout" for information about the screen. When setting up a station by local resection, check the coordinate system of the points used from the list. FlexLine plus, Favourites... -
Page 129: Sketchpad
To change the line width. Tap the icon to open a window displaying line widths for selection. The selected line width is remembered. To undo all changes since the last saving. To zoom into the image. Zoom + To zoom out of the image. Zoom - FlexLine plus, Favourites... -
Page 130: Coding
Code name. Code Q-Code Two digit quick code assigned to the code. Refer to "9.2 Quick Coding". Desc. Additional remarks. Info 1 to More information lines, freely editable. Used to describe attributes of the code. Info 8 FlexLine plus, Coding... - Page 131 Attributes with status "Normal" can be edited freely. The *.cls in the \CODES folder of the USB stick is not changed. Edit To edit quick code, description and attributes. Column Description First column Code name Second column Description of the code FlexLine plus, Coding...
-
Page 132: Quick Coding
No codelist in memory. Manual input for code and attributes are called automatically. No code is assigned to the entered number. Code not found! Instrument Tools Codelists can be easily created and uploaded to the instrument using the supplied Instrument Tools software. FlexLine plus, Coding... -
Page 133: Mapview Interactive Display Feature
Access Select Settings from the Main Menu. Select Screen… from the Settings Menu. Press to scroll through the screens of available settings. Access from the For C&T: Tap on the MapView toolbar. MapView toolbar FlexLine plus, MapView Interactive Display Feature... -
Page 134: Mapview Components
Prism Symbol Description Measured position. The orientation of the instrument is shown as dotted line. Instrument station Symbol Description Position of the instrument station. FlexLine plus, MapView Interactive Display Feature... -
Page 135: Keys, Softkeys And Toolbar
Screen & Audio Settings, Map page. Calculated station Measured point. Show in Map: Measurements or Show in Map: Meas & Fixpts must be selected in Screen & Audio Settings, Map page. FlexLine plus, MapView Interactive Display Feature... -
Page 136: Selecting Points
The ID and the type of the points within range of the point selection is displayed. Select the desired point. View to display the coordinate and job details of the selected point. Cont returns to previous screen with the focus on the selected point. FlexLine plus, MapView Interactive Display Feature... -
Page 137: Imaging & Sketching
Step Description Select Manage from the Main Menu. Select ScrShots. Select a job. Press Cont. Click the icon in the toolbar. When taking a new screenshot Step Description Click Click the icon in the toolbar. FlexLine plus, Imaging & Sketching... -
Page 138: Image Management
To delete only a link but not the image. Links can be selected from a list. Info To show the file name, job, creation date, modification date and links. List To list all images stored in the selected job. FlexLine plus, Imaging & Sketching... -
Page 139: Tools
Reminder Options are: Never, 2 weeks, 1 month, 3 months, 6 months, 12months. The message will display the next time the instrument is switched on after the time period has been reached. FlexLine plus, Tools... -
Page 140: Startup Sequence
The automatic start sequence has the same effect as pressing the keys manually. Certain instrument settings cannot be made in this way. Relative entries such as auto- matically setting EDM Mode: Precise&Fast upon switching on the instrument, are not possible. FlexLine plus, Tools... -
Page 141: System Information
Displays the build number of the firmware. Build Number Displays the current language and version number selected for Active Language the instrument. EDM-Firmware Displays the version number of the EDM firmware. Display the operating system of the instrument. Oper. System FlexLine plus, Tools... - Page 142 The date when the instrument must be connected to mySecurity mySec.Renewal in oder to renew the security functionality. Date Next Service Date Displays the date of the next service check required. The field can be invisible if turned off by the service reminder. FlexLine plus, Tools...
-
Page 143: Licence Keys
• Selecting Delete from this screen will delete all firmware licence keys on the instru- ment and the firmware maintenance licence. When uploading firmware from a USB memory stick, the license key file must be stored in the System folder on the USB memory stick. FlexLine plus, Tools... -
Page 144: Instrument Protection With Pin
Select PIN-lock from the Tools Menu. Enter the current PIN in PIN-Code:. Press Cont. Deactivate PIN protection by setting Use PIN-Code: Off. Accept with Cont. The instrument is now no longer protected against unauthorised use. FlexLine plus, Tools... -
Page 145: Loading Software
USB memory stick. Select Yes or No for a language file to be uploaded. At least one language must be set to Yes. Press Cont. Once successfully loaded, the system will shut down and restart again automat- ically. FlexLine plus, Tools... -
Page 146: Data Management
USB memory stick is inserted. Refer to "13.4 Working with a USB Memory Stick"and "Appendix B Directory Structure". To view, delete, link, unlink, sketch or view information of screenshots ScrShots taken and stored. Refer to "11.3 Image Management" for sketching. FlexLine plus, Data Management... -
Page 147: Exporting Data
To list all jobs or formats within the internal memory. Field Description USB memory stick or RS232 serial interface. Data type to be transferred. Data Type To USB memory stick or RS232 serial interface: Measurements, Fixpoints, Meas & Fixpts FlexLine plus, Data Management... - Page 148 Use and order of variables and delimiter can be defined during import. Continue with step 4.. GSI: Leica Geo Serial Interface. Fixed format. Select between three prede- fined formats. Refer to "5.3 Data Settings" for an explanation of the formats.
- Page 149 PtID 41-49 Codes and attributes Horizontal direction ppm [mm] Vertical angle Prism constants Orientation 81-83 (E, N, H) Target point Slope distance 84-86 (E, N, H) Station point Horizontal distance Reflector height Height difference Instrument height FlexLine plus, Data Management...
-
Page 150: Importing Data
If the instrument firmware was updated, it can happen that a backup created before the update cannot be imported. In this case, downgrade the firmware to the previous used version, save the data in the way required and then reload the new firmware. FlexLine plus, Data Management... - Page 151 A ’+’, ’-’, ’.’ or alphanumerical characters should not be used as delimiter values in ASCII files. These characters can also be part of the point ID or coordinate values and if so, will generate errors where they occur in the ASCII file. FlexLine plus, Data Management...
-
Page 152: Working With A Usb Memory Stick
Whilst other USB memory sticks may be used, Leica Geosystems recommends Leica industrial grade USB memory sticks and cannot be held responsible for data loss or any other error that may occur when using a non-Leica USB memory stick. ... -
Page 153: Working With Bluetooth
The instrument will appear on the external device as "TS0x_y_zzzzzzz", where x = the FlexLine plus series (TS06 plus or TS09 plus), y = the angular accuracy in arc seconds, and z = the serial number of the instrument. For example, TS06_3_1234567. -
Page 154: Working With Leica Instrument Tools
Working with Leica Instrument Tools Description Leica Instrument Tools is used for the data exchange between the instrument and a computer. It contains several auxiliary programs in order to support the instrument. Leica Instrument Tools are for free and can be downloaded from myWorld. -
Page 155: Check & Adjust
14.1 Overview Description Leica Geosystems instruments are manufactured, assembled and adjusted to the best possible quality. Quick temperature changes, shock or stress can cause deviations and decrease the instrument accuracy. It is therefore recommended to check and adjust the instrument from time to time. This check and adjust can be done in the field by running through specific measurement procedures. -
Page 156: Adjusting Line-Of-Sight And Vertical Index Error
Adjust from the Tools Menu. • Select: • Hz-Collimation, or • Vertical Index. The procedures and conditions required to correct line-of-sight and vertical index errors are the same, therefore the procedure will only be described once. FlexLine plus, Check & Adjust... - Page 157 Aim on the target point with an accuracy of able for adjustment! min. 5°. Confirmation of the message required. Timelimit Time difference between measurements for results storage exceeds 15 minutes. Repeat the process. Confirmation of exceeded!Please the message required. repeat Adjustment! FlexLine plus, Check & Adjust...
-
Page 158: Adjusting The Compensator
All measurements of the current run are rejected and are not averaged with the results from previous runs. Measure the target. The standard deviations of the determined adjustment errors can be calcu- lated from the second run onwards. FlexLine plus, Check & Adjust... -
Page 159: Adjusting The Tilting Axis Error
• Press Cont to save the new adjustment data, or • Press ESC to exit without saving the new adjustment data. Messages The same messages or warning as in "14.3 Adjusting Line-of-Sight and Vertical Index Error" may appear. FlexLine plus, Check & Adjust... -
Page 160: Adjusting The Circular Level Of The Instrument And Tribrach
• To the right: and the bubble goes away from the screw. Repeat step 3. on the instrument and tribrach until both circular levels are centred and no further adjustments are necessary. After the adjustment, no adjustment screw should be loose. FlexLine plus, Check & Adjust... -
Page 161: Inspecting The Laser Plummet Of The Instrument
The laser plummet is integrated into the vertical axis of the instrument. Under normal conditions of use, the laser plummet does not need adjusting. If an adjustment is necessary due to external influences, the instrument has to be returned to a Leica service department. -
Page 162: Servicing The Tripod
1) Tighten the leg cap screws moderately with the allen key supplied. 2) Tighten the articulated joints on the tripod head just enough to keep the tripod legs open when lifting the tripod off the ground. 3) Tighten the screws of the tripod legs. FlexLine plus, Check & Adjust... -
Page 163: Mysecurity
Description mySecurity is a cloud-based theft protection. A locking mechanism ensures that the instrument is disabled and can no longer be used. A Leica Geosystems service centre will inform local authorities if such an instrument turns up. mySecurity is activated in myWorld. - Page 164 A warning comes up to confirm device as stolen. Click OK. The Status of the instrument changes to Stolen!. A Leica Geosystems service centre informs local authorities if such an instru- ment turns up. Locate stolen If a reported, stolen instrument is registered to myWorld, then the IP address of the instrument computer is logged.
-
Page 165: Care And Transport
Please format the internal memory periodically to maintain the instrument perfor- mance. The target line of the visible laser can drift during the product lifetime. Inspect the target line visually on a regular basis. If necessary, visit an authorised Leica Service Centre for adjustment. 16.2 Transport... -
Page 166: Storage
Do not repack until everything is completely dry. Always close the transport container when using in the field. Cables and plugs Keep plugs clean and dry. Blow away any dirt lodged in the plugs of the connecting cables. FlexLine plus, Care and Transport... -
Page 167: Technical Data
Strong haze, visibility 5 km; or strong sunlight, severe heat shimmer conditions Range B: Light haze, visibility about 20 km; or moderate sunlight, slight heat shimmer Range C: Overcast, no haze, visibility about 40 km; no heat shimmer FlexLine plus, Technical Data... - Page 168 Characteristics Principle: Phase measurement Type: Coaxial, visible red laser Carrier wave: 658 nm Measuring system: System analyser basis 100 MHz - 150 MHz Distance measurement system using phase-shift principle with frequency 320 MHz FlexLine plus, Technical Data...
-
Page 169: Distance Measurement Without Reflectors (Non-Prism Mode)
Distance measurement system using phase-shift prin- ciple with frequency 320 MHz Laser dot size Distance [m] Laser dot size, approximately [mm] at 30 7 x 10 at 50 8 x 20 at 100 16 x 25 FlexLine plus, Technical Data... -
Page 170: Distance Measurement Reflector (>4.0 Km)
Beam interruptions, severe heat shimmer and moving objects within the beam path can result in deviations of the specified accuracy. Characteristics Principle: Phase measurement Type: Coaxial, visible red laser Carrier wave: 658 nm Measuring system: System analyser basis 100 MHz - 150 MHz FlexLine plus, Technical Data... -
Page 171: Conformity To National Regulations
Conformity to • FCC Part 15 (applicable in US). national regulations Hereby, Leica Geosystems AG, declares that the instrument is in compli- ance with the essential requirements and other relevant provisions of applicable European Directives. The declaration of conformity may be consulted at http://www.leica-geosystems.com/ce. -
Page 172: Dangerous Goods Regulations
Leica Geosystems has developed Guidelines on “How to carry Leica products” and “How to ship Leica products” with Lithium batteries. Before any transpor- tation of a Leica product, we ask you to consult these guidelines on our web page (http://www.leica-geosystems.com/dgr) to ensure that you are in accord- ance with the IATA Dangerous Goods Regulations and that the Leica products can be transported correctly. -
Page 173: General Technical Data Of The Instrument
USB memory stick port for data transfer. USB device port* Cable connections from USB devices for communication and data transfer. Bluetooth* Bluetooth connections for communication and data transfer. * Only for instruments fitted with a Communication side cover. FlexLine plus, Technical Data... - Page 174 Visible red laser class 2 Location: In standing axis of instrument Accuracy: Deviation from plumb line: 1.5 mm (2 sigma) at 1.5 m instrument height Diameter of laser point: 2.5 mm at 1.5 m instrument height FlexLine plus, Technical Data...
- Page 175 The following automatic corrections are made: corrections • Line of sight error • Vertical index error • Tilting axis error • Refraction • Earth curvature • Compensator index error • Standing axis tilt • Circle eccentricity FlexLine plus, Technical Data...
-
Page 176: Scale Correction
550 mb 1000 1050 mb 50°C 50°C 40°C 40°C 30°C 30°C 20°C 20°C 10°C 10°C 0°C 0°C -10°C -10°C -20°C -20°C 550 mb 1000 1050 mb 5000 m 4500 4000 3500 3000 2500 2000 1500 1000 TS_108 FlexLine plus, Technical Data... - Page 177 50°F 40°F 40°F 30°F 30°F 20°F 20°F 10°F 10°F 0°F 0°F -10°F -10°F -20°F -20°F 18 19 20 21 22 23 24 25 26 27 28 29 30 31 32 inch Hg [ ft ] TS_109 FlexLine plus, Technical Data...
-
Page 178: Reduction Formulas
= X + B · Y * sinζ TSOX_129 * cosζ ζ = Vertical circle reading (1 - k)/2R = 6.83 * 10 k = 0.13 (mean refraction coefficient) R = 6.378 * 10 m (radius of the earth) FlexLine plus, Technical Data... -
Page 179: Software Licence Agreement
Leica Geosystems. Such software is protected by copyright and other laws and its use is defined and regulated by the Leica Geosystems Software Licence Agreement, which covers aspects such as, but not limited to, Scope of the Licence, Warranty, Intellectual Property Rights, Limitation of Liability, Exclusion of other Assurances, Governing Law and Place of Jurisdiction. -
Page 180: Glossary
Glass plate within the telescope with reticle. TS0X_071 Line-of-sight error The line-of-sight error (c) is the deviation from the perpendicular (horizontal between the tilting axis and line of sight. This could be eliminated collimation) by measuring in both faces. TS0X_005 FlexLine plus, Glossary... - Page 181 Reflector height above ground Instrument height above ground E0, N0, H0 Easting, Northing and Height coordinates of station E, N, H Easting, Northing and Height coordinates E 0 , N 0 , H 0 of target point TSOX_07 FlexLine plus, Glossary...
-
Page 182: Appendix A Menu Tree
Display Ill., Keyb. Ill.**, Reticle Ill., Contrast*, Displ.Heater*, Touch Screen**, Auto-Off, Screensaver, Beep, Sector Beep, Stakeout Beep |—— EDM EDM Mode, Target, Meas. Mode, No. of Meas., Leica Const., Abs. Const., Laser- Point, Guide Light |—— Interface Port :, Bluetooth:, Baud rate:, Data bits:, Parity :, Endmark :, Stop bits: 1,... - Page 183 Stations, Fixpoints, Meas.Records, Occ.Job Mem., Maint.-End Date, Next Service Date |—— Licence |—— PIN Use PIN-Code, New PIN-Code |—— Load FW F1 Firmware,EDM-FW,Logo, F2 Language(s) only Valid for Black&White displays only ** Valid for Color&Touch displays only FlexLine plus, Menu Tree...
-
Page 184: Appendix B Directory Structure
• Logfiles created from programs |—— IMAGES • Image files (*.bmp), stored in a subfolder per job. |—— SYSTEM • Firmware files (FlexField.fw and FlexField_EDM.fw) • Language files (FlexField_Lang_xx.fw) • Licence file (*.key) • Configuration files (*.cfg) FlexLine plus, Directory Structure... - Page 185 FlexLine plus, Directory Structure...
- Page 186 805707-5.0.0en Original text Published in Switzerland © 2016 Leica Geosystems AG, Heerbrugg, Switzerland Leica Geosystems AG Heinrich-Wild-Strasse CH-9435 Heerbrugg Switzerland Phone +41 71 727 31 31 www.leica-geosystems.com...
Need help?
Do you have a question about the FlexLine plus and is the answer not in the manual?
Questions and answers