Table of Contents
Advertisement
Quick Links
Download this manual
See also:
Service Manual
Advertisement
Table of Contents
Troubleshooting

Related Manuals for Oracle Sun Server X4-4


Summary of Contents for Oracle Sun Server X4-4
- Page 1 Sun Server X4-4 Installation Guide Part No: E38215-06 October 2015...
- Page 3 Oracle. Oracle Corporation and its affiliates will not be responsible for any loss, costs, or damages incurred due to your access to or use of third-party content, products, or services, except as set forth in an applicable agreement between you and Oracle.
- Page 4 Oracle Corporation et ses affiliés déclinent toute responsabilité ou garantie expresse quant aux contenus, produits ou services émanant de tiers, sauf mention contraire stipulée dans un contrat entre vous et Oracle. En aucun cas, Oracle Corporation et ses affiliés ne sauraient être tenus pour responsables des pertes subies, des coûts occasionnés ou des dommages causés par l'accès à...
-
Page 5: Table Of Contents
Front Panel Features .................. 15 Back Panel Features .................. 16 Server Supported Components ................. 17 Managing Your Server ................... 19 Oracle System Assistant ................. 19 Oracle ILOM .................. 21 Oracle Hardware Management Pack ............ 23 UEFI BIOS .................. 24 Preparing to Install the Server ................ 27 Server Specifications .................. 27 Physical Specifications ................ 27 Electrical Specifications ................ 28 Environmental Requirements .............. - Page 6 ▼ Modify Network Settings From the Oracle ILOM Web Interface .... 62 Testing Network Settings for Oracle ILOM ............ 64 ▼ Test IPv4 or IPv6 Network Configuration From the Oracle ILOM CLI .. 64 ▼ Test IPv4 or IPv6 Network Configuration From the Oracle ILOM Web Interface .................... 65...
- Page 7 Firmware and Software Updates .............. 125 Firmware and Software Access Options ............ 126 Available Software Release Packages .............. 126 Accessing Firmware and Software .............. 127 ▼ Download Firmware and Software Using My Oracle Support .... 127 Installing Updates .................. 128 Installing Firmware ................ 129 Installing Hardware Drivers and OS Tools .......... 129...
- Page 8 ▼ Use the Power Button to Power On the Server ........ 131 ▼ Use the Oracle ILOM CLI to Power On the Server ....... 132 ▼ Use the Oracle ILOM Web Interface to Power On the Server .... 133 ▼ Viewing BIOS Messages .............. 133 Powering Off the Server for Orderly Shutdown ..........
-
Page 9: Using This Documentation
You can obtain the latest version in one of following ways: Oracle System Assistant – This is a factory-installed option for Sun Oracle x86 servers. It ■ has all the tools and drivers you need and resides on an internal USB flash stick. -
Page 10: Documentation And Feedback
Documentation and Feedback My Oracle Support – This is the Oracle support web site located at: ■ https://support. oracle.com. Documentation and Feedback Documentation Link All Oracle products http://docs.oracle.com Sun Server X4-4 http://www.oracle.com/goto/X4-4/docs Oracle Integrated Lights Out Manager (ILOM). Refer to http://www.oracle.com/goto/ILOM/docs... -
Page 11: Change History
Server X4-4 Installation Guide for Linux Operating System information to add support for the Oracle Linux Fault Management Architecture software available with Oracle Hardware Management Pack 2.3. Minor editorial updates to Sun Server X4-4 Installation Guide for Windows Operating System. - Page 12 Sun Server X4-4 Installation Guide • October 2015...
-
Page 13: Installation Procedure Overview
Installation Procedure Overview This document describes initial setup and configuration Oracle's Sun Server X4-4 to the point of first power-on and operating system installation. The following table summarizes an ordered list of tasks that you must perform to properly install the server. - Page 14 Software” on page 125 Review procedures for controlling system power. “Controlling System Power and Viewing BIOS Messages” on page 131 If needed, troubleshoot installation issues. “Troubleshooting Installation Issues” on page 143 Sun Server X4-4 Installation Guide • October 2015...
-
Page 15: Server Features And Components
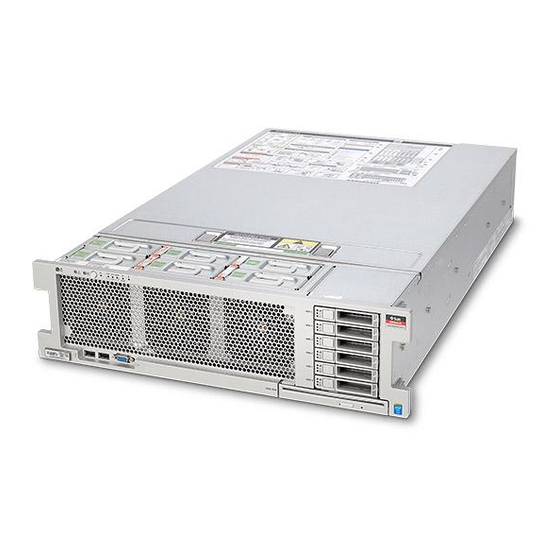
Server Features and Components This section describes Oracle's Sun Server X4-4 hardware. It includes topics shown in the following table: Description Links Locate status indicators, connectors, and storage drives ■ “Front Panel Features” on page 15 on the server front and back panels. -
Page 16: Back Panel Features
SATA DVD drive (optional) 12–17 Storage drive slots 0–5 (from bottom to top) Back Panel Features The following figure shows the Sun Server X4-4 back panel and describes its components. Callout Description Power supply unit (PSU) 0 indicator panel PSU 0 AC inlet... -
Page 17: Server Supported Components
Service processor (SP) network management (NET MGT) port Serial management (SER MGT)/RJ-45 serial port DB-15 video port Server Supported Components This section describes the components that are supported in the Sun Server X4-4. Component Sun Server X4-4 Processor (CPU) Intel Xeon® E7-8895 v2 15-core 2.8 GHz processor. - Page 18 ■ Two ports on the front of the system and two on the back. ■ Two internal ports on the motherboard. One port holds the optional factory-installed Oracle System Assistant (OSA) stick–a bootable device used to configure the server. A second port can hold a USB flash device for system booting.
-
Page 19: Managing Your Server
The following is an overview of some of the system management tools for multiple systems: If you want to manage your server from a single interface, provision firmware, an operating ■ system, or operating system updates to multiple servers, you can use the Oracle Enterprise Manager Ops Center. For more details, refer to: http://www.oracle.com/technetwork/oem/ops-center/index.html If you want to monitor your enterprise servers, you can take advantage of Sun Management ■... - Page 20 System Assistant is a factory-installed option available when you purchase your server. If your server includes Oracle System Assistant, it resides on an internal USB flash drive. At initial product release, the Sun Server X4-4 supports Oracle System Assistant version 1.2.1. For more details on Oracle System Assistant, see the...
-
Page 21: Oracle Ilom
Managing Your Server Oracle ILOM Oracle Integrated Lights Out Manager (ILOM) is a built-in feature that allows connection to the server's service processor (SP). At initial product release, the Sun Server X4-4 supports Oracle ILOM version 3.2.2. The Oracle ILOM software resides on the service processor. Use Oracle ILOM to monitor and manage server components. - Page 22 As of system software release 1.1.0, a new feature has been added that provides a graphical view of the server, its components and mouseover or clickable status. To access this new feature, select the Chassis View link from the left nav list after logging into Oracle ILOM for your server.
-
Page 23: Oracle Hardware Management Pack
Managing Your Server For more on accessing Oracle ILOM for your server, see: “Log In to Oracle ILOM Using a Remote Ethernet Connection” on page 56 ■ “Log In to Oracle ILOM Using a Local Serial Connection” on page 55 ■... -
Page 24: Uefi Bios
Oracle ILOM Fault Management shell. The Oracle Linux FMA software is available starting with Oracle Hardware Management Pack 2.3 and supported for the Sun Server X4-4 running Oracle Linux 6.5 with system software 1.1.0. - Page 25 (which would wipe out any data on them). Before changing boot modes, use the Oracle ILOM BIOS Backup and Restore function to preserve the previous configuration in case you want to switch back.
- Page 26 For more details on UEFI BIOS, refer to Oracle X4 Series Servers Administration Guide ■ (http://www.oracle.com/goto/x86AdminDiag/docs). For information about Oracle ILOM, refer to the documentation for your supported version ■ of Oracle Integrated Lights Out Manager (ILOM) at: http://www.oracle.com/goto/ILOM/ docs.
-
Page 27: Preparing To Install The Server
“Optional Component Installation” on page 32 Server Specifications This section includes physical, electrical and environmental specifications for the system. Physical Specifications The following table lists the physical specifications for the Sun Server X4-4. Parameter Value Height 129.9 mm (5.1 inches) Width 436.5 mm (17.2 inches) -
Page 28: Electrical Specifications
Weight 40 kg (88 lbs) Electrical Specifications The following table lists the electrical specifications for the Sun Server X4-4. For up-to-date information on power consumption, go to the Sun x86 Servers web site Note - and navigate to the Sun Server X4-4 page: http://www.oracle.com/technetwork/server-... -
Page 29: Ventilation Guidelines
Distribution of the temperature and humidity across the entire room is uneven. The Sun Server X4-4 has been designed to function while installed in a natural convection airflow. The following requirements must be followed to meet the environmental specification: Ensure that there is adequate airflow through the system. -
Page 30: Shipping Inventory
Inspect the shipping cartons for evidence of physical damage. If a shipping carton appears damaged, request that the carrier's agent be present when the carton is opened. Keep all contents and packing material for the agent's inspection. The following items are typically packaged with the Sun Server X4-4: Callout Description... -
Page 31: Tools And Equipment Needed
Tools and Equipment Needed Callout Description RJ-45 to DB-9 crossover adaptor Printed documents 2 AC power cords Required server components and most options are installed at the factory. However, some ordered options might be packaged separately. If possible, install optional components before installing the server in a rack. -
Page 32: Optional Component Installation
Supported components and their part numbers are subject to change over time and without notice. For the most up-to-date list, refer to: https://support.oracle.com/handbook_private/ This site requires an Oracle web account for access. Note - Click the name and model of your server. On the product page that opens for the server, click Full Components List for a list of supported components. -
Page 33: Installing The Server Into A Rack
Installing the Server Into a Rack This section describes how to place the server into a rack using the rail assembly in the rackmount kit. Perform these procedures if the rail assembly is purchased. In this guide, the term rack means either an open rack or a closed cabinet. Note - Description Links... -
Page 34: Rack Compatibility
Four-post rack (mounting at both front and rear). Two- post racks are not compatible. Rack horizontal opening and unit vertical pitch Conforms to ANSI/EIA 310-D-1992 or IEC 60927 standards. Only M6 tapped or 9.5 mm square holes are supported. Sun Server X4-4 Installation Guide • October 2015... -
Page 35: Install Mounting Brackets
Install Mounting Brackets Item Requirement Distance between front and rear mounting planes Minimum 610 mm and maximum 915 mm (24 inches to 36 inches). Clearance depth in front of front mounting plane Distance to front cabinet door is at least 25.4 mm (1 inch). -
Page 36: Attach Slide-Rail Assemblies
Repeat Steps 1 through 3 to install the remaining mounting bracket on the other side of the server. Attach Slide-Rail Assemblies Complete the following procedures to attach the slide-rail assemblies to the rack. Sun Server X4-4 Installation Guide • October 2015... - Page 37 Attach Slide-Rail Assemblies The slide rail assemblies support only racks with 9.5-mm square holes and M6 round Note - holes. All other racks, including those racks with 7.2-mm, M5, or 10-32 mounting holes, are not supported. Refer to your rack documentation for information about the size of its rail holes. To attach slide-rail assemblies to the rack: (Optional) If you need to move the rack with the server installed, it is recommended that you attach the slide-rail assembly with mounting screws and...
- Page 38 Attach Slide-Rail Assemblies You will hear an audible click when the mounting pins engage the rack. Sun Server X4-4 Installation Guide • October 2015...
- Page 39 Attach Slide-Rail Assemblies The slide assembly mounting pins accommodate either 9.5-mm square mounting holes Note - or M6 round mounting holes. No other mounting hole sizes are supported. Installing the Server Into a Rack...
-
Page 40: Install Server Into The Slide-Rail Assemblies
Equipment damage or personal injury. This procedure requires a minimum of two Caution - people because of the weight of the server. Attempting this procedure alone could result in equipment damage or personal injury. Sun Server X4-4 Installation Guide • October 2015... - Page 41 Install Server Into the Slide-Rail Assemblies Equipment damage or personal injury. Always load equipment into a rack from the Caution - bottom up so that the rack will not become top-heavy and tip over. Extend your rack's anti-tip bar to prevent the rack from tipping during equipment installation. If available, extend the anti-tip bar at the bottom of the rack.
- Page 42 Simultaneously push and hold the green slide-rail release buttons on each mounting bracket while you push the server into the rack. Continue pushing until the slide-rail locks (on the front of the mounting brackets) engage the slide- rail assemblies. Sun Server X4-4 Installation Guide • October 2015...
-
Page 43: Install Cable Management Arm
Install Cable Management Arm You will hear an audible click. Equipment damage or personal injury. Verify that the server is securely mounted in Caution - the rack and that the slide-rail locks are engaged with the mounting brackets before continuing. Install Cable Management Arm The cable management arm (CMA) is an optional assembly that you can use to route the server cables in the rack. - Page 44 Remove tape to separate the parts of the CMA. Insert the CMA's mounting bracket connector into the right slide-rail until the connector locks into place with an audible click. Callout Description CMA mounting bracket Right slide-rail Sun Server X4-4 Installation Guide • October 2015...
- Page 45 Install Cable Management Arm Insert the right CMA slide-rail connector into the right slide-rail assembly until the connector locks into place with an audible click. Callout Description CMA slide-rail connector Right slide-rail Installing the Server Into a Rack...
- Page 46 Instructions for installing the server cables are provided in “Cabling the Note - Server” on page If required, attach the cable hook and loop straps to the CMA, and press them into place to secure the cables. Sun Server X4-4 Installation Guide • October 2015...
- Page 47 Install Cable Management Arm Cable hooks and loop straps are preinstalled on the CMA. Perform this step if you need Note - to reinstall cable hooks and straps on the CMA. For best results, place three cable straps, evenly spaced, on the rear-facing side of the CMA and three cable straps on the side of the CMA nearest the server.
-
Page 48: Verify Operation Of Slide-Rails And Cma
The second set of stops are the slide-rail release buttons, located at the front of the server. Adjust the cable straps and CMA, as required. Sun Server X4-4 Installation Guide • October 2015... -
Page 49: Cabling The Server
Cabling the Server This section describes how to connect cables and power on the server for the first time. It includes the topics shown in the following table. Description Links Connect data cables to the server. “Cable the Server” on page 49 Connect power cords to the server. -
Page 50: Connect The Power Cords
USB ports [2], and a monitor to the DB-15 video port [3]. To make a management connection to the service processor: Ethernet: If you plan to access the Oracle Integrated Lights Out Manager ■ (ILOM) web or command-line interface over a network connection (separate management network recommended), connect an Ethernet cable to the network management port on the server labeled NET MGT [5]. - Page 51 Connect the Power Cords Callout Description Power supply 0 AC inlet connector with cable clip Power supply 1 AC inlet connector with cable clip A two-CPU system will operate from low-line 100 to 127 VAC or high-line 200 to 240 Note - VAC sources.
- Page 52 After a few minutes, the system OK indicator slowly flashes the standby blink pattern (0.1 ■ seconds on, 2.9 seconds off), indicating that the SP (and Oracle ILOM) is ready for use. Note that the server is not initialized or fully powered on at this point.
-
Page 53: Connecting To Oracle Ilom
Connecting to Oracle ILOM Oracle Integrated Lights Out Manager (ILOM) is an embedded tool you can use to monitor and manage server components. Oracle ILOM lets you perform the following tasks: Manage the server locally or remotely, with the server power on or off ■... -
Page 54: Oracle Ilom Hardware And Interfaces
■ SNMP v3 interface Oracle ILOM Network Defaults The Sun Server X4-4 supports dual-stack IPv4 and IPv6 settings, which enable Oracle ILOM to fully operate in an IPv4 and IPv6 network environment. For IPv4 configurations, DHCP is enabled by default, allowing a DHCP server on the ■... -
Page 55: Logging In To Oracle Ilom
This procedure does not require that you know the IP address of the server SP. It does require that you have an Oracle ILOM Administrator account. The default Oracle ILOM Administrator account shipped with the server is root and its Note - password is changeme. -
Page 56: Log In To Oracle Ilom Using A Remote Ethernet Connection
DNS) of the server SP. The Oracle ILOM password prompt appears. Password: From the Oracle ILOM web interface, type the IP address of the server in the ■ address field of your web browser and press Enter. Sun Server X4-4 Installation Guide • October 2015... - Page 57 To build a secure environment, you must change the default password (changeme) for the default Administrator account (root) after your initial login to Oracle ILOM. If this default Administrator account has since been changed, contact your system administrator for an Oracle ILOM user account with Administrator privileges.
-
Page 58: Modifying Network Settings For Oracle Ilom
Modifying Network Settings for Oracle ILOM The Summary page appears, indicating that you have successfully logged in to Oracle ILOM. For example: Modifying Network Settings for Oracle ILOM The procedures in this section describe how to modify Oracle ILOM network settings. -
Page 59: Modify Network Settings From The Oracle Ilom Cli
Modify Network Settings From the Oracle ILOM CLI Modify Network Settings From the Oracle ILOM If you want to modify the network settings currently configured for the server from the Oracle ILOM CLI, use the following procedure. You can also change network settings using the BIOS Setup Utility. For instructions,... - Page 60 Type set commitpending=true to commit changes. commitpending true If you are logged in to Oracle ILOM using an Ethernet connection, when you set Note - commitpending to true to commit the changes to the network settings, your Oracle ILOM connection will be terminated and you will have to log back in using the new settings.
- Page 61 Modify Network Settings From the Oracle ILOM CLI Commands: show To configure an IPv6 auto-configuration option, use the set command to specify the following auto-configuration property values. For example: -> set state=enabled -> set autoconfig=dhcpv6_stateless Property Value to Set Description The IPv6 network state is enabled by default.
-
Page 62: Modify Network Settings From The Oracle Ilom Web Interface
Network settings are considered pending until you commit them. Assigning a new static Note - IP address to the server will end all active Oracle ILOM sessions to the server. To log back in to Oracle ILOM, you will need to create a new session using the newly assigned IP address. - Page 63 Modify Network Settings From the Oracle ILOM Web Interface Select ILOM Administration > Connectivity from the navigation tree on the left. The Network Settings page appears. The settings configured on your device are displayed. Perform the network configuration instructions that apply to your network...
-
Page 64: Testing Network Settings For Oracle Ilom
Static IP Address field (for example: ipv6_address/subnet mask length in bits fec0:a:8:b7:214:4f ff:feca:5f7e/64) and click Save. Test the IPv4 or IPv6 network configuration from Oracle ILOM using the Network Test Tools (Ping and Ping 6). For details, see “Test IPv4 or IPv6 Network Configuration From the Oracle ILOM Web... - Page 65 Test IPv4 or IPv6 Network Configuration From the Oracle ILOM Web Interface Commands: show Use the set ping or set ping6 command to send a network test from the device to a network destination. For example: -> set ping=device_ipv4_address_on network ->...
-
Page 66: Exit Oracle Ilom
To end an Oracle ILOM session: From the Oracle ILOM CLI, type at the CLI prompt. ■ exit From the Oracle ILOM web interface, click the Log Out button at the top-right ■ corner of the page. Sun Server X4-4 Installation Guide • October 2015... -
Page 67: Troubleshooting The Service Processor Connection
Troubleshooting the Service Processor Connection Troubleshooting the Service Processor Connection This section addresses two issues that might occur regarding the Oracle ILOM service processor (SP): The Oracle ILOM SP is hung and needs to be reset. ■ As the system administrator, you have forgotten the root account password and you need to ■... -
Page 68: Resetting The Service Processor Using The Sp Reset Switch
Resetting the Service Processor Using the SP Reset Switch If the Oracle ILOM SP hangs and you cannot reset it using the Oracle ILOM web interface or the Oracle ILOM CLI command, there is a pinhole reset switch on the server that can be used. - Page 69 Recover Root Account Password Reset the account password or re-create the root account. Connecting to Oracle ILOM...
- Page 70 Sun Server X4-4 Installation Guide • October 2015...
-
Page 71: Setting Up Software And Firmware Using Oracle System Assistant
Assistant can additionally install the recommended drivers and tools that are supported by the specific operating system or virtual machine software. For the list of optional software that can be installed when you use Oracle System Assistant to install operating systems, refer to the Oracle System Assistant ReadMe. -
Page 72: Launch Oracle System Assistant Using The Oracle Ilom Web Interface
Launch Oracle System Assistant Using the Oracle ILOM Web Interface Launch Oracle System Assistant Using the Oracle ILOM Web Interface You should have already set up Oracle ILOM for remote Ethernet access “Connecting to Oracle Before You Begin ILOM” on page 53 Ensure that the server is in standby power mode. - Page 73 The server powers on. ■ Oracle System Assistant application boots. ■ Oracle System Assistant main screen appears. ■ Use Oracle System Assistant to perform the tasks shown in the following table in order. Setting Up Software and Firmware Using Oracle System Assistant...
-
Page 74: Launch Oracle System Assistant Locally
■ USB mouse ■ Choose a method to launch Oracle System Assistant locally on a server module. as described in the following sections: Ensure that the server is in standby power mode. Verify that the Power/OK indicator blinks slowly. See: “Front Panel Features”... - Page 75 The server boots. ■ POST messages appear on the monitor. ■ After you see the POST message for Oracle System Assistant, press the F9 function key. Oracle System Assistant boots. ■ Setting Up Software and Firmware Using Oracle System Assistant...
- Page 76 ■ Use Oracle System Assistant to perform the tasks shown in the following table in order. For more information about using Oracle System Assistant, click the Help button or refer to the Oracle X4 Series Servers Administration Guide (http://www.oracle.com/goto/ x86AdminDiag/docs).
- Page 77 Windows, or Oracle VM software. Do not use this option if your system Note - came with a preinstalled OS. “Configure Server Drives for OS Installation” on page 79 Next Steps ■ Setting Up Software and Firmware Using Oracle System Assistant...
- Page 78 Sun Server X4-4 Installation Guide • October 2015...
-
Page 79: Configure Server Drives For Os Installation
SAS HBA is installed in the server and which server BIOS boot mode is selected (UEFI or Legacy, see “UEFI BIOS” on page 24 for details). You can use either Oracle System Assistant (recommended) or BIOS/option ROM-based RAID configuration utilities to configure RAID. Once you have installed your operating system, supported OS-based RAID management utilities included with your server can be used to manage RAID storage drives. - Page 80 Using Oracle System Assistant” on page 81 and select the task that matches the internal HBA that is installed in your server. If your server is not equipped with Oracle System Assistant, proceed to “Configuring ■ RAID Using the BIOS RAID Configuration Utilities” on page Option 3 - Your server has the Sun Storage 6 Gb SAS PCIe RAID Internal HBA (SGX- ■...
-
Page 81: Configuring Raid Using Oracle System Assistant
Configure RAID With a Sun Storage 6 Gb SAS PCIe Internal HBA Use Oracle System Assistant to prepare a server hard drive for an OS installation by creating a bootable RAID 0 volume. You should have already selected a BIOS boot mode (UEFI or Legacy) from the BIOS Setup Before You Begin Utility. -
Page 82: Sun Server X4-4 Installation Guide • October
In the Select RAID Level list box, select RAID-0. In the Available Disks table, select the storage drives that you want to add to the RAID volume, and click the Create Volume button. Sun Server X4-4 Installation Guide • October 2015... - Page 83 The Create Volume dialog box appears. In the Create Volume dialog box: (Optional) Enter the volume name. Entering a volume name is optional. If you do not name the volume, Oracle System Assistant creates a volume without a name. Click Create.
- Page 84 In the Details/Action column of the Created Volumes table, click the Details button. The Volume Details dialog box appears. In the Volume Details dialog box: Review the volume details. (Optional) In the Volume Name field, enter a volume name or modify it. Sun Server X4-4 Installation Guide • October 2015...
- Page 85 If you entered a volume name earlier, you can modify it here; however, you cannot delete the name entirely. Naming the volume is optional. If you do not name the volume, Oracle System Assistant Note - creates a volume without a name.
-
Page 86: Configure Raid With A Sun Storage 6 Gb Sas Pcie Raid Internal
For systems with the Sun Storage 6 Gb SAS PCIe RAID Internal HBA, if you are not using a preinstalled OS from Oracle you must create a bootable volume on a drive before installing an OS. The system does not recognize a drive unless it has a volume on it created by the Sun Storage 6 Gb SAS PCIe RAID Internal HBA. - Page 87 Oracle X4 Series Servers Administration Guide (http://www. oracle.com/goto/x86AdminDiag/docs). Launch Oracle System Assistant. “Setting Up Software and Firmware Using Oracle System Assistant” on page The Oracle System Assistant System Overview screen appears. Click the Configure Hardware button, then select the RAID Configuration tab.
- Page 88 In the Available Disks table, select the storage drives that you want to add to the RAID volume, and click the Create Volume button. The Create Volume dialog box appears. In the Create Volume dialog box: Sun Server X4-4 Installation Guide • October 2015...
- Page 89 Configure RAID With a Sun Storage 6 Gb SAS PCIe RAID Internal HBA (Optional) Enter the volume name. Entering a volume name is optional. If you do not name the volume, Oracle System Assistant creates a volume without a name.
- Page 90 If you entered a volume name earlier, you can modify it here; however, you cannot delete the name entirely. Naming the volume is optional. If you do not name the volume, Oracle System Assistant Note - creates a volume without a name.
- Page 91 Configure RAID With a Sun Storage 6 Gb SAS PCIe RAID Internal HBA The Set Volume For Boot confirmation dialog appears. Click OK. The RAID Configuration screen appears and lists the RAID volume as the current boot device. If you want to designate the created volume as a global hot spare, perform the following steps;...
- Page 92 This completes the RAID configuration task. Do one of the following: To select any other Oracle System Assistant task, click the corresponding button in the ■ left panel menu. For example, after configuring RAID, you might want to select the Install OS task and perform an operating system installation.
-
Page 93: Configuring Raid Using The Bios Raid Configuration Utilities
Configuring RAID Using the BIOS RAID Configuration Utilities If Oracle System Assistant is not available, you can use the BIOS RAID configuration utilities that reside in the HBA firmware. The procedures for configuring RAID differ depending on the type of HBA installed the server. - Page 94 Power button again to power on the server. From the Oracle ILOM web interface, select Host Management > Power Control, then ■ select Reset from the Select Action list box.
- Page 95 Power button again to power on the server. From the Oracle ILOM web interface, select Host Management > Power Control, then ■ select Reset from the Select Action list box.
-
Page 96: Configuring Raid Using The Bios With The Sun Storage 6 Gb Sas Pcie Raid Internal Hba
Power button again to power on the server. From the Oracle ILOM web interface, select Host Management > Power Control, then ■ select Reset from the Select Action list box. - Page 97 Configure RAID in UEFI BIOS Boot Mode The Advanced menu appears. Use the up and down arrow keys to navigate to the LSI MegaRAID Configuration Utility menu option, and press Enter. The LSI MegaRAID Configuration Utility menu appears. Use the Up and Down keys to select the Virtual Drive Management option and press Enter.
- Page 98 Use the Up and Down Arrow keys to select the Create Configuration option and press Enter. The Create Configuration menu screen appears. Use the Up and Down arrow keys to select the Select RAID Level option and press Enter. Sun Server X4-4 Installation Guide • October 2015...
- Page 99 Configure RAID in UEFI BIOS Boot Mode The Select RAID Level dialog box appears. Use the Up and Down arrow keys to select the desired RAID level and press Enter. The Create Configuration menu screen appears. Use the Up and Down arrow keys to select the Select Drives option and press Enter.
- Page 100 The RAID Configuration Confirmation screen appears. Select OK and press Enter to accept the RAID confirmation. This completes the RAID configuration. “Set Up an Operating System and Drivers” on page 104 Next Steps ■ Sun Server X4-4 Installation Guide • October 2015...
- Page 101 You want to configure RAID on the intended OS installation hard drive and the server does ■ not have Oracle System Assistant or you do not want to use it. If you want to create a RAID volume level 5, 6, 50, or 60 using the storage drive on which ■...
- Page 102 Configure RAID in Legacy BIOS Boot Mode The Adapter Selection screen appears. In the Adapter Selection screen, click Start. Sun Server X4-4 Installation Guide • October 2015...
- Page 103 Configure RAID in Legacy BIOS Boot Mode The LSI MegaRAID BIOS Config Utility Virtual Configuration screen appears. Click Virtual Drives. Configure Server Drives for OS Installation...
-
Page 104: Set Up An Operating System And Drivers
The following table describes how to access information about installing or configuring an OS. What do you want to do? Refer to this documentation Configure a factory preinstalled OS ■ “Configuring the Preinstalled Oracle Solaris OS” on page 107 Sun Server X4-4 Installation Guide • October 2015... - Page 105 Sun Server X4-4 Installation Guide for Oracle Solaris ■ Sun Server X4-4 Installation Guide for Linux ■ Sun Server X4-4 Installation Guide for Oracle VM ■ Sun Server X4-4 Installation Guide for Microsoft Windows ■ Sun Server X4-4 Installation Guide for VMware ESXi...
- Page 106 Sun Server X4-4 Installation Guide • October 2015...
-
Page 107: Configuring The Preinstalled Oracle Solaris Os
Configuring the Preinstalled Oracle Solaris OS At initial release, the Sun Server X4-4 offers the option of a preinstalled Oracle Solaris 11.1.x operating system (OS) image on your server. If you purchased this option, finish the installation by configuring the preinstalled software. The preinstalled OS image contains all of the necessary drivers for your server model. - Page 108 ■ NIS If applicable, which name service should this system ■ DNS use? ■ LDAP ■ None* Domain name Provide the name of the domain in which the system resides. DNS or NIS Sun Server X4-4 Installation Guide • October 2015...
- Page 109 The software automatically tries to detect an IP address on reboot. Time zone How do you want to specify your default time zone? ■ Geographic region* ■ Offset from GM Configuring the Preinstalled Oracle Solaris OS...
-
Page 110: Configure The Preinstalled Oracle Solaris Operating System
107, use the following procedure to configure the preinstalled Oracle Solaris Operating System. If you are not already logged in to Oracle ILOM, log in either locally from a serial connection, or remotely from an Ethernet connection. “Connecting to Oracle ILOM” on page... - Page 111 When the GRUB menu appears, you have five seconds to make a selection. Note - From the GRUB menu, do one of the following: If you are using the Oracle ILOM CLI, use the up/down arrow keys to select ■ the Serial Port (ttya) option and press Enter.
-
Page 112: Oracle Solaris Operating System Documentation
After you have entered the system configuration information, the server completes the boot process and displays the Oracle Solaris login prompt. For information on using the Oracle Solaris OS, including updating and registration, see See Also “Oracle Solaris Operating System Documentation” on page 112. -
Page 113: Configuring The Preinstalled Oracle Linux Os
Configuring the Preinstalled Oracle Linux OS At initial release, the Sun Server X4-4 offers the option of a preinstalled Oracle Linux 6.x operating system (OS) image on your server. If you purchased this option, finish the installation by configuring the preinstalled software. The preinstalled OS image contains all of the necessary drivers for your server model. -
Page 114: Configure The Preinstalled Oracle Linux Os
These instructions describe how to configure the preinstalled Oracle Linux on your server. If you are not already logged in to the server's Oracle ILOM, log in either locally from a direct serial connection, or remotely from an Ethernet connection. - Page 115 Are you sure you want to reset /System (y/n)? y Performing hard reset on /System The server begins the host boot process. From Oracle ILOM, start the host console using one of the following methods: From the Oracle ILOM web interface, click Remote Control > Launch Remote ■...
- Page 116 The Unbreakable Enterprise Kernel ■ The Red Hat Compatible Kernel ■ Oracle recommends the use of Oracle Linux Server with the Unbreakable Enterprise Note - Kernel for all enterprise applications. Once an installation option has been selected, Linux starts. When done, you will see the Linux system login.
-
Page 117: Oracle Linux Operating System Documentation
From the Oracle ILOM web interface, close the Remote Console window, and ■ then log out of Oracle ILOM. From the Oracle ILOM CLI, press Esc followed by the ( character (Shift+9) to ■ terminate the serial redirect session, and then log out of Oracle ILOM. - Page 118 Sun Server X4-4 Installation Guide • October 2015...
-
Page 119: Configuring The Preinstalled Oracle Vm Software
Configuring the Preinstalled Oracle VM Software At initial release, the Sun Server X4-4 offers the option of a preinstalled Oracle VM Sever 3.2.x software image on your server. If you purchased this option, finish the installation by configuring the preinstalled software. The preinstalled software image contains all of the necessary drivers for your server model. -
Page 120: Oracle Vm Configuration Worksheet
Upgrade Guide. The Oracle VM documentation is available at the following web site: http:// www.oracle.com/technetwork/documentation/vm-096300.html Oracle VM Configuration Worksheet Before you begin configuring the Oracle VM Server, use the worksheet in this section to gather the information you will need. Information for Configuration Description or Example... -
Page 121: Configure The Preinstalled Oracle Vm Server
Oracle VM also has other components, such as Oracle VM Manager, that must be installed or already up and running to support the virtual machine environment. If you are not already logged in to Oracle ILOM, log in locally from a serial connection or remotely using an Ethernet connection. - Page 122 When the GRUB menu appears, you have five seconds to make a selection. Note - From the GRUB menu, do one of the following: If you are using the Oracle ILOM CLI, use the up/down arrow keys to select ■ the serial console option and press Enter.
- Page 123 If all of the configuration settings are correct, type when prompted and press Enter to save the settings. When all settings have been entered and saved, the system loads an Oracle VM Server Console session. For example: |Oracle VM Server 3.2.X Console [Alt-F2 for login console]...
-
Page 124: Oracle Vm Documentation
For information on using Oracle VM, including updating and registration, see “Oracle VM See Also Documentation” on page 124. Oracle VM Documentation For complete information about using Oracle VM, refer to the Oracle VM documentation available at: http://www.oracle.com/technetwork/documentation/vm-096300.html Sun Server X4-4 Installation Guide • October 2015... -
Page 125: Getting Server Firmware And Software
“Available Software Release Packages” on page 126 Access the firmware and software packages through “Accessing Firmware and Software” on page 127 Oracle System Assistant or My Oracle Support. Install firmware and software updates. “Installing Updates” on page 128 Firmware and Software Updates Firmware and software, such as hardware drivers and tools for the server, are updated periodically. -
Page 126: Firmware And Software Access Options
Each download contains firmware, drivers, or utilities. My Oracle Support has the same set of download types for this server family as shown in the following table. The same firmware and software can also be downloaded using Oracle System Assistant. -
Page 127: Accessing Firmware And Software
Accessing Firmware and Software This section covers instructions for downloading or requesting software release files. You can use Oracle System Assistant to easily download and use the latest software release. For further information, refer to the Oracle X4 Series Servers Administration Guide (http://www. -
Page 128: Installing Updates
The screen appears with search fields. In the Product field, select the product from the drop-down list. Alternatively, type a full or partial product name (for example, Sun Server X4-4) until a match appears. In the Release field, select a software release from the drop-down list. -
Page 129: Installing Firmware
For more information, refer to the Oracle Hardware Management Pack Documentation Library at: http://www.oracle.com/goto/ohmp/docs Oracle ILOM – Oracle ILOM and BIOS firmware are the only firmware that can be ■ updated using either the Oracle ILOM web interface or the command-line interface. - Page 130 Sun Server X4-4 Installation Guide • October 2015...
-
Page 131: Controlling System Power And Viewing Bios Messages
“Use the Power Button to Power On the Server” on page 131 ■ “Use the Oracle ILOM CLI to Power On the Server” on page 132 ■ “Use the Oracle ILOM Web Interface to Power On the Server” on page 133 ■ “Viewing BIOS Messages” on page 133 ■... -
Page 132: Use The Oracle Ilom Cli To Power On The Server
Use the Oracle ILOM CLI to Power On the Server Log in to the Oracle ILOM command-line interface (CLI) using an Administrator account. Oracle ILOM displays the default command prompt (->), indicating that you have successfully logged in to Oracle ILOM. From the CLI prompt, type the following command: ->... -
Page 133: Use The Oracle Ilom Web Interface To Power On The Server
Use the Oracle ILOM Web Interface to Power On the Server Log in to the Oracle ILOM web interface using an Administrator account. The Oracle ILOM web interface System Information > Summary page appears. From the Summary page, click the Turn On button from the Actions box. - Page 134 Hot keys to access the BIOS setup program, option ROM utilities (HBA and network cards), temporary boot device selection menu (BBS popup), and Oracle System Assistant are presented, if available. The POST codes are displayed on the bottom right of the screen.
-
Page 135: Powering Off The Server For Orderly Shutdown
Powering Off the Server for Orderly Shutdown If the boot mode is UEFI, some of these options are only be available in the BIOS Setup Note - Utility. Once POST completes, the system attempts to boot from either the default boot device, or the temporary boot device selected from the BBS Popup menu. -
Page 136: Use The Power Button For Orderly Shutdown
Use the Power Button for Orderly Shutdown “Use the Oracle ILOM CLI for Orderly Shutdown” on page 137 ■ “Use the Oracle ILOM Web Interface for Orderly Shutdown” on page 137 ■ Use the Power Button for Orderly Shutdown Momentarily press and release the Power button [1] on the front panel. -
Page 137: Use The Oracle Ilom Cli For Orderly Shutdown
Use the Oracle ILOM CLI for Orderly Shutdown Log in to the Oracle ILOM command-line interface (CLI) using an Administrator account. Oracle ILOM displays the default command prompt (->), indicating that you have successfully logged in to Oracle ILOM. From the CLI prompt, type the following command: ->... -
Page 138: Powering Off The Server For Immediate Shutdown
■ “Use the Oracle ILOM CLI for Immediate Shutdown” on page 139 ■ “Use the Oracle ILOM Web Interface for Immediate Shutdown” on page 139 ■ Use the Power Button for Immediate Shutdown Press and hold down the Power button until the main power shuts off. -
Page 139: Use The Oracle Ilom Cli For Immediate Shutdown
Use the Oracle ILOM CLI for Immediate Shutdown Log in to the Oracle ILOM command-line interface (CLI) using an Administrator account. Oracle ILOM displays the default command prompt (->), indicating that you have successfully logged in to Oracle ILOM. From the CLI prompt, type the following command: ->... -
Page 140: Reset The Server
“Use the Oracle ILOM CLI to Reset the Server” on page 140 ■ “Use the Oracle ILOM Web Interface to Reset the Server” on page 140 ■ Use the Oracle ILOM CLI to Reset the Server Log in to the Oracle ILOM command-line interface (CLI) using an Administrator account. - Page 141 In the left pane, click Host Management > Power Control, and select Reset from the Select Action list box. Click Save, and then click OK. The host server resets. “Use the Oracle ILOM CLI to Reset the Server” on page 140 See Also ■ Controlling System Power and Viewing BIOS Messages...
- Page 142 Sun Server X4-4 Installation Guide • October 2015...
-
Page 143: Troubleshooting Installation Issues
“Troubleshooting and Diagnostics” in Sun Server X4-4 Service Manual The Oracle x86 Server Diagnostics Guide (http://www.oracle.com/goto/x86AdminDiag/ docs) provides information about a wide variety of tools available for Oracle's x86 servers. Knowledge articles, white papers, and product updates are available through the Oracle Support portal: https://support.oracle.com... -
Page 144: Locating The Server Serial Number
This sheet includes the serial number. From Oracle ILOM: ■ Using the Web interface, log in and view the Summary page. ■ Using the CLI, log in and enter the command: ■ show /SYS Sun Server X4-4 Installation Guide • October 2015... -
Page 145: Index
13 description, 21 inventory, 30 electrical specifications LEDs See indicators Installation Guide, 28 locator indicator, 15 electrostatic discharge (ESD), 31 environmental specifications Installation Guide, 28 Ethernet connection logging in to Oracle ILOM, 56 management tools, description, 19... -
Page 146: Sun Server X4-4 Installation Guide • October
38 configuring preinstalled image, 119 rack compatibility, 34 rail assembly, 33 releasing slide-rail stops, 48 slide rail assemblies, 36 PCIe slots rack safety precautions, 33 back panel, 16 RAID configuration, 79 Sun Server X4-4 Installation Guide • October 2015... - Page 147 16 connecting, 49 tools and equipment serial connection needed for server installation, 31 logging in to Oracle ILOM, 55 serial null modem cable connecting, 49 Service Processor See SP shipping box contents, 30 Unified Extensible Firmware Interface (UEFI) BIOS...
- Page 148 Sun Server X4-4 Installation Guide • October 2015...
Need help?
Do you have a question about the Sun Server X4-4 and is the answer not in the manual?
Questions and answers