Toshiba e-STUDIO281c Service Manual
Hide thumbs
Also See for e-STUDIO281c:
- Service handbook (679 pages) ,
- Service manual (412 pages) ,
- Colour manual (8 pages)

Related Manuals for Toshiba e-STUDIO281c


Summary of Contents for Toshiba e-STUDIO281c
-
Page 1: Service Manual
SERVICE MANUAL MULTIFUNCTIONAL DIGITAL COLOR SYSTEMS e-STUDIO281c/351c/451c File No. SME050004D0 R05032182501-TTEC Ver04_2008-04... - Page 2 © 2005 - 2008 TOSHIBA TEC CORPORATION All rights reserved Under the copyright laws, this manual cannot be reproduced in any form without prior written permission of TOSHIBA TEC CORPORATION. No patent liability is assumed, however, with respect to the use of the information contained herein.
- Page 3 GENERAL PRECAUTIONS REGARDING THE SERVICE FOR e-STUDIO281c/351c/451c The installation and service should be done by a qualified service technician. 1) Transportation/Installation When transporting/installing the equipment, employ four persons and be sure to hold the posi- tions as shown in the figure.
- Page 4 If these parts are short-circuited and their functions become ineffective, they may result in fatal accidents such as burnout. Do not allow a short-circuit or do not use the parts not recommended by Toshiba TEC Corporation. 4) Cautionary Labels During servicing, be sure to check the rating plate and cautionary labels such as “Unplug the power cable during service”, “CAUTION.
- Page 5 5) Disposal of the Equipment, Supplies, Packing Materials, Used Batteries and IC-RAMs Regarding the recovery and disposal of the equipment, supplies, packing materials, used batter- ies and IC-RAMs including lithium batteries, follow the relevant local regulations or rules. Caution: Dispose of used batteries and IC-RAMs including lithium batteries according to this manual. Attention: Se débarrasser de batteries et IC-RAMs usés y compris les batteries en lithium selon ce manuel.
-
Page 7: Table Of Contents
5.4.2 LED display circuit ....................5-14 5.5 Disassembly and Replacement ..................5-15 6. SCANNER ........................6-1 6.1 General Description ......................6-1 6.2 Construction......................... 6-2 6.3 Functions ..........................6-3 © 2005 - 2008 TOSHIBA TEC CORPORATION All rights reserved e-STUDIO281c/351c/451c CONTENTS... - Page 8 10.4.1 Drive of rollers ......................10-4 10.4.2 Operation of bypass pickup roller ................10-4 10.4.3 Operation of drawer pickup roller ................10-5 10.4.4 Separation of paper ....................10-5 e-STUDIO281c/351c/451c © 2005 - 2008 TOSHIBA TEC CORPORATION All rights reserved CONTENTS...
- Page 9 13.6.6 During image quality control ................... 13-7 13.7 Disassembly and Replacement ..................13-8 14. TRANSFER UNIT......................14-1 14.1 General Descriptions ......................14-1 14.2 Construction........................14-2 14.3 Functions ........................... 14-3 © 2005 - 2008 TOSHIBA TEC CORPORATION All rights reserved e-STUDIO281c/351c/451c CONTENTS...
- Page 10 18.4 Fuse........................... 18-5 18.5 Configuration of Power Supply Unit................... 18-6 18.6 Sequence of Power Supply ....................18-7 18.7 AC Wire Harness ....................... 18-8 19. PC BOARDS ....................... 19-1 e-STUDIO281c/351c/451c © 2005 - 2008 TOSHIBA TEC CORPORATION All rights reserved CONTENTS...
- Page 11 * When the Reversing Automatic Document Feeder is used, copying in the speed of 28, 35 and 45 sheets per minute are only possible under the following conditions: © 2005 - 2008 TOSHIBA TEC CORPORATION All rights reserved e-STUDIO281c/351c/451c SPECIFICATIONS/ACCESSORIES/OPTIONS/SUPPLIES...
- Page 12 • Mode: APS and Automatic density not selected, Plain paper mode • Number of copies: Black mode: 28 sheets or more (e-STUDIO281c), 35 sheets or more (e-STUDIO351c), 45 sheets or more (e-STUDIO451c) Color mode: 11 sheets or more • Reproduction ratio: 100% * The values in ( ) can be realized in the color mode.
- Page 13 10 (2) A3, LD 10 (2) 10 (2) Bypass feed Paper supply Drawer Size not Paper size (A4/LT only) Size specified specified A4, LT 10 (3) © 2005 - 2008 TOSHIBA TEC CORPORATION All rights reserved e-STUDIO281c/351c/451c SPECIFICATIONS/ACCESSORIES/OPTIONS/SUPPLIES 1 - 3...
- Page 14 * The bypass copying speed is measured with the paper size specified. * The values in ( ) can be realized in the color mode. e-STUDIO281c/351c/451c © 2005 - 2008 TOSHIBA TEC CORPORATION All rights reserved SPECIFICATIONS/ACCESSORIES/OPTIONS/SUPPLIES 1 - 4...
- Page 15 (25 to 200% when using RADF) Resolution/Gradation....Scanning: 600 dpi x 600 dpi Printing: Equivalent to 2400 dpi x 600 dpi (black) Equivalent to 600 dpi x 600 dpi (color) © 2005 - 2008 TOSHIBA TEC CORPORATION All rights reserved e-STUDIO281c/351c/451c SPECIFICATIONS/ACCESSORIES/OPTIONS/SUPPLIES 1 - 5...
- Page 16 Dimensions of the equipment...... See the figure below (W 660 x D 758 x H 739 (mm)) * When the tilt angle of the control panel is 45 degrees. 45° Fig. 1-1 e-STUDIO281c/351c/451c © 2005 - 2008 TOSHIBA TEC CORPORATION All rights reserved SPECIFICATIONS/ACCESSORIES/OPTIONS/SUPPLIES 1 - 6...
-
Page 17: Specifications/Accessories/Options/Supplies
1 pc. (for CND) * Machine version NAD: North America MJD: Europe AUD: Australia ASD: Asia, Argentine TWD: Taiwan Saudi Arabia Saudi Arabia, Asia China Korea JPD: Japan © 2005 - 2008 TOSHIBA TEC CORPORATION All rights reserved e-STUDIO281c/351c/451c SPECIFICATIONS/ACCESSORIES/OPTIONS/SUPPLIES 1 - 7... -
Page 18: Options
7. When the wireless LAN module (GN-1040/1041) and the bluetooth module (GN-2010) are installed together, only 1 antenna (GN-3010) can be connected to each. e-STUDIO281c/351c/451c © 2005 - 2008 TOSHIBA TEC CORPORATION All rights reserved SPECIFICATIONS/ACCESSORIES/OPTIONS/SUPPLIES 1 - 8 08/04... -
Page 19: Supplies
Toner cartridge (Y) PS-ZT281C-Y(4) PS-ZT281C-EY(1) PS-ZT3511DY Others PS-ZT3511TY PS-ZT3511CY Toner cartridge (M) PS-ZT281C-M(4) PS-ZT281C-EM(1) PS-ZT3511DM Others PS-ZT3511TM PS-ZT3511CM Toner cartridge (C) PS-ZT281C-C(4) PS-ZT281C-EC(1) PS-ZT3511DC Others PS-ZT3511TC PS-ZT3511CC © 2005 - 2008 TOSHIBA TEC CORPORATION All rights reserved e-STUDIO281c/351c/451c SPECIFICATIONS/ACCESSORIES/OPTIONS/SUPPLIES 1 - 9... -
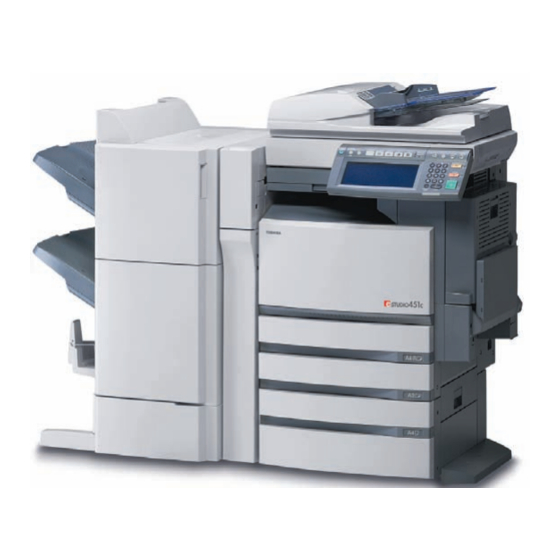
Page 20: System List
System List Fig. 1-2 e-STUDIO281c/351c/451c © 2005 - 2008 TOSHIBA TEC CORPORATION All rights reserved SPECIFICATIONS/ACCESSORIES/OPTIONS/SUPPLIES 1 - 10 08/04... -
Page 21: Outline Of The Machine
OUTLINE OF THE MACHINE Sectional View Front side view 7 5 3 32 31 Fig. 2-1 © 2005 - 2008 TOSHIBA TEC CORPORATION All rights reserved e-STUDIO281c/351c/451c OUTLINE OF THE MACHINE 2 - 1... - Page 22 Developer sleeve Y ADU entrance sensor Mixer-F (Y) ADU exit sensor Mixer-R (Y) Receiving tray Color auto-toner sensor Pressure roller discharge brush e-STUDIO281c/351c/451c © 2005 - 2008 TOSHIBA TEC CORPORATION All rights reserved OUTLINE OF THE MACHINE 2 - 2 05/08...
- Page 23 Rear side view (Drive system) CLT1 CLT17 CLT15 CLT8 CLT12 CLT9 CLT10 CLT16 CLT14 CLT2 CLT15 CLT3 CLT16 CLT13 CLT11 Fig. 2-2 © 2005 - 2008 TOSHIBA TEC CORPORATION All rights reserved e-STUDIO281c/351c/451c OUTLINE OF THE MACHINE 2 - 3...
- Page 24 Upper transport clutch (Low speed) CLT14 Upper transport clutch (High speed) CLT15 Lower transport clutch (Low speed) CLT16 Lower transport clutch (High speed) e-STUDIO281c/351c/451c © 2005 - 2008 TOSHIBA TEC CORPORATION All rights reserved OUTLINE OF THE MACHINE 2 - 4...
-
Page 25: Electric Parts Layout
Control panel unit Fuser unit Automatic duplexing unit Bypass unit Transport unit Process unit Front side Laser unit Paper feeder unit Fig. 2-3 © 2005 - 2008 TOSHIBA TEC CORPORATION All rights reserved e-STUDIO281c/351c/451c OUTLINE OF THE MACHINE 2 - 5... - Page 26 Scanner unit [B-1] Motor, sensor, lamp A4 series Front side Fig. 2-4 LT series Front side Fig. 2-5 e-STUDIO281c/351c/451c © 2005 - 2008 TOSHIBA TEC CORPORATION All rights reserved OUTLINE OF THE MACHINE 2 - 6...
- Page 27 DH2* THMO2* DH1* Front side Fig. 2-6 * ASD/AUD/CND/SAD/ASU/TWD/KRD model: Standard, NAD/MJD model: Option [C] Control panel unit Front side Fig. 2-7 © 2005 - 2008 TOSHIBA TEC CORPORATION All rights reserved e-STUDIO281c/351c/451c OUTLINE OF THE MACHINE 2 - 7...
- Page 28 Motor, sensor, switch, solenoid, lamp, heater, thermistor, thermostat SOL2 THM4 THMO3* DH3* Front side Fig. 2-9 * ASD/AUD/CND/SAD/ASU/TWD/KRD model: Standard, NAD/MJD model: Option e-STUDIO281c/351c/451c © 2005 - 2008 TOSHIBA TEC CORPORATION All rights reserved OUTLINE OF THE MACHINE 2 - 8...
- Page 29 [D-3] Motor, switch Front side Fig. 2-10 Laser unit Front side Fig. 2-11 © 2005 - 2008 TOSHIBA TEC CORPORATION All rights reserved e-STUDIO281c/351c/451c OUTLINE OF THE MACHINE 2 - 9...
- Page 30 Paper feeder unit CLT2 CLT3 Front side Fig. 2-12 [G] Transport unit CLT5 Front side Fig. 2-13 e-STUDIO281c/351c/451c © 2005 - 2008 TOSHIBA TEC CORPORATION All rights reserved OUTLINE OF THE MACHINE 2 - 10...
- Page 31 [H] Bypass unit CLT6 SOL3 Front side Fig. 2-14 Automatic duplexing unit CLT7 Front side Fig. 2-15 © 2005 - 2008 TOSHIBA TEC CORPORATION All rights reserved e-STUDIO281c/351c/451c OUTLINE OF THE MACHINE 2 - 11...
- Page 32 Fuser unit IH-COIL THMO1 THM2 Front side THM3 THM1 Fig. 2-16 e-STUDIO281c/351c/451c © 2005 - 2008 TOSHIBA TEC CORPORATION All rights reserved OUTLINE OF THE MACHINE 2 - 12...
- Page 33 Drive unit CLT12 CLT14 CLT13 CLT8 CLT15 CLT9 CLT16 CLT10 CLT11 Front side Fig. 2-17 © 2005 - 2008 TOSHIBA TEC CORPORATION All rights reserved e-STUDIO281c/351c/451c OUTLINE OF THE MACHINE 2 - 13...
- Page 34 PC board unit Front side Fig. 2-18 e-STUDIO281c/351c/451c © 2005 - 2008 TOSHIBA TEC CORPORATION All rights reserved OUTLINE OF THE MACHINE 2 - 14...
-
Page 35: Symbols And Functions Of Various Components
INTRNL-FAN-MOT Cooling down the equipment inside 1-35 Internal cooling fan HDD-FAN-MOT Cooling down the HDD and SYS board 8-26 HDD cooling fan © 2005 - 2008 TOSHIBA TEC CORPORATION All rights reserved e-STUDIO281c/351c/451c OUTLINE OF THE MACHINE 2 - 15... - Page 36 FED-L-SNR Detecting paper jam and paper trans- 24-52 Lower drawer feed sensor port at lower drawer feeding section e-STUDIO281c/351c/451c © 2005 - 2008 TOSHIBA TEC CORPORATION All rights reserved OUTLINE OF THE MACHINE 2 - 16...
- Page 37 Cover opening/closing interlock switch voltage by opening/closing of the front cover or jam access cover SIDE-COV-SW Side cover opening/closing detection 24-51 Side cover opening/closing switch © 2005 - 2008 TOSHIBA TEC CORPORATION All rights reserved e-STUDIO281c/351c/451c OUTLINE OF THE MACHINE 2 - 17...
- Page 38 Driving the image quality sensor shut- 23-21 Image quality sensor shutter solenoid SOL3 SFB-SOL Driving the bypass pickup roller 22-11 Bypass pickup solenoid e-STUDIO281c/351c/451c © 2005 - 2008 TOSHIBA TEC CORPORATION All rights reserved OUTLINE OF THE MACHINE 2 - 18...
- Page 39 Logic PC board (LGC board) PWA-F-FIL Cutting noise of the AC power Power 7-11 Filter PC board (FIL board) supplying to each damp heater © 2005 - 2008 TOSHIBA TEC CORPORATION All rights reserved e-STUDIO281c/351c/451c OUTLINE OF THE MACHINE 2 - 19...
- Page 40 THMO3 THERMO-DRM-DH Controlling the temperature of the drum 35-24 Drum damp heater thermostat damp heater ASD/AUD/CND/SAD/ASU/TWD/ KRD model: Standard NAD/MJD model: Option e-STUDIO281c/351c/451c © 2005 - 2008 TOSHIBA TEC CORPORATION All rights reserved OUTLINE OF THE MACHINE 2 - 20...
- Page 41 Generating DC voltage and supplying it Switching regulator to each section of the equipment BREAKER Preventing the inflow of overcurrent to Breaker the equipment © 2005 - 2008 TOSHIBA TEC CORPORATION All rights reserved e-STUDIO281c/351c/451c OUTLINE OF THE MACHINE 2 - 21...
-
Page 42: General Description
General Description 2.4.1 System block diagram Fig. 2-19 e-STUDIO281c/351c/451c © 2005 - 2008 TOSHIBA TEC CORPORATION All rights reserved OUTLINE OF THE MACHINE 2 - 22 06/07... -
Page 43: Construction Of Boards
KEY board. • KEY board: This is the board on which each button switch and each LED on the control panel are mounted. © 2005 - 2008 TOSHIBA TEC CORPORATION All rights reserved e-STUDIO281c/351c/451c OUTLINE OF THE MACHINE 2 - 23... - Page 44 This is the unit to generate each DC voltage, which is used in the equipment, from external AC elec- tric power input. And then it is provided to each electric part. e-STUDIO281c/351c/451c © 2005 - 2008 TOSHIBA TEC CORPORATION All rights reserved OUTLINE OF THE MACHINE 2 - 24...
-
Page 45: Disassembly And Replacement Of Covers
Hinge pin Front cover Fig. 2-21 Maintenance tray Remove 1 screw and take off the mainte- nance tray. Maintenance tray Fig. 2-22 © 2005 - 2008 TOSHIBA TEC CORPORATION All rights reserved e-STUDIO281c/351c/451c OUTLINE OF THE MACHINE 2 - 25... - Page 46 Take off the front cover ( P.2-25 "[A] Front cover"). Take off the black developer unit cover. Black developer unit cover Fig. 2-25 e-STUDIO281c/351c/451c © 2005 - 2008 TOSHIBA TEC CORPORATION All rights reserved OUTLINE OF THE MACHINE 2 - 26...
- Page 47 Screw Fig. 2-27 [G] Front upper cover Remove 2 screws and take off the front upper cover. Front upper cover Fig. 2-28 © 2005 - 2008 TOSHIBA TEC CORPORATION All rights reserved e-STUDIO281c/351c/451c OUTLINE OF THE MACHINE 2 - 27...
- Page 48 Take off the right front hinge cover P.2-28 "[I] Right front hinge cover"). Remove 2 screws and take off the front right cover. Front right cover Fig. 2-31 e-STUDIO281c/351c/451c © 2005 - 2008 TOSHIBA TEC CORPORATION All rights reserved OUTLINE OF THE MACHINE 2 - 28...
- Page 49 Take off the left upper cover ( P.2-29 "[L] Left upper cover"). Remove 3 screws and take off the left rear cover. Left rear cover Fig. 2-34 © 2005 - 2008 TOSHIBA TEC CORPORATION All rights reserved e-STUDIO281c/351c/451c OUTLINE OF THE MACHINE 2 - 29...
- Page 50 Remove 1 screw and take off the ozone filter cover ( P.11-23 "[Q] Ozone filter"). Remove 2 screws and take off the right rear cover. Right rear cover Fig. 2-36 e-STUDIO281c/351c/451c © 2005 - 2008 TOSHIBA TEC CORPORATION All rights reserved OUTLINE OF THE MACHINE 2 - 30...
- Page 51 Right lower cover Fig. 2-38 [R] Rear cover-1 Remove 1 screw and take off the connector cover. Connector cover Fig. 2-39 © 2005 - 2008 TOSHIBA TEC CORPORATION All rights reserved e-STUDIO281c/351c/451c OUTLINE OF THE MACHINE 2 - 31...
- Page 52 Take off the right rear cover ( P.2-30 "[O] Right rear cover"). Remove 2 screws and take off the upper rear cover. Fig. 2-42 e-STUDIO281c/351c/451c © 2005 - 2008 TOSHIBA TEC CORPORATION All rights reserved OUTLINE OF THE MACHINE 2 - 32...
-
Page 53: Disassembly And Replacement Of Pc Boards/Hdd
SYS board cover Fig. 2-44 Disconnect 1 connector. Remove 2 screws HDD cooling fan and take off the HDD cooling fan. Fig. 2-45 © 2005 - 2008 TOSHIBA TEC CORPORATION All rights reserved e-STUDIO281c/351c/451c OUTLINE OF THE MACHINE 2 - 33... - Page 54 HDD cooling fan (M21)"). Disconnect 2 connectors, remove 2 screws, and then take off the hard disk with the stay. Hard disk Fig. 2-48 e-STUDIO281c/351c/451c © 2005 - 2008 TOSHIBA TEC CORPORATION All rights reserved OUTLINE OF THE MACHINE 2 - 34...
- Page 55 Take off the SYS board cover ( P.2-33 "[A] HDD cooling fan (M21)"). Loosen 2 screws and take off the PS cover. PS cover © 2005 - 2008 TOSHIBA TEC CORPORATION All rights reserved e-STUDIO281c/351c/451c OUTLINE OF THE MACHINE 2 - 35...
- Page 56 Remove 4 screws. Take off the SYS board case while releasing the harness from the harness clamp. SYS board case Fig. 2-53 e-STUDIO281c/351c/451c © 2005 - 2008 TOSHIBA TEC CORPORATION All rights reserved OUTLINE OF THE MACHINE 2 - 36...
- Page 57 Disconnect 21 connectors. Fig. 2-55 Remove 4 screws, release 2 lock supports, and then take off the LGC board. LGC board Fig. 2-56 © 2005 - 2008 TOSHIBA TEC CORPORATION All rights reserved e-STUDIO281c/351c/451c OUTLINE OF THE MACHINE 2 - 37...
- Page 58 Release harnesses from 12 harness clamps. Fig. 2-58 Remove 4 screws and take off the LGC board case. LGC board case Fig. 2-59 e-STUDIO281c/351c/451c © 2005 - 2008 TOSHIBA TEC CORPORATION All rights reserved OUTLINE OF THE MACHINE 2 - 38...
- Page 59 1 harness clamp. Remove 3 Switching regulator screws and take off the switching regulator unit unit while the unit is inclined. Fig. 2-62 © 2005 - 2008 TOSHIBA TEC CORPORATION All rights reserved e-STUDIO281c/351c/451c OUTLINE OF THE MACHINE 2 - 39...
- Page 60 Switching regurator Fig. 2-64 Remove 12 screws (1 screw fastened by a Switching nut) and take off the switching regulator. regurator Fig. 2-65 e-STUDIO281c/351c/451c © 2005 - 2008 TOSHIBA TEC CORPORATION All rights reserved OUTLINE OF THE MACHINE 2 - 40...
- Page 61 Take off the right lower cover ( P.2-31 "[Q] Right lower cover"). Remove 1 screw and take off the cover plate. Cover plate Fig. 2-68 © 2005 - 2008 TOSHIBA TEC CORPORATION All rights reserved e-STUDIO281c/351c/451c OUTLINE OF THE MACHINE 2 - 41...
- Page 62 Disconnect 4 connectors and 2 terminals. Fig. 2-70 Remove 2 screws, release 2 lock supports, and then take off the FIL board. FIL board Fig. 2-71 e-STUDIO281c/351c/451c © 2005 - 2008 TOSHIBA TEC CORPORATION All rights reserved OUTLINE OF THE MACHINE 2 - 42...
- Page 63 P.2-38 "[F] LGC board case"). Disconnect 4 connectors. Fig. 2-72 Remove 4 screws and take off the DRV board. DRV board Fig. 2-73 © 2005 - 2008 TOSHIBA TEC CORPORATION All rights reserved e-STUDIO281c/351c/451c OUTLINE OF THE MACHINE 2 - 43...
-
Page 64: Removal And Installation Of Options
Take off the connector cover. Connector cover Fig. 2-74 Disconnect the connector. Fig. 2-75 Remove 1 screw and 1 washer on the rear side. Fig. 2-76 e-STUDIO281c/351c/451c © 2005 - 2008 TOSHIBA TEC CORPORATION All rights reserved OUTLINE OF THE MACHINE 2 - 44... - Page 65 Remove 1 screw on the rear side. Fig. 2-77 Open the RADF. Fig. 2-78 Remove 2 screws on the front side. Fig. 2-79 © 2005 - 2008 TOSHIBA TEC CORPORATION All rights reserved e-STUDIO281c/351c/451c OUTLINE OF THE MACHINE 2 - 45...
- Page 66 Change the position of the screw for installing the damper holding bracket. Installing the RADF: A Installing the platen cover: B Fig. 2-82 e-STUDIO281c/351c/451c © 2005 - 2008 TOSHIBA TEC CORPORATION All rights reserved OUTLINE OF THE MACHINE 2 - 46...
- Page 67 Remove 3 screws and take off the rear cover-2. Rear cover-2 Note: Disconnect the connector of the RADF first when the RADF is installed. Fig. 2-85 © 2005 - 2008 TOSHIBA TEC CORPORATION All rights reserved e-STUDIO281c/351c/451c OUTLINE OF THE MACHINE 2 - 47...
- Page 68 Fixing bracket Fig. 2-87 Take off the lower drawer of the equipment and PFP upper drawer. Fig. 2-88 e-STUDIO281c/351c/451c © 2005 - 2008 TOSHIBA TEC CORPORATION All rights reserved OUTLINE OF THE MACHINE 2 - 48...
- Page 69 Turn OFF the power and unplug the power cable. Remove 1 screw and take off the connector cover of the equipment. Connector cover Fig. 2-91 © 2005 - 2008 TOSHIBA TEC CORPORATION All rights reserved e-STUDIO281c/351c/451c OUTLINE OF THE MACHINE 2 - 49...
- Page 70 Remove 1 screw and the ground wire, and then disconnect 2 connectors (3 if the optional damp heater is installed). Fig. 2-94 e-STUDIO281c/351c/451c © 2005 - 2008 TOSHIBA TEC CORPORATION All rights reserved OUTLINE OF THE MACHINE 2 - 50...
- Page 71 Fixing bracket Fig. 2-95 Take off the lower drawer of the equipment. Fig. 2-96 Pull out the LCF drawer. Fig. 2-97 © 2005 - 2008 TOSHIBA TEC CORPORATION All rights reserved e-STUDIO281c/351c/451c OUTLINE OF THE MACHINE 2 - 51...
- Page 72 Turn OFF the power and unplug the power cable. Take off the connector cover and disconnect the connector. Connector cover Fig. 2-100 e-STUDIO281c/351c/451c © 2005 - 2008 TOSHIBA TEC CORPORATION All rights reserved OUTLINE OF THE MACHINE 2 - 52...
- Page 73 Remove 2 screws and take off the safety bracket on the front side and the cover. Cover Safety bracket Fig. 2-102 Remove 2 screws. Fig. 2-103 © 2005 - 2008 TOSHIBA TEC CORPORATION All rights reserved e-STUDIO281c/351c/451c OUTLINE OF THE MACHINE 2 - 53...
- Page 74 Take off the connector cover and disconnect the connector. Connector cover Fig. 2-105 Remove 2 screws and take off the cover on the rear side. Cover Fig. 2-106 e-STUDIO281c/351c/451c © 2005 - 2008 TOSHIBA TEC CORPORATION All rights reserved OUTLINE OF THE MACHINE 2 - 54...
- Page 75 Remove 2 screws and take off the cover on the front side. Cover Fig. 2-107 Remove 2 screws. Fig. 2-108 Lift up the finisher and take it off. Fig. 2-109 © 2005 - 2008 TOSHIBA TEC CORPORATION All rights reserved e-STUDIO281c/351c/451c OUTLINE OF THE MACHINE 2 - 55...
- Page 76 Remove 1 screw and take off the finisher lower cover. Cover Fig. 2-111 Remove 3 screws and take off the finisher front cover. Fig. 2-112 e-STUDIO281c/351c/451c © 2005 - 2008 TOSHIBA TEC CORPORATION All rights reserved OUTLINE OF THE MACHINE 2 - 56...
- Page 77 Fig. 2-113 Remove 1 screw and take off the cover of the finisher rear side. Cover Fig. 2-114 Remove 1 screw. Fig. 2-115 © 2005 - 2008 TOSHIBA TEC CORPORATION All rights reserved e-STUDIO281c/351c/451c OUTLINE OF THE MACHINE 2 - 57...
- Page 78 Take off the connector cover and disconnect the connector. Connector cover Fig. 2-117 Open the finisher front cover and remove 1 screw. Fig. 2-118 e-STUDIO281c/351c/451c © 2005 - 2008 TOSHIBA TEC CORPORATION All rights reserved OUTLINE OF THE MACHINE 2 - 58...
- Page 79 Fig. 2-120 Take off the finisher. Note: Note: Be careful not to fell the finisher when moving the finisher unit only. Fig. 2-121 © 2005 - 2008 TOSHIBA TEC CORPORATION All rights reserved e-STUDIO281c/351c/451c OUTLINE OF THE MACHINE 2 - 59...
- Page 80 Fixing plate Fig. 2-123 Loosen 1 screw and take off the ground wire. Fig. 2-124 e-STUDIO281c/351c/451c © 2005 - 2008 TOSHIBA TEC CORPORATION All rights reserved OUTLINE OF THE MACHINE 2 - 60 06/07...
- Page 81 Take off the connector cover and disconnect connector. Connector cover Fig. 2-126 Open the front cover of the hole punch unit and remove 1 screw. Fig. 2-127 © 2005 - 2008 TOSHIBA TEC CORPORATION All rights reserved e-STUDIO281c/351c/451c OUTLINE OF THE MACHINE 2 - 61 06/07...
- Page 82 Cover Fig. 2-128 Remove 1 screw. Fig. 2-129 Remove 3 screws and take off the punch unit rear cover. Cover Fig. 2-130 e-STUDIO281c/351c/451c © 2005 - 2008 TOSHIBA TEC CORPORATION All rights reserved OUTLINE OF THE MACHINE 2 - 62...
- Page 83 Note: Be careful not to fell the finisher when mov- ing the finisher unit only. Fig. 2-132 Disconnect 2 connectors. Fig. 2-133 © 2005 - 2008 TOSHIBA TEC CORPORATION All rights reserved e-STUDIO281c/351c/451c OUTLINE OF THE MACHINE 2 - 63...
- Page 84 Turn OFF the power and unplug the power cable. Take off the connector cover and disconnect the connector. Connector cover Fig. 2-136 e-STUDIO281c/351c/451c © 2005 - 2008 TOSHIBA TEC CORPORATION All rights reserved OUTLINE OF THE MACHINE 2 - 64 06/07...
- Page 85 Fixing plate Fig. 2-138 Loosen 1 screw and take off the groune wire. Fig. 2-139 © 2005 - 2008 TOSHIBA TEC CORPORATION All rights reserved e-STUDIO281c/351c/451c OUTLINE OF THE MACHINE 2 - 65 06/07...
- Page 86 Fig. 2-140 Remove 1 screw and take off the connector cover. Connector cover Fig. 2-141 Disconnect 1 connector. Fig. 2-142 e-STUDIO281c/351c/451c © 2005 - 2008 TOSHIBA TEC CORPORATION All rights reserved OUTLINE OF THE MACHINE 2 - 66 06/07...
- Page 87 (10) Remove 1 screw and take off the cover. Cover Fig. 2-144 (11) Remove 4 screws. Lift up the punch unit and take it off. Fig. 2-145 © 2005 - 2008 TOSHIBA TEC CORPORATION All rights reserved e-STUDIO281c/351c/451c OUTLINE OF THE MACHINE 2 - 67 06/07...
- Page 88 Remove 2 screws and take off the cover. Cover Fig. 2-146 Disconnect 1 connector. Fig. 2-147 Open the bridge unit. Remove 1 screw. Fig. 2-148 e-STUDIO281c/351c/451c © 2005 - 2008 TOSHIBA TEC CORPORATION All rights reserved OUTLINE OF THE MACHINE 2 - 68...
- Page 89 Fig. 2-149 Close the bridge unit and remove 1 screw. Fig. 2-150 Remove 4 screws and take off the bracket. Bracket Fig. 2-151 © 2005 - 2008 TOSHIBA TEC CORPORATION All rights reserved e-STUDIO281c/351c/451c OUTLINE OF THE MACHINE 2 - 69...
- Page 90 Lift up the bridge unit and release the hook. Take off the bridge unit toward the front. Fig. 2-152 e-STUDIO281c/351c/451c © 2005 - 2008 TOSHIBA TEC CORPORATION All rights reserved OUTLINE OF THE MACHINE 2 - 70...
-
Page 91: Copy Process
1st transfer roller Transfer belt Fuser unit 2nd transfer roller Color developer unit Black developer Main charger unit Laser optical unit Photoconductive drum Fig. 3-2 © 2005 - 2008 TOSHIBA TEC CORPORATION All rights reserved e-STUDIO281c/351c/451c COPY PROCESS 3 - 1... -
Page 92: General Description Of Copying Process
(10) Discharging: Eliminates the residual (–) made to adhere to the photoconductive charge from the surface of the photocon- drum, producing a visible image. ductive drum. e-STUDIO281c/351c/451c © 2005 - 2008 TOSHIBA TEC CORPORATION All rights reserved COPY PROCESS 3 - 2... -
Page 93: Details Of Copying Process
Time ( t ) Colored area of original -500 White area of original Discharge Charging -1000 process process Electric potential of the photoconductive drum Fig. 3-5 © 2005 - 2008 TOSHIBA TEC CORPORATION All rights reserved e-STUDIO281c/351c/451c COPY PROCESS 3 - 3... - Page 94 The surface potential on the drum is determined by the grid potential and is controlled to a fixed value by the grid control circuit. Main charger Rotation of drum Grid control circuit High-voltage transformer Fig. 3-6 e-STUDIO281c/351c/451c © 2005 - 2008 TOSHIBA TEC CORPORATION All rights reserved COPY PROCESS 3 - 4...
- Page 95 Value of image receiving signals to be output amount Light Difference between "light " and "dark" is divided into 256 steps. Dark Fig. 3-8 © 2005 - 2008 TOSHIBA TEC CORPORATION All rights reserved e-STUDIO281c/351c/451c COPY PROCESS 3 - 5...
- Page 96 Image Laser driving processing PC board section Polygonal mirror Semiconductor laser element Drum Fig. 3-9 e-STUDIO281c/351c/451c © 2005 - 2008 TOSHIBA TEC CORPORATION All rights reserved COPY PROCESS 3 - 6...
- Page 97 Image is developed by toner - 300V When the (–) potential of the photoconductive drum is lower than - 200V the developer bias. - 100V Fig. 3-12 © 2005 - 2008 TOSHIBA TEC CORPORATION All rights reserved e-STUDIO281c/351c/451c COPY PROCESS 3 - 7...
- Page 98 2. Toner scattering occurs. 3. Background fogging occurs. Solution: Replace the developer material. Toner Carrier Where toner is caked, no frictional electrification occurs. Fig. 3-14 e-STUDIO281c/351c/451c © 2005 - 2008 TOSHIBA TEC CORPORATION All rights reserved COPY PROCESS 3 - 8...
- Page 99 This is caused by the lines of magnetic force between the south and north poles. Lines of magnetic force Photoconductive drum Magnetic roller Fig. 3-15 © 2005 - 2008 TOSHIBA TEC CORPORATION All rights reserved e-STUDIO281c/351c/451c COPY PROCESS 3 - 9...
- Page 100 K→C→M→Y on the transfer belt. Transfer belt Photoconductive drum Fig. 3-16 1st transfer roller Transfer belt Toner Fig. 3-17 e-STUDIO281c/351c/451c © 2005 - 2008 TOSHIBA TEC CORPORATION All rights reserved COPY PROCESS 3 - 10...
- Page 101 The paper is subjected to the heat and pressure when passing through the fuser belt and the pres- sure roller. ↓ (Fusing) The toner on the paper is fused to it. Separation roller Fuser belt Press roller Fuser roller Fig. 3-19 © 2005 - 2008 TOSHIBA TEC CORPORATION All rights reserved e-STUDIO281c/351c/451c COPY PROCESS 3 - 11...
- Page 102 The edge of the conductive blade is pressed against the photoconductive drum surface to scrape off residual toner. The toner removed is then caught by the recovery blade. Recovery blade Drum rotation Conductive blade Fig. 3-21 e-STUDIO281c/351c/451c © 2005 - 2008 TOSHIBA TEC CORPORATION All rights reserved COPY PROCESS 3 - 12...
- Page 103 (+) charge is eliminated by the conductive blade as mentioned in 9)). ↓ Preparation for the next copying process is completed. Photoconductive drum Discharge LED array Fig. 3-22 © 2005 - 2008 TOSHIBA TEC CORPORATION All rights reserved e-STUDIO281c/351c/451c COPY PROCESS 3 - 13...
-
Page 104: List Of Copying Process Conditions
3) Simultaneous cleaning and dis- removal charging by the conductive blade ← 9. Transfer belt cleaning Blade cleaning (contact/release mechanism) ← 10.Discharge LED array (red) e-STUDIO281c/351c/451c © 2005 - 2008 TOSHIBA TEC CORPORATION All rights reserved COPY PROCESS 3 - 14... - Page 105 ← Cleaning roller (ø16) ← 3) Heat roller tempera- 3) ON/OFF control and power control ture by thermistor ← 4) Heater 4) IH coil © 2005 - 2008 TOSHIBA TEC CORPORATION All rights reserved e-STUDIO281c/351c/451c COPY PROCESS 3 - 15...
- Page 106 © 2005 - 2008 TOSHIBA TEC CORPORATION All rights reserved COPY PROCESS 3 - 16...
-
Page 107: General Operation
Operation of equipment Operation during initializing, pre-running and ready Drawer feed copying by the [ START ] button Copying operation Bypass feed copying Interrupt copying © 2005 - 2008 TOSHIBA TEC CORPORATION All rights reserved e-STUDIO281c/351c/451c GENERAL OPERATION 4 - 1... -
Page 108: Description Of Operation
→ When no button is pressed for a certain period of time, - Set number “1” and reproduction ratio “100%” are displayed. Equipment returns to the normal ready state. e-STUDIO281c/351c/451c © 2005 - 2008 TOSHIBA TEC CORPORATION All rights reserved GENERAL OPERATION 4 - 2... -
Page 109: Drawer Feed Copying (Upper Drawer Paper Feeding)
→ Exposure lamp (EXP) turned OFF → Registration clutch (CLT12) turned OFF (after the trailing edge of the paper passed the registra- tion roller) → “READY (PRINTING)” is displayed © 2005 - 2008 TOSHIBA TEC CORPORATION All rights reserved e-STUDIO281c/351c/451c GENERAL OPERATION 4 - 3... - Page 110 Revolver rotates 55 degrees to move to escape position → Transfer belt marker detection → 2nd transfer roller contact clutch (CLT5) and 2nd transfer bias turned ON e-STUDIO281c/351c/451c © 2005 - 2008 TOSHIBA TEC CORPORATION All rights reserved GENERAL OPERATION 4 - 4...
- Page 111 → Drum, fuser unit and developer unit are stopped Fans return to rotate at the normal rotation speed → “READY” is displayed and the equipment enters into ready mode © 2005 - 2008 TOSHIBA TEC CORPORATION All rights reserved e-STUDIO281c/351c/451c GENERAL OPERATION...
- Page 112 Timing chart for copying (A4/LT size, 1 sheet from upper drawer) 1) Color copy e-STUDIO281c/351c/451c © 2005 - 2008 TOSHIBA TEC CORPORATION All rights reserved GENERAL OPERATION 4 - 6...
- Page 113 2) Black copy © 2005 - 2008 TOSHIBA TEC CORPORATION All rights reserved e-STUDIO281c/351c/451c GENERAL OPERATION 4 - 7...
-
Page 114: Bypass Feed Copying
→ “Ready to resume job 1” is displayed. 4) Press the [START] button The copying operation before the interruption is resumed. e-STUDIO281c/351c/451c © 2005 - 2008 TOSHIBA TEC CORPORATION All rights reserved GENERAL OPERATION 4 - 8... -
Page 115: Detection Of Abnormality
(E) Developer unit not installed properly (F) Toner bag replacement 3) Abnormality not cleared without turning OFF the main switch (G) Call for service © 2005 - 2008 TOSHIBA TEC CORPORATION All rights reserved e-STUDIO281c/351c/451c GENERAL OPERATION 4 - 9... -
Page 116: Description Of Abnormality
It is judged that there is paper. OFF: It is judged that there is no paper. Drawer area of the control panel blinks. (When the drawer is selected) e-STUDIO281c/351c/451c © 2005 - 2008 TOSHIBA TEC CORPORATION All rights reserved GENERAL OPERATION 4 - 10... - Page 117 Bypass misfeed symbol is displayed The copying operation is disabled. Solution: The bypass sensor (S35) is turned OFF by removing the paper from the bypass tray. © 2005 - 2008 TOSHIBA TEC CORPORATION All rights reserved e-STUDIO281c/351c/451c GENERAL OPERATION 4 - 11...
- Page 118 The registration sensor (S22) is not turned ON in a fixed period of time after the leading edge of paper passed the transport roller. Paper jam (E120, E200, E210, E300, E330 and E3C0) e-STUDIO281c/351c/451c © 2005 - 2008 TOSHIBA TEC CORPORATION All rights reserved GENERAL OPERATION 4 - 12...
- Page 119 (F) Toner bag replacement • Toner bag is full of used toner Toner recovery auger shifts to the rear side: Toner bag full detection sensor (S20) ON © 2005 - 2008 TOSHIBA TEC CORPORATION All rights reserved e-STUDIO281c/351c/451c GENERAL OPERATION 4 - 13...
- Page 120 Check the error code displayed on the control panel when “Call for service” appears, and handle the abnormality in reference to the error code table in Service Handbook. e-STUDIO281c/351c/451c © 2005 - 2008 TOSHIBA TEC CORPORATION All rights reserved GENERAL OPERATION 4 - 14...
-
Page 121: Flow Chart
Performs image "E030" quality control Image quality control finished propery? Call for service "CE10" Polygonal motor low "CE20" speed rotation ON "CE40" "CE50" "CE90" © 2005 - 2008 TOSHIBA TEC CORPORATION All rights reserved e-STUDIO281c/351c/451c GENERAL OPERATION 4 - 15... - Page 122 IH coil broken? Call for service IH coil OFF Polygonal Call for service motor condition "CA10" abnormal? READY "C470" IH error? Call for service "C480" "C490" e-STUDIO281c/351c/451c © 2005 - 2008 TOSHIBA TEC CORPORATION All rights reserved GENERAL OPERATION 4 - 16...
-
Page 123: Automatic Feed Copying
Paper jam "E010" Exit sensor check trailing edge? Paper jam "E020" Main motor OFF Transport motor OFF Developer motor OFF Exit motor OFF READY READY © 2005 - 2008 TOSHIBA TEC CORPORATION All rights reserved e-STUDIO281c/351c/451c GENERAL OPERATION 4 - 17... - Page 124 Color developer drive clutch ON Cleaning blade bias OFF Color developer bias (-) ON Polygonal motor low speed rotation ON Processing system control completed e-STUDIO281c/351c/451c © 2005 - 2008 TOSHIBA TEC CORPORATION All rights reserved GENERAL OPERATION 4 - 18...
- Page 125 2nd transfer roller contact clutch OFF 2nd transfer bias OFF Transfer belt cleaner clutch OFF Transfer belt cleaner auger motor OFF 1st transfer bias OFF © 2005 - 2008 TOSHIBA TEC CORPORATION All rights reserved e-STUDIO281c/351c/451c GENERAL OPERATION 4 - 19...
- Page 126 © 2005 - 2008 TOSHIBA TEC CORPORATION All rights reserved GENERAL OPERATION 4 - 20...
-
Page 127: Control Panel
When the operator’s attention is required, graphic symbols appear with messages explaining the condi- tion of the equipment in the LCD panel. Fig. 5-1 © 2005 - 2008 TOSHIBA TEC CORPORATION All rights reserved e-STUDIO281c/351c/451c CONTROL PANEL 5 - 1... -
Page 128: Items Shown On The Display Panel
2) Paper jam display Displays error code, paper jam position and paper jam release guidance. Error code Paper jam position Paper jam release guidance Fig. 5-3 e-STUDIO281c/351c/451c © 2005 - 2008 TOSHIBA TEC CORPORATION All rights reserved CONTROL PANEL 5 - 2... - Page 129 3) Service call display Displays error code and service call symbol. Error code Service call symbol Fig. 5-4 © 2005 - 2008 TOSHIBA TEC CORPORATION All rights reserved e-STUDIO281c/351c/451c CONTROL PANEL 5 - 3...
-
Page 130: Message
Saddle stitcher tray is full of paper (SADDLE STITCH TRAY • Scanning is enabled FULL) READY Incorrect paper size setting (CHANGE DRAWER TO CORRECT PAPER SIZE) e-STUDIO281c/351c/451c © 2005 - 2008 TOSHIBA TEC CORPORATION All rights reserved CONTROL PANEL 5 - 4... - Page 131 Displayed when the size of insertion insert1 sheets as the origi- sheet (sheet 1) is different from that nals of other pages at Sheet Insertion Mode © 2005 - 2008 TOSHIBA TEC CORPORATION All rights reserved e-STUDIO281c/351c/451c CONTROL PANEL 5 - 5...
- Page 132 COUNTER Cannot copy TWIN COLOR Displayed when the number of print- mode outs exceeds the limit number of Check DEPARTMENT department counter COUNTER e-STUDIO281c/351c/451c © 2005 - 2008 TOSHIBA TEC CORPORATION All rights reserved CONTROL PANEL 5 - 6...
- Page 133 Displays the warning that the copy is normal paper size not enabled when any drawer but bypass feed is selected at Cover Sheet Mode or Sheet Insertion Mode. © 2005 - 2008 TOSHIBA TEC CORPORATION All rights reserved e-STUDIO281c/351c/451c CONTROL PANEL 5 - 7...
- Page 134 Set standard size Displayed when the paper size which Reset the paper size is not acceptable is set (depends on the setting) e-STUDIO281c/351c/451c © 2005 - 2008 TOSHIBA TEC CORPORATION All rights reserved CONTROL PANEL 5 - 8...
-
Page 135: Relation Between The Equipment State And Operator's Operation
Display not changed [TEMPLATE] screen changed button Press [USER Displays USER FUNC- Display not changed Display not Display not changed FUNCTIONS] TIONS screen changed button © 2005 - 2008 TOSHIBA TEC CORPORATION All rights reserved e-STUDIO281c/351c/451c CONTROL PANEL 5 - 9... - Page 136 Press [FAX] Displays FAX Display not Display not Displays FAX Displays FAX button screen changed changed screen screen e-STUDIO281c/351c/451c © 2005 - 2008 TOSHIBA TEC CORPORATION All rights reserved CONTROL PANEL 5 - 10...
- Page 137 “COPYING” “COPYING” and mode is cleared original set on starts feeding and RADF RADF starts feed- and displays RADF starts feeding BASIC screen © 2005 - 2008 TOSHIBA TEC CORPORATION All rights reserved e-STUDIO281c/351c/451c CONTROL PANEL 5 - 11...
-
Page 138: Description Of Operation
* STN: Super Twisted Nematic * CCFL: Cold Cathod Fluorescent Lamp 2) Block diagram XSCL LCDEN LCD panel 640 x 240 dots Power supply Fig. 5-6 e-STUDIO281c/351c/451c © 2005 - 2008 TOSHIBA TEC CORPORATION All rights reserved CONTROL PANEL 5 - 12... - Page 139 Panel processing Hard-key matrix LED driver Buzzer Fig. 5-7 4) Data Transmission 1/tF 1/tF FRAME LOAD FRAME LOAD CP x(640/4) pulses D0-D3 Fig. 5-8 © 2005 - 2008 TOSHIBA TEC CORPORATION All rights reserved e-STUDIO281c/351c/451c CONTROL PANEL 5 - 13...
-
Page 140: Led Display Circuit
(b) The output from the cathode side of the LED is “L” level. The LED turns ON when the conditions (a) and (b) are met. e-STUDIO281c/351c/451c © 2005 - 2008 TOSHIBA TEC CORPORATION All rights reserved CONTROL PANEL 5 - 14... -
Page 141: Disassembly And Replacement
“b”, remove the stopper or move it to the position “a”. Fig. 5-10 Stopper Slide the stopper and pull it out. Stopper Fig. 5-11 © 2005 - 2008 TOSHIBA TEC CORPORATION All rights reserved e-STUDIO281c/351c/451c CONTROL PANEL 5 - 15... - Page 142 Take off the control panel unit while sliding it. Control panel unit Fig. 5-13 Remove 3 screws and take off the cover. Cover Fig. 5-14 e-STUDIO281c/351c/451c © 2005 - 2008 TOSHIBA TEC CORPORATION All rights reserved CONTROL PANEL 5 - 16...
- Page 143 (10) Remove 1 screw and take off the DSP board. DSP board Fig. 5-16 (11) Remove 4 screws and take off the LCD. Fig. 5-17 © 2005 - 2008 TOSHIBA TEC CORPORATION All rights reserved e-STUDIO281c/351c/451c CONTROL PANEL 5 - 17...
- Page 144 (12) Remove 16 screws and take off the KEY board. KEY board Fig. 5-18 e-STUDIO281c/351c/451c © 2005 - 2008 TOSHIBA TEC CORPORATION All rights reserved CONTROL PANEL 5 - 18...
-
Page 145: Scanner
Lens RADF original glass Reflector Original glass Exposure lamp Drive pulley Rail for carriage-2 Rail for carriage-1 Carriage-2 SLG board Carriage-1 CCD board Fig. 6-1 © 2005 - 2008 TOSHIBA TEC CORPORATION All rights reserved e-STUDIO281c/351c/451c SCANNER 6 - 1... -
Page 146: Construction
Scanning section control PC board (SLG) Scanner unit cooling fan (M15) Damp heater (DH1, DH2 THMO2) Carriage home position sensor (S6) Platen sensor (S7) Main switch (S41) Rubber damper e-STUDIO281c/351c/451c © 2005 - 2008 TOSHIBA TEC CORPORATION All rights reserved SCANNER 6 - 2... -
Page 147: Functions
This mirror directs the light reflected from the original to the mirror-2 described later. Original glass Original Exposure lamp Lamp inverter Reflector Mirror-1 Fig. 6-3 © 2005 - 2008 TOSHIBA TEC CORPORATION All rights reserved e-STUDIO281c/351c/451c SCANNER 6 - 3... - Page 148 The size of an original placed on the glass is instantly detected using the automatic original detec- tion sensors (S1-5) (APS sensor) fixed on the base frame without moving the carriage-1. e-STUDIO281c/351c/451c © 2005 - 2008 TOSHIBA TEC CORPORATION All rights reserved SCANNER 6 - 4...
-
Page 149: Description Of Operation
The carriage-1 stays at the shading position during shading correction, and at the scanning posi- tion during scanning operation. • Scanning velocity The scanning velocity at color modes is reduced to a half of it at the Black Mode. © 2005 - 2008 TOSHIBA TEC CORPORATION All rights reserved e-STUDIO281c/351c/451c SCANNER 6 - 5... -
Page 150: Scanning Drive Circuit
Internal circuit of the driver is initialized by setting the motor to “L” level. The motor drive circuit is automatically reset when the power is turned ON. e-STUDIO281c/351c/451c © 2005 - 2008 TOSHIBA TEC CORPORATION All rights reserved SCANNER 6 - 6... -
Page 151: Initialization At Power-On
Carriage home position Deceleration Stop data set Deceleration Stop Moving peak detection position Peak detection Completion of initialization Moving carriage waiting position Scanning command Fig. 6-8 © 2005 - 2008 TOSHIBA TEC CORPORATION All rights reserved e-STUDIO281c/351c/451c SCANNER 6 - 7... -
Page 152: Control Of Exposure Lamp (Exp)
Shading correction plate Exposure lamp ( Xenon lamp ) Lighting device for xenon lamp (Inverter board) CCD sensor SLG board Scanner CCD board Fig. 6-9 e-STUDIO281c/351c/451c © 2005 - 2008 TOSHIBA TEC CORPORATION All rights reserved SCANNER 6 - 8... -
Page 153: Exposure Lamp (Exp)
( 6 ) Visible light ( irradiated from the opening to outside the pipe ) ( 7 ) Openig ( 8 ) Harness Fig. 6-11 © 2005 - 2008 TOSHIBA TEC CORPORATION All rights reserved e-STUDIO281c/351c/451c SCANNER 6 - 9... -
Page 154: Control Circuit For The Exposure Lamp
Controls +5VSW by CPU. Normally “L” WDTOUT Watchdog timer signal “L” is output when CPU is out of control LMPEN Exposure lamp enable signal Normally “L” Xenon lamp e-STUDIO281c/351c/451c © 2005 - 2008 TOSHIBA TEC CORPORATION All rights reserved SCANNER 6 - 10... -
Page 155: General Description Of Ccd Control
(S-K) I = k (W-K) Coefficient Image data before correction Black data (stored in "Black" memory) White data (stored in "White" memory) © 2005 - 2008 TOSHIBA TEC CORPORATION All rights reserved e-STUDIO281c/351c/451c SCANNER 6 - 11... -
Page 156: Automatic Original Size Detection Circuit
[ A4 Series ] [ LT Series ] Original Original glass Original Original glass APS-R APS-R APS-3 APS-3 APS-2 APS-1 APS-C APS-C APS-2 Fig. 6-14 e-STUDIO281c/351c/451c © 2005 - 2008 TOSHIBA TEC CORPORATION All rights reserved SCANNER 6 - 12... -
Page 157: Process Of Detection Of Original Size
APS-R APS-C APS-C Reflection type Reflection type Scanner Scanner APS-3 photosensor photosensor APS-3 APS-2 APS-1 APS-2 SLG board SLG board Fig. 6-15 Sensor detection points © 2005 - 2008 TOSHIBA TEC CORPORATION All rights reserved e-STUDIO281c/351c/451c SCANNER 6 - 13... - Page 158 [A4 Series] APS-R APS-C A5–R B5–R A4–R APS-3 APS-1 APS-2 Fig. 6-16 [LT Series] APS-R APS-C ST–R APS-3 LT–R APS-1 Fig. 6-17 e-STUDIO281c/351c/451c © 2005 - 2008 TOSHIBA TEC CORPORATION All rights reserved SCANNER 6 - 14...
- Page 159 The latest original size (or no original state) recognized right before the platen sensor (S7) is turned ON is retained regardless of the status the APS sensor output signals. © 2005 - 2008 TOSHIBA TEC CORPORATION All rights reserved e-STUDIO281c/351c/451c...
- Page 160 The pulse modulation is performed inside the reflection type phototransistor. e-STUDIO281c/351c/451c © 2005 - 2008 TOSHIBA TEC CORPORATION All rights reserved SCANNER 6 - 16...
-
Page 161: Disassembly And Replacement
Take off the original glass ( P.6-17 "[A] Original glass"). Disconnect 1 connector, remove 6 screws Lens cover and take off the lens cover. Fig. 6-21 © 2005 - 2008 TOSHIBA TEC CORPORATION All rights reserved e-STUDIO281c/351c/451c SCANNER 6 - 17... - Page 162 Take off the original glass ( P.6-17 "[A] Original glass"). Disconnect 1 connector and remove 1 screw for each APS sensor. Take off 4 APS sen- sors. Fig. 6-23 e-STUDIO281c/351c/451c © 2005 - 2008 TOSHIBA TEC CORPORATION All rights reserved SCANNER 6 - 18...
- Page 163 Release the harness from the harness clamp. Fig. 6-25 Move the carriage-1 to the position where the side of the frame is cut out. Fig. 6-26 © 2005 - 2008 TOSHIBA TEC CORPORATION All rights reserved e-STUDIO281c/351c/451c SCANNER 6 - 19...
- Page 164 Remove 1 screw. Exposure lamp Lift up the front side of the exposure lamp and take off by sliding it. Fig. 6-27 e-STUDIO281c/351c/451c © 2005 - 2008 TOSHIBA TEC CORPORATION All rights reserved SCANNER 6 - 20...
- Page 165 Fig. 6-29 4. Handle the unit with care. Do not touch the adjusted area and lens. (Hold the unit as the right figure.) Fig. 6-30 © 2005 - 2008 TOSHIBA TEC CORPORATION All rights reserved e-STUDIO281c/351c/451c SCANNER 6 - 21...
- Page 166 4. The scan motor is pulled by the belt ten- sion jig. Fix the screw B and then C at the stopped position. 5. Remove the belt tension jig. Fig. 6-33 e-STUDIO281c/351c/451c © 2005 - 2008 TOSHIBA TEC CORPORATION All rights reserved SCANNER 6 - 22...
- Page 167 Remove the square seal fixing the lamp har- Connector Seal ness to the base. Disconnect the connector of the lamp harness from the SLG board. Fig. 6-35 © 2005 - 2008 TOSHIBA TEC CORPORATION All rights reserved e-STUDIO281c/351c/451c SCANNER 6 - 23 07/03...
- Page 168 Then take off the carriage-1. Note: When replacing the mirror-1, replace the car- riage-1 together with mirror-1. Mirror-1 should not be removed. Fig. 6-38 e-STUDIO281c/351c/451c © 2005 - 2008 TOSHIBA TEC CORPORATION All rights reserved SCANNER 6 - 24 07/03...
- Page 169 Note: Refer to “3.9 Adjustment of the Scanner Sec- tion” in the Service Handbook for the direc- tion of the wire holder jigs. Fig. 6-41 © 2005 - 2008 TOSHIBA TEC CORPORATION All rights reserved e-STUDIO281c/351c/451c SCANNER 6 - 25...
- Page 170 Remove the seal. Disconnect 1 connector. Release the latches and take off the carriage home position sen- sor. Carriage home position sensor Fig. 6-44 e-STUDIO281c/351c/451c © 2005 - 2008 TOSHIBA TEC CORPORATION All rights reserved SCANNER 6 - 26...
- Page 171 Disconnect 1 connector. Release the har- ness from the harness clamp. Remove 2 screws and take off the scanner unit cooling fan. Scanner unit cooling fan Fig. 6-46 © 2005 - 2008 TOSHIBA TEC CORPORATION All rights reserved e-STUDIO281c/351c/451c SCANNER 6 - 27...
- Page 172 © 2005 - 2008 TOSHIBA TEC CORPORATION All rights reserved SCANNER 6 - 28...
-
Page 173: Image Processing
Scanner high quality image processing, printer high quality image pro- cessing, black over print, pure black/pure gray, chroma adjustment and brightness adjustment LGC board Smoothing processing, image area control and laser related control © 2005 - 2008 TOSHIBA TEC CORPORATION All rights reserved e-STUDIO281c/351c/451c IMAGE PROCESSING 7 - 1... - Page 174 Images are processed by the SYS board and LGC board in this equipment. Also, the image signals read with the Scanning Function and the printer image signals are processed in the SYS board. e-STUDIO281c/351c/451c © 2005 - 2008 TOSHIBA TEC CORPORATION All rights reserved IMAGE PROCESSING 7 - 2...
-
Page 175: Construction
Printer high quality image processing LGC board ASIC : Image data flow Laser related control Smoothing processing LDR board ASIC Laser drive Fig. 7-3 © 2005 - 2008 TOSHIBA TEC CORPORATION All rights reserved e-STUDIO281c/351c/451c IMAGE PROCESSING 7 - 3 06/07... -
Page 176: System Control Pc Board (Sys)
K (Black) signal is generated from the CMY image data. Based on this K signal, the CMY image data is corrected to suppress hue on reproducing grays or to make the black look more real. e-STUDIO281c/351c/451c © 2005 - 2008 TOSHIBA TEC CORPORATION All rights reserved IMAGE PROCESSING 7 - 4... - Page 177 “a” and “b” respectively. X is converted to X’ through the low pass filtering. When the matrix is (3 x 1): a+b+x x' = © 2005 - 2008 TOSHIBA TEC CORPORATION All rights reserved e-STUDIO281c/351c/451c IMAGE PROCESSING 7 - 5...
- Page 178 Enlargement/Reduction Enlargment/Reduction is accomplished by using the line memory control function in the process of the image processing operation. <Example> Enlargement 100% 200% e-STUDIO281c/351c/451c © 2005 - 2008 TOSHIBA TEC CORPORATION All rights reserved IMAGE PROCESSING 7 - 6...
- Page 179 12)Printer high quality image processing This function reproduces the image signals output from the printer controller in a higher image qual- ity. © 2005 - 2008 TOSHIBA TEC CORPORATION All rights reserved e-STUDIO281c/351c/451c IMAGE PROCESSING 7 - 7...
- Page 180 4 color toner. The gray text/graphics are also printed out with black toner only. 15)Chroma adjustment (PCL5C) This function adjusts chromaticness of the printer data. 16)Brightness adjustment (PCL5C) This function adjusts brightness of the printer data. e-STUDIO281c/351c/451c © 2005 - 2008 TOSHIBA TEC CORPORATION All rights reserved IMAGE PROCESSING 7 - 8...
-
Page 181: Logic Pc Board (Lgc)
This function sets the effective image area in horizontal and vertical directions to be output. 3) Laser related control This function performs the APC (Auto Power Control). © 2005 - 2008 TOSHIBA TEC CORPORATION All rights reserved e-STUDIO281c/351c/451c IMAGE PROCESSING... - Page 182 © 2005 - 2008 TOSHIBA TEC CORPORATION All rights reserved IMAGE PROCESSING 7 - 10...
-
Page 183: Laser Optical Unit
The unit must not be disassembled in the field as they are very sensitive to dust and finely adjusted at the factory. Fig. 8-1 © 2005 - 2008 TOSHIBA TEC CORPORATION All rights reserved e-STUDIO281c/351c/451c LASER OPTICAL UNIT 8 - 1... - Page 184 ( for outgoing laser beam ) Mirror Cylinder lens SNS board LDR board f lens-2 Aperture f lens-1 Polygonal motor Finite focus lens Fig. 8-2 e-STUDIO281c/351c/451c © 2005 - 2008 TOSHIBA TEC CORPORATION All rights reserved LASER OPTICAL UNIT 8 - 2...
-
Page 185: Structure
Polygonal motor (M4) Polygonal mirror 8 planes Polygonal mirror cover fθ lens 1 fθ lens 2 Mirror Slit glass H-sync signal detection PC board (SNS) © 2005 - 2008 TOSHIBA TEC CORPORATION All rights reserved e-STUDIO281c/351c/451c LASER OPTICAL UNIT 8 - 3... - Page 186 "CAUTION. HOT", "CAUTION. HIGH VOLTAGE", "CAUTION. LASER BEAM", etc. to see if there is any dirt on their surface and if they are properly stuck to the equipment. e-STUDIO281c/351c/451c © 2005 - 2008 TOSHIBA TEC CORPORATION All rights reserved LASER OPTICAL UNIT 8 - 4...
- Page 187 (C). One scan is performed on one plane of the polygonalmirror. Eight scans can be made with one rotation of the polygonal mirror. © 2005 - 2008 TOSHIBA TEC CORPORATION All rights reserved e-STUDIO281c/351c/451c LASER OPTICAL UNIT 8 - 5...
- Page 188 5) Slit glass Slit glass is located where the laser beams are output from the laser optical unit, and it protects the unit from dust. e-STUDIO281c/351c/451c © 2005 - 2008 TOSHIBA TEC CORPORATION All rights reserved LASER OPTICAL UNIT 8 - 6...
-
Page 189: Laser Diode
Power source Semiconductive laser Laser power Laser driver comparison circuit Constant circuit optical output Monitor efficiency regulation circuit Monitor output Fig. 8-8 © 2005 - 2008 TOSHIBA TEC CORPORATION All rights reserved e-STUDIO281c/351c/451c LASER OPTICAL UNIT 8 - 7... -
Page 190: Laser Unit Cooling Fan
The laser unit cooling fan is a propeller fan (80 x 80 mm). It cools down the polygonal motor and the Laser driving PC board (LDR). e-STUDIO281c/351c/451c © 2005 - 2008 TOSHIBA TEC CORPORATION All rights reserved LASER OPTICAL UNIT 8 - 8... -
Page 191: Polygonal Motor (M4)
Level “L” Level “H” Remarks POMON Polygonal motor ON/OFF signal POMCK Polygonal motor reference clock signal POMPL Locked Unlocked Polygonal motor PLL signal © 2005 - 2008 TOSHIBA TEC CORPORATION All rights reserved e-STUDIO281c/351c/451c LASER OPTICAL UNIT 8 - 9... -
Page 192: Laser Driving Pc Board (Ldr)
3) Laser drive section ON/OFF control of the semiconductive laser and APC (Auto Power Control). APC : Adjusts disparity of the laser intensity caused by temperature e-STUDIO281c/351c/451c © 2005 - 2008 TOSHIBA TEC CORPORATION All rights reserved LASER OPTICAL UNIT 8 - 10... -
Page 193: Disassembly And Replacement
Fig. 8-11 Take off the left cover. P.2-29 "[K] Left cover") Remove 2 screws and take off the toner cover. Toner cover Fig. 8-12 © 2005 - 2008 TOSHIBA TEC CORPORATION All rights reserved e-STUDIO281c/351c/451c LASER OPTICAL UNIT 8 - 11... - Page 194 Left inner cover Fig. 8-14 Disconnect 1 connector and remove 2 screws. Take off the laser unit cooling fan. Laser unit cooling fan Fig. 8-15 e-STUDIO281c/351c/451c © 2005 - 2008 TOSHIBA TEC CORPORATION All rights reserved LASER OPTICAL UNIT 8 - 12...
-
Page 195: Drive System
Toner motor (M3) Black toner cartridge • Drum cleaner brush motor (M8) Drum cleaner brush • Transfer belt cleaner auger motor (M2) Transfer belt cleaner auger © 2005 - 2008 TOSHIBA TEC CORPORATION All rights reserved e-STUDIO281c/351c/451c DRIVE SYSTEM 9 - 1... -
Page 196: Main Motor (M6)
( G27/G20 ) ( G31 ) ( G19 ) ( G40/G23 ) ( G47 ) ( G252 ) Coupling ( Drum ) Fig. 9-1 e-STUDIO281c/351c/451c © 2005 - 2008 TOSHIBA TEC CORPORATION All rights reserved DRIVE SYSTEM 9 - 2... -
Page 197: Drive Circuit Of Main Motor
(M6). The speed is lowered to the range from 1/2 to 1/3 at the Thick Paper / OHP Film Mode. This switching is performed between the completion of the 1st trans- fer and that of the 2nd transfer. © 2005 - 2008 TOSHIBA TEC CORPORATION All rights reserved e-STUDIO281c/351c/451c DRIVE SYSTEM... -
Page 198: Transport Motor (M9)
Upper transport clutch ( High speed ) ( G28 ) ( G27 ) ( G31/G38 ) Upper transport clutch ( Low speed ) ( G28 ) Fig. 9-3 e-STUDIO281c/351c/451c © 2005 - 2008 TOSHIBA TEC CORPORATION All rights reserved DRIVE SYSTEM 9 - 4... -
Page 199: Drive Circuit Of Transport Motor
Transport motor reference clock signal FDMPL Unlocked Locked Transport motor PLL signal * FDMCW (rotational direction signal): The motor does not rotate backward (CCW) in actual move- ment. © 2005 - 2008 TOSHIBA TEC CORPORATION All rights reserved e-STUDIO281c/351c/451c DRIVE SYSTEM 9 - 5... -
Page 200: Developer Motor (M11)
( G33/G16 ) ( G43 ) ( G17 ) Black developer lifting clutch Black developer drive clutch ( G28 ) ( G28 ) Fig. 9-5 e-STUDIO281c/351c/451c © 2005 - 2008 TOSHIBA TEC CORPORATION All rights reserved DRIVE SYSTEM 9 - 6... - Page 201 *3 : Developer motor *4 : Color developer driver clutch *5 : Black developer driver clutch Developer sleeve *6 : Transfer belt cleaner clutch © 2005 - 2008 TOSHIBA TEC CORPORATION All rights reserved e-STUDIO281c/351c/451c DRIVE SYSTEM 9 - 7...
-
Page 202: Drive Circuit Of Developer Motor
Developer motor ON signal DVMCW Developer motor rotational direction signal DVMCK — — Developer motor reference clock signal DVMPL Locked Unlocked Developer motor PLL signal e-STUDIO281c/351c/451c © 2005 - 2008 TOSHIBA TEC CORPORATION All rights reserved DRIVE SYSTEM 9 - 8... -
Page 203: Disassembly And Replacement
Remove 2 screws and take off the bracket. Bracket Fig. 9-8 Open the mylar sheet. Release the harness from 2 harness clamps. Mylar sheet Fig. 9-9 © 2005 - 2008 TOSHIBA TEC CORPORATION All rights reserved e-STUDIO281c/351c/451c DRIVE SYSTEM 9 - 9... - Page 204 2 harness clamps. Fig. 9-11 (11) Remove 5 screws and take off the developer Developer motor drive unit motor drive unit. Fig. 9-12 e-STUDIO281c/351c/451c © 2005 - 2008 TOSHIBA TEC CORPORATION All rights reserved DRIVE SYSTEM 9 - 10...
- Page 205 1 gear, and then take off the black devel- oper lifting clutch. Note: Place the stopper when installing the clutch. Connector Bushing Gear Black developer lifting clutch Fig. 9-15 © 2005 - 2008 TOSHIBA TEC CORPORATION All rights reserved e-STUDIO281c/351c/451c DRIVE SYSTEM 9 - 11...
- Page 206 Bushing Note: Connector Place the stopper when installing the clutch. Clip Bushing Color developer toner supply clutch Fig. 9-18 e-STUDIO281c/351c/451c © 2005 - 2008 TOSHIBA TEC CORPORATION All rights reserved DRIVE SYSTEM 9 - 12...
- Page 207 (10) Disconnect 1 connector and take off the color developer drive clutch. Note: Place the stopper when installing the clutch. Clip Color developer drive clutch Bushing Fig. 9-21 © 2005 - 2008 TOSHIBA TEC CORPORATION All rights reserved e-STUDIO281c/351c/451c DRIVE SYSTEM 9 - 13...
- Page 208 Remove 1 screw and take off the cover plate. Cover plate Fig. 9-23 (10) Remove 2 screws and take off the bracket. Bracket Fig. 9-24 e-STUDIO281c/351c/451c © 2005 - 2008 TOSHIBA TEC CORPORATION All rights reserved DRIVE SYSTEM 9 - 14...
- Page 209 (13) Loosen 1 setscrew and disconnect 1 connec- tor. Setscrew (14) Release the harness from 1 harness clamp. Fig. 9-26 (15) Take off the registration clutch. Registration clutch Fig. 9-27 © 2005 - 2008 TOSHIBA TEC CORPORATION All rights reserved e-STUDIO281c/351c/451c DRIVE SYSTEM 9 - 15...
- Page 210 Do not mix up the registration clutch and upper transport clutch (High speed) when installing them. Upper transport clutch (High speed) Gear Fig. 9-30 e-STUDIO281c/351c/451c © 2005 - 2008 TOSHIBA TEC CORPORATION All rights reserved DRIVE SYSTEM 9 - 16...
- Page 211 (19) Remove 5 screws and take off the transport motor drive unit. Transport motor drive unit Fig. 9-32 (20) Remove 2 screws and take off the bracket. Bracket Fig. 9-33 © 2005 - 2008 TOSHIBA TEC CORPORATION All rights reserved e-STUDIO281c/351c/451c DRIVE SYSTEM 9 - 17...
- Page 212 P.11-24 "[R] Ozone exhaust fan (M18)"). Disconnect 1 connector. Release 1 lock support, remove 2 screws, and take off the transport motor. Transport motor Fig. 9-36 e-STUDIO281c/351c/451c © 2005 - 2008 TOSHIBA TEC CORPORATION All rights reserved DRIVE SYSTEM 9 - 18...
- Page 213 Bracket Fig. 9-38 (11) Remove 2 screws and take off the drum cleaner brush motor. Drum cleaner brush motor Fig. 9-39 © 2005 - 2008 TOSHIBA TEC CORPORATION All rights reserved e-STUDIO281c/351c/451c DRIVE SYSTEM 9 - 19...
- Page 214 Take off the SYS board case P.2-35 "[D] SYS board case"). Disconnect 1 connector, remove 4 screws and take off the main motor. Main motor Fig. 9-42 e-STUDIO281c/351c/451c © 2005 - 2008 TOSHIBA TEC CORPORATION All rights reserved DRIVE SYSTEM 9 - 20...
-
Page 215: Paper Feeding System
Upper drawer feed sensor (S23) Transport roller Lower drawer feed sensor (S24) Lower drawer feed roller Bypass feed sensor (S36) Lower drawer separation roller © 2005 - 2008 TOSHIBA TEC CORPORATION All rights reserved e-STUDIO281c/351c/451c PAPER FEEDING SYSTEM 10 - 1... -
Page 216: Construction
(CLT13, 14, 15, 16) Drawer detection switch (S33, 34) Drawer feed sensor (S23, 24) Registration sensor (S22) Transport motor (M9) Tray-up motor (M10) e-STUDIO281c/351c/451c © 2005 - 2008 TOSHIBA TEC CORPORATION All rights reserved PAPER FEEDING SYSTEM 10 - 2... -
Page 217: Functions
This sensor detects that the leading edge of the paper has reached the registration roller and the trailing edge of the paper has passed the registration roller. © 2005 - 2008 TOSHIBA TEC CORPORATION All rights reserved e-STUDIO281c/351c/451c PAPER FEEDING SYSTEM... -
Page 218: Description Of Operation
The roller is rotated by this driving force. Bypass pickup solenoid Spring Pickup roller Lever Pickup arm Fig. 10-2 e-STUDIO281c/351c/451c © 2005 - 2008 TOSHIBA TEC CORPORATION All rights reserved PAPER FEEDING SYSTEM 10 - 4... -
Page 219: Operation Of Drawer Pickup Roller
Feed roller Spring joint Separation rolle Fig. 10-4 © 2005 - 2008 TOSHIBA TEC CORPORATION All rights reserved e-STUDIO281c/351c/451c PAPER FEEDING SYSTEM 10 - 5... -
Page 220: General Operation
2) When a drawer is inserted or removed at ready status, the tray is raised again to check the availabil- ity of paper. e-STUDIO281c/351c/451c © 2005 - 2008 TOSHIBA TEC CORPORATION All rights reserved PAPER FEEDING SYSTEM 10 - 6... - Page 221 • The registration clutch (CLT12) and transport clutch (low speed) (CLT13) are turned ON and the paper is transported to the 2nd transfer position. © 2005 - 2008 TOSHIBA TEC CORPORATION All rights reserved e-STUDIO281c/351c/451c PAPER FEEDING SYSTEM 10 - 7...
-
Page 222: Drive Circuit Of Tray-Up Motor
ON/OFF of the motor rotation direction. Input Output Remarks M(+) M(-) BRAKE OFF (high impedance) STOP e-STUDIO281c/351c/451c © 2005 - 2008 TOSHIBA TEC CORPORATION All rights reserved PAPER FEEDING SYSTEM 10 - 8... -
Page 223: Disassembly And Replacement
Remove 1 screw. Open the bypass feed tray and take off the bypass feed rear cover. Bypass feed rear cover Fig. 10-9 © 2005 - 2008 TOSHIBA TEC CORPORATION All rights reserved e-STUDIO281c/351c/451c PAPER FEEDING SYSTEM 10 - 9 05/08... - Page 224 Fig. 10-11 Remove 2 screws and slide the hinge assembly to take it off with the tray. Tray Hinge assembly Fig. 10-12 e-STUDIO281c/351c/451c © 2005 - 2008 TOSHIBA TEC CORPORATION All rights reserved PAPER FEEDING SYSTEM 10 - 10 05/08...
- Page 225 Remove 1 screw for the plate spring. And remove 1 screw on the tray side and take off Plate spring Bracket the bracket. Fig. 10-15 © 2005 - 2008 TOSHIBA TEC CORPORATION All rights reserved e-STUDIO281c/351c/451c PAPER FEEDING SYSTEM 10 - 11...
- Page 226 P.10-9 "[A-1] Bypass unit"). Bypass feed upper cover Remove 1 screw and slide the bypass feed upper cover to take it off. Fig. 10-18 e-STUDIO281c/351c/451c © 2005 - 2008 TOSHIBA TEC CORPORATION All rights reserved PAPER FEEDING SYSTEM 10 - 12...
- Page 227 Remove 1 spring. Disconnect 1 connector and take off the bypass pickup solenoid with the solenoid arm. Bypass pickup solenoid Solenoid arm Fig. 10-21 © 2005 - 2008 TOSHIBA TEC CORPORATION All rights reserved e-STUDIO281c/351c/451c PAPER FEEDING SYSTEM 10 - 13...
- Page 228 Fig. 10-23 Disconnect the connector from the sensor and release the latch to take off the bypass paper sensor. Bypass paper sensor Fig. 10-24 e-STUDIO281c/351c/451c © 2005 - 2008 TOSHIBA TEC CORPORATION All rights reserved PAPER FEEDING SYSTEM 10 - 14...
- Page 229 Fig. 10-26 5. Install the bypass pickup roller and the bypass feed roller in the correct direction. © 2005 - 2008 TOSHIBA TEC CORPORATION All rights reserved e-STUDIO281c/351c/451c PAPER FEEDING SYSTEM 10 - 15 05/08...
- Page 230 Remove the bushing and the bypass feed clutch. Bypass feed clutch Note: Match the protruding portion of the clutch Bushing and bracket for assembling. Bracket Fig. 10-29 e-STUDIO281c/351c/451c © 2005 - 2008 TOSHIBA TEC CORPORATION All rights reserved PAPER FEEDING SYSTEM 10 - 16 05/08...
- Page 231 Detach the cover, the arbor, and the clutch spring from the shaft, and then take off the Arbor bypass separation roller. Shaft Clutch spring Cover Bypass separation roller Fig. 10-32 © 2005 - 2008 TOSHIBA TEC CORPORATION All rights reserved e-STUDIO281c/351c/451c PAPER FEEDING SYSTEM 10 - 17...
- Page 232 Be careful not to come off the sensor arm and the sensor spring after taking off the sensor. Sensor spring Sensor arm Bypass feed sensor Fig. 10-35 e-STUDIO281c/351c/451c © 2005 - 2008 TOSHIBA TEC CORPORATION All rights reserved PAPER FEEDING SYSTEM 10 - 18...
- Page 233 Disconnect the connector and release the latch to take off the tray-up sensor. Disconnect the connector and release the latch to take off the empty sensor. Fig. 10-37 © 2005 - 2008 TOSHIBA TEC CORPORATION All rights reserved e-STUDIO281c/351c/451c PAPER FEEDING SYSTEM 10 - 19...
- Page 234 Fig. 10-39 Detach the lever from the holder and take off the separation roller with the shaft. Lever Separation roller Holder Fig. 10-40 e-STUDIO281c/351c/451c © 2005 - 2008 TOSHIBA TEC CORPORATION All rights reserved PAPER FEEDING SYSTEM 10 - 20...
- Page 235 "[B-1] Drawer feeding unit"). Pickup roller assembly Remove the pickup roller assembly from the pickup arms and take off the belt. Belt Fig. 10-43 © 2005 - 2008 TOSHIBA TEC CORPORATION All rights reserved e-STUDIO281c/351c/451c PAPER FEEDING SYSTEM 10 - 21 05/08...
- Page 236 Note: Match the protruding portion of clutch with the position shown in the figure for assem- Bushing bling Clutch bracket Fig. 10-46 e-STUDIO281c/351c/451c © 2005 - 2008 TOSHIBA TEC CORPORATION All rights reserved PAPER FEEDING SYSTEM 10 - 22...
- Page 237 P.2-41 "[K] FIL board (FIL)"). Disconnect 1 connector. Remove 4 screws and take off the tray drive unit. Tray drive unit Fig. 10-49 © 2005 - 2008 TOSHIBA TEC CORPORATION All rights reserved e-STUDIO281c/351c/451c PAPER FEEDING SYSTEM 10 - 23...
- Page 238 Tray-up motor Fig. 10-51 Note: Match the boss of the gear with the hole of the cover when installing the motor. Fig. 10-52 e-STUDIO281c/351c/451c © 2005 - 2008 TOSHIBA TEC CORPORATION All rights reserved PAPER FEEDING SYSTEM 10 - 24...
- Page 239 Lower transport clutch ( High speed ) Fig. 10-55 © 2005 - 2008 TOSHIBA TEC CORPORATION All rights reserved e-STUDIO281c/351c/451c PAPER FEEDING SYSTEM 10 - 25 05/08...
- Page 240 2. When the clutch is being installed, be sure that the stoppers of the clutch and harness holder are placed at the right positions. Harness holder Connector Fig. 10-58 e-STUDIO281c/351c/451c © 2005 - 2008 TOSHIBA TEC CORPORATION All rights reserved PAPER FEEDING SYSTEM 10 - 26 05/08...
- Page 241 Remove 1 screw and take off the gear cover. Gear cover Fig. 10-60 Open the side cover. Remove 6 screws and take off the stay. Stay Fig. 10-61 © 2005 - 2008 TOSHIBA TEC CORPORATION All rights reserved e-STUDIO281c/351c/451c PAPER FEEDING SYSTEM 10 - 27 05/08...
- Page 242 P.10-27 "[F] Paper feed guide assembly"). Remove 3 screws and take off the registra- tion guide while lifting it up. Registration guide Fig. 10-64 e-STUDIO281c/351c/451c © 2005 - 2008 TOSHIBA TEC CORPORATION All rights reserved PAPER FEEDING SYSTEM 10 - 28...
- Page 243 Remove the sticker and disconnect 1 con- nector. Release 2 latches and take off the upper drawer feed sensor. Upper drawer feed sensor Fig. 10-67 © 2005 - 2008 TOSHIBA TEC CORPORATION All rights reserved e-STUDIO281c/351c/451c PAPER FEEDING SYSTEM 10 - 29...
- Page 244 "[G] Registration guide"). Remove 2 screws and take off the bracket. Bracket Fig. 10-69 Remove 1 screw and take off the cover. Cover Fig. 10-70 e-STUDIO281c/351c/451c © 2005 - 2008 TOSHIBA TEC CORPORATION All rights reserved PAPER FEEDING SYSTEM 10 - 30...
- Page 245 [M] Intermediate guide (Paper dust removal brush) Loosen 1 screw and take off the intermediate guide by sliding to the rear side. Intermediate guide Fig. 10-73 © 2005 - 2008 TOSHIBA TEC CORPORATION All rights reserved e-STUDIO281c/351c/451c PAPER FEEDING SYSTEM 10 - 31 05/08...
- Page 246 A. 2. Hook the center latch of the intermediate guide securely. Fig. 10-74 e-STUDIO281c/351c/451c © 2005 - 2008 TOSHIBA TEC CORPORATION All rights reserved PAPER FEEDING SYSTEM 10 - 32 05/08...
-
Page 247: Drum Related Section
Toner bag full detection sensor Toner recovery auger Cleaning blade Discharge LED Drum Main charger Automatic wire cleaning drive unit Ozone exhaust duct Drum thermistor Fig. 11-1 © 2005 - 2008 TOSHIBA TEC CORPORATION All rights reserved e-STUDIO281c/351c/451c DRUM RELATED SECTION 11 - 1... -
Page 248: Construction
Toner bag full detection sensor (S20) High-voltage transformer Image quality sensor (S17) Chapter 15 Note: Drum cleaner unit is the process unit with the transfer belt unit removed. e-STUDIO281c/351c/451c © 2005 - 2008 TOSHIBA TEC CORPORATION All rights reserved DRUM RELATED SECTION 11 - 2... -
Page 249: Functions
When the sensor is in trouble, “Toner bag full” is determined instead of “Call for service”. If “Toner bag full” status is not cleared, the sensor, harnesses and LGC board need to be checked. © 2005 - 2008 TOSHIBA TEC CORPORATION All rights reserved e-STUDIO281c/351c/451c DRUM RELATED SECTION... - Page 250 This sensor measures the environment inside the equipment. The values of the temperature and humidity detected inside the equipment are output to the LGC board. e-STUDIO281c/351c/451c © 2005 - 2008 TOSHIBA TEC CORPORATION All rights reserved DRUM RELATED SECTION 11 - 4...
-
Page 251: Output Control Circuits Of High-Voltage Transformer
Black developer ( AC ) ON CDVAON Color developer ( AC ) ON ECON Cleaning blade ON Gate array TC1IV 1st transfer constant voltage/current switch Fig. 11-2 © 2005 - 2008 TOSHIBA TEC CORPORATION All rights reserved e-STUDIO281c/351c/451c DRUM RELATED SECTION 11 - 5... -
Page 252: Drum Temperature Detection Circuit
2) Configuration of the drum temperature detection circuit LGC board +5.1V Engine CPU Drum thermistor DRTMP Fig. 11-3 e-STUDIO281c/351c/451c © 2005 - 2008 TOSHIBA TEC CORPORATION All rights reserved DRUM RELATED SECTION 11 - 6... -
Page 253: Temperature/Humidity Sensor (S19)
+5.1V +5.1V Temperature/ Gate array ALSW02 humidity sensor TEMPS-1 ( Temp ) TEMPS-1/ HUMIS-1 Engine Analog switch HUMIS-1 ( Hum ) Fig. 11-4 © 2005 - 2008 TOSHIBA TEC CORPORATION All rights reserved e-STUDIO281c/351c/451c DRUM RELATED SECTION 11 - 7... -
Page 254: Charger Wire Cleaner
This switch detects whether the wire cleaner has reached to the rear position or not. When this switch is turned ON, the charger cleaner motor (M13) rotates normally. Then the wire cleaner shifts to the front position (home position). e-STUDIO281c/351c/451c © 2005 - 2008 TOSHIBA TEC CORPORATION All rights reserved DRUM RELATED SECTION 11 - 8... -
Page 255: Drive Circuit
Charger wire cleaner is at the rear Charger wire cleaner is at the posi- Charger wire cleaner rear posi- position tion other than the rear position tion detection signal © 2005 - 2008 TOSHIBA TEC CORPORATION All rights reserved e-STUDIO281c/351c/451c DRUM RELATED SECTION 11 - 9... -
Page 256: Disassembly And Replacement
Open the toner cartridge holder. Then Center inner cover remove 2 screws and take off the center inner cover. Screw Screw Fig. 11-8 e-STUDIO281c/351c/451c © 2005 - 2008 TOSHIBA TEC CORPORATION All rights reserved DRUM RELATED SECTION 11 - 10... - Page 257 Connector Fig. 11-10 Loosen 2 screws and take off the process unit by pulling it toward you. Process unit Fig. 11-11 © 2005 - 2008 TOSHIBA TEC CORPORATION All rights reserved e-STUDIO281c/351c/451c DRUM RELATED SECTION 11 - 11 06/07...
- Page 258 2. Push all of the 3 transfer belt drive cou- plings on the rear frame to the inside, and check if they have slid back to their original position. Fig. 11-14 e-STUDIO281c/351c/451c © 2005 - 2008 TOSHIBA TEC CORPORATION All rights reserved DRUM RELATED SECTION 11 - 12 06/07...
- Page 259 Remove 1 screw on the front side and 1 screw on the rear side. Then loosen 1 screw on the front side and disconnect 1 connector. Fig. 11-17 © 2005 - 2008 TOSHIBA TEC CORPORATION All rights reserved e-STUDIO281c/351c/451c DRUM RELATED SECTION 11 - 13...
- Page 260 Loosen 1 screw and take off the drum stay. Drum stay Fig. 11-19 Remove 2 screws and take off the bushing of the drum. Bushing Fig. 11-20 e-STUDIO281c/351c/451c © 2005 - 2008 TOSHIBA TEC CORPORATION All rights reserved DRUM RELATED SECTION 11 - 14...
- Page 261 1 round or more and install it while the holder arm is being pulled completely inside. Holder arm Fig. 11-23 © 2005 - 2008 TOSHIBA TEC CORPORATION All rights reserved e-STUDIO281c/351c/451c DRUM RELATED SECTION 11 - 15...
- Page 262 V-groove on both front and rear sides. 2. Do not twist the wire. 3. Do not touch the wire directly with bare hands. Fig. 11-26 e-STUDIO281c/351c/451c © 2005 - 2008 TOSHIBA TEC CORPORATION All rights reserved DRUM RELATED SECTION 11 - 16...
- Page 263 It is recommended to mark off the position of each before they are taken off. Fig. 11-29 © 2005 - 2008 TOSHIBA TEC CORPORATION All rights reserved e-STUDIO281c/351c/451c DRUM RELATED SECTION 11 - 17...
- Page 264 Take off the drum cleaning blade P.11-18 "[H] Drum cleaning blade"). Rotate the lever to unlock it, and then pull out the lever. Lever Fig. 11-32 e-STUDIO281c/351c/451c © 2005 - 2008 TOSHIBA TEC CORPORATION All rights reserved DRUM RELATED SECTION 11 - 18...
- Page 265 Then take off the drum thermistor with its bracket. Drum thermistor Fig. 11-34 Remove 1 screw and take off the drum ther- mistor. Screw Drum thermistor Fig. 11-35 © 2005 - 2008 TOSHIBA TEC CORPORATION All rights reserved e-STUDIO281c/351c/451c DRUM RELATED SECTION 11 - 19...
- Page 266 [M] Charger cleaner motor (M13) Disconnect 2 connectors and remove 1 screw. Then take off the charger cleaner motor unit. Charger cleaner motor unit Fig. 11-38 e-STUDIO281c/351c/451c © 2005 - 2008 TOSHIBA TEC CORPORATION All rights reserved DRUM RELATED SECTION 11 - 20...
- Page 267 Take off the discharge LED unit P.11-20 "[L] Discharge LED (ERS)"). Remove 1 screw and separate the discharge LED unit into 2 sections. Fig. 11-41 © 2005 - 2008 TOSHIBA TEC CORPORATION All rights reserved e-STUDIO281c/351c/451c DRUM RELATED SECTION 11 - 21...
- Page 268 Toner bag full detection sensor Disconnect 1 connector and remove 1 screw. Then take off the toner bag full detection sensor with its bracket. Fig. 11-44 e-STUDIO281c/351c/451c © 2005 - 2008 TOSHIBA TEC CORPORATION All rights reserved DRUM RELATED SECTION 11 - 22...
- Page 269 Fig. 11-46 [Q] Ozone filter Remove 1 screw and take off the cover. Take off the ozone filter. Ozone filter Screw Cover Fig. 11-47 © 2005 - 2008 TOSHIBA TEC CORPORATION All rights reserved e-STUDIO281c/351c/451c DRUM RELATED SECTION 11 - 23...
- Page 270 (10) Release 6 latches and take off the duct. Then take out the ozone exhaust fan. Ozone exhaust fan Fig. 11-49 e-STUDIO281c/351c/451c © 2005 - 2008 TOSHIBA TEC CORPORATION All rights reserved DRUM RELATED SECTION 11 - 24...
-
Page 271: Developer Unit
Chapter 9 in this manual describes more. Mixer Color auto-toner sensor Drum Developer sleeve Color developer unit Developer sleeve Black developer unit Mixer Black auto-toner sensor Fig. 12-1 © 2005 - 2008 TOSHIBA TEC CORPORATION All rights reserved e-STUDIO281c/351c/451c DEVELOPER UNIT 12 - 1... -
Page 272: Construction
Color auto-toner sensor shutter solenoid (SOL1) Color developer drive section Chapter 9 Color developer toner supply clutch (CLT8) Chapter 9 Color developer drive clutch (CLT9) Chapter 9 e-STUDIO281c/351c/451c © 2005 - 2008 TOSHIBA TEC CORPORATION All rights reserved DEVELOPER UNIT 12 - 2... -
Page 273: Black Toner Cartridge Drive Unit
Black toner cartridge switch Fig. 12-2 Signal level for motor circuit Signal State KTNA1A KTNA1B CW (when supplying toner) CCW (detecting cartridge installation) Brake © 2005 - 2008 TOSHIBA TEC CORPORATION All rights reserved e-STUDIO281c/351c/451c DEVELOPER UNIT 12 - 3... -
Page 274: Black Developer Unit
The magnetic bridge circuit in the black auto-toner sensor (S13) detects the toner ratio in the developer material. This sensor supplies the toner from the toner cartridge. e-STUDIO281c/351c/451c © 2005 - 2008 TOSHIBA TEC CORPORATION All rights reserved DEVELOPER UNIT 12 - 4... -
Page 275: Black Developer Unit Drive Section
ON and disconnected when it is OFF. Gear ( G21 ) Gear ( G20 ) Gear ( G19 ) Gear ( G19 ) Gear ( G20 ) Fig. 12-4 © 2005 - 2008 TOSHIBA TEC CORPORATION All rights reserved e-STUDIO281c/351c/451c DEVELOPER UNIT 12 - 5... -
Page 276: Black Auto-Toner Sensor Circuit
→ Supplies toner from the toner cartridge. → Output of the auto-toner sensor changes. → Toner density recovers to its normal value. → “Toner-empty” is cleared. e-STUDIO281c/351c/451c © 2005 - 2008 TOSHIBA TEC CORPORATION All rights reserved DEVELOPER UNIT 12 - 6... - Page 277 When the toner density is high: Toner ratio to the carrier in the developer material increases. → Magnetic resistance increases. → Detection output decreases. → Auto-toner output V decreases. © 2005 - 2008 TOSHIBA TEC CORPORATION All rights reserved e-STUDIO281c/351c/451c DEVELOPER UNIT 12 - 7...
-
Page 278: Black Developer Unit Lifting Mechanism
“L” is output when contacting. The sensor controls the power supply to turn OFF the clutch after detecting the output alteration (“L” to “H” or “H” to “L”). e-STUDIO281c/351c/451c © 2005 - 2008 TOSHIBA TEC CORPORATION All rights reserved DEVELOPER UNIT 12 - 8... -
Page 279: Color Developer Unit
The color toner cartridge and the color developer units are fitting each other to prevent misinstalla- tion of the color toner cartridge. Therefore, the revolver unit has no device preventing misinstallation. © 2005 - 2008 TOSHIBA TEC CORPORATION All rights reserved e-STUDIO281c/351c/451c... -
Page 280: Color Developer Unit Drive Section
Gear ( G21 ) Coupling ( G20 ) Gear ( G19 ) Gear ( G18 ) Gear ( G19/G27 ) Gear ( G27 ) Fig. 12-8 e-STUDIO281c/351c/451c © 2005 - 2008 TOSHIBA TEC CORPORATION All rights reserved DEVELOPER UNIT 12 - 10... -
Page 281: Color Auto-Toner Sensor Circuit
Color auto-toner sensor Color auto-toner sensor shutter solenoid Control voltage signal Gate array converter Shutter driving signal Color developer unit Color toner cartridge Fig. 12-9 © 2005 - 2008 TOSHIBA TEC CORPORATION All rights reserved e-STUDIO281c/351c/451c DEVELOPER UNIT 12 - 11... - Page 282 When the toner density is high: Toner ratio to the carrier in the developer material increases. → The light reflection amount increases. → Detection output (voltage) increases. e-STUDIO281c/351c/451c © 2005 - 2008 TOSHIBA TEC CORPORATION All rights reserved DEVELOPER UNIT 12 - 12...
-
Page 283: Color Toner Supply
If the toner density is still lower than the regulated value, it is judged as “toner empty” and the unit moves to the escape position. 5) Procedure 1 to 4 is repeated for other color developer units when the toner supply is needed. © 2005 - 2008 TOSHIBA TEC CORPORATION All rights reserved e-STUDIO281c/351c/451c DEVELOPER UNIT... -
Page 284: High-Voltage Transformer Output Control Circuit
The developer bias transformer generates output voltage proportional to the control voltage Vc by ON signed. * Adjustment of the control voltage Vc (change of adjustment data) is performed in the adjustment mode. e-STUDIO281c/351c/451c © 2005 - 2008 TOSHIBA TEC CORPORATION All rights reserved DEVELOPER UNIT 12 - 14... -
Page 285: Disassembly And Replacement
Black developer unit cover Fig. 12-11 Disconnect 2 connectors. Fig. 12-12 Remove 1 screw and pull out the black developer unit. Black developer unit Fig. 12-13 © 2005 - 2008 TOSHIBA TEC CORPORATION All rights reserved e-STUDIO281c/351c/451c DEVELOPER UNIT 12 - 15... - Page 286 Remove 2 screws and take off the upper cover. Upper cover Fig. 12-14 Discharge the developer material. Fig. 12-15 Pour the developer material. Fig. 12-16 e-STUDIO281c/351c/451c © 2005 - 2008 TOSHIBA TEC CORPORATION All rights reserved DEVELOPER UNIT 12 - 16...
- Page 287 Discharge the developer material P.12-16 "[A-2] Developer material"). Right cover Remove 2 screws, release 1 hook and take off the right cover. Fig. 12-19 © 2005 - 2008 TOSHIBA TEC CORPORATION All rights reserved e-STUDIO281c/351c/451c DEVELOPER UNIT 12 - 17...
- Page 288 Then match the polarity adjustment plate at the scale previously recorded when reassembling. Remove 1 screw and take off the bracket. Screw Polarity adjustment plate Fig. 12-22 e-STUDIO281c/351c/451c © 2005 - 2008 TOSHIBA TEC CORPORATION All rights reserved DEVELOPER UNIT 12 - 18...
- Page 289 E-ring, bushing, collar, roller (bear- ing-1), E-ring, gear, pin, bearing-2 and oil seal. Fig. 12-25 © 2005 - 2008 TOSHIBA TEC CORPORATION All rights reserved e-STUDIO281c/351c/451c DEVELOPER UNIT 12 - 19...
- Page 290 E-ring, gear, bearing and oil seal. * Procedure for replacing an oil seal: E-ring P.12-32 "Fig. 12-63 " Gear Fig. 12-28 e-STUDIO281c/351c/451c © 2005 - 2008 TOSHIBA TEC CORPORATION All rights reserved DEVELOPER UNIT 12 - 20...
- Page 291 03-454: Cyan toner cartridge moves to the replacement position. Fig. 12-30 Open the front cover and take off the color toner cartridge while pressing the lever. © 2005 - 2008 TOSHIBA TEC CORPORATION All rights reserved e-STUDIO281c/351c/451c DEVELOPER UNIT 12 - 21...
- Page 292 Color developer unit Fig. 12-33 e-STUDIO281c/351c/451c © 2005 - 2008 TOSHIBA TEC CORPORATION All rights reserved DEVELOPER UNIT 12 - 22...
- Page 293 Fig. 12-35 3. When installing the toner holder, be care- ful not to peel the seal. Fig. 12-36 © 2005 - 2008 TOSHIBA TEC CORPORATION All rights reserved e-STUDIO281c/351c/451c DEVELOPER UNIT 12 - 23...
- Page 294 P.12-23 "[B-2] Developer material"). Remove the urethane seal. Urethan seal Remove 2 screws and take off the doctor blade. Screw Doctor blade Screw Fig. 12-39 e-STUDIO281c/351c/451c © 2005 - 2008 TOSHIBA TEC CORPORATION All rights reserved DEVELOPER UNIT 12 - 24...
- Page 295 * Procedure for replacing an oil seal: P.12-32 "Fig. 12-63 " Fig. 12-41 Rear side: Remove 1 screw and take off the gear assembly. Gear assembly Screw Fig. 12-42 © 2005 - 2008 TOSHIBA TEC CORPORATION All rights reserved e-STUDIO281c/351c/451c DEVELOPER UNIT 12 - 25...
- Page 296 Front side: Remove the following parts in order: E-ring, bushing-1 and bushing-2. * Procedure for replacing an oil seal: E-ring E-ring P.12-32 "Fig. 12-63 " Bushing-1 Fig. 12-45 e-STUDIO281c/351c/451c © 2005 - 2008 TOSHIBA TEC CORPORATION All rights reserved DEVELOPER UNIT 12 - 26...
- Page 297 (length of spring). When installing, pay attention to its active coils (length of spring). Front side: 20 (longer) Rear side: 18 (shorter) Fig. 12-48 © 2005 - 2008 TOSHIBA TEC CORPORATION All rights reserved e-STUDIO281c/351c/451c DEVELOPER UNIT 12 - 27...
- Page 298 Take off the laser optical unit P.8-11 "[A] Laser optical unit"). Take off the black toner cartridge. Remove 1 screw and take off the toner case. Screw Fig. 12-51 e-STUDIO281c/351c/451c © 2005 - 2008 TOSHIBA TEC CORPORATION All rights reserved DEVELOPER UNIT 12 - 28...
- Page 299 Fig. 12-53 Remove 1 screw and take off the black toner cartridge switch with the whole bracket. Black toner cartridge switch Fig. 12-54 © 2005 - 2008 TOSHIBA TEC CORPORATION All rights reserved e-STUDIO281c/351c/451c DEVELOPER UNIT 12 - 29...
- Page 300 Remove 1 screw and take off the rail. Rail Fig. 12-56 Remove 2 screws and take off the black toner supply auger unit. Screw Black toner supply auger unit Fig. 12-57 e-STUDIO281c/351c/451c © 2005 - 2008 TOSHIBA TEC CORPORATION All rights reserved DEVELOPER UNIT 12 - 30...
- Page 301 Shutter solenoid Fig. 12-59 Remove 2 screws and 1 spring and take off the stay. Spring Stay Fig. 12-60 © 2005 - 2008 TOSHIBA TEC CORPORATION All rights reserved e-STUDIO281c/351c/451c DEVELOPER UNIT 12 - 31...
- Page 302 Grease diameter. Note: Wipe off the grease which has run off to the inner side of the oil seal. Oil seal Fig. 12-63 e-STUDIO281c/351c/451c © 2005 - 2008 TOSHIBA TEC CORPORATION All rights reserved DEVELOPER UNIT 12 - 32...
-
Page 303: Revolver Unit
Color auto-toner sensor Revolver motor Color toner cartridge sensor Photoconductive drum Revolver home position sensor Revolver unit Fig. 13-1 © 2005 - 2008 TOSHIBA TEC CORPORATION All rights reserved e-STUDIO281c/351c/451c REVOLVER UNIT 13 - 1... -
Page 304: Construction
( P.9-6 "9.4 Developer Motor (M11)"). • Revolver unit • Revolver motor • Revolver home position sensor • Color toner cartridge sensor e-STUDIO281c/351c/451c © 2005 - 2008 TOSHIBA TEC CORPORATION All rights reserved REVOLVER UNIT 13 - 2... -
Page 305: Functions
This sensor is a transmissive type light sensor detecting the revolver unit home position. The posi- tion detection is performed at initialization. "Call for service" if it does not detect the position in a specified period of time. © 2005 - 2008 TOSHIBA TEC CORPORATION All rights reserved e-STUDIO281c/351c/451c REVOLVER UNIT... -
Page 306: Drive Of Revolver Unit
Then the revolver unit rotates clockwise. Revolver motor ( G15 ) Revolver unit ( G135 ) Revolver home position sensor Fig. 13-2 e-STUDIO281c/351c/451c © 2005 - 2008 TOSHIBA TEC CORPORATION All rights reserved REVOLVER UNIT 13 - 4... -
Page 307: Revolver Motor Drive Circuit
RVMPHC-0 Engine GATE2 RVMC RVMB +24V RVMD +5VSW RVMPHB-0 GATE1 RVMBHD-0 Revolver motor RVMC3-0 RVMC1-0 GATE2 Motor driver Gate array RVMC2-0 RVMC1-0 Fig. 13-3 © 2005 - 2008 TOSHIBA TEC CORPORATION All rights reserved e-STUDIO281c/351c/451c REVOLVER UNIT 13 - 5... -
Page 308: Operation
9) The revolver unit moves to the escape position to perform black image development after the com- pletion of yellow image development. e-STUDIO281c/351c/451c © 2005 - 2008 TOSHIBA TEC CORPORATION All rights reserved REVOLVER UNIT 13 - 6... -
Page 309: Color Toner Supply
7) Procedure 1 to 7 is repeated for one to six times until the specified gradation characteristic and image density are obtained. © 2005 - 2008 TOSHIBA TEC CORPORATION All rights reserved e-STUDIO281c/351c/451c REVOLVER UNIT 13 - 7... -
Page 310: Disassembly And Replacement
P.2-26 "[C] Inner tray"). Disconnect 1 connector and remove 2 screws. Then take off the internal cooling fan together with the duct. Duct Fig. 13-6 e-STUDIO281c/351c/451c © 2005 - 2008 TOSHIBA TEC CORPORATION All rights reserved REVOLVER UNIT 13 - 8... - Page 311 Take off the LGC board case ( P.2-38 "[F] LGC board case"). Disconnect 1 connector and remove 2 screws and take off the revolver motor. Revolver motor Fig. 13-9 © 2005 - 2008 TOSHIBA TEC CORPORATION All rights reserved e-STUDIO281c/351c/451c REVOLVER UNIT 13 - 9...
- Page 312 2. Apply the grease to the shaft after the replacement of the gears. Grease Grease Fig. 13-11 e-STUDIO281c/351c/451c © 2005 - 2008 TOSHIBA TEC CORPORATION All rights reserved REVOLVER UNIT 13 - 10 06/07...
- Page 313 (11) Pull out the handle. Remove 2 screws and take off the laser cooling duct cover (front side). Laser cooling duct cover (front side) Fig. 13-13 © 2005 - 2008 TOSHIBA TEC CORPORATION All rights reserved e-STUDIO281c/351c/451c REVOLVER UNIT 13 - 11...
- Page 314 (Remove 1 of 4 screws from the rear side of the equipment.) Stay Fig. 13-15 (14) Remove 3 screws and take off the bracket. Bracket Fig. 13-16 e-STUDIO281c/351c/451c © 2005 - 2008 TOSHIBA TEC CORPORATION All rights reserved REVOLVER UNIT 13 - 12...
- Page 315 Bearing Fig. 13-17 (17) Slide the revolver unit to the front and take off the revolver unit. Revolver unit Fig. 13-18 © 2005 - 2008 TOSHIBA TEC CORPORATION All rights reserved e-STUDIO281c/351c/451c REVOLVER UNIT 13 - 13...
- Page 316 © 2005 - 2008 TOSHIBA TEC CORPORATION All rights reserved REVOLVER UNIT 13 - 14...
-
Page 317: Transfer Unit
Used toner auger Idling roller Drum stay Transfer belt home position sensor-1 Drum 2nd transfer guide roller 2nd transfer roller position detection sensor Fig. 14-1 © 2005 - 2008 TOSHIBA TEC CORPORATION All rights reserved e-STUDIO281c/351c/451c TRANSFER UNIT 14 - 1... - Page 318 Transfer belt cleaner clutch (CLT1) 2nd transfer unit 2nd transfer roller PM parts 2nd transfer roller contact clutch (CLT5) 2nd transfer roller position detection sensor (S18) e-STUDIO281c/351c/451c © 2005 - 2008 TOSHIBA TEC CORPORATION All rights reserved TRANSFER UNIT 14 - 2...
- Page 319 OFF. Since the transport motor is its drive source, the clutch needs to be ON as long as they are contacting. It also controls the clutch not to turn more than 180 degrees by the spring and stopper. © 2005 - 2008 TOSHIBA TEC CORPORATION All rights reserved e-STUDIO281c/351c/451c TRANSFER UNIT...
- Page 320 13)2nd transfer roller position detection sensor (S18) This sensor is a photointerrupter detecting whether the 2nd transfer roller is at its contacting position or releasing position. e-STUDIO281c/351c/451c © 2005 - 2008 TOSHIBA TEC CORPORATION All rights reserved TRANSFER UNIT 14 - 4...
-
Page 321: Outline Of 1St Transfer
3) When the transfer of the toner image from the transfer belt to the paper is completed in 2nd transfer, residual toner on the transfer belt is scraped off by the transfer belt cleaning blade. © 2005 - 2008 TOSHIBA TEC CORPORATION All rights reserved e-STUDIO281c/351c/451c... -
Page 322: Outline Of 2Nd Transfer
3) After an electrode bias is applied on the 2nd transfer roller, the toner image is transferred from the transfer belt to the paper. 4) Upon the completion of 2nd transfer, the 2nd transfer roller escapes to the releasing position. e-STUDIO281c/351c/451c © 2005 - 2008 TOSHIBA TEC CORPORATION All rights reserved TRANSFER UNIT 14 - 6... -
Page 323: High-Voltage Transformer Output Control Circuit
2nd transfer roller is performed. 2nd transfer roller Engine TC2VR converter Gate array High-voltage transformer NVRAM +1000V, -1000V TC2ON Fig. 14-2 © 2005 - 2008 TOSHIBA TEC CORPORATION All rights reserved e-STUDIO281c/351c/451c TRANSFER UNIT 14 - 7... -
Page 324: Disassembly And Replacement
Take off the transfer belt. Note: Transfer belt unit When the transfer belt unit is being installed, screw the unit by pressing it downward. Fig. 14-5 e-STUDIO281c/351c/451c © 2005 - 2008 TOSHIBA TEC CORPORATION All rights reserved TRANSFER UNIT 14 - 8 05/08... - Page 325 Make sure that the spring is not installed incorrectly or deformed. Spring Fig. 14-7 Remove 1 screw and take off the bracket. Bracket Fig. 14-8 © 2005 - 2008 TOSHIBA TEC CORPORATION All rights reserved e-STUDIO281c/351c/451c TRANSFER UNIT 14 - 9...
- Page 326 Remove 1 screw on the front side and 1 screw on the rear side. Then lay down the Screw tension roller. Screw Tension roller Fig. 14-11 e-STUDIO281c/351c/451c © 2005 - 2008 TOSHIBA TEC CORPORATION All rights reserved TRANSFER UNIT 14 - 10...
- Page 327 6. Check if the flange on both ends of the Fig. 14-14 transfer belt does not run on the rollers. © 2005 - 2008 TOSHIBA TEC CORPORATION All rights reserved e-STUDIO281c/351c/451c TRANSFER UNIT 14 - 11...
- Page 328 Fig. 14-16 Disconnect 1 connector and remove 1 screw. Then take off the transfer belt home position Transfer belt sensor-1. home position sensor-1 Fig. 14-17 e-STUDIO281c/351c/451c © 2005 - 2008 TOSHIBA TEC CORPORATION All rights reserved TRANSFER UNIT 14 - 12...
- Page 329 Drum stay Take off the process unit P.11-10 "[B] Process unit"). Loosen 1 screw and take off the drum stay. Drum stay Fig. 14-20 © 2005 - 2008 TOSHIBA TEC CORPORATION All rights reserved e-STUDIO281c/351c/451c TRANSFER UNIT 14 - 13...
- Page 330 2. Be sure that the attached blade mylars come at the bottom side of the recovery blade and the blade sheet. Blade mylar Blade sheet Blade mylar Fig. 14-23 e-STUDIO281c/351c/451c © 2005 - 2008 TOSHIBA TEC CORPORATION All rights reserved TRANSFER UNIT 14 - 14 05/08...
- Page 331 Remove 1 clip and slide 1 bushing (with bearing) on the rear side of the 2nd transfer roller. Take off the 2nd transfer roller. Fig. 14-26 © 2005 - 2008 TOSHIBA TEC CORPORATION All rights reserved e-STUDIO281c/351c/451c TRANSFER UNIT 14 - 15...
- Page 332 Disconnect 1 connector and release the har- ness clamp. Remove 3 screws and take off the 2nd trans- fer gear unit. Gear unit Fig. 14-29 e-STUDIO281c/351c/451c © 2005 - 2008 TOSHIBA TEC CORPORATION All rights reserved TRANSFER UNIT 14 - 16...
- Page 333 When the pre-transfer guide is being installed, be sure that 3 tabs of the guide come underneath the bracket (metal plate). Fig. 14-32 © 2005 - 2008 TOSHIBA TEC CORPORATION All rights reserved e-STUDIO281c/351c/451c TRANSFER UNIT 14 - 17 05/08...
- Page 334 If the partial gear is incorrectly installed in a 180-degree reversed position, an operation abnormality (CEC0: 2nd trans- fer belt position detection abnormality) may occur. Partial gear Fig. 14-35 e-STUDIO281c/351c/451c © 2005 - 2008 TOSHIBA TEC CORPORATION All rights reserved TRANSFER UNIT 14 - 18...
- Page 335 Bushing Fig. 14-37 Take off the transfer belt cleaner clutch. Transfer belt cleaner clutch Fig. 14-38 © 2005 - 2008 TOSHIBA TEC CORPORATION All rights reserved e-STUDIO281c/351c/451c TRANSFER UNIT 14 - 19...
- Page 336 © 2005 - 2008 TOSHIBA TEC CORPORATION All rights reserved TRANSFER UNIT 14 - 20...
-
Page 337: Image Quality Control
In addition, a shutter operated by the solenoid is equipped on the light receiving/emitting surfaces to prevent stain to the sensor and to calibrate the sensor with the reflection from the shutter. © 2005 - 2008 TOSHIBA TEC CORPORATION All rights reserved e-STUDIO281c/351c/451c... -
Page 338: Principle Of The Sensor
Light emitting Light receiving element element Reflected light amount signal Reflected light amount voltage Light source amount voltage Light source amount signal Fig. 15-1 e-STUDIO281c/351c/451c © 2005 - 2008 TOSHIBA TEC CORPORATION All rights reserved IMAGE QUALITY CONTROL 15 - 2... -
Page 339: Flow Chart Of Control Procedure
The image forming conditions are determined and stored in NVRAM. [ 10 ] Control procedure is completed. ( The determined image forming conditions will be reflected on subsequent prints. ) © 2005 - 2008 TOSHIBA TEC CORPORATION All rights reserved e-STUDIO281c/351c/451c IMAGE QUALITY CONTROL... -
Page 340: Construction
Image forming process Transfer belt Image quality sensor Laser optical system Various image forming conditions Light source Reflected light amount signal amount signal Fig. 15-2 e-STUDIO281c/351c/451c © 2005 - 2008 TOSHIBA TEC CORPORATION All rights reserved IMAGE QUALITY CONTROL 15 - 4... -
Page 341: Disassembly And Replacement
Image quality sensor Fig. 15-4 Remove 2 screws and take off the image quality sensor shutter solenoid. Image quality sensor shutter solenoid Fig. 15-5 © 2005 - 2008 TOSHIBA TEC CORPORATION All rights reserved e-STUDIO281c/351c/451c IMAGE QUALITY CONTROL 15 - 5... - Page 342 © 2005 - 2008 TOSHIBA TEC CORPORATION All rights reserved IMAGE QUALITY CONTROL 15 - 6...
-
Page 343: Fuser Unit / Paper Exit Section
Separation plate Cleaning roller Oil roller Discharge brush Thermostat Separation finger Thermistor Fuser roller IH coil Pressure roller Fig. 16-1 © 2005 - 2008 TOSHIBA TEC CORPORATION All rights reserved e-STUDIO281c/351c/451c FUSER UNIT / PAPER EXIT SECTION 16 - 1 05/08... -
Page 344: Construction
Thermostat (THMO1) Exit roller Exit sensor (S40) Exit motor (M7) IH control PC board (IH) IH control board cooling fan (M17) e-STUDIO281c/351c/451c © 2005 - 2008 TOSHIBA TEC CORPORATION All rights reserved FUSER UNIT / PAPER EXIT SECTION 16 - 2... -
Page 345: Functions
(preventing offsetting phenomenon). Also, the cleaning roller is a metal roller which removes the residual toner and paper dust adhered on the oil roller. © 2005 - 2008 TOSHIBA TEC CORPORATION All rights reserved e-STUDIO281c/351c/451c FUSER UNIT / PAPER EXIT SECTION... - Page 346 It is installed with the pressure roller contacting it in order to keep the surface potential on the roller even. e-STUDIO281c/351c/451c © 2005 - 2008 TOSHIBA TEC CORPORATION All rights reserved FUSER UNIT / PAPER EXIT SECTION 16 - 4...
-
Page 347: Operation
1/2 to 1/3 in order to improve fusing efficiency. The exit motor (M7) which drives the exit roller is decelerated at the same time. © 2005 - 2008 TOSHIBA TEC CORPORATION All rights reserved e-STUDIO281c/351c/451c FUSER UNIT / PAPER EXIT SECTION... -
Page 348: Heater Control Circuit
CPU Photocoupler Temperature control circuit IH board AC line DC line 250°C upper limit circuit LGC board Fig. 16-2 e-STUDIO281c/351c/451c © 2005 - 2008 TOSHIBA TEC CORPORATION All rights reserved FUSER UNIT / PAPER EXIT SECTION 16 - 6... -
Page 349: Heating Principle Of Ih Heater
( IGBT ) IGBT drive Current input Monitoring input current Voltage input I/F circuit on LGC board Monitoring input current Fig. 16-4 © 2005 - 2008 TOSHIBA TEC CORPORATION All rights reserved e-STUDIO281c/351c/451c FUSER UNIT / PAPER EXIT SECTION 16 - 7... -
Page 350: Ih Control Circuit Interface
P.16-10 "16.5.5 Abnormality in the IH con- CN456-5 H1ERR2 trol circuit") CN456-2 LGC to IH CN456-3 IHDUTY Duty ratio changing signal e-STUDIO281c/351c/451c © 2005 - 2008 TOSHIBA TEC CORPORATION All rights reserved FUSER UNIT / PAPER EXIT SECTION 16 - 8... -
Page 351: Relation Between System Configuration And Ih Output
(*2) AC power should be input voltage when the equipment is warming up (The lower the voltage is, the longer the warming up time becomes). © 2005 - 2008 TOSHIBA TEC CORPORATION All rights reserved e-STUDIO281c/351c/451c FUSER UNIT / PAPER EXIT SECTION... -
Page 352: Abnormality In The Ih Control Circuit
LGC board IH board +5VSW H1ERR1 Gate array H1ERR2 Fig. 16-5 e-STUDIO281c/351c/451c © 2005 - 2008 TOSHIBA TEC CORPORATION All rights reserved FUSER UNIT / PAPER EXIT SECTION 16 - 10... - Page 353 (Other than the above) when the cover is opened opened An abnormal status is detected when the cover is opened © 2005 - 2008 TOSHIBA TEC CORPORATION All rights reserved e-STUDIO281c/351c/451c FUSER UNIT / PAPER EXIT SECTION 16 - 11...
-
Page 354: Temperature Detection Section
250°C, the heater is automatically turned OFF regardless of the temperature of the area where the paper passes on. e-STUDIO281c/351c/451c © 2005 - 2008 TOSHIBA TEC CORPORATION All rights reserved FUSER UNIT / PAPER EXIT SECTION 16 - 12... - Page 355 100°C. Auto Shut Off Mode (Setting Mode (08-206)): When the printing is not performed in a specified period of time (default setting: e-STUDIO281c/ 351c: 60 min. / e-STUDIO451c: 90 min.) after the equipment entered to Auto Power Save Mode, the equipment then enters to Auto Shut Off Mode to turn OFF the IH coil.
- Page 356 OFF again. After confirming that it is the fuser unit abnormality, correct the abnormality and reset the counter value (08-400) to "0" to start up the equipment normally. e-STUDIO281c/351c/451c © 2005 - 2008 TOSHIBA TEC CORPORATION All rights reserved FUSER UNIT / PAPER EXIT SECTION 16 - 14...
- Page 357 OFF the power when the temperature of IH coil exceeds the specified temperature. +5.1 V thermistor STHU-1A +5.1 V Main thermistor THMU-1A Engine CPU +5.1 V Front edge thermistor SSTH-1A Fig. 16-8 © 2005 - 2008 TOSHIBA TEC CORPORATION All rights reserved e-STUDIO281c/351c/451c FUSER UNIT / PAPER EXIT SECTION 16 - 15...
- Page 358 40°C or below 40°C or below At energy 250°C or above C449 On usual saving mode 250°C or above 250°C or above e-STUDIO281c/351c/451c © 2005 - 2008 TOSHIBA TEC CORPORATION All rights reserved FUSER UNIT / PAPER EXIT SECTION 16 - 16...
- Page 359 08-422 will be applied, and in all other cases, the temperature set at 08-411 will be applied. © 2005 - 2008 TOSHIBA TEC CORPORATION All rights reserved e-STUDIO281c/351c/451c FUSER UNIT / PAPER EXIT SECTION...
-
Page 360: Control Circuit Of Exit Motor
EXTMC Engine EXTMB-0 EXTMB EXTMD-0 EXTMD +5VSW Motor driver Exit motor EXTC3-0 EXTC1-0 VREF EXTC2-0 Gate array EXTC1-0 Fig. 16-9 e-STUDIO281c/351c/451c © 2005 - 2008 TOSHIBA TEC CORPORATION All rights reserved FUSER UNIT / PAPER EXIT SECTION 16 - 18... -
Page 361: Disassembly And Replacement
Take off the fuser unit P.16-19 "[A] Fuser unit"). Transport guide Open the jam access cover and transport guide. Jam access cover Fig. 16-12 © 2005 - 2008 TOSHIBA TEC CORPORATION All rights reserved e-STUDIO281c/351c/451c FUSER UNIT / PAPER EXIT SECTION 16 - 19... - Page 362 Oil roller Fig. 16-14 Remove 1 bushing from each side of the oil roller. Bushing Oil roller Bushing Fig. 16-15 e-STUDIO281c/351c/451c © 2005 - 2008 TOSHIBA TEC CORPORATION All rights reserved FUSER UNIT / PAPER EXIT SECTION 16 - 20...
- Page 363 Remove 1 E-ring, the gear (C) and 1 bushing from the cleaning roller rear side. Bushing Gear ( C ) E-ring Fig. 16-18 © 2005 - 2008 TOSHIBA TEC CORPORATION All rights reserved e-STUDIO281c/351c/451c FUSER UNIT / PAPER EXIT SECTION 16 - 21...
- Page 364 IH coil. 3. Make sure that there is not any peeling or scratch on the harness tube. IH coil Fig. 16-21 e-STUDIO281c/351c/451c © 2005 - 2008 TOSHIBA TEC CORPORATION All rights reserved FUSER UNIT / PAPER EXIT SECTION 16 - 22...
- Page 365 Remove 1 C-ring and 2 gears. Gear Pressure releasing lever Fig. 16-23 Remove 1 bearing. Bearing Fig. 16-24 © 2005 - 2008 TOSHIBA TEC CORPORATION All rights reserved e-STUDIO281c/351c/451c FUSER UNIT / PAPER EXIT SECTION 16 - 23...
- Page 366 Fuser roller C-ring Fuser belt guide Bearing Fig. 16-27 e-STUDIO281c/351c/451c © 2005 - 2008 TOSHIBA TEC CORPORATION All rights reserved FUSER UNIT / PAPER EXIT SECTION 16 - 24...
- Page 367 Screw Bracket Fig. 16-29 Remove 1 screw and take off the bracket on the rear side. Bracket Screw Fig. 16-30 © 2005 - 2008 TOSHIBA TEC CORPORATION All rights reserved e-STUDIO281c/351c/451c FUSER UNIT / PAPER EXIT SECTION 16 - 25...
- Page 368 Keep the paper between then until the fuser roller is installed. Fig. 16-33 e-STUDIO281c/351c/451c © 2005 - 2008 TOSHIBA TEC CORPORATION All rights reserved FUSER UNIT / PAPER EXIT SECTION 16 - 26...
- Page 369 Screw Pressure releasing lever Pressure releasing lever Fig. 16-35 Remove 2 springs. Fig. 16-36 © 2005 - 2008 TOSHIBA TEC CORPORATION All rights reserved e-STUDIO281c/351c/451c FUSER UNIT / PAPER EXIT SECTION 16 - 27...
- Page 370 P.16-25 "[F] Fuser belt"). Take off the separation finger unit P.16-27 "[G] Separation finger"). Take off the pressure roller. Pressure roller Fig. 16-39 e-STUDIO281c/351c/451c © 2005 - 2008 TOSHIBA TEC CORPORATION All rights reserved FUSER UNIT / PAPER EXIT SECTION 16 - 28...
- Page 371 Remove 2 screws and take off the thermo- Screw stat unit. Note: Fuser belt Be careful not to scratch the fuser belt. Thermostat unit Fig. 16-42 © 2005 - 2008 TOSHIBA TEC CORPORATION All rights reserved e-STUDIO281c/351c/451c FUSER UNIT / PAPER EXIT SECTION 16 - 29...
- Page 372 P.16-19 "[A] Fuser unit"). Remove 2 screws and take off the fuser unit entrance guide. Fuser unit entrance guide Fig. 16-45 e-STUDIO281c/351c/451c © 2005 - 2008 TOSHIBA TEC CORPORATION All rights reserved FUSER UNIT / PAPER EXIT SECTION 16 - 30...
- Page 373 Disconnect 1 connector and take off the exit Exit sensor Spring sensor. Remove 1 spring. Connector Screw Bracket Fig. 16-48 © 2005 - 2008 TOSHIBA TEC CORPORATION All rights reserved e-STUDIO281c/351c/451c FUSER UNIT / PAPER EXIT SECTION 16 - 31...
- Page 374 Remove 2 screws (one of the front side is a shoulder screw) and take off the exit roller Exit roller cover cover. Fig. 16-51 e-STUDIO281c/351c/451c © 2005 - 2008 TOSHIBA TEC CORPORATION All rights reserved FUSER UNIT / PAPER EXIT SECTION 16 - 32...
- Page 375 Take off the fuser unit P.16-19 "[A] Fuser unit"). Remove 2 screws and take off the jam access cover. Jam access cover Fig. 16-54 © 2005 - 2008 TOSHIBA TEC CORPORATION All rights reserved e-STUDIO281c/351c/451c FUSER UNIT / PAPER EXIT SECTION 16 - 33...
- Page 376 ( P.16-19 "[A] Fuser unit"). Remove 3 screws and take off the IH board cover. IH board cover Fig. 16-57 e-STUDIO281c/351c/451c © 2005 - 2008 TOSHIBA TEC CORPORATION All rights reserved FUSER UNIT / PAPER EXIT SECTION 16 - 34...
- Page 377 IH control board cooling fan cover case"). Remove 1 screw and take off the IH control Screw board cooling fan cover. Fig. 16-60 © 2005 - 2008 TOSHIBA TEC CORPORATION All rights reserved e-STUDIO281c/351c/451c FUSER UNIT / PAPER EXIT SECTION 16 - 35...
- Page 378 Fig. 16-63 e-STUDIO281c/351c/451c © 2005 - 2008 TOSHIBA TEC CORPORATION All rights reserved FUSER UNIT / PAPER EXIT SECTION 16 - 36 05/08...
-
Page 379: Automatic Duplexing Unit (Adu)
ADU motor ADU entrance sensor Paper guide ADU clutch Middle transport roller ADU exit sensor Exit guide Lower transport roller Fig. 17-1 © 2005 - 2008 TOSHIBA TEC CORPORATION All rights reserved e-STUDIO281c/351c/451c AUTOMATIC DUPLEXING UNIT (ADU) 17 - 1... -
Page 380: Construction
ADU exit sensor (S39) ADU opening/closing switch (S37) ADU driving PC board (ADU) Upper transport roller Middle transport roller Lower transport roller e-STUDIO281c/351c/451c © 2005 - 2008 TOSHIBA TEC CORPORATION All rights reserved AUTOMATIC DUPLEXING UNIT (ADU) 17 - 2... -
Page 381: Functions
This switch detects whether the ADU is open or not. 6) Upper transport roller / Middle transport roller / Lower transport roller This roller transports paper into the ADU. © 2005 - 2008 TOSHIBA TEC CORPORATION All rights reserved e-STUDIO281c/351c/451c AUTOMATIC DUPLEXING UNIT (ADU) -
Page 382: Drive Of Adu
The ADU clutch (CLT7) is then turned ON and the middle transport roller and lower transport roller are rotated. ADU motor Upper transport roller ADU clutch Middle transport roller Lower transport roller Fig. 17-2 e-STUDIO281c/351c/451c © 2005 - 2008 TOSHIBA TEC CORPORATION All rights reserved AUTOMATIC DUPLEXING UNIT (ADU) 17 - 4... -
Page 383: Description Of Operations
The figures in the following pages show the circulating operations during duplex copying. The numbers in the figures indicate the page numbers. © 2005 - 2008 TOSHIBA TEC CORPORATION All rights reserved e-STUDIO281c/351c/451c AUTOMATIC DUPLEXING UNIT (ADU) - Page 384 With the paper larger than A4/LT size, duplex printing (back-side printing→front-side printing) is per- formed for one sheet at a time as shown below. Fig. 17-3 e-STUDIO281c/351c/451c © 2005 - 2008 TOSHIBA TEC CORPORATION All rights reserved AUTOMATIC DUPLEXING UNIT (ADU) 17 - 6...
- Page 385 Back side of the 1st sheet→Back side of the 2nd sheet→Front side of the 1st sheet→Front side of the 2nd sheet Fig. 17-4 © 2005 - 2008 TOSHIBA TEC CORPORATION All rights reserved e-STUDIO281c/351c/451c AUTOMATIC DUPLEXING UNIT (ADU) 17 - 7...
- Page 386 Front side of the 3rd sheet (5) → Back side of the 5th sheet (10) → Front side of the 4th sheet (7) → Front side of the 5th sheet (9) Fig. 17-5 e-STUDIO281c/351c/451c © 2005 - 2008 TOSHIBA TEC CORPORATION All rights reserved AUTOMATIC DUPLEXING UNIT (ADU) 17 - 8...
- Page 387 ADU entrance sensor 7344 9452 ADU exit sensor 7090 7850 8195 9634 ADU clutch 6561 7826 8198 9663 ADU motor Fig. 17-7 © 2005 - 2008 TOSHIBA TEC CORPORATION All rights reserved e-STUDIO281c/351c/451c AUTOMATIC DUPLEXING UNIT (ADU) 17 - 9...
-
Page 388: Flow Chart
ADU motor stopped ADU motor ON ADU clutch ON ADU exit sensor check the arrival? ADU transport jam (E520) Specified time has passed e-STUDIO281c/351c/451c © 2005 - 2008 TOSHIBA TEC CORPORATION All rights reserved AUTOMATIC DUPLEXING UNIT (ADU) 17 - 10... - Page 389 ON? ADU misfeeding (E110) Registration proceeded Registration operation completed ADU motor stopped ADU clutch OFF Next paper is ready for the registration © 2005 - 2008 TOSHIBA TEC CORPORATION All rights reserved e-STUDIO281c/351c/451c AUTOMATIC DUPLEXING UNIT (ADU) 17 - 11...
-
Page 390: Disassembly And Replacement
Open the ADU. Lift up the ADU a little and slide it to the rear side and take it off. Fig. 17-10 e-STUDIO281c/351c/451c © 2005 - 2008 TOSHIBA TEC CORPORATION All rights reserved AUTOMATIC DUPLEXING UNIT (ADU) 17 - 12... - Page 391 P.17-13 "[B] ADU inside rear cover") ADU board Disconnect 6 connectors from the ADU board. Release 3 lock supports and take off the ADU board. Fig. 17-13 © 2005 - 2008 TOSHIBA TEC CORPORATION All rights reserved e-STUDIO281c/351c/451c AUTOMATIC DUPLEXING UNIT (ADU) 17 - 13...
- Page 392 When installing the E-ring, make sure that the latches of both ends of E-ring are on the flat part of the shaft. ADU clutch E-ring Fig. 17-16 e-STUDIO281c/351c/451c © 2005 - 2008 TOSHIBA TEC CORPORATION All rights reserved AUTOMATIC DUPLEXING UNIT (ADU) 17 - 14...
- Page 393 Disconnect 1 connector. Release the har- ness from 2 harness clamps. Remove 2 screws and take off the ADU drive unit. ADU drive unit Fig. 17-19 © 2005 - 2008 TOSHIBA TEC CORPORATION All rights reserved e-STUDIO281c/351c/451c AUTOMATIC DUPLEXING UNIT (ADU) 17 - 15...
- Page 394 P.17-15 "[H] ADU motor (M5) / ADU drive unit") Remove 1 E-ring on the rear side. Then take off 1 pulley. Pulley E-ring Fig. 17-22 e-STUDIO281c/351c/451c © 2005 - 2008 TOSHIBA TEC CORPORATION All rights reserved AUTOMATIC DUPLEXING UNIT (ADU) 17 - 16...
- Page 395 Take off 1 bushing on the front side. Then Middle transport roller take off the middle transport roller. Clip Bushing Fig. 17-25 © 2005 - 2008 TOSHIBA TEC CORPORATION All rights reserved e-STUDIO281c/351c/451c AUTOMATIC DUPLEXING UNIT (ADU) 17 - 17...
- Page 396 P.17-14 "[E] ADU cover") ADU entrance sensor Disconnect 1 connector. Release the latches and take off the ADU entrance sensor. Fig. 17-28 e-STUDIO281c/351c/451c © 2005 - 2008 TOSHIBA TEC CORPORATION All rights reserved AUTOMATIC DUPLEXING UNIT (ADU) 17 - 18...
- Page 397 P.17-14 "[E] ADU cover") Disconnect 1 connector. Release the latches and take off the ADU exit sensor. ADU exit sensor Fig. 17-29 © 2005 - 2008 TOSHIBA TEC CORPORATION All rights reserved e-STUDIO281c/351c/451c AUTOMATIC DUPLEXING UNIT (ADU) 17 - 19...
- Page 398 © 2005 - 2008 TOSHIBA TEC CORPORATION All rights reserved AUTOMATIC DUPLEXING UNIT (ADU) 17 - 20...
-
Page 399: Power Supply Unit
Two kinds of voltage (+5.1VD and +24VD) are output only when the main switch of the equipment is turned ON and two covers (front cover and jam access cover) are closed. © 2005 - 2008 TOSHIBA TEC CORPORATION All rights reserved e-STUDIO281c/351c/451c POWER SUPPLY UNIT... -
Page 400: Operation Of Dc Output Circuits
If the protection circuit is activated (except the case the fuse is blown out), remove the causes such as short-circuit. Turn ON the power again 1 minute later to clear the overcurrent protection. e-STUDIO281c/351c/451c © 2005 - 2008 TOSHIBA TEC CORPORATION All rights reserved POWER SUPPLY UNIT 18 - 2... -
Page 401: Output Channel
Output to the SYS board +12VB: CN466 Pin 16 Output to the LGC board +12VB: CN471 Pin 1 Output to the FAX unit © 2005 - 2008 TOSHIBA TEC CORPORATION All rights reserved e-STUDIO281c/351c/451c POWER SUPPLY UNIT 18 - 3... - Page 402 Bridge unit (via LGC board) CN466 LGC board +5.1VD CN467 SLG board, RADF +24VD3, +24VD4 CN468 Finisher +24VD5 CN469 PFP/LCF +24VD1 CN470 Power supply cooling fan +24VD1 e-STUDIO281c/351c/451c © 2005 - 2008 TOSHIBA TEC CORPORATION All rights reserved POWER SUPPLY UNIT 18 - 4...
-
Page 403: Fuse
+24VD3 RADF +24VD4 Exposure lamp (lamp inverter) F5:8A (Semi time-lag) CCD drive circuit (CCD board) Scanner unit cooling fan Scan motor +24VD5 Finisher © 2005 - 2008 TOSHIBA TEC CORPORATION All rights reserved e-STUDIO281c/351c/451c POWER SUPPLY UNIT 18 - 5... -
Page 404: Configuration Of Power Supply Unit
18.5 Configuration of Power Supply Unit Regulator Regulator Fig. 18-1 e-STUDIO281c/351c/451c © 2005 - 2008 TOSHIBA TEC CORPORATION All rights reserved POWER SUPPLY UNIT 18 - 6... -
Page 405: Sequence Of Power Supply
+4.95V ( R.V. +5.1V ) +11.4V ( R.V. +12V ) +24VD1 to +24VD5 ( Linked with main switch ) +21.6V ( R.V. +24V ) Fig. 18-2 © 2005 - 2008 TOSHIBA TEC CORPORATION All rights reserved e-STUDIO281c/351c/451c POWER SUPPLY UNIT 18 - 7... -
Page 406: Ac Wire Harness
18.7 AC Wire Harness Fig. 18-3 e-STUDIO281c/351c/451c © 2005 - 2008 TOSHIBA TEC CORPORATION All rights reserved POWER SUPPLY UNIT 18 - 8... -
Page 407: Pc Boards
19. PC BOARDS 1) PWA-F-SYS Fig. 19-1 © 2005 - 2008 TOSHIBA TEC CORPORATION All rights reserved e-STUDIO281c/351c/451c PC BOARDS 19 - 1... - Page 408 2) PWA-F-LGC Fig. 19-2 e-STUDIO281c/351c/451c © 2005 - 2008 TOSHIBA TEC CORPORATION All rights reserved PC BOARDS 19 - 2...
- Page 409 3) PWA-F-SLG Fig. 19-3 4) PWA-F-CCD Fig. 19-4 5) PWA-F-DRV Fig. 19-5 © 2005 - 2008 TOSHIBA TEC CORPORATION All rights reserved e-STUDIO281c/351c/451c PC BOARDS 19 - 3...
- Page 410 6) PWA-F-LDR Fig. 19-6 7) PWA-F-SNS Fig. 19-7 8) PWA-F-ADU Fig. 19-8 e-STUDIO281c/351c/451c © 2005 - 2008 TOSHIBA TEC CORPORATION All rights reserved PC BOARDS 19 - 4...
- Page 411 9) PWA-F-DSP Fig. 19-9 10)PWA-F-KEY Fig. 19-10 © 2005 - 2008 TOSHIBA TEC CORPORATION All rights reserved e-STUDIO281c/351c/451c PC BOARDS 19 - 5...
- Page 412 11)PWA-F-FIL Fig. 19-11 e-STUDIO281c/351c/451c © 2005 - 2008 TOSHIBA TEC CORPORATION All rights reserved PC BOARDS 19 - 6...
Need help?
Do you have a question about the e-STUDIO281c and is the answer not in the manual?
Questions and answers