Sign In
Upload
Manuals
Brands
Ricoh Manuals
Printer
Aficio SP 5200DN
Ricoh Aficio SP 5200DN Manuals
Manuals and User Guides for Ricoh Aficio SP 5200DN. We have
4
Ricoh Aficio SP 5200DN manuals available for free PDF download: Operation And Use Manual, Hardware Manual, Training, User Manual
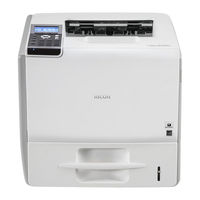
Ricoh Aficio SP 5200DN Operation And Use Manual (824 pages)
SP 5200DN; SP 5210DN printers
Brand:
Ricoh
| Category:
Printer
| Size: 10.25 MB
Table of Contents
Table of Contents
23
Power Source
2
Laws and Regulations
3
Legal Prohibition
3
Safety During Operation
7
Safety Information
7
Positions of Rwarning and Rcaution Labels
14
Safety Labels of this Machine
14
Power Switch Symbols
15
Noise Emission
16
How to Read this Manual
28
Symbols
28
Model-Specific Information
29
Machine Types
29
Positions of WARNING and CAUTION Labels
31
Power Switch Symbols
32
Manuals for this Printer
33
List of Options
35
Operating Instructions
36
Reading the HTML Manuals on the CD-Roms
36
Reading the HTML Manuals that You Install on the Computer
36
1 Guide to the Printer
39
Exterior: Front View
39
Exterior: Rear View
41
Interior
43
Control Panel
45
Power Indicator
46
Number Keys
46
Display Panel
47
Entering Characters
48
How to Enter Characters
49
2 Setting up the Printer
53
Printer Setup Procedure
53
Place to Install
54
Unpacking
58
Turning the Printer's Power on and off
61
Turning on the Power
61
Turning off the Power
63
Selecting the Display Language
65
Test Printing
66
3 Installing Options
67
Available Options
67
Order of Option Installation
67
Where to Install Options
67
Caution When Re-Installing the Controller Board
69
Attaching the Paper Feed Unit
70
Installing the Memory Expansion Units
74
Installing the Hard Disk
74
Installing the SDRAM Module
77
Installing the Interface Units
81
Installing the Gigabit Ethernet Board
81
Installing the Wireless LAN Interface Board
83
Installing the IEEE 1284 Interface Board
85
Installing the SD Memory Card Options
88
4 Connecting the Printer
91
Ethernet Cable Connection
91
Reading the LED Lamps
93
USB Cable Connection
94
Parallel Cable Connection
96
5 Configuration
97
Ethernet Configuration
97
Specifying an IP Address (no DHCP)
98
Receiving an IP Address Automatically (DHCP)
100
Configuring Network Settings When Using Netware
102
Setting the Ethernet Speed
103
Wireless LAN Configuration
106
Setting the SSID
108
Confirming Wireless Network Connectivity
109
Cautions When Using a Wireless LAN
109
Setting Security Method of Wireless LAN
111
Setting a WEP Key
111
Setting WPA
112
Configuring IEEE 802.1X
116
Installing a Site Certificate
116
Installing Device Certificate
116
Setting Items of IEEE 802.1X for Ethernet
117
Setting Items of IEEE 802.1X for Wireless LAN
119
6 Loading Paper
123
Supported Paper for each Tray
123
Symbols
123
Standard Paper Feed Tray
123
Optional Paper Feed Tray
124
Bypass Tray
126
Supported Paper Types
127
Plain Paper
127
Middle Thick
128
Thick Paper
128
Thin Paper
128
Letterhead
129
Label Paper
130
Special Paper
130
Preprinted Paper
131
Color Paper
131
Recycled Paper
131
OHP Transparencies
132
Envelopes
132
Storing Paper
135
Non-Recommended Paper Types
136
Print Area
137
Loading Paper in Trays
139
Loading Paper into a Standard or Optional Paper Feed Tray
139
Loading Paper Onto Bypass Tray
148
Loading Envelopes
155
Loading Envelopes Onto Bypass Tray
155
Loading Envelopes into a Standard or Optional Paper Feed Tray
160
Printing on Fixed-Orientation Paper
167
Registering Unique Names to Paper Types
169
Registering Names to Paper Types
169
Setting User Paper Types to Trays
169
Printing Using Registered Paper Types
170
7 Maintaining the Printer
171
Replacing the Print Cartridge
171
Print Cartridge
172
Replacing the Maintenance Kit
176
Cautions When Cleaning
177
Cleaning the Friction Pad and the Paper Feed Roller
178
Cleaning the Registration Roller
181
8 Adjusting the Printer
185
Adjusting the Image Density
185
Adjusting Printing Position
187
Adjusting the Paper Type
190
9 Troubleshooting
193
Error and Status Messages Appear on the Control Panel
193
Status Messages (in Alphabetical Order)
193
Alert Messages (in Alphabetical Order)
194
Panel Tones
199
Printer Does Not Print
200
Checking the Port Connection
201
Other Printing Problems
203
When You Cannot Print Properly
203
Paper Misfeeds Occur Frequently
205
The Printed Image Is Different from the Image on the Computer
207
When Printer Is Not Functioning Properly
208
Additional Troubleshooting
210
10 Removing Misfed Paper
213
When Paper Is Jammed
213
Paper Misfeed Message (A)
215
Paper Misfeed Message (B)(C)
219
Paper Misfeed Message (Y1)(Y2)(Y3)(Y4)
224
Paper Misfeed Message (Z1)(Z2)
227
11 Appendix
231
Moving and Transporting the Printer
231
Moving the Printer in a Short Distance
231
Consumables
233
Maintenance Kit
234
Specifications
235
Options
238
Trademarks
242
Table of Contents
246
Table of Contents
251
Installing the Printer Drivers
253
How to Read this Manual
255
Symbols
255
Quick Install
257
1 About Quick Install
257
Confirming the Connection Method
259
Using this Printer as the Windows Printing Port
259
Using as the Network Printer
260
2 Network Connection
259
Installing the Printer Driver for the Selected Port
262
Using the Standard TCP/IP Port
262
Using the IPP Port
264
Using the LPR Port
266
Using the WSD Port
268
Using the Smartdevicemonitor for Client Port
271
Using as the Windows Network Printer
278
Installing the PCL Printer Driver
278
Installing the Postscript 3 Printer Driver
279
Using as the Netware Print Server/Remote Printer
281
When Using the Postscript 3 Printer Driver
282
Form Feed
283
Banner Page
283
Printing after Resetting the Printer
283
Installing the Printer Driver Using USB
285
Windows XP, Windows Server 2003/2003 R2 - USB
285
Windows Vista, Windows Server 2008 - USB
286
Windows 7, Windows Server 2008 R2 - USB
287
Troubleshooting USB
289
3 Local Connection
285
Installing the Printer Driver Using Parallel Cable
290
Installing the PCL Printer Driver
290
Installing the Postscript 3 Printer Driver
291
Installing the Printer
293
Installing the PPD Files
293
Setting up the PPD File
294
Setting up Options for Mac os X
294
Using USB Interface
295
Using Bonjour
296
Changing to Ethertalk
297
4 When Using the Printer under Mac os
293
5 Appendix
299
Installing Windows 64-Bit Compatible Drivers
299
Windows XP, Windows Server 2003/2003 R2
299
Windows Vista, Windows Server 2008
300
Windows 7, Windows Server 2008 R2
300
Messages Displayed When Installing the Printer Driver
301
Windows XP, Windows Server 2003/2003 R2
301
Windows Vista, Windows Server 2008
301
Windows 7
302
Making Option Settings for the Printer
303
Conditions for Bidirectional Communication
303
If Bidirectional Communication Is Disabled
304
Installing Font Manager
305
Using Adobe Pagemaker Version 6.0, 6.5, or 7.0
306
Trademarks
307
Index
309
Table of Contents
315
How to Read this Manual
322
Symbols
322
About IP Address
322
Model-Specific Information
323
Machine Types
323
Manuals for this Printer
325
List of Options
327
Before Using the Printer
329
Drivers and Utilities
329
Using User Authentication
329
Accessing the Extended Features
329
1 Preparing for Printing
329
Software Included on the CD-ROM
331
Viewing the Contents of the CD-ROM
331
Printer Drivers for this Printer
331
Downloading Utility Software
333
Smartdevicemonitor for Admin
333
Desktopbinder
333
Smartdevicemonitor for Client
334
If User Authentication Is Specified
335
User Code Authentication (Using the Printer Driver)
335
Log in (Using the Control Panel)
335
Log out (Using the Control Panel)
336
Log in (Using the Printer Driver)
336
Log in (Using Web Image Monitor)
337
Log out (Using Web Image Monitor)
337
Displaying the Printer Driver Settings Screen
339
Making Printer Default Settings - the Printer Properties
339
Making Printer Default Settings - Printing Preferences
339
Making Printer Settings from an Application
340
Making Printer Settings - One Click Presets
340
2 Printing Documents
339
Frequently Used Print Methods
342
Standard Printing
342
Performing Duplex or Booklet Printing
343
Types of Duplex Printing
346
Combining Multiple Pages into Single Page
347
Advanced Printing
352
Menu Names and Brief Overview of each Function
352
Specifying Printer Driver or Print Command Priority
353
Printing on Cover Sheet
355
Inserting Slip Sheets
356
Printing with Watermarks
358
Collate Function
360
Spool Printing
361
Setting Spool Printing
361
Viewing or Deleting Spooled Jobs Using Web Image Monitor
362
Printing a PDF File Directly
363
Using Desktopbinder
363
Expanding Desktopbinder Features
363
Function Palette
364
PDF Direct Printing Using Function Palette
364
PDF Direct Print Properties
365
Using Commands to Print
366
Specifying the Classification Code for a Print Job
368
Using the Virtual Printer
370
Adding a Virtual Printer
370
Changing a Virtual Printer Configuration
371
Confirming a Virtual Printer Configuration
371
Deleting a Virtual Printer
372
Printing Using a Virtual Printer
372
If Errors Occur with the Specified Paper Size and Type
374
Changing the Paper Tray Settings
374
Printing from a Selected Tray
374
Using the Print Job Function
377
Print Job Screen
377
3 Printing Stored Documents
377
Printing from the Print Job Screen
380
Sample Print
380
Locked Print
383
Hold Print
386
Stored Print
389
Printing from the User ID Screen
393
Printing the Selected Print Job
393
Printing All Print Jobs
394
Canceling a Print Job
395
If Printing Has Not yet Started
395
If Printing Has Already Started
395
Menu Chart
397
4 Making Printer Settings Using the Control Panel
397
Applying the Machine Settings to Other Printers
403
About the Machine Settings Export Function
403
Exporting the Machine Settings to a SD Card
403
Importing the Machine Settings Stored on the SD Card into Other Printers
404
Memory Erase Status Menu
405
Viewing the Status of Remaining Data in Memory
405
Paper Input Menu
406
Paper Input Menu Parameters
406
Changing the Paper Input Menu
408
Tray Priority
408
Maintenance Menu
410
Maintenance Menu Parameters
410
Changing the Maintenance Menu
415
List/Test Print Menu
417
List/Test Print Menu Parameters
417
Test Printing
418
System Menu
421
System Menu Parameters
421
Changing the System Menu
424
Print Settings Menu
425
Print Settings Menu Parameters
425
Changing the Print Settings Menu
435
Security Options Menu
437
Security Options Menu Parameters
437
Changing the Security Options Menu
440
Host Interface Menu
442
Host Interface Menu Parameters
442
Changing the Host Interface Menu
448
Language Menu
449
Language Menu Parameters
449
Changing the Language Menu
449
Options Menu
450
Options Menu Parameters
450
Checking the Error Log
450
Using Web Image Monitor
453
Introduction to Web Image Monitor
453
Displaying Top Page
454
When User Authentication Is Set
455
About Menu and Mode
456
Access in the Administrator Mode
457
Displaying Web Image Monitor Help
457
Downloading Help
458
5 Monitoring and Configuring the Printer
453
Registering Classification Codes
459
Configuring Classification Codes
460
Address Book Backup and Restore
461
Backing up Address Book Data
461
Restoring Address Book Data
461
Using Smartdevicemonitor for Admin
462
When Using IPP with Smartdevicemonitor for Client
463
Printer Status Notification by E-Mail
464
Setting the Account for E-Mail Notification
465
Mail Authentication
466
Auto E-Mail Notification
467
On-Demand E-Mail Notification
468
Format of On-Demand E-Mail Messages
469
Preparing Printer Server
471
6 Using a Printer Server
471
Using Netware
472
Setting up as a Print Server (Netware 3.X)
472
Setting up as a Print Server (Netware 4.X, 5 / 5.1, 6 / 6.5)
473
Using Pure IP in the Netware 5 / 5.1 or 6 / 6.5 Environment
474
Setting up as a Remote Printer (Netware 3.X)
476
Setting up as a Remote Printer (Netware 4.X, 5 / 5.1, 6 / 6.5)
477
Using Postscript 3
481
Job Type
481
Paper Type
487
Fit to Paper
487
Print Mode
487
Gradation
488
Image Smoothing
488
Dithering
489
Watermark
489
Watermark Text
489
Watermark Font
490
Watermark Size
490
Watermark Angle
490
Watermark Style
490
7 Mac os X Configuration
481
8 Appendix
491
When Using Windows Terminal Service/Citrix Presentation Server/Citrix Xenapp
491
Operating Environment
491
Supported Printer Drivers
491
Limitations
491
Using DHCP
493
Using Autonet
493
Configuring the WINS Server
494
Using Web Image Monitor
494
Using Telnet
494
Using the Dynamic DNS Function
495
Updating
495
DNS Servers Targeted for Operation
496
DHCP Servers Targeted for Operation
496
Setting the Dynamic DNS Function
496
Precautions
498
Connecting a Dial-Up Router to a Network
498
When the Wireless LAN Interface Unit Is Installed
498
Copyright Information about Installed Applications
500
Expat
500
Netbsd
500
Freebsd 4.6.2/Netipx
509
Sablotron(Version 0.82)
510
Jpeg Library
510
Sasl
510
Rsa Bsafe
511
Open SSL
511
Open SSH
513
Open LDAP
517
Heimdal
518
IPS TM Print Language Emulations
519
Appletalk
519
Spx/Ipx
519
WPA Supplicant
519
Nana
520
Ilu
520
Racoon
521
Trousers
521
Samba
524
Security Guide
537
Table of Contents
539
How to Read this Manual
544
Symbols
544
IP Address
544
List of Options
544
Manuals for this Printer
546
1 Getting Started
549
Before Using the Security Functions
549
Setting up the Printer
550
Enhanced Security
551
Glossary
552
Security Measures Provided by this Printer
554
Using Authentication and Managing Users
554
Ensuring Information Security
554
Limiting and Controlling Access
555
Enhanced Network Security
555
2 Configuring Administrator Authentication
557
Administrators
557
User Administrator
557
Machine Administrator
558
Network Administrator
558
File Administrator
558
Supervisor
558
About Administrator Authentication
559
Enabling Administrator Authentication
560
Using Web Image Monitor to Configure Administrator Authentication
560
Specifying Administrator Privileges
561
Registering the Administrator
562
Logging in Using Administrator Authentication
563
Logging out Using Administrator Authentication
563
Changing the Administrator
563
3 Configuring User Authentication
565
Users
565
About User Authentication
566
Configuring User Authentication
567
Enabling User Authentication
568
User Code Authentication
569
Specifying User Code Authentication
569
Basic Authentication
571
Specifying Basic Authentication
571
Authentication Information Stored in the Address Book
572
Specifying Login User Name and Login Password
573
Windows Authentication
574
Specifying Windows Authentication
575
LDAP Authentication
581
Specifying LDAP Authentication
582
Integration Server Authentication
585
Specifying Integration Server Authentication
585
Printer Job Authentication
588
User Lockout Function
590
Specifying the User Lockout Function
591
Unlocking a Locked User Account
591
Auto Logout Function
593
Authentication Using an External Device
594
4 Protecting Data from Information Leaks
595
Printing a Confidential Document
595
Specifying a Locked Print File
595
Printing a Locked Print File
596
Deleting Locked Print Files
596
Changing Passwords of Locked Print Files
597
Unlocking Locked Print Files
597
5 Securing Information Stored on the Hard Disk
599
Protecting the Address Book
599
Address Book Access Permission
599
Encrypting Data in the Address Book
600
Encrypting Data on the Hard Disk
601
Enabling the Encryption Settings
601
Printing the Encryption Key
603
Updating the Encryption Key
604
Canceling Data Encryption
605
Deleting Data on the Hard Disk
606
Overwriting Data on the Hard Disk
606
Auto Erase Memory
607
Erase All Memory
609
6 Managing Access to the Printer
611
Preventing Changes to Printer Settings
611
Menu Protect
612
Specifying Menu Protect
612
Disabling Menu Protect
612
Limiting Available Functions
613
Specifying Which Functions Are Available
613
Managing Log Files
614
Using the Control Panel to Specify Log Files Settings
614
Using Remote Communication Gate S to Manage Log Files
615
Using Web Image Monitor to Manage Log Files
615
7 Enhanced Network Security
619
Preventing Unauthorized Access
619
Access Control
619
Enabling and Disabling Protocols
620
Specifying Network Security Level
626
Encrypting Transmitted Passwords
630
Specifying a Driver Encryption Key
630
Specifying an IPP Authentication Password
630
Protection Using Encryption
632
SSL (Secure Sockets Layer) Encryption
632
User Settings for SSL (Secure Sockets Layer)
637
Setting the SSL/TLS Encryption Mode
637
Snmpv3 Encryption
638
Transmission Using Ipsec
640
Encryption and Authentication by Ipsec
640
Encryption Key Auto Exchange Settings and Encryption Key Manual Settings
641
Ipsec Settings
642
Encryption Key Auto Exchange Settings Configuration Flow
651
Encryption Key Manual Settings Configuration Flow
655
Telnet Setting Commands
657
Deactivating Ipsec Using the Control Panel
664
Authentication by Telnet
665
Authfree" Command
665
Authentication by IEEE 802.1X
666
8 Specifying the Extended Security Functions
667
Changing the Extended Security Functions
667
Extended Security Settings
667
Limiting Printer Operation to Customers Only
672
Settings
672
Specifying Service Mode Lock Preparation
672
Canceling Service Mode Lock
673
9 Troubleshooting
675
If Authentication Fails
675
If a Message Is Displayed
675
If the Printer Cannot be Operated
677
10 Appendix
681
Supervisor Operations
681
Logging in as the Supervisor
681
Logging out as the Supervisor
681
Changing the Supervisor
682
Resetting an Administrator's Password
682
User Administrator Settings
683
Control Panel
683
Settings Via Web Image Monitor
683
Machine Administrator Settings
684
Control Panel
684
Settings Via Web Image Monitor
685
Network Administrator Settings
688
Control Panel
688
Settings Via Web Image Monitor
688
File Administrator Settings
691
Control Panel
691
Settings Via Web Image Monitor
691
The Privilege for User Account Settings in the Address Book
693
User Settings-Control Panel Settings
695
Panel Menu
695
User Settings-Web Image Monitor Settings
698
Functions that Require Options
699
Trademarks
700
Index
703
Table of Contents
711
How to Read this Manual
714
Symbols
714
Before Setup
715
Using the Lp/Lpr Commands
715
Using the Rsh/Rcp/Ftp Commands
715
Windows Setup
715
1 Command Configuration
715
Using the Installation Shell Script
717
Assigning the IP Address
717
Executing the Installation Shell Script
718
After Executing the Installation Shell Script
721
Solaris
723
Hp-Ux
724
Printing Method
726
Printing with Lpr, Lp
726
Printing with Rsh, Rcp, Ftp
727
Printer Status
729
Viewing the Print Job Status with Lpq and Lpstat
729
Viewing the Printer Status with Rsh and Ftp
729
Copying Information to a File
730
Specifying the Device Option
731
Configuring the Device Option
731
Printer Language
734
Text Printing
735
Input Tray
735
Paper Size
736
Paper Type
737
Output Tray
739
Copies
740
Collating
740
Duplex Printing
741
Binding
741
Orientation
742
Image Direction
743
Resolution
743
Gradation Quality
744
Billing Code
745
Usercode
745
Symbol Set
746
Using Telnet
749
8021X
750
Access
751
Authfree
752
Autonet
753
Bonjour
754
Devicename
755
Dhcp
756
Dhcp6
757
Diprint
757
Dns
758
Domainname
760
Etherauth
761
Etherconfig
761
Help
761
Hostname
761
Ifconfig
762
Info
763
Ipds
764
Ipsec
764
Ipp
764
Ipv6
765
Logout
765
Lpr
766
Netware
766
Passwd
767
Pathmtu
768
Prnlog
768
Rhpp
769
Route
769
Set
771
Show
774
Slp
774
Smb
774
Snmp
775
Sntp
778
Spoolsw
779
Ssdp
779
Ssh
780
Status
781
Syslog
781
Upnp
781
Web
781
Wiconfig
782
Wins
786
Wsmfp
787
2 Remote Maintenance Using Telnet
749
Getting Printer Information over the Network
789
Current Printer Status
789
Printer Configuration
793
Understanding the Displayed Information
795
Print Job Information
795
Print Log Information
795
Configuring the Network Interface Board
796
Message List
807
System Log Information
807
Index
819
Advertisement
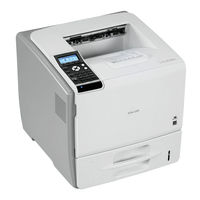
Ricoh Aficio SP 5200DN Hardware Manual (228 pages)
Operating Instructions
Brand:
Ricoh
| Category:
Printer
| Size: 5.4 MB
Table of Contents
Operating Instructions
1
Table of Contents
3
How to Read this Manual
8
Symbols
8
Model-Specific Information
9
Machine Types
9
Positions of WARNING and CAUTION Labels
11
Power Switch Symbols
12
Manuals for this Printer
13
List of Options
15
Operating Instructions
16
Reading the HTML Manuals on the CD-Roms
16
Reading the HTML Manuals that You Install on the Computer
16
1 Guide to the Printer
19
Exterior: Front View
19
Exterior: Rear View
21
Interior
23
Control Panel
25
Power Indicator
26
Alert Indicator
26
Display Panel
27
Entering Characters
28
How to Enter Characters
29
2 Setting up the Printer
33
Printer Setup Procedure
33
Place to Install
34
Unpacking
38
Turning the Printer's Power on and off
41
Turning on the Power
41
Turning off the Power
43
Selecting the Display Language
45
Test Printing
46
3 Installing Options
47
Available Options
47
Order of Option Installation
47
Where to Install Options
47
Caution When Re-Installing the Controller Board
49
Attaching the Paper Feed Unit
50
Installing the Memory Expansion Units
54
Installing the Hard Disk
54
Installing the SDRAM Module
57
Installing the Interface Units
61
Installing the Gigabit Ethernet Board
61
Installing the Wireless LAN Interface Board
63
Installing the IEEE 1284 Interface Board
65
Installing the SD Memory Card Options
68
4 Connecting the Printer
71
Ethernet Cable Connection
71
Reading the LED Lamps
73
USB Cable Connection
74
Parallel Cable Connection
76
5 Configuration
77
Ethernet Configuration
77
Specifying an IP Address (no DHCP)
78
Receiving an IP Address Automatically (DHCP)
80
Configuring Network Settings When Using Netware
82
Setting the Ethernet Speed
83
Wireless LAN Configuration
86
Setting the SSID
88
Confirming Wireless Network Connectivity
89
Cautions When Using a Wireless LAN
89
Setting Security Method of Wireless LAN
91
Setting a WEP Key
91
Setting WPA
92
Configuring IEEE 802.1X
96
Installing a Site Certificate
96
Installing Device Certificate
96
Setting Items of IEEE 802.1X for Ethernet
97
Setting Items of IEEE 802.1X for Wireless LAN
99
6 Loading Paper
103
Supported Paper for each Tray
103
Symbols
103
Standard Paper Feed Tray
103
Optional Paper Feed Tray
104
Bypass Tray
106
Supported Paper Types
107
Plain Paper
107
Middle Thick
108
Thick Paper
108
Thin Paper
108
Letterhead
109
Label Paper
110
Special Paper
110
Preprinted Paper
111
Color Paper
111
Recycled Paper
111
OHP Transparencies
112
Envelopes
112
Storing Paper
115
Non-Recommended Paper Types
116
Print Area
117
Loading Paper in Trays
119
Loading Paper into a Standard or Optional Paper Feed Tray
119
Loading Paper Onto Bypass Tray
128
Loading Envelopes
135
Loading Envelopes Onto Bypass Tray
135
Loading Envelopes into a Standard or Optional Paper Feed Tray
140
Printing on Fixed-Orientation Paper
147
Registering Unique Names to Paper Types
149
Registering Names to Paper Types
149
Setting User Paper Types to Trays
149
Printing Using Registered Paper Types
150
7 Maintaining the Printer
151
Replacing the Print Cartridge
151
Print Cartridge
152
Replacing the Maintenance Kit
156
Cautions When Cleaning
157
Cleaning the Friction Pad and the Paper Feed Roller
158
Cleaning the Registration Roller
161
8 Adjusting the Printer
165
Adjusting the Image Density
165
Adjusting Printing Position
167
Adjusting the Paper Type
170
9 Troubleshooting
173
Error and Status Messages Appear on the Control Panel
173
Status Messages (in Alphabetical Order)
173
Alert Messages (in Alphabetical Order)
174
Panel Tones
179
Printer Does Not Print
180
Checking the Port Connection
181
Other Printing Problems
183
When You Cannot Print Properly
183
Paper Misfeeds Occur Frequently
185
The Printed Image Is Different from the Image on the Computer
187
When Printer Is Not Functioning Properly
188
Additional Troubleshooting
190
10 Removing Misfed Paper
193
When Paper Is Jammed
193
Paper Misfeed Message (A)
195
Paper Misfeed Message (B)(C)
199
Paper Misfeed Message (Y1)(Y2)(Y3)(Y4)
204
Paper Misfeed Message (Z1)(Z2)
207
11 Appendix
211
Moving and Transporting the Printer
211
Moving the Printer in a Short Distance
211
Consumables
213
Print Cartridge
213
Maintenance Kit
214
Specifications
215
Mainframe
215
Options
218
Trademarks
222
Index
225
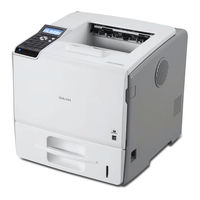
Ricoh Aficio SP 5200DN Training (117 pages)
Brand:
Ricoh
| Category:
Printer
| Size: 3.63 MB
Table of Contents
Product Outline
3
Specifications
9
Reliability Targets
11
Optional Units
13
Optional Paper Trays
15
SD Card Slots
17
Installation
18
Transporting the Machine
21
Maintenance
23
PM Counter Reset
27
Machine Overview
28
Component Layout
29
Paper Path
31
Drive Layout
32
Printing Process
35
Board Structure
36
Replacing the Controller
44
Paper Feed
48
Paper Feed Components
50
Tray Extension
51
Paper Lift
52
Paper Feed Drive
54
Paper Size Detection
55
Paper End Detection
57
Remaining Paper Detection
58
Bypass Tray
59
Laser Exposure
60
Automatic Power Control (APC)
62
Toner Supply and Development
69
Fusing and Paper Exit
75
Fusing Drive
77
Electrical Components
78
Fusing Entrance Guide Adjustment
79
New Fusing Unit Detection
81
Fusing Temperature Control
82
Overheat Protection
83
Energy Saver Mode
84
Paper Exit
85
Duplex Drive
88
Inverter Mechanism
89
Electrical Component Layout
94
Environmental Conservation
96
Quick Start-Up
104
Advertisement
Ricoh Aficio SP 5200DN User Manual (68 pages)
Brand:
Ricoh
| Category:
Printer
| Size: 0.77 MB
Table of Contents
Power Source
4
Laws and Regulations
5
Legal Prohibition
5
Remarque Concernant Les Utilisateurs Au Canada
7
Safety Information
8
Safety During Operation
8
Safety Labels of this Machine
15
Power Switch Symbols
16
Informations Générales
19
Lois Et Réglementations
21
Remarque Concernant Les Utilisateurs Au Canada
23
Consignes de Sécurité
24
Étiquettes de Sécurité de Cet Appareil
31
Alimentación Eléctrica
36
Remarque Concernant Les Utilisateurs Au Canada
39
Información de Seguridad
40
Precauciones de Seguridad
40
Etiquetas de Seguridad de Esta Máquina
47
Fonte de Alimentação
52
Informações de Segurança
56
Advertisement
Related Products
Ricoh Aficio SP 5210DN
Ricoh SP 5300DN
Ricoh SP 5310DN
Ricoh Aficio SP 5100N
Ricoh Aficio SP 3510DN
Ricoh Aficio SP 4310N
Ricoh SP204SFN
Ricoh Aficio SP 4410SF
Ricoh SP 211SU
Ricoh SP 8200DN
Ricoh Categories
All in One Printer
Printer
Digital Camera
Copier
Printer Accessories
More Ricoh Manuals
Login
Sign In
OR
Sign in with Facebook
Sign in with Google
Upload manual
Upload from disk
Upload from URL