Mitsubishi M800S series Manuals
Manuals and User Guides for Mitsubishi M800S series. We have 2 Mitsubishi M800S series manuals available for free PDF download: Connection And Set Up Manual
Mitsubishi M800S series Connection And Set Up Manual (648 pages)
Brand: Mitsubishi
|
Category: Control Unit
|
Size: 35.75 MB
Table of Contents
-
Replacements61
-
System Type63
-
Precautions100
-
Precautions107
-
Precautions109
-
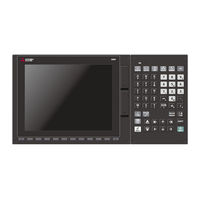
Keyboard Unit110
-
List of Units121
-
Remote I/O Unit148
-
List of Units148
-
Main Panel a , B211
-
Handy Terminal222
-
Thermistor226
-
Installation230
-
Display Unit238
-
Keyboard Unit241
-
Remote I/O Unit248
-
Handle Numbers286
-
Handle Numbers307
-
Cable378
-
G071 Cable381
-
G123 Cable381
-
G430 Cable382
-
G460 Cable383
-
J010 Cable384
-
J012 Cable384
-
J026/J027 Cable387
-
J030/J031 Cable388
-
J070/J071 Cable389
-
J100 Cable390
-
J120 Cable391
-
J121 Cable391
-
J210 Cable392
-
J221 Cable393
-
J224 Cable394
-
J225 Cable395
-
J303 Cable395
-
J350 Cable396
-
J351 Cable396
-
J460 Cable397
-
J461 Cable397
-
CNP2E-1 Cable400
-
CNV2E-D Cable403
-
CNV2E-HP Cable403
-
DG30 Cable404
-
G380 Cable404
-
J395 Cable405
-
J396 Cable406
-
SH21 Cable409
-
Setup Outline412
-
Using JOG Feed488
-
NC Analyzer2490
-
Dog-Type506
-
Outline518
-
Precautions528
-
Outline531
-
Setting Method535
-
Outline538
-
Setting Method539
-
Outline545
-
In MDI Operation558
-
Function567
-
Parameter572
-
Precautions575
-
All Backup596
-
All Restoration598
-
Caution603
-
Introduction615
-
EMC Directives615
-
EMC Measures616
-
Panel Structure616
-
Ferrite Core621
-
Surge Absorber622
-
Target Products627
-
Handling by User628
-
Reference628
-
Important Notes632
Advertisement
Mitsubishi M800S series Connection And Set Up Manual (542 pages)
Brand: Mitsubishi
|
Category: Control Unit
|
Size: 31.42 MB
Table of Contents
-
-
Replacements50
-
-
-
Remote I/O Unit115
-
Handy Terminal177
-
Thermistor181
-
5 Installation
186 -
-
-
Handle Numbers237
-
-
-
-
Handle Numbers255
-
-
-
15 Cable
310-
-
G071 Cable313
-
G123 Cable314
-
G430 Cable315
-
G460 Cable316
-
J010 Cable317
-
J026/J027 Cable320
-
J030/J031 Cable321
-
J070/J071 Cable322
-
J100 Cable323
-
J120 Cable324
-
J121 Cable325
-
J210 Cable326
-
J221 Cable327
-
J224 Cable328
-
J303 Cable329
-
J350 Cable330
-
J351 Cable331
-
J460 Cable332
-
J461 Cable333
-
-
CNP2E-1 Cable336
-
CNV2E-D Cable339
-
CNV2E-HP Cable340
-
DG30 Cable341
-
G380 Cable342
-
J395 Cable343
-
J396 Cable344
-
SH21 Cable347
-
16 Setup Outline
350 -
-
-
-
-
Dog-Type430
-
-
-
-
All Backup494
-
All Restoration496
-
-
-
Introduction513
-
EMC Directives513
-
EMC Measures514
-
Panel Structure514
-
-
-
-
Target Products525
-
Handling by User526
-
Reference526
-
-
-
-
Revision History534
-