Sign In
Upload
Manuals
Brands
Konica Minolta Manuals
All in One Printer
BIZHUB PRO C500
Konica Minolta BIZHUB PRO C500 Manuals
Manuals and User Guides for Konica Minolta BIZHUB PRO C500. We have
3
Konica Minolta BIZHUB PRO C500 manuals available for free PDF download: User Manual, Service Manual
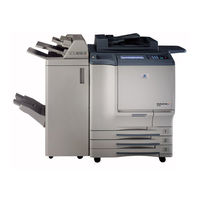
Konica Minolta BIZHUB PRO C500 User Manual (466 pages)
Brand:
Konica Minolta
| Category:
All in One Printer
| Size: 19 MB
Table of Contents
Table of Contents
3
Contents
4
Features of the Bizhub PRO C500
11
Legal Restrictions on Copying
16
Safety Information
20
Section 1: Safety Information
26
Regulation Notices
26
Caution Labels and Indicators
28
Installation Space
31
Section 2: Machine Information
33
Machine Configuration
34
External Machine Items
34
Internal Machine Items
36
Standard/Optional Equipment
37
Control Panel Layout
38
Basic Screen
40
FS-513/FS-606 Finisher (with PK-507/PK-508 Punching Kit)
42
Cover Sheet Feeder
44
Large Capacity Tray
45
Trimmer Unit
46
Turning on the Power Switch
48
To Turn on the Power
48
To Turn off the Power
50
Reducing the Power in Standby Mode (Auto Low Power)
51
Shutting off Automatically (Auto Shut-Off)
52
Shutting off / Reducing the Power Manually
53
Entering an EKC Password (EKC)
54
Loading Paper
55
Loading Paper in Tray 1 ,2, and 3
56
Loading Paper in Multi-Sheet Bypass Tray
59
Loading Paper in LCT (LT-211)
60
Loading Tabbed Sheets in Tray 1, 2, or 3
63
Loading Tabbed Sheets in LCT (LT-211)
64
Loading Tabbed Sheets in Multi-Sheet Bypass Tray
65
Section 3: Copying Operations
68
Selecting Colour Mode
68
Positioning Originals
70
Positioning Originals in RADF
70
Positioning Original on Platen Glass
74
Setting Print Quantity
76
To Set Print Quantity
76
To Change Print Quantity
77
Setting Job During Warm-Up
78
To Stop Scanning/Printing
81
Selecting Paper Size
82
To Select Paper Size Automatically (APS)
82
To Specify Desired Paper Size (AMS)
84
Copying Using Special Paper (Multi-Sheet Bypass Tray)
86
Selecting Magnification Ratio (Lens Mode)
91
To Copy in 1.000 Magnification Mode
91
To Change Magnification Ratio (Fixed Magnification / Zoom Mode)
92
Making Double-Sided Copies (1)2, 2)2)
94
Using RADF
94
Using Platen Glass
98
Making Single-Sided Copies from Double-Sided Originals (2)1)
102
To Scan Originals into Memory (Store Mode)
104
To Set Next Copying Job (Reserve)
106
To Check/Control Jobs in Progress (Job Status Screen)
109
Output Mode for Machine Without Finisher
112
Output Mode for Machine with Finisher
116
Selecting Binding Mode
125
Section 4: Helpful Functions
128
Making Sample Copy (Proof Copy)
128
Checking Feature Selections / Proof Copying (Check Mode)
130
Interrupt Copying
134
Storing Job Conditions (Job Memory: Job Store)
137
Recalling Stored Job Settings (Job Memory: Job Recall)
140
Recalling Previous Job Settings
141
Displaying Screen for Operation Guide (Help Mode)
142
To Display Help Screen from Basic Screen
142
To Display Help Screen from Other Screens
145
When "Call for Service" Message Is Displayed
148
Limited Use of the Copier in Trouble
150
Section 5: Troubleshooting
150
Clearing Mishandled Paper
151
When "JAM" Appears on Folder Key (or Arrow Key Flashes)
153
When "ADD PAPER" Appears on Folder Key (or Arrow Key Flashes)
155
When "Memory Full" Message Is Displayed (Memory Overflow)
157
Memory Overflow in Current Job
158
Memory Overflow in Reserve Job
159
When Power OFF/ON Screen Is Displayed
160
Troubleshooting Tips
161
Section 6: Specifications
165
Main Body Specifications
166
Main Body
166
Option Specifications
168
Radf (Df-319)
168
FS-513/FS-606 In-Bin Stapler Finisher
168
Cover Sheet Feeder
169
Trimmer Unit
169
TU-109 Trimmer Unit
169
PK-507/PK-508 Punching Kit
170
Large Capacity Tray
170
Memory Unit
170
Others
170
Advanced
171
Section 7: Colour Image Adjustment
174
About Colours
174
RGB and CMYK Models
174
HSB Model
176
Colour Copy Quality
177
Modifying Colours
177
Reproducing Images
184
What Is Image Detection
185
Applying Filters
186
Improving Colour Copy Quality
188
Selecting Density Level and Whitening the Background
189
To Adjust Copy Density / Background Whiteness
189
Setting Density Shift
192
Changing Colours Using RGB and HSB Values (Colour Adjustment)
194
Modifying RGB Value
194
Changing Colours Using RGB and HSB Values (Colour Adjustment)7-24
194
Modifying HSB Value
196
Changing Colours Using CMYK Value (Colour Balance Adjustment)
199
Selecting Line Screen, Dot Screen, or High Compression (Screen Setting)
201
Adjusting Sharpness and Contrast / Selecting Gloss Mode
204
Making Fine Adjustment in Image Detection (Image Judge)
207
Specifying Original Type (Original Image/Type in Special Original)
209
Advanced Information
211
Section 8: Advanced Information
212
Programmed Shut-Off (Weekly Timer)
212
Rotation
214
Vertical/Horizontal Zoom Mode
216
Making Folded Booklet (Fold / Stitch & Fold)
219
Punching File Holes in Copies (Punch)
222
Output Three-Folded Copies (Three-Fold)
225
Making Trimmed Booklets (Trimming)
227
Cover Sheet Feeding
230
Position Originals
232
Off-Line Finishing
233
Tray Adjustment
236
To Set the Adjustment Value
236
To Recall/Delete the Adjustment Value
238
Section 9: Special Original
242
Selecting Binding Direction
242
Special Original
242
Specifying Original Direction
244
Copying Non-Standard Size Originals (Original Form)
246
Copying Mixed Size Originals (Mixed Original)
249
Copying Z-Folded Originals (Z-Folded Original)
252
Scanning Thin/Thick Originals in RADF (Original Thickness)
254
Section 10: Applications
258
To Display Application Selection Screen
258
Inserting Sheets and Covers (Sheet/Cover Insertion)
260
Locating Title Pages on the Right Side (Chapter)
264
Lay out Several Pages Onto One Sheet (Combination)
267
Making a Multiple Page Signature Booklet (Booklet)
271
Inserting Images into Printed Sets (Image Insert)
275
Dividing an Image into Right and Left Pages (Dual Page)
279
Programming Different Settings for an Output Job (Program Job)
283
Dividing an Image for Enlarged Copy (Multi
286
Erasing Outside of the Original (Non-Image Area Erase)
290
Reversing Colour in Image (Reverse Image)
292
Repeating Selected Image Area (Repeat: Vert./Horiz. Mode)
294
Repeating (Repeat: Auto/Repeat Mode)
297
Eliminating Copy Marks (Frame/Fold Erasure)
300
Copying Image in the Centre of Copy Paper (AUTO Layout)
303
Adjusting Position of Copy Image (Image Shift)
305
Reducing Images to Create Binding Margin (Reduce&Shift)
308
Printing Stamp, Page, Date/Time Onto Copies (Stamp)
311
Printing Watermark Onto Copies (Stamp)
318
Overlaying an Image Onto each Page Copied in the Job (Overlay)
323
Storing Overlay Image in HDD (Overlay Memory)
326
Section 11: Network Function
332
To Use Web Utilities
332
To Display Information on Machine
334
To Display Current Machine Status (Job Status)
336
Setting E-Mail Transmission Function
338
Setting E.K.C. Function
340
Setting Scan Transmission Function
351
Transmitting/Editing Machine Setting File
355
Section 12: Paper and Original Information
361
Paper Information
362
Paper Weight
363
Tray / Exit Tray Capacity
365
Paper Size
367
Special Paper in Multi-Sheet Bypass Tray
369
To Store Copy Paper
369
Original Information
370
Platen Glass Originals
370
RADF Originals
371
Section 13: Maintenance & Supplies
374
Adding Toner
374
Inserting a New Staple Cartridge into FS-513/FS-606 Finisher
379
Empty Waste Basket of PK-507/PK-508 Punching Kit
383
Empty Waste Basket of TU-109 Trimmer Unit
385
Exchanging Toner Recovery Box
387
Cleaning Image Scanning Section
389
Cleaning the Document Glass
390
Cleaning the RADF Platen Guide Cover
391
Cleaning the Platen Cover
392
Checking Copy Count
393
To Display the Counter List Screen
394
To Print the Counter List
395
Periodic Maintenance
396
To Check the PM Counter
397
Key Operator Mode
399
Section 14: Key Operator Mode
400
An Outline of the Key Operator Mode
400
How to Access the Key Operator Mode
400
System Initial Setting
403
Date & Time Setting
403
Language Select Setting
405
IP Address Setting
406
E-Mail Transmission Setting
407
Copier Initial Setting
409
User Setting Mode
410
User Lens Mode Ratio Setting
410
EKC (Electronic Key Counter) Function Setting
411
How to Access the EKC Setting Mode
412
Data Edit
413
E.K.C. Data Edit
413
All Count Reset
416
Function Setting
417
E.K.C. Function Setting
417
Scanner Function Setting
418
Lock/Delete Job Memory
419
Paper Type / Special Size Set
420
Paper Type Set (Bypass)
422
Panel Contrast / Key Sound Adjustment
423
Key Operator Data Setting
424
Weekly Timer
425
How to Access the Weekly Timer Setting Mode
426
Weekly Timer On/Off Setting
427
Timer Setting
428
Timer Action On/Off Setting
430
Lunch Hour off Setting
431
Timer Interrupt Password Setting
432
Control Panel Adjustment
433
Tray Auto Select Setting
434
Power Save Setting
435
Memory Switch Setting
436
Machine Management List Print
443
Call Remote Centre
444
Finisher Adjustment
445
Front & Back Density Setting
447
Scan Transmission Setting
448
Non-Image Area Erase Setting
450
AE Adjustment
451
Execute Adjustment Operation
452
Magnification Adjustment
453
Timing Adjustment
454
Centring Adjustment
456
Printer Gamma Sensor Adjustment
457
Index
459
Advertisement
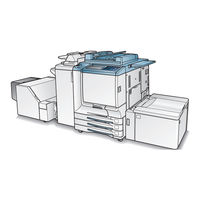
Konica Minolta BIZHUB PRO C500 User Manual (436 pages)
Brand:
Konica Minolta
| Category:
Printer
| Size: 13 MB
Table of Contents
Table of Contents
3
Legal Restrictions on Copying
16
Safety Information
20
Section 1: Safety Information
21
Regulation Notices
26
Ozone Release
27
Electromagnetic Interference
27
For European Users
27
Caution Labels and Indicators
28
Installation Space
31
Section 2: Machine Information
33
Machine Configuration
34
External Machine Items
34
Internal Machine Items
36
Standard/Optional Equipment
37
Control Panel Layout
38
Basic Screen
40
FS-513/FS-606 Finisher (with PK-507/PK-508 Punching Kit)
42
Cover Sheet Feeder
44
Large Capacity Tray
45
Trimmer Unit
46
Turning on the Power Switch
48
To Turn on the Power
48
To Turn off the Power
50
Reducing the Power in Standby Mode (Auto Low Power)
51
Shutting off Automatically (Auto Shut-Off)
51
Shutting off / Reducing the Power Manually
52
Entering an EKC Password (EKC)
53
Loading Paper
54
Loading Paper in Tray 1 ,2, and 3
55
Loading Paper in Multi-Sheet Bypass Tray
58
Loading Paper in LCT (LT-211)
59
Loading Tabbed Sheets in Tray 1, 2, or 3
62
Loading Tabbed Sheets in LCT (LT-211)
63
Loading Tabbed Sheets in Multi-Sheet Bypass Tray
64
Section 3: Copying Operations
66
Selecting Colour Mode
66
Positioning Originals
68
Positioning Originals in RADF
68
Positioning Original on Platen Glass
72
Setting Print Quantity
74
To Set Print Quantity
74
To Change Print Quantity
74
Setting Job During Warm-Up
75
To Stop Scanning/Printing
77
Selecting Paper Size
78
To Select Paper Size Automatically (APS)
78
To Specify Desired Paper Size (AMS)
80
Copying Using Special Paper (Multi-Sheet Bypass Tray)
82
Selecting Magnification Ratio (Lens Mode)
86
To Copy in 1.000 Magnification Mode
86
To Change Magnification Ratio (Fixed Magnification / Zoom Mode)
87
Making Double-Sided Copies (1A2, 2A2)
89
Using RADF
89
Using Platen Glass
92
Making Single-Sided Copies from Double-Sided Originals (2A1)
95
To Scan Originals into Memory (Store Mode)
97
To Set Next Copying Job (Reserve)
99
To Check/Control Jobs in Progress (Job Status Screen)
102
Output Mode for Machine Without Finisher
105
Output Mode for Machine with Finisher
109
Selecting Binding Mode
116
Section 4: Helpful Functions
118
Making Sample Copy (Proof Copy)
118
Checking Feature Selections / Proof Copying (Check Mode)
120
Interrupt Copying
124
Storing Job Conditions (Job Memory: Job Store)
127
Recalling Stored Job Settings (Job Memory: Job Recall)
130
Recalling Previous Job Settings
131
Displaying Screen for Operation Guide (Help Mode)
132
To Display Help Screen from Basic Screen
132
To Display Help Screen from Other Screens
134
Troubleshooting
135
When "Call for Service" Message Is Displayed
136
Limited Use of the Copier in Trouble
137
Clearing Mishandled Paper
138
When "JAM" Appears on Folder Key (or Arrow Key Flashes)
140
When "ADD PAPER" Appears on Folder Key (or Arrow Key Flashes)
142
When "Memory Full" Message Is Displayed (Memory Overflow)
143
Memory Overflow in Current Job
143
Memory Overflow in Reserve Job
144
When Power OFF/ON Screen Is Displayed
145
Troubleshooting Tips
146
Section 6: Machine Specifications
149
Main Body Specifications
150
Main Body
150
Option Specifications
152
Radf (Df-319)
152
FS-513/FS-606 In-Bin Stapler Finisher
152
Cover Sheet Feeder
153
Trimmer Unit
153
PK-507/PK-508 Punching Kit
154
Large Capacity Tray
154
Memory Unit
154
Others
154
Section 7: Colour Image Adjustment
158
About Colours
158
RGB and CMYK Models
158
HSB Model
159
Colour Copy Quality
160
Modifying Colours
160
Reproducing Images
167
What Is Image Detection
168
Applying Filters
169
Improving Colour Copy Quality
170
Selecting Density Level and Whitening the Background(Copy Density)
171
To Adjust Copy Density / Background Whiteness
171
Setting Density Shift
173
Changing Colours Using RGB and HSB Values (Colour Adjustment)
175
Modifying RGB Value
175
Modifying HSB Value
177
Changing Colours Using CMYK Value (Colour Balance Adjustment)
180
Selecting Line Screen, Dot Screen, or High Compression (Screen Setting)
182
Adjusting Sharpness and Contrast / Selecting Gloss Mode
185
Making Fine Adjustment in Image Detection (Image Judge)
188
Specifying Original Type (Original Image/Type in Special Original)
190
Section 8: Advanced Information
194
Programmed Shut-Off (Weekly Timer)
194
Rotation
196
Vertical/Horizontal Zoom Mode
197
Making Folded Booklet (Fold / Stitch & Fold)
200
Punching File Holes in Copies (Punch)
203
Output Three-Folded Copies (Three-Fold)
206
Making Trimmed Booklets (Trimming)
208
Cover Sheet Feeding
211
Off-Line Finishing
214
Tray Adjustment
217
To Set the Adjustment Value
217
To Recall/Delete the Adjustment Value
218
Special Original
221
Section 9: Special Original
222
Selecting Binding Direction
222
Specifying Original Direction
224
Copying Non-Standard Size Originals (Original Form)
226
Copying Mixed Size Originals (Mixed Original)
228
Copying Z-Folded Originals (Z-Folded Original)
230
Scanning Thin/Thick Originals in RADF (Original Thickness)
232
Section 10: Applications
236
To Display Application Selection Screen
236
Inserting Sheets and Covers (Sheet/Cover Insertion)
237
Locating Title Pages on the Right Side (Chapter)
241
Lay out Several Pages Onto One Sheet (Combination)
244
Making a Multiple Page Signature Booklet (Booklet)
247
Inserting Images into Printed Sets (Image Insert)
251
Dividing an Image into Right and Left Pages (Dual Page)
254
Programming Different Settings for an Output Job (Program Job)
258
Dividing an Image for Enlarged Copy (Multi
261
Erasing Outside of the Original (Non-Image Area Erase)
264
Reversing Colour in Image (Reverse Image)
266
Repeating Selected Image Area (Repeat: Vert./Horiz. Mode)
268
Repeating Automatically or Selecting Repeatingtimes (Repeat: AUTO/ Repeat Mode)
271
Eliminating Copy Marks Along Borders (Frame/Fold Erasure)
274
Copying Image in the Centre of Copy Paper (AUTO Layout)
277
Adjusting Position of Copy Image (Image Shift)
279
Reducing Images to Create Binding Margin (Reduce&Shift)
282
Printing Stamp, Page, Date/Time Onto Copies (Stamp)
285
Printing Watermark Onto Copies (Stamp)
292
Overlaying an Image Onto each Page Copied in the Job (Overlay)
296
Storing an Overlay Image in HDD / Overlaying Image Stored in HDD (Overlay Memory)
299
Section 11: Network Function
306
To Use Web Utilities
306
Over a Network
306
To Display Information on Machine
308
To Display Current Machine Status (Job Status)
309
Setting E-Mail Transmission Function
311
Setting E.K.C. Function
313
Setting Scan Transmission Function
324
Transmitting/Editing Machine Setting File
328
Section 12: Paper and Original Information
335
Paper Information
336
Paper Weight
336
Tray / Exit Tray Capacity
338
Paper Size
340
Special Paper in Multi-Sheet Bypass Tray
342
To Store Copy Paper
342
Original Information
343
Platen Glass Originals
343
RADF Originals
344
Section 13: Maintenance & Supplies
348
Adding Toner
348
Inserting a New Staple Cartridge into FS-513/FS-606 Finisher
353
Empty Waste Basket of PK-507/PK-508 Punching Kit
356
Empty Waste Basket of TU-109 Trimmer Unit
358
Exchanging Toner Recovery Box
360
The Machine
360
Cleaning Image Scanning Section
362
Cleaning the Document Glass
362
Cleaning the RADF Platen Guide Cover
362
Cleaning the Platen Cover
363
Checking Copy Count
364
To Display the Counter List Screen
364
To Print the Counter List
365
Periodic Maintenance
366
To Check the PM Counter
366
Key Operator Mode
369
Section 14: Key Operator Mode
370
An Outline of the Key Operator Mode
370
How to Access the Key Operator Mode
370
System Initial Setting
372
Date & Time Setting
372
Language Select Setting
374
IP Address Setting
375
E-Mail Transmission Setting
376
Copier Initial Setting
378
User Setting Mode
379
User Lens Mode Ratio Setting
379
EKC (Electronic Key Counter) Function Setting
380
How to Access the EKC Setting Mode
381
Data Edit
382
E.K.C. Data Edit
382
All Count Reset
385
Function Setting
386
E.K.C. Function Setting
386
Scanner Function Setting
387
Lock/Delete Job Memory
388
Paper Type / Special Size Set
389
Paper Type Set (Bypass)
391
Panel Contrast / Key Sound Adjustment
392
Key Operator Data Setting
393
Weekly Timer
394
How to Access the Weekly Timer Setting Mode
395
Weekly Timer On/Off Setting
396
Timer Setting
397
Timer Action On/Off Setting
399
Lunch Hour off Setting
400
Timer Interrupt Password Setting
401
Control Panel Adjustment
402
Tray Auto Select Setting
403
Power Save Setting
404
Memory Switch Setting
405
Machine Management List Print
411
Call Remote Centre
412
Finisher Adjustment
413
Front & Back Density Setting
415
Scan Transmission Setting
416
Non-Image Area Erase Setting
418
AE Adjustment
419
Execute Adjustment Operation
420
Magnification Adjustment
421
Timing Adjustment
422
Centring Adjustment
424
Printer Gamma Sensor Adjustment
425
Konica Minolta BIZHUB PRO C500 Service Manual (428 pages)
Brand:
Konica Minolta
| Category:
Printer
| Size: 25 MB
Table of Contents
Important Notice
3
Description Items for Danger, Warning and Caution
3
Iadjustment
33
How to Use the Adjustment Section
33
Composition
33
Adjustments When Replacing Parts
33
List of Adjustment Items
34
Mode Change Menu
36
Setting Method
36
Checking by the P Function
36
Checking Method of the P Function
36
Mode
37
List of Adjustment Items for 25 Mode
37
Setting Method
38
Setting Software DIPSW
38
Paper Size Setting
54
Standard Size Setting
54
Non-Standard Size Setting
54
Wide Paper Setting
54
PM Count Setting
55
Count Reset
55
Change Setting
55
Data Collection
56
Parts Counter
72
Count of Special Parts
72
Count of each Parts
79
Password Setting
81
Telephone Number Setting
81
M/C Serial Number Setting
82
Indication of ROM Version
82
KRDS Setting
82
Isw
82
Setting Date Input
83
Board Change Mode
83
Mode
84
Setting Method
84
Process Adjustment
84
High Voltage Adjustment
85
Drum Peculiarity Adjustment
85
Sensor Output Check
91
Exclusive Paper Setting
91
Recall Standard Data
93
Image Adjustment
94
Magnification Adjustment
94
Timing Adjustment
100
RADF Adjustment
108
Centring Adjustment
110
Non-Image Area Erase Check
112
Recall Standard Data
113
Image Quality Adjustment
114
Scanner Gamma Adjustment
114
Printer Gamma Adjustment
117
Sharpness Adjustment
120
Contrast Adjustment
121
Image Judge Adjustment
121
ACS Adjustment
123
Density Adjustment
124
Tone Adjustment
126
Recall Standard Data
127
Running Test Mode
128
Setting Method
128
Test Pattern Output Mode
129
Test Pattern Density Setting
138
Finisher Adjustment
138
Stitch and Fold Stopper Adjustment (FS-215/FN-9/FS-606 Only)
139
Fold Stopper Adjustment (FS-215/FN-9/FS-606 Only)
139
Cover Sheet Tray Size Adjustment (PI-110 Only)
140
Trimming Stopper Adjustment (TU-109/TMG-3 Only)
140
Punch Adjustment (PK-120/PK-5/PK-507 Only)
141
Three-Folding Adjustment (FS-215/FN-9/FS-606 Only)
143
Positions Staple Pitch Adjustment
144
List Output Mode
144
Mode
145
Mode/Multi Mode Setting Method
145
Adjustment Data Display
146
Hard Disk Check
146
Input Check List
148
Output Check List
159
Other Adjustments
171
Paper Feed Roller/Bp Pressure Adjustment
171
Paper Feed Height (Upper Limit) Adjustment (Bypass)
172
Pick-Up Movement Amount Adjustment (Bypass)
174
Paper Feed Tray /1 to /3 Mis-Centering Adjustment
175
Paper Feed Tray/1 to /3 Sheet Feed Pressure Adjustment
176
FNS Adjustment of the Bypass Conveyance Guide Plate Magnet
178
FNS Adjustment of the Bypass Gate
179
FNS Adjustment of the Shift Position
181
FNS Adjustment of the Paper Exit Opening Solenoid
182
FNS Adjustment of the Position of Paper Exit Arm
184
FNS Adjustment of the Position of Alignment Plate /U
186
FNS Adjustment of the Position of Alignment Plate /L (Only for FS-215/FN-9/FS-606)
188
FNS Adjustment of the Stapling Position (Flat Stapling)
200
FNS Adjustment of the Stapling Position (Flat Stapling) (Only for FS-215/FN-9/FS-606)
200
FNS Adjustment of the Angle of the Folding Stopper (Only for FS-215/FN-9/FS-606)
202
FNS Adjustment of the Folding Force (Only for FS-215/FN-9/FS-606)
204
FNS Adjustment of the Three-Holding Position (Only for FS-215/FN-9/FS-606)
205
FNS Adjustment of the Stapler Drive Belt Position
206
TU Adjustment of the Sheet Cutting Parallelism
210
LCT Tray Mis-Centering Adjustment
211
LCT Skew Adjustment
213
LCT Paper Feed Roller Pressure Adjustment
215
LCT Up/Down Plate Horizontal Adjustment
216
LCT Sheet Feed Pressure Adjustment
217
LCT Paper Feed Height (Upper Limit) Adjustment
218
LCT Pick-Up Release Amount Adjustment
220
Service Tool
223
2 II Service Tool
223
Description of the ISW
223
Setup
223
Board Used for the ISW
223
Data Flow
223
ISW Transfer Type
223
Instances of ISW Transfer
225
Setup Procedure
226
Usb Isw
231
What Is the USB ISW
231
Internet Isw
233
What Is the Internet ISW
233
Operating Environment
233
Main Features
233
Initial Setting
234
Setting on Control Panel
234
Setting on Web Browser
234
Internet ISW Using E-Mail Remote Notification System
242
Function
242
Transmitting E-Mail
243
Internet ISW Using Web Utility
248
Function
248
How to Use
248
Precautions for Use
251
Prior Announcement to Administrator
251
If Power Failure Occurs During Data Rewriting
251
ISW of Multiple Programs
251
If ISW Fails in Low Power Mode
251
Proxy Server Authentication in Internet ISW
252
What Is a Proxy Server
252
Authentication of Proxy Server
252
Type and Command List for Authentication on Proxy Server
252
Remarks
253
Mail Remote Notification System
254
What Is the Mail Remote Notification System
254
Operation Environment
254
Initial Setting
254
How to Use the Mail Remote Notification System
261
Disabling System
269
Service
271
Service Schedule
271
Maintenance Items
273
Periodic Check Items (Main Body)
278
Periodic Check Items (DF-319/AFR-20)
282
Periodic Check Items (LT-211/C-208)
282
Periodic Check Items (FS-115/215/FN-120/9/FS-513/606)
283
Periodic Check Items (PI-110)
284
Periodic Check Items (TU-109/TMG-3)
284
Replacement Parts List
285
Important Maintenance Parts
289
Copy Material
290
Product
290
Materials
290
PM Parts Kit
291
Service Material List
293
Ce Tools List
294
Jam Code List
295
Error Code List
305
About Abnormal Unit Isolation
333
Diagrams
335
Parts Layout Drawing
335
8050/CF5001/C500/8150 Parts Layout Drawing
335
DF-319/AFR-20 Parts Layout Drawing
356
LT-211/C-208 Parts Layout Drawing
357
FS-115/FS-215/FN-120/FN-9/FS-513/FS-606 Parts Layout Drawing
358
TU-109/TMG-3 Parts Layout Drawing
362
PK-120/PK-5/PK-507 Parts Layout Drawing
364
Connector Layout Drawing
365
8050/CF5001/C500/8150 Connector Layout Drawing
365
Relay Connector
365
Connector in the Board
373
DF-319/AFR-20 Connector Layout Drawing
383
LT-211/C-208 Connector Layout Drawing
384
FS-115/FS-215/FN-120/FN-9/FS-513/FS-606 Connector Layout Drawing
385
TU-109/TMG-3 Connector Layout Drawing
386
PK-120/PK-5/PK-507 Connector Layout Drawing
386
Timing Chart
387
8050/CF5001/C500/8150 Timing Chart
387
DF-319/AFR-20 Timing Chart
388
LT-211/C-208 Timing Chart
395
FS-115/215/FN-120/9/FS-513/606 Timing Chart
396
TU-109/TMG-3 Timing Chart
400
PK-120/PK-5/PK-507 Timing Chart
402
Overall Wiring Diagram
403
Overall Wiring Diagram
404
LT-211/C-208 Overall Wiring Diagram
405
FS-115/215/FN-120/9/FS-513/606 Overall Wiring Diagram
407
TU-109/TMG-3 Overall Wiring Diagram
409
PK-120/PK-5/PK-507 Overall Wiring Diagram
411
Appendix
413
8050/CF5001/C500/8150 Overall Wiring Diagram (1/8)
413
8050/CF5001/C500/8150 Overall Wiring Diagram (2/8)
413
8050/CF5001/C500/8150 Overall Wiring Diagram (3/8)
415
8050/CF5001/C500/8150 Overall Wiring Diagram (4/8)
417
8050/CF5001/C500/8150 Overall Wiring Diagram (5/8)
419
8050/CF5001/C500/8150 Overall Wiring Diagram (6/8)
421
Fixing Unit
425
Advertisement
Advertisement
Related Products
Konica Minolta bizhub PRO C5501
Konica Minolta bizhub PRO C6000L
Konica Minolta BIZHUB PRO C5500
Konica Minolta BIZHUB PRO C6500
Konica Minolta BIZHUB PRO C6500E
Konica Minolta bizhub pro C6500P
Konica Minolta bizhub pro c1060l
Konica Minolta bizhub PRO C6501P
Konica Minolta bizhub proc6500
Konica Minolta BIZHUB PROC500 8150
Konica Minolta Categories
All in One Printer
Printer
Digital Camera
Measuring Instruments
Copier
More Konica Minolta Manuals
Login
Sign In
OR
Sign in with Facebook
Sign in with Google
Upload manual
Upload from disk
Upload from URL