Sign In
Upload
Manuals
Brands
Canon Manuals
All in One Printer
imageRUNNER ADVANCE C5535
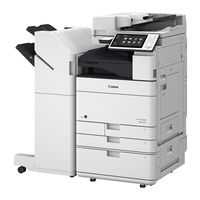
Canon imageRUNNER ADVANCE C5535 Manuals
Manuals and User Guides for Canon imageRUNNER ADVANCE C5535. We have
3
Canon imageRUNNER ADVANCE C5535 manuals available for free PDF download: Service Manual, Faq Manual, User's Manual (Notification Of New And Enhanced Functions
Canon imageRUNNER ADVANCE C5535 Service Manual (1331 pages)
Brand:
Canon
| Category:
Printer
| Size: 88.12 MB
Table of Contents
Table of Contents
4
Safety Precautions
15
Laser Safety
16
Handling of Laser System
16
Turn Power Switch on
16
Power Supply
17
Toner Safety
17
About Toner
17
Handling Adhered Toner
17
Notes When Handling a Lithium Battery
17
Notes before It Works Serving
18
Points to Note at Cleaning
18
Notes on Assembly/Disassembly
18
1 Product Overview
19
Product Lineup
20
Host Machine
20
Options
21
Features
25
Product Features
25
Toner Container
25
Setup Guide
26
Introduction of Situation Mode
26
Limiting of Color Printing
27
Specifications
29
Product Specifications
29
Weight and Size
31
Productivity
31
Paper Type
31
Parts Name
40
External View
40
Cross Section View
45
Control Panel
46
2 Technology
47
Basic Configuration
48
Functional Configuration
48
Original Exposure System
49
Overview
49
Magnification Ratio
57
Original Size Detection
57
Dust Detection Control
58
Image Processing
59
Color Displacement Correction Processing in Vertical Scanning Direction
62
Outline of Electric Circuits
62
Scanner Unit
65
Pickup Feed System
66
Fan
73
Power Supply Assembly
74
Controller System
75
Specifications / Configuration
75
Motion Sensor
78
Shutdown Sequence
79
Startup Sequence
80
Laser Exposure System
81
Overview
81
Laser ON/OFF Control
83
Horizontal Scanning Synchronization Control
83
Vertical Scanning Synchronization Control
84
APC (Auto Power Control)
85
Laser Scanner Motor Control
85
BD Correction Control
86
Laser Shutter Control
87
Image Skew Correction Control
88
Image Formation System
89
Overview
89
Charging Control
91
Developing Control
96
Primary Transfer Control
97
Secondary Transfer Control
102
Pre-Exposure Control
109
Image Stabilization Control
110
Toner Supply Control
116
Waste Toner Feed Control
127
Other Controls
129
Fixing System
132
Overview
132
Overview of Fixing Temperature Control
134
Standby Temperature Control
135
Print Temperature Control
136
Down Sequence Control
137
Fixing Film Edge Cooling Control
139
Film Unit Engagement/Disengagement Control
139
Fixing Unit Detection
140
Detection of New Fixing Film Unit
141
Protection Function
141
Pickup Feed System
143
Overview
143
Cassette Pickup Assembly
149
Multi-Purpose Tray Pickup Assembly
156
Fixing/Registration Assembly
158
Duplex / Delivery Assembly
161
Jam Detection
162
External Auxiliary System
164
Counter Control
164
Fan Control
166
Environment Heater Control
168
Power Supply
169
Power-Saving Function
170
Quick Startup
173
3 Periodical Service
175
Consumable Parts List
176
Host Machine
176
Cassette Feeding Unit-AM1
179
High Capacity Cassette Feeding Unit-A1
180
Paper Deck Unit-F1
180
Booklet Finisher-Y1
181
Staple Finisher-Y1
181
Inner Finisher-H1
181
Cleaning/Check/Adjustment Locations
183
Compatibility of Consumable Parts
185
4 Disassembly/Assembly
186
Preface
187
Outline
187
List of Parts
188
List of Cover
188
List of Electrical Parts
193
List of Connectors
215
Original Exposure System
238
Removing the ADF Pre-Separation Unit / ADF Separation Roller
238
Removing the ADF Pickup Roller Unit
239
Removing the ADF Pickup Roller and the ADF Feed Roller
240
Installing the ADF Pickup Roller Unit
242
Removing the ADF
244
Installing the White Plate
245
Removing the ADF Scanner Unit
247
Cleaning the Paper Back Reading Glass
250
Removing the Rear Cover
251
Cleaning the Lead Roller 1/2/3
252
Removing the ADF Driver PCB
256
Removing the Reader Controller PCB
257
Cleaning the Reader Scanner Unit Scanner Mirror
259
Removing the Reader Scanner Unit
262
Main Controller System
266
Removing the HDD
266
Removing the Main Controller PCB
267
Removing the Riser PCB
269
Opening the Controller Box
272
Removing the DC Controller PCB
273
Removing the Primary Transfer/Bk Developing Charging High-Voltage Unit
275
Removing the Rear Lower Cover
276
Removing the Power Supply Unit (12 V/24 V)
277
Removing the Feed/Drum Driver PCB
278
Removing the Relay PCB
279
Removing the Secondary Transfer High Voltage Unit
280
Removing the AC Driver PCB
282
Removing the Control Panel
283
Removing the All-Night Power Supply PCB
288
Removing the Developing High-Voltage PCB (Ymc)/Charging High-Voltage PCB (YMC)
289
Laser Control System
292
Cleaning the Dustproof Glass
292
Removing the Dustproof Glass Cleaning Pad
293
Removing the Laser Scanner Unit
293
Image Formation System
297
Removing the Toner Filter
297
Removing the ITB Unit
297
Cleaning the Registration Patch Sensor
301
Removing the Registration Patch Sensor (Front), (Middle), (Rear)
302
Removing the ITB Cleaning Unit
304
Removing the ITB Cleaning Blade Unit
306
Installing the ITB Cleaning Blade Unit
307
Removing the ITB
309
Removing the Primary Transfer Roller (Bk)
313
Removing the Primary Transfer Roller (C, M, Y)
317
Removing the Secondary Transfer Inner Roller
321
Installing the ITB
323
Removing the Waste Toner Container
331
Pulling out the Process Unit
331
Removing the Process Unit
334
Installing the Process Unit
335
Removing the Drum Unit
339
Installing the Drum Unit
340
Removing the Developing Unit
342
Installing a New Developing Unit
345
Removing the Waste Toner Feed Unit
347
Removing the Secondary Transfer Roller/Secondary Transfer Separation Guide Unit
351
Installing the Secondary Transfer Roller/Secondary Transfer Separation Guide Unit
353
Removing the Main Drive Unit
355
Removing the Toner Container Front Inner Cover
360
Removing the Hopper Unit (M)
363
Removing the Hopper Unit (Y)
365
Removing the Hopper Unit (C)
368
Removing the Hopper Unit (Bk)
371
Fixing System
374
Removing the Fixing Unit
374
Removing the Film Unit
375
Cleaning the Fixing Shutter Cover
379
Cleaning the Fixing Separation Guide
380
Cleaning the Fixing Inlet Guide
381
Removing the Pressure Roller and Pressure Roller Bearing
382
Removing the 27T Gear
384
Pickup Feed System
386
Cleaning the Secondary Transfer Guide
386
Cleaning the Feed Contact Guide
387
Cleaning the Registration Roller
387
Cleaning the Pre-Registration Guide Unit
388
Cleaning the Registration Sensor
389
Cleaning the Between-Cassette 1/2 Sensor
390
Cleaning the Fixing Delivery Guide
392
Cleaning the Fixing Rear Roller
393
Cleaning the Fixing Delivery Roller
394
Removing the Duplex Feed Upper Rollers
395
Removing the Duplex Feed Lower Roller
396
Cleaning the Second/Third Delivery Roller, Roller and First, Second, and Third Delivery Rollers
397
Removing the Right Rear Cover 1
399
Removing the Front Right Cover
401
Removing the Reverse Backend Guide and Inner Output Cover
402
Removing the Second/Third Delivery Unit
402
Removing the First Delivery Unit
404
Removing the Duplex Unit
407
Removing the Multi-Purpose Tray/Feed/Separation Roller
408
Removing the Pickup/Delivery/Separation Roller (Cassette 1/2)
411
Removing the Right Door
412
Removing the Cassette 1/2 Pickup Unit
415
Removing the Transparency Sensor/Registration Sensor
417
5 Adjustment
420
Pickup Feed System
421
Image Position Adjustment
421
Geometric Characteristics Adjustment
424
Original Exposure System
429
Reader Assembly
429
Adf
430
Actions at Parts Replacement
442
MP Pickup Tray Unit
442
DC Controller PCB
442
Control Panel CPU PCB
443
Hard Disk
444
Laser Scanner Unit
446
ITB Unit
447
Itb
447
Secondary Transfer Inner Roller
447
Secondary Transfer Roller
449
Drum Unit
450
Developing Unit
450
Patch Sensor
450
Reader Controller PCB
450
Scanner Unit (Paper Front)
452
Scanner Unit (Paper Back)
452
Copyboard Glass
453
6 Troubleshooting
454
Initial Check
455
Test Print
456
Overview
456
How to Use the Test Print
457
Troubleshooting Items
461
Fixing Wrinkle/Jams Caused by Deterioration in the Rib of the Fixing Inlet Guide
461
Display of "Non-Canon Product" Message
462
Forcible Stop of Paper Feed
463
Controller Self Diagnosis
466
Preface
466
Overview
466
Basic Flowchart
468
Boot Method
469
Diagnosis Result
469
Limitations
472
Debug Log
473
Overview
473
Saving to a USB Device Using Download Mode (Method 1)
477
Saving to a USB Device with Counter Key + Numeric Key (Methods 2 and 4)
478
Saving to a PC Using SST (Method 3)
479
Saving to a USB Flash Drive Using Service Mode (Method 5)
482
Service Mode Relating to Debug Logs
482
Collecting the Log of Key Operations
485
Network Packet Capture
486
7 Error/Jam/Alarm
494
Overview
495
Location Code
495
Pickup Position Code
495
Pickup Size
495
Points to Note When Clearing MN-CON
497
Points to Note When Clearing HDD
497
Error Code
498
Error Code Details
498
Jam Code
643
Jam Type
643
Jam Screen Display Specification
643
Main Unit
644
ADF/ Reader
646
Cassette Feeding Unit-AM1
648
High Capacity Cassette Feeding Unit-A1
649
Paper Deck Unit-F1
650
Inner Finisher-H1
651
Staple Finisher-Y1/ Booklet Finisher-Y1
652
2/4 Hole Puncher Unit-A1
653
Inner 2/4 Hole Puncher-B1
654
Buffer Pass Unit-L1
655
Alarm Code
656
Alarm Code Details
656
8 Service Mode
672
Overview
673
Points to Note When Executing Service Mode
673
Service Mode Menu
673
Description of Service Mode Items
673
Operation Check of Electrical Components
674
Enhanced I/O Information
677
Security Support
679
Switching the Screen Display (Level 1 <->2)
680
Service Mode Backup
680
Output of Service Print Data
681
SITUATION Mode
686
Function to Mask the Screen During Remote Access
686
Copier
689
Display
689
I/O
781
Adjust
800
Function
881
Test
1047
Counter
1054
Feeder
1084
Display
1084
Adjust
1084
Function
1086
Sorter
1089
Adjust
1089
Function
1100
Board
1110
9 Installation
1111
How to Check this Installation Procedure
1113
Symbols
1113
Points to Note at Installation
1114
Checking before Installation
1115
Checking Power Supply
1115
Checking the Installation Environment
1115
Checking the Installation Space
1115
Points to Note before Installation
1115
Combination Table of Accessory Installation
1117
Unpacking
1118
Checking the Contents
1119
Installation Procedure
1120
Removing the Packaging Materials
1120
Installing the Scanner
1123
Installing the Drum Unit
1123
Setting the Environment Heater Switch
1131
Installing IC Card Reader (EUR Only)
1131
Setting the Cassette
1137
Advertisement
Canon imageRUNNER ADVANCE C5535 Faq Manual (224 pages)
Brand:
Canon
| Category:
All in One Printer
| Size: 107.9 MB
Table of Contents
English
4
Table of Contents
4
Check the Following First
6
The Machine Does Not Respond to the Computer
7
The Authentication Screen (Logon Screen) Is Displayed and You Cannot Go Further
7
How to Load Paper
8
Loading Paper in the Paper Drawer 1
8
Loading Paper in the Paper Drawer 2
8
When You Have Loaded a Different Type of Paper than the Preset One
9
Loading Paper in the Multi-Purpose Tray
10
Loading Paper with Printed Logos
12
Loading Envelopes
13
Images Are Shifted/Slanted
16
Irregularities Appear in Images/Images
16
Are Faint
16
Black Streaks Appear in Images
17
White Streaks/Color Streaks Appear
18
In Images
18
Bleed-Through Occurs
19
Paper Jams Occur
20
Paper Jams Occur Frequently
21
Loading Paper or Paper Settings Cannot be Done Successfully
22
Paper Is Not Fed
22
If the "Load Paper." Message Is Displayed
23
Printing Cannot be Performed on the Expected
24
Side of Paper
24
Printing Cannot be Performed with the Expected Size
24
In Two-Sided Printing, the Print Direction Differs between the Front and Back Sides of the Paper
25
Scan/Fax Cannot be Performed Successfully
26
If You Cannot Send Documents to a Server Using [Scan and Send]
26
Stopping Scanning/Faxing
26
Scanned Documents Cannot be E-Mailed
27
If You Cannot Send/Forward Faxes
28
If You Cannot Receive Faxes
29
Canceling a Copy Job
30
Canceling a Print Job
30
Replacement Parts
32
An Error Screen Is Displayed
34
Illustrated Index
36
Main Unit
36
Control Panel
38
Appendix
40
Important Safety Instructions
40
Fixing Unit
42
Installation Precautions
42
Laser Safety Label
42
Français
44
About this Manual
44
Third Party Software
44
Do You Want to Know more
45
If You Notice a Search Number
45
You Can Consult the User's Guide
45
English
47
Vérifiez D'abord Les Points Suivants
50
L'appareil Ne Répond Pas À L'ordinateur
51
L'écran D'authentification (Ecran de Connexion) S'affiche Et Vous Ne Pouvez Pas Continuer
51
Chargement de Papier Dans la Cassette 1
52
Chargement de Papier Dans la Cassette 2
52
Chargement du Papier Dans Le Plateau
52
Du Papier PréDéfini
53
Multifonctions
55
Imprimés
55
Comment Charger du Papier
52
Chargement des Enveloppes
57
Des Irrégularités Apparaissent Sur Les Images/Les Images Sont Pâles
60
Les Images Sont Décalées Ou Inclinées
60
Des Traînées Noires Apparaissent Dans Les Images
61
Des Traînées Blanches Ou de Couleur
62
Apparaissent Sur Les Images
62
Le Verso Est Visible Par Transparence
63
Des Bourrages Papier Surviennent
64
Fréquemment
65
Impossible de Charger du Papier Ou D'effectuer Les Réglages Papier
66
Le Papier N'est Pas Défini
66
Si Le Message "Charger du Papier." S'affiche
67
Des Feuilles
68
L'impression Ne S'effectue Pas Au Bon Format
68
En Impression Recto Verso, Le Sens D'impression N'est Pas Le Même Sur Les Deux Faces des Feuilles
69
Envoyer]
70
Arrêt de la Numérisation Ou de la Télécopie
70
Numérisés
71
Des Fax
72
Si Vous Ne Parvenez Pas À Recevoir des Fax
73
Pièces de Rechange
76
Un Message D'erreur S'affiche
78
Index Illustré
80
Panneau de Commande
82
Annexe
84
De L'utilisateur
89
Si Vous Relevez un Numéro de Recherche
89
Vous Pouvez Consulter Le Guide
89
Vous Souhaitez en Savoir Plus
89
Français
91
Deutsch
92
Prüfen Sie Zuerst Folgendes
94
Das Gerät Reagiert nicht auf den Computer
95
Können nicht Fortfahren
95
Einlegen von Papier in die Papierkassette 1
96
Einlegen von Papier in die Papierkassette 2
96
So Legen Sie das Papier ein
96
Wenn Sie einen anderen Papiertyp Eingelegt haben als der Voreingestellte
97
Einlegen von Papier in das Mehrzweckfach
98
Logopapier
100
Einlegen von Briefumschlägen
101
Papierstau Tritt auf
108
Papierstau Tritt Häufig auf
109
Der Scan-/Faxvorgang kann nicht Erfolgreich Durchgeführt werden
114
Stoppen des Scan-/Faxvorgangs
114
Wenn Sie die Dokumente nicht an einen Server
114
Über [Scannen und Senden] Senden können
114
Gescannte Dokumente Konnten nicht Per
115
E-Mail Versendet werden
115
Wenn Sie Faxnachrichten nicht Senden
116
Übermitteln können
116
Wenn Sie Faxnachrichten nicht Empfangen können
117
Abbrechen von Kopie-/Druckaufträgen
118
Installieren des Druckertreibers
119
Austauschteile
120
Ein Fehlerbildschirm
122
Bildlich Dargestellter Index
124
Anhang
128
Buffer Pass Unit-L1
132
Möchten Sie Mehr
133
Sie können IM Anwenderhandbuch
133
Deutsch
135
Italiano
136
Prima Controllare Quanto Segue
138
Continuare
139
La Macchina Non Risponde al Computer
139
Caricamento Della Carta Nel Cassetto Della Carta 1
140
Caricamento Della Carta Nel Cassetto Della Carta 2
140
Come Caricare la Carta
140
Quando È Stato Caricato un Tipo DI Carta Diverso da Quello Preimpostato
141
Caricamento Carta Nel Vassoio Multiuso
142
Caricamento DI Carta con Loghi Stampati
144
Caricamento DI Buste
145
La Carta si Inceppa
152
La Carta si Inceppa DI Frequente
153
Interruzione Dell'operazione DI Scansione/Fax
158
Non È Possibile Eseguire Correttamente Le Operazioni DI Scansione/Fax
158
Se Non È Possibile Inviare I Documenti Su un Server Usando [Scansione E Invio]
158
Acquisiti
159
Se Non È Possibile Inviare/Inoltrare Fax
160
Se Non È Possibile Ricevere Fax
161
Annullamento Dei Lavori DI Copia/Stampa
162
Installazione del Driver Stampante
163
Parti DI Ricambio
164
Booklet Finisher-Y1
165
Appare una Schermata DI Errore
166
Indice Illustrato
168
Appendice
172
Materiali DI Consumo
175
2/4 Hole Puncher Unit-A1
176
Super G3 FAX Board
176
Cassette Feeding Unit-AM1
176
Consulta la Guida Per L'utente
177
Italiano
179
Vuoi Saperne DI Più
177
Español
180
Verifique Primero lo Siguiente
182
El Equipo no Responde al Ordenador
183
Avanzar Más
183
Cargar Papel en el Casete 1
184
Cargar Papel en el Casete 2
184
Cómo Cargar Papel
184
Si Ha Cargado un Tipo de Papel Distinto del
184
Preestablecido
185
Carga de Papel en la Bandeja Multiuso
186
Cargar Papel con Logotipos Impresos
188
Cargar Sobres
189
Se Producen Atascos de Papel
196
Frecuencia
197
No Se Ha Podido Escanear/Enviar por Fax Correctamente
202
Parar de Escanear/Enviar por Fax
202
Si no Puede Enviar Documentos a un Servidor Empleando [Leer y Enviar]
202
No Se Pueden Enviar por Correo Electrónico Los Documentos Escaneados
203
Si no Puede Enviar/Reenviar Faxes
204
Si no Puede Recibir Faxes
205
Panel de Control
214
Acerca de Este Manual
220
Canon imageRUNNER ADVANCE C5535 User's Manual (Notification Of New And Enhanced Functions (40 pages)
Brand:
Canon
| Category:
All in One Printer
| Size: 0.31 MB
Table of Contents
Table of Contents
2
Read this First
3
Changes to Functions
7
Changes to Functions
8
Support for Universal Print (Ver.3.11-)
9
Configuring the Universal Print User Settings
13
Addition of New Features to the Visual Message Function (Ver.3.11-)
16
Changes to Supported Operating Systems (Ver.3.11-)
18
Changes to Settings/Registration
20
Changed Items
22
Changes to Messages
23
Other Changes to the User's Guide
25
Changes for each Version
33
Changes from Ver. 3.10 to Ver. 3.11
33
Changes in Ver. 3.10 and Earlier
34
Third Party Software
37
Advertisement
Advertisement
Related Products
Canon imagerunner advance C5535i
Canon imageRUNNER ADVANCE C5535i II
Canon MultiPASS C5500
Canon MultiPASS C555
Canon imagerunner advance C5540i
Canon imageRUNNER ADVANCE C5500i II
Canon imageRUNNER ADVANCE C5500 II Series
Canon imageRUNNER ADVANCE C5560i II
Canon imageRUNNER ADVANCE C5540i II
Canon imageRUNNER ADVANCE C5560F
Canon Categories
Printer
Digital Camera
All in One Printer
Camcorder
Scanner
More Canon Manuals
Login
Sign In
OR
Sign in with Facebook
Sign in with Google
Upload manual
Upload from disk
Upload from URL