Sign In
Upload
Manuals
Brands
Beckman Coulter Manuals
Laboratory Equipment
CytoFLEX Series
User Manuals: Beckman Coulter CytoFLEX Series Cytometer
Manuals and User Guides for Beckman Coulter CytoFLEX Series Cytometer. We have
1
Beckman Coulter CytoFLEX Series Cytometer manual available for free PDF download: Instructions For Use Manual
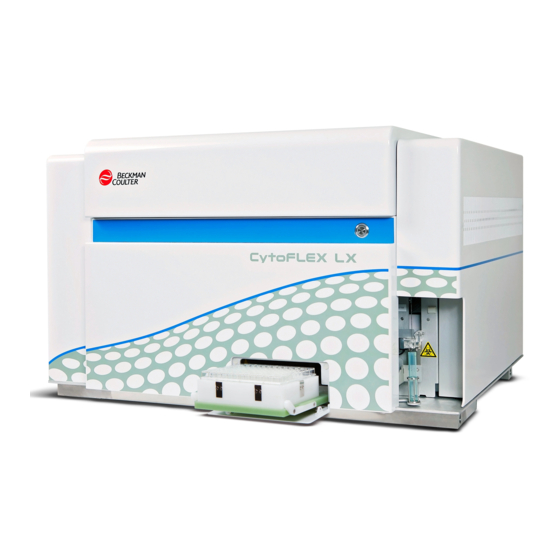
Beckman Coulter CytoFLEX Series Instructions For Use Manual (480 pages)
Flow Cytometers
Brand:
Beckman Coulter
| Category:
Laboratory Equipment
| Size: 32 MB
Table of Contents
Revision History
3
Alerts for Danger, Warning, and Caution
9
Safety Notices
9
Safety Precautions
10
Symbol Explanations
11
Table of Contents
13
About this Manual
27
How to Use Your Manual
27
Introduction
27
Overview
27
Conventions Used
29
Graphics
29
Overview
31
Product Description
31
Sample Station
31
System Overview
31
Main Components
32
Main Components [Cytoflex Without Plate Loader]
32
Main Components [Cytoflex LX]
33
Optical Components
34
Optical Filter Mount with Optical Filter
35
Optical Filter Mounts
35
Wavelength Division Multiplexer (WDM)
35
Optical Filter Mount (Top)
36
Optical Filter Mount Labeled with the Band-Pass
36
WDM Optical Filter Mount Color Codes [Cytoflex LX]
37
WDM Optical Filter Mount Color Codes [Cytoflex]
37
[Cytoflex
37
Cytoflex
39
Optical Fiber
39
Fluidics System
40
Fluid Containers/Cubitainers
41
Fluidics Module
42
Fluidics Module View
42
Fluidic Connections
43
Sample Station
44
Sample Tube Holder Positions
45
Plate Loader Components
46
Plate Holder
48
Plate Holder Components
48
Plate Holder Stage
49
System Configuration
50
System Configuration [Cytoflex]
50
System Connections
50
Back Cover Connections
51
Front of Cytometer [Cytoflex Without Plate Loader Shown]
51
System Configuration [Cytoflex LX]
52
System Connections
52
Back Cover Connections
53
Consumables and Supplies
54
Material Safety Data Sheets (SDS/MSDS)
54
Ordering Information
54
Reagents
54
Acoustic Noise Level
55
Dimensions [Cytoflex LX]
55
Dimensions [Cytoflex]
55
Electrical Ratings
55
Installation Category
55
Instrument Specifications
55
Pollution Degree
55
Cytometer
56
Performance Characteristics
58
Performance Characteristics [Cytoflex]
58
Performance Characteristics [Cytoflex LX]
59
Reagent Limitations
59
CHAPTER 2: Using the Cytexpert Software
61
Overview
61
Launching the Software
61
Main Software Screen
61
Start Page
62
Acquisition Screen
63
Acquisition Screen Navigation
64
Collection [With Plate Loader]
65
Test Tubes
67
Plot Area
68
Status Bar
69
Analysis Screen
69
Compensation Experiment Screen
70
Drawing Controls Toolbar (Top of Screen)
70
QC Experiment Screen
72
QC Report Screen
72
QC Experiment Screen
73
QC Screen Navigation
73
Software Menu
74
Plate Loader
74
Software Menu Tree
74
Acquisition and Analysis Screen Menu
75
QC Software Menu Tree
75
User Management
82
User Manager (Card View)
83
User Manager (Grid View)
83
Creating, Deleting, and Modifying Users in User Manager
84
Creating a New User in User Manager
84
Deleting Users in User Manager
85
Modifying Users in User Manager
85
Unlocking a User Account
86
Resetting a User Passwords
86
Changing a User Password
86
Role Management
86
Role Manager
87
Creating, Deleting, and Modifying User Roles in Role Manager
88
Creating New User Roles in Role Manager
88
Deleting User Roles in Role Manager
89
Modifying User Roles in the Role Window
89
Account Policies
90
User Management Operation Log
91
Viewing and Exporting User Logs
91
Graphic and Gating Styles
92
Plots
92
Gates
93
Software Settings
94
Language Settings
97
Setting up Cytexpert Application Programming Interface (API) Test Client
97
Daily Startup
99
Overview
99
Pre-Startup Inspection
99
Check Waste and Reagent Levels [4 L Fluid Containers]
100
Check Waste and Reagent Levels [10 L Fluid Cubitainers]
102
Power Source Inspection
103
Workstation Connections Inspection
103
Turning on the Instrument
104
Logging into the Software
104
Logging out of the Software
107
Selecting the Proper Sample Injection Mode
107
Using Semi-Automatic Injection Mode
108
Using the Manual Injection Mode
109
Selecting the Plate Loader Sample Injection Mode [With Plate Loader]
110
Using Plate Loader Injection Mode
110
Running the System Startup Program with the Single Tube Loader
112
Running the System Startup Program [With Plate Loader]
115
Selecting Experiments from the Start Page
122
Initializing the Instrument
123
Instrument Quality Control and Standardization
125
Overview
125
Preparing the QC Sample
127
Required Materials
127
Preparation Process Cytoflex Daily QC Fluorospheres
127
Preparation Process Cytoflex IR Daily QC Fluorospheres
127
Preparing the QC Sample [With Plate Loader]
128
Required Materials
128
Preparation Process Cytoflex Daily QC Fluorospheres
128
Preparation Process Cytoflex IR Daily QC Fluorospheres
129
Importing Lot-Specific Target Values
130
Collecting QC Data
134
Confirming Results
140
Creating Levey-Jennings
143
QC Result Manager
145
Standardization
146
Adding, Editing, Importing, and Deleting Standardization Laser
147
Adding a New Standardization
148
Editing Standardization Item
149
Importing a Standardization
150
Deleting Standardization
150
Applying the Standardization in
150
CHAPTER 5: Data Acquisition and Sample
155
Overview
155
Creating an Experiment
155
Creating an Experiment
157
Setting Sample Wells
161
Plate Window [Cytoflex LX Shown]
161
Modifying Well
165
Applying Existing Well Settings to Additional
166
Copying, Cutting, and Pasting
166
Moving the Location of a
167
Running Samples
167
Creating a Heat
169
Refreshing a Heat
175
Modifying Existing Heat Map
176
Deleting an Existing Heat
177
Exporting a Heat
177
Load Sample and Record Data
178
Before Running
178
Verifying, Selecting, Editing, and Creating Detector
178
Configuration
178
Sampling and Collecting
186
Configuring Acquisition
190
Changing the Tube
190
Setting the Channel and Creating Plots and
190
All Gates - Example
200
Circular Gating Logic - Example
200
Creating and Adjusting Auto
202
Turning Auto Recalculate
204
Adjusting Autogate Movement and Laser Settings
205
Movement - Max
206
Extent - Maximum
207
Adjusting the
209
Experiment
227
Exporting Plots or the Statistics Table of Multiple Tubes as Picture Files
227
Importing Instrument
228
Exporting Instrument
228
Importing and Exporting Compensation
229
Saving the Experiment
232
Concluding the
232
CHAPTER 6: Compensation
233
Overview
233
Before Compensation
233
After Compensation
233
Positive Population Selected from the Unstained
239
Positive and Negative Populations Without an Unstained Sample
240
Creating a Compensation
242
Preparing the Compensation
245
Creating the Compensation Matrix from Previously Acquired
247
Adjusting Compensation
248
Manually Adjusting
248
Importing and Exporting
248
Files
248
Importing Compensation Settings from the Compensation Library
249
Exporting Compensation
251
Managing the Compensation
252
Adding Channels for
253
CHAPTER 7: Data Review
255
Overview
255
Copying Experiments and Importing
255
Copying a Previously Acquired Experiment
255
Importing Previously Acquired Data
255
Setting the Plots and Statistics
257
Opening the Analysis Screen
257
Creating Histogram and Dot Plot Overlays
259
Calculating Sample Volume and Concentration
261
Adjusting Compensation Settings
262
Exporting Results
263
CHAPTER 8: Daily Shutdown
265
Overview
265
Preparing the Cleaning Solution
265
Shutting down the Instrument
265
Auto Shutdown [Cytoflex LX Only]
266
CHAPTER 9: Troubleshooting
267
Overview
267
Precautions/Hazards
267
Laser Related Hazards
267
Laser Beam Hazards
268
Laser Warning Labels
268
Troubleshooting
268
Laser Warning Label on the Laser Optical Bench
269
The Cytometer)
269
Laser Warning Label Within the Optical Bench
270
Laser Warning Label Within the Optical Bench (Located Inside the Cytometer)
270
Laser Warning Labels on the Cytometer
271
Laser Warning Labels on the Cytometer Back Cover [Cytoflex LX]
271
Hazard Labels and Locations
272
Biohazard Label and Location
272
Biohazard Label on the 4 L Fluid
272
Biohazard Label on the 10 L Fluid
272
Electrical Shock Hazard Label and Location
273
Caution Labels and Location
273
Biohazard Label Located in the Sample Station and on the Back
273
Electrical Shock Hazard Label by the Power Switch
273
Caution Labels
273
Plate Loader Hazard Labels and Location
274
Disposal of Electrical Instrumentation
274
Plate Loader Hazard
274
Rohs Notice
275
Rohs Caution Label
275
Rohs Environmental Label
275
Disposal Precaution
275
Troubleshooting Table
276
Backup and Restore
289
Backup
289
Restore
291
CHAPTER 10: Cleaning Procedures
293
Overview
293
Routine Cleaning
293
Daily Clean
293
Daily Clean [With Plate Loader]
297
Cleaning the Sample Station
299
Cleaning the Sample Probe
300
Deep Clean Procedure
300
Cleaning the 4 L Sheath Fluid
302
Cleaning the 4 L Waste Container
303
Cleaning
303
Surface Cleaning and Disinfection
305
Preparing the Instrument for Transport or
306
Lifting and Carrying
310
Replacement/Adjustment Procedures
313
Replacement/Adjustment
314
Front Cover Removal
314
Reinstallation
315
Right-Side Cover Removal
316
Reinstallation
317
Filling the 4 L Sheath Fluid Container
318
Replacing the 10 L Sheath Fluid
319
Emptying the 4 L Waste Container
321
Emptying the 10 L Waste
322
Managing the Maintenance
326
Adding the Deep Clean Solution
329
Replacing the Sheath Fluid
330
Replacing the Sample Probe Assembly
340
Tube Sample Station
347
Inspecting the Liquid Flow Path for Priming the Flow Cell
354
Replacing the Plate Holder
357
Plate Holder Stage
357
Plate Loader Module Removal and Reinstallation
358
Removal
358
Removing the Tubings from the Fluidics Module to the Plate Loader
361
Installation
362
Plate Loader Module Securing
362
Plate Loader Module Securing
363
Connecting the Tubings from the Fluidics Module to the Plate Loader
364
Changing the Event Rate Setting
367
Replacement/Adjustment
368
Calibrating the Sample Flow
371
Calibrating the Sample Flow Rate
371
Setting Laser Delay
375
Replacing the Optical Filter
376
Replacing the Fuse
379
Replacing the Sheath Fluid Harness And/Or Waste
381
Changing Sample Mixing and Backflush Settings
383
Calibrating the Plate Position [With Plate Loader]
385
APPENDIX A: Instrument Installation
391
Instrument Transportation and Storage
391
Installation Environment Validation
392
Worktable
392
Ventilation and Cleaning
392
Power Source
393
Temperature and Humidity
394
Waste Disposal
394
Unpacking the Instrument and Inspecting the Materials for Defects or Omissions [Cytoflex
394
Installing the Instrument and Connecting the Equipment
395
Installing the Instrument and Connecting the Equipment
401
Cytexpert Software Installation Options
402
Installing the Software [Cytoflex
402
Required Materials
403
Installing the Cytexpert Software
403
Installing the Instrument Configuration File
411
Starting the Software
414
Upgrading the Cytexpert Software
414
Reinstalling the Cytexpert Software
419
APPENDIX B: Cytexpert Electronic Record Management
429
Overview
429
Software Menu
429
Experiment Management
430
Closed File System
430
Experiment Directory Management
431
Setting up the Experiment Directory
431
Folder Hierarchy Management
432
Experiment Related Operations
433
Importing an Experiment/Template
434
Exporting an Experiment/Template
436
Log
439
Experiment Operation Log
439
System Operation Log
442
User Management Operation Log
443
Electronic Signature
444
Signing an Experiment
444
Retracting an Experiment Signature
445
User Management
446
User Administration
446
Logging in and out of the Software
446
Role Management
446
Account Policies
446
APPENDIX C: Sample Injection Mode Control Kit
448
Table of Hazardous Substances Name and Concentration
454
Table of Hazardous Substances Name and Concentration
455
Advertisement
Advertisement
Related Products
Beckman Coulter CytoFLEX LX
Beckman Coulter CytoFLEX SRT
Beckman Coulter CytoFLEX
Beckman Coulter CytoFLEX S
Beckman Coulter COULTER HmX
Beckman Coulter COULTER EPICS XL
Beckman Coulter COULTER EPICS XL-MCL
Beckman Coulter CD103-FITC
Beckman Coulter CEQ 8000
Beckman Coulter CSD2
Beckman Coulter Categories
Laboratory Equipment
Measuring Instruments
Medical Equipment
Cash Counter
Desktop
More Beckman Coulter Manuals
Login
Sign In
OR
Sign in with Facebook
Sign in with Google
Upload manual
Upload from disk
Upload from URL