Table of Contents
Advertisement
Advertisement
Table of Contents
Troubleshooting

Related Manuals for McAfee SG310


Summary of Contents for McAfee SG310
- Page 1 McAfee UTM Firewall ® Administration Guide version 4.0.4...
- Page 2 No part of this publication may be reproduced, transmitted, transcribed, stored in a retrieval system, or translated into any language in any form or by any means without the written permission of McAfee, Inc., or its suppliers or affiliate companies.
-
Page 3: Table Of Contents
Multifunction vs. fixed-function ports ..........42 McAfee UTM Firewall 4.0.4 Administration Guide... - Page 4 DNS ............... 117 McAfee UTM Firewall 4.0.4 Administration Guide...
- Page 5 Selecting TCP dummy services ..........197 McAfee UTM Firewall 4.0.4 Administration Guide...
- Page 6 Uploading a McAfee Web Gateway certificate and key ........219 Copying and pasting a McAfee Web Gateway certificate and key ......219 Blocking categories for McAfee Web Gateway filtering .
- Page 7 Command Line access ............350 Enabling remote management by McAfee UTM Firewall Control Center ..... . 351 Control Center Attributes .
- Page 8 Troubleshooting ............. . . 384 CLI commands Glossary Index McAfee UTM Firewall 4.0.4 Administration Guide...
-
Page 9: About This Document
About this Document This guide describes the features and capabilities of your McAfee UTM Firewall (formerly SnapGear ® appliance. The document organization follows the menu layout of the UTM Firewall Management Console. The appendixes contain additional maintenance and reference information. - Page 10 McAfee UTM Firewall 4.0.4 Administration Guide...
-
Page 11: Introduction
UTM Firewall Management Console UTM Firewall menus Interface icons Help and Support menu option UTM Firewall desktop appliances The McAfee UTM Firewall desktop appliance range includes the following models: Figure 1 UTM Firewall desktop appliance models SG310 SG560 and SG560U SG565... -
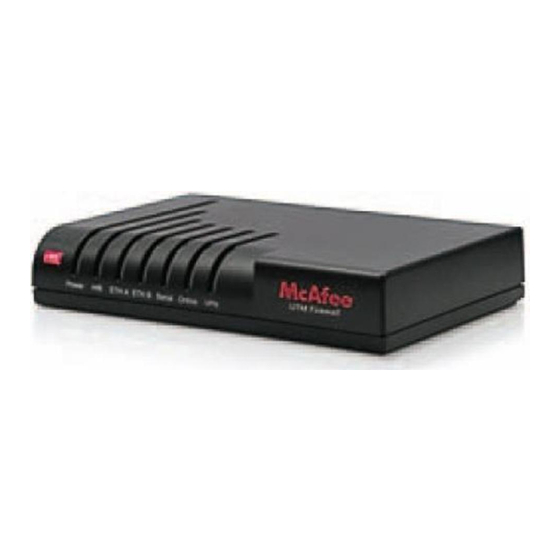
Page 12: Front Panel Leds
The labels for the front panel LEDs are detailed in the following tables. Note: If H/B does not begin flashing shortly after power is supplied, refer to Recovering from a failed upgrade. Table 1 SG310 LED descriptions Label Activity Description Power On (steady) Power is supplied to the UTM Firewall appliance. -
Page 13: Rear Panel
Appendix C, Null modem administration. If network status LEDs are present for the ports (not present on the SG310 model), the lower or left LED indicates the link condition, where a cable is connected correctly to another device. The upper or right LED indicates network activity. -
Page 14: Utm Firewall Rack Mount Appliance
The following are the connectivity specifications: • Two 10/100/1000 GbE ports (A and B) Note: Port A is set to LAN and cannot be changed. • Three 10/100BaseT FE ports (C, D, E) • Serial port McAfee UTM Firewall 4.0.4 Administration Guide... -
Page 15: Utm Firewall Pci Appliance
Network Interface Card (NIC). This is the IP address that other PCs on the LAN see. It should be dynamically (DHCP) or statically configured to use the same gateway and DNS settings as a regular PC on the LAN. McAfee UTM Firewall 4.0.4 Administration Guide... -
Page 16: Leds
Chapter 2, Getting Started) and the guided configurations. Once you have completed the initial configuration, you can continue the setup using the Guided Configurations that are available from the lower pane of the page. McAfee UTM Firewall 4.0.4 Administration Guide... -
Page 17: Utm Firewall Menus
Your current menu selection is highlighted. The UTM Firewall Management Console contains the following menus: • Network Setup • Firewall • VPN • System The following tables provide brief descriptions of the tabs available under each menu option. McAfee UTM Firewall 4.0.4 Administration Guide... - Page 18 Systems. Note: Snort IDS (Intrusion Detection System) and IPS (Intrusion Prevention System) features are not applicable to the SG310 or SG560 models. Basic IDB (Intrusion Detection and Blocking) is available on all UTM Firewall models. Access Control Opens the Authorizations pages for Access Control, ACL, Web Lists, Policy, and Web Filtering.
-
Page 19: Interface Icons
Port Tunnels Opens the pages for configuring HTTP and SSL client and server port tunnels. See Port tunnels. Note: Not applicable to the SG310 model. Table 9 System menu System menu options Description Status Opens high-level summaries of the general system, the unit’s connections, and the unit’s services. -
Page 20: Backup And Restore Icon
Many of the pages in the console also have enable or disable checkboxes. The enable checkbox is the leftmost checkbox. Tooltips Hover your pointer over a control to view its tooltip (Figure 12). McAfee UTM Firewall 4.0.4 Administration Guide... -
Page 21: Help And Support Menu Option
Click a link to view its associated topic. The Search field is available on every help page. Technical Support page To access the technical support page, from the System menu, click Help and Support, then select the Technical Support tab. The Technical Support page appears (Figure 14). McAfee UTM Firewall 4.0.4 Administration Guide... -
Page 22: Technical Support Report Page
Support Report. Otherwise, only the most recent log entries will be included. Click Download. Save the report as a text file. Submit a support request and attach the technical support report in plain text format. McAfee UTM Firewall 4.0.4 Administration Guide... -
Page 23: Getting Started
SG310, SG560U, SG565, SG580, and SG720 models. For instructions on installing an SG640, refer to the McAfee UTM Firewall Quick Installation Guide for PCI Cards. Installing the UTM Firewall into a well-planned network is quick and easy. To add your UTM Firewall device to your LAN (Local Area Network),... -
Page 24: Connecting An Administrative Pc To The Device
Connecting an administrative PC to the device Connect your administrative PC to the device: • If you are setting up the SG310, attach your PC's network interface card directly to any LAN port on the device using the supplied network cable. - Page 25 DHCP server, which automatically configures the network settings of PCs and other hosts on your LAN, select Use a fixed IP. • To use the UTM Firewall’s initial network settings as a basis for your LAN settings, and not use the UTM Firewall's built-in DHCP server, select Skip. McAfee UTM Firewall 4.0.4 Administration Guide...
- Page 26 • If you are not configuring an SG565, The ISP connection dialog appears (Figure 20).Continue to Step 6 on page • If you are configuring an SG565, the Wireless dialog appears. See Wireless for configuration details, and then continue to Step 6 on page McAfee UTM Firewall 4.0.4 Administration Guide...
- Page 27 ADSL for configuration details. The next dialog that appears depends on the UTM Firewall model you are setting up. • If you are setting up an SG310, the Firewall page appears. Go to Selecting an initial firewall level. • For all other models, the Switch Configuration page appears. Go to Configuring the UTM Firewall switch.
- Page 28 Click Next. • If you chose Use an IP address obtained from a server on the Internet (DHCP), and you are setting up an SG310, the Firewall page appears. Continue to Selecting an initial firewall level. • For all other desktop models, the Switch Configuration page appears. Go to...
-
Page 29: Configuring The Utm Firewall Switch
• The Switch Configuration page appears for most models. In this case, go to Configuring the UTM Firewall switch. • If you are setting up a SG310, the Confirm Settings page appears. Go to Confirming settings. Configuring the UTM Firewall switch The switch dialog displays if you are setting up the SG560, SG 560U, SG565 or SG580. -
Page 30: Selecting An Initial Firewall Level
Denies peer to peer (P2P) traffic unless that traffic is tunneled through another protocol (such as P2P over HTTP). • Low / All Internet access – Allows all Internet traffic to pass through the firewall. Click Next. The Confirm settings dialog appears. McAfee UTM Firewall 4.0.4 Administration Guide... -
Page 31: Confirming Settings
If you have not already done so, connect the device to your LAN: • If you are setting up the SG310, connect PCs and/or your LAN hub directly to its LAN switch. • If you are setting up the SG560, SG560U, SG565 or SG580 and have configured its switch as 4 LAN Ports, connect PCs and/or your LAN hub directly to switch A. -
Page 32: Automatic Lan Configuration Using The Utm Firewall Dhcp Server
LAN configuration using the UTM Firewall DHCP server, then restart them. Note: The purpose of restarting the computers is to force an update of their automatically configured network settings. Alternatively, you can disable and re-enable the network connection. McAfee UTM Firewall 4.0.4 Administration Guide... -
Page 33: Manual Lan Configuration
(Figure 27). The Technical Support tab is available from every user page by selecting the Help button on the user page, then selecting the Technical Support tab (Figure 27). Figure 27 Technical Support tab McAfee UTM Firewall 4.0.4 Administration Guide... -
Page 34: Using The My Secure Computing Website
Figure 28 My Secure Computing Login page Creating an account If you have not already done so, you will need to create a My Secure Computing account to access the site. To create an account: McAfee UTM Firewall 4.0.4 Administration Guide... -
Page 35: Adding Your Utm Firewall Appliance
Once you log in, you can change your My Secure Computing password, add products you own to your profile, download Beta firmware, and activate any add-on features you may have purchased. Adding your UTM Firewall appliance To add a product you have purchased to your My Secure Computing profile: McAfee UTM Firewall 4.0.4 Administration Guide... - Page 36 Log in to the My Secure Computing site at http://my.securecomputing.com. The Welcome page appears (Figure 30). Figure 30 My Secure Computing Welcome page Click Add Products. The Product Management - Add Device page appears (Figure 31). McAfee UTM Firewall 4.0.4 Administration Guide...
-
Page 37: Activating A Feature
Figure 31 My Secure Computing Product Management — Add Device page Enter the serial number of your UTM Firewall appliance in the McAfee UTM Firewall Serial Number field. The serial number is found on a sticker attached underneath the appliance. -
Page 38: Retrieving License Information For Add-On Products
Enter the token in the Feature Serial Number (token) field. Click Submit. Retrieving license information for add-on products Once you activate a feature, that feature is added to the Options and Expiration Dates box on the Product Management page (Figure 33). McAfee UTM Firewall 4.0.4 Administration Guide... - Page 39 Figure 33 My Secure Computing Product Management - License data For those features that require a certificate and private key to activate, click the associated View... License data button. The certificate and private key are then displayed in text form (Figure 34). McAfee UTM Firewall 4.0.4 Administration Guide...
- Page 40 You can then copy and paste the license key, for Web Filtering for instance, into the Certificate copy/paste page. Note: Be sure to include the ----Begin... and ----End... text lines in your copy and paste. McAfee UTM Firewall 4.0.4 Administration Guide...
-
Page 41: Network Setup Menu Options
Traffic Shaping IPv6 Network overview This chapter describes the Network Setup options of the McAfee UTM Firewall Management Console. Use the Network Setup options to configure each of your UTM Firewall appliance’s Ethernet, wireless, and serial ports. • An Ethernet network interface can be configured to connect to your LAN, DMZ, an untrusted LAN, or the Internet as a primary, backup, or load-balancing connection. -
Page 42: Quick Setup Wizard
The simplest network connections are static or dynamic IP addresses. More advanced network connections allow you to communicate with cable, ADSL, or serial modems that are connected to your UTM Firewall appliance. McAfee UTM Firewall 4.0.4 Administration Guide... - Page 43 Select the checkbox for the connection. The Enable/Disable checkbox is to the left of the Name column. The page refreshes and a check mark appears in the column (Figure 36). Figure 36 Enabled and disabled connections McAfee UTM Firewall 4.0.4 Administration Guide...
-
Page 44: Direct Connection Overview
• If you are using DHCP, select the DHCP assigned checkbox and skip to Step 8. The appliance obtains its LAN network settings from an active DHCP server on your local network. Any values in the IP Address, Subnet Mask, and Gateway fields are ignored. McAfee UTM Firewall 4.0.4 Administration Guide... -
Page 45: Ethernet Configuration Tab
From the Network Setup menu, click Network Setup. The Network Setup Connections tab appears. Select the edit icon for the connection your want to edit. The main configuration page appropriate for the connection appears. Click the Ethernet configuration tab. The Configure Ethernet Port page appears (Figure 38). McAfee UTM Firewall 4.0.4 Administration Guide... - Page 46 VLAN as described below. Port 1 will always use the default VLAN. You can also use the Quick Setup Wizard to automatically create separate VLANs for each port. After disabling port-based VLANs, any VLANs you have created will remain as tagged VLANs. You should delete them if they are unneeded. McAfee UTM Firewall 4.0.4 Administration Guide...
-
Page 47: Aliases Tab
From the Network Setup menu, click Network Setup. The Network Setup Connections tab appears. Select the edit icon for the connection your want to edit. The main configuration page appropriate for the connection appears. McAfee UTM Firewall 4.0.4 Administration Guide... -
Page 48: Enabling Ipv6 For A Connection
Clear the Enable IPv6 checkbox. Click Update. ADSL This topic contains procedures for configuring your DSL connection, also referred to as ADSL (Asymmetric Digital Subscriber Line). ADSL connections have the interface firewall class of Internet. McAfee UTM Firewall 4.0.4 Administration Guide... -
Page 49: Routed Versus Bridged Dsl Modems
For more information on LEDs, refer to the appropriate LED topic for your UTM Firewall model in Chapter 1, Introduction. Access the ADSL connections page so that you can configure your DSL connection. See Accessing the ADSL connection methods page. McAfee UTM Firewall 4.0.4 Administration Guide... -
Page 50: Accessing The Adsl Connection Methods Page
If autodetection fails, your DSL modem might not be configured correctly for your connection type, or your DSL service has not yet been provisioned by your telecommunications company. Try the manual settings procedure as well. McAfee UTM Firewall 4.0.4 Administration Guide... - Page 51 From the Network Setup menu, click Network Setup. On the Connections page, select ADSL from the Change Type list. The ADSL Connection Methods page appears. Select the Use PPTP to connect option and click Next. The ADSL PPTPoE Configuration page appears (Figure 43). McAfee UTM Firewall 4.0.4 Administration Guide...
- Page 52 [Optional] Select the Preferred Gateway checkbox to enable load-balancing over this connection. Select the strength of encryption from the Required Encryption Level drop-down menu. It is recommended that Strong encryption be used when possible. Set the MTU value or accept the default. Click Finish. McAfee UTM Firewall 4.0.4 Administration Guide...
- Page 53 From the Network Setup menu, click Network Setup. On the Connections page, select ADSL from the Change Type list. The ADSL Connection Methods page appears. Select the Manually assign settings option and click Next. The ADSL Static Configuration page appears (Figure 45). McAfee UTM Firewall 4.0.4 Administration Guide...
-
Page 54: Connecting With A Cable Modem
For the interface that you want to connect to your cable modem, select Cable Modem from the Change Type list. The Cable Model Connection Details page appears (Figure 46). Select your cable ISP. If it is not BigPond or @Home, select the Generic Cable Modem Provider option. McAfee UTM Firewall 4.0.4 Administration Guide... - Page 55 Connection Name field [optional] and click Finish. Figure 47 Generic Cable Modem Provider • If you chose BigPond Advance as shown in Figure 48, enter a Connection Name [optional], Username, and Password, and click Finish. McAfee UTM Firewall 4.0.4 Administration Guide...
-
Page 56: Configuring A Dialout Connection On The Com Port
PCs on the LAN, DMZ, or Guest network (via a VPN tunnel) are trying to reach the Internet. For instructions, refer to Enabling dial on demand for a connection. Note: Concurrent Dialin and Dialout configurations are not supported at this time. McAfee UTM Firewall 4.0.4 Administration Guide... - Page 57 [Conditional; if required]] Enter the password provided by your ISP in the Password field. Enter the password again in the Confirm Password field. [Optional] Select a Firewall Class for the connection. The firewall class determines the packet filtering rules that are applied to the connection. See Packet filtering. McAfee UTM Firewall 4.0.4 Administration Guide...
-
Page 58: Configuring Dialout Port Settings
• 38400 • 57600 • 115200 • 230400 Note: This setting must match the baud rate of the device connected to the serial interface. Leave the Modem init. string default value unchanged. Click Update. McAfee UTM Firewall 4.0.4 Administration Guide... -
Page 59: Enabling Dial On Demand For A Connection
If necessary, you can continue to configure additional settings by clicking the Static Addresses, Aliases, and IPv6 tabs for the serial port connection. See Configuring static IP addresses for a connection, Aliases tab, and Enabling IPv6 for a connection. McAfee UTM Firewall 4.0.4 Administration Guide... -
Page 60: Configuring Static Ip Addresses For A Connection
From the Network Setup menu, click Network Setup. The Connections tab opens. Click the edit icon for the connection you want to edit. Click the Aliases tab. The Interface Aliases page appears (Figure 54). McAfee UTM Firewall 4.0.4 Administration Guide... -
Page 61: Setting Up Dial-In Access
From the Change Type list of the Connection you want to configure, select Dialin. The connection is the interface you want to connect to the dialup modem to answer incoming calls. The Dial-In Setup Account Details page appears (Figure 56). McAfee UTM Firewall 4.0.4 Administration Guide... - Page 62 • RADIUS – Use an external RADIUS server as defined on the RADIUS tab of the Users page. • TACACS+ – Use an external TACACS+ server as defined on the TACACS+ tab of the Users page. McAfee UTM Firewall 4.0.4 Administration Guide...
-
Page 63: Connecting A Dial-In Client
Click Next. The Network Connection Type page appears (Figure 58). Figure 58 New Connection WIzard – Network Connection Type Select the Connect to the network at my workplace option. Click Next to continue. The Network Connection page appears (Figure 59). McAfee UTM Firewall 4.0.4 Administration Guide... - Page 64 Select Dial-up connection and click Next. The Select a Device page appears (Figure 60). Figure 60 New Connection WIzard – Select a Device Select the device to use for the connection and click Next. The Connection Name page appears (Figure 61). McAfee UTM Firewall 4.0.4 Administration Guide...
- Page 65 Enter a name for the connection and click Next. The Phone Number to Dial page appears (Figure 62). Figure 62 New Connection WIzard – Phone Number to Dial Enter the phone number to dial and click Next. The Smart Cards page appears (Figure 63). McAfee UTM Firewall 4.0.4 Administration Guide...
- Page 66 To make the connection only available for you, select the My use only option. This is a security feature that does not allow any other users who log onto your machine to use this remote access connection. Click Next. The completionpage appears (Figure 65). McAfee UTM Firewall 4.0.4 Administration Guide...
-
Page 67: Failover, Load Balancing, And High Availability
Internet connections, and even multiple UTM Firewall appliances, to ensure Internet availability in the event of service outage or heavy network load. These availability services can be configured individually or in combination. The following Internet availability services are provided by the UTM Firewall appliance: McAfee UTM Firewall 4.0.4 Administration Guide... - Page 68 MAC address from the UTM Firewall appliance. Typically, this means the ADSL modem terminates the PPPoE connection, and the appliance is configured with DHCP or manually assigned settings, using the ADSL modem as a gateway. McAfee UTM Firewall 4.0.4 Administration Guide...
-
Page 69: Internet Connection Failover
Click the Edit icon next to the connection for which you wish to edit the failover parameters. The edit page for failover parameters appears (Figure 69). The Name and Port of the connection are displayed, along with several connection testing options. Figure 69 Edit page for failover parameters McAfee UTM Firewall 4.0.4 Administration Guide... - Page 70 Click Next to configure settings specific to the Test Type. • If you selected a Test Type of Default, no further configuration is required. Click Finish. The next step is to modify the failover levels. See To modify failover levels. McAfee UTM Firewall 4.0.4 Administration Guide...
- Page 71 Default: 5 Click Finish. The next step is to modify the failover levels. See To modify failover levels. • If you selected Custom, the page to enter a custom test command appears (Figure 72). McAfee UTM Firewall 4.0.4 Administration Guide...
- Page 72 Internet connection, setting the level to Enabled or Required has the same effect. For failover to succeed, you must then configure at least the Secondary connection level for another port or ports. Select Enabled or Required from the Secondary list. McAfee UTM Firewall 4.0.4 Administration Guide...
-
Page 73: Load Balancing
If there are multiple internet connections and none have been selected as preferred gateways, a warning is displayed (Figure 74). McAfee UTM Firewall 4.0.4 Administration Guide... -
Page 74: High Availability
IP address as their gateway, and only use the devices’ primary IP addresses when they need to contact a particular UTM Firewall appliance, such as to access the Management Console of that appliance. McAfee UTM Firewall 4.0.4 Administration Guide... - Page 75 The standby status could be due to UTM Firewall appliance #1 booting up before UTM Firewall appliance #2, or UTM Firewall appliance #2 might have previously failed but has come back online. McAfee UTM Firewall 4.0.4 Administration Guide...
- Page 76 Should UTM Firewall appliance #1 lose LAN connectivity (for example, someone accidentally powers it down), UTM Firewall appliance #2 assumes the shared IP address and becomes the default gateway for the local network, as illustrated in Figure McAfee UTM Firewall 4.0.4 Administration Guide...
-
Page 77: Default High Availability Script
More sophisticated HA scenarios can be configured by setting up a basic configuration in the High Availability page and then manually editing the ifmond.conf file and the scripts it calls. McAfee UTM Firewall 4.0.4 Administration Guide... -
Page 78: Enabling High Availability
IP addresses, and the interface configured as the checked interface. From the Network Setup menu, select Network Setup > Failover & H/A > High Availability (Figure 79). Click New. The Edit High Availability Connection page appears. McAfee UTM Firewall 4.0.4 Administration Guide... - Page 79 [Optional] Click Add. To add the alias to the Alias IP Address list. You can repeat steps 7-9 to add additional aliases to the Alias IP Address list. Click Finish. The connection is added to the edit list (Figure 80). McAfee UTM Firewall 4.0.4 Administration Guide...
-
Page 80: Dmz Network
DMZ. Note: DMZ is not available on the SG310 or SG640 PCI appliances. By default, the UTM Firewall appliance blocks network traffic originating from the DMZ from entering the LAN. Additionally, any network traffic originating from the Internet is blocked from entering the DMZ and must be specifically allowed before the servers become publicly accessible. -
Page 81: Services On The Dmz Network
You may also want to configure your appliance to allow access from servers on your DMZ to servers on your LAN. By default, all network traffic from the DMZ to the LAN is dropped. McAfee UTM Firewall 4.0.4 Administration Guide... -
Page 82: Guest Network
VPN connection. Note: Guest network is not available on the SG310 or SG640 PCI appliances. By default, you can configure the appliance’s DHCP server to hand out addresses on a guest network, and the appliance’s VPN servers to listen for connections from a guest network and establish VPNs. -
Page 83: Wireless Security Methods
WPA-PSK, then this method is also known as WPA2 or 802.11i. Security Alert: If you use WEP or no wireless security method at all, McAfee recommends you configure the wireless interface as a Guest connection, disable bridging between clients, and only allow VPN traffic over the wireless connection. - Page 84 Disabling the ESSID broadcast should not be considered a security measure; clients can still connect if they know the ESSID, and it is possible for network sniffers to read the ESSID from other clients. McAfee UTM Firewall 4.0.4 Administration Guide...
- Page 85 Step 13 (page 86) • WPA-PSK — Go to Step 14 (page 86) • WPA-Enterprise — Go to Step 15 (page 87). If you chose the WEP security method, complete the following fields (Figure 84). McAfee UTM Firewall 4.0.4 Administration Guide...
- Page 86 Due to flaws in the authentication protocol, the Shared Key method reduces the security Open System of the WEP key. McAfee recommends using authentication instead. Select a key length from the WEP Key Length list. This sets the length of the WEP key fields 1-4.
- Page 87 • TKIP (Temporary Key Integrity Protocol): TKIP is more commonly supported by wireless clients, but is less secure than AES. • AES (Advanced Encryption Standard): AES is more secure, but might not be supported by some older wireless clients. Click Finish. McAfee UTM Firewall 4.0.4 Administration Guide...
-
Page 88: Bridging Wireless And Lan Connections
Switch A and Wireless are now bridged. You can edit or delete the bridge as necessary. If you have a Windows client, be sure to allot extra time for the bridge deletion to complete. McAfee UTM Firewall 4.0.4 Administration Guide... -
Page 89: Configuring Wireless Mac-Based Acl
Connections page, click the Edit icon alongside the Wireless network interface. On the Wireless Configuration tab select the ACL tab (Figure 89). Figure 89 Wireless ACL-MAC Select an ACL configuration from the Mode options. Available options are: • Disable Access Control List (Default) McAfee UTM Firewall 4.0.4 Administration Guide... -
Page 90: Configuring Wds
From the Network Setup menu, click Network Setup. The Connections tab opens. On the Connections page, click the Edit icon alongside the Wireless network interface. On the Wireless Configuration tab select the WDS tab (Figure 90). McAfee UTM Firewall 4.0.4 Administration Guide... - Page 91 Use this procedure to configure WDS bridging. Configure the wireless settings on the Access Point tab. Select the WDS tab. Set Mode to Automatic. Click Add and enter the MAC of the peer Access Point. Click the Connections tab. McAfee UTM Firewall 4.0.4 Administration Guide...
-
Page 92: Configuring Advanced Wireless Features
DTIM indicates to clients in power-saving mode that there are packets for them to receive. Sending a DTIM more frequently increases responsiveness for clients in power-saving mode, but uses more electrical power since the clients must stay awake longer. McAfee UTM Firewall 4.0.4 Administration Guide... - Page 93 Select a preamble length from the Preamble Type list. The preamble is part of the physical wireless protocol. Available options are: • Long (Default) • Short – Short preambles can increase throughput; however, some wireless clients might not support short preambles. McAfee UTM Firewall 4.0.4 Administration Guide...
-
Page 94: Bridging
Bridge interface. Once this bridge interface has been added, it appears on the Network Setup page under the Connections tab, along with the UTM Firewall appliance’s other network interfaces. Prerequisites: • If high availability is configured for a connection, it must be modified or disabled before bridging. McAfee UTM Firewall 4.0.4 Administration Guide... - Page 95 [Optional, can be left blank] Enter the IP address for the Gateway. [Optional, can be left blank] Enter the IP address for the DNS Server. Click Next. The Edit Bridge Configuration page appears. Continue with the next step. McAfee UTM Firewall 4.0.4 Administration Guide...
- Page 96 From below the main Connections table, select Bridge from the list and click Add. The Bridge Configuration tab appears. Select the interface from the Existing Interface Configuration list. This example transfers the settings from the Switch A LAN interface (Figure 95). Figure 95 Example transfer configuration to bridge McAfee UTM Firewall 4.0.4 Administration Guide...
- Page 97 (Figure 97). Figure 97 Bridge Configuration Direct Connection Settings page Enter test_bridge in the Connection Name field. Enter 1.1.1.3 in the IP Address field. Click Next. The Edit Bridge Configuration page appears (Figure 98). McAfee UTM Firewall 4.0.4 Administration Guide...
-
Page 98: Deleting A Bridge
• Serving DHCP addresses to remote sites to ensure that they are under better control (which can also be achieved with a DHCP relay. See DHCP Relay page). • Allowing users to make use of protocols that do not work well in a WAN environment (such as netbios). McAfee UTM Firewall 4.0.4 Administration Guide... -
Page 99: Vlan
VLAN header is called a tagged packet. Note: VLANs are not supported by the SG310. When a packet is routed out the VLAN interface, the VLAN header is inserted and then the packet is sent out on the underlying physical interface. When a packet is received on the physical interface, it is checked for a VLAN header. -
Page 100: Port-Based Vlans
• Switch A can only have one default VLAN, and any ports that are not explicitly assigned to another VLAN are automatically placed on the default VLAN. The default VLAN is untagged. • You cannot add tagged VLANs to port A1; it is a member of the default VLAN only. McAfee UTM Firewall 4.0.4 Administration Guide... -
Page 101: Enabling Port-Based Vlans
You can also run the wizard again to select this feature, skipping the options that are already configured. To relaunch the wizard, click the McAfee logo in the upper left above the menu, or open the console in a fresh browser window. -
Page 102: Adding A Port-Based Vlan
103. You can also run the wizard again to select this feature, skipping the options that are already configured. To relaunch the wizard, click Quick Setup in the Network Setup menu. All that remains to do with the wizard approach is configuring the Mode and connection (Change Type) for each port. McAfee UTM Firewall 4.0.4 Administration Guide... - Page 103 2, Port A2 uses VLAN ID 3, Port A3 uses VLAN ID 4, and so forth. Note: Some Cisco equipment uses tagged VLAN 1 for its own purposes. McAfee recommends setting the default VLAN ID to 2 or greater for tagged VLANs, unless you intend for the UTM Firewall appliance and Cisco equipment to interact over tagged VLAN 1.
-
Page 104: Gre Tunnels
Create a GRE tunnel for which the Local Address is the local LAN IP address, and the Remote Address is the remote LAN IP address. Create static routes that use the GRE tunnel as their interface. See Routes. Do not specify a gateway address. To bridge the local and remote LAN over IPsec McAfee UTM Firewall 4.0.4 Administration Guide... -
Page 105: Troubleshooting Gre Tunnels
• Ensure that there is a route set up on the GRE tunnel to the remote network. • Ensure that there is a route on the remote GRE endpoint to the network at this end of the GRE tunnel. McAfee UTM Firewall 4.0.4 Administration Guide... -
Page 106: 3G Usb Modems
If no profile exists for your ISP, select Custom Profile from the ISP Profile drop down list. The following additional fields appear. Enter the name of your ISP in the Profile Name field. Select the type of connection being created from the Profile Type drop-down list. McAfee UTM Firewall 4.0.4 Administration Guide... -
Page 107: Configuring Usb Port Settings
Click the Port Settings tab. The Serial Port Setup page appears (Figure 107). Figure 107 Port Settings-Serial Port Setup Select the type of flow control to perform from the Flow Control list. Available options are: McAfee UTM Firewall 4.0.4 Administration Guide... -
Page 108: Adding New 3G Usb Modem Profiles
Select Network Setup from the Network Setup menu, and click the USB tab. The USB tab contains a list of all the USB Modem Profiles currently stored on the device (Figure 108). Figure 108 USB tab Click New. The USB Modem Details dialog appears (Figure 109). McAfee UTM Firewall 4.0.4 Administration Guide... -
Page 109: Routes
• Example: BGP Creating a static route Use this procedure to add static routes for the UTM Firewall appliance. These routes are additional to those created automatically by the configuration scripts of the appliance. McAfee UTM Firewall 4.0.4 Administration Guide... - Page 110 • Accepted value range: A number equal to or greater than 0. Click Finish. The new static route appears in the Static Routes list (Figure 112). McAfee UTM Firewall 4.0.4 Administration Guide...
-
Page 111: Policy Routes Page
If this is the first route, click New. Otherwise, you can click the add above or below icon to add the route in the location you want above or below an already defined route. The Edit Policy Route page appears (Figure 115). McAfee UTM Firewall 4.0.4 Administration Guide... -
Page 112: Enabling Route Management
Route management does not have full Management Console configuration support. It is recommended that only advanced users familiar with the Zebra routing daemon and the RIP, BGP, or OSPF routing protocol attempt configuration of this feature. McAfee UTM Firewall 4.0.4 Administration Guide... -
Page 113: Manually Configuring Route Management
In zebra.conf, enter: ! Uncomment and set telnet/vty passwords to enable telnet access on port 2601 #password changeme #enable password changeme McAfee UTM Firewall 4.0.4 Administration Guide... - Page 114 Zebra and/or ripd via the command line. The command line interface is very similar to the Cisco IOS interface. If you are familiar with this, you may prefer to configure using this method. McAfee UTM Firewall 4.0.4 Administration Guide...
-
Page 115: Example: Ospf
Manually configuring route management. , enter: zebra.conf hostname sg ! Uncomment and set telnet/vty passwords to enable telnet access on port 2602 #password changeme #enable password changeme # Enable multicast for OSPF interface eth1 McAfee UTM Firewall 4.0.4 Administration Guide... -
Page 116: Example: Bgp
Ensure you have enabled BGP under Route Management, then open zebra.conf and bgpd.conf for editing as described in Manually configuring route management. In zebra.conf, enter: hostname ! Uncomment and set telnet/vty passwords to enable telnet access on port 2602 McAfee UTM Firewall 4.0.4 Administration Guide... -
Page 117: Dns
IP address numbers to the machine name, which is referred to as reverse mapping. The DNS settings control the network name services of the UTM Firewall appliance. The DNS tab contains the following tabs: • DNS Proxy tab • Dynamic DNS tab McAfee UTM Firewall 4.0.4 Administration Guide... -
Page 118: Dns Proxy Tab
Disabling DNS proxy server From the Network Setup menu, click Network Setup, select the DNS tab, and then select the DNS Proxy tab. The DNS Proxy Server page appears. Clear the Enable DNS Proxy checkbox. Click Submit. McAfee UTM Firewall 4.0.4 Administration Guide... -
Page 119: Dynamic Dns Tab
• dyndns.org—Use this option if your dynamic DNS hostname is on the standard dyndns.org domains. • dyndns.org (Custom)—Use this option if your dynamic DNS hostname is on your own domain name that you own and have delegated to dyndns.org. • GnuDip • ODS • TZO McAfee UTM Firewall 4.0.4 Administration Guide... - Page 120 Click Finish. The account is added to Dynamic DNS Accounts page (Figure 122). Figure 122 Dynamic DNS Accounts page—Status This page also displays the current Status for each dynamic DNS service. The status can be one of the following: McAfee UTM Firewall 4.0.4 Administration Guide...
-
Page 121: Static Hosts Tab
Deleting a static host Creating a static host From the Network Setup menu, click Network Setup, and then select the Static Hosts tab. The Static Hosts page appears (Figure 123). Figure 123 Static Hosts page McAfee UTM Firewall 4.0.4 Administration Guide... -
Page 122: Ipv6
• The site-local DNS server address (fec0:0:0:ffff::1/64) is assigned to LAN connections if the DNS proxy is enabled. • Router advertisements are sent on LAN connections. • 6to4 tunnels are created on Internet connections. McAfee UTM Firewall 4.0.4 Administration Guide... -
Page 123: Enabling Ipv6 At The Appliance Level
IP address of 10.10.1.254 and assign addresses in the 192.168.0.0 network. DHCP is defined by RFC2131. For details, visit the following URL: http://www.faqs.org/rfcs/rfc2131.html. The main pages for DHCP in the Management Console are as follows: • DHCP Status page McAfee UTM Firewall 4.0.4 Administration Guide... -
Page 124: Dhcp Status Page
From the Network Setup menu, click DHCP Server. The DHCP Server Configuration page appears. For the interface you want to configure, select DHCP Server from the Type list. The Server Configuration page appears (Figure 129). McAfee UTM Firewall 4.0.4 Administration Guide... - Page 125 • Default: 86400 In the Maximum Lease Time field, enter the maximum time in seconds that a dynamically assigned IP address is valid before the client must request it again. • Default: 172800 McAfee UTM Firewall 4.0.4 Administration Guide...
-
Page 126: Dhcp Addresses Page
This page becomes available after an interface has been configured as a DHCP server. See Note: Configuring a DHCP server Use this page to view the status of IP addresses. You can also free leased addresses; and add, reserve, and delete addresses. McAfee UTM Firewall 4.0.4 Administration Guide... - Page 127 Network Setup menu options DHCP Server Figure 130 DHCP Addresses page McAfee UTM Firewall 4.0.4 Administration Guide...
- Page 128 Add/Remove Dynamic IP Addresses pane Use this pane to manually add or remove a dynamic IP address or address range. Figure 132 shows the Add/Remove Dynamic IP Addresses pane of the DCHP Addresses page: McAfee UTM Firewall 4.0.4 Administration Guide...
- Page 129 DNS server available. This is useful for sites that are too small to run a DNS/WINS server. Both the DHCP reserved hosts and the Static hosts configuration work together so that when you create a MyWebServer 10.0.0.5 machine, everyone on the internal network can ping and connect to it. McAfee UTM Firewall 4.0.4 Administration Guide...
-
Page 130: Dhcp Relay Page
From the Network Setup menu, click DHCP Server. The DHCP Server Configuration Status page appears. Click the edit icon for the Interface DHCP Relay configuration you want to edit. The DHCP Relay page appears. McAfee UTM Firewall 4.0.4 Administration Guide... -
Page 131: Configuring The Windows Client For Dhcp
Click Properties. The Local Area Connection Properties dialog box is displayed (Figure 136). Figure 136 Windows Local Area Connection Properties dialog box Select Internet Protocol (TCP/IP) in the connection item list and click Properties. The Internet Protocol (TCP/IP) Properties dialog box appears (Figure 137). McAfee UTM Firewall 4.0.4 Administration Guide... -
Page 132: Verifying And Troubleshooting Dhcp
Web browsers running on PCs on your LAN can use the proxy-cache server of the UTM Firewall appliance to reduce Internet access time and bandwidth consumption. Note: Web Cache is applicable to SG565, SG580, SG640, and SG720 models only. McAfee UTM Firewall 4.0.4 Administration Guide... -
Page 133: Enabling The Web Cache
IP address of this UTM Firewall appliance. In complicated network scenarios, you may need to manually edit the proxy.pac file for completeness and reliability. McAfee UTM Firewall 4.0.4 Administration Guide... -
Page 134: Creating A User Account And Network Share In Windows Xp
User name field, fill out the other fields, and click Next. Select the Standard user radio button, and click Finish. Create a network share Use this procedure to create a Network share in Windows XP for the Web cache. McAfee UTM Firewall 4.0.4 Administration Guide... -
Page 135: Allocating Network Storage For Web Cache
Prerequisite: Create a network folder to share. See Create a network share. If you prefer, you can use local USB storage (SG565 model only) instead of Network Storage. For more information, see Allocating local USB storage for Web caching. McAfee UTM Firewall 4.0.4 Administration Guide... -
Page 136: Configuring Browsers To Use The Web Cache
Once the Web cache has been set up, personal computers on the LAN must have their browsers configured appropriately. In Internet Explorer, the configuration must be set manually. In Mozilla Firefox, you can specify the UTM Firewall URL to the .pac file for automatic configuration. McAfee UTM Firewall 4.0.4 Administration Guide... - Page 137 In Firefox, click Tools > Options > Advanced > Network and click the Settings button. The Connection Settings dialog box is displayed (Figure 142). Figure 142 Web Cache - Firefox Mozilla Connection Settings Select the Automatic proxy configuration URL option. Enter the location of the file: proxy.pac McAfee UTM Firewall 4.0.4 Administration Guide...
-
Page 138: Allocating Local Usb Storage For Web Caching
From the Network Setup menu, click Web Cache, select the Advanced tab, and then select the Peers tab. The Peers tab appears (Figure 144). Figure 144 Web Cache page Peers tab Click New. The Peers edit page appears (Figure 145). McAfee UTM Firewall 4.0.4 Administration Guide... -
Page 139: Configuring Icap Client For Web Cache
From the Network Setup menu, click Web Cache, select the Advanced tab, and then select the ICAP Client tab. The ICAP page appears (Figure 146). Figure 146 Web Cache page ICAP Client tab Select the Enable ICAP functionality checkbox to enable the ICAP features of the Web cache. McAfee UTM Firewall 4.0.4 Administration Guide... -
Page 140: Configuring Advanced Settings For The Web Cache
(one 32 MB object hit counts for 3200 10 KB hits). To increase speed at the expense of bandwidth, leave this setting low. • Default: 250 • Integer value McAfee UTM Firewall 4.0.4 Administration Guide... -
Page 141: Traffic Shaping
LANs and DMZs. For the SG565 model, the wireless connection must be unconfigured. This section contains the following topics: • Enabling QoS Autoshaper • Disabling QoS Autoshaper • About ToS packet priority McAfee UTM Firewall 4.0.4 Administration Guide... -
Page 142: Enabling Qos Autoshaper
Figure 149 assumes a speed of 1.5 MB down (inbound), 256 KB up (outbound). 1.5 x 1024 = 1536 kbits inbound. 90% of 1536 is 1382 kilobits. 90% of 256 is 230 kbits. Click Finish. McAfee UTM Firewall 4.0.4 Administration Guide... -
Page 143: About Tos Packet Priority
Packets can also be matched by their source or destination IP address. Tip: ToS traffic shaping works best when used in conjunction with the QoS autoshaper. Enable and configure the QoS autoshaper if possible when using ToS packet prioritization. See Enabling QoS Autoshaper. McAfee UTM Firewall 4.0.4 Administration Guide... - Page 144 Creating a packet priority rule Under Network Setup, click QoS Traffic Shaping, then select the ToS Packet Priority tab. The ToS Packet Priority page appears. Click New. The Add ToS Packet Priority rule page appears (Figure 151). McAfee UTM Firewall 4.0.4 Administration Guide...
- Page 145 Select a Priority from the list. Available options are: • Low • Medium • High Click Finish. The rule is displayed in the Services list. You can edit and delete the definitions as needed (Figure 152). McAfee UTM Firewall 4.0.4 Administration Guide...
-
Page 146: Sip
The SIP proxy allows seamless communication between SIP phones running on an internal network (LAN or DMZ) and SIP phones in the wider Internet. See the Siproxd Web site for full details: http://siproxd.sourceforge.net/ A typical SIP configuration is shown in Figure 153: McAfee UTM Firewall 4.0.4 Administration Guide... -
Page 147: Enabling The Sip Proxy
Details of incoming and outgoing calls are logged in the system log. To view the log, from the System menu, click Diagnostics > System Log tab. Disabling the SIP proxy From the Network Setup menu, click SIP. The SIP Proxy page appears. Clear the Enabled checkbox. McAfee UTM Firewall 4.0.4 Administration Guide... - Page 148 Network Setup menu options McAfee UTM Firewall 4.0.4 Administration Guide...
-
Page 149: Firewall Menu Options
Antispam (TrustedSource) Controlling packet traffic Many features within the McAFee UTM Firewall Management Console can affect the flow of packet traffic within the appliance. This topic outlines the hierarchy and precedence of the features. The vast majority of incoming traffic are forwarded packets. Packets considered as Input (device-bound) are destined for the UTM Firewall appliance itself, targeted as either a device endpoint, Web-administration, proxy, or sshd. - Page 150 Also, if rate limiting on a rule is enabled, a second rate limiting is applied. See Rate limiting a packet filter rule. After packet filtering rules are applied, packets are directed either to Incoming Access or Access Control. McAfee UTM Firewall 4.0.4 Administration Guide...
-
Page 151: Firewall Overview
The Firewall menu contains the following topics for its menu options (some models do not have all menu options): • Definitions • Packet filtering • • Connection tracking • Intrusion Detection Systems • Access control • Antivirus • Antispam (TrustedSource) McAfee UTM Firewall 4.0.4 Administration Guide... -
Page 152: Definitions
1 and 65535. As an example, HTTP (Web) uses the TCP protocol, with a default port of 80. Network packets may be matched by destination service. The Service Groups page is shown in Figure 156. McAfee UTM Firewall 4.0.4 Administration Guide... - Page 153 Details column displays the protocol and port number. You can click the edit or delete icon to edit or delete the existing service groups. Click New. The Modify Service Group page appears (Figure 157). McAfee UTM Firewall 4.0.4 Administration Guide...
- Page 154 HTTP, HTTPS, FTP, Ping, and SSH. From the Firewall menu, click Definitions > Service Groups tab. The Service Groups page appears. Click New. The Modify Service Group page appears. Enter Internet-services in the Name field. McAfee UTM Firewall 4.0.4 Administration Guide...
-
Page 155: Addresses Page
Enter the IP address or range in the IP Address field. Click Finish. Example: Adding a single IP address This example adds a single IP address for the administration personal computer used to manage the appliance. McAfee UTM Firewall 4.0.4 Administration Guide... - Page 156 Group previously added addresses together to simplify your firewall ruleset. From the Firewall menu, click Definitions > Addresses tab. The Addresses page appears. Select Address Group from the Type list. Click New. The Address Group page appears (Figure 161). McAfee UTM Firewall 4.0.4 Administration Guide...
-
Page 157: Interfaces Page
Use the Interfaces page to define, edit, and delete interface groups. Packets can also be matched by incoming and outgoing Interface. You can group the appliance network interfaces into Interface Groups to simplify your firewall ruleset. The Interfaces page is shown in Figure 162. McAfee UTM Firewall 4.0.4 Administration Guide... - Page 158 Click the delete icon for the interface group you want to delete. Example: Creating an Interface Group This example creates an Interface Group named “LAN Interface”, which encompasses the LAN interfaces on a SG565 appliance. McAfee UTM Firewall 4.0.4 Administration Guide...
-
Page 159: Packet Filtering
Packets that are accepted are passed along to Access Control or Incoming Access for further processing. For further information about the actions performed on packets, see Packet filtering actions. McAfee UTM Firewall 4.0.4 Administration Guide... -
Page 160: Packet Filtering Actions
• Reject - The Reject action behaves like the Drop action, but in addition to any logging and rate limiting that might be enabled, the Reject action sends an “ICMP administratively prohibited” message in response to every packet that is Rejected. McAfee UTM Firewall 4.0.4 Administration Guide... -
Page 161: Packet Filtering Page
If you use the New button, the rule is added to the bottom of the table. Use the up or down arrows to reposition a rule. For more information on icons, see Interface icons. McAfee UTM Firewall 4.0.4 Administration Guide... - Page 162 The Type controls which incoming and outgoing interface options are available: McAfee UTM Firewall 4.0.4 Administration Guide...
- Page 163 • If you selected IP for the Protocol: • IP protocol number • If you selected ICMP for the Protocol: • ICMP type number [Optional] To log the first packet of the connection to the system log, select the Log checkbox. McAfee UTM Firewall 4.0.4 Administration Guide...
- Page 164 From the Firewall menu, click Packet Filtering. The Packet Filtering page appears. Click the edit icon next to the rule that you want to configure rate limiting. The edit page for the rule opens. Click the Rate Limit tab (Figure 168). McAfee UTM Firewall 4.0.4 Administration Guide...
- Page 165 [Optional] To ease identification of matched rules within the system log, enter an identifying string in the Log Prefix field. The prefix text is placed at the start of the log message. Click Update. McAfee UTM Firewall 4.0.4 Administration Guide...
- Page 166 From the Incoming Interface list, select WIFI (wireless). From the Outgoing Interface, select Any DMZ interface. Allow the Source Address and Destination Address lists to default to the Any wildcard. In the Services list, select DMZ-services. Click Finish. McAfee UTM Firewall 4.0.4 Administration Guide...
-
Page 167: Incoming Access
This column controls access to the UTM Firewall appliance via the UTM Firewall Management Console. (HTTPS) To use the console, ensure that the UTM Firewall appliance's Web server is configured appropriately on the Web page. See Creating a user. McAfee UTM Firewall 4.0.4 Administration Guide... -
Page 168: About Custom Firewall Rules
Incoming Access and Packet Filtering pages is adequate for most applications. Only experts on firewalls and iptables should add custom firewall rules. Note: McAfee does not provide technical support for custom firewall rules. Further reading about firewall, NAT, and packet mangling for Linux can be found at http://www.netfilter.org/documentation. - Page 169 Mangle Rules, and Untracked Rules. You can see a portion of the Packet Filter Rules iptables is shown in Figure 170. A portion of the NAT Rules iptables is shown in Figure 171. Figure 171 NAT Rules area A portion of the Packet Mangle Rules iptables is shown in Figure 172. McAfee UTM Firewall 4.0.4 Administration Guide...
- Page 170 It also displays how many times each rule has been matched, which can be useful for troubleshooting. Scroll through the page to view the iptables for Packet Filter, Packet Mangle, and Untracked Rules. NAT rules are not applicable to this page. McAfee UTM Firewall 4.0.4 Administration Guide...
-
Page 171: Nat
UTM Firewall boots, and to provide options such as faster IPsec offloading. NAT (Network Address Translation) modifies the IP address, port, or both of traffic traversing the UTM Firewall appliance. The appliance supports the following types of network address translation: McAfee UTM Firewall 4.0.4 Administration Guide... -
Page 172: About Port Forwarding
UTM Firewall appliance. Figure 175, the UTM Firewall appliance replaces the source IP address (SRC_IP=1.1.1.1) packet originating with the IP address of the exiting interface, which is 3.3.3.3. The destination IP address remains 25.25.25.25. McAfee UTM Firewall 4.0.4 Administration Guide... -
Page 173: About One-To-One Nat
Internet by forwarding requests for a specific service coming into one of the appliance’s interfaces (typically the WAN interface) to a machine on your DMZ or LAN that services the request. Click New to define the first rule, as shown in Figure 176. McAfee UTM Firewall 4.0.4 Administration Guide... - Page 174 If this is the first rule, click New. Otherwise, you can also click the add above or below icon to add the rule in the location you want above or below an already defined rule. The Modify Port Forward page appears (Figure 178). McAfee UTM Firewall 4.0.4 Administration Guide...
- Page 175 [Conditional; if not using definitions] Enter a port in the Optional To Ports field. If you select Show Definitions for the Ports field, the Optional To Ports field changes to the display-only field “To Services Unchanged”. Click Finish. Make sure you create an associated packet filter rule. See Packet filtering. McAfee UTM Firewall 4.0.4 Administration Guide...
- Page 176 Select the packet protocol from the Protocol list. Available options are: • TCP • UDP Enter the destination service port or ports of the request in the Ports field. Multiple public ports can be forwarded to a single internal port. McAfee UTM Firewall 4.0.4 Administration Guide...
- Page 177 Precautions must be taken when configuring the mail server, otherwise you could become susceptible to such abuse as unauthorized relaying of unsolicited email (spam) using your server. Configuration of the email server is outside the scope of this manual. McAfee UTM Firewall 4.0.4 Administration Guide...
- Page 178 Next to Ports, click Show Definitions. Select E-Mail from the Services list. Enter the IP address of your internal email server in the To Destination Address field. Figure 182 shows the completed page as it should appear at this step of the procedure: McAfee UTM Firewall 4.0.4 Administration Guide...
- Page 179 Click the add below icon for the lowermost rule. The Modify Port Forward page appears. Click Advanced. The Advanced Port Forward page appears. In the Descriptive Name field, enter SSH to Build server. Leave the Enable and Create Packet Filter Rule checkboxes selected. McAfee UTM Firewall 4.0.4 Administration Guide...
-
Page 180: Source Nat Page
To use the predefined definitions added through the Definitions menu, click Show Definitions by the fields where applicable and select a definition from the list. For more information on definitions, see Definitions. To manually enter an address or service, click New. McAfee UTM Firewall 4.0.4 Administration Guide... - Page 181 TCP or UDP destination port, an IP protocol, or an ICMP message type. This field allows you to use a predefined service. Or, click New to create a service definition when you create this rule (Figure 187). McAfee UTM Firewall 4.0.4 Administration Guide...
- Page 182 You cannot translate the port for IP protocols or ICMP messages. In addition, you cannot translate the source port if Services is set to a predefined Service. Since a predefined service may contain multiple protocols, a single port definition is not well-defined. Click Finish. McAfee UTM Firewall 4.0.4 Administration Guide...
- Page 183 This example assumes there are address definitions defined for Port B named “Internet (Port B)”, an address defined for the DMZ named “DMZ-network”, and an address defined named “Internet-Alias” to translate the IP address. For information on defining addresses, see Adding an IP address or range. McAfee UTM Firewall 4.0.4 Administration Guide...
-
Page 184: One-To-One Nat
To use the predefined definitions added through the Definitions menu, click Show Definitions by the fields where applicable and select a definition from the list. For more information on definitions, see Definitions. To manually enter an address or service, click New. McAfee UTM Firewall 4.0.4 Administration Guide... - Page 185 Use this procedure to re-enable a disabled rule. Tip: Click the enable checkbox to the left of the object list to quickly re-enable the rule. The page refreshes, and a green check mark indicates the rule is enabled again. McAfee UTM Firewall 4.0.4 Administration Guide...
-
Page 186: Masquerading Page
• All machines on the local network can access the Internet using a single ISP account. • Only one public IP address is used and is shared by all machines on the local network. Each machine has its own private IP address. McAfee UTM Firewall 4.0.4 Administration Guide... -
Page 187: Universal Plug And Play Gateway
NAT firewall to automatically work. Caution: When UPnP in enabled, any host connected to the internal network can create a port-forwarding rule on the firewall. McAfee strongly recommends you do not enable the UPnP Gateway feature. McAfee UTM Firewall 4.0.4 Administration Guide... -
Page 188: Configuring Upnp Rules From Windows Xp
Click Submit. Configuring UPnP rules from Windows XP Once UPnP is running on the UTM Firewall appliance, you can configure UPnP port forwarding rules from a local Windows XP PC. McAfee UTM Firewall 4.0.4 Administration Guide... - Page 189 Enter the Internal Port number for this service. Select whether the service uses the TCP or UDP protocol. Click OK. This rule now appears on the UTM Firewall appliance UPnP page in the Current UPnP Port Mappings pane (Figure 196). McAfee UTM Firewall 4.0.4 Administration Guide...
-
Page 190: Connection Tracking
Configuring connection tracking • Disabling connection tracking • About the Connection Tracking Report • Viewing the connection tracking report in the console • Downloading the connection tracking report • Example: Creating a connection tracking report McAfee UTM Firewall 4.0.4 Administration Guide... -
Page 191: Supported Protocols
Implementations of protocols such as H.323 can vary, so if you are experiencing problems, try disabling the H.323 module. Disabling H.323 might be necessary when using H.323 across links that do not perform NAT, such as IPSec or PPTP tunnels. McAfee UTM Firewall 4.0.4 Administration Guide... - Page 192 Global flood rate limiting is disabled by default so that it doesn’t interfere with certain legitimate high-load situations. It is recommended that flood rate limiting be handled on a rule-by-rule basis. See Rate limiting a packet filter rule for more details. McAfee UTM Firewall 4.0.4 Administration Guide...
-
Page 193: Disabling Connection Tracking
You can select the Display checkboxes to indicate which fields you want to include in a report. The Filter box is available for additional narrowing of your reporting criteria. You can optionally sort a specified column in ascending order using the Sort by (Ascending) list. McAfee UTM Firewall 4.0.4 Administration Guide... -
Page 194: Viewing The Connection Tracking Report In The Console
Click View Details. An action successful message is displayed. You can click the Displaying current connection details here link to jump to the bottom of the page where the results are displayed, or use the scroll bars. McAfee UTM Firewall 4.0.4 Administration Guide... -
Page 195: Downloading The Connection Tracking Report
IP addresses currently connected. The current date and time is given, along with connections matching your selection criteria. Figure 200 Current Connection Details Intrusion Detection Systems The UTM Firewall appliance provides two IDS (Intrusion Detection Systems): McAfee UTM Firewall 4.0.4 Administration Guide... -
Page 196: Benefits Of Using An Ids
An attacker can easily forge the source address of UDP or TCP requests. A host that automatically blocks UDP or TCP probes might inadvertently restrict access from legitimate services. Proper firewall rules and ignored hosts lists significantly reduce the risk of restricting legitimate services. McAfee UTM Firewall 4.0.4 Administration Guide... -
Page 197: Configuring Basic Idb
Use this procedure to set the network ports scanned for TCP services. You can choose Basic, default Standard, or Strict settings, and add your own custom entries. To view a list of the services available for each setting, see Table 16 on page 198. McAfee UTM Firewall 4.0.4 Administration Guide... - Page 198 (—) indicates the service is not available in a setting. Table 16 TCP services settings Service Basic Standard Strict 40421 — 40425 — — 49724 — bo2k — — — discard — — McAfee UTM Firewall 4.0.4 Administration Guide...
-
Page 199: Selecting Udp Dummy Services
Standard, or Strict settings, and add your own custom entries. To view a list of the services available for each setting, see Table 17 on page 200. Prerequisite: Detect UDP probes must be enabled in the IDB configuration for any scanning or blocking to occur. See Configuring basic IDB. McAfee UTM Firewall 4.0.4 Administration Guide... - Page 200 The list of network ports can be freely edited; however, adding network ports used by services running on the UTM Firewall unit (such as telnet) may compromise the security of the device and your network. McAfee strongly recommends to use only the predefined lists of network ports (Basic, Standard, Strict).
-
Page 201: Advanced Intrusion Detection And Prevention
These are grouped by type such as ddos, exploit, backdoor, and netbios. Each group encompasses many attack signatures. The full list of signatures can be viewed at the Snort Web site (http://www.snort.org). McAfee UTM Firewall 4.0.4 Administration Guide... -
Page 202: Configuring Snort In Ips Mode
Select the checkbox or checkboxes for the Rule sets you want to enable for snort detection. All rules sets are selected by default. Click Submit. Configuring Snort in IDS mode Use this procedure to configure snort detection in IDS mode. McAfee UTM Firewall 4.0.4 Administration Guide... - Page 203 Click Submit. You can also log results of the snort detection to a MySQL database rather than the syslog. For more information, see Logging to an analysis server (Snort IDS only). McAfee UTM Firewall 4.0.4 Administration Guide...
-
Page 204: Logging To An Analysis Server (Snort Ids Only)
With these tools installed, Web pages can be created that display, analyze, and graph data stored in the MySQL database from the UTM Firewall appliance running Advanced Intrusion Detection. They should be installed in the following order: McAfee UTM Firewall 4.0.4 Administration Guide... -
Page 205: Access Control
If none of the access control rules apply, the packet is processed according to the default action that was set on the main access control page (either deny or allow). McAfee UTM Firewall 4.0.4 Administration Guide... -
Page 206: Authorizations Page
Configuring browsers to use the appliance proxy. Access control users should generally have only the Internet Access (via Access Controls) checkbox selected, with all other access permissions cleared. For information on setting up users, see Creating a user. McAfee UTM Firewall 4.0.4 Administration Guide... -
Page 207: User Authentication For Internet Access
[Optional] Select the Verbosely log accesses checkbox to enable logging of all access attempts. Note: This option must be selected if you wish to configure your UTM Firewall for use with McAfee Firewall Reporter, which provides reporting and real-time monitoring. -
Page 208: Configuring Browsers To Use The Appliance Web Proxy
Web proxy of the UTM Firewall appliance. The example given is for Microsoft Internet Explorer 6. Instructions for other browsers should be similar; refer to their documentation for details on using a Web proxy. McAfee UTM Firewall 4.0.4 Administration Guide... - Page 209 In the row labeled HTTP, enter the LAN IP address of the appliance in the Proxy address to use column, and your Web server port in the Port column. Leave the other rows blank. McAfee UTM Firewall 4.0.4 Administration Guide...
-
Page 210: Acl Tab
0-127 prevents access to those source hosts. However, there is an exception to this policy in that a source host with address 10.0.0.15 requires access. An allow rule can grant access in this circumstance. McAfee UTM Firewall 4.0.4 Administration Guide... -
Page 211: Web Lists Tab
Click Add. The URL is added to the Web URL list of allowed URLs. Repeat as necessary. Deleting an allowed URL or URL fragment Use this procedure to delete an allowed URL or URL fragment. McAfee UTM Firewall 4.0.4 Administration Guide... -
Page 212: Policy Enforcement
NASL reference guide is available at http://www.virtualblueness.net/nasl.html. This section contains the following topics: • Enabling security policy enforcement • Creating a security policy group • Uploading a NASL script • Managing policy enforcement scripts McAfee UTM Firewall 4.0.4 Administration Guide... - Page 213 This setting also determines the maximum time for changes to take effect. • Integer value equal to or greater than 1 McAfee UTM Firewall 4.0.4 Administration Guide...
- Page 214 These services are not scanned for during the security policy scans of the included hosts. The entries available in the list are defined in the Service Groups page. For information, see Service Groups page. McAfee UTM Firewall 4.0.4 Administration Guide...
-
Page 215: Managing Policy Enforcement Scripts
The table of scripts provides two testing buttons for this purpose. The table also contains two checkboxes indicating if the two tests have been successfully executed for each script. McAfee UTM Firewall 4.0.4 Administration Guide... -
Page 216: Mcafee Web Protection Service
Web Protection Service is a security-as-a-service deployment option that provides Web filtering, reputation-based filtering, protection against malware and spyware, and informative reports and dashboards. Web Protection Service is a security-as-a-service deployment option. To subscribe to the McAfee Web Protection Service, contact your McAfee channel partner. McAfee UTM Firewall 4.0.4 Administration Guide... -
Page 217: Mcafee Web Gateway Web Filtering Service
Activating a feature. The McAfee Web Gateway URL filtering service on the UTM Firewall appliance is for the URL filtering (and reporting if applicable) feature only. Advanced McAfee Web Gateway features include anti-malware, antivirus, anti-spam, SSL scanner, and IM and peer-to-peer security. If you or your organization want to use the advanced features of McAfee Web Gateway, you need to purchase a standalone McAfee Web Gateway appliance to use in conjunction with the UTM Firewall appliance. - Page 218 Figure 220 Web Filtering – Content Filtering tab Select the Enable content filtering checkbox. [Optional] To allow access to Web sites that the McAfee Web Gateway filtering system has not yet rated, select the Allow accesses that cannot be rated checkbox. The default and recommended behavior is to block all unrated sites.
-
Page 219: Uploading A Mcafee Web Gateway Certificate And Key
Uploading a McAfee Web Gateway certificate and key Use this procedure to upload the McAfee Web Gateway certificate and private key for your UTM Firewall appliance. Until you upload a valid certificate and key for the McAfee Web Gateway filter service, the message “Both the certificate and the private key are missing or invalid”... -
Page 220: Blocking Categories For Mcafee Web Gateway Filtering
Use this procedure to block categories for McAfee Web Gateway filter service. There is only one block or allow category policy per appliance. If necessary, you can override the McAfee Web Gateway ratings in the Web Lists tab > URL Allow or URL Block pages. For more information, see Web Lists tab. - Page 221 By default, all categories are unblocked initially. Click Submit. Testing a McAfee Web Gateway URL rating Use this procedure to test the URL rating of a given URL. You can provide feedback if you think the rating for the URL is inaccurate and needs to be reassessed.
-
Page 222: Antivirus
The appliance is equipped with proxies for POP, SMTP, HTTP, and FTP that facilitate the transparent scanning of files passing through it. Note: The antivirus feature applies to models SG565, SG580, and SG720 only. McAfee UTM Firewall 4.0.4 Administration Guide... -
Page 223: Enabling Antivirus
UTM Firewall appliance (clamav) by upgrading your UTM Firewall firmware. Such messages are not cause for alarm and Antivirus still functions correctly. As with all firmware updates, McAfee determines an appropriate firmware release schedule based on the nature of the changes made. Serious vulnerabilities are given priority over feature enhancements. - Page 224 CPU resources required by the antivirus scanning. • Default: 20 • Can be a value of 1 or greater Click Submit. Disabling antivirus From the Firewall menu, click Antivirus. The Anti-Virus Configuration page appears. Clear the Enable checkbox. McAfee UTM Firewall 4.0.4 Administration Guide...
-
Page 225: Manually Downloading Antivirus Database Files
Auxiliary storage for virus scanning. McAfee recommends you login to the appliance using telnet or ssh and check the database files are installed correctly. The example below changes the directory (cd command) to the clamav directory and lists the files (ls command) within: # cd /var/clamav # ls -l *.cvd... -
Page 226: Auxiliary Storage For Virus Scanning
\\HOSTNAME\sharename OR \\a.b.c.d\sharename Note: McAfee recommends using a FQDN (Fully Qualified Domain Name) if specifying the hostname. If you allowed full control to everyone on the network share drive, leave the Username and Password fields blank and click Submit. If the dedicated user account must authenticate to the network share,... - Page 227 UTM Firewall appliance and click Check Names then Select this account, or Everyone if you are not securing the network share with a user name and password, and check Allow next to Full Control. Click OK and OK again to finish. McAfee UTM Firewall 4.0.4 Administration Guide...
-
Page 228: Virus Scanning Pop Email
• If there is no single mail server from which most of your internal email clients are retrieving email: • Leave the Default POP server field blank. • Select the Allow connections to other POP servers checkbox. The checkbox must be selected if the Default POP server field is blank. McAfee UTM Firewall 4.0.4 Administration Guide... -
Page 229: Virus Scanning Smtp Email
The How Long Ago column lists the time elapsed since the infected email was received. Virus scanning SMTP email If you have an SMTP mail server on your LAN, the appliance antivirus can scan emails sent to it by external mail servers. McAfee UTM Firewall 4.0.4 Administration Guide... - Page 230 • Can be a value of 1 or greater To set the maximum number of simultaneous SMTP connections, enter a value in the Maximum simultaneous SMTP sessions field. Increasing this value increases the resources consumed by virus scanning. • Default: 10 McAfee UTM Firewall 4.0.4 Administration Guide...
-
Page 231: Virus Scanning Web Traffic
The Virus URL column lists the URL of the infected web page. Enabling FTP virus scanning Use this procedure to enable and configure virus scanning. FTP transfers going through the appliance are proxied and scanned for viruses. McAfee UTM Firewall 4.0.4 Administration Guide... - Page 232 If an FTP client cannot process the status messages, disable the feature by entering zero (0). • 0: disables the Keep alive interval feature • Default: 30 • Can be a value of 0 or greater McAfee UTM Firewall 4.0.4 Administration Guide...
-
Page 233: Antispam (Trustedsource)
With TrustedSource, the lower the score, the more trustworthy the sender. Note: You must have purchased either a McAfee UTM Firewall TrustedSource Subscription to use this feature. Contact your McAfee channel partner or sales representative for additional information. TrustedSource filtering will not function on the appliance until it is licensed. -
Page 234: Enabling Trustedsource
TrustedSource licensing and is required to enable TrustedSource in a UTM Firewall appliance. • You have registered your appliance and activated the feature. For more information, see Registering your Firewall, and Activating a feature. To enable TrustedSource filtering: McAfee UTM Firewall 4.0.4 Administration Guide... - Page 235 • Can be a value of 1 or greater To set the maximum number of simultaneous SMTP connections, enter a value in the Maximum simultaneous SMTP sessions field. Increasing this value increases the resources consumed by TrustedSource filtering. McAfee UTM Firewall 4.0.4 Administration Guide...
- Page 236 Click Test. A successful test returns a rating. An unsuccessful test returns a reputation retrieval failed message, which could be due to either the license not being activated or an invalid IP address being entered. McAfee UTM Firewall 4.0.4 Administration Guide...
- Page 237 Firewall menu options Antispam (TrustedSource) Disabling TrustedSource Select Firewall > Antispam > TrustedSource tab. The TrustedSource page appears. Clear the Enable checkbox. Click Submit. McAfee UTM Firewall 4.0.4 Administration Guide...
- Page 238 Firewall menu options Antispam (TrustedSource) McAfee UTM Firewall 4.0.4 Administration Guide...
-
Page 239: Vpn Menu Features
LAN to the branch offices. IPSec is generally the most suitable choice in this scenario. With the McAfee UTM Firewall appliance, you can establish a VPN tunnel over the Internet using either PPTP, IPSec, or L2TP. IPSec provides enterprise-grade security, and is generally used for connecting two or more networks, such as a branch office to a head office. -
Page 240: About Pptp
From the VPN menu, click PPTP, and select the PPTP VPN Client tab. The PPTP VPN Client page appears (Figure 238). Figure 238 PPTP VPN Client Setup page Click New. The Edit VPN Connection page appears (Figure 239). McAfee UTM Firewall 4.0.4 Administration Guide... - Page 241 You can also configure additional static routes accessible over the PPTP client VPN. Do not specify a gateway, and select the PPTP client connection in the Interface field. For more information on static routes, see Creating a static route. McAfee UTM Firewall 4.0.4 Administration Guide...
-
Page 242: Pptp Vpn Server
Connect to the remote VPN client. See Setting up the remote PPTP client. Enabling and configuring the PPTP VPN Server Use this procedure to enable and configure the UTM Firewall appliance as a PPTP VPN Server. McAfee UTM Firewall 4.0.4 Administration Guide... - Page 243 If you have configured several network connections, select the one that you want to connect remote users to from the IP Address to Assign VPN Server list. This is typically a LAN interface or alias. McAfee UTM Firewall 4.0.4 Administration Guide...
-
Page 244: Adding A Pptp User Account
VPN connection. [Required for VPN PPTP access] Be sure to select the PPTP Access checkbox. If applicable, enter a static IP address in the PPTP Address field. McAfee UTM Firewall 4.0.4 Administration Guide... -
Page 245: Setting Up The Remote Pptp Client
Click Create New Connection from the Network Tasks menu. The New Connection Wizard begins (Figure 242). Figure 242 New Connection Wizard – Welcome page Click Next. The Network Connection Type page appears (Figure 243). McAfee UTM Firewall 4.0.4 Administration Guide... - Page 246 Select Connect to the network at my workplace and click Next. The Network Connection page appears (Figure 244). Figure 244 New Connection Wizard Network Connection page Select Virtual Private Network connection and click Next. The Connection Name page appears (Figure 245). McAfee UTM Firewall 4.0.4 Administration Guide...
- Page 247 If not, or if you wish to manually establish your ISP connection before the VPN connection, select Do not dial the initial connection. Click Next. The VPN Server Selection page appears (Figure 247). McAfee UTM Firewall 4.0.4 Administration Guide...
- Page 248 Enter the UTM Firewall PPTP appliance’s Internet IP address or fully qualified domain name and click Next. The Smart Cards page appears (Figure 248). Figure 248 New Connection Wizard – Smart Cards page Select a Smart Card option and click Next. The Connection Availability page appears (Figure 249). McAfee UTM Firewall 4.0.4 Administration Guide...
- Page 249 Figure 250 New Connection Wizard – Completion page To add a shortcut to your desktop, select the checkbox and click Finish. Your VPN client is now set up and ready to connect. The Connect dialog box is displayed (Figure 251). McAfee UTM Firewall 4.0.4 Administration Guide...
- Page 250 Figure 252 VPN connection Right-click on the VPN connection (Figure 252) to connect, view its status when connected, and make other changes as desired. Figure 253 displays the status of a connection named “SCC.” McAfee UTM Firewall 4.0.4 Administration Guide...
-
Page 251: L2Tp Vpn Server
UTM Firewall appliance performing NAT. Connect to the remote VPN client. See Connecting to the remote VPN client. Configuring the L2TP VPN server Use this procedure to enable and configure the L2TP server for VPN. McAfee UTM Firewall 4.0.4 Administration Guide... - Page 252 Also note that clients connecting using CHAP are unable to encrypt traffic. • Unencrypted Authentication (PAP) — This is plain text password authentication. When using this type of authentication, the client passwords are transmitted unencrypted over the Internet. McAfee UTM Firewall 4.0.4 Administration Guide...
-
Page 253: L2Tp Ipsec Configuration Page
L2TP Server IPSec Details — If the authentication method is x.509 certificates, this column shows the distinguished name of the remotely connecting device. Status — Click the linked text to view more details about the status, as shown in Figure 256. Click Refresh to update the current status. McAfee UTM Firewall 4.0.4 Administration Guide... -
Page 254: Viewing The Status Of An L2Tp Ipsec Tunnel
When you are done viewing the information, click Cancel to cancel out of the status and return to the L2TP IPSec configuration page. For further information about the IPSec status information, see IPSec status details overview. McAfee UTM Firewall 4.0.4 Administration Guide... - Page 255 From the VPN menu, click L2TP VPN Server > L2TP IPSec Configuration tab. Select Preshared Secret Tunnel from the configuration list and click New. The L2TP IPSec Preshared Secret Configuration page appears (Figure 258). McAfee UTM Firewall 4.0.4 Administration Guide...
-
Page 256: Adding An L2Tp User Account
If not, or if you want to manually establish your ISP connection before the VPN connection, select Do not dial the initial connection. Click Next. McAfee UTM Firewall 4.0.4 Administration Guide... - Page 257 Your VPN client is now set up and ready to connect. Connecting to the remote VPN client Verify that you are connected to the Internet, or have set up your VPN connection to automatically establish an initial Internet connection. McAfee UTM Firewall 4.0.4 Administration Guide...
-
Page 258: L2Tp Vpn Client
Enter a descriptive name for the VPN connection, such as the purpose of the connection, in the Name field. Enter the address of the remote L2TP Server to connect to in the Server field. Allowed formats are as follows: • Can be a fully-qualified domain name 'host.domain.com'. McAfee UTM Firewall 4.0.4 Administration Guide... -
Page 259: Browsing And Name Resolution Using L2Tp
If you have a WINS or DNS server, you can browse the network and query the internal name server to resolve internal names. If you do not have a WINS server, you can use an LMHOSTS file. For example: McAfee UTM Firewall 4.0.4 Administration Guide... -
Page 260: Ipsec Vpn
In those cases, x.509 certificate authentication is mandatory. McAfee UTM Firewall 4.0.4 Administration Guide... -
Page 261: Ipsec Vpn Setup Page
• Running indicates that the tunnel has been established. • Running, Renegotiating Phase 1 indicates that the tunnel has been established and the tunnel is attempting to renegotiate its Phase 1 keys. McAfee UTM Firewall 4.0.4 Administration Guide... -
Page 262: Enabling Ipsec Vpn
This procedure uses the Quick Setup to connect two sites together that have static IP addresses. For more control over the configuration options, see Setting up the branch office. From the VPN menu, click IPSec. The IPSec VPN Setup page appears. Click Quick Setup. The Tunnel Settings page appears (Figure 264). McAfee UTM Firewall 4.0.4 Administration Guide... - Page 263 ID using the form of an email to authenticate the device to the remote party. For example: sg@remote.com. [Conditional; only if Preshared Secret was selected for Authentication] Enter the Preshared Secret to use during negotiations. This secret should be kept confidential. McAfee UTM Firewall 4.0.4 Administration Guide...
- Page 264 The attribute/value pairs must be of the form attribute=value and be separated by commas. For example: C=US, ST=Illinois, L=Chicago, O=McAfee, OU=Sales, CN=SG580. It must match exactly the Distinguished Name of the remote party's local certificate to successfully authenticate the tunnel.
- Page 265 In the Tunnel List pane, click the linked status in the Status column (Figure 265). Figure 265 IPSec status The activated link displays data similar to that shown in Figure 266. Figure 266 IPSec status details McAfee UTM Firewall 4.0.4 Administration Guide...
-
Page 266: Ipsec Status Details Overview
• The 2 in 3_000-2 refers to hash SHA1 or SHA (where SHA1 has an ID of 2) • pfsgroup=2 refers to the Diffie Hellman Group 2 for Perfect Forward Secrecy where Diffie Hellman Group 2 has an ID of 2. McAfee UTM Firewall 4.0.4 Administration Guide... -
Page 267: Ipsec Advanced Setup Wizard
This method is considered less secure than automatic key exchange since it uses a static key. Guidance procedures provided in this section include the following: McAfee UTM Firewall 4.0.4 Administration Guide... -
Page 268: Main Keying Mode For An Ipsec Tunnel
• Use Interfaces Default Gateway — Uses the default gateway for the interface selected in the Local Interface list. • Specify — Enter the IP address of the local gateway to use. This example uses 192.168.0.254. McAfee UTM Firewall 4.0.4 Administration Guide... - Page 269 Click Next. The Local Endpoint Settings page appears (Figure 269). This page allows you to configure an IPSec tunnel's local endpoint settings. The options that display depend on your previous selections. Figure 269 IPSec VPN — Local Endpoint Settings page McAfee UTM Firewall 4.0.4 Administration Guide...
- Page 270 [Recommended] To enable automatic renegotiation of the tunnel when the keys are about to expire, select the Initiate Phase 1 & 2 rekeying checkbox. Click Next. The Remote Endpoint Settings page appears (Figure 270). McAfee UTM Firewall 4.0.4 Administration Guide...
- Page 271 You must specify at least one Local and Remote network pair for the IPSec tunnel. If this is a host-to-host tunnel, you need to explicitly add the local and remote endpoint for the tunnel as a network pair. McAfee UTM Firewall 4.0.4 Administration Guide...
- Page 272 [Optional] If Perfect Forward Secrecy is enabled, you can select the Diffie-Hellman group to use. The default is Diffie-Hellman group 2 (1024 bit). Option are: • Diffie-Hellman Group 1 (768 bit) • Diffie-Hellman Group 2 (1024 bit) • Diffie-Hellman Group 5 (1536 bit) • Diffie-Hellman Group 14 (2048 bit) McAfee UTM Firewall 4.0.4 Administration Guide...
-
Page 273: Setting Up A Tunnel With Rsa Signatures Authentication
Interface to the Internet. Allow the Local and Remote addresses to default to Static IP Address. From the Authentication list, select RSA Digital Key Signature. Click Next. The Local Endpoint Settings page appears (Figure 275). McAfee UTM Firewall 4.0.4 Administration Guide... - Page 274 • Custom RSA key Note: The greater the key pair length, the longer the time required to generate the keys. It may take up to 20 minutes to generate a 2048 bit RSA key. McAfee UTM Firewall 4.0.4 Administration Guide...
- Page 275 The Remote Endpoint is selected for the Remote Network. Click Add. The pair appears in the Local and Remote Network list. Leave the Key lifetime field at the default value. Leave the Allow the Phase 2 Proposal at the default. McAfee UTM Firewall 4.0.4 Administration Guide...
-
Page 276: Setting Up A Tunnel Using X.509 Certificates For Authentication
From the Local Interface list, allow the Local Interface to default to the Default Gateway Interface to the Internet. Allow the Local and Remote addresses to default to Static IP Address. From the Authentication list, select x.509 Certificates. Click Next. The Local Endpoint Settings page appears (Figure 280). McAfee UTM Firewall 4.0.4 Administration Guide... - Page 277 Figure 281 IPSec VPN Setup — Remote Endpoint Settings page — x.509 authentication Fill in the fields. Enter the IP address of the remote party. This example uses 1.1.1.3. Enter the Distinguished Name. This example uses C=US, ST=MN, L=St. Paul, O=McAfee, CN=vpn.McAfee.com, emailAddress=vpn@mcafee.com Tip: Copy the distinguished name from the Certificate Lists page.
-
Page 278: Aggressive Keying Mode For An Ipsec Tunnel
From the VPN menu, click IPSec. The IPSec VPN Setup page appears. Click Advanced. The Tunnel Settings page appears (Figure 284). Figure 284 Tunnel Settings page — Aggressive keying mode Fill in the fields. McAfee UTM Firewall 4.0.4 Administration Guide... - Page 279 Figure 286 Local Endpoint Settings — Aggressive keying mode Enter the IP address in the remote party’s IP address field. This example leaves the Optional Endpoint ID blank. Click Next. The Phase 1 Settings page appears (Figure 287). McAfee UTM Firewall 4.0.4 Administration Guide...
- Page 280 Definitions, or you can define custom networks. Custom networks can be specified in the following formats: • Can be an IP address of the form a.b.c.d McAfee UTM Firewall 4.0.4 Administration Guide...
-
Page 281: Manual Keying Mode For An Ipsec Tunnel
Figure 290 IPSec VPN Setup — Tunnel Settings page — Manual keying Fill in the fields. Enter a name for the tunnel in Tunnel name field. Leave Enable this tunnel selected. Allow the Local Interface list to default to default gateway interface. McAfee UTM Firewall 4.0.4 Administration Guide... - Page 282 • DES-SHA1-96 uses the encryption transform following the DES standard in Cipher-Block_Chaining mode with authentication provided by HMAC and SHA1 (96 bit authenticator). It uses a 56 bit DES encryption key and a 160 bit HMAC-SHA1 authentication key. McAfee UTM Firewall 4.0.4 Administration Guide...
-
Page 283: Converting An Ipsec Tunnel Configuration To The Advanced Format
From the VPN menu, click IPSec. The IPSec VPN Setup page appears. Click the edit icon for the tunnel you want to convert to advanced format. The Tunnel Settings page appears (Figure 293). McAfee UTM Firewall 4.0.4 Administration Guide... -
Page 284: Ipsec Example
For more control over the IPSec configuration, the Advanced configuration wizard provides additional fields. To connect two offices together, a network similar to Figure 294 is used. Figure 294 Example UTM Firewall to UTM Firewall network McAfee UTM Firewall 4.0.4 Administration Guide... -
Page 285: Setting Up The Branch Office
Endpoint ID defaults to the static IP address. The Endpoint ID becomes required if the tunnel has a dynamic or DNS IP address or if RSA Digital Signatures are used for authentication. McAfee UTM Firewall 4.0.4 Administration Guide... - Page 286 IP address. If the remote party is a UTM Firewall appliance, it must have the form abcd@efgh. If the remote party is not a UTM Firewall appliance, refer the interoperability documents on the KnowledgeBase (mysupport.mcafee.com) to determine what form it must take.
-
Page 287: Configuring Headquarters
Select the type of IPSec endpoint the UTM Firewall appliance has on its Internet interface. In this example, select static IP address. Leave the IPSec MTU unchanged. Click Submit. Click Advanced. The Tunnel Settings page appears. McAfee UTM Firewall 4.0.4 Administration Guide... - Page 288 IP address. If the remote party is a UTM Firewall appliance and an Endpoint ID is used, it must have the form abcd@efgh. If the remote party is not a UTM Firewall appliance, refer to the interoperability documents in the KnowledgeBase (mysupport.mcafee.com)to determine what form it must take.
-
Page 289: Nat Traversal Support
A Windows version of OpenSSL is provided in the openssl directory of the UTM Firewall CD. Ensure that this directory is in your execution path, or copy all files from this directory into a working directory on your hard drive. McAfee UTM Firewall 4.0.4 Administration Guide... -
Page 290: Extracting A Pkcs12 Certificate
Create an empty CA database file under Windows: type nul > rootCA/index.txt .. or under Linux: touch rootCA/index.txt Create the CA certificate, omit the –nodes option if you want to use a password to secure the CA key: McAfee UTM Firewall 4.0.4 Administration Guide... -
Page 291: Using Certificates With Windows Ipsec
(Start > Run > then type mmc). The Certificate console appears (Figure 295). Figure 295 Microsoft Management Console Add the Certificate Snap-in (File > Add/Remove Snap-in. The Add/Remove Snap-in dialog box appears (Figure 296). McAfee UTM Firewall 4.0.4 Administration Guide... - Page 292 Figure 296 Add/Remove Snap-in dialog Click Add. The Add Standalone Snap-in dialog box is displayed (Figure 297). Figure 297 Add Standalone Snap-in Select Certificates and click Add. The Certificates snap-in dialog box is displayed (Figure 298). McAfee UTM Firewall 4.0.4 Administration Guide...
- Page 293 Figure 299 Certificates - Current User In the Logical Store Name pane, select the Personal store (Figure 300). Figure 300 Logical Store Name pane To import a new certificate, click Action > All Tasks > Import (Figure 301). McAfee UTM Firewall 4.0.4 Administration Guide...
- Page 294 VPN menu features Certificate management Figure 301 Action menu The Certificate Import wizard starts (Figure 302). Figure 302 Certificate Import Wizard — Welcome page Click Next. The File to Import wizard page is displayed (Figure 303). McAfee UTM Firewall 4.0.4 Administration Guide...
- Page 295 Click Browse and locate your cert1.p12. Click Next. The Password page appears (Figure 304). Figure 304 Certificate Import Wizard — Password Type in the Export Password if you used one. Click Next. The Certificate Store page appears (Figure 305). McAfee UTM Firewall 4.0.4 Administration Guide...
-
Page 296: Adding A Certificate For Use With Ipsec Vpn
IPSec connection. • CA Certificate is the public key of a certificate authority. It is used to verify that a remote devices public key certificate is trusted. McAfee UTM Firewall 4.0.4 Administration Guide... - Page 297 Use this procedure to add a CA certificate for use with IPSec VPN. If a Certificate Authority is being used for authenticating IPSec connections, the Certificate Authority's public key certificate must be installed. The certificate must be in PEM or DER format. McAfee UTM Firewall 4.0.4 Administration Guide...
- Page 298 From the VPN menu, click IPSec > Certificate Lists tab. The IPSec Certificates page appears. Click the delete icon next to the certificate you want to delete. You are prompted to confirm the delete. Click OK. McAfee UTM Firewall 4.0.4 Administration Guide...
-
Page 299: Ipsec Failover
Local interface <select interface for primary link> Local interface gateway Use Interfaces Default Gateway Keying Aggressive mode (IKE) Local address static IP address Remote address: dynamic IP address Local Optional Endpoint ID primary@HQ McAfee UTM Firewall 4.0.4 Administration Guide... - Page 300 Local Optional Endpoint ID secondary@HQ Dead Peer Detection enabled Remote Required Endpoint ID secondary@branch Preshared Secret <secondary secret> Local Network 1 192.168.1.0/24 Remote Network 1 192.168.2.0/24 Local Network 2 192.168.11.1/32 Remote Network 2 192.168.12.1/32 McAfee UTM Firewall 4.0.4 Administration Guide...
- Page 301 --terminate --name primary_1 --asynchronous connection secondary parentipsec-tunnel-secondary_1 parentofipsec-tunnel-secondary_0 retry_delay5 test_delay5 maximum_retriesinfinite startwhack --initiate --name secondary_1 --asynchronous testifretry 2 5 ping -I 192.168.12.2 192.168.11.2 -c 3 stopwhack --terminate --name secondary_1 --asynchronous service ipsec-failover groupprimary groupsecondary McAfee UTM Firewall 4.0.4 Administration Guide...
-
Page 302: Branch Office With Static Ip Addresses
Headquarters UTM Firewall. Once in the failover state, the Branch Office UTM Firewall periodically determines if the primary IPSec tunnel path is functioning again and, if so, falls forward to use the primary link instead. McAfee UTM Firewall 4.0.4 Administration Guide... - Page 303 Remote Network 2 Remote Endpoint Table 29 Secondary IPSec tunnel – Branch Office UTM Firewall configuration Field Value Tunnel name primary Local interface <interface of secondary port, 210.0.1.1> Local interface gateway Use Interfaces Default Gateway McAfee UTM Firewall 4.0.4 Administration Guide...
- Page 304 GRE tunnel, and one for the secondary GRE tunnel.. Table 34 Static route 1 – Headquarters UTM Firewall configuration Field Value Target address 192.168.2.0 Subnet mask Interface primary (GRE Tunnel 1) McAfee UTM Firewall 4.0.4 Administration Guide...
- Page 305 ##-- Custom entries MUST be added below this point connection primary parentipsec-tunnel-primary parentofnetif-gre1 testifretry 2 5 ping -I 209.0.0.1 210.0.0.1 -c 3 retry_delay5 test_delay5 maximum_retriesinfinite connection secondary parentipsec-tunnel-secondary parentofnetif-gre2 testifretry 2 5 ping -I 209.0.1.1 210.0.1.1 -c 3 retry_delay5 test_delay5 McAfee UTM Firewall 4.0.4 Administration Guide...
-
Page 306: Ipsec Vpn Offloading
IPSec VPN offloading improves overall tunnel counts and throughput by configuring additional UTM Firewall appliances as an offload device. An IPSec offload device is another McAfee UTM Firewall appliance that has been specifically configured to handle IPSec offloading. A single SG720 can manage about 400 IPSec tunnels. - Page 307 SG 640 and SG720 rack mount appliances. Figure 316 illustrates three daisy-chained SG580s (SG1, SG2, and SG3) that are connected via their An switch, which represents any port switch A1, A2, A3, or A4. McAfee UTM Firewall 4.0.4 Administration Guide...
- Page 308 /etc/config/ssh_host_rsa_key.pub from the IPSec offload device. Note: This new entry must all be on the same line without changes. Be sure to insert a space between the IP address and the key. For example: McAfee UTM Firewall 4.0.4 Administration Guide...
-
Page 309: Troubleshooting Ipsec
• The remote party does not have an Internet IP address. A No route to host message is reported in the system log. • The remote party has IPSec disabled (a Connection refused message is reported in the system log). • The remote party does not have a tunnel configured correctly because: McAfee UTM Firewall 4.0.4 Administration Guide... - Page 310 Phase 1 and Phase 2 for Automatic Keying (IKE). This does not occur for Manual Keying. Symptom: Dead Peer Detection does not seem to be working. Possible causes: McAfee UTM Firewall 4.0.4 Administration Guide...
- Page 311 If you can ping the LAN IP address of the remote party but not a host on the remote network, then either the local and/or remote subnets of the tunnel settings have been incorrectly configured or the remote host does not have its default gateway as the remote party. McAfee UTM Firewall 4.0.4 Administration Guide...
-
Page 312: Port Tunnels
From the VPN menu, click Port Tunnels. The Port Tunnels page appears (Figure 317). Figure 317 Port Tunnels page Select HTTP Tunnel Client from the tunnels list and click Add. The HTTP Tunnel Client page appears (Figure 318). McAfee UTM Firewall 4.0.4 Administration Guide... - Page 313 To specify a maximum age for connections, after which the connection is closed, enter a value in seconds in the Maximum Age field. • Default: 300 • Can be an integer value equal to or greater than 1 McAfee UTM Firewall 4.0.4 Administration Guide...
-
Page 314: Configuring An Http Tunnel Server
Use this procedure to configure an HTTP tunnel server that corresponds to an HTTP tunnel client. From the VPN menu, click Port Tunnels. The Port Tunnels page appears. Select HTTP Tunnel Server from the tunnels list and click Add. The HTTP Tunnel Server page appears (Figure 319). McAfee UTM Firewall 4.0.4 Administration Guide... -
Page 315: Configuring An Ssl Tunnel Client
• Can be an integer value equal to or greater than 1 Click Finish. Configuring an SSL tunnel client Use this procedure to create an SSL tunnel client. Prerequisite: Install an SSL certificate. For further information, see Certificates for HTTPS. McAfee UTM Firewall 4.0.4 Administration Guide... -
Page 316: Configuring An Ssl Tunnel Server
To create an SSL tunnel server From the VPN menu, click Port Tunnels. The Port Tunnels page appears. Select SSL Tunnel Server from the tunnels list and click Add. The SSL Tunnel Server page appears (Figure 321). McAfee UTM Firewall 4.0.4 Administration Guide... - Page 317 From the VPN menu, click Port Tunnels. The Port Tunnels page appears. Click the edit icon for the tunnel you want to edit. An edit page for the tunnel client or server appears. Clear the Enable checkbox and click Finish. McAfee UTM Firewall 4.0.4 Administration Guide...
-
Page 318: Creating Nested Port Tunnels
Create a SSL tunnel server such that the Tunnel Endpoint of the SSL tunnel server matches the Data Endpoint of the HTTP tunnel server. Specify 127.0.0.1 for the Data Server field of the HTTP tunnel server. McAfee UTM Firewall 4.0.4 Administration Guide... -
Page 319: System Menu Features
This menu provides access to high-level summaries of the general status of the system, including the connections to the unit, and the services running on it. Whenever you log into your McAfee UTM Firewall appliance, the Management Console opens to the Status page. -
Page 320: Reviewing The Status Of The Unit's Connections
System Status table. Reviewing the status of the unit’s connections The Connections Status tab displays the current status of the connections to and from the unit (Figure 323). McAfee UTM Firewall 4.0.4 Administration Guide... -
Page 321: Reviewing The Status Of The Unit's Services
These statistics are measured over the statsd polling period. To change the polling period, see Directly viewing or editing the configuration file. Reviewing the status of the unit’s services The Services Status tab provides details on the services running on your system (Figure 324). McAfee UTM Firewall 4.0.4 Administration Guide... -
Page 322: System Setup Menu
System Setup Menu Device tab This page allows you to set some basic device settings. Administrative Contact and Device Location are used to populate fields on some Management pages. To update the device settings: McAfee UTM Firewall 4.0.4 Administration Guide... -
Page 323: Date And Time Tab
Firewall appliance has a real time clock (all but the SG300 have a real time clock). After you select your local region, the system clock shows local time. Without setting locale, the system clock shows UTC (Coordinated Universal Time) time. Prerequisite: You must set your Locality before you set the date and time. McAfee UTM Firewall 4.0.4 Administration Guide... - Page 324 From the System menu, click System Setup and select the Date and Time tab. The Set Date and Time page appears (Figure 327). Figure 327 Set Date and Time tab Click Sync Date and Time. You can compare the current times between the UTM Firewall appliance and your PC. McAfee UTM Firewall 4.0.4 Administration Guide...
- Page 325 Local hosts can synchronize their clocks to the UTM Firewall appliance by specifying the IP address of their appliance as their network time server in the Windows Date and Time Properties dialog box. Prerequisite: The host running Windows must not be connected to a domain controller. McAfee UTM Firewall 4.0.4 Administration Guide...
- Page 326 Select Server from the Type list. Click Add. The NTP server is displayed in the Host and Type list (Figure 330). You can delete the server by clicking the delete icon next to the server name. McAfee UTM Firewall 4.0.4 Administration Guide...
-
Page 327: Security Policy Tab
The security policy tab provides bootloader recovery options. These options control whether or not administrators can network boot your UTM Firewall appliance (Figure 331). Figure 331 Security Policy tab To set network boot options for your UTM Firewall appliance: McAfee UTM Firewall 4.0.4 Administration Guide... -
Page 328: Memory Allocation Tab
The Minimum field indicates a recommended minimum percentage of memory that should be allocated to the associated subsystem for a modest configuration. It is possible to specify total percentages below this threshold. To re-allocate system memory: McAfee UTM Firewall 4.0.4 Administration Guide... -
Page 329: Backup/Restore Menu
Each local configuration backup stores a single snapshot of the configuration only; existing configuration snapshots on the UTM Firewall appliance are not saved embedded inside any subsequent snapshots. To create a local configuration backup: McAfee UTM Firewall 4.0.4 Administration Guide... -
Page 330: Remote Backup/Restore Page
Use this page to backup and restore configuration files saved to a personal computer (Figure 334). Backing up a configuration remotely A remote backup saves the configuration file to a password-encrypted file on a personal computer. McAfee UTM Firewall 4.0.4 Administration Guide... - Page 331 Ignore version checkbox. Caution: Restoring configuration files from firmware versions newer than the currently installed firmware, or from a different product, may cause errors. Click Submit. McAfee UTM Firewall 4.0.4 Administration Guide...
-
Page 332: Text Save/Restore Tab
Some passwords and keys used in the appliance, such as for PPTP and IPSec, are stored unencrypted. Since plain text files are prone to undetected corruption, ensure the plain text backup is stored in a secure manner. McAfee recommends using Remote backup/restore for regular backups instead of text file backups. Backing up a configuration remotely. -
Page 333: Users Page
Creating a user From the System menu, click Users and select the Users tab. The Users page appears (Figure 337). Figure 337 Users tab Click New. The Edit User Information page appears (Figure 337). McAfee UTM Firewall 4.0.4 Administration Guide... - Page 334 [Optional} Select one or more groups that the user will be a part of. Users gain all the permissions of the groups they belong to. Click Finish. The administrative user is displayed in the edit box and is enabled by default. McAfee UTM Firewall 4.0.4 Administration Guide...
-
Page 335: Groups Page
You can create new groups and edit existing ones on the Groups page (Figure 340). Creating a group From the System Menu click Users and select the Groups tab. Figure 340 Groups tab Click the New button. This opens the Edit Group Settings page. (Figure 341) McAfee UTM Firewall 4.0.4 Administration Guide... - Page 336 [Optional] You can include the group in another group or groups by selecting the checkboxes of the pertinent groups from the group list. Groups gain all the permissions of the groups they belong to. McAfee UTM Firewall 4.0.4 Administration Guide...
-
Page 337: Domain Page
Multiple RADIUS servers can be added by clicking New or the Add Above or Add Below buttons. If multiple RADIUS servers are configured, the order in which they are queried can be set by using the Move Up and Move Down arrows next to each server. McAfee UTM Firewall 4.0.4 Administration Guide... - Page 338 Figure 345 Test RADIUS tab Enter the user name and password of a valid user in the Username and Password fields. Click Submit. A RADIUS request is sent to the server and the result are displayed. McAfee UTM Firewall 4.0.4 Administration Guide...
-
Page 339: Tacacs+ Page
Creating a new Password class From the System menu, click Users and select the Passwords tab (Figure 347). Figure 347 Passwords tab Click New. This opens the Edit Password Class Setting page (Figure 348). McAfee UTM Firewall 4.0.4 Administration Guide... - Page 340 Warning email address field. • Warning email address – the email address that warnings are sent to. • Email server – the SMTP server of the Warning email address. McAfee UTM Firewall 4.0.4 Administration Guide...
-
Page 341: Service Authentication
The password class is removed from the list of classes. Service Authentication The Management Console provides a Pluggable Authentication Manager (PAM) to configure authentication policies for the services running on your UTM Firewall appliance. McAfee UTM Firewall 4.0.4 Administration Guide... - Page 342 Enter the amount of time in seconds for a successful authentication to be cached in the Authentication Lifetime (seconds) field. Note: In order to maintain PCI DSS compliance, this time out value should be less than the time out value specified for any associated Password class. See Password classes. McAfee UTM Firewall 4.0.4 Administration Guide...
-
Page 343: Management Menu
The Management menu provides configuration options that control how the UTM Firewall appliance is managed. Configuration options include settings for the web administration server, command line access, and remote access. The UTM Firewall appliance can be managed remotely using the McAfee UTM Firewall Control Center, or the Simple Network Management System (SNMP). - Page 344 Uploading an SSL certificate Creating an SSL certificate. [Optional] Select one or more of the checkboxes listed beneath HTTPS Protocols to specify the protocols a client can use to access the Management Console over HTTPS. McAfee UTM Firewall 4.0.4 Administration Guide...
-
Page 345: Certificates For Https
Certificate Authority. For more information, see Uploading an SSL certificate. Otherwise, if you want to import your certificate into the IE browser, see Installing your certificate in your browser. McAfee UTM Firewall 4.0.4 Administration Guide... - Page 346 UTM Firewall appliance and the key length. When the certificate has been created, the message “A valid SSL certificate has been installed” is displayed under the Web tab. McAfee UTM Firewall 4.0.4 Administration Guide...
- Page 347 (Figure 354). Figure 354 Certificate Error warning in the browser address bar Click the Certificate Error warning in the address bar, and then click View Certificate. The general certificate information is displayed (Figure 355). McAfee UTM Firewall 4.0.4 Administration Guide...
- Page 348 You can view the Details or Certification by click the relevant tab. Click Install Certificate. The Certificate Import Wizard begins (Figure 356). Figure 356 Certificate Import Wizard – Welcome screen Click Next. The Certificate Store page appears (Figure 357). McAfee UTM Firewall 4.0.4 Administration Guide...
- Page 349 A security warning dialog box displays the thumbprint and requests you to confirm the import (Figure 359). Figure 359 Security Warning - Thumbprint Click Yes. A message appears telling you that the import was successful. McAfee UTM Firewall 4.0.4 Administration Guide...
-
Page 350: Command Line Access
Figure 361 IE browser installed certificates Command Line access The UTM Firewall appliance is configured to allow telnet and ssh service access by default. To alter the command line access to your UTM Firewall appliance: McAfee UTM Firewall 4.0.4 Administration Guide... -
Page 351: Enabling Remote Management By Mcafee Utm Firewall Control Center
Click Submit to save the configuration changes. Enabling remote management by McAfee UTM Firewall Control Center Use this procedure to enable remote management by a McAfee ® UTM Firewall Control Center appliance. -
Page 352: Control Center Attributes
From the System menu, click Management > Control Center Management > Control Center Attributes tab. The Control Center Attributes page appears (Figure 364). Figure 364 Control Center Attributes Click New. The Edit Control Center Device Attributes page appears (Figure 365). McAfee UTM Firewall 4.0.4 Administration Guide... -
Page 353: Enabling The Snmp Agent
Click the delete icon for the attribute you want to delete. You are prompted to confirm the delete. Click OK. Enabling the SNMP agent Use this procedure to enable and configure the SNMP agent. The SNMP agent allows external SNMP management software to query the appliance for management information. McAfee UTM Firewall 4.0.4 Administration Guide... -
Page 354: Diagnostics Menu
From the System menu, click Management > SNMP tab. The SNMP Agent Configuration page appears. Clear the Enable SNMP Agent checkbox. Click Submit. Diagnostics menu Low-level diagnostic information and network tests are provided to assist you in diagnosing network problems. McAfee UTM Firewall 4.0.4 Administration Guide... -
Page 355: System Tab
Only one copy of the file is kept in the directory. Log output is color-coded by output type. General information and debug output is black, warnings and notices are blue, and errors are red. McAfee UTM Firewall 4.0.4 Administration Guide... - Page 356 By default, all messages are recorded in the System Log. The Filter Level setting allows you to control which classes of messages are recorded in the system log. Tip: If your logging requirements generate extremely large log sizes, McAfee recommends using a remote syslog server. See Enabling remote system logging.
- Page 357 Prerequisite: Configure the remote server to accept the logs. • If the server is a UNIX/Linux machine, it should already provide a remote logging daemon. Information about configuring remote logging should be available from your vendor. McAfee UTM Firewall 4.0.4 Administration Guide...
- Page 358 Sending log messages to an email account Use this procedure to reroute the system log messages to an email account. Syslog log messages can be sent to an email account, which allows you to keep system log messages persistently. McAfee UTM Firewall 4.0.4 Administration Guide...
-
Page 359: Network Tests Page
The default setting of 0 means unlimited, and is typically appropriate for all systems except those that experience heavy traffic. Click Submit. Network Tests page The basic network tests of ping and traceroute help test the current functionality of the UTM Firewall appliance (Figure 373). McAfee UTM Firewall 4.0.4 Administration Guide... - Page 360 Since the UTM Firewall appliance runs on the Linux OS, it uses UDP probes in traceroute by default. This is in contrast to the Windows platform, which uses ICMP. Depending on what is blocked upstream, you may observe different results between platforms. McAfee UTM Firewall 4.0.4 Administration Guide...
-
Page 361: Detected Usb Devices
/var/tmp directory. You can either download or decode the .pcap file. This can be useful for diagnosing network problems. The downloaded file can also be viewed using freely available utilities such as tcpdump or Wireshark. McAfee UTM Firewall 4.0.4 Administration Guide... - Page 362 [Optional] If desired, adjust the default display options in the Options field. The default packet display option is '-n', which disables DNS lookups for IP addresses. For some examples, see More filtering options. Click Display to decode and display the packets in the Packet Capture page (Figure 379). McAfee UTM Firewall 4.0.4 Administration Guide...
- Page 363 Match packets with a source or destination IP address of host 1.2.3.4 1.2.3.4. Match packets with a source IP address of 1.2.3.4. src host 1.2.3.4 Match packets with a destination IP address of 1.2.3.4. dst host 1.2.3.4 McAfee UTM Firewall 4.0.4 Administration Guide...
-
Page 364: Advanced Menu
Figure 380 Reboot tab Click Reboot. It usually takes around 10 seconds before the appliance is up and running again. If you have enabled bridging, the UTM Firewall appliance may take up to 30 seconds to reboot. McAfee UTM Firewall 4.0.4 Administration Guide... -
Page 365: Erasing Configuration And Rebooting
Upgrading firmware Periodically, McAfee releases new versions of firmware for your UTM Firewall appliance. If a new version fixes an issue you have been experiencing, or contains a new feature you want to use, go to the download page on the product registration Web site to obtain the latest firmware. You can then load the new firmware with a flash upgrade. - Page 366 TFTP server and use that for flash upgrades. Note: Although TFTP is an option for upgrading, this program is not supported by McAfee technical support. Prerequisites: • Download the binary image file (.sgu). Go to the product Web site for instructions on obtaining this file.
- Page 367 Enter the name of the image file in the Filename field. Place this file in the directory your TFTP is serving files from, usually: /tftpboot/. Enter any Extra Parameters only at the request of McAfee technical support staff. Click Upgrade. The firmware upload only accepts valid firmware images and only accepts newer images appropriate for your device.
-
Page 368: Configuration Files Tab
383). Figure 383 Upgrade from Device tab Enter any Extra Parameters only at the request of McAfee technical support staff. Click Upgrade. The firmware upload only accepts valid firmware images and only accepts newer images appropriate for your device. Wait for the upgrade to complete. - Page 369 Use this procedure to manually create a configuration file from scratch. From the System menu, click Advanced > Configuration Files tab. The Edit File tab appears. Scroll to the bottom of the page and click New. An empty Modify File page appears. McAfee UTM Firewall 4.0.4 Administration Guide...
- Page 370 Directly viewing or editing the configuration file Use this procedure to access the page where you can directly view or edit the main configuration file of the appliance. Caution: Do not edit this file without the assistance of technical support. McAfee UTM Firewall 4.0.4 Administration Guide...
- Page 371 Advanced menu From the System menu, click Advanced > Device Config tab. The Display/Modify Device Configuration page appears (Figure 387). Figure 387 Display/Modify Device Configuration page Make changes only as instructed by technical support personnel. McAfee UTM Firewall 4.0.4 Administration Guide...
- Page 372 System menu features Advanced menu McAfee UTM Firewall 4.0.4 Administration Guide...
-
Page 373: System Log
The firewall rules deny all packets arriving from the WAN port by default. There are a few ports open to deal with traffic such as DHCP, VPN services, and similar traffic. Any traffic that does not match the exceptions is dropped. McAfee UTM Firewall 4.0.4 Administration Guide... -
Page 374: Creating Custom Log Rules
-I INPUT -j LOG -p tcp --syn -s <X.X.X.X/XX> -d <Y.Y.Y.Y/YY> --dport <Z> --log-prefix <prefix> This logs any TCP (-p tcp) session initiations (--syn) that arrive from the IP address/netmask X.X.X.X/XX (-s ...) and are going to Y.Y.Y.Y/YY, destination port Z (--dport). McAfee UTM Firewall 4.0.4 Administration Guide... - Page 375 -I FORWARD -j LOG -o IPSec+ There are many more combinations possible. It is possible to write rules that log inbound and outbound traffic, or to construct several rules that differentiate between the two. McAfee UTM Firewall 4.0.4 Administration Guide...
-
Page 376: Rate Limiting
Jan 30 01:54:02 kernel: Linux version 2.4.31-uc0 (build@sgbuild) (gcc version 3.3.2) #1 Tue Oct 17 02:00:32 EST 2006 This also shows the version of the operating system (Linux), and the build date and time. McAfee UTM Firewall 4.0.4 Administration Guide... -
Page 377: Upgrading Firmware
Backup/Restore menu. McAfee makes every effort to ensure an existing configuration, including custom rules and text-file edits, continues to work as intended after upgrading firmware. However, there is no guarantee an entire legacy configuration will transition properly to an upgraded firmware version, particularly in major firmware revision updates. -
Page 378: Upgrading Firmware Using Netflash
• The device you want to upgrade is on a different subnet than your PC. In this case, the broadcast ping will not reach it. • Your PC is separated from the device you wish to upgrade by network hardware (such as a router) that is not forwarding broadcasts. McAfee UTM Firewall 4.0.4 Administration Guide... -
Page 379: Recovering From A Failed Upgrade
(.sgr) used to recover the appliance, and the firmware image (.sgu) appropriate for your appliance. They are available in the \images directory of the UTM Firewall CD that shipped with your appliance, or can be downloaded from my.securecomputing.com. McAfee UTM Firewall 4.0.4 Administration Guide... -
Page 380: Recovery Using A Bootp Server
To perform the recovery boot, you must have a firmware image for your appliance. The firmware that shipped with your appliance is located in the \firmware directory on the UTM Firewall CD. The latest firmware for your appliance can be obtained from my.securecomputing.com. McAfee UTM Firewall 4.0.4 Administration Guide... -
Page 381: Recovery Using The Boot Recovery Image
The UTM Firewall boot recovery image is a simplified version of the UTM Firewall firmware that contains a GUI for use in diagnosing problems and recovering standard firmware. To reboot the SG560U into the boot recovery image: McAfee UTM Firewall 4.0.4 Administration Guide... - Page 382 Plug in the power cord. Continue to hold the erase button for five seconds. The UTM Firewall reboots into the boot recovery image. Follow the GUI instructions to complete recovery of the firmware image. McAfee UTM Firewall 4.0.4 Administration Guide...
-
Page 383: Null Modem Administration
From the Select device list, select the local PC’s serial (COM) port to which the null modem is attached, and click Next. Click Finish. The network connection now appears under Network Connections in Control Panel under the Direct heading. McAfee UTM Firewall 4.0.4 Administration Guide... -
Page 384: Troubleshooting
If the local PC is running Windows XP, right-click the connection you added in the previous procedure (Enabling null modem dial out of the local PC), select Properties, select the General tab and click Configure to modify port settings. McAfee UTM Firewall 4.0.4 Administration Guide... -
Page 385: Cli Commands
This appendix contains an alphabetical list of command, programs, and utilities available on each of the McAfee UTM Firewall models for use with the CLI (Command Line Interface). This information is provided as a courtesy in the event you need a function not provided in the Management Console, and is intended for expert users. - Page 386 Tool for interacting with the system's connection tracking system Copy files and directories cpio Copy files to and from archives Simple CPU usage reporting tool create-siproxd-c McAfee tool to create a config file for onf.tcl SIP Proxy cron Daemon to execute scheduled commands date...
- Page 387 McAfee firewall utility firewallenv McAfee firewall utility flash McAfee flash utility wrapper flashkey McAfee tool for loading public crypto keys into flash flashw Write data to individual flash devices flatfs McAfee flash filesystem control tool flatfsd Daemon to save RAM filesystems back...
- Page 388 SG310 SG560 SG560U SG565 SG580 SG640 SG720 https-certgen McAfee tool to generate default HTTP SSL certificates hub-ctrl utility for controlling the port power on a USB hub hwclock Query and set the hardware clock (RTC) McAfee Intrusion Detection & Blocking...
- Page 389 Program to add and remove modules from the Linux Kernel more File perusal filter for crt viewing mount Mount a file system mount-squid McAfee wrapper program to start the squid Web Cache mtuchk McAfee MTU checking utility Move (rename) files nasl Nessus Attack Scripting Language...
- Page 390 DARPA port to RPC program number mapper poweroff Busybox reboot utility pppd Point-to-Point protocol daemon pppoe-up McAfee program to run when PPPoE connections are brought up pptp PPTP Client for establishing VPN pptpctrl PPTP VPN controller pptpd PPTP VPN daemon...
- Page 391 RADIUS server radvd Router advertisement daemon for IPv6 radvdump Dump router advertisements ranbits Generate random bits in ASCII form McAfee TCL script to output the datapoints of statistics data from RRDTOOL reboot Safely reboot the system redialer McAfee phone number redialer...
- Page 392 McAfee VLAN configuration tool sync Flush file system buffers sysctl Configure kernel parameters at runtime syslogd Linux system logging utilities daemon The GNU version of the tar archiving utility Show or manipulate traffic control settings McAfee UTM Firewall 4.0.4 Administration Guide...
- Page 393 McAfee program to run when pptp/pptpd are brought up Show who is logged on and what they are doing watchdog Daemon to periodically write to watchdog device whack Control interface for IPSEC keying daemon McAfee UTM Firewall 4.0.4 Administration Guide...
- Page 394 Program Name Description Supported Products SG310 SG560 SG560U SG565 SG580 SG640 SG720 wlan McAfee utility for configuring WLAN (Wireless LAN) connections zcat Identical to gunzip -c zebra Routing manager for use with associated components McAfee UTM Firewall 4.0.4 Administration Guide...
-
Page 395: Glossary
Certificate Revocation List necessary if the private key certificate has been compromised or if the holder of the certificate is to be denied the ability to establish a tunnel to the UTM Firewall appliance. McAfee UTM Firewall 4.0.4 Administration Guide... - Page 396 A network gateway device that protects a private network from users on other networks. A firewall is usually installed to allow users on an intranet access to the public Internet without allowing public Internet users access to the intranet. McAfee UTM Firewall 4.0.4 Administration Guide...
- Page 397 ISAKMP is a framework for doing Security Association Key Management. It can, in theory, be used to produce session keys for many different systems, not just IPSec. Key lifetimes The length of time before keys are renegotiated. Local Area Network. Light-Emitting Diode. McAfee UTM Firewall 4.0.4 Administration Guide...
- Page 398 Phase 1 Sets up a secure communications channel to establish the encrypted tunnel in IPSec. McAfee UTM Firewall 4.0.4 Administration Guide...
- Page 399 DES pass. Coordinated Universal Time. Unshielded Twisted Pair cabling. A type of Ethernet cable that can operate up to 100Mbits/s. Also known as Category 5 or CAT 5. McAfee UTM Firewall 4.0.4 Administration Guide...
- Page 400 Certificate Authority's (CA) certificate. The CA certificate must have signed the local certificates that are used for tunnel authentication. Certificates need to be uploaded into the UTM Firewall appliance before a tunnel can be configured to use them. McAfee UTM Firewall 4.0.4 Administration Guide...
-
Page 401: Index
SNMP bridged mode enabling SNMP bridging network interfaces alias IP address busybox adding for interface deleting for interface aliases adding certificate interface CA certificate allowing creating cable antispam modem antivirus cache disabling disabling Web McAfee UTM Firewall 4.0.4 Administration Guide... - Page 402 DNS account restoring local file packet priority rule restoring remote backup security policy group configuration file service group creating source NAT rule direct display SSL certificate direct edit static host editing McAfee UTM Firewall 4.0.4 Administration Guide...
- Page 403 IPSec VPN tunnel masquerading L2TP IPSec tunnel McAfee UTM Firewall Control Center local configuration file McAfee Web Gateway content filtering McAfee UTM Firewall Control Center device attribute NASL script NASL script packet capture file packet capture file packet filter rule...
- Page 404 DNS account custom rule failover connection parameters firmware Interface group flash upgrade HTTP McAfee UTM Firewall Control Center device attribute flash upgrade TFTP packet filter rule restoring factory default settings packet priority rule upgrading with Netflash port forwarding rule...
- Page 405 IPSec command McAfee UTM Firewall Control Center IPSec VPN Device Attributes IPSec VPN tunnel disabling deleting enabling disabling McAfee UTM Firewall Control Center device attribute IPSec VPN tunnels deleting refreshing status editing iptables McAfee Web Gateway IPv6 blocking categories Custom Firewall Rules...
- Page 406 Port Forwarding page port forwarding rule creating advanced offloading creating basic IPSec VPN port settings online dialout 58, 60, Help port tunnel McAfee UTM Firewall 4.0.4 Administration Guide...
- Page 407 DHCP server or relay null modem refresh server view of UPnP port forwards adding NTP refreshing configuring HTTP tunnel VPN IPSec tunnel status DHCP relay enabling PPTP VPN configuring DHCP L2TP VPN DHCP PPTP VPN McAfee UTM Firewall 4.0.4 Administration Guide...
- Page 408 Netflash technical report flash firmware via HTTP system log flash firmware via TFTP persistent remote uploading remote configuration file System tab McAfee Web Gateway certificate and private key NASL scripts SSL certificate McAfee UTM Firewall 4.0.4 Administration Guide...
- Page 409 IPSec IPSec L2TP client L2TP server offloading IPSec PPTP client PPTP server VPN server enabling PPTP cache Lists Web cache advanced configuration disabling McAfee UTM Firewall 4.0.4 Administration Guide...
- Page 410 Index McAfee UTM Firewall 4.0.4 Administration Guide...
- Page 412 700-2237A00...
Need help?
Do you have a question about the SG310 and is the answer not in the manual?
Questions and answers