Toshiba e-STUDIO 600 User Manual
Multinational digital systems
Hide thumbs
Also See for e-STUDIO 600:
- Operator's manual for basic function (338 pages) ,
- Printing manual (420 pages) ,
- Operator's manual (366 pages)
Table of Contents
Advertisement
Quick Links
Advertisement
Table of Contents

Related Manuals for Toshiba e-STUDIO 600


Summary of Contents for Toshiba e-STUDIO 600
- Page 1 MULTIFUNCTIONAL DIGITAL SYSTEMS TopAccess Guide...
-
Page 3: Software License Agreement
ELECTRONIC FILE INCLUDED ON THE USER DOCUMENTATION CD-ROM INCLUDED HEREWITH; HOWEVER, ALL SOFTWARE AND DOCUMENTATION DEVELOPED OR CRE- ATED BY OR FOR TOSHIBA TEC CORPORATION (“TTEC”) ARE PROPRIETARY PROD- UCTS OF TTEC AND ARE PROTECTED BY COPYRIGHT LAWS, INTERNATIONAL TREATY PROVISIONS, AND OTHER APPLICABLE LAWS. -
Page 4: Limitation Of Liability
U.S. Government is subject to restrictions set forth in subdivision (b) (3) (ii) or (c) (i) (ii) of the Rights in Technical Data and Computer Software Clause set forth in 252.227-7013, or 52.227-19 (c) (2) of the DOD FAR, as appropriate. Contractor/Manufacturer is TOSHIBA TEC Corporation, 6-78, Minami-cho, Mishima-shi, Shizuoka-ken, 411-8520, Japan. -
Page 5: Trademarks And Copyright
Copyright © 2005 TOSHIBA TEC CORPORATION All rights reserved Under the copyright laws, this manual cannot be reproduced in any form without prior written permission of TTEC. No patent liability is assumed, however, with respect to the use of the infor- mation contained herein. -
Page 6: Preface
The term “e-Filing” in this manual is an abbreviation of “electronic filing”. Lineup of Our Manuals Thank you for purchasing the TOSHIBA multifunctional digital systems e-STUDIO850 Series. We have provided you with these manuals for the operation of this equipment. Select and read the manual best suited to your needs. - Page 7 Other guides are provided by the User Documentation CD-ROM in PDF files: TopAccess Guide This TopAccess Guide explains how to operate and set up the network functions such as the network scanning function and job management, using the TopAccess (Web-based utility) from client computers. Network Administration Guide This Network Administration Guide explains the guidelines for setting up network servers to provide various network services, and troubleshoot-...
- Page 8 Viewer The e-BRIDGE Viewer provides the functions to view and find the docu- ments in e-Filing boxes on the TOSHIBA e-STUDIO MULTIFUNC- TIONAL DIGITAL SYSTEMS from a client computer via TCP/IP network, and also it can view and find the files in your computer.
-
Page 9: Precautions In This Manual
Precautions in this manual To ensure correct and safe use of this equipment, this operator’s manual describes safety pre- cautions according to the three levels shown below. You should fully understand the meaning and importance of these items before reading this manual. -
Page 11: Table Of Contents
TABLE OF CONTENTS SOFTWARE LICENSE AGREEMENT ............3 TRADEMARKS AND COPYRIGHT...............5 Preface......................6 Chapter 1 Overview TopAccess Overview .................16 Accessing TopAccess End-User Mode ............17 TopAccess Web Site ................18 Chapter 2 Checking Device Status TopAccess Device Tab Page..............22 Device Status Indicators................23 Chapter 3 Managing Jobs Managing Print Jobs ..................26 Displaying Print Jobs ................26... - Page 12 Managing Address Book ................85 Managing Contacts in the Address Book ..........85 Managing Groups in the Address Book...........92 Managing Mailboxes ..................95 Setting Up an Open Mailbox..............96 Deleting an Open Mailbox ..............102 Chapter 6 Managing Counters Viewing Counters ..................106 Displaying the Total Counter ..............106 Displaying the Department Counter ............106 Chapter 7 TopAccess Administrator Mode...
- Page 13 Clearing the Logs and Journals.............220 Rebooting the Equipment ..............221 Registering from TopAccess..............223 About the Registrations .................223 Registering Public Templates..............223 Registering Fax and Internet Fax Received Forward ......231 Displaying Message Log................248 Managing Department Code..............249 Displaying the Department List and Counters ........249 Clearing the Department Counters............251 Registering or modifying the Department Code ........253 Deleting the Department Code ..............255...
- Page 14 TABLE OF CONTENTS...
-
Page 15: Chapter 1 Overview
Overview This section describes overview of the TopAccess functions. TopAccess Overview ....................16 Accessing TopAccess End-User Mode..............17 TopAccess Web Site .........................18... -
Page 16: Topaccess Overview
1 Overview TopAccess Overview TopAccess is a web-based job and device management tool that allows you to access informa- tion about this equipment over the Internet. TopAccess has two web sites available. One site is designed for end users and the other is for the administrators. -
Page 17: Accessing Topaccess End-User Mode
Accessing TopAccess End-User Mode To operate TopAccess, this equipment should be connected to the network and be configured with the TCP/IP settings. After you complete the TCP/IP setup, you can access to TopAccess web site to operate various functions from your computer using a web browser such as Netscape Navigator and Internet Explorer. -
Page 18: Topaccess Web Site
1 Overview The TopAccess web page for end users opens. You can also access TopAccess using the TopAccessDocMon link. For instructions on accessing TopAccess from TopAccessDocMon, see the Printing Guide. TopAccess Web Site When you access TopAccess, the general information page of the TopAccess web site is dis- played. - Page 19 The basic TopAccess page contains following items: 1) Function Tab This provides access to main pages of TopAccess for each function. 2) Menu Bar This provides access to each menu page under the selected function tab. 3) Submenu Bar This provides access to each submenu page under the selected menu and function tab. 4) Install Software link Click this to open the Install Client Software page to download the client software from TopAccess.
-
Page 21: Checking Device Status
Checking Device Status This section describe the Device tab page of TopAccess end-user mode TopAccess Device Tab Page..................22 Device Status Indicators........................23... -
Page 22: Topaccess Device Tab Page
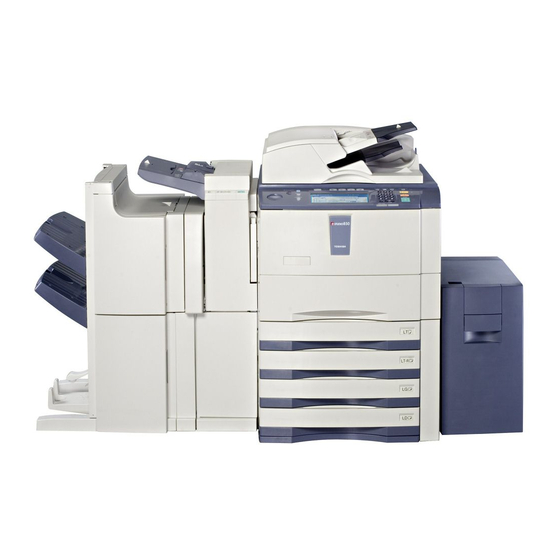
2 Checking Device Status TopAccess Device Tab Page TopAccess opens with the end-user Device tab, which includes a picture of the device. At any time, the end-user may click Refresh to update the TopAccess status information. This tab shows the following information about the device: 1) Device Information The Device Information list shows the following information. -
Page 23: Device Status Indicators
3) Paper The Paper list shows the drawer status. - Drawer — Lists the installed drawers. - Size — Displays the paper size set in each drawer. - Type — Displays the paper type set in each drawer. - Capacity — Displays the maximum paper capacity that can be set in each drawer. - Status —... - Page 24 2 Checking Device Status Drawer Open The Drawer Open error icon shows which drawer is open: upper, middle, or lower. You must close the specified drawer to resume printing and copying functions. Toner Empty The Toner Empty icon indicate that the toner is empty. For information on resolving the error condition, refer to “REPLACE TONER CARTRIDGE SYMBOL”...
- Page 25 Managing Jobs Using TopAccess, end users can display and delete print jobs, fax transmission jobs, and scan jobs released by end users. Managing Print Jobs....................26 Displaying Print Jobs.........................26 Deleting a Print Job...........................27 Releasing a Print Job ........................27 Managing Fax/Internet Fax Jobs ................29 Displaying Fax/Internet Fax Jobs......................29 Deleting a Fax Transmission Job ......................29 Managing Scan Jobs ....................31...
-
Page 26: Chapter 3 Managing Jobs
3 Managing Jobs Managing Print Jobs Using TopAccess, you can display, delete and release print jobs that are currently in the queue. Displaying Print Jobs Accessing the Print menu page in the Job Status tab Click the Job Status tab and click the Print menu. The Print menu page is displayed. -
Page 27: Deleting A Print Job
Deleting a Print Job You can delete jobs that are stored in the queue. The private print jobs cannot be deleted by users. To delete the private print jobs from TopAc- cess, you must log in as an administrator in the Administration tab page first, then display the Print menu page. - Page 28 3 Managing Jobs Select an option button at the left of the print job that you want to release. You can select only one print job at a time. Click [Release]. The selected print job is immediately printed. Managing Print Jobs...
-
Page 29: Managing Fax/Internet Fax Jobs
Managing Fax/Internet Fax Jobs Using TopAccess, you can display and delete fax transmission jobs including fax transmission and Internet Fax transmission. Displaying Fax/Internet Fax Jobs Accessing the Fax/Internet Fax menu page in the Job Status tab Click the Job Status tab and click the Fax/Internet Fax menu. The Fax/Internet Fax menu page is displayed. - Page 30 3 Managing Jobs Deleting a fax transmission job Click the Job Status tab and click the Fax/Internet Fax menu. The Fax/Internet Fax menu page is displayed. Select an option button at the left of the fax transmission job that you want to delete. You can select only one fax transmission job at a time.
-
Page 31: Managing Scan Jobs
Managing Scan Jobs Using TopAccess, you can display and delete scan jobs that are currently in the queue. Displaying Scan Jobs Accessing the Scan menu page in the Job Status tab Click the Job Status tab and click the Scan menu. The Scan menu page is displayed. - Page 32 3 Managing Jobs Deleting a scan job Click the Job Status tab and click the Scan menu. The Scan menu page is displayed. Select an option button at the left of the scan job that you want to delete. You can select only one scan job at a time. Click [Delete].
- Page 33 Displaying Job Logs Using TopAccess, end users can display print job logs, transmission journals, reception journals, and scan job logs. Displaying Print Job Logs..................34 Displaying Transmission Journals................35 Displaying Reception Journals ................37 Displaying Scan Job Logs ..................39...
-
Page 34: Chapter 4 Displaying Job Logs
4 Displaying Job Logs Displaying Print Job Logs Using TopAccess, you can display the print job logs printed on this equipment. A maximum of 100 logs is displayed in the chronologic order, most recent first. When the num- ber of logs exceeds 100, they are deleted from the oldest one. Accessing the Print menu page in the Logs tab Click the Logs tab and click the Print menu. -
Page 35: Displaying Transmission Journals
Displaying Transmission Journals Using TopAccess, you can display the transmission journals that this equipment sent by fax, Internet Fax transmission, and E-mail. A maximum of 100 logs is displayed in the chronologic order, most recent first. When the num- ber of logs exceeds 100, they are deleted from the oldest one. Accessing the Transmission menu page in the Logs tab Click the Logs tab and click the Transmission menu. - Page 36 4 Displaying Job Logs Mode Displays the transmission mode. The transmission mode is displayed with the combination of 2-digit alphabet code, 3-digit numeric code, and up to 4-digit supplemental code. For example: EC 604 1st numeric 2nd numeric 3rd numeric 2 digit alphabet code Up to 4 digit code...
-
Page 37: Displaying Reception Journals
Displaying Reception Journals Using TopAccess, you can display the reception journals that this equipment received by fax, Internet Fax transmission, and E-mail. A maximum of 100 logs is displayed in the chronologic order, most recent first. When the num- ber of logs exceeds 100, they are deleted from the oldest one. Accessing the Reception menu page in the Logs tab Click the Logs tab and click the Reception menu. - Page 38 4 Displaying Job Logs Mode Displays the reception mode. The reception mode is displayed with the combination of 2-digit alphabet code, 3-digit numeric code, and up to 4-digit supplemental code. For example: EC 604 1st numeric 2nd numeric 3rd numeric 2 digit alphabet code Up to 4 digit code...
-
Page 39: Displaying Scan Job Logs
Displaying Scan Job Logs Using TopAccess, you can display scan job logs that this equipment performed. A maximum of 100 logs is displayed in the chronologic order, most recent first. When the num- ber of logs exceeds 100, they are deleted from the oldest one. Accessing the Scan menu page in the Logs menu Click the Logs tab and click the Scan menu. - Page 40 4 Displaying Job Logs - ST: Scan to File, Scan to e-Filing, Scan to Email - FA: Fax and Save as File - PA: Print and e-Filing - PT: Print to e-Filing - IA: N/W-Fax and Save as File - BE: e-Filing to Email - RS: Remote Scan B: This describes the transmission type.
- Page 41 Registering from TopAccess This section describes the instruction on how to register templates, address book, and mailboxes. Managing Templates....................42 Registering Private Template Groups ....................42 Registering Private Templates ......................50 Displaying Public Templates ......................83 Managing Address Book..................85 Managing Contacts in the Address Book ..................85 Managing Groups in the Address Book ....................92 Managing Mailboxes....................95 Setting Up an Open Mailbox ......................96...
-
Page 42: Chapter 5 Registering From Topaccess
5 Registering from TopAccess Managing Templates Templates contain preset information for the operation of the copiers, scans, and fax and Inter- net Fax transmissions so that users can perform these operations easily by selecting the tem- plate button on the Touch Panel Display. Templates are stored in groups. - Page 43 Setting a private template group information Click the Registration tab and the Template menu. The Template menu page is displayed. When the User Management Setting and Role Based Access Control are enabled, the login page will be displayed. When the Role Based Access Control is enabled, only users that has the privilege to operate the registration can login to the Registration tab page.
- Page 44 5 Registering from TopAccess When the Input Group Password page is displayed, enter the 5-digit password (or administrator’s password) for the selected private template group and click [OK]. The Private Templates page is displayed. Click [Edit] to define or edit the group information. The Group Properties page is displayed.
-
Page 45: Setting Group Password
Enter the items below as desired. Number — Displays the number of the private template group. Name — Enter the name of the private template group. User Name — Enter the owner name of the private template group. Notification — Enter the default email address where the notification will be sent. The email address entered here will be displayed in the Panel Settings page and can be selected for the destination of the notifications when creating a private template in this group. - Page 46 5 Registering from TopAccess Click the group name link that you want to set or to modify the group password. If you select the private template group that is not protected by a password, the Pri- vate Templates page is displayed. Skip to step 4. If you select the private template group that is protected by a password, the Input Group Password page is displayed.
- Page 47 Click [Change Password] to set the password for the private tem- plate group. The Change Group Password page is displayed. Enter the old password in the Old Password field, and new pass- word in the New Password and Retype Password fields. You can only use 5-digit numbers for the password.
-
Page 48: Resetting Group Information
5 Registering from TopAccess Resetting Group Information You can reset the group information that you no longer require and turn it to an undefined group. If you reset the group information, all private templates registered in the group will be deleted. Resetting group information Click the Registration tab and the Template menu. - Page 49 When the Input Group Password page is displayed, enter the 5-digit password (or administrator’s password) for the selected private template group and click [OK]. The Private Templates page is displayed. Click [Reset]. The confirmation dialog box appears. Click [OK]. The group information is reset. Managing Templates...
-
Page 50: Registering Private Templates
5 Registering from TopAccess Registering Private Templates In each private template group, you can create up to 60 templates. To define the private tem- plate, specify the panel settings that will be displayed in the Touch Panel Display and agent set- tings. - Page 51 Click the group name link where you want to register or edit the pri- vate template. If you select the private template group that is not protected by a password, the Pri- vate Templates page is displayed. Skip to step 4. If you select the private template group that is protected by a password, the Input Group Password page is displayed.
- Page 52 5 Registering from TopAccess From the templates list, click the “Undefined” icon to register a new template, or click defined icon to edit the template. If the templates list is displayed in the List view, click the “Undefined” template name to register new template, or click the defined template name to edit the template.
- Page 53 When the Input Template Password page is displayed, enter the 5- digit password (or administrator’s password) for selected private template and click [OK]. The Template Properties page is displayed. Click [Edit] to define or edit the template properties. The Template Properties page to select agents is displayed. Managing Templates...
- Page 54 5 Registering from TopAccess Select agents and click [Select Agent]. You can select one of the following template: Copy — Select this to create a copy template. Usually, this is selected to print copies as well as sending originals to other destinations. This agent can also be combined with the Save as file agent or Store to e-Filing agent.
- Page 55 Click each button displayed in the page to specify or edit the asso- ciated template properties. [Panel Setting] — Click this to specify the icon settings for the template. P.57 “Panel Setting (Private Template)” [Destination Setting] — Click this to specify the document’s destination. This can be set only when creating the Fax/Internet Fax agent or Scan to Email agent.
- Page 56 5 Registering from TopAccess [Save as file Setting] — Click this to specify how the document will be stored in local hard disk or network folder. This can be set only when creating the Save as file agent. P.70 “Save as file Setting (Private Template)” [Box Setting] —...
- Page 57 — Panel Setting (Private Template) In the Panel Settings page, specify how the icon for the template is displayed in the Touch Panel Display, and the notification settings for the template. 1) Picture This indicates the icon that will be displayed in the Touch Panel Display. The icon is auto- matically designated according to the agent that you select.
- Page 58 5 Registering from TopAccess When you enable the Notification setting, make sure to set up the Email settings in the Email submenu page of the Setup menu in the TopAccess Administrator’s mode. For instructions on how to set up the Email settings, refer to the Network Administration Guide. —...
- Page 59 Enter the email address or fax number of the recipient, in the Desti- nation field. You can specify the fax number for the destination only when the optional Fax unit is installed. Click [OK]. Entered recipient is added in the Recipient List page. Repeat step 2 to 4 to add all additional recipients that you require.
- Page 60 5 Registering from TopAccess Check the Email boxes of users you want to add as the Email recip- ients or Internet Fax recipients, and check the Fax boxes of users you want to add as the Fax recipients. When you are creating the Scan to Email template, only the Email check boxes are dis- played in the Address Book page.
- Page 61 Click [Save]. The contacts are added as the destinations. Selecting the groups from the address book By this method, you can select groups from the address book. Click [Destination Setting] to open the Recipient List page. Click [Address Group]. The Address Group page is displayed. Check the Group boxes that contains the desired recipients.
- Page 62 5 Registering from TopAccess Click [Add]. All recipients in the selected groups are added in the Recipient List page. You can remove the contacts that you added in the recipient list before submitting the destination settings. P.64 “Removing the contacts from the recipient list” Click [Save].
- Page 63 Select the directory service name that you want to search in the “Directory Service Name” field, and enter the search terms in the fields that you want to search. If you select the model name of this equipment at the Directory Service Name drop down box, you can search for recipients in the address book of this equipment.
- Page 64 5 Registering from TopAccess Click [Add]. The selected recipients are added in the Recipient List page. You can remove the contacts that you added in the recipient list before submitting the destination settings. P.64 “Removing the contacts from the recipient list” Click [Save].
- Page 65 — Internet Fax Setting (Private Template) In the Internet Fax Setting page, you can specify the content of the Internet Fax to be sent. 1) Subject This sets the subject of the Internet Faxes. Select “Scanned from (Device Name) [(Template Name)] (Date) (Time)”...
- Page 66 5 Registering from TopAccess — Fax Setting (Private Template) In the Fax Setting page, you can specify how the fax will be sent. 1) Resolution Select the resolution for sending faxes. - Standard — Select the Standard mode as the resolution for originals with regular size text.
- Page 67 - Direct Transmit — Select the Direct TX mode to send the original as it is being scanned. This mode is useful if you want a confirm from the remote party. Originals are not stored to memory, and you can specify only one remote Fax at a time. You can select “Direct Transmit”...
- Page 68 5 Registering from TopAccess — Email Setting (Private Template) In the Email Setting page, you can specify the content of the Scan to Email document to be sent. 1) Subject This sets the subject of the Scan to Email documents. Select “Scanned from (Device Name) [(Template Name)] (Date) (Time)”...
- Page 69 - TIFF (Single) — Select this to save scanned images separately as Single-page TIFF files. - PDF (Multi) — Select this to save scanned images as a Multi-page PDF file. - PDF (Single) — Select this to save scanned images separately as Single-page PDF files.
- Page 70 5 Registering from TopAccess 7) File Name Select how the scanned file will be named. Select “DocYYMMDD” to name as it described, or you can enter the desired file name in the field. When you want to add the date and time in the file name, check the “Add the date and time to a file name”...
- Page 71 - TIFF (Multi) — Select this to save scanned images as a Multi-page TIFF file. - TIFF (Single) — Select this to save scanned images separately as Single-page TIFF files. - PDF (Multi) — Select this to save scanned images as a Multi-page PDF file. - PDF (Single) —...
- Page 72 5 Registering from TopAccess 4) Destination — Remote 1 Check this box to save a scanned file to the Remote 1. How you can set this item depends on how your administrator configured the Save as file settings. If the Remote 1 does not allow to specify a network folder, you can only select “Use Adminis- trator Settings”.
- Page 73 5) Destination — Remote 2 Check this box to save a scanned file to the Remote 2. How you can set this item depends on how your administrator configured the Save as file settings. If the Remote 2 does not allow to specify a network folder, you can only select “Use Adminis- trator Settings”.
- Page 74 5 Registering from TopAccess — Scan Setting (Private Template) In the Scan Setting page, you can specify how originals are scanned for the Scan to File, Scan to Email, and Scan to e-Filing agent. 1) Single/2-Sided Scan Select whether scanning one side or both sides of originals. - Single —...
-
Page 75: Setting Template Password
This is not available when “Black” is selected at the “Color Mode” drop down box. 8) Original Size Select the original size. Select “Auto” to automatically detect the original paper size, “Mixed Original Sizes” to allow scanning mixed original sizes, or a desired paper size. 9) Jpeg Compression Select the level of Jpeg compression. - Page 76 5 Registering from TopAccess Click the group name link that contains the private template that you want to edit. If the selected private template group is protected by a password, the Input Group Password page is displayed. If not, the Group Information page is displayed. You can display only defined private template groups by clicking on the “Defined Groups”...
- Page 77 From the templates list, click the template icon that you want to set or change the password. If the templates list is displayed in the List view, click the template name that you want to set or modify the password. If the selected private template is protected by a password, the Input Template Pass- word page is displayed.
- Page 78 5 Registering from TopAccess Click [Change Password] to set the password for the private tem- plate. The Change Template Password page is displayed. Enter old password in the Old Password field, and new password in the New Password and Retype Password fields. You can only use 5-digit numbers for the password.
-
Page 79: Resetting Private Templates
Click [OK]. The password is set or modified. Resetting Private Templates Users can reset the private template. Resetting the private template Click the Registration tab and the Template menu. The Template menu page is displayed. When the User Management Setting and Role Based Access Control are enabled, the login page will be displayed. - Page 80 5 Registering from TopAccess Click the group name link that contains the private template that you want to reset. If you select the private template group that is not protected by a password, the Pri- vate Templates page is displayed. Skip to step 4. If you select the private template group that is protected by a password, the Input Group Password page is displayed.
- Page 81 From the templates list, click the template icon that you want to reset. If the templates list is displayed in the List view, click the template name that you want to reset. If you select the private template that is not protected by a password, the Template Properties page is displayed.
- Page 82 5 Registering from TopAccess When the Input Template Password page is displayed, enter the 5- digit password (or administrator’s password) for selected private template and click [OK]. The Template Properties page is displayed. Click [Reset Template]. The confirmation dialog box appears. Click [OK].
-
Page 83: Displaying Public Templates
Displaying Public Templates End users can also display the templates list in the public group so that users can see what tem- plates are available. Displaying templates in the public group Click the Registration tab and the Template menu. The Template menu page is displayed. When the User Management Setting and Role Based Access Control are enabled, the login page will be displayed. - Page 84 5 Registering from TopAccess The templates list in the public group is displayed. You can change the template list view by clicking on either “Panel View” or “List View”. If you know which public template you want to view, click the number of the public tem- plate in the “Jump to”...
-
Page 85: Managing Address Book
Managing Address Book This equipment comes with the Address Book feature that enables users to manage who receives Scan to Email, Internet Fax transmission, and fax transmission. In the Address Book menu page at the Registration tab in TopAccess, you can add, edit, and delete recipient information. - Page 86 5 Registering from TopAccess Click [Add Address] to add new contact, or click the contact link that you want to edit in the contacts list. The Contact Properties page is displayed. Managing Address Book...
- Page 87 Enter following items to specify the recipient information. First Name — Enter the first name of the recipient. You can enter up to 32 characters. Last Name — Enter the last name of the recipient. You can enter up to 32 characters. Email Address —...
- Page 88 5 Registering from TopAccess Enter following items according to the capabilities of recipient fac- simile, and click [Save]. SUB — Enter the mailbox number if you want to send originals to the mailbox in the recipient facsimile. You can enter up to 20 characters including numbers and hyphenations (-), #, *.
-
Page 89: Deleting A Contact
In the Contact Properties page, click [Save] to add new contact. Deleting a contact Click the Registration tab and the Address Book menu. The Address Book menu page is displayed. When the User Management Setting and Role Based Access Control are enabled, the login page will be displayed. -
Page 90: Adding New Contact From The Ldap Server
5 Registering from TopAccess Click [Delete]. The contact is deleted from the Address Book. Adding New Contact from the LDAP Server You can search for contacts in the LDAP server and add them to the Address Book. To use the LDAP search feature, the administrator must configure the directory service. - Page 91 Click [Search]. The Search Contact page is displayed. Select the directory service name that you want to search in the “Directory Service Name” field, and enter the search terms in the fields that you want to search. If you select the model name of this equipment at the Directory Service Name drop down box, you can search for recipients in the address book of this equipment.
-
Page 92: Managing Groups In The Address Book
5 Registering from TopAccess Check the boxes of contacts that you want to add to the Address Book. You can select all users in the list by clicking on the button. Click [Add]. Selected contacts are added in the Address Book. Managing Groups in the Address Book You can create groups that contain the multiple recipients. - Page 93 Click [New] to add new group, or click the group link that you want to edit in the groups list. The Group Properties page is displayed. Enter following items to specify the group properties. Group Name — Enter the group name. You can clear the entered values in each field by clicking [Reset].
-
Page 94: Deleting A Group
5 Registering from TopAccess Deleting a group Click the Registration tab and the Address Book menu. The Address Book menu page is displayed. When the User Management Setting and Role Based Access Control are enabled, the login page will be displayed. When the Role Based Access Control is enabled, only users that has the privilege to operate the registration can login to the Registration tab page. -
Page 95: Managing Mailboxes
Managing Mailboxes Mailboxes can be managed only when the optional Fax unit is installed. Mailboxes can be managed using the Touch Panel Display. See the Operator’s Manual for Facsimile Function. This equipment supports the ITU-T compatible mailboxes that allow storage and retrieval of doc- uments via mailboxes that are already set up in a mailbox hub. -
Page 96: Setting Up An Open Mailbox
5 Registering from TopAccess Setting Up an Open Mailbox To carry out ITU-T communications, you must first set up an Open Mailbox in the mailbox hub. You can set up a maximum of 300 mailboxes. Setting up or editing a mailbox Click the Registration tab and the Inbound FAX routing menu. - Page 97 Click [Edit]. Select agents and click [Select Agent]. Confidential — Select this to create a Confidential mailbox. Bulletin Board — Select this to create a Bulletin Board mailbox. Forward — Select this to create a relay station mailbox. When you select this, select the agent from “Internet/Fax(Relay)”, “Save as file”, “Email”, or “Store to e-Filing”.
- Page 98 5 Registering from TopAccess Click each button displayed in the page to set the template proper- ties. [MailBox Setting] — Click this to specify the mailbox settings. P.99 “MailBox Setting” [Destination Setting] — Click this to specify the destinations to be sent. This can be set only when creating the Internet/Fax(Relay) agent or Email agent.
-
Page 99: Mailbox Setting
After configuring the desired mailbox properties, click [Save]. The mailbox properties are registered. MailBox Setting In the MailBox Settings page, specify the general information of the mailbox such as the box number, password, owner, comment, and notification. Specifying email addresses for the destinations is available only when the Scanner Kit is installed, or the Printer/Scanner Kit is installed. - Page 100 5 Registering from TopAccess The Inbound Fax Routing is available only for a Forward mailbox. If you select “Confiden- tial” or “Bulletin Board” as an agent, you cannot specify the fax number. When a fax is sent from the specified fax number with a box number (or sub address), the Inbound Fax Routing will not apply to the transmission and it is processed according to the specified box number (or sub address) settings.
- Page 101 P.58 “Destination Setting (Private Template)” Internet Fax Setting (Mailbox) In the Internet Fax Settings page, you can specify the content of the Internet Fax to be sent. The instructions on how to setting up the Internet Fax settings for the mailbox is same as setting up the Internet Fax settings for the private template.
-
Page 102: Deleting An Open Mailbox
5 Registering from TopAccess The instructions on how to setting up the Email setting for the mailbox is same as setting up the Email setting for the private template. P.68 “Email Setting (Private Template)” Save as file Setting (Mailbox) In the Save as file Setting page, you can specify how and where a received fax will be stored. The instructions on how to setting up the Save as file setting for the mailbox is same as setting up the Save as file setting for the private template. - Page 103 Click the box number link that you want to delete in the mailboxes list. If you click the box number link that is not protected by a password, skip to step 4. If you click the box number link that is protected by a password, go to the next step. Enter the password for the mailbox and click [OK].
-
Page 105: Managing Counters
Managing Counters This section describes about the Counter tab page of TopAccess end-user mode. Viewing Counters....................106 Displaying the Total Counter ......................106 Displaying the Department Counter ....................106... -
Page 106: Viewing Counters
6 Managing Counters Viewing Counters This equipment maintains a set of counters that keep track of the number of pages printed, cop- ied and scanned. These statistics can be displayed in totals or broken down by department. This topic describes how to display the statistics and manage the department counters. P.106 “Displaying the Total Counter”... - Page 107 Displaying the department counter Click the Counters tab and the Department menu. The Department menu page is displayed. Enter a department code that you want to display the counter in the “Department Code” field and click [Enter]. The department counter for specified department is displayed. Click the department name link to display the detailed counters for the department.
- Page 109 TopAccess Administrator Mode This section describes about administrative functions of TopAccess. Features and Functions ..................111 About Setup from TopAccess......................111 About Maintenance from TopAccess....................112 About Registration from TopAccess ....................113 About Other Administrative Functions in TopAccess ..............113 Accessing TopAccess Administrator Mode ............114 Setting up from TopAccess .................116 Setting up Device Settings ......................
- Page 110 Registering from TopAccess ................223 About the Registrations........................223 Registering Public Templates......................223 Registering Fax and Internet Fax Received Forward..............231 Displaying Message Log ..................248 Managing Department Code ................249 Displaying the Department List and Counters.................249 Clearing the Department Counters ....................251 Registering or modifying the Department Code ................253 Deleting the Department Code......................255 Setting up User Management ................258 Enabling Department Management ....................258...
-
Page 111: Features And Functions
Features and Functions With the TopAccess web-based device management utility in the administrator mode, you can configure network and device settings, display and filter message and job logs, and control cur- rent jobs using a web browser. About Setup from TopAccess Following setup options are performed from TopAccess in the administrator mode: Configuring device settings An administrator can configure the device settings such as device information, energy save,... -
Page 112: Configuring Print Service Settings
7 TopAccess Administrator Mode Configuring print service settings An administrator can configure the print services such as Raw TCP/IP print, LPD print, IPP print, FTP print, NetWare print, and Email print. About Maintenance from TopAccess Following maintenance options are performed from TopAccess in the administrator mode: Updating client software An administrator can update the client software saved in this equipment. -
Page 113: About Registration From Topaccess
Rebooting the equipment An administrator can reboot the equipment. About Registration from TopAccess Registering is performed from TopAccess in the administrator mode: Registering public templates An administrator can register public templates that are available for all users. Registering Fax or Internet Fax Received Forward An administrator can register the agents for the relay transmission of received faxes or Internet Faxes. -
Page 114: Accessing Topaccess Administrator Mode
7 TopAccess Administrator Mode Accessing TopAccess Administrator Mode TopAccess, web-based utility available on this equipment, allows you to manage this equipment remotely via the Internet or via your company’s intranet. To operate TopAccess, this equipment should be connected to the network and configured with the TCP/IP settings. - Page 115 Click the [Administration] tab. The Login page is displayed. Enter the administrator password in the “Password” field. Then click [Login]. You cannot change a name in the User Name field. It always must be “Admin” to login TopAccess in the administrator mode. The Setup page is displayed.
-
Page 116: Setting Up From Topaccess
7 TopAccess Administrator Mode Setting up from TopAccess This section describes how to set up the equipment using TopAccess. P.116 “Setting up Device Settings” P.121 “Setting up Network Settings” P.159 “Setting up Copier Settings” P.162 “Setting up Fax Settings” P.167 “Setting up Save as file Settings” P.174 “Setting up Email Settings”... - Page 117 In the General submenu page, set the device settings as required. In the General submenu page, you can set the following: P.118 “Setting up the Device Information” P.119 “Setting up the Energy Save” P.120 “Setting up the Time and Date” P.120 “Setting up the Web General Setting”...
-
Page 118: Setting Up The Device Information
7 TopAccess Administrator Mode Setting up the Device Information You can set the device information displayed in the Device tab page. 1) Name This displays the equipment’s device name. 2) Copier Model This displays the equipment’s model name. 3) Save as File Space Available This displays the available size to store the Save as file documents. -
Page 119: Setting Up The Energy Save
If the Department Code Enforcement is set to ON and the SNMP communication is enabled in the printer driver, the user will be prompted to enter the correct department code if an invalid department code was entered in the printer driver. The Department Code Enforcement setting is not applied when the User Management Set- ting is enabled. -
Page 120: Setting Up The Time And Date
7 TopAccess Administrator Mode 2) Auto Power Save Select how long this equipment can remain inactive before entering the power save mode. 3) Sleep/Auto Shut Off Select how long this equipment can remain inactive before entering the sleep mode or auto shut off mode. -
Page 121: Setting Up Network Settings
Setting up Network Settings In the Network submenu page in the Setup menu, an administrator can configure the network settings such as TCP/IP, IPX/SPX, AppleTalk, Bonjour, LDAP Session, DNS Session, DDNS Session, SMB Session, NetWare Session, HTTP Network Service, SMTP Client, SMTP Server, POP3 Network Service, SNTP Service, FTP Client, FTP Server, SNMP Network Service, and Security Service. - Page 122 7 TopAccess Administrator Mode In the Network submenu page, click link or scroll the page to find the setting table, and click the button of the setting to set the net- work settings as required. In the Network submenu page, you can set the following: P.123 “Setting up the TCP/IP”...
- Page 123 Click [OK] to apply the changes. This equipment starts initializing the network interface card to apply the changes During the initialization of the network interface card, the network will not be available. TopAccess will display “Please restart after waiting a few minutes.” During the initializa- tion, the Touch Panel Display will display “NETWORK INITIALIZING”.
- Page 124 7 TopAccess Administrator Mode When you select a specific ethernet speed, you must select the same ethernet speed as set in the connected network. If you do not know the ethernet speed that must be used, select “AUTO”. 2) Address Mode Select how to set the IP address.
- Page 125 When the DHCP server does not have a primary and secondary WINS server addresses, the blank data is set to in the primary and secondary WINS server addresses even if you set the correct primary and secondary WINS server addresses manually in the SMB Session. In that case, select “Disable”...
- Page 126 7 TopAccess Administrator Mode 11) Default Gateway Enter the gateway address if required when “Static IP” is selected in the “Address Mode” drop down box. 12) IP Filtering When you want to set the IP filtering for Raw TCP, LPR, and IPP printing, specify the range of IP addresses in the Start Address and End Address fields.
- Page 127 3) Manual You assign the IPv6 address, prefix and default gateway manually. In this mode, you can assign one IPv6 address to this equipment. - IP ADDRESS — Assign the IPv6 address for this equipment. - PREFIX — Assign the prefix for the IPv6 address. - GATEWAY —...
-
Page 128: Setting Up The Appletalk
7 TopAccess Administrator Mode Setting up the IPX/SPX You can set the IPX/SPX protocol to enable the communication over IPX/SPX. The IPX/SPX must be configured to enable Novell printing with NetWare server 5.1, 6.0, 6.5 over IPX/SPX. 1) Enable IPX/SPX Select whether the IPX/SPX protocol is enabled or disabled. -
Page 129: Setting Up The Ldap Session
Setting up the Bonjour In Bonjour, you can enable or disable the Bonjour networking that is available for Mac OS X. 1) Enable Bonjour Select whether the Bonjour is enabled or disabled. 2) Link-Local Host Name Enter the DNS host name of this equipment. 3) Service Name Enter the device name of this equipment that will be displayed in the Bonjour network. -
Page 130: Setting Up The Dns Session
7 TopAccess Administrator Mode When “Verify with imported cert” is selected, you must import the CA certificate in this equipment. P.145 “Setting up the Security Service” If at least one of the registered LDAP directory services requires the SSL, you must enable the “Enable SSL”... -
Page 131: Setting Up The Ddns Session
When the “Obtain a Domain Server Address automatically” option is enabled in the TCP/IP set- tings, the server address of the primary and secondary DNS server addresses can be obtained using the DHCP server. P.123 “Setting up the TCP/IP” Setting up the DDNS Session In DDNS Session, you can enable the Dynamic DNS service if the DNS server supports the dynamic DNS. - Page 132 7 TopAccess Administrator Mode When using DDNS and the IP address is assigned using DHCP, enable “006 DNS Servers” and “015 DNS Domain Name” in the DHCP Server’s Scope Options or Server Options. When using DDNS, make sure the “Allow dynamic updates?” option is set to “Yes” (for Win- dows 2000 Server) or “Nonsecure and Secure”...
-
Page 133: Setting Up The Smb Session
When the “Obtain a Domain Name automatically” option is enabled in the TCP/IP settings, the domain name can be obtained using the DHCP server. P.123 “Setting up the TCP/IP” 4) Primary Login Name Enter the primary login name for the dynamic DNS service. 5) Primary Password Enter the primary password for the dynamic DNS service. - Page 134 7 TopAccess Administrator Mode - Disable — Select this to disable SMB. - Disable Print Share — Select this to enable the file sharing service using SMB, but dis- able SMB printing. - Disable File Share — Select this to enable SMB printing, but disable the file sharing ser- vice using SMB.
- Page 135 7) Logon User Name Enter a valid user name that is able to logon the specified domain. 8) Password Enter the password for the specified logon user name to logon the domain network. 9) Primary WINS Server Specify the IP address of the primary WINS server when the WINS server is used to provide the NetBIOS name in your local area network.
-
Page 136: Setting Up The Netware Session
7 TopAccess Administrator Mode 12) SMB Signing of SMB Client Select whether SMB Signing is enabled or disabled when this equipment accesses the cli- ents using SMB, such as when this equipment stores the scanned data in the network folder using SMB. -
Page 137: Setting Up The Http Network Service
3) Context Enter the NDS context that the NetWare print server for this equipment is located. 4) Tree Enter the NDS tree. 5) Search root Enter the NetWare server name that this equipment preferentially searches for the queues. Setting up the HTTP Network Service In HTTP Network Service, you can enable or disable Web-based services such as TopAccess and e-Filing web utility. - Page 138 7 TopAccess Administrator Mode A From Address setting is also required to send Internet Fax and Emails. For information about the From Address setting, please refer to the following sections. P.174 “Setting up Email Settings” P.177 “Setting up Internet Fax Settings” The From Address can be also determined automatically when the User Management Setting is enabled.
- Page 139 4) SMTP Server Address Enter the IP address or FQDN (Fully Qualified Domain Name) of the SMTP server when “Enable SMTP Client” is enabled. If you use FQDN to specify the SMTP server, you must configure the DNS server and enable the DNS in the DNS Session.
-
Page 140: Setting Up The Smtp Server
7 TopAccess Administrator Mode Setting up the SMTP Server In SMTP Server, you can enable or disable SMTP transmission for receiving the Internet Fax and Emails. This function is usually set when you want to enable the Offramp Gateway feature. 1) Enable SMTP Server Select whether this equipment works as an SMTP server or not. -
Page 141: Setting Up The Pop3 Network Service
Setting up the POP3 Network Service In POP3 Network Service, you can specify the POP3 server to receive an Internet Fax and Emails. 1) Enable POP3 Client Select whether retrieving an Internet Fax and an Email from the POP3 server is enabled or disabled. - Page 142 7 TopAccess Administrator Mode 4) Authentication Enable or disable the authentication for accessing the POP3 server. - Disable — Select this to disable the authentication. - NTLM/SPA — Select this to access the POP3 server using the NTLM/SPA authentica- tion. - Kerberos —...
-
Page 143: Setting Up The Ftp Client
1) Enable SNTP Select whether the SNTP service is enabled or disabled. When this is enabled, the time set- tings of this equipment can be adjusted using the SNTP service. 2) Primary SNTP Server Specify the IP address of the primary SNTP server when the SNTP service is enabled. 3) Secondary SNTP Server Specify the IP address of the secondary SNTP server as you require. -
Page 144: Setting Up The Snmp Network Service
7 TopAccess Administrator Mode - Reading/writing the address book data using the AddressBook Viewer - Backing up/Restoring the e-Filing data using the e-Filing Backup/Restore Utility 2) Enable SSL Select whether the SSL (Secure Sockets Layer) is enabled or disabled for FTP server. To enable SSL, you must create a self-signed certificate or import a server certificate in Security Service. - Page 145 2) Read Community Enter the SNMP read community name for the SNMP access. If you specify a community name other than “public” for the Read Community, the applica- tions that use MIB (TopAccessDocMon, TWAIN driver, File Downloader, and Address- Book Viewer) will be unavailable. The SNMP communication of the printer driver also will be unavailable, so that the obtaining the configurations, confirming the department code, and obtaining the available boxes in e-Filing will be disabled.
- Page 146 7 TopAccess Administrator Mode — Installing Certificate for Wireless LAN When you want to set the 802.1x authentication with the RADIUS server for the optional Wire- less LAN Module (GN-1041), you must install user certificate and CA certificate as required. This equipment supports CA certificate and User certificate that are the following encoding format.
- Page 147 Click [Browse] to select CA certificate and user certificate file as required. Then click [Upload]. It start installing the certificates. Please wait until the installation is completed and the Security Service page is displayed. Click [Previous] to close the Security Service page. —...
- Page 148 7 TopAccess Administrator Mode Creating a self-signed certificate Click [Security Service]. The Security Service page is displayed. Select “self-signed certificate” below “Server certificate” and click [Create]. The Create self-signed certificate page is displayed. Setting up from TopAccess...
- Page 149 Enter the following items and click [Save]. Country/Region Code — Enter the country or region code using two alphabet characters. State or Province Name — Enter the State or Province Name. Locality Name — Enter the city or locality name. Organization Name —...
- Page 150 7 TopAccess Administrator Mode Deleting a self-signed certificate Click [Security Service]. The Security Service page is displayed. Click [DELETE] in the “self-signed certificate” option. The confirmation dialog box appears. If the self-signed certificate has not been created, you cannot delete the self-signed cer- tificate.
- Page 151 Click [Previous] to close the Security Service page. Installing an imported server certificate Click [Security Service]. The Security Service page is displayed. Setting up from TopAccess...
- Page 152 7 TopAccess Administrator Mode Click [Browse] to select server certificate file and then click [Upload]. The alert message dialog box appears. Click [OK]. The server certificate is imported. This message appears to inform you to input the password for the server certificate from the touch panel of the equipment before saving the network settings.
- Page 153 Before enabling SSL, you must input the password for the imported server certificate from the touch panel of the equipment. For instructions on how to input the password, please refer to the following section in User Functions Guide. Chapter 4 “SETTING ITEMS (ADMIN)” - “SETTING NETWORK FUNCTIONS”...
-
Page 154: Installing Ca Certificate
7 TopAccess Administrator Mode Click [DELETE] in the “Import” option. The confirmation dialog box appears. If the server certificate has not been imported, you cannot delete the server certificate. Click [OK]. The self-signed certificate is deleted. Click [Previous] to close the Security Service page. —... - Page 155 Installing a CA certificate Click [Security Service]. The Security Service page is displayed. Select the encryption of the CA certificate and click [Browse] to select a CA certificate file. Then click [Upload]. The CA certificate is installed. Setting up from TopAccess...
- Page 156 7 TopAccess Administrator Mode Click [Previous] to close the Security Service page. Then you can enable SSL by selecting “Verify with imported cert” for the following network settings. P.129 “Setting up the LDAP Session” P.137 “Setting up the SMTP Client” P.141 “Setting up the POP3 Network Service”...
- Page 157 Select the CA certificate file that you want to delete in the “Certifi- cate File” list, and click [DELETE]. The confirmation dialog box appears. Click [OK]. The self-signed certificate is deleted. Click [Previous] to close the Security Service page. Setting up from TopAccess...
- Page 158 7 TopAccess Administrator Mode Setting up the Web Service Setting In Web Service Print and Web Service Scan, you can set the Web service Setting. The Web Service Print operations and Web Service Scan operations are performed on client computers with Windows Vista through a network.
-
Page 159: Setting Up Copier Settings
Setting up Copier Settings In the Copier submenu page in the Setup menu, an administrator can configure the copier set- tings that initially apply to copy operations. Some settings may not apply to the Touch Panel Display as soon as you save the settings. The settings will be updated by pressing the [FUNCTION CLEAR] button on the Control Panel or after an Auto Clear time period. -
Page 160: Setting Up The Copier Settings
7 TopAccess Administrator Mode Click [OK] to apply the changes. When using the Internet Explorer, the settings that are displayed in each field may not be changed even if you change the settings and click [Save]. However, the settings have been changed in the equipment. - Page 161 - Write Laterally — Select this to copy each two pages or four pages from right to left or top to bottom. When the portrait originals are copied using 2in1 or 4in1, this equipment copies them from right to left. When the landscape originals are copied using 2in1 or 4in1, this equipment copies them from to bottom.
-
Page 162: Setting Up Fax Settings
7 TopAccess Administrator Mode Setting up Fax Settings In the Fax submenu page in the Setup menu, an administrator can configure the fax device set- tings and the settings initially apply to fax operations. Some settings may not apply to the Touch Panel Display as soon as you save the settings. The settings will be updated by pressing the [FUNCTION CLEAR] button on the Control Panel or after an Auto Clear time period. - Page 163 Click [Save]. The confirmation dialog box appears. If you want to restore the current settings without saving the changes, click [Cancel]. Clicking [Cancel] cannot restore the defaults. This can only clear the changes and restore the current settings before saving the changes. Click [OK] to apply the changes.
-
Page 164: Setting Up The Fax Settings
7 TopAccess Administrator Mode Setting up the Fax Settings In Fax Settings, you can set the default fax settings that apply to fax operation from the Touch Panel Display. 1) Terminal ID Enter the terminal ID name (company name) to identify this equipment. The name will be printed at the leading edge of all documents transmitted. - Page 165 - Auto — Select this to automatically receive incoming originals when the bell rings. Select this when the line is being used exclusively by the fax transmission. - Manual — Select this to manually receive incoming originals after pressing the Start but- ton on the Control Panel.
- Page 166 7 TopAccess Administrator Mode 17) Reduction Select whether reducing the received fax image if it is larger than the effective printing area of the recording paper. 18) Duplex Print Select whether printing the received fax images on both sides of the recording paper. 19) Rotate Sort Select whether rotating the output direction in the tray for each reception.
-
Page 167: Setting Up Save As File Settings
Setting up Save as file Settings In the Save as file submenu page in the Setup menu, an administrator can configure the Save as file settings that apply to the Save as file operations. An administrator also configures the Save as file settings that apply to the Save as file operation using the N/W-Fax driver. The settings in the Save as file submenu page are only applied when the Scanner Kit is installed, or when the Printer/Scanner Kit is installed. - Page 168 7 TopAccess Administrator Mode In the Save as file submenu page, set the Save as file settings as required. In the Save as file submenu page, you can set the following: P.169 “Setting up the Local Storage Path” P.169 “Setting up the Storage Maintenance” P.169 “Setting up the Destination”...
-
Page 169: Setting Up The Local Storage Path
Setting up the Local Storage Path You can see the folder path where files are stored by the Save as file to local folder. 1) Storage Path This displays the local storage path where files are stored when files are saved to the local folder by the Save as file functions. -
Page 170: Setting Up The Remote 1 And Remote 2
7 TopAccess Administrator Mode 2) Use Network Folder Destination When this is selected, set the Remote 1 and Remote 2 settings to specify how users can select the network folders for Save as file destination. When you select “Use Network Folder Destination”, make sure both “Remote 1” and “Remote 2”... - Page 171 3) Server Name When you select “FTP” as the protocol, enter the FTP server name or IP address where a scanned file will be sent. For example, to send a scanned file to the “ftp://192.168.1.1/user/ scanned” FTP folder in the FTP server, enter “192.168.1.1” in this field. You can specify the directory at the “Network Path”...
- Page 172 7 TopAccess Administrator Mode 2) Use Network Folder Destination Select this to allow network folders to be used as Save as file destinations for N/W-Fax doc- uments. When selected, set the N/W-Fax Folder settings to specify which network folder to use.
- Page 173 5) Login User Name Enter the login user name to access a SMB server, FTP server, or NetWare file server, if required. When you select “FTP” as the protocol, anonymous login is assumed if you leave this field blank. 6) Password Enter the password to access a SMB server, FTP server, or NetWare file server, if required.
-
Page 174: Setting Up Email Settings
7 TopAccess Administrator Mode Setting up Email Settings In the Email submenu page in the Setup menu, an administrator can configure the Email set- tings that are needed for Scan to Email operations. Some settings may not apply to the Touch Panel Display as soon as you save the settings. The settings will be updated by pressing the [FUNCTION CLEAR] button on the Control Panel or after an Auto Clear time period. -
Page 175: Setting Up The Email Settings
Click [OK] to apply the changes. When using the Internet Explorer, the settings that are displayed in each field may not be changed even if you change the settings and click [Save]. However, the settings have been changed in the equipment. In that case, click the Email submenu then the page displays the current settings in each field. - Page 176 7 TopAccess Administrator Mode If you saved the data in an XPS format, it may not be opened depending on the specification of your computer. 4) Number of Retry Enter the number of times to retry sending scanned images when it fails. 5) Retry interval Enter the interval to retry sending scanned images when it fails.
-
Page 177: Setting Up Internet Fax Settings
Setting up Internet Fax Settings In the Internet Fax submenu page in the Setup menu, an administrator can configure the Inter- net Fax settings needed for Internet Fax transmissions. The Internet Fax submenu page in the Setup menu is available only when the Scanner Kit is installed, or when the Printer/Scanner Kit is installed. -
Page 178: Setting Up The Internet Fax Settings
7 TopAccess Administrator Mode Click [Save]. The confirmation dialog box appears. If you want to restore the current settings without saving the changes, click [Cancel]. Clicking [Cancel] cannot restore the defaults. This can only clear the changes and restore the current settings before saving the changes. Click [OK] to apply the changes. - Page 179 3) Number of Retry Enter the number of times to retry sending the Internet Faxes when it fails. 4) Retry interval Enter the interval to retry sending the Internet Faxes when it fails. When the “Number of Retry” and “Retry interval” options are changed, the “Number of Retry” and “Retry interval”...
-
Page 180: Setting Up Printer Settings
7 TopAccess Administrator Mode Setting up Printer Settings In the Printer submenu page in the Setup menu, an administrator can configure how the printer works and the printer options needed for the raw print jobs. The Printer submenu page in the Setup menu is available only when the Printer Kit or the Printer/Scan- ner Kit is installed. -
Page 181: Setting Up The General Setting
Click [OK] to apply the changes. When using the Internet Explorer, the settings that are displayed in each field may not be changed even if you change the settings and click [Save]. However, the settings have been changed in the equipment. In that case, click the Printer submenu then the page displays the current settings in each field. - Page 182 7 TopAccess Administrator Mode You can also add LPR queue names and specify the raw job setting for each queue. P.183 “Setting up the Raw Job Setting” 1) Raw jobs - Duplex Printing Select whether a raw job will be printed on both sides of the paper. The “Raw jobs - Duplex Printing”...
-
Page 183: Setting Up The Raw Job Setting
10) PCL Font Number Enter the font number of the internal PCL font to be used as the default font for printing. You can check the font numbers and internal PCL fonts in the Internal PCL Font List. Please see the Printing Guide for the font number of internal PCL fonts, 11) PCL Line Termination Select the type of the line termination. - Page 184 7 TopAccess Administrator Mode Enter following items as required. Queue Name — Enter the queue name using up to 31 alphanumeric characters. The queue name is case sensitive so that “Queue1” and “queue1” will be added as different queues. Raw jobs - Duplex Printing — Select whether a raw job will be printed on both sides of the paper.
- Page 185 Deleting a LPR queue Select a radio button of a queue that you want to delete and click [Delete]. The confirmation dialog box appears. Click [OK]. The selected queue is deleted. Setting up from TopAccess...
-
Page 186: Setting Up Print Service Settings
7 TopAccess Administrator Mode Setting up Print Service Settings In the Print Service submenu page in the Setup menu, an administrator can configure such print services as Raw TCP Print, LPD Print, IPP Print, FTP Print, NetWare Print, and Email Print. The Print Service submenu page in the Setup menu is available only when the Printer Kit or the Printer/ Scanner Kit is installed. -
Page 187: Setting Up The Raw Tcp Print
Click [Save]. The confirmation dialog box appears. If you want to restore the current settings without saving the changes, click [Cancel]. Clicking [Cancel] cannot restore the defaults. This can only clear the changes and restore the current settings before saving the changes. Click [OK] to apply the changes. -
Page 188: Setting Up The Ipp Print
7 TopAccess Administrator Mode 3) Banners Select whether printing a banner page for each print job using LPR printing. Setting up the IPP Print In IPP Print, you can set the IPP Print options to enable the IPP print service. 1) Enable IPP Enable or disable IPP print service. -
Page 189: Setting Up The Ftp Print
7) SSL URL Display the SSL URL for IPP printing. You cannot change the SSL URL for IPP printing. This SLL URL should be set as the print port when users set up the printer driver for IPP printing if the SSL for IPP printing is enabled. 8) Administrator’s Name Enter the user name of the administrator’s client computer. -
Page 190: Setting Up The Netware Print
7 TopAccess Administrator Mode Setting up the NetWare Print In NetWare Print, you can set the NetWare print options to enable the Novell print service. 1) Login Name Enter the print server name that is created in the NetWare file server. 2) Password Enter the password that is set to the print server, if required. - Page 191 8) Partial Wait Time Enter how long this equipment should wait before printing a partial Email job. This should be entered in hour. 9) MDN Reply Select whether sending the MDN message reply or not when the equipment receives an Email print job with a MDN request.
-
Page 192: Displaying Version Information
7 TopAccess Administrator Mode Displaying Version Information An administrator can display the system software version information of this equipment. The version information can be displayed from the Setup menu page. Displaying the version information Access TopAccess in the administrator mode. P.114 “Accessing TopAccess Administrator Mode”... -
Page 193: Maintaining From Topaccess
Maintaining from TopAccess This section details procedures for maintaining this equipment. It covers backing up and restor- ing files, deleting files stored on this equipment, and updating the software on TopAccess. About the Maintenance Functions In the Maintenance menu of the TopAccess administrator mode, an administrator can perform the following maintenance: Updating client software in TopAccess An administrator can upload client software that allows users to download to their computers... -
Page 194: Updating The Software
7 TopAccess Administrator Mode Exporting logs and journals An administrator can export logs and journals as CSV files. This feature is used to save the logs and journals as files before clearing them, if you want to maintain them. P.218 “Exporting the Logs, Journals, and Counters” Clearing logs and journals An administrator can clear logs and journals in this equipment. - Page 195 Select the software that you are going to upload in the “Upload Files” drop down box. Driver Files — Select this to upload the setup files for the Client Utilities CD-ROM. Macintosh PPD Files — Select this to upload the self-extracting files that contains the Macintosh PPD files for Mac OS 8.6/9.x and Mac OS X.
-
Page 196: Removing The Client Software
7 TopAccess Administrator Mode Removing the Client Software You can remove client software in TopAccess so that it can no longer be installed from TopAc- cess. The printer drivers for Point and Print that had been uploaded cannot be deleted. However, you can upload new printer drivers to overwrite them. -
Page 197: Backing Up Data
Backing up Data An administrator can create backup files of the address book, mailboxes, and templates data in the hard disk. This maintenance feature is used to create backup files before updating the sys- tem software or hard disk replacement, etc. The backup files can be used to restore or upload to another e-STUDIO850 Series. - Page 198 7 TopAccess Administrator Mode Click [Create New File] for the data that you want to backup, or click [Create New File] in the “Combined Backup” section to create a backup file of all data. The backup file name and the file size will be displayed. Creating the backup file may takes a few minutes depending on the file size.
-
Page 199: Restoring Data From Backup File
Select the file location and select “All Files” in the “Save as type” drop down box. It is recommended to save the backup file as it is named. If you change the file name, the equipment cannot restore the data from the backup files. The file name of each backup data must be the following name: - Address Book: BACKUP_ADDR<date>.tbf - MailBoxes: BACKUP_MBOX<date>.tbf... - Page 200 7 TopAccess Administrator Mode Click the Maintenance menu and Restore submenu. The Restore submenu page is displayed. Click [Browse] in the data section that you want to restore, or click [Browse] in the “Combined Restore” section to restore all data from a backup file of all data.
- Page 201 Select a backup file and click [Open]. The file version and device name of selected backup file will be displayed. If the backup file name is not the name as shown below, the equipment cannot restore the data from the backup files. - Address Book: BACKUP_ADDR<date>.tbf - MailBoxes: BACKUP_MBOX<date>.tbf - Template: BACKUP_TEMP<date>.tbf...
-
Page 202: Deleting The Data From Local Folder
7 TopAccess Administrator Mode Check the box of data that you uploaded a backup file and click [Restore]. The restore process begins. This procedure may take several minutes. Deleting the Data from Local Folder An administrator can delete information such as, scanned data, transmission data, and recep- tion data that are stored in the local folder using the Save as file function. -
Page 203: Managing Directory Service
Check the box of data that you want to delete and click [Delete Files]. Scan — The data in the “SCAN” folder within the “FILE_SHARE” folder of this equipment, that are stored by Scan to File operations, will be deleted. Transmission —... - Page 204 7 TopAccess Administrator Mode Click [New] to add a new Directory Service, or click the Directory Service name link to edit the Directory Service properties. The Directory Service Properties page is displayed. Maintaining from TopAccess...
- Page 205 Enter following items as required. Directory Service Name — Enter the directory service name that identifies the directory service. Server IP Address — Enter the IP address or FQDN of the LDAP server. Port Number — Enter the port number to access the LDAP server. Generally “389” port is used to access the LDAP server without SSL.
-
Page 206: Setting Up Notification
7 TopAccess Administrator Mode You can clear the entered values by clicking [Reset]. You can delete the Directory Service by clicking [Delete] when you edit the Directory Service. Click [OK]. Entered Service Directory is added in the Directory Service List. Select a radio button of the directory service that you want to set as default server. - Page 207 Click the Maintenance menu and Notification submenu. The Notification submenu page is displayed. In Email Settings, check the box “Notify administrator at Email Address” to enable the notifications, and enter the administrator’s Email address where the notifications are sent. In General Notification Events, check the boxes for general events to be notified.
- Page 208 7 TopAccess Administrator Mode In Received Fax/Internet Fax Notification Events, check the boxes for the events and status to be notified. When these are enabled, the following events will be notified. When “Send email when an error occurs” is enabled: -Failed to print or store the received fax or Internet Fax jobs.
- Page 209 In Scan Notification Events, check the boxes for scanning status to be notified. When these are enabled, the following events will be notified. When “Warning” is enabled: -Deleting files automatically by Storage Maintenance is successfully done. When “Information” is enabled: -Deleting manually by the Delete Files function in the Maintenance menu is successfully done.
- Page 210 7 TopAccess Administrator Mode In Fax Received Forward Notification Events, check the boxes for the events to be notified. Even if you check the items in the Fax Received Forward Notification Events, Emails are sent only when the optional Fax unit is installed. In Internet Fax Received Forward Notification Events, check the boxes for the events to be notified.
-
Page 211: Importing And Exporting The Address Book
Importing and Exporting the Address Book This equipment allows you to import and export address book data in CSV format. P.211 “Importing the Address Book Data” P.213 “Exporting the Address Book Data” Importing the Address Book Data You can import address information that has been exported from another TopAccess address book or from a different address book program. - Page 212 7 TopAccess Administrator Mode Click [Browse...] in the Address Book area. The Choose File dialog box appears. Select the CSV file that contains address book data and click [Open]. Click [Import]. The data is imported to the address book. Maintaining from TopAccess...
-
Page 213: Exporting The Address Book Data
Exporting the Address Book Data You can export address information for use in another TopAccess address book or another address book program. Exporting the address book data as a CSV file Access TopAccess in the administrator mode. P.114 “Accessing TopAccess Administrator Mode” Click the Maintenance menu and Export/Clear Log submenu. - Page 214 7 TopAccess Administrator Mode Right-click the File Name link and select [Save Target As...]. The Save As dialog box appears. Select the file location and select “All Files” or “.csv Document” in the “Save as type” drop down box. Click [Save] The CSV file that contains the address book data is saved in a selected location.
-
Page 215: Importing And Exporting The Department Code
Importing and Exporting the Department Code An administrator can import and export department code data in CSV format. P.215 “Importing the Department Code Data” P.216 “Exporting the Department Code Data” Importing the Department Code Data You can import department code information from a file that has been exported from another device. -
Page 216: Exporting The Department Code Data
7 TopAccess Administrator Mode Select the CSV file that contains department code data and click [Open]. Click [Import]. The data is imported to the department code. Exporting the Department Code Data You can export department code information for use in other equipment. Exporting the department code data as a CSV file Access TopAccess in the administrator mode. - Page 217 When you want to export only the department code information, click [Create New File] in the “Department Code Export (Department Information)” area. When you want to export the department code information with counter information, click [Create New File in the “Department Code Export (Department Information + All Counters)”...
-
Page 218: Exporting The Logs, Journals, And Counters
7 TopAccess Administrator Mode Select the file location and select “All Files” or “.csv Document” in the “Save as type” drop down box. Click [Save]. The CSV file that contains the department code data is saved in a selected location. Exporting the Logs, Journals, and Counters An administrator can export logs and journals in this equipment as CSV files. - Page 219 Click [Create New File] in the area of logs or journals that you want to export. You can export the following logs and journals. Print Job Log Fax Transmission Journal Fax Reception Journal Scan Log Message Log Department Code (Small/Large Counter) The CSV file name will be displayed.
-
Page 220: Clearing The Logs And Journals
7 TopAccess Administrator Mode Right-click the File Name link and select [Save Target As...]. The Save As dialog box appears. Select the file location and select “All Files” or “.csv Document” in the “Save as type” drop down box. Click [Save]. The CSV file that contains the logs or journals data is saved in a selected location. -
Page 221: Rebooting The Equipment
Click the Maintenance menu and Export/Clear Log submenu. The Export/Clear Log submenu page is displayed. Click [Clear Logs] in the area of logs or journals that you want to clear. The selected logs are cleared. Rebooting the Equipment An administrator can reboot the equipment Rebooting the equipment cannot be performed when there are jobs in progress. - Page 222 7 TopAccess Administrator Mode Click the Maintenance menu and Reboot submenu. The Reboot submenu page is displayed. Click [Reboot] to reboot the equipment. The confirmation dialog box appears. Click [OK]. The equipment is restarted. During the equipment is restarted, the network will not be available. TopAccess will dis- play “Please restart after waiting a few minutes.”...
-
Page 223: Registering From Topaccess
Registering from TopAccess About the Registrations In the Registration menu in the TopAccess administrator mode, an administrator can register the public Templates, and relay transmissions of received faxes/internet faxes. Public Template An administrator can create public templates that are held in a public template group available to everyone. - Page 224 7 TopAccess Administrator Mode From the templates list, click the “Undefined” icon to register a new template, or click defined icon to edit the template. If the templates list is displayed in the List view, click the “Undefined” template name to register new template, or click the defined template name to edit the template.
- Page 225 When you edit the existing template, the following window will be displayed. Click [Edit]. The Template Properties page to select agents is displayed. Select agents and click [Select Agent]. You can select one of the following templates: Copy — Select this to create a copy template. Usually, this is selected to print copies as well as sending originals to other destinations.
- Page 226 7 TopAccess Administrator Mode Click each button displayed in the page to specify or edit the asso- ciated template properties. [Panel Setting] — Click this to specify the icon settings for the template. P.227 “Panel Setting (Public Template)” [Destination Setting] — Click this to specify the document’s destination. This can be set only when creating the Fax/Internet Fax agent or Email agent.
- Page 227 [Box Setting] — Click this to specify how the document will be stored in the Box. This can be set only when creating the Store to e-Filing agent. P.228 “Box Setting (Public Template)” [Scan Setting] — Click this to specify how the document will be scanned. This can be set only when creating the Save as file agent, Email agent, and Store to e-Filing agent.
-
Page 228: Resetting The Public Template
7 TopAccess Administrator Mode The instructions on how to setting up the Destination settings for the public template is same as setting up the Destination settings for the private template. P.58 “Destination Setting (Private Template)” — Internet Fax Setting (Public Template) In the Internet Fax Settings page, you can specify the content of the Internet Fax to be sent. -
Page 229: Resetting A Public Template
— Resetting a Public Template To reset an unnecessary public template, perform the following procedure. Resetting a public template Access TopAccess in the administrator mode. P.114 “Accessing TopAccess Administrator Mode” Click the Registration menu and Public Template submenu. The Public Template submenu page is displayed. From the templates list, click the template icon that you want to reset. - Page 230 7 TopAccess Administrator Mode Click [Reset Template]. The confirmation dialog box appears. Click [OK]. The selected template is cleared. — Resetting All Public Templates To reset all public templates, perform the following procedure. Resetting all public templates Access TopAccess in the administrator mode. P.114 “Accessing TopAccess Administrator Mode”...
-
Page 231: Registering Fax And Internet Fax Received Forward
Click [Reset]. The confirmation dialog box appears. Click [OK]. The group information is cleared. Registering Fax and Internet Fax Received Forward The Fax Received Forward and Internet Fax Received Forward allow you to transmit received fax or Internet Faxes to specific destinations — to check all fax and Internet Faxes received. The Fax Received Forward can be registered only when the optional Fax unit is installed. - Page 232 7 TopAccess Administrator Mode Registering the Fax or Internet Fax Received Forward The procedures to register the Fax Received Forward and Internet Fax Received Forward are almost the same. Access TopAccess in the administrator mode. P.114 “Accessing TopAccess Administrator Mode” Click the Registration menu and Fax Received Forward submenu to register the Fax Received Forward, or click the Internet Fax Received Forward submenu to register the Internet Fax Received...
- Page 233 Check the “Forward” check box and select the desired agents and click [Select Agent]. To disable the Fax Received Forward or Internet Fax Received Forward, uncheck the “Forward” check box and click [Select Agent], and then click [Save]. Internet Fax — Select this to transmit received fax or Internet Faxes to another Internet Fax devices.
- Page 234 7 TopAccess Administrator Mode Select when the Fax or Internet Fax Received Forward document will be printed in the “Document Print” drop down box. Always — Select this to always print a forwarded document. ON ERROR — Select this to print a forwarded document when the document will not be sent for all destinations due to errors.
- Page 235 Click each button displayed in the page to specify or edit the asso- ciated properties. [Destination Setting] — Click this to specify the destinations of documents sent. This can be set only when registering the Internet Fax, or Email agent. P.236 “Destination Setting (Fax/Internet Fax Received Forward)”...
- Page 236 7 TopAccess Administrator Mode — Destination Setting (Fax/Internet Fax Received Forward) In the Recipient List page, you can specify the destinations to which the received faxes or Inter- net Faxes will be transmitted. You can specify the recipients by entering Email addresses manually, selecting recipients from the address book, selecting recipient groups from the address book, or searching for recipients in the LDAP server.
- Page 237 Click [Save]. The contacts are added as the destinations. Selecting the recipients from the address book By this method, you can select recipients from the address book. Click [Destination Setting] to open the Recipient List page. Click [Address Book]. The Address Book page is displayed. Check the Email boxes of users you want to add as the recipients.
- Page 238 7 TopAccess Administrator Mode Click [Add]. The selected recipients are added in the Recipient List page. You can remove the contacts that you added in the recipient list before saving the desti- nation settings. P.241 “Removing the contacts from the recipient list” Click [Save].
- Page 239 Click [Add]. All recipients in the selected groups are added in the Recipient List page. You can remove the contacts that you added in the recipient list before saving the desti- nation settings. P.241 “Removing the contacts from the recipient list” Click [Save].
- Page 240 7 TopAccess Administrator Mode Select the directory service name that you want to search in the “Directory Service Name” field, and enter the search terms in the fields that you want to search. If you select the model name of this equipment at the Directory Service Name drop down box, you can search for recipients in the address book of this equipment.
- Page 241 Click [Add]. The selected recipients are added in the Recipient List page. You can remove the contacts that you added in the recipient list before saving the desti- nation settings. P.241 “Removing the contacts from the recipient list” Click [Save]. The contacts are added as the destinations.
- Page 242 7 TopAccess Administrator Mode — Email Setting (Fax/Internet Fax Received Forward) In the Email Setting page, you can specify the content of the Email document to be sent. 1) Subject This sets the subject of the Email documents. Select “Scanned from (Device Name) [(Tem- plate Name)] (Date) (Time)”...
- Page 243 Master Password Enter a password for changing the Encrypt PDF setting. The user password is set “12345” at our factory. Ask the administrator for resetting master password. The passwords must be entered in one-byte alphanumeric characters. The minimum and maximum numbers of characters allowed are 1 and 32. The user password must differ from the master password.
- Page 244 7 TopAccess Administrator Mode — Save as file Setting (Fax/Internet Fax Received Forward) In the Save as file Setting page, you can specify how and where a received document will be stored. 1) File Format Select the file format that the received document will be converted. - TIFF (Multi) —...
- Page 245 - PDF (Multi) — Select this to save scanned images as a Multi-page PDF file. - PDF (Single) — Select this to save scanned images separately as Single-page PDF files. 2) Encryption Set this for encrypting PDF files if you have selected “PDF (Multi)” or “PDF (Single)” in the File Format setting.
- Page 246 7 TopAccess Administrator Mode - FTP — Select this to send a scanned file to the FTP server. - NetWare IPX/SPX — Select this to send a scanned file to the NetWare file server using the IPX/SPX protocol. - NetWare TCP/IP — Select this to send a scanned file to the NetWare file server using the TCP/IP protocol.
- Page 247 Up to 999 files that are sent from the same sender can be stored in a same destination. If 999 files that are sent from the same sender have already been stored in the specified desti- nation, this equipment will print the received document of the same sender instead of storing as file.
-
Page 248: Displaying Message Log
7 TopAccess Administrator Mode Displaying Message Log In the Message Logs menu page, you can display the system message logs such as job infor- mation, warnings, and errors. You can use this page to find out what happened and trouble- shoot the problem. -
Page 249: Managing Department Code
Managing Department Code In the Department menu page at the Counters tab, an administrator can: Display the department list that contains the counter information for each department Display the department counter of a specific department Clear all department counters Clear the department counter of a specific department Register new department code settings Modify the department code settings Delete all department codes... - Page 250 7 TopAccess Administrator Mode The departments list containing the counter information is dis- played. Displaying the department counters Click the Counters tab and the Department menu. The Department menu page is displayed. Enter the administrator password in the “Department Code” field and click [Enter].
-
Page 251: Clearing The Department Counters
The Department Information page opens. Clearing the Department Counters An administrator can clear the counters for all departments at one time, or individually. Clearing all department counters Click the Counters tab and the Department menu. The Department menu page is displayed. Enter the administrator password in the “Department Code”... - Page 252 7 TopAccess Administrator Mode Click [Reset All Counter]. The confirmation dialog box appears. Click [OK]. The department counters for all departments are cleared. Clearing the department counter for a department Click the Counters tab and the Department menu. The Department menu page is displayed. Enter the administrator password in the “Department Code”...
-
Page 253: Registering Or Modifying The Department Code
Click the department name link whose counter you want to clear. The Department Information page opens. Click [Reset Counters]. The confirmation dialog box appears. Click [OK]. The department counters for the selected department are cleared. Registering or modifying the Department Code An administrator can register new department code or modify the department code settings. - Page 254 7 TopAccess Administrator Mode Enter the administrator password in the “Department Code” field and click [Enter]. The Department Management page is displayed. Click [New] to set up a new department code, or click the depart- ment name link that you want to edit in the departments list. The Department Information page is displayed.
-
Page 255: Deleting The Department Code
Enter following items to specify the department information. Department Name — Enter the department name to identify the department code. You can enter up to 20 characters. Department Code — Enter a 5-digit department code. Set Limitation — Select whether enabling the limitation for outputs for this department code. - Page 256 7 TopAccess Administrator Mode Click [Delete All]. The confirmation dialog box appears. Click [OK]. All department code settings are deleted. Deleting a department code setting Click the Counters tab and the Department menu. The Department menu page is displayed. Enter the administrator password in the “Department Code” field and click [Enter].
- Page 257 Click the department name link that you want to delete. The Department Information page opens. Click [Delete]. The confirmation dialog box appears. Click [OK]. The selected department code is deleted. Managing Department Code...
-
Page 258: Setting Up User Management
7 TopAccess Administrator Mode Setting up User Management In the User Management tab page, you can enable or disable the department management, configure the User Management Setting, and configure the User Authentication for Scan to E- mail. P.258 “Enabling Department Management” P.261 “Setting up User Management Setting”... - Page 259 Click [Department Setting]. The Department Setting page opens. Specify the following items and click [Finish]. Department Code Select whether the department management is enabled or disabled. When the User Management Setting is enabled, the Department Code option cannot be disabled. Setting up User Management...
- Page 260 7 TopAccess Administrator Mode Department Code Enforcement Select whether invalid jobs, which a department code is not specified or invalid department code is specified, are printed or stored in the invalid job list when the department code is enabled. ON — Select this to not print the invalid jobs and store them in the invalid job list. Print —...
-
Page 261: Setting Up User Management Setting
Setting up User Management Setting When the User Management Setting is enabled, users must enter the user name and password before operating this equipment. Therefore, you can secure the equipment from the unexpected users. When the User Management Setting is enabled, the following functions will be available. The counters for each user can be managed. -
Page 262: Enabling User Management Setting
7 TopAccess Administrator Mode Please remember the following limitations and considerations for the User Management Setting. The jobs cannot be printed or deleted from TopAccess. When you want to print or delete the jobs, please perform the operation from the [JOB STATUS] button on the Control Panel. The department codes that any users are registered cannot be deleted. - Page 263 — Enabling Windows Domain Authentication To use the Windows Domain Authentication, you must have Windows Domain Authentication system in your network. When the Windows Domain Authentication is enabled, the SNMP Communication must be enabled for printing. Enabling Windows Domain Authentication Click the User Management tab and the Authentication menu.
- Page 264 7 TopAccess Administrator Mode Select “Windows Domain Authentication”. The confirmation dialog box appears. You can disable the User Management Setting by selecting “Disable” and click [Next]. Click [OK]. Select how to process a print job whose user authentication has failed in the User Authentication Enforcement drop down box, and then click [Next].
- Page 265 Enter domain names for the network in the Domain Name 1, Domain Name 2 and Domain Name 3 fields, and then click [Detail Setting]. You can specify up to 3 domain names. You must specify at least one domain name to enable the Windows Domain Authentication.
- Page 266 7 TopAccess Administrator Mode Specify the following items and click [Next]. Role Based Access — Select whether the Role Based Access Control is enabled or not. LDAP Server — Select the LDAP server that manages the Role Based Access Control. When you enable Role Based Access Control, you must export the role based data set- ting file embedded in this equipment or another equipment of the e-STUDIO3510C series, the e-STUDIO451c series, the e-STUDIO850 series, the e-STUDIO452 series...
- Page 267 Specify how the From Address is set for Scan to Email. When the User Authentication for Scan to Email is not enabled, these settings are not used for Scan to Email. Setting Address is 'User Name + @ + Mail Domain Name' — Select this to set the From Address as “User Name@Mail Domain Name”, whose “User Name”...
-
Page 268: Enabling Ldap Authentication
7 TopAccess Administrator Mode — Enabling LDAP Authentication To enable the LDAP Authentication, you must have LDAP directory service in your network. Before enabling the LDAP Authentication, please see “Setting up LDAP Authentication Ser- vice” in the Network Administration Guide. To enable LDAP with SSL, please see the following section. - Page 269 Select “LDAP Authentication”. The confirmation dialog box appears. You can disable the User Management Setting by selecting “Disable” and click [Next]. Click [OK]. Select how to process a print job whose user authentication has failed in the User Authentication Enforcement drop down box, and then click [Next].
- Page 270 7 TopAccess Administrator Mode Select the LDAP server to be used for the authentication and select the type of the LDAP server. Then click [Detail Setting]. Windows Server — Select this when LDAP is running on Windows server. LDAP Server (Other than Windows Server) — Select this when the LDAP is running the server other than Windows server.
- Page 271 Select the following items to enable the privileges for the Guest account. Enable Copy — Check this to enable copying. Enable Email — Check this to enable Emailing. Enable File Share — Check this to enable the file saving operation Enable Internet Fax —...
- Page 272 7 TopAccess Administrator Mode Specify how the From Address is set for Scan to Email. When the User Authentication for Scan to Email is not enabled, these settings are not used for Scan to Email. Setting Address is 'User Name + @ + Mail Domain Name' — Select this to set the From Address as “User Name@Mail Domain Name”, whose “User Name”...
-
Page 273: Enabling Mfp Local Authentication
— Enabling MFP Local Authentication When no network authentication system is configured in your network, you can enable the MFP Local Authentication. The MFP Local Authentication uses the account information that is registered in this equipment for the authentication. Therefore, you must register the user account information first before enabling the MFP Local Authentication. - Page 274 7 TopAccess Administrator Mode Select “MFP Local Authentication” in the “User Authentication” drop down box, and select how invalid jobs are processed in the “User Authentication Enforcement” drop down box. Then click [Next]. The MFP Local Authentication is enabled. In the “User Authentication Enforcement” drop down box, select whether invalid jobs, which an authentication failed, are printed or stored in the invalid job list.
-
Page 275: Managing User Information
Enter the following items and click [Next]. Enable Copy — Check this to enable copying. Enable Email — Check this to enable Emailing. Enable File Share — Check this to enable the file saving operation Enable Internet Fax — Check this to enable the Internet Fax function. Enable Print —... - Page 276 7 TopAccess Administrator Mode Creating or modifying user information Click the User Management tab. The login page is displayed. Enter “Admin” in the “User Name” field, enter the administrator password in the “Password” field, and click [Login]. The User Information List submenu page is displayed. Users can also login using the user name, domain name (required only when Windows Domain Authentication is enabled), and password that has been set as the Account Manager in the User Information.
-
Page 277: Deleting User Information
Enter the following items and press [Save]. User Name — Enter a login user name. You can enter up to 128 characters. Domain Name — Select the domain name that this user will login. The domain name that is set while enabling the Windows Domain authentication is used for the authentication. - Page 278 7 TopAccess Administrator Mode Click the User Management tab. The login page is displayed. Enter “Admin” in the “User Name” field, enter the administrator password in the “Password” field, and click [Login]. The User Information List submenu page is displayed. Users can also login using the user name, domain name (required only when Windows Domain Authentication is enabled), and password that has been set as the Account Manager in the User Information.
- Page 279 Click [OK] to delete the user information. The selected users are deleted. Deleting all user information When the user’s jobs are in progress or the user currently log in the touch panel, the user information cannot be deleted. The “Undefined” user information cannot be deleted. Click the User Management tab.
- Page 280 7 TopAccess Administrator Mode Click [Delete All]. The confirmation dialog box appears. Click [OK] to delete all user information. The counters of selected users are cleared. Resetting the counters for specific users When the user’s jobs are in progress or the user currently log in the touch panel, you cannot reset the user’s counters.
- Page 281 Enter “Admin” in the “User Name” field, enter the administrator password in the “Password” field, and click [Login]. The User Information List submenu page is displayed. Users can also login using the user name, domain name (required only when Windows Domain Authentication is enabled), and password that has been set as the Account Manager in the User Information.
- Page 282 7 TopAccess Administrator Mode Resetting the counters for all users When the user’s jobs are in progress or the user currently log in the touch panel, you cannot reset the user’s counters. Click the User Management tab. The login page is displayed. Enter “Admin”...
- Page 283 Click [Reset All Counters]. The confirmation dialog box appears. Click [OK] to reset all counters. The counters of selected users are cleared. Exporting User Information and Counters The user information can be exported as a CSV file for use in other equipment. Click the User Management tab.
- Page 284 7 TopAccess Administrator Mode Enter “Admin” in the “User Name” field, enter the administrator password in the “Password” field, and click [Login]. The User Information List submenu page is displayed. Users can also login using the user name, domain name (required only when Windows Domain Authentication is enabled), and password that has been set as the Account Manager in the User Information.
- Page 285 Click [Create New File] of which you want to export. Export (Small/Large Counter) — Click [Create New File] of this area to export the counter information only. Export (User Information) — Click [Create New File] of this area to export the user information only.
- Page 286 7 TopAccess Administrator Mode Select the file location and select “All Files” in the “Save as type” drop down box. Then click [Save]. The CSV file that contains the user information data is saved in a selected location. Importing User Information You can import user information from a file that has been exported from another device such as e-STUDIO3510c Series, e-STUDIO451c Series, e-STUDIO850 Series, e-STUDIO452 Series, and e-STUDIO282 Series.
- Page 287 Win- Items dows LDAP Local Supplements Domain Rolebase When the value is blank, the value is set to “0”. 0 = Disable, 1 = Enable Set Limitation When the value is blank or invalid value is entered, the value is set to “OFF”. Maximum reached When user sends a print job while importing the user information, the alert message will be displayed to tell that the equipment cannot receive the print job.
- Page 288 7 TopAccess Administrator Mode Click the “Export/Import” link at the upper right of the page. The Export/Import window appears. Click Import menu and click [Browse...]. The Choose file dialog box appears. Select the CSV file that contains user information data and click [Open].
- Page 289 Click [Import]. The data is imported to the User Information list page. Exporting Role Information Role information is stored in this equipment in the XML format. The role information can be exported as a CSV file for use in other equipment. Web Services Scanning is not be given any restrictions by the user management setting.
- Page 290 7 TopAccess Administrator Mode Enter “Admin” in the “User Name” field, enter the administrator password in the “Password” field, and click [Login]. The User Information List submenu page is displayed. Users can also login using the user name, domain name (required only when Windows Domain Authentication is enabled), and password that has been set as the Account Manager in the User Information.
- Page 291 Click the “Export/Import” link at the upper right of the page. The Export/Import window appears. Right-click the File Name link and select [Save Target As...]. The Save As dialog box appears. Select the file location and select “XML Document” in the “Save as type”...
- Page 292 7 TopAccess Administrator Mode Importing Role Information You can import role information exported from any of other e-STUDIO3510c Series, e- STUDUI451c Series, e-STUDIO850 Series, e-STUDIO452 Series or e-STUDIO282 Series as an XML file. The file to be imported must be created in an XML format compliant with the TopAccess role information format.
- Page 293 Click the “Export/Import” link at the upper right of the page. The Export/Import window appears. Click Import menu. The Import page appears Click [Browse...]. The Choose file dialog box appears. Select the XML file that contains user information data and click [Open].
- Page 294 7 TopAccess Administrator Mode Click [Import]. The data is imported to the Role Information. Viewing the own user information by a user Users can view the own user information by login the User Confirm/Create/Modify page. When the Role Based Access Control is enabled, users can also confirm the functions to be allowed. Click the User Management tab.
- Page 295 The User Information page is displayed. Changing a password by a user (Local MFP Authentication only) When the Local MFP Authentication is enabled, not only an administrator or account managers but also each registered user can change the password himself. Click the User Management tab.
-
Page 296: Setting Up User Authentication For Scan To E-Mail
7 TopAccess Administrator Mode Click [Change Password]. The Change Password window appears. Enter the following items and click [Save]. Old Password — Enter your login password. New Password — Enter a new login password. You can enter up to 64 characters. Retype Password —... - Page 297 LDAP Authentication When your network manages the network users using the LDAP, this equipment can be managed using the LDAP Authentication. When this is configured, users must enter the user name and password that is registered in the LDAP server to perform Scan to E-mail on the Control Panel of this equipment. P.299 “Enabling User Authentication for Scan to Email (LDAP)”...
- Page 298 7 TopAccess Administrator Mode Click [User Authentication for Scan to Email]. The User Authentication for Scan to Email page opens. Select “SMTP” in the “Method” drop down box and click [Next]. This equipment can set the authentication for Scan to Email, but cannot set the authen- tication for Internet Fax transmission.
- Page 299 Specify how the From Address is set for Scan to Email. Setting Address is 'User Name + @ + Mail Domain Name' — Select this to set the From Address as “User Name@Mail Domain Name”, whose “User Name” is the user name that is entered on the Touch Panel Display for the authentication, and “Mail Domain Name”...
- Page 300 7 TopAccess Administrator Mode Enter the administrator password and click [Login]. The Authentication page is displayed. Click [User Authentication for Scan to Email]. The User Authentication for Scan to Email page opens. Select “LDAP” in the “Method” drop down box and click [Next]. This equipment can set the authentication for Scan to Email, but cannot set the authen- tication for Internet Fax transmission.
- Page 301 Select the LDAP server to be used for the authentication and select the type of the LDAP server. Then click [Next]. Windows Server — Select this when LDAP is running on Windows server. LDAP Server (Other than Windows Server) — Select this when the LDAP is running the server other than Windows server.
- Page 302 7 TopAccess Administrator Mode Specify how the From Address is set for Scan to Email. Setting Address is 'User Name + @ + Mail Domain Name' — Select this to set the From Address as “User Name@Mail Domain Name”, whose “User Name” is the user name that is entered on the Touch Panel Display for the authentication, and “Mail Domain Name”...
- Page 303 Troubleshooting This chapter describes the most common TopAccess errors and provides steps to resolve the conditions. If the problem persists after you have followed all of the steps, make sure to note what you were trying to do and any error messages appear, etc. — and then contact your service representative. TopAccess Error Messages .................304 Print Job Status Messages......................304 Transmission/Reception Journal Status Messages.................304...
-
Page 304: Topaccess Error Messages
8 Troubleshooting TopAccess Error Messages The error messages displayed in the Touch Panel Display are described in the Operator’s Man- ual for Basic Function. Print Job Status Messages Error Code Cause Corrective Action PM size error 1200 dpi print jobs cannot be printed with- 402F out the optional expansion memory. - Page 305 Error Code Cause Corrective Action HDD error Retry communications. If the error still 00E8 occurs, contact your service representa- tive. Software failure Retry communications. If the error still 00F0 occurs, contact your service representa- tive. Hardware noise Retry communications. If the error still 00F1 occurs, contact your service representa- tive.
- Page 306 8 Troubleshooting Error Code Cause Corrective Action HDD full failure during processing Reduce the number of pages of the job in error and perform the job again. Check if 1C60 the server or local disk has a sufficient space in disk capacity. Address Book reading failure Turn the power OFF and then back ON.
- Page 307 Error Code Cause Corrective Action POP Before SMTP error Confirm the POP Before SMTP settings 1C72 and POP3 settings are correct. Internet Fax transmission failure when pro- Confirm the “Received Internet Fax For- 1C80 cessing E-mail job received ward” settings. 1C81 Onramp Gateway transmission failure Confirm the mail box settings.
- Page 308 8 Troubleshooting Error Code Cause Corrective Action TIFF resolution error Ask the sender to resend the Email with attached TIFF files whose resolution is 3C30-3C32 either 200x100, 200x200, 200x400, 300x300, or 400x400 dpi. TIFF paper size error Ask the sender to resend the Email with 3C40-3C42 attached TIFF files that can be printed on the paper available for this equipment.
-
Page 309: Scan Job Status Messages
Scan Job Status Messages The status and result of the scan jobs is indicated as following in the Scan Job page in the Job Status tab and Scan Log page in the Logs tab. Error Code Message Corrective Action Email Illegal Job status A system error has occurred during send- 2C10, 2C12,... - Page 310 8 Troubleshooting Error Code Message Corrective Action Invalid address specified in From: field Make sure that there is an illegal character in the Terminal mail address. Delete the 2C6B illegal character and reset the appropriate Terminal mail address, then retry it. Invalid address specified in To: field Make sure that there is an illegal character in the Destination mail address.
- Page 311 Error Code Message Corrective Action Failed to create directory Make sure that the access privilege to the storage directory is writable and also the disk in the directory has enough space, and then retry the job. If more than one job is performed simultaneously, the error may 2D30 occur because the disk temporarily runs...
- Page 312 8 Troubleshooting Error Code Message Corrective Action There are too many documents in the Delete the data in the local storage folder 2D65 folder. Failed in creating new document. in the equipment and retry the scan. Failed to process your job. Insufficient Delete the data in the destination folder in 2D66 storage space.
- Page 313 Error Code Message Corrective Action Failed to process print image. Make sure that the Function List can be printed out. Retry the print. If the error still 2B51 occurs, contact your service representa- tive. The folder was renamed. A folder of the The same named folder cannot be created 2B60 same name already existed.
-
Page 314: Message Log
8 Troubleshooting Error Code Message Corrective Action RFC related Syntax error, command unrecognized Check if the Terminal mail address and Destination mail address are correct. 2500 Check if the mail server is operating prop- erly. Turn the power OFF and then back ON. - Page 315 TopAccess Message Corrective Action Paper Feeding Cover Open - Please Close Cover. Close the Paper Feeding Cover. Transfer/Transport unit Open - Please Close Close the Transfer/Transport unit. Cover. Large Capacity Feeder Cover Open - Please Close the Large Capacity Feeder Cover. Close Cover.
- Page 316 8 Troubleshooting TopAccess Message Corrective Action Alignment Error in Automatic Document Feeder - Contact your service representative. Please Contact Service Technician. Motor Error in Automatic Document Feeder - Contact your service representative. Please Contact Service Technician. I/F Error in Automatic Document Feeder - Please Contact your service representative.
- Page 317 TopAccess Message Corrective Action POP3 Connection Error has been occurred in the Make sure the POP3 server is properly running. received mail. Make sure correct IP address of the POP3 server is assigned. POP3 Connection Timeout Error has been Make sure that the network cable is correctly con- occurred in the received mail.
- Page 318 8 Troubleshooting TopAccess Message Corrective Action Active Directory Domain-The Domain specified Please enter the correct domain name in network could not be found settings. If the problem persists please contact the Administrator for the correct realm name for your server. Information Failed User Authentication Check DomainName/UserName/Password SNTP Server - Connect Error has occurred...
-
Page 319: Index
INDEX ........164 Numerics Completion Volume ..........97 Confidential ..........160 2in1/4in1 ........95 Confidential mailbox ......... 87 2nd Fax Number ........119 Confirm Password Contact ............85 Adding ..........17 Accessing ...........89 Deleting ....... 114 Accessing TopAccess ......22 Contact Information ........277 Account Manager ............137 Context .......... - Page 320 .........73 ....213 Document Name Export/Clear Log .........100 Document Print Exporting ............ 134 .........213 Domain Address Book Data ........132 ........216 Domain Name Department Code ............23 ..........218 Drawer Journals ..........166 .............218 Duplex Print Logs ......66 Exposure ........... 67 ......87 ............22 Email Address .........
- Page 321 Maintenance ..........197 Backup ..........211 Import ...........202 Delete Files Importing ........203 Directory Service ........ 211 Address Book Data ...213 Export/Clear Log ........215 Department Code .......... 211 Import ........99 Inbound Fax Routing ..........207 Notification ........19 Install Software link ..........222 Reboot ........
- Page 322 ..........22 Network Phone Number ..........128 ............57 AppleTalk Picture ..........129 ...........166 Bonjour Polling Report ........131 ........139 DDNS Session POP Before SMTP ......... 130 ......141 DNS Session POP3 Network Service ..........143 ........141 FTP Client POP3 Server Address ........... 143 ....143 FTP Server Port Number...
- Page 323 ....182 ....130 Raw jobs - Default Paper Size Secondary DNS Server Address ...182 ......133 Raw jobs - Default Paper Type Secondary Login Name ....182 .........133 Raw jobs - Default Stapling Secondary Password ....182 ......137 Raw jobs - Duplex Printing Secondary Port Number ........
- Page 324 ..........169 Storage Path ....95 Store to e-Filing agent ..22 Store to e-Filing Space Available ............67 ........65 Subject ..........19 Submenu Bar ..........125 Subnet mask ........183 Symbol set ............. 123 TCP/IP ..........42 Templates ..........50 Editing ..........50 Registering ..........
- Page 325 DP-5200/6000/7200/8500 OME050007E0...
- Page 326 MULTIFUNCTIONAL DIGITAL SYSTEMS TopAccess Guide 2-17-2, HIGASHIGOTANDA, SHINAGAWA-KU, TOKYO, 141-8664, JAPAN R05022078104-TTEC Ver05 2007-03 ©2005 TOSHIBA TEC CORPORATION All rights reserved...
Need help?
Do you have a question about the e-STUDIO 600 and is the answer not in the manual?
Questions and answers