Table of Contents
Advertisement
Quick Links
Advertisement
Table of Contents

Related Manuals for Xerox Wide Format IJP 2000


Summary of Contents for Xerox Wide Format IJP 2000
-
Page 1: User Guide
August 2014 Xerox Wide Format IJP 2000 ® User Guide... - Page 2 If a malfunction occurs with the machine's hard disk or other storage media, any received or stored data including registered configurations may be lost. Xerox is not responsible for any direct or indirect damages arising from or caused by such data loss.
-
Page 3: Preface
® Wide Format IJP 2000. To get the most out of the Xerox Wide Format IJP 2000 and to use it effectively, be sure to read ® this User Guide before use. This guide is intended for first-time users of the Xerox Wide Format IJP 2000 (hereinafter called "the... - Page 4 Xerox® Wide Format IJP 2000 User Guide...
-
Page 5: Table Of Contents
Configuring Paper Settings............. .1-19 Xerox® Wide Format IJP 2000... - Page 6 Error Messages ................4-9 Xerox® Wide Format IJP 2000...
- Page 7 Notes and Restrictions for IPv6 Connection ......... . . 6-4 Xerox® Wide Format IJP 2000...
- Page 8 Contents viii Xerox® Wide Format IJP 2000 User Guide...
-
Page 9: Types Of Manuals
Guides for the Optional Components The guides for the optional components provide information such as how to operate the optional components, and how to install software. Xerox® Wide Format IJP 2000 User Guide... -
Page 10: Using This Guide
Energy Saver mode, and how to load paper. Chapter 2 Xerox® CentreWare® Internet Services This chapter describes the CentreWare Internet Services feature. -
Page 11: Conventions
The description of operations in this guide are mainly based on Windows 7. If using an operating system other than Windows 7, the operating procedures and the screen appearance may be different in your environment. Xerox® Wide Format IJP 2000 User Guide... - Page 12 Xerox® Wide Format IJP 2000 User Guide...
-
Page 13: Safety Notes
WARNING: Any unauthorized alteration including an addition of new functions or connection to external devices may not be covered by the product warranty. Contact your local Xerox representative for more information. Follow all warning instructions marked on this product. The warning marks stand for the following: Used for items where if not followed strictly, death or severe or fatal injuries may result and the possibility is comparatively high. -
Page 14: Electrical Safety
If the power cord is damaged or insulated wires are exposed, contact your local Xerox representative for its replacement. Do not use a damaged or uninsulated cord to avoid the risk of electric shock and a fire accident. -
Page 15: Caution Notes
– the power cord is not cracked or worn down. Once you notice any unusual condition, switch off and unplug this product first and contact your local Xerox representative. Xerox® Wide Format IJP 2000 User Guide... -
Page 16: Machine Installation Warnings
With the Paper Stack Tray (optional) • Do not incline the product at more than 10 degree angle. Otherwise, it may fall over and cause injuries. Rear Front Right Left Right Left Front Rear Xerox® Wide Format IJP 2000 User Guide... -
Page 17: Machine Environment
For measures to prevent the machine from moving and overturning in case of earthquake, please consult with your local Xerox representative. Xerox® Wide Format IJP 2000 xvii... -
Page 18: Operational Safety
• To avoid the risk of electric shock and a fire accident, switch off and unplug the product promptly in the following conditions, then contact your local Xerox representative. – The product emits smoke or its surface is unusually hot. - Page 19 Power Breaker Test Button Test Button If the circuit does not work properly, contact your local Xerox representative. • When pulling out the roll unit, do it gently. If pulled out with too much force, the unit can hit and injure your knees.
-
Page 20: Consumables
This product uses roll printing paper. Be careful not to drop it as it is heavy and may cause injuries. • Do not lay the paper roll on the machine or on any unstable surface. The paper roll can fall, causing injuries. Xerox® Wide Format IJP 2000 User Guide... -
Page 21: Location Of Warning And Caution Labels
Location of Warning and Caution Labels Always follow all warning instructions marked on or supplied with this product. To avoid the risk of burn injuries, never touch the area with the "High Temperature" mark. Xerox® Wide Format IJP 2000 User Guide... -
Page 22: Environment
Environment • For environmental protection and efficient use of resources, Xerox reuses returned ink cartridges to make recycle materials or energy recovery. • Proper disposal is required for ink cartridges no longer needed. Do not open ink cartridges. Return them to your local Xerox representative. -
Page 23: Regulations
This Class A digital apparatus complies with Canadian ICES-003. Cet appariel numérique de la classe “A” est conforme à la norme NMB-003 du Canada. Changes and modifications to this product not specifically approved by Xerox may void the user's authority to operate this equipment. -
Page 24: Legal Notice
Copyright material or trademarks without the consent of the owner • Postage stamps and other negotiable instruments This list is not inclusive and no liability is assumed for either its completeness or accuracy. In case of doubt, contact your legal counsel. xxiv Xerox® Wide Format IJP 2000 User Guide... -
Page 25: Before Using The Machine
Delete All Jobs ..............1-35 Xerox® Wide Format IJP 2000... -
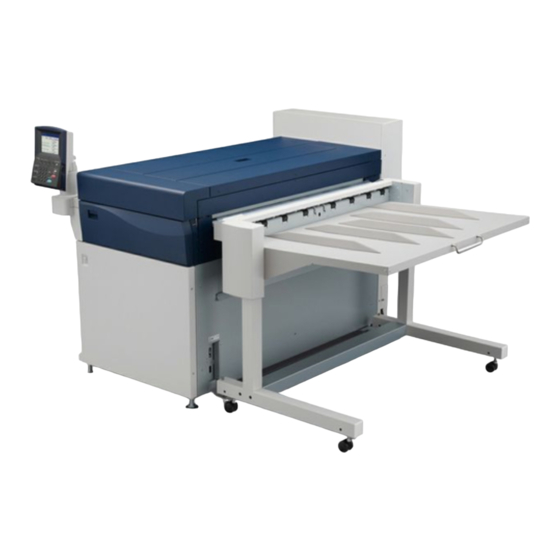
Page 26: Machine Components
Load media here when making prints onto cut sheet. Manual feeder guide Aligns both edges of paper when loading paper into the bypass (manual) feed table. (Optional) Ink cover Open this cover when replacing an ink cartridge. Xerox® Wide Format IJP 2000 User Guide... - Page 27 Contains the LAN port, service port, and media heater switch. Note: These ports and switch are intended to be used only by our customer engineers For more information, contact your local Xerox representative. Power breaker A power breaker of the machine.
- Page 28 This tray can accommodate printed sheets on the tray or underneath the tray. You can eject up to 150 sheets of paper on the tray. Note Depending on the size of paper you use, pull out the paper support. Paper support Xerox® Wide Format IJP 2000 User Guide...
-
Page 29: Power Source
Data is being received (the Transmitting indicator on the control panel is blinking) – – Printing is being processed – After paper is completely output, wait for five seconds or more before switching the power off. Xerox® Wide Format IJP 2000 User Guide... -
Page 30: Saving Power Consumption While The Machine Is Not In Use
After making sure that the touch screen on the control panel is turned off, turn the power breaker off. Turning the Power Breaker On Turn the power breaker on. Switch the power on. CAUTION: Do not turn the power switch on prior to turning the breaker switch on. Xerox® Wide Format IJP 2000 User Guide... -
Page 31: Energy Saver Mode
Press the Power Saver button on the control panel. The Power Saver button goes out to indicate that the Energy Saver mode is exited. Supplies Language Power Saver Job Status Clear All Stop Machine Status Start Log In/Out Power Saver button Xerox® Wide Format IJP 2000 User Guide... -
Page 32: Control Panel
Use the numeric buttons on the keypad to enter numerical characters. Log In/Out button Press this button to display the System Administration Menu screen. Pressing this button displays the screen to enter the system administrator's user ID. Xerox® Wide Format IJP 2000 User Guide... -
Page 33: Adjusting Screen Contrast
Turn the contrast adjustment dial to adjust the contrast of the touch screen. Power Saver Clear All Stop Changing the Language Press the Language button on the control panel. Select the desired language. Press Save. Xerox® Wide Format IJP 2000 User Guide... -
Page 34: Touch Screen
Entry field Directly enter a numeric value using the numeric keypad. The allowable range is indicated in parentheses ( ). Arrow button Press the , or arrow button to change a numeric value. 1-10 Xerox® Wide Format IJP 2000 User Guide... -
Page 35: Text Entry
To enter upper-case alphabets, press Shift. To toggle to the previous mode, press Shift again. Entering symbols Press Symbol. Press Space. Entering a space Deleting characters Press Back. This deletes one character at one time. Xerox® Wide Format IJP 2000 1-11 User Guide... -
Page 36: Loading/Replacing Paper
Have a new roll paper ready. Pull out the roll unit. Note When you want to just cut the leading edge of the roll paper without replacing with new roll paper, go to step 9. 1-12 Xerox® Wide Format IJP 2000 User Guide... - Page 37 You can place the roll paper in front of the roll unit. Pull up the handle of the paper holder ( ), and pull out the paper holder from both edges of the core of roll paper ( ). Xerox® Wide Format IJP 2000 1-13 User Guide...
- Page 38 Push down the handle of the paper holder to fix the paper holder. While holding the green lever of the roll unit, move the saddle to adjust it to the width of the roll paper to be loaded. 1-14 Xerox® Wide Format IJP 2000 User Guide...
- Page 39 If you press the paper cutter button once, 5.9 in. (150 mm) of the paper is cut. If you hold down the paper cutter button, the paper comes out until you release the button, and it is cut at the position where you release the button. Xerox® Wide Format IJP 2000 1-15 User Guide...
-
Page 40: Loading Cut Sheet Paper (Bypass)
– Paper of up to 78.7 in. (2,000 mm) in length can be loaded. Align both edges of the paper against the scale, and insert the paper until it is conveyed automatically. 1-16 Xerox® Wide Format IJP 2000 User Guide... -
Page 41: Switching Between Trays
Select a paper tray that contains paper of which the size is larger than the print size. If you select a tray that contains paper of which the size is smaller than the print size, it causes the machine inside to get dirty. Xerox® Wide Format IJP 2000 1-17 User Guide... -
Page 42: Tray Heaters
The paper tray heater switch is located behind the cover which is positioned under the ink supply system. Note The tray heater is used in high temperature / high humidity conditions (86 F (30 C), 80% RH) 1-18 Xerox® Wide Format IJP 2000 User Guide... -
Page 43: Configuring Paper Settings
Press the Machine Status button. Press the Media/Settings tab. Select the desired tray. Select the desired item. In this example, select Size Series. Select an item to fit the paper loaded into the paper tray. Xerox® Wide Format IJP 2000 1-19 User Guide... - Page 44 Select the desired paper type from Plain, Matte coated, Gloss, Tracing, Matte film, and Backlit film. Note Tracing paper is displayed as Tracing on the touch screen. Weight Select from Light, Standard, and Heavy. In normal use, set to Light. 1-20 Xerox® Wide Format IJP 2000 User Guide...
- Page 45 Select the desired size between 2inch core roll and 3inch core roll. Note Select the same roll core size as the loaded roll paper. If this setting is incorrect, the remaining paper level cannot be correctly detected. Xerox® Wide Format IJP 2000 1-21 User Guide...
-
Page 46: Media
Use of unrecommended media may result in paper jams, lower print quality, malfunctions, or damage to the machine. To achieve optimum performance of the machine, we recommend that you use only media recommended by Xerox. If you wish to use media other than that recommended by Xerox, contact your local Xerox representative. WARNING: Do not use conductive paper such as origami paper, carbonic paper or conductively- coated paper. - Page 47 – For more information about media type such as coated paper types that can be used for roll paper feed and paper types that can be used for manual feed, contact your local Xerox representative. Xerox® Wide Format IJP 2000...
-
Page 48: Unusable Media
Before Using the Machine Unusable Media Using media not recommended by Xerox may cause a paper jam or machine malfunction. Use media recommended by Xerox. • Transparencies • Electric spectaculars film • Digital coated paper (glossy type) • NK special simplex art paper (127/157/209 g/m •... -
Page 49: Handling And Storing Media
Vellum especially should be put into a plastic or moisture-proof bag. • When the machine is not used for extended intervals, remove the media and store it accordingly. Xerox® Wide Format IJP 2000 1-25 User Guide... -
Page 50: Billing Meters
Displays the sum total of the surface area printed in color by the machine so far. (Unit: m2) – Length Count Displays the sum total of the length printed in color by the machine so far. (Unit: m or 0.1 m) 1-26 Xerox® Wide Format IJP 2000 User Guide... - Page 51 If data in black and white is set to the color mode using the print driver, it is counted as a color print. – A test print is also counted. For information on test printing, refer to Making a Test Print page 3-19. Xerox® Wide Format IJP 2000 1-27 User Guide...
-
Page 52: Checking Consumables (Supplies)
Once any one of the five cartridges (K1, M, Y, C, and K2) becomes empty, the machine can no longer perform printing. Print Head The amount of printed ink is displayed for each print head. If the amount of consumed ink exceeds 2,500ml, "Replace Soon" displays. 1-28 Xerox® Wide Format IJP 2000 User Guide... - Page 53 "OK," "Replace Soon," or "Replace Now" displays depending on the amount of waste ink pooled in a waste ink cartridge. For information on how to replace consumables, refer to Replacing Consumables on page 3-2. Xerox® Wide Format IJP 2000 1-29 User Guide...
-
Page 54: Checking Machine Information
You can check the machine serial number, machine configuration, and software version on the Machine Info. screen. • For maintenance/support: Tells you whom to contact when making inquiries about maintenance and operation. • Serial Number Indicates the serial number of the machine. 1-30 Xerox® Wide Format IJP 2000 User Guide... - Page 55 • Configuration code • Memory size Software Versions Press Software Versions to display the Software Versions screen. You can check the following information: • Control panel • Text • Controller • Printer Xerox® Wide Format IJP 2000 1-31 User Guide...
- Page 56 Disables receiving data from the computer. Up to the currently received data is printed, and the subsequent data is not received. Supplies (Consumables) Press Supplies to display the Supplies screen. For more information on the Supplies screen, refer to Checking Consumables (Supplies) on page 1-28. 1-32 Xerox® Wide Format IJP 2000 User Guide...
-
Page 57: Job Status
– Press Update to refresh the display. Select a job to see the details. Check the job details on the displayed screen. Xerox® Wide Format IJP 2000 1-33 User Guide... -
Page 58: Cancelling A Job
Cancelling a Job The following describes how to stop a job that has been sent to the machine. Press the Stop button on the control panel. Select Ok to cancel the job. 1-34 Xerox® Wide Format IJP 2000 User Guide... -
Page 59: Delete All Jobs
Delete All Jobs The following describes how to delete all jobs from memory. Press the Delete All button on the control panel. Select Ok if you want to delete all jobs from memory. Xerox® Wide Format IJP 2000 1-35 User Guide... - Page 60 Before Using the Machine 1-36 Xerox® Wide Format IJP 2000 User Guide...
-
Page 61: Xerox Centreware Internet Services
Machine Settings ..............2-8 Xerox® Wide Format IJP 2000... -
Page 62: Overview Of Centreware Internet Services
TCP/IP connection is available. With CentreWare Internet Services, you can track the usage of the machine and change the setting values for the machine features, without going to the machine's control panel. Xerox® Wide Format IJP 2000 User Guide... -
Page 63: Setting Up For Using Centreware Internet Services
If you have changed the default port number, in the address bar of your Web browser, enter the IP address or the Internet address followed by a colon ":" and the assigned port number. Xerox® Wide Format IJP 2000 User Guide... - Page 64 Press Save. Press Close several times until the System Administrator Menu screen is displayed. Press Close. Note When a message prompting you to reboot the machine appears, follow the message to reboot the machine. Xerox® Wide Format IJP 2000 User Guide...
-
Page 65: Starting Centreware Internet Services
Switch the machine Off and then On for System Administrator login. – If you encounter problems during setup, refer to Problems with CentreWare Internet Services on page 4-8. Xerox® Wide Format IJP 2000 User Guide... -
Page 66: Centreware Internet Services Screen Components
Right frame The right frame displays information and status of the machine and the Refresh button. Click Refresh to update the display to the current status. Xerox® Wide Format IJP 2000 User Guide... - Page 67 ID is the System Administrator ID, which is set on the machine. By factory default, the user ID (System Administrator ID) is 11111, and the password is x-admin. For information on how to change the System Administrator ID and password, refer to System Admin Settings on page 5-22. Xerox® Wide Format IJP 2000 User Guide...
-
Page 68: Machine Settings
Press Save. Press Close several times until the System Administrator Menu screen displays. Press Close. Note When a message prompting you to reboot the machine appears, follow the message to reboot the machine. Xerox® Wide Format IJP 2000 User Guide... -
Page 69: Daily Management And Maintenance
Print Head Maintenance ............. 3-19 Xerox® Wide Format IJP 2000... -
Page 70: Replacing Consumables
When using consumables, carefully read precautions for use that are instructed on their bodies or packages. • When calling your local Xerox representative to order consumables, have the product codes ready. • The proper treatment is required for used ink cartridge, waste ink cartridge, and print head. -
Page 71: Used Consumables
Even if printing is specified in black and white, it consumes not only black inks but also color inks. All the color inks are consumed so that the print heads are protected. For more information on the Supplies screen, refer to Checking Consumables (Supplies) on page 1-28. Xerox® Wide Format IJP 2000 User Guide... - Page 72 Have a new ink cartridge ready. Open the ink cover. Note When you open the cover while the machine is running a print job, the machine stops operation after the page currently being processed has been printed. Xerox® Wide Format IJP 2000 User Guide...
- Page 73 Dispose of the used ink cartridge in accordance with local regulations. Grasp the nozzle between fingers, pinch, and pull to remove (2). Slide the nozzle along the track beneath the cartridge and into the notch. Remove the ink cartridge. Xerox® Wide Format IJP 2000 User Guide...
- Page 74 The label affixed inside the ink cover depicts ink color location. – The ink nozzle is keyed and color-coded. Remove the nozzle from the track and attach it to the ink cartridge (1). Connect the network cable (2). Close the ink cover. Xerox® Wide Format IJP 2000 User Guide...
-
Page 75: Replacing A Waste Ink Cartridge
We recommend that you always replace the waste ink cartridge prior to the display of this message. Have a new waste ink cartridge ready. Xerox® Wide Format IJP 2000 User Guide... - Page 76 Always store the used waste ink cartridge in a horizontal place to prevent ink from being dropped. Be careful to handle ink of the waste ink cartridge. – Dispose of waste ink cartridge in accordance with local regulations. Xerox® Wide Format IJP 2000 User Guide...
-
Page 77: Replacing A Print Head
On the touch screen, check the Supplies screen to see which print head needs to be replaced. The amount used of ink at each print head can also be viewed in the Supplies screen. For more information on the Supplies screen, refer to Checking Consumables (Supplies) on page 1-28. Xerox® Wide Format IJP 2000 User Guide... - Page 78 5-2. Select the print head to be replaced. Note If necessary, you can select multiple print heads. To replace all of five print heads, select All. Press Start. Press Yes. 3-10 Xerox® Wide Format IJP 2000 User Guide...
- Page 79 Fold the print head toward you ( ) to pull out it ( ). Note Install the cover removed from a new print head on the used print head, and return it to your local Xerox representative. Xerox® Wide Format IJP 2000 3-11 User Guide...
- Page 80 11. Insert a new print head on a slight angle( ), and push up so that it is located vertically ( Note The print head can be installed only in one direction. 3-12 Xerox® Wide Format IJP 2000 User Guide...
- Page 81 To continuously replace other print head, press Replace more, and repeat steps 2 to 13 to make replacement. After the replacement of print heads has been completed, proceed to Carrying out Calibration page 3-21. Xerox® Wide Format IJP 2000 3-13 User Guide...
-
Page 82: Cleaning The Machine
Turn off the power switch ( ) and the power breaker of the machine ( Note Turn off the power switch and the power breaker when cleaning to avoid the risk of electric shock. 3-14 Xerox® Wide Format IJP 2000 User Guide... - Page 83 Print Unit on page 3-16. – Use a lint-free cleaning cloth. – If it is difficult to get the dirt out of the print head, wipe off with a wet, lint-free cleaning cloth. Xerox® Wide Format IJP 2000 3-15 User Guide...
-
Page 84: Removing Ink Stains In The Ink Receiving Side Of The Print Unit
On the System Administrator Menu screen, press Print Head Maintenance > Internal Cleaning. For information on how to display the System Administrator Menu screen, refer to System Administrator Menu Settings Overview on page 5-2. 3-16 Xerox® Wide Format IJP 2000 User Guide... - Page 85 When message Preparing disappears, pull up the upper unit release lever to open the upper unit. Wipe off the black plastic surface with a dry cloth. Close the upper unit. CAUTION: Be careful not to pinch your fingers. Xerox® Wide Format IJP 2000 3-17 User Guide...
- Page 86 Daily Management and Maintenance Press Done. Message Exiting internal cleaning mode. appears. Press Done to exit the cleaning mode. 3-18 Xerox® Wide Format IJP 2000 User Guide...
-
Page 87: Print Head Maintenance
For information on how to display the System Administrator Menu screen, refer to System Administrator Menu Settings Overview on page 5-2. Select a type of paper to be used for test printing, and press Start. Note Manual feed cannot be selected. Xerox® Wide Format IJP 2000 3-19 User Guide... -
Page 88: Cleaning The Print Head
For information on test printing, refer to Making a Test Print on page 3-19. If the status of the print head is not improved by print head cleaning, proceed to Replacing a Print Head on page 3-9. 3-20 Xerox® Wide Format IJP 2000 User Guide... -
Page 89: Carrying Out Calibration
Select a roll unit that contains paper of size A0 or larger. If the correct type of paper is not selected, Start cannot be initiated. Press Start. Press Yes. Calibration starts. Press Done to end calibration. Xerox® Wide Format IJP 2000 3-21 User Guide... -
Page 90: Performing A Join Adjustment
Image Join Overlay must be turned off to enable the manual join adjustment: Press Image Join Overlay. Press Off. Press Save. Note Input Adjustment Value is hidden when Image Join Overlay is turned On. Press Calibration. 3-22 Xerox® Wide Format IJP 2000 User Guide... - Page 91 Select a roll unit that contains paper of size A0 or larger. If the correct type of paper is not selected, Start cannot be initiated. Press Start. Press Yes to confirm calibration start. Press Done when calibration is complete. Xerox® Wide Format IJP 2000 3-23 User Guide...
- Page 92 Select A0 size or larger to check all joins. 10. Press Start. 11. Press Yes to Print Adjustment Chart. 12. Press Done when test print is complete. Use this chart to check the gaps between print heads. 3-24 Xerox® Wide Format IJP 2000 User Guide...
- Page 93 13. Press Input Adjustment Value to adjust the position of each print head in the X-direction (right/left) and the Y-direction (up/down). Note Input Adjustment Value is only valid when Image Join Overlay is turned off. Xerox® Wide Format IJP 2000 3-25 User Guide...
- Page 94 Daily Management and Maintenance 3-26 Xerox® Wide Format IJP 2000 User Guide...
-
Page 95: Problem Solving
When a Paper Jam Occurs ............4-10 Xerox® Wide Format IJP 2000... -
Page 96: Troubleshooting
(p. 4-4) Problems during printing Action Problems during Printing (p. 4-7) If the error is not resolved even after following the above procedure, contact your local Xerox representative. Machine Problems Check the status of your machine again before contacting us. Symptom... -
Page 97: Paper Jam Problems
Media does not Is the media electrostatically Take appropriate measures against static electricity. For exit the machine charged? example, maintain proper room temperature and fully, and the trail humidity. edge sticks at the exit. Xerox® Wide Format IJP 2000 User Guide... -
Page 98: Image Quality Problems
When the image quality of the printed output is poor, identify the symptom in the following table to perform the corresponding remedy. If the image quality does not improve even after the remedy is performed, contact your local Xerox representative. - Page 99 Alternatively, perform the print head cleaning two or sheet. three times See: • Cleaning the Print Head on page 3-20 • Removing Ink Stains in the Print Head Side of the Print Unit on page 3-14. Xerox® Wide Format IJP 2000 User Guide...
- Page 100 3-20. Image density is The print heads may have Try to run a print job again. too light or been clogged. uneven on the first printed sheet during a continuous print job. Xerox® Wide Format IJP 2000 User Guide...
-
Page 101: Problems During Printing
Is the media of the specified Load the specified size media in the machine. size loaded? Loading/Replacing Paper on page 1-12. Switch to another available tray to continue printing. Switching Between Trays on page 1-17. Xerox® Wide Format IJP 2000 User Guide... -
Page 102: Problems With Centreware Internet Services
Reboot the machine. The server returned an properly? invalid or unrecognized response and No Data. Unable to delete jobs. The machine is Wait for a while and then press the Update button. processing. Xerox® Wide Format IJP 2000 User Guide... -
Page 103: Error Messages
If the trouble persists, call If the message persists, record the for service. displayed contents XXX-XXX. Then, turn the power switch off, and after XXX-XXX the touch screen goes out, contact your local Xerox representative. Xerox® Wide Format IJP 2000 User Guide... -
Page 104: When A Paper Jam Occurs
Be sure to clear paper jams while the machine's power is on. Otherwise, the data being processed may be erased. – Do not touch the components inside the machine, as this may cause print failure. 4-10 Xerox® Wide Format IJP 2000 User Guide... -
Page 105: Paper Jams In The Roll Unit
If the jammed paper is not found Rotate the roll paper backwards. Then, reload the roll paper. If the jammed paper is cut Remove the jammed paper. Rotate the roll paper backwards. Xerox® Wide Format IJP 2000 4-11 User Guide... - Page 106 For information on how to load the roll paper, refer to Replacing/Cutting Roll Paper on page 1-12. Close the roll unit cover. Gently push the roll unit back into the machine all the way until it stops. 4-12 Xerox® Wide Format IJP 2000 User Guide...
-
Page 107: Paper Jams In The Bypass (Manual) Feed Table Or Upper Unit
Remove the jammed paper from the opening. Note If the paper edge is located behind the print unit, hold both edges of paper, and pull the paper toward you while pulling out slowly in the feeding direction. Xerox® Wide Format IJP 2000 4-13 User Guide... - Page 108 If you cannot find the jammed paper through the opening Pull up handle B. Remove the paper jammed inside the paper feed area. Pull down handle B. Return lever A back to its original position. 4-14 Xerox® Wide Format IJP 2000 User Guide...
-
Page 109: Paper Jams Inside The Upper Roll Paper Cover
Paper Jams inside the Upper Roll Paper Cover Open the upper roll paper cover. Pull up the green lever. Remove the jammed paper from the opening. Close the upper roll paper cover. Xerox® Wide Format IJP 2000 4-15 User Guide... -
Page 110: Paper Jams In The Paper Stack Tray (Optional)
Remove the jammed paper from the paper path. If the jammed paper is inside the upper cover Remove the jammed paper from the opening. Close the upper cover of the Paper Stack Tray. 4-16 Xerox® Wide Format IJP 2000 User Guide... - Page 111 Authentication / Security Settings ........... . 5-26 Xerox® Wide Format IJP 2000...
-
Page 112: System Administrator Menu Settings Overview
Enter the user ID of the system administrator, by using the numeric keypad or the keyboard displayed on the screen, and press Confirm. Notes – By factory default, the system administrator ID is 11111. – The screen may differ depending on the settings of the machine. Xerox® Wide Format IJP 2000 User Guide... -
Page 113: Step 2 Selecting The Desired Item
For more information, refer to Network Settings on page 5-16. System Admin Settings Use this option to specify the administrator's ID and password. For more information, refer to System Admin Settings on page 5-22. Xerox® Wide Format IJP 2000 User Guide... -
Page 114: Step 3 Configuring A Feature
Press Close several times until the Ready screen is displayed. Note If the changes you have made require rebooting of the machine to apply the changes, pressing Close on the System Administrator Menu screen displays the Restart screen. Xerox® Wide Format IJP 2000 User Guide... -
Page 115: System Administrator Menu List
IPv4 - Gateway Address (p. 5-19) IPv6 Address Manual Set on page 5-19 IPv6 Address - Manual (p. 5-20) IPv6 Address Prefix (p. 5-20) IPv6 Gateway - Manual (p. 5-20) IPv6 Address - Auto (p. 5-20) Xerox® Wide Format IJP 2000 User Guide... - Page 116 Authentication / Security Settings (p. 5-26) Password Entry from Control Panel (p. 5-26) Overwrite Hard Disk (p. 5-27) * For information on print head maintenance, refer to Chapter 3 Daily Management and Maintenance on p. 3-1. Xerox® Wide Format IJP 2000 User Guide...
-
Page 117: Common Settings
Administrator Menu Settings Overview on page 5-2. Select the item you want to configure or change. Machine Clock / Timer Settings Press Machine Clock / Timer Settings. Set each item as necessary, and click Close. Xerox® Wide Format IJP 2000 User Guide... -
Page 118: Time Zone
Auto Clear has elapsed. The factory default is Off. Audio Tones You can use this feature to set whether to sound an alarm when a job ends or a fault occurs. Xerox® Wide Format IJP 2000 User Guide... - Page 119 Set the volume of the beep that sounds when paper is Off, On inserted into the bypass (manual) feed table. Waste Full Alert Set the volume of the beep that sounds when the waste ink Off, On cartridge needs replacing. Xerox® Wide Format IJP 2000 User Guide...
-
Page 120: Default Language
Some of the items and features on the screen shots or illustrations may not be displayed or available on your machine depending on its configuration. Press Paper Tray Priority. Set each item as necessary, and click Save. 5-10 Xerox® Wide Format IJP 2000 User Guide... -
Page 121: Maintenance
System Administrator Menu Settings Maintenance This function is for customer engineer use. For more information, contact your local Xerox representative. Other Settings Press Other Settings. Set each item as necessary, and click Close. Software Download This function is for customer engineer use. For more information, contact your local Xerox representative. - Page 122 Reboot the machine according to the instructions displayed on the screen. – The encryption setting is set to Off the next time the machine starts up. – During the encryption setup process, the machine cannot accept the print operation. 5-12 Xerox® Wide Format IJP 2000 User Guide...
-
Page 123: Detailed Settings
Specify the default of the tab displayed 0: Machine Information 0: Machine Information when the Machine Status button has 1: Billing Information been pressed. 2: Media/Settings Xerox® Wide Format IJP 2000 5-13 User Guide... -
Page 124: Print Settings
On the System Administrator Menu screen, press System Settings > Print Settings. For information on how to display the System Administrator Menu screen, refer to System Administrator Menu Settings Overview on page 5-2. Select the item you want to configure or change. 5-14 Xerox® Wide Format IJP 2000 User Guide... -
Page 125: Job Recovery
Select this to print all jobs that have not been output at the time the machine was turned off. Press Save. Detailed Settings This function is for customer engineer use. For more information, contact your local Xerox representative. Xerox® Wide Format IJP 2000... -
Page 126: Network Settings
On the System Administrator Menu screen, press System Settings > Network Settings. For information on how to display the System Administrator Menu screen, refer to System Administrator Menu Settings Overview on page 5-2. Select the item you want to configure or change. 5-16 Xerox® Wide Format IJP 2000 User Guide... -
Page 127: Port Settings
When using HTTP, specify a port number and select Enabled. The factory default port number is 80. Select Enabled when using LPR. Select Enabled when using FTP. SNMP Select Enabled when using SNMP. Xerox® Wide Format IJP 2000 5-17 User Guide... -
Page 128: Protocol Settings
Select this to fix the transmission rate to 100 Mbps (Half-Duplex). 10 Mbps (Full-Duplex) Select this to fix the transmission rate to 10 Mbps (Full-Duplex). 10 Mbps (Half-Duplex) Select this to fix the transmission rate to 10 Mbps (Half-Duplex). 5-18 Xerox® Wide Format IJP 2000 User Guide... -
Page 129: Tcp/Ip - Ip Mode
The first "xxx" cannot be set to numeric value 127 or 224 to 255. The factory default is 192.168.150.1. IPv6 Address Manual Set To enter an IP address and Gateway address manually, select Enabled. The factory default is Disabled. Xerox® Wide Format IJP 2000 5-19 User Guide... -
Page 130: Ssl / Tls Settings
This field displays the Link-local address, IPv6 address, and Gateway address that have been automatically configured. SSL / TLS Settings Press SSL / TLS Settings. Set each item as necessary, and click Close. 5-20 Xerox® Wide Format IJP 2000 User Guide... -
Page 131: Detailed Settings
Select Enabled or Disabled. The factory default is Disabled. HTTP - SSL / TLS Port No. The factory default is 443. Detailed Settings This function is for customer engineer use. For more information, contact your local Xerox representative. Xerox® Wide Format IJP 2000 5-21... -
Page 132: System Admin Settings
On the System Administrator Menu screen, press System Admin Settings. For information on how to display the System Administrator Menu screen, refer to System Administrator Menu Settings Overview on page 5-2. Select the item you want to configure or change. 5-22 Xerox® Wide Format IJP 2000 User Guide... -
Page 133: System Administrator's Id
The factory default is x-admin. To tell the system administrator to enter the password whenever displaying the System Administrator Menu, set Password Entry Control Panel to On in Authentication / Security Settings. Xerox® Wide Format IJP 2000 5-23 User Guide... -
Page 134: Maximum Login Attempts
You can specify the maximum number of fails allowed so that access will be denied when the number of consecutive attempts to log in as system administrator exceeds this limit. 5-24 Xerox® Wide Format IJP 2000 User Guide... - Page 135 To exit the Access Denied state, reboot the machine. Press Maximum Login Attempts. Press On. Enter the number of the upper limit by using the numeric keypad or by pressing [ ] and [ ]. Press Save. Xerox® Wide Format IJP 2000 5-25 User Guide...
-
Page 136: Authentication / Security Settings
(p. 5-23) is enabled. When Off is selected, a password will not be required when users attempt to access the machine's control panel, even when a password is specified for those settings described above. 5-26 Xerox® Wide Format IJP 2000 User Guide... -
Page 137: Overwrite Hard Disk
Overwriting once erases the data, but overwriting three times makes it even more definite that the data cannot be restored. It does, however, take longer. – During overwriting, normal operations may be slowed down. Press [Overwrite Hard Disk]. Xerox® Wide Format IJP 2000 5-27 User Guide... - Page 138 Note that the Data Security Kit is used to protect deleted document data from being recovered; • Set the password and encryption key according to the following rules: – Do not use easily assured character string – Use both characters and numerics 5-28 Xerox® Wide Format IJP 2000 User Guide...
-
Page 139: Appendix
Notes and Restrictions ............. . . 6-3 Xerox® Wide Format IJP 2000... -
Page 140: Optional Components
Appendix Optional Components The following table lists the optional components. To purchase these options, contact your local Xerox representative. Product Name Description Manual Feeder Guide A guide to load paper manually. 2inch core paper holder A paper holder for 2-inch core roll paper. A set of two. -
Page 141: Notes And Restrictions
This section describes the notes and restrictions to observe when using the machine. Notes and Restrictions on the Use of the Machine Installing and Moving the Machine • When moving the machine to another location, contact your local Xerox representative. • When the machine is operating, protect it from shocks. •... -
Page 142: Continuous Print
In an IPv4 environment, discovery across routers via broadcast can be performed. However, this is not possible in an IPv6 environment. Also, because an IPv6 environment does not support discovery across routers, only multicast in an local link (FF02::1) can respond to multicasting. Xerox® Wide Format IJP 2000 User Guide... - Page 143 3-3, 3-7 switching between trays, 1-17 IP address, 2-4, 2-8 paper jams, 4-10 IPv4 address setting (system settings), 5-19 bypass (manual) feed table or upper unit, 4- IPv6 address setting (system settings), 5-19 Xerox® Wide Format IJP 2000 User Guide...
- Page 144 1-17 switching the power off, 1-5 switching the power on, 1-5 system administrator ID, 5-23 system administrator menu, 5-2 list, 5-5 system administrator password, 5-23 system settings, 5-3 text entry, 1-11 Xerox® Wide Format IJP 2000 User Guide...
Need help?
Do you have a question about the Wide Format IJP 2000 and is the answer not in the manual?
Questions and answers