
Related Manuals for Xerox Wide Format 6604


Summary of Contents for Xerox Wide Format 6604
-
Page 1: User Guide
FreeFlow® Accxes® Print Server V15.0 August 2010 701P50900 ® Xerox Wide Format 6604/6605 Solution User Guide... - Page 2 ® © 2010 Xerox Corporation. All rights reserved. XEROX® and Xerox and Design 6604/6605 Solution , Accxes® and FreeFlow®, are trademarks of Xerox Corporation in the US and/or other countries. Microsoft Windows® is a trademark of Microsoft Corporation in the United States and/or other countries.
-
Page 3: Table Of Contents
System Power On ....................1-20 Document Input........................1-20 Precautions When Handling Documents...........1-21 Copy Strategies for Special Documents............1-21 Media Source........................1-23 To Specify the Media Source................1-23 Media Types and Loading....................1-24 Printable Media ....................1-25 Handling and Storing Media................1-27 ® Xerox Wide Format 6604/6605 Solution User Guide... - Page 4 Original Type........................2-11 Media Source........................2-11 Output Format ........................2-11 Collation..........................2-12 Collation (Making Sets)....................2-13 Copy Set Specifications (photos only)..............2-13 Copy Set Specifications....................2-14 Check Plot..........................2-15 Printer Interrupt.........................2-16 Scan Display........................2-17 Setting Up the Image Quality Selections..............2-17 Density........................2-17 Contrast........................2-18 ® Xerox Wide Format 6604/6605 Solution User Guide...
- Page 5 Delete a Document....................3-7 Removable Device Document Lists............3-8 Scanning To a Standard Mailbox..............3-9 Step 1: Selecting a Mailbox and Using Templates....3-10 Step 2: Selecting Scan to Mailbox Features.........3-12 Step 3: Select Image Quality Features...........3-13 Density...................3-13 ® Xerox Wide Format 6604/6605 Solution User Guide...
- Page 6 4 Job Information..................4-1 All Tab............................4-1 Active Tab........................4-1 Held Tab........................4-2 Administrator Managed Queue................4-2 Job Reprint..........................4-3 Reprint Jobs with Edits.......................4-3 Edit Job Settings.....................4-4 Reduce/Enlarge..................4-4 Media Types....................4-4 Media Source....................4-4 Output Format....................4-4 Output Format (Print Jobs)..............4-5 ® Xerox Wide Format 6604/6605 Solution User Guide...
- Page 7 Image Recall......................5-13 Immediate Image Overwrite................5-13 Immediate Image Overwrite Algorithm.............5-14 Scan Display......................5-14 Set Thumbnail Creation..................5-14 Administrator Managed Queue..............5-15 Control Panel Settings.....................5-15 Sound Settings .....................5-16 Configure Timers..................5-16 Low Power Timeout..............5-16 Sleep Timeout................5-17 Feature Timeout................5-17 ® Xerox Wide Format 6604/6605 Solution User Guide...
- Page 8 Setup Test Print Sample Report (Printer Settings)........6-10 Pen Settings......................6-11 PostScript Test Sample Report................6-12 Machine Configuration Tab..................6-12 How to Access Machine Configuration............6-12 Administration Tab......................6-13 How to Access Administration................6-13 7 Maintenance....................7-1 Replacing Consumables.....................7-1 Handling Consumables..................7-1 Loading Toner......................7-2 ® Xerox Wide Format 6604/6605 Solution User Guide...
- Page 9 Scanner Jam Message.....................8-14 Document Jam........................8-14 Media Jams..........................8-17 Media Jams in Roll 1 or Roll 2..................8-17 Media Jams in Manual Feed-in Shelf (Bypass)............8-21 Media Jams in Upper Unit.....................8-21 Media Jams in Fuser Unit....................8-24 ® Xerox Wide Format 6604/6605 Solution User Guide...
- Page 10 Table of Contents viii ® Xerox Wide Format 6604/6605 Solution User Guide...
-
Page 11: Product Overview
Product Overview This chapter describes the major components of the Xerox Wide Format 6604/6605 Solution, the way to power the machine on and off correctly, use the Power Saver feature, and use the User Interface. This chapter also describes the characteristics of the originals that may be copied and scanned, the types of media that can be used, andthe way to make the media size, type, and thickness settings. -
Page 12: Machine Components
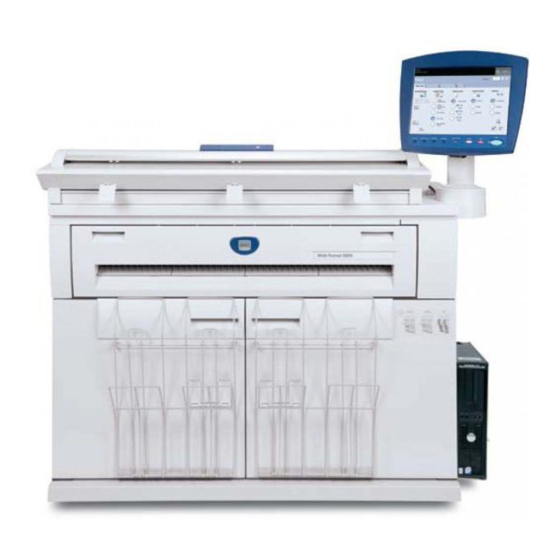
Product Overview Machine Components This section describes the main components of the Xerox Wide Format 6604/6605 Solution. Front View ® Xerox Wide Format 6604/6605 Solution User Guide... - Page 13 User Interface Also known as the UI, contains the Touch Screen and the Control Panel. This is where the operator programs jobs and configures the Xerox Wide Format 6604/6605 Solution settings. Control Panel Contains selection buttons and copy/print/scan services access.
-
Page 14: Rear View
Upper Unit Open this to clear a paper jam. Front View (Doors Open) WARNING Never touch an area labeled hot or sharp parts. You may receive a burn or incur other injuries. ® Xerox Wide Format 6604/6605 Solution User Guide... -
Page 15: Controller Front View
1. This roll is optional. Controller Front View The Accxes Controller communicates with the Print Engine/machine via the Command Status Interface. The Command Status Interface software provides status messages about the operation of the print engine. ® Xerox Wide Format 6604/6605 Solution User Guide... -
Page 16: Controller Rear View
Controller Rear View This design may vary depending on your model. Table 4: Controller Rear View Description Card Slide (location may vary depending on Controller model) Cover Release Latch Power Connector Padlock Ring ® Xerox Wide Format 6604/6605 Solution User Guide... -
Page 17: Controller Back Panel Connectors
DisplayPort Connector (not used) NOTE On a system that is working normally and has a good network connection, the Link Integrity Light illuminates continuously; the Network Activity Light blinks in response to network activity. ® Xerox Wide Format 6604/6605 Solution User Guide... -
Page 18: Controller Cables And Connectors
USB Port. Scanner The Xerox Wide Format 6604/6605 Solution is an integrated solution for basic copying and electronically scanning and printing copies of the images for engineering and architectural size documents. The scanner produces images up to 40 inches wide (1016 mm) and can send the image to a mailbox, a File Transfer Protocol (FTP) location or a remote printer. -
Page 19: Scanner Panel
Scanner or abort a scan. • Forward - Press the Forward button to advance a document forward. • Back - Press the Back button to rewind a scanned document back toward the user. ® Xerox Wide Format 6604/6605 Solution User Guide... -
Page 20: Opening And Closing The Scanner
Opening the Scanner Lid reveals the white, solid Main Roller and the five Contact Image Sensors. Refer to the Maintenance chapter for details on cleaning the Main Roller and Contact Image Sensors. 1-10 ® Xerox Wide Format 6604/6605 Solution User Guide... -
Page 21: To Close The Scanner
Take each of the three Media Exit Deflectors and attach them to the brackets on the underside front of the Scanner. Ensure that they click fully into position. NOTE If the Paper Exit Deflectors are improperly installed, they will cause document feed jams. Contact your Xerox Customer Support Center for installation. ® 1-11 Xerox... -
Page 22: User Interface (Ui)
Browser, are the two sources that enable users to set up and perform print service operations. The Printer User Interface is used to perform a variety of tasks using the Touch Screen and Control Panel Buttons. 1-12 ® Xerox Wide Format 6604/6605 Solution User Guide... -
Page 23: Touch Screen
The Services Menu is the default page for the User Interface. It appears after the machine is powered on or exits the Power Saver mode, and when the machine exits the System Administration mode. The screen below displays the copy/scan features. There is a scanner connected. ® 1-13 Xerox Wide Format 6604/6605 Solution User Guide... - Page 24 Product Overview The following screen displays the printer only features. There is no scanner connected. 1-14 ® Xerox Wide Format 6604/6605 Solution User Guide...
-
Page 25: Touch Screen Features And Functions
Scan-to-FTP Allows users to send scan jobs to a networked file server destination. Scan-to-Remote Printer Allows users to send scan jobs to a remote printer. Touch Screen Features and Functions ® 1-15 Xerox Wide Format 6604/6605 Solution User Guide... -
Page 26: Keyboards
You may get an Invalid Entry error message if you select a character that is unacceptable in the feature. For instance, when naming a mailbox, you may not use an apostrophe. 1-16 ® Xerox Wide Format 6604/6605 Solution User Guide... -
Page 27: Control Panel
Units and select an Imperial or International Date Format. Power Saver The <Power Saver> button illuminates when the system is in the Low Power or Sleep modes. ® 1-17 Xerox Wide Format 6604/6605 Solution User Guide... -
Page 28: Language
Sleep Mode from the Low Power Mode if the machine remains idle for an additional period. NOTE Refer to the Timers section to learn how to customize the Power Saver mode settings. 1-18 ® Xerox Wide Format 6604/6605 Solution User Guide... - Page 29 The machine exits the Power Saver mode when it detects a print job in the active queue. NOTE Refer to the System Administration chapter to learn how to customize the Power Saver mode settings. This is a System Administrator only setting. ® 1-19 Xerox Wide Format 6604/6605 Solution User Guide...
-
Page 30: System Power On
Length: 7.8 - 644 inches (200-16510 mm) (0.3 mm max) NOTE The maximum length that can be scanned to the network is 650 inches. The maximum copy length is 590.55 inches (15 meters). 1-20 ® Xerox Wide Format 6604/6605 Solution User Guide... -
Page 31: Precautions When Handling Documents
Saving customized jobs with special settings for different document types is saving time. After following the suggestions below, refer to the use of Templates to the Recall Tab of this chapter. ® 1-21 Xerox Wide Format 6604/6605 Solution User Guide... - Page 32 Binary and enable setting. Scan Mode: Invert. Adjust the copy Contrast Scan Mode: as required for best Set Original Document image quality. Type to Text/Line. Set Advanced Settings to Rendering, Snap to Black. 1-22 ® Xerox Wide Format 6604/6605 Solution User Guide...
-
Page 33: Media Source
Media Source Before you load an original in the Xerox Wide Format 6604/6605 Solution, you must specify where the original is loaded. To Specify the Media Source 1. Press the Services button on the Control Panel. -
Page 34: Media Types And Loading
The use of inappropriate media may result in media jams, reduced print quality, malfunctions and other problems. To make the most effective use of the machine, we recommend that you use only the media recommended by Xerox. 1-24 ®... -
Page 35: Printable Media
Press the Media Mismatch button, and then follow the instructions on the screen. If you choose to use media not recommended by Xerox, contact your Xerox Customer Support Center. Printable Media When using supplier paper for copies or prints, make sure that it complies with the following specifications. - Page 36 75-100 micron NOTE Jams may occur if the media being used differs from the current media settings. Always select the correct media size, type and thickness to achieve the best results. 1-26 ® Xerox Wide Format 6604/6605 Solution User Guide...
-
Page 37: Handling And Storing Media
The following describes how to load the Roll Media on Roll 1 or the optional Roll 2. When changing the media type, size or weight, make sure to change the media settings before starting copying. For information about the setup procedure, refer to the Media Settings section. ® 1-27 Xerox Wide Format 6604/6605 Solution User Guide... -
Page 38: To Load Roll Media
1. Open the Front Doors. 2. Pull out the Media Drawer for Roll 1 or Roll 2. 3. Remove the Media Shaft and the partial roll or core from the machine. 1-28 ® Xerox Wide Format 6604/6605 Solution User Guide... - Page 39 5. Pinch the Green Lever at the end of the Media Shaft, and insert the shaft into the new roll media. Be sure the roll ends align with the media size guide. 6. Adjust the roll media’s orientation, and place the shaft on the Shaft Guide. ® 1-29 Xerox Wide Format 6604/6605 Solution User Guide...
- Page 40 When the Cutter Button is held down, the Roll Media feeds continuously until the cutter button is released. The Roll Media is cut when the Cutter Button is released. 1-30 ® Xerox Wide Format 6604/6605 Solution User Guide...
-
Page 41: Manual Feed-In Shelf (Bypass)
10. Gently slide the Roll 1 or Roll 2 Drawer into the machine until it stops. 11. Close the Front Doors. Manual Feed-in Shelf (Bypass) When printing cut sheets, load the media into the Manual Feed-in Shelf (Bypass). ® 1-31 Xerox Wide Format 6604/6605 Solution User Guide... -
Page 42: To Print Cut Sheets
• Hold the media while it feeds. If you release the media too soon, a jam may occur. Cutting Roll Media The following describes how to cut the lead edge of Roll Media. 1-32 ® Xerox Wide Format 6604/6605 Solution User Guide... -
Page 43: To Cut Roll Media
2. Pull out the Media Drawer for Roll 1 or Roll 2. WARNING Do not open the Roll 1 or Roll 2 Cutter Cover unless you are specifically directed to do so. ® 1-33 Xerox Wide Format 6604/6605 Solution User Guide... - Page 44 Cutter Button is released. 4. Remove the piece of paper that was cut. 5. Gently slide the Roll 1 or Roll 2 Media Drawer into the machine until it stops and latches. 1-34 ® Xerox Wide Format 6604/6605 Solution User Guide...
-
Page 45: Media Settings
Premium Tracing 90 90g/m2 Film Premium Translucent 75 micron 75µm Heavy Bond Presentation 110g/m2 Vellum Premium Tracing 112 gsm 112g/m2 Film Premium Translucent 100 micron 100µm * Tracing paper is displayed as [Vellum]. ® 1-35 Xerox Wide Format 6604/6605 Solution User Guide... -
Page 46: To Set Up The Media
4. Select the appropriate size series radio button, and then press Close. 5. Select the Type/Thickness button for the media you are setting up, such as, Roll 1, Roll 2 or Manual Feed. 1-36 ® Xerox Wide Format 6604/6605 Solution User Guide... - Page 47 Product Overview The Media Type and Thickness screen displays. 6. Select the Media Type and Thickness buttons that define the new media, and then select Close. 7. Select Close again. ® 1-37 Xerox Wide Format 6604/6605 Solution User Guide...
- Page 48 Product Overview 1-38 ® Xerox Wide Format 6604/6605 Solution User Guide...
-
Page 49: Printing And Copying Documents
Printing and Copying Documents This chapter describes the copy features of the Xerox Wide Format 6604/6605 Solution, including how to make copies from both roll fed and manually fed cut sheet media, and how to use the many copy features from basic through advanced settings. - Page 50 • The arrow key takes you back. • Delete files using the red selection. • The View All selection displays all file types beyond the primary FreeFlow Access recognizes. 4. Select Print. ® Xerox Wide Format 6604/6605 Solution User Guide...
-
Page 51: Copying Procedures
If multiple devices are attached, you will be requested to choose which to eject from a list. Copying Procedures This section describes the procedures for making copies using the Xerox Wide Format 6604/6605 Solution. Refer to the sections listed below for instructions: Step 1: Selecting Features Making a copy begins by displaying the Copy screen on the User Interface. -
Page 52: Image Quality Tab
Select the required Image Quality features from those displayed on the Image Quality tab. The Image Quality screen displays the following options: • Density • Contrast • White Point NOTE Adjusting Background Suppression is only available in Scan modes. ® Xerox Wide Format 6604/6605 Solution User Guide... -
Page 53: Advanced Settings Tab
You may enter a copy quantity between 1 and 999 using the Numeric Entry screen. This screen displays automatically when required. 1. Enter the copy Quantity using the up and down arrow in the Copy screen. ® Xerox Wide Format 6604/6605 Solution User Guide... -
Page 54: Step 3: Copying The Original
Refer to Making Copies using the Manual Feed-in Shelf (Bypass)next in this chapter for more details and options available. ® Xerox Wide Format 6604/6605 Solution User Guide... -
Page 55: Step 4: Stopping The Copy Job
NOTE If after selecting this Media Source, you start scanning the original before loading the cut sheet media, a Load or Change Media Type message will display. ® Xerox Wide Format 6604/6605 Solution User Guide... - Page 56 Do not let go of the original until the motor detects it and starts. NOTE When the Scanner detects the original, it prefeeds in an out of the scanner, feeds again, completes the scan and finally exits just below the scanner. ® Xerox Wide Format 6604/6605 Solution User Guide...
-
Page 57: Setting Up The Copy Selections
The factory default setting is 100%. Once a job has been scaled to a different percentage, that percentage then becomes the new image and setting. This is seen during Job Recall and is considered 100% of the document. ® Xerox Wide Format 6604/6605 Solution User Guide... -
Page 58: Reduce/Enlarge Using The Scale Factor
Refer to Media Settings in the Product Overview chapter and verify the correct settings are present. 3. Select Save. Refer to Select Custom Reduction and Enlargement in the System Administration chapter, for details on changing these custom presets percentages. 2-10 ® Xerox Wide Format 6604/6605 Solution User Guide... -
Page 59: Original Type
Feed-in Shelf (Bypass). The Media Feed-in Shelf is the last choice shown in the column. Output Format The Output Format feature permits you to specify the media cut mode. The factory default setting is Synchronized. 1. Select Copy on the Services menu. ® 2-11 Xerox Wide Format 6604/6605 Solution User Guide... -
Page 60: Collation (Making Sets)
5. Continue in this order until your job is complete. NOTE When collation is desired and selected, the Building Sets Insert Documents message appears in the top right of the screen. 2-12 ® Xerox Wide Format 6604/6605 Solution User Guide... -
Page 61: Copy Set Specifications (Photos Only)
Normal Quality Ansi C (17x22) Normal Quality Ansi D (22x34) Normal Quality Ansi E (34x44) Normal Quality Arch A (9x12) Best Quality Arch B (12x18) Best Quality Arch 15 (15x21) Best Quality ® 2-13 Xerox Wide Format 6604/6605 Solution User Guide... -
Page 62: Copy Set Specifications
This information is useful to ensure the memory can accept the copy set capacity. Document Size Maximum pages Ansi A (8.5x11) Ansi B (11x17) Ansi C (17x22) Ansi D (22x34) Ansi E (34x44) 2-14 ® Xerox Wide Format 6604/6605 Solution User Guide... -
Page 63: Check Plot
4. When the original exits the scanner, the Sets Build screen displays four buttons (listed below). If all of the originals to be scanned are the same type and size, you can continue to feed them at this time. ® 2-15 Xerox Wide Format 6604/6605 Solution User Guide... -
Page 64: Printer Interrupt
Typically, no more than two prints exit the machine from the interrupted job. 2. When the suspended job stops, the Copy screen reappears. 3. Select the required copy settings. 4. Enter the copy quantity desired. 5. Scan the original(s). 2-16 ® Xerox Wide Format 6604/6605 Solution User Guide... -
Page 65: Scan Display
The Density option allows you to adjust the lightness or darkness of the copies relative to the original. 1. Select Copy on the Services menu. The Copy screen displays. 2. Select the Image Quality tab. 3. Select the best Density match using the scroll key. ® 2-17 Xerox Wide Format 6604/6605 Solution User Guide... -
Page 66: Contrast
2. Select the Image Quality tab. 3. Select the Background Suppression setting from the Image Quality screen using the scroll key to obtain the desired background results. 4. Select the Enabled key to save your setting. 2-18 ® Xerox Wide Format 6604/6605 Solution User Guide... -
Page 67: Setting Up The Advanced Settings Selections
• Scan Offset • Scanner Media Thickness • Copy Quality • Image Mirroring • Image Location • Sample Copy • Scan Width • Margins • Media Type • Finishing (optional-not shown) ® 2-19 Xerox Wide Format 6604/6605 Solution User Guide... -
Page 68: Media Type
Perform the following steps to set up Mirror Image: 1. Select Copy on the Services menu. 2. Select the Advanced Settings tab. 3. Select Mirror Image. 4. Select Off, X, Y, or XY. 2-20 ® Xerox Wide Format 6604/6605 Solution User Guide... -
Page 69: Image Inversion
2. Select the Advanced Settings tab. 3. Select Image Location. 4. Select Auto Center or Corner Shift. 5. If you choose Corner Shift, continue by selecting from the options provided. 6. Select Save when finished. ® 2-21 Xerox Wide Format 6604/6605 Solution User Guide... -
Page 70: Scanner Media Thickness
Premium Tracing 112 g/m2 Card stock Extra Heavy Card stock/Cover 110 lb 13 mil * Tracing paper is displayed as [Vellum]. 4. Adjust the setting as required. 5. Select Save when finished. 2-22 ® Xerox Wide Format 6604/6605 Solution User Guide... -
Page 71: Margins
This feature lets the scanner determine the actual original documents width by detecting the image as it is seen. It is best to align the input document against the left edge registration mark, rather than the center. • Variable Width ® 2-23 Xerox Wide Format 6604/6605 Solution User Guide... -
Page 72: Scan Offset
• Enabled: A scan offset equivalent to the dimension you specify will be applied to the original when it is scanned. 1. Press the Services button on the Control Panel. The Services menu will display with Copy as an option. 2-24 ® Xerox Wide Format 6604/6605 Solution User Guide... -
Page 73: Copy Quality
1. Select Copy on the Services menu. The Copy screen displays. 2. Select the Advanced Settings tab. 3. Select Copy Quality. 4. Choose Normal or Best depending on the desired resolution. ® 2-25 Xerox Wide Format 6604/6605 Solution User Guide... -
Page 74: Finishing
The Finishing feature is an option, requiring a feature key to activate. If you obtain this feature, the System Administrator can enable it at any time by sending a special feature key file to the machine. Contact your Xerox Sales Representative for ordering information.Finishing is displayed on the Web Printer Management Tool, test prints and on the User Interface as indicated below. -
Page 75: View Last Scan
If the View Last Scan button is not present on the Recall tab, it has been disabled by the System Administrator and View Last Scan is not available. This feature is enabled or disabled by the System Administrator within General Administration > Control Panel > Set Scan Display. ® 2-27 Xerox Wide Format 6604/6605 Solution User Guide... - Page 76 The zoom box may be moved by touching the center of the box dragging. The zoom box may be resized by touching and dragging a corner of the box. • Zoom Box 2-28 ® Xerox Wide Format 6604/6605 Solution User Guide...
- Page 77 This selected area is highlighted. 7. Select the Plus or Minus sign and zoom in or out on the highlighted area. 8. Select Best Fit to return to the original view. ® 2-29 Xerox Wide Format 6604/6605 Solution User Guide...
- Page 78 Printing and Copying Documents 2-30 ® Xerox Wide Format 6604/6605 Solution User Guide...
-
Page 79: Scanning Documents
Scanning Documents This chapter introduces the multiple scan features of the Xerox Wide Format Solution available with the attached Scanner configuration. FreeFlow Accxes, the software of the controller, has the capability to configure scan destinations to the following locations: • Scan-to-Mailbox - Stores your files on the FreeFlow Accxes Print Server (hard drive) or a removable media device (USB) for later retrieval. -
Page 80: Establish The Network Setup
Establish the Network Setup NOTE Refer to System Administration Network Setup, for additional information or use the Xerox FreeFlow Accxes Printer Server and Web Printer Management Tool Setup Guide for detailed instructions. Creating a Mailbox Before using the Scan-to-Mailbox service, you need to define a mailbox as a Destination. -
Page 81: Selecting Mailboxes
Selecting Mailboxes The Scroll to selection is used to link you to a mailbox or you may enter the mailbox number (if known) in the Selected Mailbox field using the numeric keypad. ® Xerox Wide Format 6604/6605 Solution User Guide... -
Page 82: Standard Mailbox Document Lists
The Document List selection displays the documents scanned to the Standard Mailbox selected. The Edit Mailbox Document List screen is where you can do the following to your documents: • Scroll the list • Delete • Delete All ® Xerox Wide Format 6604/6605 Solution User Guide... -
Page 83: Document List
5. Then select Delete. A Delete Confirmation window displays. NOTE Once a mailbox is deleted, it can not be recovered. All documents in the mailbox will be deleted. 6. Select Yes on the Confirmation window. ® Xerox Wide Format 6604/6605 Solution User Guide... -
Page 84: Mailbox Passwords
5. Select the Set this Mailbox as the default to set. NOTE The default mailbox appears as the selected mailbox when the machine enters the Scan mode. 6. Select Save when finished. ® Xerox Wide Format 6604/6605 Solution User Guide... -
Page 85: Delete
The Edit Mailbox Document List screen will display. 6. Select and highlight the image file you wish to delete. 7. Select Delete. NOTE Do not select Delete All because this will delete all files from the mailbox. ® Xerox Wide Format 6604/6605 Solution User Guide... -
Page 86: Removable Device Document Lists
The Removable Device selection of the Scan-to-Mailbox feature, displays the name of the attached device. 1. Select Removable Device to highlight. 2. Select Document List. The Print From Device screen displays. Here you see the removable device list of contents. ® Xerox Wide Format 6604/6605 Solution User Guide... -
Page 87: Scanning To A Standard Mailbox
Step 2: Selecting Scan to Mailbox Features Step 3: Select Image Quality Features Step 4: Select Advanced Settings Features Step 5: Scanning the Document Step 6: Stopping a Scan Job Step 7: Retrieving Files Stored in a Mailbox ® Xerox Wide Format 6604/6605 Solution User Guide... -
Page 88: Step 1: Selecting A Mailbox And Using Templates
1. Select Scan to Mailbox. The screen displays with the following: 1. Destination (mailbox or removable device name) 2. Template (customized format) 2. Select Destination. The Select a Destination screen displays. 3-10 ® Xerox Wide Format 6604/6605 Solution User Guide... - Page 89 Settings you choose as a Template for future use. A System Power On Default template can be set as well to save time and redundancy by programming features for commonly run jobs. ® 3-11 Xerox Wide Format 6604/6605 Solution User Guide...
-
Page 90: Step 2: Selecting Scan To Mailbox Features
Selecting Scan-to-Mailbox features: 1. Select the output type Rendering to generate the electronic file. 2. Select the output File Format type desired. 3. Select the input Original Document Type you are scanning. 3-12 ® Xerox Wide Format 6604/6605 Solution User Guide... -
Page 91: Step 3: Select Image Quality Features
The Services menu will display with Scan to Mailbox as an option. 2. Select Scan to Mailbox. 3. Select the Image Quality tab. 4. Select the best Density match using the scroll key. ® 3-13 Xerox Wide Format 6604/6605 Solution User Guide... -
Page 92: Contrast
1. Select Scan to Mailbox on the Services menu. 2. Select the Image Quality tab. 3. Select the Enable key to save your settings. 4. Select the best White Point using the scroll key. 3-14 ® Xerox Wide Format 6604/6605 Solution User Guide... -
Page 93: Step 4: Select Advanced Settings Features
1. Press the Services button on the Control Panel. The Services menu will display with Scan to Mailbox as an option. ® 3-15 Xerox Wide Format 6604/6605 Solution User Guide... -
Page 94: Scan Offset
1. Press the Services button on the Control Panel. The Services menu will display with Scan to Mailbox as an option. 2. Select Scan to Mailbox. 3. Select the Advanced Settings tab. 3-16 ® Xerox Wide Format 6604/6605 Solution User Guide... -
Page 95: Scanner Media Thickness
1. Select Copy on the Services menu. The Copy screen displays. 2. Select the Advanced Settings tab. 3. Select Scanner Media Thickness. Prior to scanning the original, specify the thickness of it as listed below: ® 3-17 Xerox Wide Format 6604/6605 Solution User Guide... -
Page 96: Mirror Image
Perform the following steps to set Mirror Image: 1. Select Scan to Mailbox on the Services menu. 2. Select the Advanced Settings tab. 3. Select Mirror Image. 3-18 ® Xerox Wide Format 6604/6605 Solution User Guide... -
Page 97: Scan To Printer
The factory default setting is Create Preview Image. 1. Select Scan to Mailbox on the Services menu. 2. Select the Advanced Settings tab. 3. Select Preview Generation. 4. Select the desired option: ® 3-19 Xerox Wide Format 6604/6605 Solution User Guide... -
Page 98: Scan Width
"dpi." The greater the dpi, the better the image. Select from the available options below: • 600 DPI • 400 DPI • 300 DPI • 200 DPI • 150 DPI 3-20 ® Xerox Wide Format 6604/6605 Solution User Guide... -
Page 99: Step 5: Scanning The Document
Administration chapter, Set Start Scan Mode, for more details. If the problem occurs during scanning, an error message appears on the Touch Screen. Solve the problem as instructed in the message. ® 3-21 Xerox Wide Format 6604/6605 Solution User Guide... -
Page 100: Step 6: Stopping A Scan Job
Naming Scanned Files When scanning jobs to a file destination you assign a filename and organize them within groups using a customized naming convention or allow default naming to occur. 3-22 ® Xerox Wide Format 6604/6605 Solution User Guide... -
Page 101: Scan To Removable Devices
• Scan-to-Removable Devices • Scan-to-FTP Auto Indexing: When Auto Indexing is enabled, files get a default name of XWF-0000.tif (Xerox Wide Format - XWF). The Base File Name, or prefix, is used with the number indexing automatically for each scanned document that follows. -
Page 102: Scan To Device
2. Select Scan to Mailbox followed by the features and settings desired from the Scan to Mailbox, Image Quailty and Advanced Settings tabs. 3. Select Destination. 4. Select Removable Device. 5. Insert your document into the Scanner. 3-24 ® Xerox Wide Format 6604/6605 Solution User Guide... -
Page 103: Scan Multiple Pages To Device
The Select a Destination Mailbox screen displays. 6. Select Removable Device. 7. Insert the first of the multiple documents. The Multi-page Scanning screen displays with current file size and available space information on the USB device. ® 3-25 Xerox Wide Format 6604/6605 Solution User Guide... -
Page 104: Scan To Ftp
FTP Destination setup is accomplished using Web Printer Management Tool software and require an FTP server application running on the target destination. Refer to the Xerox FreeFlow Access Print Server and Web Printer Management Tool Setup Guide for more detailed instructions on configuring FTP Destinations. -
Page 105: How To Scan To An Ftp Site
Color Calibration The Color Calibration process is used to improve color consistency when sending jobs to a remote printer from the Xerox Wide Format 6604/6605 Scanner. Creating color profiles is the procedure that is used to correlate the scanner input with the remote printer output. -
Page 106: Creating A New Color Calibration
By default, the available quality level options supported on the Remote Printer are shown. A calibration target prints for each selected quality level. 7. Deselect the Quality Levels you wish to exclude in the calibrated profile set. 8. Select Print. 3-28 ® Xerox Wide Format 6604/6605 Solution User Guide... -
Page 107: Problems During Color Calibration
In some rare cases, you may experience problems when creating Color Calibrations. To prevent problems, ensure the originals used for calibration are not damaged or missing information. If incorrect calibration targets are used, color images may be jeopardized. ® 3-29 Xerox Wide Format 6604/6605 Solution User Guide... -
Page 108: Scan To Remote Printer
The remote printer destinations are set up using the Web Printer Management Tool. See your System Administrator for more details on this feature. Refer to the Xerox FreeFlow Accxes System and Web Printer Management Tool Setup Guide or Help files in the Web Printer Management Tool for detailed instructions on setup if needed. -
Page 109: How To Scan To Remote Printer
You can also locate the newly scanned job in the Web Printer Management Tool under the Printer Queue tab. How to Scan to Remote Printer 1. Select Scan to Remote Printer from the Services menu. ® 3-31 Xerox Wide Format 6604/6605 Solution User Guide... - Page 110 7. You may now get your output from the remote printer you had previously selected. You can also locate the newly scanned job in the Web Printer Management Tool under the Printer Queue tab. 3-32 ® Xerox Wide Format 6604/6605 Solution User Guide...
-
Page 111: Job Information
All print and copy jobs are placed in the Job Information queue on the User Interface. Print jobs are jobs sent to the Xerox Wide Format System from either a remote client workstation using Web Printer Management Tool or a network Printer Driver. -
Page 112: Held Tab
Without a secure password set, any user can perform these operations. Placing all jobs on hold: 1. Select Machine Info from the Services screen. 2. Select General Administration. 3. Select Enable/Disable Administration-Managed Queue. 4. Select Enable. ® Xerox Wide Format 6604/6605 Solution User Guide... -
Page 113: Job Reprint
7. Press the Print button. NOTE The edited job moves from the Job Information queue to the Active Queue. Once it is printed, it returns to the list in the Job Information Reprint Queue. ® Xerox Wide Format 6604/6605 Solution User Guide... -
Page 114: Edit Job Settings
Preset option. • Manual:The Media Roll is cut to a customized size that you specify (x and y coordinates). A screen with data entry fields displays when you select Manual. ® Xerox Wide Format 6604/6605 Solution User Guide... -
Page 115: Output Format (Copy Jobs)
4. Load the (n) document face up into the Scanner Feed-in Shelf. 5. Continue in this order until your job is complete. NOTE When collation is desired and selected, the Building Sets Insert Documents message appears in the top right of the screen. ® Xerox Wide Format 6604/6605 Solution User Guide... -
Page 116: Finishing
There are multiple ways to bring jobs through the Web Printer Management Tool to your remote printer. The first and primary way is done by connecting from a client workstation or a printer driver. Refer to the Xerox FreeFlow Accxes V15.0 Drivers and Client Tools Software Install Guide for detailed instructions. - Page 117 7. Select the Browse button and navigate to the file you would like to print. 8. Select the Upload button. 9. Select Printer Queue. 10. Select Reprint Queue, the Status pull-down, and Print. 11. Select the Update Printer button. ® Xerox Wide Format 6604/6605 Solution User Guide...
- Page 118 Edit button where the user can Edit Job Options specific for printing and then submit the job to the designated remote printer. The selected jobs disappear from the Reprint Queue and reappear in the Active Queue. ® Xerox Wide Format 6604/6605 Solution User Guide...
-
Page 119: System Administrator
• Network Setup System Administration Overview Most of the features available using the Xerox Wide Format Solution are accessible to all users. Some features, however, are restricted to the System Administrator if the environment warrants it. Those features are then only accessible by logging into the system with a secured password. -
Page 120: Entering System Administration Mode
Press the Log In/Out button on the Control Panel to access the System Administrator screen. Login Options The Log In/Out screen, shown below, allows the user or administrator to log in to the system in one of two ways. ® Xerox Wide Format 6604/6605 Solution User Guide... - Page 121 The buttons on the Administration tab may require an administrator log in. If you are logged out, the system will prompt for the System Administrator password if one of these buttons is selected and access is denied. ® Xerox Wide Format 6604/6605 Solution User Guide...
-
Page 122: System Administrator
For more detailed information about timers setup, see the Configure Timers section of this chapter. ® Xerox Wide Format 6604/6605 Solution User Guide... -
Page 123: Exiting System Administration Mode
• Changing the Administrator Password • Configuring Job Accounting • Configuring Job Reprint • Shutting down and restarting the system • Enabling/Disabling Image Recall • Enabling/Disabling Immediate Image Overwrite • Setting Scan Displays ® Xerox Wide Format 6604/6605 Solution User Guide... -
Page 124: Setting The Date And Time
If you are logged out, the system prompts you to log in as a System Administrator. 4. Select Set the date and time... 5. Enter the following: • Year • Month • Day • Hour • Minute ® Xerox Wide Format 6604/6605 Solution User Guide... -
Page 125: Changing The Administrator Password
The job accounting feature is an option, requiring a Feature Key to activate. If you obtain this feature, the System Administrator can enable it at any time by sending a special feature key file to the machine. Contact your Xerox Sales Representative for ordering information. -
Page 126: Entering Job Accounting Mode
If you are using the Account Management Tool for Job Accounting, see the FreeFlow Accxes Software Tools Customer Training Guide for more detailed information about assigning IDs to users. The Xerox FreeFlow Accxes V15.0 Drivers and Client Software Installation Guide provides instructions for installing the Account Management Tool. -
Page 127: Configure Job Reprint
NOTE Accounting must be set up from a third party job management tool, such as the Account Management Tool offered by Xerox. 4. Select Enter. The Accounting icon will display in the upper right hand corner of the screen. -
Page 128: Power Outage Job Status
Copy/Scan jobs that did not finish processing are cancelled. Checking the Circuit Breaker The Circuit Breaker opens automatically and removes input power from the machine if a short circuit or over-current condition occurs. 5-10 ® Xerox Wide Format 6604/6605 Solution User Guide... -
Page 129: Shutdown From The User Interface
Controller may be powered down. See the System Administrator for this task. Check the Circuit Breaker once a month for correct operation. If you notice any unusual conditions, contact your Xerox Customer Support Center. To check the Circuit Breaker: 1. Ensure that all print jobs have finished processing before proceeding. -
Page 130: Shutdown From The Web Printer Management Tool
Do not select the Restart Controller button. It is used to Reboot the system when jobs in the print queue fail to process correctly. 3. Move the Printer Power Switch to the Off position. 5-12 ® Xerox Wide Format 6604/6605 Solution User Guide... -
Page 131: Image Recall
2. Select the Administration tab. 3. Select General Administration. 4. Select the Enable / Disable Immediate Image Overwrite. The Set Immediate Image Overwrite Mode screen displays. 5. Select Enabled or Disabled. ® 5-13 Xerox Wide Format 6604/6605 Solution User Guide... -
Page 132: Immediate Image Overwrite Algorithm
Thumbnails are the first page of a multipage job. They are used for job recognition. Thumbnails only display if the feature has been enabled in the General Administration screen and can be disabled when the System Administrator sets up a lockout password to the feature. 5-14 ® Xerox Wide Format 6604/6605 Solution User Guide... -
Page 133: Administrator Managed Queue
Touch Screen. If you are not already logged in as a System Administrator, you are prompted to enter a System Administrator password to access the Control Panel settings. ® 5-15 Xerox Wide Format 6604/6605 Solution User Guide... -
Page 134: Sound Settings
240 minutes. The default setting for Low Power mode is 15 minutes. 1. Press the Services button on the Control Panel. 2. Select Machine Info from the Services menu screen. 5-16 ® Xerox Wide Format 6604/6605 Solution User Guide... -
Page 135: Sleep Timeout
10 and 300 seconds. The default value for this feature is 5 minutes. 1. Press the Services button on the Control Panel. The Services menu screen displays. 2. Select Machine Info. ® 5-17 Xerox Wide Format 6604/6605 Solution User Guide... -
Page 136: File Deletion Timeout
1. Press the Services button on the Control Panel. 2. Select Machine Info. 3. Select the Administration tab. 4. Select Control Panel from the Administration tab. 5-18 ® Xerox Wide Format 6604/6605 Solution User Guide... -
Page 137: Set Start Scan Mode
9. Select the Services button on the Control Panel and Copy if you intend to scan a document at this time. NOTE Once this feature is enabled, users selecting options from the Services menu will get a “press start” message. ® 5-19 Xerox Wide Format 6604/6605 Solution User Guide... -
Page 138: Calibrate Touch Screen
Instead of entering the IP Address, Subnet Mask, and Gateway Address, you may enable Dynamic Host Configuration Protocol (DHCP) on the Network Setup screen. For more information on DHCP, see the Setting Up DHCP section of this chapter for details. 5-20 ® Xerox Wide Format 6604/6605 Solution User Guide... -
Page 139: Setting Up A Static Ip Address
6. Select Network Setup. NOTE The network settings can also be setup using the Web Printer Management Tool. Refer to the Xerox FreeFlow Accxes System and Web Printer Management Tool Setup Guide or Web Printer Management Tool Online Help for network settings instructions. -
Page 140: Setting Up Ip Gateway
1. Select the Services button on the Control Panel, followed by Machine Info > Administration Tab > Network Setup. 2. Select Gateway from the Network Setup screen. The IP Gateway screen displays. 3. Enter the Gateway in the format XXX.XXX.XXX.XXX. 4. Select Enter. 5-22 ® Xerox Wide Format 6604/6605 Solution User Guide... -
Page 141: Setting Up Netmask
Since constantly changing IP addressing can cause problems for users in network communications, the default value for this feature is not checked (disabled). 1. Select the Services button on the Control Panel, followed by Machine Info > Administration Tab > Network Setup. ® 5-23 Xerox Wide Format 6604/6605 Solution User Guide... -
Page 142: Copy Options
If you are not already logged in as System Administrator, you are prompted for the Administrator password when you select Copy Options. Contact your System Administrator for the password if required. 5-24 ® Xerox Wide Format 6604/6605 Solution User Guide... -
Page 143: Select Output Media Series
The factory default R/E presets are 25%, 33.3%, 35.3%, 66.6%, 70.7%, 133.3%, and 141.4%. 1. Select the Services button on the Control Panel, followed by Machine Info > Administration Tab. 2. Select the Copy Options button. The Copy Options menu displays ® 5-25 Xerox Wide Format 6604/6605 Solution User Guide... - Page 144 Custom R/E value (using the numeric keypad or the scroll buttons). Numeric Keypad (shown below) displays after selecting the Custom Reduction/Enlargement Percent box. Here you can enter the new value. 5-26 ® Xerox Wide Format 6604/6605 Solution User Guide...
-
Page 145: Set Reduction Line Preservation
1. Select the Services button on the Control Panel, followed by Machine Info > Administration Tab. 2. Select the Copy Options button. The Copy Options menu displays 3. Select Set Line Preservation mode for reductions. The Line Preservation screen displays. ® 5-27 Xerox Wide Format 6604/6605 Solution User Guide... -
Page 146: Configure Custom Output Formats
Output Format Presets list, for easy selection from the Copy screen. 1. Select the Services button on the Control Panel, followed by Machine Info > Administration Tab. 2. Select Copy Options. The Copy Options screen displays 5-28 ® Xerox Wide Format 6604/6605 Solution User Guide... - Page 147 7. Repeat steps 4 through 6 to set up additional custom formats. 8. Select Close to return to the Copy Options menu. 9. Select Close to return to the Administration menu. ® 5-29 Xerox Wide Format 6604/6605 Solution User Guide...
-
Page 148: Auto Rotate
Alignment is also required when the intersection of the scanner five Contact Image Sensors becomes visible on the image of the output document. The printed image then displays an upward or downward alignment in the lines. 5-30 ® Xerox Wide Format 6604/6605 Solution User Guide... -
Page 149: Normalization
If the System Administrator password is enabled, the scanner setup tasks below can only be performed by the System Administrator. Performing Scanner SetUp routines: 1. Select Machine Info. 2. Select the Administration tab. 3. Select Copy Options. ® 5-31 Xerox Wide Format 6604/6605 Solution User Guide... - Page 150 5. Select the Normalization button to start the scanner normalization process. NOTE Normalization should be performed before Stitch Alignment. The normalization target that came with your system is shown below. This target normalizes both black and white, and grayscale and color. 5-32 ® Xerox Wide Format 6604/6605 Solution User Guide...
- Page 151 8. Insert the Autostitch target document face up with the labeled text feeding into the Scanner first. 9. To test the results, copy the target sample and verify that the lines are all perfectly straight lines. ® 5-33 Xerox Wide Format 6604/6605 Solution User Guide...
- Page 152 Figure 1: Horizontal Stitch The broken lines can also be seen on a vertical image as well. This is shown in the following graphic. Figure 2: Vertical Stitch 5-34 ® Xerox Wide Format 6604/6605 Solution User Guide...
-
Page 153: Machine Info
Within Machine Info, the System Administrator maintains control of the functionality of certain features and options. The System Administrator is also responsible for customizing the printer for your work environment. ® Xerox Wide Format 6604/6605 Solution User Guide... -
Page 154: Media Status And Setup
The Media Status and Setup feature displays the media status as the amount of media remaining, the installed media sizes and media types. Changing the setup for different media is accomplished here. ® Xerox Wide Format 6604/6605 Solution User Guide... - Page 155 1. Select the Media Source desired from the Basic Copy tab if it is present. If not, go to step 2. 2. Select the Machine Info button on the Control Panel. 3. Select Media Status and Setup. Once Media Status and Setup is selected the following screen displays. ® Xerox Wide Format 6604/6605 Solution User Guide...
-
Page 156: How To Access Media Settings
How to Access Media Settings 1. Select Machine Information on the Services menu. 2. Select Media Status and Setup. The Media Status and Setup menu includes the following information: ® Xerox Wide Format 6604/6605 Solution User Guide... - Page 157 4. Select the specific installed Media that best defines the contents loaded. 5. Select Close to return to the Media Status and Setup... menu. 6. Select the Type/Thickness button to access the Media Type and Thickness options. ® Xerox Wide Format 6604/6605 Solution User Guide...
-
Page 158: Print Reports Tab
The Print Reports tab also allows you to print diagnostic prints. The use of standard test patterns helps determine the root cause of image quality problems. The diagnostic print choices include • Scanner Test Print (copy/scan only) ® Xerox Wide Format 6604/6605 Solution User Guide... -
Page 159: Print Reports
• Scanner Test Print - Only available for printers with a scanner upgrades. 5. Select Print. The selected item prints. From the Web Printer Management Tool 1. Type in your URL using your web browser to access the FreeFlow Accxes Web Printer Management Tool. ® Xerox Wide Format 6604/6605 Solution User Guide... - Page 160 • Normal - Prints the configuration data and settings information. • Full - Prints the configuration data, settings information and pen palettes information. • PostScript - Requires a license and prints a PostScript test page. ® Xerox Wide Format 6604/6605 Solution User Guide...
-
Page 161: Configuration Test Sample Report (Printer)
Machine Info Configuration Test Sample Report (Printer) This report is a sample printout. ® Xerox Wide Format 6604/6605 Solution User Guide... -
Page 162: Setup Test Print Sample Report (Printer Settings)
Machine Info Setup Test Print Sample Report (Printer Settings) This report is a sample printout. 6-10 ® Xerox Wide Format 6604/6605 Solution User Guide... -
Page 163: Pen Settings
Machine Info Pen Settings This report is a sample printout. ® 6-11 Xerox Wide Format 6604/6605 Solution User Guide... -
Page 164: Postscript Test Sample Report
The Machine Configuration tab displays configurations, software versions and the availability of the component options, as shown below: How to Access Machine Configuration 1. Select Machine Information on the Services menu. 2. Select the Machine Configuration tab. 6-12 ® Xerox Wide Format 6604/6605 Solution User Guide... -
Page 165: Administration Tab
How to Access Administration 1. Select Machine Information on the Services menu. 2. Select the Administration tab. 3. Enter the Administrator password. Refer to the System Administration chapter for more details. ® 6-13 Xerox Wide Format 6604/6605 Solution User Guide... - Page 166 Machine Info 6-14 ® Xerox Wide Format 6604/6605 Solution User Guide...
-
Page 167: Maintenance
NOTE The use of consumables not recommended by Xerox may impair image quality and machine performance. Use only consumables recommended by Xerox for the machine. -
Page 168: Loading Toner
Before using consumables, carefully read the instructions and precautions on the packaging. Check the product code of the consumables and contact your Xerox Customer Support Center to place your orders. Follow the disposal instructions for used toner and Waste Toner Bottles. - Page 169 Align the notch on the Toner Cartridge with the right side of the Toner Supply Port. Lower the left side of the Toner Cartridge, and push the Toner Cartridge into the Toner Supply Port until it clicks. ® Xerox Wide Format 6604/6605 Solution User Guide...
- Page 170 Maintenance 4. Slide the Lever to the left, and align it with the triangular symbol. 5. Tap the top of the Toner Cartridge repeatedly until the cartridge is empty. ® Xerox Wide Format 6604/6605 Solution User Guide...
-
Page 171: Replacing The Waste Toner Bottle
When replacing the Waste Toner Bottle, toner may spill and dirty the floor. We recommend placing paper on the floor beforehand. 1. Make sure that the machine has stopped, and lift up the Upper Unit Release Latch to open the Upper Unit. ® Xerox Wide Format 6604/6605 Solution User Guide... - Page 172 3. Pull open the Waste Toner Bottle Door on the right hand side of the machine to access the Waste Toner Bottle. 4. Remove the Waste Toner Bottle by gently lifting the bottle up and pulling it out toward you, then pulling the bottle down. ® Xerox Wide Format 6604/6605 Solution User Guide...
- Page 173 Otherwise the machine may not detect that the bottle is in place. 7. Close the Waste Toner Bottle Door. ® Xerox Wide Format 6604/6605 Solution User Guide...
-
Page 174: Cleaning The Machine
Cleaning the Machine WARNING To reduce the risk of electric shock, power off the machine before cleaning, as directed in Powering the System On/Off in the Product Overview section of this guide. ® Xerox Wide Format 6604/6605 Solution User Guide... -
Page 175: To Clean The Scanner
1. Press the On/Off Switch behind the Scanner to turn it to the Off (down) position. 2. Remove the power to the Scanner by removing the top Power Cord below the On/Off Switch. ® Xerox Wide Format 6604/6605 Solution User Guide... - Page 176 4. With both hands, push the lid up and away from you. The lid can support itself in the fully open position. 5. Apply Xerox Film Remover or Isopropanol to the Main Roller with a clean cloth, turning the roller as you clean it.
-
Page 177: To Clean The User Interface (Ui)
To Clean the User Interface (UI) The User Interface Touch Screen becomes soiled with fingerprints and needs to be cleaned on a regular basis. Apply Xerox Platen Glass Lens and Mirror Cleaner or Xerox Film Remover with a clean cloth. -
Page 178: To Clean The Machine
Stitch Alignment is required. The Autostitch target that came with your system is used for this task. See System Administration, for Stitch Alignment instructions. 7-12 ® Xerox Wide Format 6604/6605 Solution User Guide... -
Page 179: Problem Solving
Problem Solving This chapter describes problems that may occur with the Xerox Wide Format 6604/6605 Solution and the recommended solutions. • General Problems • Problems During Copying • Problems During Scanning • Problems During Printing • Error Messages • Document Jams •... -
Page 180: Problems During Copying
• Follow the specific instructions on the Touch Screen. displays on the Touch Screen. • If the condition does not improve, contact your Service Representative. Problems During Copying The following helps you solve problems encountered during copying. ® Xerox Wide Format 6604/6605 Solution User Guide... - Page 181 Refer to Document Input. A corner of the Is the document curled? Flatten out the curl and insert the document is document again. folded. ® Xerox Wide Format 6604/6605 Solution User Guide...
- Page 182 Refer to the Maintenance chapter for details. The copy is too Is the copy density set to Adjust the copy density. dark. Darken? Refer to Copy Density. Rotate the document 90 degrees. ® Xerox Wide Format 6604/6605 Solution User Guide...
- Page 183 Refer to Loading Media. Dirt appears at Is there dirt in the media feed Copy a few pages. equal intervals. path? Internal components are dirty. Contact your Xerox Customer Support Center. ® Xerox Wide Format 6604/6605 Solution User Guide...
- Page 184 Problem Solving Symptoms Check Remedy Black dots are Internal components are dirty. Contact your Xerox Customer Support printed. Center. Black lines are Have you cleaned the Scanner Clean the Contact Image Sensors (CIS) printed. areas as a daily maintenance and the Main Roller.
- Page 185 Are the media settings correct? Correctly select the media settings. Refer to Media Settings. The entire media A probable cause is some type Contact your Xerox Customer Support area is printed of internal machine error. Center. black. Nothing is copied.
-
Page 186: Problems During Scanning
Refer to Original Type, and White Point sections for details. The scanned Have you cleaned the Scanner Clean the scanning area. image has black areas as a daily maintenance Refer to Cleaning the Machine scanner lines. task? portion. ® Xerox Wide Format 6604/6605 Solution User Guide... - Page 187 Is the scan resolution set too Select a higher resolution. image is coarse. low? Refer to Scan Resolution. Did you select the correct Select the correct rendering setting. rendering setting? Refer to Rendering. ® Xerox Wide Format 6604/6605 Solution User Guide...
-
Page 188: Problems During Printing
Maintenance chapter. Static during Have you cleaned the Scanner Clean the Scanner and Sensors with Xerox Scanning areas as a daily maintenance Anti-static fluid and a clean dry cloth. Refer task? to the Maintenance procedure in this guide. - Page 189 Refer to Loading Media. Is the loaded media folded or Remove the defective media and replace wrinkled? with new media. Refer to Loading Media. ® 8-11 Xerox Wide Format 6604/6605 Solution User Guide...
- Page 190 Dirt appears at Is there dirt in the media feed Print a few pages. equal intervals. path? Internal components are dirty. Contact your Xerox Customer Support Center. The print has black Internal components are dirty. Contact your Xerox Customer Support dots.
-
Page 191: Error Messages
Are the media settings correct? Select the correct media settings. Refer to Media Settings. The entire media A probable cause is an internal Contact your Xerox Customer Support area is printed machine error. Center. black. Nothing is printed. -
Page 192: Scanner Jam Message
If the document becomes jammed in the Scanner, the machine stops and an error message displays on the Touch Screen. Clear the jammed document according to the instructions displayed, and then reload the document. 8-14 ® Xerox Wide Format 6604/6605 Solution User Guide... - Page 193 NOTE Opening the Scanner Lid reveals the Main Roller and the five optical Contact Image Sensors (CIS). See the Maintenance chapter for details on cleaning the Main Roller and Sensors. ® 8-15 Xerox Wide Format 6604/6605 Solution User Guide...
- Page 194 Touch Screen. NOTE If a Scanner jam message persists after you remove the document, check the Scanner Exit Tray for a document. A message remains on the screen until you remove it. 8-16 ® Xerox Wide Format 6604/6605 Solution User Guide...
-
Page 195: Media Jams
If a sheet of media is wrapped around the heat roller, or the jammed media is difficult or impossible to see, do not try to remove it yourself. Doing so may cause injuries or burns. Switch off the machine immediately and contact your Xerox Customer Support Center. - Page 196 2. Pull out Roll 1 or Roll 2, as directed on the Touch Screen. WARNING Do not open the Roll 1 Cutter Cover or the Roll 2 Cutter Cover unless you are specifically directed to do so. 8-18 ® Xerox Wide Format 6604/6605 Solution User Guide...
- Page 197 • When the jammed media is not clearly visible in one of the rolls even though the roll is jammed, pull out the appropriate roll drawer and remove the jammed media. ® 8-19 Xerox Wide Format 6604/6605 Solution User Guide...
- Page 198 Problem Solving 4. Gently slide Roll 1 or Roll 2 until it is firmly in position. 5. Close the Front Doors. 8-20 ® Xerox Wide Format 6604/6605 Solution User Guide...
-
Page 199: Media Jams In Manual Feed-In Shelf (Bypass)
Pull the media toward you gently to remove it. NOTE Be careful not to tear the sheet. Media Jams in Upper Unit The following describes how to clear media jams that occur in the Upper Unit. ® 8-21 Xerox Wide Format 6604/6605 Solution User Guide... - Page 200 2. Check the state of the jammed media, and solve the problem as follows. WARNING Never touch a labeled area on hot or sharp parts. You can get burned or injured. 8-22 ® Xerox Wide Format 6604/6605 Solution User Guide...
- Page 201 If media is jammed in the Media Feed Path: 4. Lift up the green Lever A, and remove the jammed media from the Media Feed Path. ® 8-23 Xerox Wide Format 6604/6605 Solution User Guide...
-
Page 202: Media Jams In Fuser Unit
5. Lower the green Lever A to its original position. 6. Close the Upper Unit. Media Jams in Fuser Unit The following describes how to clear media jams that occur in the Fuser Unit. 8-24 ® Xerox Wide Format 6604/6605 Solution User Guide... - Page 203 Gently remove the media, taking care not to tear it. If the media is torn, make sure to remove all torn media from the machine. Media fragments inside the machine can cause future jams and image quality defects. ® 8-25 Xerox Wide Format 6604/6605 Solution User Guide...
- Page 204 Never touch a labeled area on hot or sharp parts. You can get burned or injured. 4. Lift up the green lever to hold the baffle, and remove the jammed media through the output port. 5. Lower the Baffle. 8-26 ® Xerox Wide Format 6604/6605 Solution User Guide...
- Page 205 Problem Solving 6. Close the Fuser Cover and the Manual Feed-in Shelf. 7. Close the Upper Unit. ® 8-27 Xerox Wide Format 6604/6605 Solution User Guide...
- Page 206 Problem Solving 8-28 ® Xerox Wide Format 6604/6605 Solution User Guide...
Need help?
Do you have a question about the Wide Format 6604 and is the answer not in the manual?
Questions and answers