Table of Contents
Advertisement
Quick Links
Advertisement
Table of Contents
Troubleshooting

Related Manuals for Xerox WorkCentre 3315DN


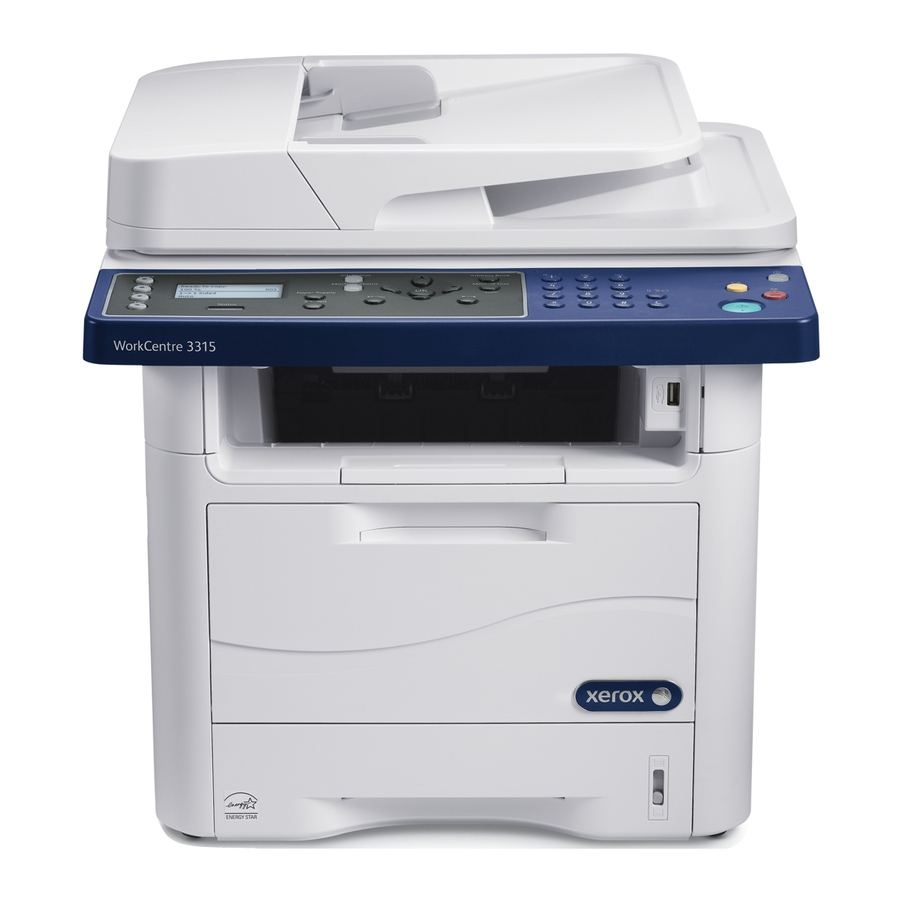
Summary of Contents for Xerox WorkCentre 3315DN
-
Page 1: Xerox Workcentre
Version 1.1 December 2013 ® Xerox WorkCentre™ 3315DN/3325DN/3325DNI User Guide... - Page 2 ® ® ©2013 Xerox Corporation. All rights reserved. Xerox and Xerox and Design are trademarks of Xerox Corporation in the United States and/or other countries. Document Version 1.1: December 2013...
-
Page 3: Table Of Contents
Using Fax Send Options ..............80 Xerox WorkCentre 3315DN/3325DN/3325DNI... - Page 4 Xerox Easy Printer Manager (EPM)........
- Page 5 Environment, Health and Safety (EH&S) Contact Information......252 Index Xerox WorkCentre 3315DN/3325DN/3325DNI User Guide...
- Page 6 Xerox WorkCentre 3315DN/3325DN/3325DNI User Guide...
-
Page 7: Getting Started
18 • Loading Documents on page 22 • Media Output Locations on page 23 • Machine Status on page 25 • General Care and Consumables on page 29 • Further Assistance on page 30 Xerox WorkCentre 3315DN/3325DN/3325DNI User Guide... -
Page 8: Machine Overview
Bypass Tray Extension Front Cover Bypass Tray Width Guides Control Board Cover Output Tray Support Handle Document Glass Cover Paper Level Indicator Document Glass Paper Tray 2 (Optional) USB Memory Device Port Paper Tray 1 Xerox WorkCentre 3315DN/3325DN/3325DNI User Guide... -
Page 9: Rear View
Machine Overview Rear View Network Port Rear Door IEEE 1284 Parallel Connector (Optional) Paper Tray Rear Cover Power Switch Telephone Line Socket Power Receptacle Extension Telephone Socket Duplex Unit Xerox WorkCentre 3315DN/3325DN/3325DNI User Guide... -
Page 10: Product Configurations
The internal Mass Storage Device (HDD) is used on the WorkCentre 3325DN / 3325DNI Note: models to support Secure Print, Delayed Print, Proof Print, Spooling of Scan to FTP/SMB jobs and Stored Jobs, and to provide an increased capacity for downloaded fonts. Xerox WorkCentre 3315DN/3325DN/3325DNI User Guide... -
Page 11: Powering On The Machine
Powering off the Machine There are two ways to switch the machine off: Press the ON/OFF switch to the (O) position. • • Press the Power Save button and select Power Down and then OK. Xerox WorkCentre 3315DN/3325DN/3325DNI User Guide... -
Page 12: Control Panel Overview
Menu: Enters Menu Mode and enables you to access options and settings. Arrows: The up/down and left/right arrows are used to scroll through the options available in the selected menu, and to increase or decrease values. OK: Confirms the selection on the screen. Xerox WorkCentre 3315DN/3325DN/3325DNI User Guide... - Page 13 ‘C’ Cancel Entry: Cancels the previous entry made on the keypad. Interrupt Printing: Interrupts the current job to run a more urgent job. (Not applicable to the 3315DN) Clear All: Clears the last selections made. Power Save: Sends the machine into Power Save mode or Power Down. Press the button again to restart a powered off machine.
-
Page 14: Inserting A Pause
To insert a pause, press Pause / Redial at the appropriate place while entering the telephone number. A dash [ - ] appears on the display at the corresponding location. Xerox WorkCentre 3315DN/3325DN/3325DNI User Guide... -
Page 15: Menu Overview
Some menu options may be unavailable depending on your machine configuration and whether the machine is in the Ready state. Also, for some services such as E-mail and Fax, additional selections or setups may be required before the Menu options can be accessed. Xerox WorkCentre 3315DN/3325DN/3325DNI User Guide... -
Page 16: Software
After you have set up your machine and connected it to your computer, you must install the printer and scanner software. The software required for Windows or Macintosh is supplied on the CD delivered with your machine, additional software can be downloaded from www.xerox.com. The following software is available:... - Page 17 • Printer Driver: Use this driver to take full advantage of your printer’s Software features. Note: Unix software is available on xerox.com only. Printer Macintosh • Printer Driver: Use this driver to take full advantage of your printer’s Software CD features.
-
Page 18: Loading Paper
Pull out the paper tray and load paper into the tray, print side down. Do not fill above the Maximum Fill line indicated by the symbol Slide the paper length guide until it lightly touches the end of the paper stack. Xerox WorkCentre 3315DN/3325DN/3325DNI User Guide... -
Page 19: Bypass Tray
Media Output Locations on page 23. Load the print material between the width guides with the print side facing up. Note: Hold transparencies by the edges and avoid touching the print side. Xerox WorkCentre 3315DN/3325DN/3325DNI User Guide... -
Page 20: Duplex Unit
The duplex unit is preset to either Letter size or A4 depending on your country. To change the size of the duplex unit, follow the instructions below. Pull the duplex unit out of the machine. Adjust the guides to match the size of paper you will be using. Xerox WorkCentre 3315DN/3325DN/3325DNI User Guide... - Page 21 Loading Paper Insert the duplex unit back into the machine, aligning the edges of the unit with the feed grooves on the inside of the machine. Make sure the duplex unit is fully pushed Xerox WorkCentre 3315DN/3325DN/3325DNI User Guide...
-
Page 22: Loading Documents
The default document size is 8.5 x 11” or A4. For other sized documents, change the Original Size option. Refer Copy Options on page 36 for further information. Note: Documents are only scanned once even when several copies are selected. Xerox WorkCentre 3315DN/3325DN/3325DNI User Guide... -
Page 23: Media Output Locations
The output tray collects printed paper face down, in the order in which the sheets were printed. The output tray should be used for most jobs. When the output tray is full, a message displays on the control panel. Xerox WorkCentre 3315DN/3325DN/3325DNI User Guide... - Page 24 Duplex printing with the rear door open will cause paper jams. CAUTION: The fuser area inside the rear door of your machine becomes very hot when in use. Take care when you access this area. Xerox WorkCentre 3315DN/3325DN/3325DNI User Guide...
-
Page 25: Machine Status
Configuration This report provides information about your machine setup, including the serial number, IP Address, installed options and the software version. Demo Page The demo page is printed to check the quality of the print. Xerox WorkCentre 3315DN/3325DN/3325DNI User Guide... - Page 26 This list shows the number of impressions made on the machine. The list includes: • Total Impressions • Black Impressions • Maint. Impressions • Sheets • 2 Sided Sheets Fax Options Prints fax setup information. Xerox WorkCentre 3315DN/3325DN/3325DNI User Guide...
-
Page 27: Feature Defaults
A password may be required to access and change the Fax Setup settings. Print Setup You can change the default settings for various options within the print environment to meet your preferences and needs. A password may be required to access and change the Print Setup settings. Xerox WorkCentre 3315DN/3325DN/3325DNI User Guide... -
Page 28: System Setup
Enables a location on the machine’s hard drive to be set up for stored scan, print and fax jobs. Note: For full instructions on accessing and customizing the machine settings, refer to Machine Status and Setups on page 153. Xerox WorkCentre 3315DN/3325DN/3325DNI User Guide... -
Page 29: General Care And Consumables
Xerox Cleaning Fluid or Anti-Static Cleaner can be used to clean the document glass, but must be applied using a cloth and not poured directly on the document glass. -
Page 30: Further Assistance
Error Messages on page 198. If the difficulty persists, contact the Xerox Support Center. The Xerox Support Center will want to know the nature of the problem, the machine serial number, the fault code (if any) plus the name and location of your company. -
Page 31: Copy
Copy This chapter includes: • Copy Procedure on page 32 • Copy Options on page 36 • Using the Layout Options on page 39 • Media Output Locations on page 43 Xerox WorkCentre 3315DN/3325DN/3325DNI User Guide... -
Page 32: Copy Procedure
Load documents to be scanned face up in the input tray of the automatic document feeder with the top of the document to the left of the tray. Move the document guide to just touch both sides of the document. Xerox WorkCentre 3315DN/3325DN/3325DNI User Guide... -
Page 33: Document Glass
5 envelopes. Weight ranges from 16 - 58 lbs bond (60 - 220 g/m²). Sizes range from 76 x 127 mm (custom) to 216 x 356 mm (Legal). Select the Paper Supply option required using the up/down arrows and press OK. Xerox WorkCentre 3315DN/3325DN/3325DNI User Guide... -
Page 34: Enter The Quantity
Select the 2 Sided option required using the up/down arrows and press OK. Note: Not all the 2 sided options are available on the WorkCentre 3315DN. Additional Copy options are available through the Menu button. For information about programming additional options, refer to Copy Options on page 36. -
Page 35: Stop The Copy Job
Press the Job Status button on the control panel to display the active jobs. Use the up/down arrows and select the job required, press OK. Select Delete and OK. Select Yes to delete the job or No to return to previous screen. Xerox WorkCentre 3315DN/3325DN/3325DNI User Guide... -
Page 36: Copy Options
Lighten +5; works well with dark print. • Normal: Works well with standard typed or printed originals. • Darken +1 to +5: Darkens the original in increments to the darkest setting of Darken +5; works well with light print. Xerox WorkCentre 3315DN/3325DN/3325DNI User Guide... - Page 37 • Auto: Select to automatically eliminate background. dark background resulting • Enhance: Levels 1 to 4: Suppresses the background from scanning colored color in increments, level 4 representing the greatest paper or newspaper amount of background elimination. originals. Xerox WorkCentre 3315DN/3325DN/3325DNI User Guide...
- Page 38 This feature is only available when you place originals on the document glass. • Border Erase: Use the numeric keypad to enter the left, right, top or bottom amount of margin to erase. Xerox WorkCentre 3315DN/3325DN/3325DNI User Guide...
-
Page 39: Using The Layout Options
Your machine can print 2 sided originals on one sheet of A4, Letter, Legal, Folio, Executive, B5, A5, or A6 paper. Press Copy on the control panel. Press Menu on the control panel. Press the up/down arrows to highlight Layout and press OK. Xerox WorkCentre 3315DN/3325DN/3325DNI User Guide... -
Page 40: Book Copy
Place the book original face down on the document glass with the spine of the book lined up with the book marker at the center of the rear edge of the document glass. Press Start. Xerox WorkCentre 3315DN/3325DN/3325DNI User Guide... -
Page 41: Booklet Creation
Press the up/down arrows to highlight Poster Copy and press OK. Select OK to save your selections and press Menu to return to the top level menu. Load originals and press Start. Each portion is scanned and printed one by one. Xerox WorkCentre 3315DN/3325DN/3325DNI User Guide... -
Page 42: Clone Copy
Press the up/down arrows to highlight Layout and press Press the up/down arrows to highlight Clone Copy and press OK. Select OK to save your selections and press Menu to return to the top level menu. Load originals and press Start. Xerox WorkCentre 3315DN/3325DN/3325DNI User Guide... -
Page 43: Media Output Locations
The output tray collects printed paper face down, in the order in which the sheets were printed. The output tray should be used for most jobs. When the output tray is full, a message displays on the control panel. Xerox WorkCentre 3315DN/3325DN/3325DNI User Guide... - Page 44 Duplex printing with the rear door open will cause paper jams. CAUTION: The fuser area inside the rear door of your machine becomes very hot when in use. Take care when you access this area. Xerox WorkCentre 3315DN/3325DN/3325DNI User Guide...
-
Page 45: Scan
53 • Scan Assistant on page 55 • Scan Using TWAIN on page 56 • Scan Using WIA Driver on page 57 • Macintosh Scanning on page 58 • Linux Scanning on page 60 Xerox WorkCentre 3315DN/3325DN/3325DNI User Guide... -
Page 46: Scanning Overview
Scan Using TWAIN on page 56. • WIA (Windows Image Acquisition): To use this feature your computer must be connected to the machine via a USB cable. Refer to Scan Using WIA Driver on page 57. Xerox WorkCentre 3315DN/3325DN/3325DNI User Guide... -
Page 47: Scan Procedure
Load documents to be scanned face up in the input tray of the automatic document feeder with the top of the document to the left of the tray. Move the document guide to just touch both sides of the document. Xerox WorkCentre 3315DN/3325DN/3325DNI User Guide... -
Page 48: Select The Scan Destination
Press the up/down arrows to highlight Local PC. Press OK. If you see the Not Available message, check the port connection and/or setup. Press the up/down arrows until the scan destination you want highlights and press OK. Xerox WorkCentre 3315DN/3325DN/3325DNI User Guide... -
Page 49: Scan To Smb
Scan to Network PC from Control Panel Make sure that your machine is connected to a network. Make sure the machine has been configured using the Xerox Scan Assistant utility and the scan driver has been installed. For instructions, refer to System Administrator guide. - Page 50 1 Sided, Rotated: Use this option for 2 sided originals which have the second side rotated. This option will rotate the second side image 180 degrees. Select the 2 Sided option required using the up/down arrows and press OK. Xerox WorkCentre 3315DN/3325DN/3325DNI User Guide...
-
Page 51: Start The Job
A list of Active Jobs or Saved Jobs is displayed. Select your job using the up/down arrows and press OK. The following Job Options are available: For active jobs: • Release • Cancel For saved jobs: • Print • Delete Xerox WorkCentre 3315DN/3325DN/3325DNI User Guide... -
Page 52: Stop The Job
Press the Job Status button on the control panel to display the active jobs. Use the up/down arrows to select the job required, press OK. Select Delete and OK. Select Yes to delete the job or No to return to previous screen. Xerox WorkCentre 3315DN/3325DN/3325DNI User Guide... -
Page 53: Scan Options
• Grayscale: Use if output is to be in shades of gray. grayscale or color output. • Black and White: Use to select black and white output regardless of the color of your original. Xerox WorkCentre 3315DN/3325DN/3325DNI User Guide... - Page 54 Less +5. dark areas of the image. • Normal: No contrast adjustment is made. • More +1 to +5: Increases the contrast in increments up to the highest contrast setting of More +5. Xerox WorkCentre 3315DN/3325DN/3325DNI User Guide...
-
Page 55: Scan Assistant
Scan Assistant Scan Assistant The Scan Assistant is a Xerox utility that is automatically installed with the your Xerox Printer Driver. It provides an interface to select a scanner and to adjust Scan settings and start the scanning process directly from your computer. Using the preview window allows you to view the scan and make adjustments as necessary using the easy access buttons on the left of the preview window. -
Page 56: Scan Using Twain
Load originals face up into the automatic document feeder, or place a single original face down on the document glass. Open an application, such as Adobe Photoshop. Open the TWAIN window and set the scan options. Scan and save your scanned image. Xerox WorkCentre 3315DN/3325DN/3325DNI User Guide... -
Page 57: Scan Using Wia Driver
From the Start menu select Control Panel > Devices and Printers. Click the right mouse button on the device driver icon in Printers and Faxes > Start Scan. New Scan application appears. Choose your scanning preferences. Select Scan. Xerox WorkCentre 3315DN/3325DN/3325DNI User Guide... -
Page 58: Macintosh Scanning
If a warning message appears, click Change Port... to select the port, or if TWAIN UI appears, click Change Port... from the Preference tab and select a new port. • For 10.6, select your device below SHARED. Set the scan options on this program. Xerox WorkCentre 3315DN/3325DN/3325DNI User Guide... - Page 59 Use the Scan and Fax Manager program to check the installed scan driver’s condition, to change scan settings and to add or delete document folders for storing scanned documents. To use the Scan and Fax Manager program: Select /Applications/Xerox and run Scan and Fax Manager. Select the appropriate device in Scan and Fax Manager. Select Properties.
-
Page 60: Linux Scanning
11. When you are finished, click Save on the toolbar. 12. Select the file directory where you want to save the image and enter the file name. 13. Click Save. Job Type Settings You can save your scan option settings for later use. Xerox WorkCentre 3315DN/3325DN/3325DNI User Guide... -
Page 61: Using The Image Manager
Allows you to scale the image size; you can enter the size manually, or set the rate to scale proportionally, vertically, or horizontally. Rotate Allows you to rotate the image; you can select the number of degrees from the drop-down list. Xerox WorkCentre 3315DN/3325DN/3325DNI User Guide... - Page 62 Allows you to adjust the brightness or contrast of the image, or to invert the image. Properties Shows the properties of the image. For further details about the Image Manager application, refer to the on screen help. Xerox WorkCentre 3315DN/3325DN/3325DNI User Guide...
-
Page 63: E-Mail
You can scan the originals and e-mail the scanned image to several destinations from the machine by e-mail. This chapter includes: • E-mail Procedure on page 64 • E-mail Options on page 68 • Address Book on page 70 • Smart Key Addresses on page 71 Xerox WorkCentre 3315DN/3325DN/3325DNI User Guide... -
Page 64: E-Mail Procedure
Load documents to be scanned face up in the input tray of the automatic document feeder with the top of the document to the left of the tray. Move the document guide to just touch both sides of the document. Xerox WorkCentre 3315DN/3325DN/3325DNI User Guide... -
Page 65: Enter The E-Mail Address
70 for instructions. • Press the down arrow and enter additional e-mail addresses if required and press OK. If File Format appears, highlight the file format required and press OK. Enter an e-mail subject and press OK. Xerox WorkCentre 3315DN/3325DN/3325DNI User Guide... - Page 66 OK. For information about each of the options refer to E-mail Options on page 68. Start the Job Press the Start button. The images are scanned and sent to the e-mail address or addresses entered. Xerox WorkCentre 3315DN/3325DN/3325DNI User Guide...
- Page 67 Press the Job Status button on the control panel to display the active jobs. Use the up/down arrows to select the job required, press OK. Select Delete and OK. Select Yes to delete the job or No to return to previous screen. Xerox WorkCentre 3315DN/3325DN/3325DNI User Guide...
-
Page 68: E-Mail Options
• Grayscale: Use if output is to be in shades of gray. grayscale or color output. • Black and White: Use to select black and white output regardless of the color of your original. Xerox WorkCentre 3315DN/3325DN/3325DNI User Guide... - Page 69 Less +5. dark areas of the image. • Normal: No contrast adjustment is made. • More +1 to +5: Increases the contrast in increments up to the highest contrast setting of More +5. Xerox WorkCentre 3315DN/3325DN/3325DNI User Guide...
-
Page 70: Address Book
Press the Machine Status button on the control panel. Press the up/down arrows to highlight Information Pages and press OK. Press the up/down arrows to highlight Address Book and press OK. Your Address Book information prints out. Xerox WorkCentre 3315DN/3325DN/3325DNI User Guide... -
Page 71: Smart Key Addresses
The Smart Key addresses are selected by pressing the .com key on the control panel. When entering the e-mail address, press the .com key .com repeatedly until the address text required is displayed and press OK. Xerox WorkCentre 3315DN/3325DN/3325DNI User Guide... - Page 72 Smart Key Addresses Xerox WorkCentre 3315DN/3325DN/3325DNI User Guide...
-
Page 73: Fax
80 • Using Fax Forward on page 83 • Using Secure Receive on page 85 • Address Book on page 86 • Fax from PC on page 90 • Receiving Faxes on page 91 Xerox WorkCentre 3315DN/3325DN/3325DNI User Guide... -
Page 74: Fax Procedure
Load documents to be scanned face up in the input tray of the automatic document feeder with the top of the document to the left of the tray. Move the document guide to just touch both sides of the document. Xerox WorkCentre 3315DN/3325DN/3325DNI User Guide... - Page 75 Secure Receive Use to restrict printing of received faxes when the machine is unattended. Add Page Use to add additional documents to a delayed fax job which is saved in memory. Xerox WorkCentre 3315DN/3325DN/3325DNI User Guide...
-
Page 76: Enter The Fax Number
Stop. Note: To change the time interval between redials and the number of redial attempts, refer to Setup on page 166. To print a confirmation or error report, refer to Information Pages on page 25. Xerox WorkCentre 3315DN/3325DN/3325DNI User Guide... -
Page 77: Stop The Fax Job
Stop to clear the message and try to send the fax again. • You can set your machine to print a confirmation report automatically each time sending a fax is completed. For further details, refer to Fax Setup on page 166. Xerox WorkCentre 3315DN/3325DN/3325DNI User Guide... -
Page 78: Fax Options
In this mode, memory transmission is not available. Note: When your machine is set to Super Fine resolution and the remote fax machine does not support Super Fine resolution, the machine transmits using the highest resolution mode supported. Xerox WorkCentre 3315DN/3325DN/3325DNI User Guide... - Page 79 Delayed for instructions. Fax job which is saved in memory. Cancel Job You can cancel a Delayed Refer to Canceling a Delayed Fax on page 81 for Fax job which is saved in instructions. memory. Xerox WorkCentre 3315DN/3325DN/3325DNI User Guide...
-
Page 80: Using Fax Send Options
Enter the number of the receiving fax machine and press OK. You can select speed dial numbers or a group dial number by pressing the Address book button. For details, see Address Book on page 86. Xerox WorkCentre 3315DN/3325DN/3325DNI User Guide... -
Page 81: Canceling A Delayed Fax
Press the up/down arrows to highlight Cancel Job and press OK. Press the up/down arrows until the fax job you want appears and press OK. Press OK when Yes highlights to confirm and cancel the job. The selected fax is deleted from memory. Xerox WorkCentre 3315DN/3325DN/3325DNI User Guide... -
Page 82: Priority Send
If an original is placed on the document glass, select Yes at the Another Page? prompt. Load another original and press OK. When you have finished, select No at the Another Page? prompt. The machine scans and sends the fax to the destinations entered. Xerox WorkCentre 3315DN/3325DN/3325DNI User Guide... -
Page 83: Using Fax Forward
All received faxes will continue to be forwarded to the destination set until the option is deactivated. To deactivate Fax Forward, refer to Deactivating Fax Forward on page 84. Press Fax on the control panel. Xerox WorkCentre 3315DN/3325DN/3325DNI User Guide... -
Page 84: Deactivating Fax Forward
Press the up/down arrows to highlight Fax, E-mail or Server and press OK. Press the up/down arrows to highlight Send Forward or Receive Forward and press OK. Press the up/down arrows to highlight Off and press OK. Xerox WorkCentre 3315DN/3325DN/3325DNI User Guide... -
Page 85: Using Secure Receive
Press the up/down arrows to highlight Secure Receive and press OK. Press the up/down arrows to highlight Print and press OK. If required, enter the four-digit password and press OK. The machine prints all of the faxes stored in memory. Xerox WorkCentre 3315DN/3325DN/3325DNI User Guide... -
Page 86: Address Book
You can also set up an Address Book at the machine. The address book can store up to 500 entries on the WorkCentre 3325DN / 3325DNI and up to 200 entries on the WorkCentre 3315DN. You can include Speed Dial numbers and Group numbers and also print out a list of all the address book entries. -
Page 87: Group Dial Numbers
Press the up/down arrows to highlight New & Edit and press OK. Press the up/down arrows to highlight Group Dial and press OK. Enter the group dial number you want to edit and press OK. Xerox WorkCentre 3315DN/3325DN/3325DNI User Guide... -
Page 88: Deleting An Address Book Entry
Press the up/down arrows to highlight Delete and press OK. Press the up/down arrows to highlight Speed Dial or Group Dial and press OK. Press the up/down arrows until the searching method you want highlights and press OK. Xerox WorkCentre 3315DN/3325DN/3325DNI User Guide... -
Page 89: Printing The Address Book
Printing the Address Book You can check your Address Book settings by printing a list. Press Fax on the control panel. Press Address Book on the control panel. Press the up/down arrows to highlight Print and press OK. Xerox WorkCentre 3315DN/3325DN/3325DNI User Guide... -
Page 90: Fax From Pc
Select Print from the File menu. The Print window is displayed. It may look slightly different depending on your application. Select Xerox MFP PC Fax from the Name drop-down list box. Select OK. The Fax Options screen displays. Select the Add button to add new recipients,... -
Page 91: Receiving Faxes
Unless you change it, this ringing pattern will continue to be recognized and answered as a fax call, and all other ringing patterns will be Xerox WorkCentre 3315DN/3325DN/3325DNI User Guide... -
Page 92: Receiving Faxes In Memory
If you receive a fax while you are copying or printing, your machine stores incoming faxes in its memory. Then, as soon as you finish copying or printing, the machine automatically prints the fax. Xerox WorkCentre 3315DN/3325DN/3325DNI User Guide... -
Page 93: Print
Print The Xerox WorkCentre 3315DN/3325DN/3325DNI produces high quality prints from electronic documents. You can access the printer from your computer by installing the appropriate printer driver. To access the many printer drivers which can be used with your machine, refer to the Drivers CD or download the latest versions from the Xerox website at www.xerox.com. -
Page 94: Printing Using Windows
> Accessories > Run, and type X:\Setup.exe. If the AutoPlay window appears in Windows Vista, select Run Setup.exe in the Install or run program field, and select Continue in the User Account Control window. Select Install Software. Xerox WorkCentre 3315DN/3325DN/3325DNI User Guide... - Page 95 If you don’t want to connect the printer at this time, select Next and then No on the following screen. Then the installation will start and a test page will not be printed at the end of the installation. Xerox WorkCentre 3315DN/3325DN/3325DNI User Guide...
-
Page 96: Networked Printer
> Accessories > Run, and type X:\Setup.exe. If the AutoPlay window appears in Windows Vista, select Run Setup.exe in Install or run program field, and select Continue in the User Account Control window. Select Install Software. Xerox WorkCentre 3315DN/3325DN/3325DNI User Guide... - Page 97 Test Print page will be printed. If the Test Print operation is successful, continue on to Print Procedure on page 102 in this document. If the print operation failed, refer to Troubleshooting page 188. Xerox WorkCentre 3315DN/3325DN/3325DNI User Guide...
-
Page 98: Custom Installation
Note: If the AutoPlay window appears in Windows Vista, select Run Setup.exe in Install or run program field, and select Continue in the User Account Control window. Select Install Software. Select Custom installation. Select Next. Xerox WorkCentre 3315DN/3325DN/3325DNI User Guide... - Page 99 Note: The installation window that appears in this User Guide may differ depending on the printer and interface in use. Xerox WorkCentre 3315DN/3325DN/3325DNI User Guide...
- Page 100 Make sure that the printer is connected to your computer with a usb cable and powered on. For details about connecting to the network, refer to the System Administrator Guide. Xerox WorkCentre 3315DN/3325DN/3325DNI User Guide...
- Page 101 AutoPlay window appears in Windows Vista, select Run Setup.exe in Install or run program field, and select Continue in the User Account Control window. Select Install Software. Select Wireless Setup and follow the wizard instruction to select and install the printer. Xerox WorkCentre 3315DN/3325DN/3325DNI User Guide...
-
Page 102: Print Procedure
Documents can be printed from your computer using the printer drivers supplied. The printer driver must be loaded on each PC which uses the machine for printing. Notes: • Some options may be unavailable depending on your machine configuration. Xerox WorkCentre 3315DN/3325DN/3325DNI User Guide... -
Page 103: Basic Tab
Note: Not all job types are available, depending on your model and machine configuration. • Normal: This is the default print mode and is used for printing without saving the print file in memory. Xerox WorkCentre 3315DN/3325DN/3325DNI User Guide... -
Page 104: Layout Options
To print more than one page per sheet, the pages will be reduced in size and arranged in the order you specify. • Single Page Per Side: Use this option if the layout does not require changing. Xerox WorkCentre 3315DN/3325DN/3325DNI User Guide... -
Page 105: Sided Printing
If the required size is not listed in the Size box, select Edit. When the Custom Paper Setting window appears, set the paper size and select OK. The setting appears in the list so that you can select it. Xerox WorkCentre 3315DN/3325DN/3325DNI User Guide... -
Page 106: Scaling Options
Fit to Page: This allows you to scale your print job to any selected paper size, regardless of the digital document size. • Percentage: Use this option to change the contents of a page to appear larger or smaller on the printed page. Enter the scaling rate in the Percentage input box. Xerox WorkCentre 3315DN/3325DN/3325DNI User Guide... -
Page 107: Graphics Tab
Fonts option if the fonts do not require downloading and the printer fonts should be used. Toner Save Selecting this option extends the life of your print cartridge and reduces your cost per page without a significant reduction in print quality. Xerox WorkCentre 3315DN/3325DN/3325DNI User Guide... -
Page 108: Advanced Tab
Printing using Windows Advanced Tab You can select Advanced output options for your document, such as watermarks or overlay text. Xerox WorkCentre 3315DN/3325DN/3325DNI User Guide... - Page 109 When you have finished editing, select OK. Deleting a Watermark Select Edit from the Watermark drop-down list. The Edit Watermark window appears. Select the watermark you want to delete from the Current Watermarks list and select Delete. Select OK. Xerox WorkCentre 3315DN/3325DN/3325DNI User Guide...
- Page 110 Select Edit from the Overlay drop-down list. The Edit Overlay window appears. Select the Overlay you want to delete from the Overlay List box. Select Delete Overlay. When a confirming message window appears, select Yes. Select OK. Xerox WorkCentre 3315DN/3325DN/3325DNI User Guide...
-
Page 111: Output Options
Earth Smart Printing: When this option is selected, 2 Sided Printing, Layout, Skip Blank Pages and Toner Save can be customized to suit requirements. • Printer Default. This option automatically selects the printer default settings. Xerox WorkCentre 3315DN/3325DN/3325DNI User Guide... -
Page 112: Xerox Tab
This area of the Earth Smart Tab shows a visual representation of the estimated energy and paper savings based on the selections made. Xerox Tab This tab provides version and copyright information as well as links to drivers and downloads, supplies ordering and the Xerox website. Xerox WorkCentre 3315DN/3325DN/3325DNI User Guide... -
Page 113: Xerox Easy Printer Manager (Epm)
Xerox Easy Printer Manager is a Windows-based application that combines Xerox machine settings into one location. Xerox Easy Printer Manager conveniently combines device settings as well as printing/scanning environments, settings/actions, Scan to PC and Fax to PC. All of these features provide a gateway to conveniently use Xerox devices. -
Page 114: Wireless Setting Program
When installing the WorkCentre 3325DNI you can use the Wireless Setting program that was automatically installed with the printer driver to configure the wireless settings. To open the program: Select Start > Programs or All Programs > Xerox Printers > Xerox WorkCentre 3325 > Wireless Setting Program. Connect the machine to your computer using the USB cable. - Page 115 Note: It may be necessary to select the program again before this screen appears. When the search is complete, the wireless Network Setting Information is displayed. If you want to configure the settings, select Next. Xerox WorkCentre 3315DN/3325DN/3325DNI User Guide...
-
Page 116: Setip
TCP/IP protocol. This program is on the software CD that comes with your printer. For information on using the SetIP program, refer to the Xerox WorkCentre 3315DN/3325DN/3325DNI Utilities Guide available on Xerox.com. Xerox WorkCentre 3315DN/3325DN/3325DNI User Guide... -
Page 117: Printing Using Macintosh
This option allows you to select the printing resolution. The higher the setting, the sharper the clarity of printed characters and graphics. The higher setting also may increase the time it takes to print a document. Xerox WorkCentre 3315DN/3325DN/3325DNI User Guide... -
Page 118: Printer Features
Long-Edge Binding: This option is the conventional layout used in book binding. • Short-Edge Binding: This option is the type often used with calendars. Select the other options you want to use and select Print. Xerox WorkCentre 3315DN/3325DN/3325DNI User Guide... -
Page 119: Using Smart Panel
For Mac OS 10.5: Select Print & Fax from System Preferences > Open Printer Queue... of a printer > Utility. • For Mac OS 10.6: Select Print & Fax from System Preferences > Open Printer Queue... of a printer > Printer Setup > Utility > Open Printer Utility. Xerox WorkCentre 3315DN/3325DN/3325DNI User Guide... -
Page 120: Printing Using Linux
Using the Printer Properties window provided by the Printers configuration, you can change the various properties for your machine as a printer. Open the Unified Driver Configurator. If necessary, switch to Printers configuration. Select your machine on the available printers list and select Properties. Xerox WorkCentre 3315DN/3325DN/3325DNI User Guide... - Page 121 Classes: This option shows the class that your machine is in. Select Add to Class to add your • machine to a specific class or select Remove from Class to remove the machine from the selected class. Select OK to apply the changes and close the Printer Properties window. Xerox WorkCentre 3315DN/3325DN/3325DNI User Guide...
-
Page 122: Printing Using Unix
Use Margins: Set the margins for the document. By default, margins are not enabled. The user can change the margin settings by changing the values in the respective fields. Set by default, these values depend on the page size selected. Xerox WorkCentre 3315DN/3325DN/3325DNI User Guide... - Page 123 Unit: Change the units to points, inches, or centimeters. Printer-Specific Settings Tab Select various options in the JCL and General frames to customize various settings. These options are specific to the printer and depend on the PPD file. Xerox WorkCentre 3315DN/3325DN/3325DNI User Guide...
- Page 124 Printing using Unix Xerox WorkCentre 3315DN/3325DN/3325DNI User Guide...
-
Page 125: Usb Port
This chapter includes: • Inserting the USB Memory Device on page 126 • Scanning to USB Memory Device on page 127 • Printing from USB Memory Device on page 128 • Managing USB Memory on page 129 Xerox WorkCentre 3315DN/3325DN/3325DNI User Guide... -
Page 126: Inserting The Usb Memory Device
• If your USB memory device has certain features, such as security settings and password settings, your machine may not automatically detect it. For details about these features, see your USB memory device User Guide. Xerox WorkCentre 3315DN/3325DN/3325DNI User Guide... -
Page 127: Scanning To Usb Memory Device
To scan another page, press the left/right arrows to highlight Yes and press OK. Load an original and press Start. Otherwise, press the left/right arrows to highlight No and press OK. After scanning is complete, you can remove the USB memory device from the machine. Xerox WorkCentre 3315DN/3325DN/3325DNI User Guide... -
Page 128: Printing From Usb Memory Device
After printing the file, the display asks if you want to print another job. To print another document, press the left/right arrows to highlight Yes and press OK. Otherwise, press the left/right arrows to highlight No and press OK. Press Stop to return to Ready mode. Xerox WorkCentre 3315DN/3325DN/3325DNI User Guide... -
Page 129: Managing Usb Memory
Insert a USB memory device into the USB memory port on your machine. Press the up/down arrows to highlight Available Space and press OK. The available memory space appears on the display. Press Stop to return to Ready mode. Xerox WorkCentre 3315DN/3325DN/3325DNI User Guide... - Page 130 Managing USB Memory Xerox WorkCentre 3315DN/3325DN/3325DNI User Guide...
-
Page 131: Centreware Internet Services
Using CentreWare Internet Services on page 132 • Status on page 133 • Jobs on page 134 • Print on page 137 • Address Book on page 138 • Properties on page 141 • Support on page 142 Xerox WorkCentre 3315DN/3325DN/3325DNI User Guide... -
Page 132: Using Centreware Internet Services
If a different language is required, select the language drop-down menu and change to the language required. Use the Index option to navigate to specific topics. Note: Some options may be unavailable depending on your machine configuration. Xerox WorkCentre 3315DN/3325DN/3325DNI User Guide... -
Page 133: Status
The Print Information page allows you to print the configuration report, address book, completed jobs list and other documents about the machine usage. Xerox WorkCentre 3315DN/3325DN/3325DNI User Guide... -
Page 134: Jobs
Job Management folders. Note: The Jobs tab is not present on the WorkCentre 3315DN unless the optional memory is installed and the RAM Disk enabled. When the Jobs tab is enabled the only options available are Active Jobs, Stored Print and Secure Print. -
Page 135: Job Management
Secure Print allows you to access and print your secure jobs which have been sent to the device. To send a Secure Print job: Open a document to print and select the 3325 printer driver. Xerox WorkCentre 3315DN/3325DN/3325DNI User Guide... - Page 136 At the Internet Services Jobs screen select Secure Received Fax. Select your job and click Delete. A confirmation message is displayed, select Yes to delete the Secure Received Fax. The secure fax job is deleted. Xerox WorkCentre 3315DN/3325DN/3325DNI User Guide...
-
Page 137: Print
Select the required orientation of your print from the Orientation menu. Select the required option for 2-Sided printing. In the Print-Ready File area, select the Browse button. The File Download page displays. Select the print-ready document and select OK. Select Apply to print the document. Xerox WorkCentre 3315DN/3325DN/3325DNI User Guide... -
Page 138: Address Book
In the Address Book area, click the Individual link and check the checkbox for the address you want to delete. Select the Delete button. Select OK when the ‘Do you really want to delete selected items?’ message displays. Xerox WorkCentre 3315DN/3325DN/3325DNI User Guide... - Page 139 In the E-mail Group Address Book area, check the checkbox for the group you want to edit. Select the Edit Group button. Add or remove individuals as required using the arrow button. Select Apply. The group is updated and the E-mail Groups Address Book page is displayed. Xerox WorkCentre 3315DN/3325DN/3325DNI User Guide...
- Page 140 In the Fax Groups Address Book area, check the checkbox for the group you want to delete. Select the Delete Group button. Select the OK button for the ‘Do you really want to delete selected items?’ message. Xerox WorkCentre 3315DN/3325DN/3325DNI User Guide...
-
Page 141: Properties
Administrator. For information about all the Properties options, refer to the System Administrator Guide. Note: The Properties tab only appears when the administrator is logged in or when the CWIS Access Control has been disabled. Xerox WorkCentre 3315DN/3325DN/3325DNI User Guide... -
Page 142: Support
System Administrator. Links are also provided to the Xerox website for downloading the Printer Drivers and User Guides, ordering supplies, accessing Technical Support or registering your machine. -
Page 143: Paper And Media
This chapter includes: • Loading Paper on page 144 • Setting Paper Size and Type on page 148 • Media Specifications on page 150 Xerox WorkCentre 3315DN/3325DN/3325DNI User Guide... -
Page 144: Loading Paper
For more media specifications, refer to Media Specifications on page 150. Pull out the paper tray and load paper into the tray, print side down. Do not fill above the Maximum Fill line indicated by the symbol Xerox WorkCentre 3315DN/3325DN/3325DNI User Guide... -
Page 145: Using The Bypass Tray
Acceptable print media is plain paper from 3.0 x 5.0 inches to 8.5 x 14 inches Legal (76 mm x 127 mm to 216 mm x 356 mm) and weighing between 16 lb and 58 lb (60 g/m² and 220 g/m²). For more media specifications, refer to Media Specifications on page 150. Xerox WorkCentre 3315DN/3325DN/3325DNI User Guide... -
Page 146: Loading The Bypass Tray
A maximum of 5 envelopes can be loaded. Straighten the edges on a level surface. Note: For more information on media specifications, refer to Media Specifications on page 150. Xerox WorkCentre 3315DN/3325DN/3325DNI User Guide... - Page 147 Setting Paper Size and Type on page 148. Note: The settings made from the printer driver on your computer override the settings on the control panel. After printing, close the bypass tray. Xerox WorkCentre 3315DN/3325DN/3325DNI User Guide...
-
Page 148: Setting Paper Size And Type
Press the up/down arrows to select the paper type you want. Press OK to save the selection. Press Stop to return to Ready mode. Setting the Paper Source Press Machine Status on the control panel. Xerox WorkCentre 3315DN/3325DN/3325DNI User Guide... - Page 149 Press the up/down arrows to highlight Copy Tray or Fax Tray and press OK. Press the up/down arrows to select the paper tray you want. Press OK to save the selection. Press Stop to return to Ready mode. Xerox WorkCentre 3315DN/3325DN/3325DNI User Guide...
-
Page 150: Media Specifications
Do not feed a sheet of labels through the machine more than once. The adhesive backing is designed for one pass only through the machine. • Do not use labels that are separating from the backing sheet or are wrinkled, bubbled, or otherwise damaged. Xerox WorkCentre 3315DN/3325DN/3325DNI User Guide... -
Page 151: Media Types
28 to 32 lb (105 to 120 Archival g/m² 28 to 32 lb (105 to 120 ) if you need to keep the print-out for a long period time, such as archives, select this option Xerox WorkCentre 3315DN/3325DN/3325DNI User Guide... - Page 152 32 to 43 lb (121 to 163 ) card stock Envelopes g/m² 20 to 24 lb (75 to 90 For more information on supported paper sizes and weights, refer to Media Specifications on page 225. Xerox WorkCentre 3315DN/3325DN/3325DNI User Guide...
-
Page 153: Machine Status And Setups
Feature Defaults on page 159 • Print Setup on page 165 • Fax Setup on page 166 • System Setup on page 170 • Network Settings on page 178 • Local Drive on page 180 Xerox WorkCentre 3315DN/3325DN/3325DNI User Guide... -
Page 154: Machine Status Menu
Press the OK button on the control panel. Once the password is verified the selected option menu displays. Customize the options required using the instructions on the following pages. Settings can also be customized using CentreWare Internet Services. Refer to the System Administrator Guide for more information. Xerox WorkCentre 3315DN/3325DN/3325DNI User Guide... -
Page 155: Machine Information
Press the up/down arrows to highlight the setting required or enter the correct information using the keypad. Press OK to save the selection. Continue customizing the Machine Information defaults as required, then press Stop to return to Ready mode. Xerox WorkCentre 3315DN/3325DN/3325DNI User Guide... -
Page 156: Toner Level
Press the up/down arrows to highlight Toner Level and press OK. If necessary, enter the Administrator’s Password using the keypad. Refer to Accessing the Setup Options on page 154 for instructions. A graphical depiction of the level of toner remaining is indicated. Press Stop to return to Ready mode. Xerox WorkCentre 3315DN/3325DN/3325DNI User Guide... -
Page 157: Information Pages
User Auth. This list shows users who are authorized to use the e-mail function. PCL Font Prints the PCL font list PS Font Prints the PS font list. EPSON Font Prints the EPSON font list. Xerox WorkCentre 3315DN/3325DN/3325DNI User Guide... - Page 158 Press the up/down arrows to highlight the information page required and press OK. Press the up/down arrows to highlight the Print? Yes setting and press OK. The selected information page will be printed. Continue printing Information Pages as required, then press Stop to return to Ready mode. Xerox WorkCentre 3315DN/3325DN/3325DNI User Guide...
-
Page 159: Feature Defaults
1-999 Collation If On is selected the copy output will be collated, for • example 1,2,3, 1,2,3, 1,2,3. If Off is selected the job will • Off * be uncollated, for example 1,1,1, 2,2,2 3,3,3. Xerox WorkCentre 3315DN/3325DN/3325DNI User Guide... - Page 160 (3325DN/DNI only) Background Use to automatically reduce or eliminate the dark • Suppression background resulting from scanning colored paper or • Auto newspaper originals. • Enhance Levels 1 to • Erase Levels 1 to 4 Xerox WorkCentre 3315DN/3325DN/3325DNI User Guide...
- Page 161 Administrator’s Password using the keypad. Refer to Accessing the Setup Options on page 154 for instructions. Press the up/down arrows to highlight Scan Defaults and press OK. Press the up/down arrows to highlight USB, FTP or SMB and press OK. Xerox WorkCentre 3315DN/3325DN/3325DNI User Guide...
- Page 162 Press the up/down arrows to highlight the option required and press OK. Press the up/down arrows to highlight the setting required and press OK to save the selection. Continue customizing the Scan Defaults as required, then press Stop to return to Ready mode. Xerox WorkCentre 3315DN/3325DN/3325DNI User Guide...
- Page 163 Press the up/down arrows to highlight the option required and press OK. Press the up/down arrows to highlight the setting required and press OK to save the selection. Continue customizing the E-mail Defaults as required, then press Stop to return to Ready mode. Xerox WorkCentre 3315DN/3325DN/3325DNI User Guide...
-
Page 164: Fax Defaults
Press the up/down arrows to highlight the option required and press OK. Press the up/down arrows to highlight the setting required and press OK to save the selection. Continue customizing the Fax Defaults as required, then press Stop to return to Ready mode. Xerox WorkCentre 3315DN/3325DN/3325DNI User Guide... -
Page 165: Print Setup
Press the up/down arrows to highlight the option required and press OK. Press the up/down arrows to highlight the setting required and press OK to save the selection. Continue customizing the Print Defaults as required, then press Stop to return to Ready mode. Xerox WorkCentre 3315DN/3325DN/3325DNI User Guide... -
Page 166: Fax Setup
ECM-equipped fax machine. Sending a fax using ECM may take more time. Send Report Enables or disables printing of a confirmation report • On Error * showing whether the fax was successful or not. • • Xerox WorkCentre 3315DN/3325DN/3325DNI User Guide... - Page 167 Stamp RCV Name This option allows the machine • to automatically print the page • Off * number, and the date and time of reception at the bottom of each page of a received fax. Xerox WorkCentre 3315DN/3325DN/3325DNI User Guide...
-
Page 168: Setting Up Drpd Mode
Administrator’s Password using the keypad. Refer to Accessing the Setup Options on page 154 for instructions. Press the up/down arrows to highlight Receiving and press OK. Press the up/down arrows to highlight Receive Mode and press OK. Xerox WorkCentre 3315DN/3325DN/3325DNI User Guide... -
Page 169: Auto Report
Press the up/down arrows to highlight Auto Report and press OK. Press the up/down arrows to highlight On to automatically print a report, or Off to switch off the feature. Press OK. Press Stop to return to Ready mode. Xerox WorkCentre 3315DN/3325DN/3325DNI User Guide... -
Page 170: System Setup
You can switch this • Scan default mode between Fax mode • E-mail and Copy mode. • Metric Defaults Use to set the machine to • inches * display measurements in • millimeters or inches. Xerox WorkCentre 3315DN/3325DN/3325DNI User Guide... - Page 171 Determines whether or not the • On * machine continues printing • when it detects the paper does not match the paper settings. Line Termination Sets the default line termination. • LF * • LF+CR Xerox WorkCentre 3315DN/3325DN/3325DNI User Guide...
- Page 172 Press the up/down arrows to highlight the option required and press OK. Press the up/down arrows to highlight the setting required or enter the correct information using the keypad. Press OK to save the selection. Xerox WorkCentre 3315DN/3325DN/3325DNI User Guide...
-
Page 173: Paper Setup
• Oficio • US Folio • • ISO B5 • JIS B5 • Executive • • • Monarch Env • DL Env • C5 Env • C6 Env • No.10 Env • Postcard • Custom Xerox WorkCentre 3315DN/3325DN/3325DNI User Guide... - Page 174 Press the up/down arrows to highlight System Setup and press OK. If necessary, enter the Administrator’s Password using the keypad. Refer to Accessing the Setup Options on page 154 for instructions. Press the up/down arrows to highlight Sound/Volume and press OK. Xerox WorkCentre 3315DN/3325DN/3325DNI User Guide...
- Page 175 125 Pages • ADF Scan • 125 Pages • Platen Scan • 125 Pages Toner Low Alert Use this option to enable an alert to • On * display when the toner is low. • Xerox WorkCentre 3315DN/3325DN/3325DNI User Guide...
-
Page 176: Clear Settings
• Disable * (3315DN Model only) Press the up/down arrows to highlight the option required and press OK. Press the up/down arrows to highlight the setting required and press OK to save the selection. Continue customizing the Maintenance options as required, then press Stop to return to Ready mode. -
Page 177: Image Overwrite
Press the up/down arrows to highlight Image Overwrite and press OK. Press the up/down arrows to highlight Enable or Disable and press OK. If Enable is selected, press OK to confirm Overwrite Now? Press Stop to return to Ready mode. Xerox WorkCentre 3315DN/3325DN/3325DNI User Guide... -
Page 178: Network Settings
• On * embedded web page. • Press the up/down arrows to highlight the option required and press OK. Press the up/down arrows to highlight the setting required and press OK to save the selection. Xerox WorkCentre 3315DN/3325DN/3325DNI User Guide... - Page 179 Network Settings Continue customizing the Network Setting options as required, then press Stop to return to Ready mode. Xerox WorkCentre 3315DN/3325DN/3325DNI User Guide...
-
Page 180: Local Drive
Press the up/down arrows to highlight the option required and press OK. Press the up/down arrows to highlight the setting required and press OK to save the selection. Continue customizing the Local Drive options as required, then press Stop to return to Ready mode. Xerox WorkCentre 3315DN/3325DN/3325DNI User Guide... -
Page 181: General Care And Troubleshooting
General Care and Troubleshooting This chapter includes: • General Care on page 182 • Troubleshooting on page 188 • Further Assistance on page 221 Xerox WorkCentre 3315DN/3325DN/3325DNI User Guide... -
Page 182: General Care
There is only one customer replaceable consumable in the machine, the print cartridge.To place an order for Xerox consumables, please contact your local Xerox Representative giving your Company Name, product number and the machine serial number. Supplies can also be ordered from www.xerox.com, refer to... -
Page 183: Replacing The Print Cartridge
Pull the print cartridge out. Remove the new print cartridge from the packaging. Remove the protective sheet from the cartridge and the plastic handle that is attached to the protective sheet. Carefully pull the tape out of the cartridge. Xerox WorkCentre 3315DN/3325DN/3325DNI User Guide... -
Page 184: Cleaning The Machine
Do not use pressurized air-spray cleaning aids on or in this equipment. Some pressurized air-spray containers contain explosive mixtures and are not suitable for use in electrical applications. Use of such cleaners can result in a risk of explosion and fire. Xerox WorkCentre 3315DN/3325DN/3325DNI User Guide... - Page 185 Wipe away any residue with a clean cloth or paper towel. Use a lint-free cloth, lightly dampened with water, Xerox cleaning fluid or Xerox film remover to clean the under side of the automatic document feeder and the...
-
Page 186: Internal Areas
Do not use solvents such as benzene or thinner to clean. Printing quality problems can occur and damage can be caused to the machine. Xerox WorkCentre 3315DN/3325DN/3325DNI User Guide... -
Page 187: Moving The Machine
When moving the machine, do not tilt or turn it upside down as the inside of the machine may become contaminated with toner, which can cause damage to the machine or adversely affect print quality. • When moving the machine, make sure at least two people are holding the machine securely. Xerox WorkCentre 3315DN/3325DN/3325DNI User Guide... -
Page 188: Troubleshooting
• The machine has stopped due to a fault. Check the display message to resolve. • The print cartridge has reached its estimated end of life. Replace the print cartridge - see Replacing the Print Cartridge on page 183 Xerox WorkCentre 3315DN/3325DN/3325DNI User Guide... -
Page 189: Redistributing Toner
In some cases, white streaks or light printing will still occur even after you have redistributed the toner. Press the release latch on the left side of the machine. Open the front door. Pull the print cartridge out. Xerox WorkCentre 3315DN/3325DN/3325DNI User Guide... - Page 190 To avoid tearing the document, remove the jammed document slowly and gently. Note: To prevent document jams, use the document glass for thick, thin, or mixed paper-type originals. Remove any remaining pages from the automatic document feeder. Xerox WorkCentre 3315DN/3325DN/3325DNI User Guide...
- Page 191 If necessary, use two hands to raise the duplex cover and pull any jammed originals gently out of the document feeder. If you see no paper in this area, go to the next step. Xerox WorkCentre 3315DN/3325DN/3325DNI User Guide...
-
Page 192: Paper Jams
Close the automatic document feeder. Reload the removed pages back into the automatic document feeder and press the Start button to resume the job. Paper Jams Tips for Avoiding Paper Curls Open the rear door. Xerox WorkCentre 3315DN/3325DN/3325DNI User Guide... -
Page 193: Tips For Avoiding Paper Jams
When a paper jam occurs, a warning message appears on the display screen. CAUTION: To avoid tearing the paper, pull the jammed paper out slowly and gently. Follow the instructions in the following sections to clear the jam. Xerox WorkCentre 3315DN/3325DN/3325DNI User Guide... -
Page 194: Optional Paper Tray
If the paper has been removed, insert tray 2 back into the machine until it snaps into place. Printing automatically resumes. Pull tray 1 half-way out. Xerox WorkCentre 3315DN/3325DN/3325DNI User Guide... - Page 195 If the paper is not feeding properly, pull the paper out of the machine. Press the release latch on the left side of the machine and open then close the front door. Re-load the bypass tray to resume printing. Xerox WorkCentre 3315DN/3325DN/3325DNI User Guide...
-
Page 196: Inside The Machine
Press the release latch on the left side of the machine and open then close the front door. The jammed paper is automatically ejected from the machine. If no paper is automatically ejected and you do not see the jammed paper, go to the next step. Xerox WorkCentre 3315DN/3325DN/3325DNI User Guide... -
Page 197: Duplex Unit Area
The duplex unit is located at the rear of the machine. .Pull the duplex unit out of the machine. Remove the jammed paper from the duplex unit If the paper does not come out with the duplex unit, go to the next step. Xerox WorkCentre 3315DN/3325DN/3325DNI User Guide... -
Page 198: Error Messages
Close the rear door. Printing automatically resumes. Error Messages Use the following information to solve problems on the machine. Some messages may not appear on the display depending on options or models. Xerox WorkCentre 3315DN/3325DN/3325DNI User Guide... - Page 199 • Check the IP address or obtain a new IP address. This IP address conflicts with that of other system Jam bottom of duplex Paper has jammed during duplex • Clear the jam. (See Paper Jams printing. on page 192.) Xerox WorkCentre 3315DN/3325DN/3325DNI User Guide...
- Page 200 There is a problem with the network administrator. network. Network Problem The machine is not connected • Connect the machine to the with a network cable. network with a network cable. Network cable is not connected. Check it Xerox WorkCentre 3315DN/3325DN/3325DNI User Guide...
- Page 201 • This message appears when end of its lifespan. the pickup roller is worn. [yyy] pickup roller is worn. Replace the pickup roller with a Replace with new one new one or call for service. Xerox WorkCentre 3315DN/3325DN/3325DNI User Guide...
- Page 202 • Install the print cartridge. Print cartridge is not Installed. Install it Too many Faxes There are too many received faxes • Print or remove received fax. in the memory. Too may faxes are received. Print or remove job. Xerox WorkCentre 3315DN/3325DN/3325DNI User Guide...
-
Page 203: Common Problems
• The paper is too thick. Use only paper that meets the specifications required by the machine. (See Media Specifications on page 225.) • If you are printing on special media, use the Bypass Tray. Xerox WorkCentre 3315DN/3325DN/3325DNI User Guide... - Page 204 The originals keep jamming in • If an original does not feed into the machine, the automatic document the automatic document feeder feeder rubber pad may need to be replaced. Contact a service representative. Xerox WorkCentre 3315DN/3325DN/3325DNI User Guide...
-
Page 205: Printing Problems
Contact a service representative. The document size is so big • Get more hard disk space and print that the hard disk space of the the document again. computer is insufficient to access the print job. Xerox WorkCentre 3315DN/3325DN/3325DNI User Guide... - Page 206 The software application is • Try printing a job from another malfunctioning. application. The operating system is • Exit Windows and reboot the malfunctioning. computer. Turn the machine off and back on again. Xerox WorkCentre 3315DN/3325DN/3325DNI User Guide...
- Page 207 • Set the correct paper size in the Custom Paper Size Settings in the special- sized paper, such as setting do not match. billing paper. Paper tab in the Printing Preferences. (See Paper Options page 105.) Xerox WorkCentre 3315DN/3325DN/3325DNI User Guide...
-
Page 208: Common Postscript Problems
• Make sure that the resolution Macintosh with Acrobat Reader printer driver may not be matched setting in your printer driver 6.0 or higher, colors print with the one in Acrobat Reader. matches the one in Acrobat incorrectly. Reader. Xerox WorkCentre 3315DN/3325DN/3325DNI User Guide... -
Page 209: Common Windows Problems
If the message appears in standby mode or after printing has been completed, check the connection and/or whether an error has occurred. Note: Refer to the Microsoft Windows User Guide supplied with your computer for further information on Windows error messages. Xerox WorkCentre 3315DN/3325DN/3325DNI User Guide... -
Page 210: Common Linux Problems
CD or the Gimp home page. For detailed information, refer to the ‘Help for Linux’ distribution CD or the Gimp Front-end application. • If you wish to use another kind of scan application, refer to the application’s Help files. Xerox WorkCentre 3315DN/3325DN/3325DNI User Guide... - Page 211 • Ensure a document is loaded into the machine, ensure your machine is connected to the computer. Note: Refer to the Linux User Guide supplied with your computer for further information on Linux error messages. Xerox WorkCentre 3315DN/3325DN/3325DNI User Guide...
-
Page 212: Common Macintosh Problems
• Make sure that the resolution setting in your machine driver matches Macintosh with Acrobat the one in Acrobat Reader. Reader 6.0 or higher, colors print incorrectly. Note: Refer to the Macintosh User Guide supplied with your computer for further information on Macintosh error messages. Xerox WorkCentre 3315DN/3325DN/3325DNI User Guide... -
Page 213: Print Quality Problems
• The paper is too rough and dirt from the paper falls to the inner areas of the machine on to the transfer roller. Clean the inside of your machine. (See Internal Areas on page 186.). • The paper path may need cleaning. (See Internal Areas on page 186.) Xerox WorkCentre 3315DN/3325DN/3325DNI User Guide... - Page 214 • If background scatter covers the entire surface area of a printed page, adjust the print resolution through your software application or using the printer driver options. (See Print Procedure on page 102.) Xerox WorkCentre 3315DN/3325DN/3325DNI User Guide...
- Page 215 • If the job is simplex, use the rear door as the output location. For instructions, refer Using the Rear Door on page 44. Back of printouts Check for leaking toner. Clean the inside of the machine. (See Internal Areas are dirty page 186.) Xerox WorkCentre 3315DN/3325DN/3325DNI User Guide...
- Page 216 Replacing the Print Cartridge on page 183.) A a B b C • If the problem persists, the machine may require repair. Contact a service A a B b C representative. A a B b C Xerox WorkCentre 3315DN/3325DN/3325DNI User Guide...
-
Page 217: Copying Problems
• Replace the paper in the tray with paper from a new package. copy easily. • In high humidity areas, do not leave paper in the machine for extended periods of time. • Check that the paper is within specification. (See Media Specifications page 225.) Xerox WorkCentre 3315DN/3325DN/3325DNI User Guide... -
Page 218: Scanning Problems
• Make sure that the machine cable is not defective. Switch the cable with a known good cable. If necessary, replace the cable. • Check that the scanner is configured correctly. Check scan setting in the Xerox Scan Assistant or the application you want to use to make certain that the scanner job is being sent to the correct port (for example, USB001). -
Page 219: Fax Problems
• Check the fax machine you are sending to, to see if it can receive your fax. • Try the job again later, the line may have a fault or be busy. Xerox WorkCentre 3315DN/3325DN/3325DNI User Guide... - Page 220 • You may have chosen the wrong paper settings in the user option setting. For at the bottom of details about paper settings refer to Setting Paper Size and Type on page 148. each page or on other pages, with a small strip of text at the top. Xerox WorkCentre 3315DN/3325DN/3325DNI User Guide...
-
Page 221: Further Assistance
Error Messages on page 198. If the difficulty persists, contact the Xerox Support Center. The Xerox Support Center will want to know the nature of the problem, the machine serial number, the fault code (if any) plus the name and location of your company. - Page 222 Further Assistance Xerox WorkCentre 3315DN/3325DN/3325DNI User Guide...
-
Page 223: Specifications
Specifications This chapter includes: • Machine Specifications on page 224 • Electrical Specifications on page 227 • Feature Specifications on page 228 Xerox WorkCentre 3315DN/3325DN/3325DNI User Guide... -
Page 224: Machine Specifications
Cold Start: Ready to copy in 35 seconds Cold Start: Ready to copy in 35 secs From Power Save: Ready to copy as fast From Power Save: Ready to copy as fast as 13 seconds as 13 seconds Xerox WorkCentre 3315DN/3325DN/3325DNI User Guide... - Page 225 Paper Range Length min 5.0 - max 14 inches (127 - 356 mm) Width min 3.0 - max 8.5 inches (76.2 - 216 mm) Note: The paper stack height must not exceed 0.4 inches (10 mm). Xerox WorkCentre 3315DN/3325DN/3325DNI User Guide...
-
Page 226: Output Tray
Automatic Document Feeder 1-1: 35 ppm 1-1: 31 ppm Speed (A4) 1-2: 17 ppm 1-2: 15 ppm 2-2 collated: 13 ppm Output Modules Output Tray Feature Specification Capacity 150 sheets of 20 lb (80 g/m²) bond paper Xerox WorkCentre 3315DN/3325DN/3325DNI User Guide... -
Page 227: Electrical Specifications
Electrical Specifications Feature Specification Frequency 50/60 Hz Electrical Voltage 110 - 127 VAC & 220 - 240 VAC Average Power Consumption Power Save mode: Less than 8 Watts Stand By mode: Less than 50 Watts Xerox WorkCentre 3315DN/3325DN/3325DNI User Guide... -
Page 228: Feature Specifications
Communication Standard Super G3, IYU G3 Maximum Resolution Capability 300 x 300 dpi Standard Fax Memory WorkCentre 3325DN / 3325DNI: 50MB WorkCentre 3315DN: 5 MB Effective Scanning Width 8.2 inches (208 mm) Maximum Print Width 8.5 inches (216 mm) Connection Approvals... -
Page 229: Scan Feature
8.2 inches (208 mm) Maximum Resolution 600 x 600 dpi TWAIN / ISIS Compatible TWAIN / WIA Image Compression MH, MMR, LZW, JPEG Scan Mode Mono Text, Mono Photo and True Color Grayscale 256 levels Xerox WorkCentre 3315DN/3325DN/3325DNI User Guide... - Page 230 Feature Specifications Xerox WorkCentre 3315DN/3325DN/3325DNI User Guide...
-
Page 231: Safety
245 • Material Safety Data on page 248 • Product Recycling and Disposal on page 249 • Energy Program Compliance on page 251 • Environment, Health and Safety (EH&S) Contact Information on page 252 Xerox WorkCentre 3315DN/3325DN/3325DNI User Guide... -
Page 232: Notices And Safety
Please read the following instructions carefully before operating the machine. Refer to them as needed to ensure the continued safe operation of your machine. Your Xerox machine and supplies have been designed and tested to meet strict safety requirements. These include safety agency evaluation and certification, and compliance with electromagnetic regulations and established environmental standards. -
Page 233: Safety Labels And Symbols
This WARNING alerts users to areas of the machine where there are heated surfaces, which should not be touched. This WARNING alerts users not to perform unauthorized actions that may result in hazardous light exposure. Xerox WorkCentre 3315DN/3325DN/3325DNI User Guide... -
Page 234: Operational Safety Information
Operational Safety Information Operational Safety Information Your Xerox machine and supplies have been designed and tested to meet strict safety requirements. These include safety agency examination, approval, and compliance with established environmental standards. To ensure the continued safe operation of your Xerox machine, follow these safety... -
Page 235: Laser Safety Information
• Always exercise care when moving or relocating the device. Please contact your local Xerox dealer to arrange relocation of the device to a location outside of your building. •... -
Page 236: Emergency Power Off
If you need additional information about ozone, please request the Xerox publication Ozone by calling 1-800-828-6571 in the United States and Canada. In other markets please contact your authorized local dealer or Service Provider. -
Page 237: Consumables Information
This device is certified by the following Agency using the Safety standards listed. Agency Standard Underwriters Laboratories Inc. UL60950-1 2nd Edition (USA/Canada) IEC/EN60950-1 2nd Edition This device has been manufactured under a registered ISO9001 Quality system. Xerox WorkCentre 3315DN/3325DN/3325DNI User Guide... -
Page 238: Basic Regulations
Consult the dealer or an experienced radio/television technician for help. Any changes or modifications not expressly approved by Xerox could void the user's authority to operate the device. To ensure compliance with Part 15 of the FCC rules, use shielded interface cables. -
Page 239: European Union
To ensure compliance with European Union regulations, use shielded interface cables. A signed copy of the Declaration of Conformity for this device can be obtained from Xerox. European Union Lot 4 Imaging Equipment Agreement Environmental... - Page 240 EN1 2281 or a similar quality standard. Lighter weight paper (60 g/m ), which contains less raw material and thus save resources per print, may be used in certain applications. We encourage you to check if this is suitable for your printing needs. Xerox WorkCentre 3315DN/3325DN/3325DNI User Guide...
-
Page 241: Turkey Rohs Regulation
Mode, please consider that this device may then only switch to a lower energy level after a longer period of time or not at all. To learn more about Xerox participation in sustainability initiatives, please visit our website at: www.xerox.com/about-xerox/environment/enus.html... -
Page 242: Copy Regulations
“fair use” or library reproduction rights provisions of the copyright law. Further information of these provisions may be obtained from the Copyright Office, Library of Congress, Washington, D.C. 20559. Ask for Circular R21.5. Certificate of Citizenship or Naturalization. Foreign Naturalization Certificates may be photographed. Xerox WorkCentre 3315DN/3325DN/3325DNI User Guide... - Page 243 Canada. Documents, registers or records kept by public officials charged with the duty of making or issuing certified copies thereof, where the copy falsely purports to be a certified copy thereof. Xerox WorkCentre 3315DN/3325DN/3325DNI User Guide...
-
Page 244: Other Countries
Copyright material or trademarks without the consent of the owner • Postage stamps and other negotiable instruments This list is not inclusive and no liability is assumed for either its completeness or accuracy. In case of doubt, contact your legal counsel. Xerox WorkCentre 3315DN/3325DN/3325DNI User Guide... -
Page 245: Fax Regulations
RENs, contact the local Telephone Company. The REN for this device is part of the device identifier that has the format US:AAAEQ##TXXXX. The digits represented by ## are the REN without a decimal point (e.g., 03 is a REN of 0.3). Xerox WorkCentre 3315DN/3325DN/3325DNI User Guide... - Page 246 Fax Regulations If this Xerox device causes harm to the telephone network, the Telephone Company will notify you in advance that temporary discontinuance of service may be required. But if advance notice is not practical, the Telephone Company will notify the customer as soon as possible. Also, you will be advised of your right to file a complaint with the FCC if you believe it is necessary.
- Page 247 DTMF signaling. DTMF signaling provides reliable and faster call setup. Modification of this device, connection to external control software or to external control apparatus not authorized by Xerox, will invalidate its certification. Xerox WorkCentre 3315DN/3325DN/3325DNI...
-
Page 248: Material Safety Data
Material Safety Data Material Safety Data For Material Safety Data information regarding your printer, go to: North America: www.xerox.com/msds European Union: www.xerox.com/environment_europe For the Customer Support Center phone numbers, go to www.xerox.com/office/worldcontacts Xerox WorkCentre 3315DN/3325DN/3325DNI User Guide... -
Page 249: Product Recycling And Disposal
(1-800-ASK-XEROX) to determine whether this Xerox device is part of the program. For more information about Xerox environmental programs, visit www.xerox.com/environment.html. If you are managing the disposal of your Xerox device, please note that the device may contain lead, mercury, Perchlorate, and other materials whose disposal may be regulated due to environmental considerations. - Page 250 Note for the Battery Symbol This wheeled bin symbol may be used in combination with a chemical symbol. This establishes compliance with the requirements set out by the Directive. Xerox WorkCentre 3315DN/3325DN/3325DNI User Guide...
-
Page 251: Energy Program Compliance
Xerox ENERGY STAR equipment is preset at the factory, to switch to Power Save Mode after a preset time following the last copy/print out. The default time set for the Xerox WorkCentre 3315DN/3325DN/3325DNI is 1 minute. -
Page 252: Environment, Health And Safety (Eh&S) Contact Information
Environment, Health and Safety (EH&S) Contact Information Environment, Health and Safety (EH&S) Contact Information For more information on Environment, Health, and Safety in relation to this Xerox device and supplies, please contact the following customer help lines: USA: 1-800 828-6571... - Page 253 Clear Settings, 176 Jams, 190 Clock Mode, 170 Specifications, 226 Clone Copy, 37, 42 Common Problems Linux, 210 Back button, 13 Macintosh, 212 Background Suppression, 37 PostScript, 208 Basic Regulations, 238 Windows, 209 Basic Tab, 103 Configuration Xerox WorkCentre 3315DN/3325DN/3325DNI User Guide...
- Page 254 Deactivate Secure Receive, 85 File Format, 69 Deactivating Fax Forward, 84 Lighten/Darken, 69 Default Paper Size, 171 Original Size, 68 Defaults Original Type, 68 Clear Settings, 176 Output Color, 68 Copy, 27, 159 Printing the Address Book, 70 Xerox WorkCentre 3315DN/3325DN/3325DNI User Guide...
- Page 255 United States, 245 Add Page, 79 Fax Sending Setups, 166 Address Book, 76, 86 Fax Setup, 27 Answering Machine, 91 Fax Setups Cancel a Job in Memory, 79 Auto Report, 169 Confirmation, 77 Fax Specifications, 228 Xerox WorkCentre 3315DN/3325DN/3325DNI User Guide...
- Page 256 Information Pages, 25, 157 Loading Documents, 22, 32, 47, 64, 74 Inserting a Pause, 14 Loading Paper, 18, 143, 144 Inserting the USB Memory Device, 126 Bypass Tray, 145 Inside the Machine, 196 Envelopes, 146 Xerox WorkCentre 3315DN/3325DN/3325DNI User Guide...
- Page 257 Original Type, 37, 53, 68 Graphics, 117 Originals, 22, 32, 47, 64, 74 Paper, 118 Output Area, 196 Resolution, 117 Output Color, 53, 68 Macintosh Problems, 212 Output Module Specifications, 226 Maintenance, 175, 182, 236 Xerox WorkCentre 3315DN/3325DN/3325DNI User Guide...
- Page 258 Print Specifications, 228 Power Receptacle, 9 Print, CentreWare Internet Services, 137 Power Save, 171 Printer Drivers, 16 Power Saver button, 13 Printer Settings Power Switch, 9 Macintosh, 117 Preparing Paper for Loading, 144 Printer Software, 94 Xerox WorkCentre 3315DN/3325DN/3325DNI User Guide...
- Page 259 DRPD Mode, 91 Scan Destination Manual Receive, 91 Scan to Local PC, 48 Receiving Faxes in Memory, 92 Scan to Network PC, 49 Receiving Secure Faxes, 85 Scan to SMB, 49 Redialing, 76 Scan to USB, 48 Xerox WorkCentre 3315DN/3325DN/3325DNI User Guide...
- Page 260 Telephone Line Socket, 9 Small Original, 38 Tips for Avoiding Paper Curls, 192 Smart Key Addresses, 71 Tips for Avoiding Paper Jams, 193 SMB, 45 Toner Level, 25, 184 Software, 16 Toner Replacement, 29, 182 Solving Problems, 188 Xerox WorkCentre 3315DN/3325DN/3325DNI User Guide...
- Page 261 Viewing the USB Memory Status, 129 Watermark, 109 WEEE Directive 2002/96/EC, 249 WIA Driver, 57 Windows Printing, 94 Windows Problems, 209 Wireless Setting Program, 114 Xerox Easy Printer Manager (EPM), 113 Xerox Support Center, 30, 221 Xerox Tab, 112 Xerox WorkCentre 3315DN/3325DN/3325DNI User Guide...
- Page 262 Xerox WorkCentre 3315DN/3325DN/3325DNI User Guide...
Need help?
Do you have a question about the WorkCentre 3315DN and is the answer not in the manual?
Questions and answers