Halcro SSP100 Owner's Manual
Surround sound processor
Hide thumbs
Also See for SSP100:
- Quick setup manual (12 pages) ,
- Specification (3 pages) ,
- Wiring diagram (2 pages)

Subscribe to Our Youtube Channel
Related Manuals for Halcro SSP100


Summary of Contents for Halcro SSP100
- Page 1 Owner’s Manual SSP100 Surround Sound Processor SSP80 Surround Sound Processor www.halcro.com Free Datasheet http://www.datasheet4u.net/...
-
Page 2: Table Of Contents
Viewing the Menus on the OSD ....41 ................ 8 SSP80 Features ........9 SSP Setup and Operation ..... 43 Starting up........... 43 SSP100 Features ........10 On screen display (OSD)......43 Watching a DVD ......... 44 THX Features ..........11 Listening to a CD........45 Re-equalization..........11... - Page 3 Freight damage claims ......89 Superimpose ..........71 If you have moved ........89 Temporary display ........71 Thank you for choosing Halcro! ....89 Video format ..........72 Appendix — Technical Information ..91 Distance units ..........72 Technical data ..........91 OSD output ..........73...
-
Page 4: Introduction
Halcro Logic provides unprecedented levels of leading technology, resulting in reliability and Super- Definition performance. Halcro Logic is used throughout the world by home theater connoisseurs with a genuine love and passion for home entertainment at its best. Please enjoy the Halcro Logic audiovisual experience. - Page 5 Free Datasheet http://www.datasheet4u.net/...
-
Page 6: Important Safety Information
Important Safety Information Symbols Electrical safety WARNING: This product must The following symbols are used on this equipment: always be connected to a mains socket outlet with a lightning flash with protective earth connection. arrowhead symbol, within an equilateral triangle, is intended to Only use a suitable approved mains cord alert the user to the presence of complying with European individual country... -
Page 7: Protection From Fluids
Protection from fluids Service warnings The Halcro Logic SSP80/100 processors are designed for indoor use only and are not All compartments are sealed at the factory. If protected against liquids. They must not be... -
Page 8: Protection From Overheating
To prevent fire hazards, these openings must never be blocked or covered. o Read these instructions. The SSP80/100 may be stacked on top of a o Keep these instructions. Halcro Logic MC20/30/50/70 amplifier but o Heed all warnings. overheating result ventilation inadequate. -
Page 9: Interference Warning - Us Fcc Regulations
Consult the dealer or an experienced radio/TV technician for help. Changes modifications expressly approved by Halcro could void the user's authority to operate the equipment. Free Datasheet http://www.datasheet4u.net/... -
Page 10: Ssp80 Features
SSP80 Features Features include: • supports analog and digital HDTV • up-conversion to component video and HDMI™ outputs • three HDMI™ inputs (audio and video) • three component video inputs • one balanced stereo input • one HDMI™ output • one component video output •... -
Page 11: Ssp100 Features
SSP100 Features Features include: • supports analog and digital HDTV • up-scaling to 1080p • de-interlacing (progressive scan) • up-conversion to component video and HDMI™ outputs • four HDMI™ inputs (audio and video) • four component video inputs • one HDMI™ output •... -
Page 12: Thx Features
THX Features The SSP80 and SSP100 include a THX Re-equalization processing mode to enhance your audio experience of film soundtracks. The tonal balance of a film soundtrack is excessively bright and harsh when played THX is an exclusive set of standards and back over audio equipment in the home. -
Page 13: Thx Ultra2
Adaptive Decorrelation slightly changes one This additional channel provides surround channel’s time phase opportunity for more detailed imaging behind relationship with respect to the other surround the listener and brings more depth, spacious channel. This expands the listening position ambience and sound localization than ever and creates —... -
Page 14: Asa (Advanced Speaker Array)
ASA (Advanced Speaker Array) ASA is a proprietary THX technology which ASA is used in three new modes; THX Ultra2 processes the sound fed to two side and two Cinema, THX MusicMode and THX Games back surround speakers to provide the Mode. - Page 15 Free Datasheet http://www.datasheet4u.net/...
-
Page 16: Installation
Store the packaging in a dry location. contact your dealer. Positioning Unpacking We suggest the Halcro Logic SSP80/100 be Unpack the unit carefully, noting that all positioned on a stable, flat surface. The airflow components are present and undamaged. to the vents should not be interrupted. Ensure... - Page 17 Free Datasheet http://www.datasheet4u.net/...
-
Page 18: Controls And Connections
Controls and Connections This chapter describes the controls and reference SSP80/100 controls connections on the front and rear panels of connections and to assist you in the setup the SSP80/100. The numbers on the diagram procedure. below are used throughout the manual to Free Datasheet http://www.datasheet4u.net/... -
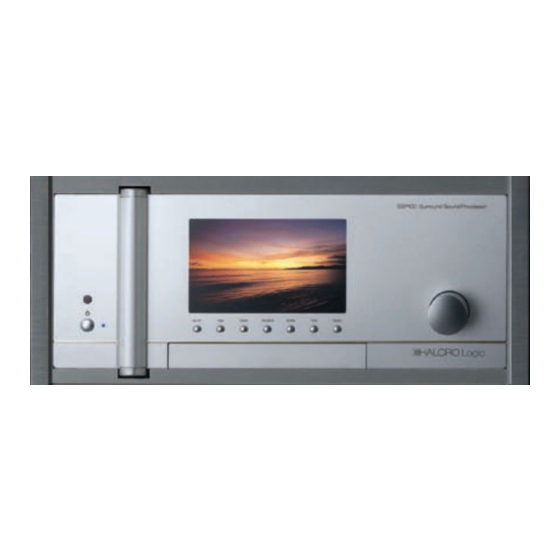
Page 19: Front Panel
(See page 27 and the mode input, operating mode and volume. The tables on page 92.) SSP100 display is a high quality 7” (18 cm) digital TFT screen. The SSP80 display is a 10 THX button high quality blue VFD screen. -
Page 20: Rear Panel
(Connect the Mon OSD to a display Rear panel device with a composite input (TV). The video signal with the On Screen Display balanced audio input (SSP100) will be shown. Accepts balanced multi-channel stereo inputs from analog audio sources You can also use the composite video (SACD or DVD audio player). - Page 21 22 Composite video Zone and monitor 29 Optical digital audio inputs 1 to 2 (without OSD) outputs These connections require optical cables The Zone output can be used, for (Toslink). You can freely associate the example, to send a signal to a TV located optical inputs to any source (see Source Setup...
- Page 22 [such as DVD players] to ensure There are three component video inputs there is always a signal at the record in the SSP80 and four in the SSP100. All outputs.) component video...
- Page 23 42 Zone B audio output 45 Auxiliary channel outputs A stereo output used to send the Zone Connect to the LINE inputs of power signal from the SSP80/100 to a power amplifiers and subwoofers. amplifier in another room. Special Output 1 is Aux channel 9 (top) 43 7.1 channel unbalanced inputs and Aux Channel 10 (bottom).
-
Page 24: Utsr1 (Remote Control)
UTSR1 (Remote Control) The Universal Touch Screen Remote (UTSR1) A. Infra-red lens supplied with the SSP80/100 is used to control B. Green LED indicator the SSP80/100. It is used during installation C. Battery level meter and setup procedures, and for controlling normal operations. -
Page 25: Accessing The Ssp80/100 Menus
Hard keys (H) Main Menu When you select the SSP80/100 • Standby/On — activates the system the processor enters SETUP mode. selected on the UTSR1 home page If the SSP80/100 is selected, the key will perform same function Standby/On button on the front panel (2). •... -
Page 26: Ssp
— select VOL+/- keys to increase or decrease volume • mute — mutes audio for Zone B SSP100 — Press the DIM key to switch the TFT screen brightness from bright to dim. • Zone B — turn off by pressing the ‘Zone’... - Page 27 Tape Trimsel and trim +/- The TAPE key activates the output signal from The TRIM keys are used to temporarily adjust a recorder connected to the ‘Tape Play’ the levels from the audio system without connection (40) on the rear panel. Press once accessing the Setup menu.
-
Page 28: Ssp
SSP Page 2 The THX key activates the THX processing Setup Menu mode selected in the (see page Source 11 for information on these features). Press the THX key to scroll through the available modes Page 2 of the SSP menu is used for quick that include: access to the different sources. - Page 29 Enter (ENT) Escape (ESC) During normal use, the ENT key is used to When the SETUP mode is active, the ESC key perform the Input Search function, to search is used to exit the setup menus without saving for active input sources (in normal operating changes.
-
Page 30: Quick Start Guide
Quick Start Guide The Halcro Logic SSP80/100 is a sophisticated Below are some basic notes to help you product designed to be compatible with the during the installation and set up procedure: world’s leading analog and digital audio/video • read the Important Safety Information components. -
Page 31: Set Up Flow Charts
Quick start flow chart Read SSP80/100 Manual & Important Safety Information Connect Amplifier to SSP80/ SSP100 7.1 output & Trigger 1 Connect speakers to designated Amplifier outputs Display Setup Connect TV monitor/projector to SSP80/100 video output... - Page 32 Fine tuning flow chart Channels Required? Connect Channels Switch on SSP80/100 & Home Theater System Connect Microphone Speaker Setup Level Autocalibrate Speaker Setup Distance Autocalibrate Speaker Setup Aux Channel Setup Audio Setup Trigger Setup Setup Free Datasheet http://www.datasheet4u.net/...
- Page 33 Source setup flow chart Read SSP80/100 Manual & Important Safety Information Connect Power AUDIO ONLY Setup Menu AV or Audio Only Source Setup Connect SRC 1-6 Connect SRC 7-10 Play Source Check Connect Source to Check Source Video SSP80/100 input output &...
-
Page 34: Factory Default Settings
Factory default settings The SSP80/100 has been programmed at the Source 5 (VCR) factory with default settings to simplify the • Component Video — input 2 (34) initial setup procedure. If possible, connect • S-Video — input 5 (23) your source components to match the below •... -
Page 35: Audio / Video Options
Audio / Video options Depending on the components you are Audio outputs connecting, you will need to select which of • balanced (19) — most desirable for the following connections need to be used. minimizing earth loop generated mains hum and ripple or high frequency Video and audio interference •... -
Page 36: Connecting An Amplifier(S)
RISK OF ELECTRIC SHOCK DO NOT OPEN 100-240VAC Analog Audio Inputs Tape Rec Out Zone External 7.1 Inputs 7.1 Outputs Special Outputs 50-60Hz, 1.1A Play/In Rec/Out Front Surround Center Rear Front Surround Center Rear SSP100 Serial Number Free Datasheet http://www.datasheet4u.net/... -
Page 37: Connecting A Subwoofer
Connecting a subwoofer From the SSP80/100, connect the analog audio output (either Sub19 or Sub44) to the corresponding subwoofer input. Free Datasheet http://www.datasheet4u.net/... -
Page 38: Connecting A Tv Monitor
Connecting a TV monitor monitor/projector requires video (36/25/35/21) to the corresponding HDMI/ connections only as the audio will be driven by S-video / component video / composite video the processor/amplifier. input of the TV monitor/projector. Note: If your TV monitor/projector is a From the SSP80/100, connect one or more of component type, you cannot down-convert the following: HDMI or S-video or component... -
Page 39: Connecting A Dvd Player
Connecting a DVD player • The DVD player requires both audio and video audio — from the DVD player, connect connections, except if your DVD player has an either the coaxial or optical digital audio HDMI output (HDMI combines audio and video output to the digital audio input on the in one cable). -
Page 40: Connecting A Cd Player
Connecting a CD player From the CD player, connect either the digital CD playing only. The SACD output is analog output, or balanced or unbalanced Left/Right only. audio output to the corresponding audio Input Note: Use default settings where possible. on the SSP80/100 (28 or 18 or 39). -
Page 41: Connecting A Vcr
Connecting a VCR • both audio video video/composite video output — on the connections with record option. SSP80/100 (24/34/21) to the S-video/ • component video/composite video input video — from the VCR, connect the of the VCR S-video/component video/composite • video output to S-video/component audio —... -
Page 42: Viewing The Menus On The Osd
Viewing the Menus on the OSD Main Menu The SSP80/100 and setup menus To exit the menu setting, use the menu button can be viewed on the On Screen Display (11) to scroll through the options until EXIT is (OSD) (4). You can access the menus using highlighted and then turn the volume control the UTSR1 remote, as explained on page 24, (12) in a clockwise direction to accept. - Page 43 Free Datasheet http://www.datasheet4u.net/...
-
Page 44: Ssp Setup And Operation
SSP Setup and Operation After completing the connection setup as On screen display (OSD) outlined in the Quick Start Guide (page 29), reconnect the power to all components and Begin the setup procedure by displaying the turn them on. menu on your TV monitor/projector, as follows: To access the setup menus during the source... -
Page 45: Watching A Dvd
Watching a DVD To watch a DVD: Dialog normalization o Press the Source button (8) on the front Dialog normalization (Dial Norm) is a feature of panel of the SSP80/100, and rotate the Dolby Digital, which is used to keep the volume control (12) to select the source programs at the same average listening level with the DVD player connected to it... -
Page 46: Listening To A Cd
Listening to a CD Watching a video To listen to a CD: To watch a video: o Press the Source button (8) on the front o Press the Source button (8) on the front panel of the SSP80/100, and rotate the panel of the SSP80/100 and rotate the volume control (12) to select the source volume control (12) to select the source... - Page 47 Free Datasheet http://www.datasheet4u.net/...
-
Page 48: Menu Structure
Menu Structure > MAIN MENU > > Speaker setup SPEAKER SETUP DISPLAY SETUP Audio setup Level setup Scaler setup Source setup Distance setup TV system NTSC Display setup Size setup Superimpose THX Audio setup Aux channel setup Temporary disp. Full Trigger setup Level Autocalibrate? Video format... - Page 49 Free Datasheet http://www.datasheet4u.net/...
-
Page 50: Speaker Setup
Speaker Setup Note: ‘NONE’ will be displayed if the speaker/ It is important to set up the speaker system correctly to accurately recreate the recorded channel is not selected in the ‘Size Setup’ menu, and the optional settings (Level, sound. distance and so on) cannot be changed. -
Page 51: Level Setup
Level setup Output channel levels are adjusted in Level You can engage the noise calibration signal by setup. pressing the TEST key on the UTSR1. This starts a test signal cycling through the LEVEL SETUP channels. The test signal stays on the channel >... -
Page 52: Size Setup
To set up speaker distances: Size setup o From the ‘Speaker Setup’ menu, use the ‘Size setup’ defines speaker UP or DOWN keys to highlight ‘Distance subwoofer settings. Setup’ and press ENT. o Use the UP or DOWN keys to highlight SIZE SETUP the speaker/channel distance you want >... -
Page 53: Aux Channel Setup
Aux channel setup To set up speaker sizes: ‘Aux channel setup’ allows user configuration o From the ‘Speaker Setup’ menu, use the of channel 9 and 10 outputs, also known as UP or DOWN keys to highlight ‘Size ‘Aux channels’. stereo subwoofer setup’... - Page 54 • To set up auxiliary channels: filter type sets the type of the filter used: none, lowpass or highpass o From the ‘Speaker Setup’ menu, use the • filter frequency sets the crossover UP or DOWN keys to highlight ‘Aux frequency used channel setup’...
- Page 55 Mixing Levels The ‘Mix levels’ setup defines the source To set up mix levels: signal for the aux channel. Aux channel signals o From the ‘Configuration setup’ menu, use are generated from other audio channels the UP or DOWN keys to highlight ‘Mix before delay is added in the DSP (Digital Signal levels’...
-
Page 56: Autocalibrate - Level And Distance
Autocalibrate — level and distance There steps involved To begin autocalibration: Autocalibration; level distance. Level o Connect the microphone cable to the autocalibration must be executed first to MIC socket (15) on the SSP80/100 front provide a more accurate result regarding panel. - Page 57 Note: You may notice that subwoofer distance values are differen than the exact physical distance. This autocalibration process measuring ‘acoustic’ distance, not physical distance. Acoustic distance usually greater than actual measurements. If the measurement is too great i.e. the distance is displayed in the erro color in the Distance Setup, reduce the subwoofer distance un il the value is legal.
-
Page 58: Audio Setup
Audio Setup The Audio Setup includes Dolby/DTS, Bass Dolby/DTS setup limiter, Tone, Preset, LFE, Reverberation and Balanced Input settings and affects all source Setup parameters are as follows: input channels. • PL II panorama – On/Off Extends the front stereo image to include MAIN MENU surround speakers. -
Page 59: Preset Setup
• Neo:6 Cente Image – Min, 1 to 4, Max Preset setup Controls the width of the front sound field in Neo:6 Music mode. The Preset setup allows compensation for Sound from Center channel possible variations in the audio outputs from distributed to the front Left and Right different sources. -
Page 60: Tone Controls
To adjust Preset settings: The Tone filters for the Treble filter are 6 kHz, 8 kHz and 10 kHz and for the Bass filter they Audio Setup o From the menu, use the UP are 80 Hz, 110 Hz and 140 Hz. or DOWN keys to highlight ‘Preset setup’... -
Page 61: Reverb
Reverb Balanced source The Reverb-parameter adjusts the level of reverberation effect of the ambient music AUDIO SETUP modes (Dry, 1,2,3, Wet). Dry has the least reverberation and Wet has the most. With this Dolby/DTS setup control it is possible to manipulate the Preset setup ambience of the listening area to replicate a Tone controls... -
Page 62: Balanced Routing
Note: In ‘Bypass’ mode, the signal is available only at the balanced 7.1 outputs and no post- processing o bass management is available. If using the SSP100, only the Left and Right channels are routed to the DSP Free Datasheet http://www.datasheet4u.net/... - Page 63 Free Datasheet http://www.datasheet4u.net/...
-
Page 64: Source Setup
Source Setup The SSP80/100 is shipped with factory default To set up a source: settings and the Source Setup menu allows Main Menu o Enter the customization of each audio/video source. o Use the UP or DOWN keys until Source Source numbers correspond to the source Setup is highlighted. -
Page 65: Source
Source Title The currently selected source is automatically The ‘Title’ setting allows you to edit the name Source Setup shown when you enter the or title of the source. menu. SOURCE SETUP SOURCE SETUP Source > Source > Title DVD-1 Title DVD-1 ▲... -
Page 66: Digital Input
Digital input Preset There are eight digital inputs that can be There are seven ‘Preset’ options that can be assigned to a source: coax 1, coax 2, coax 3, associated to the selected source. These coax 4, Opt 1, Opt 2, AES/EBU and HDMI. options are: No Change, Flat Trims and 1 to 5. -
Page 67: Analog Monitor
To change the ‘Preset’: SOURCE SETUP o Make sure correct source Source highlighted in the Source Setup menu. Title SRC 1 Source Setup o From the menu, use the Digital input HDMI UP or DOWN keys to highlight ‘Preset’. Preset No change o Use the LEFT RIGHT keys to change the >... -
Page 68: Video Type
Video type Continue as follows: When adjusting the setting, follow the rules below: o Use the LEFT or RIGHT keys to adjust the • select ‘Off’ if Component video and HDMI gain so that the signal never clips and the is not used with the source being setup peaks are located within a few decibels of •... -
Page 69: Scaler Bypass (Ssp100 Only)
Scaler bypass (SSP100 only) Scaler bypass The scaler bypass parameter feeds the HDMI To change the setting: and component video input straight through o From the Source Setup menu, use the to the HDMI and component video output Scaler bypass... -
Page 70: Display Setup
Display Setup Scaler setup The Display Setup specifies the parameters for the On Screen Display (OSD), distance The Scaler setup is used to match the units of measure and display system setup. SSP80/100 video output resolutions to the input resolution of the display and rank them in order of preference. -
Page 71: Tv System
Scaler setup To change the preferences: TV system Display Setup o From the menu, use the There are two options regarding OSD settings UP or DOWN keys to highlight ‘Scaler and these can be adjusted in the TV system setup’ and press ENT. setup. -
Page 72: Superimpose
Superimpose Temporary display Superimpose allows the OSD to replace the During normal operation you can make a TV picture (Off) or be superimposed over it ‘temporary’ OSD message appear every time (On). When OSD replaces the TV picture, the an adjustment is made. There are three background color is defined by the ‘OSD style’... -
Page 73: Video Format
Video format Video format Sources 1 to 6 have their composite video and To change the setting: S-Video linked to analog audio inputs 1 to 6. Display Setup o From the menu, use the UP The video format function allows you to select or DOWN keys to highlight Video format between... -
Page 74: Osd Output
Distance units OSD output To change the setting: To change the setting: Display Setup Display Setup o From the menu, use the UP o From the menu, use the UP or DOWN keys to highlight Distance units or DOWN keys to highlight OSD output o Use the LEFT or RIGHT keys to change o Use the LEFT or RIGHT keys to change... - Page 75 OSD style To change the setting: Display Setup o From the menu, use the UP or DOWN keys to highlight ‘OSD style’. o Use the LEFT or RIGHT keys to change scroll through the options. o Once you are happy with the display setting, use the UP or DOWN keys to highlight the next setting to be adjusted or highlight EXIT to save and return to the...
-
Page 76: Thx Audio
THX Audio The THX Audio setup contains THX specific Bass limiter setup parameters such as Bass Limiter setup. Bass limiter is a THX feature, which may be used to limit the bass peak value, preventing MAIN MENU distortion in smaller subwoofers. Speaker setup Audio setup THX AUDIO SETUP... -
Page 77: Boundary Gain Compensation
Continue as follows: Boundary gain compensation o Use the LEFT or RIGHT keys to increase Boundary Gain Compensation (BGC) is a volume until noise sounds processing method that allows compensation distorted. for the natural gain of the lowest bass signals o Once the noise has distorted, use the UP typical sized... -
Page 78: Advanced Speaker Array
Boundary gain comp To adjust the setting: THX AUDIO SETUP THX Audio Setup o From the menu, use the Bass limiter setup UP or DOWN keys to highlight THX Ultra2 Sub. Boundry gain comp THX Ultra2 Sub o Use the LEFT or RIGHT keys to change the setting (Yes/No). - Page 79 Free Datasheet http://www.datasheet4u.net/...
-
Page 80: Trigger Setup
Trigger Setup If the SSP80/100 is connected to components To access the ‘Trigger setup’ menu: with provision trigger, Main Menu o Enter the automatically turn them on and off with the Trigger sense 1 or 2 option. Connect a trigger o Use the UP DOWN keys until Trigger output (33) from the SSP to the trigger input of... -
Page 81: Polarity
Trigger sense1 Trigger sense sets which action or system To adjust the setting: state activates the trigger output. Use the Trigger Setup o From the menu, use the UP following settings as required: or DOWN keys to highlight Trigger 1 •... -
Page 82: Delay
Polarity Delay To adjust the setting: To adjust the setting: Trigger Setup Trigger Setup o From the menu, use the UP o From the menu, use the UP or DOWN keys to highlight Polarity or DOWN keys to highlight ‘Delay’. o Use the LEFT or RIGHT keys to change o Use the LEFT or RIGHT keys to change the setting (Posit/Negat). - Page 83 Duration To adjust the setting: Trigger Setup o From the menu, use the UP or DOWN keys to highlight Duration o Use the LEFT or RIGHT keys to change the setting. o Once the setting is correct, use the UP or DOWN keys to highlight the next setting to be adjusted or highlight EXIT to save and return to the...
-
Page 84: Care And Maintenance
Under no SSP80/100 and require more information, circumstances should the surround sound please ask your dealer or contact Halcro at: processor be allowed to get wet. The only service@halcro.com maintenance required is to ensure the unit is kept clean. - Page 85 Free Datasheet http://www.datasheet4u.net/...
-
Page 86: Troubleshooting
Input setting in Setup. Faulty connections. Try connecting the source to other input connectors. The internal fuse has blown. Contact your dealer or Halcro at service@halcro.com Sound missing in Interconnect cable defective: the interconnect cable is making poor one or more contact or not connected at all. - Page 87 Power cord is disconnected or power is OFF. Check if the Standby/On LED (3) is illuminated. Faulty connections. Try connecting the source to other input connectors. The internal fuse has blown. Contact your dealer or Halcro at service@halcro.com Check “Source Setup” for correct video source selection.
-
Page 88: Service And Warranty Information
SSP100 surround sound in Halcro products for years to come. It is our processor & preamplifier is warranted to be expressed desire that your Halcro products free from defects... -
Page 89: Transferability
Halcro when ownership conditions must be met: changes. • the unit must be returned to Halcro or its authorized repair center in the original Warranty verification packing materials It is the owner's responsibility to show proof or This will... -
Page 90: Transportation Of Products
Halcro dealer upon request. We are not equipped to accept freight collect shipments. Thank you for choosing Halcro is not liable for freight, courier, or other Halcro! charges incurred in transporting a unit to and We trust that you will enjoy the performance... - Page 91 Free Datasheet http://www.datasheet4u.net/...
-
Page 92: Appendix - Technical Information
56 ohms Audio 16 Vrms* 16 Vrms 20 Hz – 20 kHz, - <0.002% >100 dB per leg per leg (SSP100) 0.05 dB Stereo 5 Hz – 200 kHz, -3 dB 25 kohms 56 ohms Balanced 16 Vrms* 2 Vrms 20 Hz –... -
Page 93: Mode Tables
Mode tables The information in these tables assumes the For example, if no center speaker is set up, full speaker setup is used. If some speakers center information is automatically directed to are missing, the modes may not be available the main speakers and a phantom center or some automatic down-mixing may occur. - Page 94 Mode Description Source dependant • Timbre-Match THX Music • Adaptive Decorrelation • ASA – Adaptive Speaker Array processing Source dependant • Timbre-Match THX Games • ASA – Adaptive Speaker Array processing Source dependant • Re-equalization for Front speakers THX Surround EX •...
- Page 95 Mode Active Outputs Direct Stream channels Mono Center Stereo / Stereo 96 Front Left, Front Right Pro Logic / Pro Logic II Left Front, Right Front, Center Left Surround, Right Surround Music Modes Neo:6 Cinema Movie DTS Neo:6 Left Front, Right Front, Center DTS-ES Matrix Left Surround, Right Surround, Dolby Digital EX...
-
Page 96: Abbreviations And Units
Abbreviations The following abbreviations appear in this Owner’s Manual: Abbreviation Meaning Abbreviation Meaning Alternating current HRAS Halcro Reliability Assurance Service AES/EBU Audio Engineering Society/ European Broadcasting Low frequency effects Union; a digital audio Low voltage directive transfer standard Multi-channel audio... -
Page 97: Units
Units The following abbreviations of units appear in this Operator’s Manual: Unit Meaning Amps Centimeters fl oz Fluid ounces Feet Inches kohm Meter Milliliters Volts Free Datasheet http://www.datasheet4u.net/... -
Page 98: Index
Index Configuration, 53 channel input, 25 Connections, 17 key, 25 amplifier, 35 Advanced speaker array, 77 audio, 34 Amplifier, 35 CD player, 39 Analog audio output, 36 DVD, 38 Analog monitor , 66 Projector, 37 ASA, 77 subwoofer, 36 Audio TV monitor, 37 connections, 34, 38 VCR, 40... - Page 99 Filter frequency, 53 Music modes, 93 Fine tuning, 47 Mute, 25 Flow chart, 47 Naked flames, 6 Flow charts, 30 NTSC, 70 Front panel, 18, 41 On screen display, 25, 43 Hard keys, 24 OSD, 25, 43 HDMI, 34, 37, 38 colors, 73 High pass, 53 output, 73...
- Page 100 80 set up, 49 setup, 79 size setup, 51 Trim keys, 26 Src keys, 26 Trimsel, 26 SSP100, 10, 11 Troubleshooting, 85 SSP80, 9 TV monitor, 37 Standby/On key, 24 TV system, 70 Starting up, 43 Unbalanced inputs, 34...
- Page 101 Copyright and acknowledgements This product is manufactured by Extraordinary Technology (Hi-Fi) Pty Ltd trading as Halcro and Halcro Audio (USA) Inc. Halcro Logic is a trademark of Extraordinary Technology (Hi-Fi) Pty Ltd, Australia. Dolby, the Double-D symbol, Dolby digital, and Pro Logic are trademarks of Dolby Laboratories Licensing Corporation.
Need help?
Do you have a question about the SSP100 and is the answer not in the manual?
Questions and answers