RadioLink AT9S Pro Instruction Manual
Adaptable to helicopter/fixed-wing/glider/multirotor/car/boat/robot
Hide thumbs
Also See for AT9S Pro:
- Manual (83 pages) ,
- Instruction manual (9 pages) ,
- Quick start manual (12 pages)

Related Manuals for RadioLink AT9S Pro


Summary of Contents for RadioLink AT9S Pro
- Page 1 AT9S Pro (DSSS&FHSS&CRSF) Instruction Manual Adaptable to Helicopter/Fixed-wing/Glider/Multirotor/Car/Boat/Robot 2021.09...
-
Page 2: Table Of Contents
1.3.5 Installment of antenna --------------------------------------------------------- 16 1.3.6 RSSI testing ------------------------------------------------------------------ 17 1.4 Connection with TBS Crossfire TX ----------------------------------------------------- 17 PART 2. BASIC FUNCTION OF AT9S Pro ------------------------------------------------------- 19 2.1 PARAMETER ----------------------------------------------------------------------- 19 2.2 Model Select ---------------------------------------------------------------------- 20 2.3 Model Type ----------------------------------------------------------------------- 21 2.4 End Point (also called EPA) ----------------------------------------------------------- 22... - Page 3 3.1.11 Gyro Sense ----------------------------------------------------------------- 52 3.1.12 THR CURVE (ACRO) ---------------------------------------------------------- 53 3.1.13 THR-DELAY (ACRO) ---------------------------------------------------------- 54 3.1.14 THROTTLE-NEEDLE mixing (ACRO/ HELI): --------------------------------------- 54 3.1.15 ATTITUDE ------------------------------------------------------------------ 56 3.1.16 SERVO-DLY -----------------------------------------------------------------56 3.2 GLID ADVANCE MENU -------------------------------------------------------------- 56 3.2.1 Programmable MIX ----------------------------------------------------------- 58 3.2.2 FLAPERON -------------------------------------------------------------------58 3.2.3 V-TAIL ---------------------------------------------------------------------- 58 3.2.4 OFFSET ----------------------------------------------------------------------58...
- Page 4 4.1.7 How to setup parameters when use Radiolink AT9S Pro ----------------------------- 80 4.1.8 How to| Make RadioLink receiver R9DS bind with AT9S Pro -------------------------- 80 4.1.9 How to Distinguish Between Mode 1 and Mode 2 of Radiolink AT9S Pro ---------------80 PART 5. AFTER-SALES SERVICE POLICIES ------------------------------------------------------ 81...
-
Page 5: Part 1. Introduction Of At9S Pro
Improper operation may cause permanent damage and risk of fire. 11.There is a Micro USB port at the bottom of AT9S Pro. Please note the port is for upgrading firmware, not for charging. -
Page 6: Basic Introduction Of At9S Pro
1.2 Basic introduction of AT9S Pro 1.2.1 Technical Parameters... -
Page 7: Configuration List
THR return accessories×1 1.2.3 Recommended Configuration The below accessories sold separately. You can enter the Aliexpress Official Store to purchase. Or login to the Radiolink official website for product details. PRM-01 Voltage Telemetry module TBS crossfire cable PRM-03 Telemetry module... -
Page 8: Transmitter
1.2.4 Transmitter 1.Earth Pole 2.Null 3.Voltage Output: 7.4-18V 4.Output: PPM/SBUS/CRSF 5.Input: RSSI... -
Page 9: Basic Usage And Settings
For details, please refer to www.radiolink.com. SWITCH ASSIGNMENT TABLE • The factory default functions activated by the switches and knobs for a AT9S Pro transmitter are shown below. • Most AT9S Pro functions may be reassigned to non-default positions quickly and easily. -
Page 10: Transmitter Displays
SWITCH B rudder dual rate rudder dual rate rudder dual rate rudder dual rate SWITCH C up = ELE-FLP on up = ELE-FLP on governor attitude center/down= center = Distance cond. IDLE-DOW N down = Landing cond. down = AIRBRAKE on SWITCH D aileron dual rate aileron dual rate... -
Page 11: Receiver
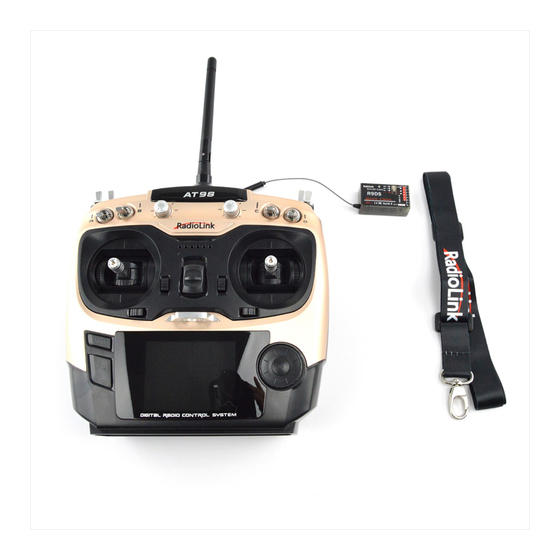
SYSTEM. Set TH-DOWN to OFF. 1.3 Receiver 1.3.1 Compatible Receivers AT9S Pro is a 10 channels transmitter, support 2.4G DSSS and FHSS dual hybrid spread spectrum, 16 channels pseudo random frequency hopping. AT9S Pro sells with receiver R9DS. -
Page 12: Two Signal Working Modes Of R9Ds
SBUS signal. Note AT9S Pro is default 10 channels, you can upgrade it to 12 channels with USB cable. You have to setup AT9S Pro to 12 channels first if you use 12 channels receivers R12DS or R12DSM while you have to setup AT9S Pro back to 10 channels when you use 10 channels receiver R6DS, R6DSM and R10DS. -
Page 13: The Connection Of The Receiver
. When connecting with the servo wires, the signal wire is upward and the ground wire is downward. Note: All RadioLink receivers are designed with Anti-polarity connect protection. When the connection of the servo wires are reversed, the receiver will stop working and it won’t be damaged. But when connecting the servo at this time, the servo may be damaged. - Page 14 spare spare spare/mo throttle/Spar / / spare/ tor/splr-2¹ motor motor motor throttle Throttle Rudder/co Rudder/co rudder/co mbined mbined mbined Rudder/spar Rudder rudder-2&e rudder-2& rudder-1 lev-2² elev-2² &elev-2² rudder Rudder spare/landi gear/aileron spare/s spare/spoil spare/spoil flap-2 -2¹ Gyro/spare plr-2¹ er-2¹ er-2¹ ³/combined flap-1 and aileron-2²...
- Page 15 GPS, RSSI, flight mode, yaw, roll, pitch, and distance are display on the transmitter screen. Telemetry modules are sold separately. You can enter the Aliexpress Official Store to purchase. Or login to the RadioLink official website for product details.
-
Page 16: Binding
2. Power on AT9S Pro and receiver R9DS. 3. Turn on AT9S Pro and it will automatically bind with the closest receiver. Turn on AT9S Pro. Long press ID SET,which is on the side of receiver for more than 1 second and release until the RED/PURPLE LED flashes. -
Page 17: Rssi Testing
1.3.6 RSSI testing Before flight, always remember to do the RSSI testing to avoid the possible unexpected signal loss. Power on transmitter and receiver, keep them with the distance of about 30 centimeters and both antennas straight. Enter the parameter setup menu by press MODE one second, you can check the RSSI in RECEIVE. The RSSI is 0 to 30dBm is normal when the transmitter is apart about 30 centimeters from the receiver, the signal is more better the RSSI data is more close to 0. - Page 18 Note : The setting is to define the signal output of the simulator port at the back of AT9S Pro. If the simulator or trainer cord to connect, there are other output options as SBUS and PPM. ② Connect TBS crossfire transmitter with the CRSF cable to the simulator port at the back of AT9S Pro.
-
Page 19: Part 2. Basic Function Of At9S Pro
RX-ALARM, EXT-ALARM, LockScreen and sound. You can also check the firmware version. If you need to download the latest firmware, please click the link here: www.radiolink.com/at9spro_firmwares Display language: can be selected the display language of the function name, etc. in each function menu. The screen reads "LANGUAGE". -
Page 20: Model Select
Mode 3 Left Left Right Right hand, hand, up hand, hand, left and up and left and right down down right Mode 4 Left Right Left Right hand, hand, up hand, hand, left and up and left and right down down right -custo... -
Page 21: Model Type
Turn on the function when you need to copy the data of the model to computer to avoid data reset. Connect the transmitter with computer and use the RadioLink official app to copy the data. Select Model 5, copy the data of Model 5 to Model 3, and change the name of... -
Page 22: End Point (Also Called Epa)
When there are dual aileron servos, the default channel of aile-1 is channel 1. The setting is to define the channel of aile-2. When it is “CH6 or 7”, enter the advance menu -FLAPERON. The channel of aile-2 is channel 6. Enter the advance menu-AIL-DIFF, and the channel of aile-2 is channel 7. -
Page 23: Sub Trim
• Retract servos are not proportional. Changing END POINT will not adjust the servo. END POINT adjusts only the individual servo. It will have no effect on any other servo that is operated in conjunction with this servo via mix or preset programming such as FLAPERON, AILEVATOR, etc. This is so that each individual servo can be carefully fine-turn to avoid binding and other conflicts. -
Page 24: Servo Reversing (Reverse)
Open BASIC menu, then open for 1s .(If ADVANCE again) Adjust the flap SUBTRIM servo’s SUB TRIM to SUB-TRIM until its center exactly matches the Choose the channel to adjust to FLAP,PUSH, as needed to each aileron servo’s until surfaces match(Ex: flap) channel. - Page 25 • The glider programming offers you the choice of Condition. This option allows you to have a separate rate for each of condition. (GLID) • Stick position (ACRO GLID). (Ex: On rudder you normally use only the center 3/4 of the stick movement except for extreme maneuvers such as snaps/spins/stalls.
- Page 26 Special note for conditions: The helicopter and glider programming offers you the choice of COND. This option allows you to have a separate rate for each of the 3 controls automatically selected when changing conditions, for a total of FIVE rates available. Simply change the switch choice to COND. and then: (HELI) press the CURSOR LEVER to toggle through the 5 conditions while setting the rates.
-
Page 27: Motor Cut (Throttle Cut)
Optional: except using a switch, to SWA to AILE(90%) , PUSH you can set high rates to be triggered when the stick moves to D/R past a certain point. To test this, AILERON STICK to 25% set aileron high rate to 25%.Now AILERON STICK to 25% set switch assignment to AIL... - Page 28 Close * Also LOGIC SW(Lsw1 to 3) may be assigned. ** Normally, a setting of 10-20% is sufficient. Viewing the carburetor barrel until it fully closes is adequate to get an approximate setting; then test with engine running to confirm. GLIDER Provides an easy way to stop the engine by flipping a switch no matter where the air brake stick is.
-
Page 29: Idle Down (Acro Only)
2.9 IDLE DOWN (ACRO only) Lowers the engine idle for: set for sitting on the runway prior to take off, 【IDLE DOWN】 stalls and spins, and landings. The normal idle setting is a little higher for easier starts and safe flights with less risk of dead sticks. MIX:INH RATE:... -
Page 30: Trim
Adjust the rate until engine Throttle Stick down, to RATE,PUSH, idles as desired with Throttle stick. to desired rate, PUSH Optional:change switch to SW, to desired position, PUSH. assignment . Close *Normally a value of 10- 20%. Secure the fuselage, engine running. Set the THROTTLE STICK to idle. Adjust the IDLE-DOWN switch ON and OFF until the desired idle is achieved. -
Page 31: Fail Safe (F/S)
2.11 Fail Safe (F/S) (loss of clean signal and low receiver battery) submenu (F/S): sets 【F/S】 responses in case of loss of signal or low Rx Battery. 1:AILE NOR 2:ELEV NOR CH1:AILE 3:THRO 15% Adjustability: NOR F/S 4:RUDD NOR •Each channel may be set independently. CH9: NOR 5:GEAR NOR •... - Page 32 2. If the function such as gyro sense, throttle-needle is turned on, the switch for the auxiliary channel is invalid. 3. The default channel of AT9S Pro is 10CH. If you use it with 12 channel receiver, pleased change the channel to 12CH.
-
Page 33: Timer
2.13 TIMER Controls three electronic clocks used to keep track of time remaining in a competition time allowed, flying time on a tank of fuel, amount of time on a battery, etc. 【TIMER】 <1>OFF <2>OFF <3>ON 10:00 TIME:10:00 MODE:UP MODEL NULL NULL RSET:... -
Page 34: Trainer
• SWITCH: controlled by spring-loaded SWITCH H only. Not assignable. • Compatibility: The AT9S Pro may be master or student with any Radiolink transmitter compatible with the cord. Simply plug the optional trainer cord (For AT9S Pro series, sold separately) into the trainer connection on each transmitter, and follow the guidelines below. -
Page 35: Logic Switch Selection (Logic Sw)
Test student radio function prior to attempting to fly! 2.15 Logic Switch Selection (LOGIC SW) The various functions in the AT9S Pro can be selected by switch.. The Logic switch can be assigned to the functions as following: THR-CUT, IDLE DOWN, AUX-CH, TIMER, PROG. -
Page 36: Servo
• Switch position (POSI) • Logic mode: AND or OR (MODE) 2.16 SERVO Displays radio's output to channels 1-12(defualt 10 channels, you can upgrade firmware to 12 channels) The servo submenu includes two features: • Real-time bar-graph display to demonstrate exactly what commands the transmitter is sending to the servos. - Page 37 Connection between R9DS and telemetry module PRM-01(pic below on left) Connection between R9DS and OSD telemetry module PRM-03 with PIXHAWK (pic below on right).
-
Page 38: System Setting
2.18 SYSTEM SETTING TX-TRIM/ RX-TRIM/ EXT-TRIM: When the telemetry voltage is different from the real voltage, adjust them to the same. The range of adjustment is from -1.0V to +1.0V. SHUTDOWN: Set a clock to remind turning off the transmitter. When it is at setting time, the transmitter will vibrate and beep. -
Page 39: Part 3. At9S Pro Advance Menu Functions
3.1 ACRO ADVANCE FUNCTION MENU 3.1.1 Programmable MIX AT9S Pro contains four separate linear programmable mixes. (Note that mixer #5-8’s mixing RATE are set with a 5-point curve. HELI has mixer #5-6's mixing. See CURVE MIXES There are a variety of reasons you might want to use these mixes. A few are listed here. All of the adjustable parameters are listed below, but don’t let them scare you. - Page 40 and see if you were correct. As with all functions, a sample setup follows, step by step, to assist you. Sample reasons to use linear programmable mixes: • To correct bad tendencies of the MULTIROTOR (such as rolling in response to rudder input). •...
- Page 41 FLAP NULL ELEV •Trim: Master’s trim affects slave. Not displayed if master is not CH 1-4, because 5-9 have no trim. Ex: two rudder servos. With TRIM OFF, rudder trim would bind the two servos. TRIM ON resolves this. • On/off choices: •...
- Page 42 • ELEV-PIT (HELI) mix: Compensate for the loss of lift of tilting the model Curve Programmable Mixes (PROG.MIX5-8)(HELI: PROG.MIX5-6 ): AT9S Pro’s ACRO/GLID programs contain four separate curve programmable mixes. HELI contains two. There are a variety of reasons you might want curve mixes. Usually a linear mix doesn't fit your needs along the whole range.
-
Page 43: Flaperon (Acro/Glid 1A+1F )
• HELI Defaults: • PROG.MIX5 aileron-to-elevator for coordinated turns • PROG.MIX6 aileron-to-elevator for coordinated turns • Master: The controlling channel can only be a channel. Cannot OFFSET or dial. • Trim: not available in curve mixes. • Offset: not available in curve mixes. Goals Steps Inputs... -
Page 44: Flap-Trim
Once FLAPERON is activated, any time you program CH6 or "flap" (i.e. ELEVATOR mixing), the radio commands both servos to operate as flaps. The amount of travel available as flaps is independently adjustable in FLAPERON. A trimming feature is also available (see FLAP-TRIM) to adjust both neutral positions together for straight-and-level flight or slight increases/decreases of the flap angle. -
Page 45: Aile Diff (Acro/ Glid 2A+1F/ Glid 2A+2F)
FLAP-TRIM assigns the primary FLAPERON control [defaults to VR(A)] to allow trimming in flight of the flap action of FLAPERON. Note: Even if FLAP-TRIM is made active with AIL-DIFF, it will not have any effect. The ONLY function that allows control of the ailerons as flaps in the AIL-DIFF configuration is AIRBRAKE. Most modelers use AIRBRAKE, or programmable mixes, to move the flaps to a specified position via movement of a switch. -
Page 46: Air Break (Acro/ Glid)
using AILE-DIFF. to AILE-DIFF .PUSH. Note that the function defaults to no difference in Activate the function. to MIX,PUSH. to ACT down travel vs. up travel. If you want differential travel, Optional: adjust the to AILE1 AILERON STICK. to 90% simply adjust each side. - Page 47 response, allowing the flaps/ailerons/elevator to all reach their desired end point together. A setting of 100% slows the servo to take approximately one second to travel the prescribed distance. (GLID: B.FLY-ELEV function) • Adjustable in flight (ACRO): Using the aileron (when AILE-DIFF or FLAPERON is activated) and elevator trim lever in flight can be set to adjust the aileron and elevator settings in your airbrake rather than adjusting the model's actual aileron and elevator trim.
-
Page 48: Elev-Flap Mixing (Acro/Glid)
3.1.6 ELEV-FLAP mixing (ACRO/GLID) [ELEV-FLAP] MIX:INH NORMA :+10% START RATE SPEED :+10% DISTA LANDI RANGE:0%(0%) SW: SwC POSI: UP ACRO GLID ELEV-FLAP mixing is the first pre-programmed mix we'll cover. This mix makes the flaps drop or rise whenever ELEVATOR STICK is moved. It is most commonly used to make tighter pylon turns or squarer corners in maneuvers. -
Page 49: Snap Rolls (Acro)
surfaces. • Elevators acting also as ailerons for extreme stunt flying or more realistic jet flying (optional). • Redundancy, for example in case of a servo failure or mid-air collision. Adjustability: • CH2 and CH8 only. (With programmable mixing, could utilize CH5 as the 2nd elevator servo. THROTTLE-NEEDLE uses CH8 and cannot be active simultaneously). - Page 50 others snap on elevator alone. Most models snap most precisely with a combination of all 3 surfaces. Additionally, rate of speed and acceleration when using the snap switch will affect how the model snaps. For information using gyros with airplanes for cleaner precision maneuvers, such as snaps and spins without over rotation.
-
Page 51: V-Tail (Acro/ Glid)
to DIR-SW1.PUSH to SwA Optional: Assign switches up/down and left/right.(Ex: to DIR-SW2.PUSH to SwB, Change to the left/down snap A down, B down and adjust rudder to 105%) Repeat steps above to set percentages. Close 3.1.9 V-Tail (ACRO/ GLID) V-TAIL mixing is used with v-tail MULTIROTOR so that both elevator and rudder functions are combined for the two tail surfaces. -
Page 52: Gyro Sense
to BASIC . again to ADVANCE Open ELEVON to ELEVON, Activate Activate the function. to MIX,PUSH to ACT. ELEVON. Adjust aileron Optional: adjust up/down travel to AIL1.PUSH. Aileron Stick. to 90% down travel to separately for the servos as 90% of up ailerons.(Ex: down to 90%) travel, to AIL2.PUSH. -
Page 53: Thr Curve (Acro)
Goals Steps Inputs to BASIC . again to ADVANCE Set up a Open GYRO-SENSE GYA gyro to GYRO-SENSE, setting (Ex:MIX-1) Activate the function. to MIX-1.PUSH to ON. Optional: change switches assignment. to SW.PUSH. to SwE Ex: select E. to gyro rate. Push. E up. -
Page 54: Thr-Delay (Acro)
Close 3.1.13 THR-DELAY (ACRO) The THR-DELAY function is used to slow the response of the throttle servo to simulate the slow response of a turbine engine. A 40% delay setting corresponds to about a one-second delay, while a 100% delay takes about eight seconds to respond. - Page 55 • Throttle cut feature also moves the in flight needle servo. • The CH8 knob adjusts the high throttle mixture (may be deactivated. see AUX-CH). • Because both use CH8, this function cannot be used simultaneously with AILEVATOR. • An acceleration (ACCE) function (ACRO only) helps the engine compensate for sudden, large amounts of throttle input by making the mixture suddenly richer, then easing it back to the proper adjustment for that throttle setting.
-
Page 56: Attitude
3.1.15 ATTITUDE Attitude is set to switch different flight modes.There are 28 models in total. The function needs to work with flight controller. After the transmitter connects with flight controller, name the model in the transmitter to match with the flight mode in the flight controller. - Page 57 Please note that nearly all of the BASIC menu functions are the same for airplane (ACRO setup), sailplane (GLID 1A+1F/ 2A+1F/ 2A+2F setups), and helicopter (HELI setups). The features that are identical refer back to the ACRO chapter. The glider BASIC menu includes MOTOR CUT and does not include IDLE-DOWN or THR-CUT.
-
Page 58: Programmable Mix
3.2.1 Programmable MIX The setting of Programmable MIX of glider is the same with that of acrobasic. Click here or go to page 39 to check the detailed setting method. 3.2.2 FLAPERON The setting of FLAPERON of glider is the same with that of acrobasic. Click here or go to page 43 to check the detailed setting method. -
Page 59: Camber-Flp
深圳市乐迪电子有限公司 www.radiolink.com Goals Steps Inputs Set up a START to gain to BASIC . again to ADVANCE maximum possible lift on Open OFFSET function launch. to OFFSET, Each Aileron: 50%. Each Flap: 100%. G or E from NORMA to START Switch to the START condition. -
Page 60: Camber Mixing
深圳市乐迪电子有限公司 www.radiolink.com 3.2.6 Camber Mixing This function adjusts the mixing rate of camber operation which operates the wing camber (ailerons and flaps) in the negative and positive directions. The aileron, flap, and elevator rates can also be adjusted independently and attitude changes caused by camber operation can be corrected. -
Page 61: Elev-Flap Mixing
深圳市乐迪电子有限公司 www.radiolink.com • Condition: The separate AILE RUDD setting for each flight condition can be set. Goals Steps Inputs to BASIC . again to ADVANCE Open AIL/RUD-MIX submenu. to AIL/RUD-MIX, Select the mixing mode. Ex:RUDD-AILE,2 to MODE to RUDD-AILE ,... -
Page 62: Flap-Trim
深圳市乐迪电子有限公司 www.radiolink.com spoiler servo position Activate the function. to MIX to ON. , to 60% Assign the SPO2-CH.(Ex: to –SPO2- CH to CH3, , CH3) Adjust the spoiler servo to –SPO1-POSI to -50%, to 60%, , position. (Ex: SPO1/SPO2=+55% to to –SPO2-POSI to +50%,... -
Page 63: B.fly-Elev
深圳市乐迪电子有限公司 www.radiolink.com and elevator, and is usually used to make steep descents or to limit increases in airspeed in dives. Separate two BUTTERFLY settings are available. (CRI1/CRI2) Adjustability: • Activation: Get proportional by moving the THROTTLE STICK. • Switch: Mix SWITCH is selectable. A to H: SWITCH A to H. Also LOGIC SW (Lsw1 to 3) may be assigned. -
Page 64: Elevon
深圳市乐迪电子有限公司 www.radiolink.com "sudden stops", consider raising the ailerons and dropping the flaps in stead as shown in the diagram above. 3.2.15 ELEVON The setting of ELEVON of glider is the same with that of acrobasic. Click here or go to page 51 to check the detailed setting method. -
Page 65: Helicopter Advance Menu Functions
深圳市乐迪电子有限公司 www.radiolink.com Adjustability: • RATE range of -100 to +100. Negative setting would result in opposite aileron action from flaps. • SWITCH A-H fully assignable. Also LOGIC SW (Lsw1 to 3) may be assigned. • POSITION fully assignable, including NULL (mix always on) and Up&Cntr and Cntr&Dn to activate the mix in 2 separate positions of the same SWITCH. -
Page 66: Programmable Mix
深圳市乐迪电子有限公司 www.radiolink.com 3.3.1 Programmable MIX The setting of Programmable MIX of helicopter is the same with that of acrobasic. Click here or go to page 39 to check the detailed setting method. 3.3.2 THR-CURVE and PIT-CURVE These 7-point curves are utilized to best match the blade collective pitch to the engine RPM for consistent load on the engine. -
Page 67: Gyro Sense
深圳市乐迪电子有限公司 www.radiolink.com 3.3.3 GYRO SENSE About GYRO SENSE, there are two types: STD and GY. please refer to 3.3.12, by following steps: Goals Steps Inputs for 1s to BASIC.(If ADVANCE Open and activate the GYRO again) . to GYRO-SENSE SENSE function. - Page 68 深圳市乐迪电子有限公司 www.radiolink.com direction setting by changing the signs of the numbers in the curve from plus (+) to minus (-) and vice versa. Suggested defaults: Clockwise rotation: -20, -10, 0, +10, +20% from low throttle to high. Counterclockwise rotation: +20, +10, 0, -10, -20% from low throttle to high.
-
Page 69: Throttle Hold
深圳市乐迪电子有限公司 www.radiolink.com collective pitch curve to the first point.(8%) 8%, achieve -4 degrees of blade pitch. Apply throttle until the model sits ‘light’ on Open the REVO.MIX to REVO.MIX to MIX , , its skids. Adjust base point Adjust the first of REVO . -
Page 70: Hovering Adjustments (Hov-Thr And Hov-Pit)
深圳市乐迪电子有限公司 www.radiolink.com • Idling position: Range of -50% to +50% centered about the throttle idle position to get the desired engine RPM. • Switch assignment: Assigned to SWITCH E(AT10) or G (AT10) down. Adjustable in the CONDITION (THR-HOLD item), (2-position type switch only) •... -
Page 71: High/Low Pitch (Hi/Lo-Pit)
深圳市乐迪电子有限公司 www.radiolink.com memorized setting. • Adjustments may be memorized and then the knobs returned to center point to use that amount of adjustment, allows easy use of the trimming knobs for multiple models. (Note that when memorization is repeated with the knob offset from center, the trim value accumulates.) •... -
Page 72: Offset
深圳市乐迪电子有限公司 www.radiolink.com Select the idle-up 1 condition to COND to IDL1 , Set the rate (Ex:80%) to HI-PIT to 80% , Optional:Change which knob to VR to desired knob and direction. , adjusts high pitch curve. Close 3.3.8 OFFSET Optional separate trims in addition to those for the normal condition. This function is used to automatically change the trim of a helicopter, for example, when transitioned from hover to flying at high speed. -
Page 73: Delay
深圳市乐迪电子有限公司 www.radiolink.com Select IDL2 . to NO. to IDL2, , Adjust trim settings as to RUDD to +8%, , needed. (Ex:rudder to +8% .) Close menus and confirm slowed transitions. E (AT9) from NORMAL to IDL2.Check the changes of rudder trim. - Page 74 深圳市乐迪电子有限公司 www.radiolink.com of changes in pitch of blades, weather conditions, etc. Governors are extremely popular in competition helicopters due to the consistency provided. How does it help in helicopter setup? The governor eliminates the need to spend large amounts of time setting up throttle curves, as it automatically adjusts the engine’s RPM to maintain the desired head speed...
-
Page 75: Throttle Mixing (Throttle Mix)
深圳市乐迪电子有限公司 www.radiolink.com governor settings. Ex : se l e c t sw i t c h th a t se l e c t s th e conditions. Adjust governor speed settings perswitch position to each Cond position or condition as needed. -
Page 76: Throttle Needle
深圳市乐迪电子有限公司 www.radiolink.com • Initial: 100% • adjusting range: 0-200% Goals Steps Inputs to BASIC menu, again to Open SWASH-RING To prevent damaging the swash ADVANCE function. linkage by simultaneous operation to SWASH-RING of the ailerons and elevators, set the limit point where swash throw Activate the function. -
Page 77: Servo-Dly
深圳市乐迪电子有限公司 www.radiolink.com (i.e. fast forward motion, backward) or maneuvers (loops, rolls, stall turns), or even the same maneuver but changing from heading-hold/AVCS gyro mode to normal gyro mode. The AT9 provides 3 idle-ups to allow the modeler 3 additional setups along with the normal flight condition. (Note that IDL3 does not include governor settings.) -
Page 78: Gyro-Sense (Car & Boat)
深圳市乐迪电子有限公司 www.radiolink.com is risk of crash for airplanes. Set MIX to INH or On. SWA to SWH can be set as switch to control the function. There are two modes, including RATE and THROTTLE. RATE: When turning on the switch, the throttle will keep at a certain rate to run. The range is from 0% to 100%, the lowest to the highest. - Page 79 深圳市乐迪电子有限公司 www.radiolink.com faster the idle speed is. Goals Steps Inputs Set THSPD to 40%, ACCEL to for 1s to BASIC.(If ADVANCE Open SPEED function. 80% to simulate the real again) to SPEED acceleration and brake of the car. Set THSPD...
-
Page 80: Part 4. Tutorial
深圳市乐迪电子有限公司 www.radiolink.com PART 4. TUTORIAL To help users to be more convenient when using AT9S Pro, we provide you with video tutorials on some complex functions. 4.1 Use tutorial 4.1.1 How to Upgrade Radiolink AT9S PRO firmware https://www.youtube.com/watch?v=i_KyGHTxWrw 4.1.2 How to connect RadioLink AT9S Pro with Blacksheep TBS Crossfire TX https://www.youtube.com/watch?v=W3HF_75FHeM... - Page 81 During the warranty period, if there is any non-artificial performance failures (no unauthorized disassembly, no modification or installation under the guidance of non-official instructions, damage, other non-artificial failures) or failures caused by the quality of the product itself, RadioLink will provide free accessories for users for replacement.
- Page 82 The USB port of AT9S Pro is used to upgrade firmware and add new functions. The added functions will not be modified in the manual. For more information, please visit the official website of RadioLink: https://www.radiolink.com/ thank you!
Need help?
Do you have a question about the AT9S Pro and is the answer not in the manual?
Questions and answers