
Related Manuals for Christie Cinema 4K-RGB


Summary of Contents for Christie Cinema 4K-RGB
- Page 1 Service Guide 020-102713-06 Cinema 4K-RGB CP4315-RGB, CP4320-RGB, CP4325-RGB, CP4330-...
- Page 2 Christie's control such as maintenance of the product in proper working conditions. Performance specifications are based on information available at the time of printing. Christie makes no warranty of any kind with regard to this material, including, but not limited to, implied warranties of fitness for a particular purpose.
-
Page 3: Table Of Contents
Filtration............28 Cinema 4K-RGB Service Guide–CP4315-RGB, CP4320-RGB, CP4325-RGB, CP4330-RGB 020-102713-06 Rev. 1 (08-2022) Copyright © 2022 Christie Digital Systems USA, Inc. All rights reserved. If printed, please recycle this document after use. - Page 4 Light engine intake fans (#25-30)........60 Cinema 4K-RGB Service Guide–CP4315-RGB, CP4320-RGB, CP4325-RGB, CP4330-RGB 020-102713-06 Rev. 1 (08-2022) Copyright © 2022 Christie Digital Systems USA, Inc. All rights reserved. If printed, please recycle this document after use.
- Page 5 ....... 103 Cinema 4K-RGB Service Guide–CP4315-RGB, CP4320-RGB, CP4325-RGB, CP4330-RGB 020-102713-06 Rev. 1 (08-2022) Copyright © 2022 Christie Digital Systems USA, Inc. All rights reserved. If printed, please recycle this document after use.
-
Page 6: Introduction
However, due to continuing research, all information is subject to change without notice. Christie assumes no responsibility for omissions or inaccuracies. Site requirements To safely install and operate the Cinema 4K-RGB, the installation location must meet these minimum requirements. Physical operating environment •... -
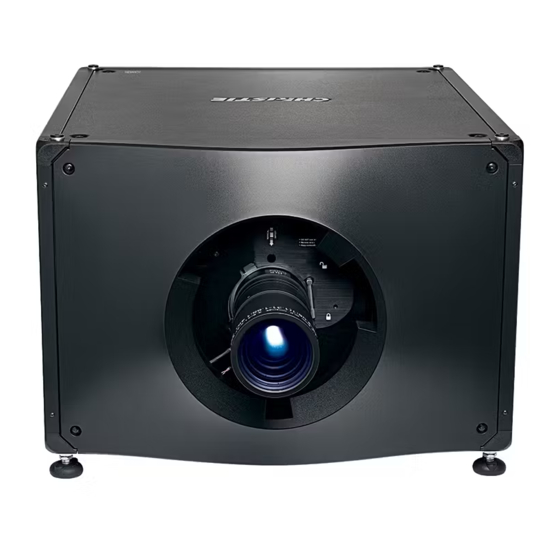
Page 7: Projector Components (Front)
Service access door Communications panel External devices are connected here. Cinema 4K-RGB Service Guide–CP4315-RGB, CP4320-RGB, CP4325-RGB, CP4330-RGB 020-102713-06 Rev. 1 (08-2022) Copyright © 2022 Christie Digital Systems USA, Inc. All rights reserved. If printed, please recycle this document after use. -
Page 8: Projector Components (Rear)
Power cord and AC receptacle Air intake Security roles Only Christie authorized service technicians should perform field repair, marriage setup, and service to the unit. Theater personnel should only perform diagnostic functions, such as running the projector interrogator. After performing a procedure mandating the use of the high-security key, theater personnel must ensure the security of the system is reestablished. -
Page 9: Product Documentation
Introduction Product documentation For installation, setup, and user information, see the product documentation available on the Christie website. Read all instructions before using or servicing this product. 1. Access the documentation from the Christie website: CP4315-RGB • Go to https://bit.ly/2JIHhtJ or https://www.christiedigital.com/en-us/cinema/cinema- products/digital-cinema-projectors/christie-cp4315-rgb •... -
Page 10: Related Documentation
2. Switch to the Downloads tab. Related documentation Additional information on the projector is available in the following documents. • Cinema 4K-RGB Installation and Setup Guide (P/N: 020-102710-XX) • Cinema 4K-RGB User Guide (P/N: 020-102712-XX) • Cinema 4K-RGB Product Safety Guide (P/N: 020-102711-XX) •... -
Page 11: Service Guidelines
To ensure you have the correct module, check the module markings and parts lists. To ensure you replace the projector module correctly, check the relevant disassembly and replacement procedures. Replace components with exact equivalents or Christie-approved replacement parts. Failure to do so may result in unsafe operation. -
Page 12: Safety Precautions
(electrically insulated) footwear, safety glasses, and gloves rated for the working voltage of the equipment you are servicing. Safety precautions Learn about the safety precautions related to the Christie Cinema 4K-RGB projector. This projector is intended for use in a cinema environment. General safety precautions Read all safety and warning guidelines before installing or operating the projector. -
Page 13: Laser Safety Precautions
• SHOCK HAZARD! A dedicated, protected ground or earth wire must be installed on the product by Christie qualified technicians or electricians before it can be connected to power. • SHOCK HAZARD! Disconnect the product from AC before installing, moving, servicing, cleaning, removing components, or opening any enclosure. -
Page 14: Light Intensity Hazard Distance
If the vertical distance to hazard zone requirement (Zone D) is satisfied, the horizontal clearance distance (Zone C) is not needed. Cinema 4K-RGB Service Guide–CP4315-RGB, CP4320-RGB, CP4325-RGB, CP4330-RGB 020-102713-06 Rev. 1 (08-2022) Copyright © 2022 Christie Digital Systems USA, Inc. All rights reserved. If printed, please recycle this document after use. -
Page 15: Product Labels
E—Represents the top view of the projector. • F—Represents the side view of the projector. For information detailing the hazard distance for each lens, refer to the Cinema 4K-RGB Installation and Setup Guide (P/N: 020-102710-XX). For Installations in the United States The following must be in place for laser-illuminated projector installations in the United States: •... - Page 16 Notice. If not avoided, the following could result in property damage. General hazard. Not for household use. Cinema 4K-RGB Service Guide–CP4315-RGB, CP4320-RGB, CP4325-RGB, CP4330-RGB 020-102713-06 Rev. 1 (08-2022) Copyright © 2022 Christie Digital Systems USA, Inc. All rights reserved. If printed, please recycle this document after use.
-
Page 17: Mandatory Action
CP4325-RGB FDA laser variance (US projectors only) CP4330-RGB FDA laser variance (US projectors only) Cinema 4K-RGB Service Guide–CP4315-RGB, CP4320-RGB, CP4325-RGB, CP4330-RGB 020-102713-06 Rev. 1 (08-2022) Copyright © 2022 Christie Digital Systems USA, Inc. All rights reserved. If printed, please recycle this document after use. - Page 18 Indicates a light hazard. Do not look directly into the lens. The extreme high brightness can cause permanent eye damage. Cinema 4K-RGB Service Guide–CP4315-RGB, CP4320-RGB, CP4325-RGB, CP4330-RGB 020-102713-06 Rev. 1 (08-2022) Copyright © 2022 Christie Digital Systems USA, Inc. All rights reserved. If printed, please recycle this document after use.
-
Page 19: Service Setups
Calibrating the Intelligent Lens System On Cinema 4K-RGB projectors, the Intelligent Lens System (ILS) is activated by default. Use the Auto Calibrate feature of the ILS to find and compensate for motor backlash, and to determine the movement range for the currently installed lens. - Page 20 5. Select the RGB-4K-Boresight pattern and display it full screen. Make sure the Uncorrected Color Box option is selected. Cinema 4K-RGB Service Guide–CP4315-RGB, CP4320-RGB, CP4325-RGB, CP4330-RGB 020-102713-06 Rev. 1 (08-2022) Copyright © 2022 Christie Digital Systems USA, Inc. All rights reserved. If printed, please recycle this document after use.
- Page 21 2) and turn them until they just touch the base. Cinema 4K-RGB Service Guide–CP4315-RGB, CP4320-RGB, CP4325-RGB, CP4330-RGB 020-102713-06 Rev. 1 (08-2022) Copyright © 2022 Christie Digital Systems USA, Inc. All rights reserved. If printed, please recycle this document after use.
-
Page 22: Adjusting The Integrator Rod And Fold Mirror
Extreme misalignment of projection optics can cause permanent damage to critical optical components. Only Christie qualified technicians can perform internal optical adjustments. The integrator rod and fold mirror adjustments are set by Christie. Make adjustments only if screen shadows are visible. - Page 23 8. Loosen the fold mirror screws to unlock the fold mirror adjustment knobs. Cinema 4K-RGB Service Guide–CP4315-RGB, CP4320-RGB, CP4325-RGB, CP4330-RGB 020-102713-06 Rev. 1 (08-2022) Copyright © 2022 Christie Digital Systems USA, Inc. All rights reserved. If printed, please recycle this document after use.
- Page 24 15. Close the access door for the Zoom and Focus paddles. Cinema 4K-RGB Service Guide–CP4315-RGB, CP4320-RGB, CP4325-RGB, CP4330-RGB 020-102713-06 Rev. 1 (08-2022) Copyright © 2022 Christie Digital Systems USA, Inc. All rights reserved. If printed, please recycle this document after use.
-
Page 25: Mechanically Adjusting Dmd Convergence
If adjusting by hand without using the tool, pull out the convergence adjustment knobs to engage them. Cinema 4K-RGB Service Guide–CP4315-RGB, CP4320-RGB, CP4325-RGB, CP4330-RGB 020-102713-06 Rev. 1 (08-2022) Copyright © 2022 Christie Digital Systems USA, Inc. All rights reserved. If printed, please recycle this document after use. -
Page 26: Adjusting The Los Coupling Mirrors
For the best stability, Christie recommends setting convergence while rotating the knobs in a clockwise direction. This may require first adjusting convergence by turning the knobs counter- clockwise and finalizing the convergence with a clockwise approach. -
Page 27: Refilling The Coolant
14. Proceed to adjusting the integrator rod and fold mirror (on page 22). Refilling the coolant Cinema 4K-RGB projectors rely on liquid coolant to maintain the laser optical subsystem at the required operating temperatures. The following provides service instructions and safety precautions for filling the reservoir unit and handling coolant. -
Page 28: Filtration
Filters help to prevent dust, smoke, fog, and other foreign materials from entering the projector. In environments where dust, smog, dirt, and other contaminants are higher than normal, Christie strongly recommends replacing the air filter more frequently than your maintenance schedule indicates. -
Page 29: Main Intake Air Filter
3. Replace the used air filter with a new one. 4. Re-install the side cover. Cinema 4K-RGB Service Guide–CP4315-RGB, CP4320-RGB, CP4325-RGB, CP4330-RGB 020-102713-06 Rev. 1 (08-2022) Copyright © 2022 Christie Digital Systems USA, Inc. All rights reserved. If printed, please recycle this document after use. -
Page 30: Parts And Module Replacement
Always power down and disengage all power sources to the projector prior to servicing. • Follow all service safety precautions. Cinema 4K-RGB Service Guide–CP4315-RGB, CP4320-RGB, CP4325-RGB, CP4330-RGB 020-102713-06 Rev. 1 (08-2022) Copyright © 2022 Christie Digital Systems USA, Inc. All rights reserved. If printed, please recycle this document after use. -
Page 31: Index Of Parts And Modules
• When reconnecting the DC outputs, ensure all positive and negative terminal connections are torqued to 30 in-lb. Index of parts and modules The following table lists the parts and modules for Cinema 4K-RGB. Description Part number Electronics 12V power supply... - Page 32 003-107325-XX Fold mirror adjustment assembly 003-107316-XX Rotating diffuser assembly 003-107244-XX Cinema 4K-RGB Service Guide–CP4315-RGB, CP4320-RGB, CP4325-RGB, CP4330-RGB 020-102713-06 Rev. 1 (08-2022) Copyright © 2022 Christie Digital Systems USA, Inc. All rights reserved. If printed, please recycle this document after use.
- Page 33 Radiator filter–six pack 003-006463-XX Leveling feet 003-005359-XX High security lock 003-006472-XX Cinema 4K-RGB Service Guide–CP4315-RGB, CP4320-RGB, CP4325-RGB, CP4330-RGB 020-102713-06 Rev. 1 (08-2022) Copyright © 2022 Christie Digital Systems USA, Inc. All rights reserved. If printed, please recycle this document after use.
-
Page 34: Lens Mount Components
1. Remove the projection lens (on page 34). Cinema 4K-RGB Service Guide–CP4315-RGB, CP4320-RGB, CP4325-RGB, CP4330-RGB 020-102713-06 Rev. 1 (08-2022) Copyright © 2022 Christie Digital Systems USA, Inc. All rights reserved. If printed, please recycle this document after use. - Page 35 7. Loosen the pivot screw in the center of the lens mount. Cinema 4K-RGB Service Guide–CP4315-RGB, CP4320-RGB, CP4325-RGB, CP4330-RGB 020-102713-06 Rev. 1 (08-2022) Copyright © 2022 Christie Digital Systems USA, Inc. All rights reserved. If printed, please recycle this document after use.
- Page 36 To avoid damaging the lens mount, do not adjust the post screws. Cinema 4K-RGB Service Guide–CP4315-RGB, CP4320-RGB, CP4325-RGB, CP4330-RGB 020-102713-06 Rev. 1 (08-2022) Copyright © 2022 Christie Digital Systems USA, Inc. All rights reserved. If printed, please recycle this document after use.
- Page 37 10. Adjust the boresight (on page 19) after replacing lens mount. Cinema 4K-RGB Service Guide–CP4315-RGB, CP4320-RGB, CP4325-RGB, CP4330-RGB 020-102713-06 Rev. 1 (08-2022) Copyright © 2022 Christie Digital Systems USA, Inc. All rights reserved. If printed, please recycle this document after use.
-
Page 38: Projector Covers And Feet
2. Use the high security key to open the projector service access door. Cinema 4K-RGB Service Guide–CP4315-RGB, CP4320-RGB, CP4325-RGB, CP4330-RGB 020-102713-06 Rev. 1 (08-2022) Copyright © 2022 Christie Digital Systems USA, Inc. All rights reserved. If printed, please recycle this document after use. -
Page 39: Touch Panel
1. Loosen the six screws securing the rear cover. 2. Remove the rear cover. Cinema 4K-RGB Service Guide–CP4315-RGB, CP4320-RGB, CP4325-RGB, CP4330-RGB 020-102713-06 Rev. 1 (08-2022) Copyright © 2022 Christie Digital Systems USA, Inc. All rights reserved. If printed, please recycle this document after use. -
Page 40: Electronics-Side Cover
3. Replace the electronics-side cover, if required. 4. To re-install, follow these steps in reverse order. Cinema 4K-RGB Service Guide–CP4315-RGB, CP4320-RGB, CP4325-RGB, CP4330-RGB 020-102713-06 Rev. 1 (08-2022) Copyright © 2022 Christie Digital Systems USA, Inc. All rights reserved. If printed, please recycle this document after use. -
Page 41: Front Cover
The side-intake cover provides access to the radiator, filter, and fans. 1. Loosen the four screws securing the side-intake cover. Cinema 4K-RGB Service Guide–CP4315-RGB, CP4320-RGB, CP4325-RGB, CP4330-RGB 020-102713-06 Rev. 1 (08-2022) Copyright © 2022 Christie Digital Systems USA, Inc. All rights reserved. If printed, please recycle this document after use. -
Page 42: Bottom Cover
2. Lower the cover from the projector and slide it out. Cinema 4K-RGB Service Guide–CP4315-RGB, CP4320-RGB, CP4325-RGB, CP4330-RGB 020-102713-06 Rev. 1 (08-2022) Copyright © 2022 Christie Digital Systems USA, Inc. All rights reserved. If printed, please recycle this document after use. -
Page 43: Projector Feet
1. Make sure the projector is in a secure position. Christie does not recommend having the projector overhang the supporting surface when replacing the feet, unless the projector is securely positioned. - Page 44 Make sure the lock nut on the projector foot is torqued to 30 in-lb. Cinema 4K-RGB Service Guide–CP4315-RGB, CP4320-RGB, CP4325-RGB, CP4330-RGB 020-102713-06 Rev. 1 (08-2022) Copyright © 2022 Christie Digital Systems USA, Inc. All rights reserved. If printed, please recycle this document after use.
-
Page 45: Electronics
7. Disconnect the two harnesses (J17, J18) from the backplane board. Cinema 4K-RGB Service Guide–CP4315-RGB, CP4320-RGB, CP4325-RGB, CP4330-RGB 020-102713-06 Rev. 1 (08-2022) Copyright © 2022 Christie Digital Systems USA, Inc. All rights reserved. If printed, please recycle this document after use. -
Page 46: Ac Breaker
2. Uninstall the ground harness ends. 3. Remove the four screws. Cinema 4K-RGB Service Guide–CP4315-RGB, CP4320-RGB, CP4325-RGB, CP4330-RGB 020-102713-06 Rev. 1 (08-2022) Copyright © 2022 Christie Digital Systems USA, Inc. All rights reserved. If printed, please recycle this document after use. -
Page 47: Power Supplies
Hi-Pot testing must be performed after removing and replacing the AC breaker. Power supplies The Cinema 4K-RGB power supply assembly includes individual 12V and 48V power supply modules secured within a support bracket. The 12V power supply module provides the required voltages for operating the electronics in the projector and for receiving a UPS connection (if installed). - Page 48 6. Loosen the three fasteners securing the power supply module to the projector system. Cinema 4K-RGB Service Guide–CP4315-RGB, CP4320-RGB, CP4325-RGB, CP4330-RGB 020-102713-06 Rev. 1 (08-2022) Copyright © 2022 Christie Digital Systems USA, Inc. All rights reserved. If printed, please recycle this document after use.
- Page 49 Hardware on the positive and negative DC terminals must be re-installed as follows: 12V DC Output Terminals Cinema 4K-RGB Service Guide–CP4315-RGB, CP4320-RGB, CP4325-RGB, CP4330-RGB 020-102713-06 Rev. 1 (08-2022) Copyright © 2022 Christie Digital Systems USA, Inc. All rights reserved. If printed, please recycle this document after use.
- Page 50 Cinema 4K-RGB Service Guide–CP4315-RGB, CP4320-RGB, CP4325-RGB, CP4330-RGB 020-102713-06 Rev. 1 (08-2022) Copyright © 2022 Christie Digital Systems USA, Inc. All rights reserved. If printed, please recycle this document after use.
-
Page 51: Laser Driver Card Cage
3. Disconnect the four panel harness connectors A, B, C, and D. Cinema 4K-RGB Service Guide–CP4315-RGB, CP4320-RGB, CP4325-RGB, CP4330-RGB 020-102713-06 Rev. 1 (08-2022) Copyright © 2022 Christie Digital Systems USA, Inc. All rights reserved. If printed, please recycle this document after use. - Page 52 6. Replace the laser driver card cage. 7. To re-install, follow these steps in reverse order. Cinema 4K-RGB Service Guide–CP4315-RGB, CP4320-RGB, CP4325-RGB, CP4330-RGB 020-102713-06 Rev. 1 (08-2022) Copyright © 2022 Christie Digital Systems USA, Inc. All rights reserved. If printed, please recycle this document after use.
-
Page 53: Light Engine Temperature Sensor
8. Replace the SID harness. 9. To re-install, follow these steps in reverse order. Cinema 4K-RGB Service Guide–CP4315-RGB, CP4320-RGB, CP4325-RGB, CP4330-RGB 020-102713-06 Rev. 1 (08-2022) Copyright © 2022 Christie Digital Systems USA, Inc. All rights reserved. If printed, please recycle this document after use. -
Page 54: Mini-Sas Cables
9. Reconnect the mini-SAS harnesses to the card cage. 10. Reconnect the shutter harness. Cinema 4K-RGB Service Guide–CP4315-RGB, CP4320-RGB, CP4325-RGB, CP4330-RGB 020-102713-06 Rev. 1 (08-2022) Copyright © 2022 Christie Digital Systems USA, Inc. All rights reserved. If printed, please recycle this document after use. -
Page 55: Ventilation And Cooling
2. To remove the light engine security cover, loosen the two screws. Cinema 4K-RGB Service Guide–CP4315-RGB, CP4320-RGB, CP4325-RGB, CP4330-RGB 020-102713-06 Rev. 1 (08-2022) Copyright © 2022 Christie Digital Systems USA, Inc. All rights reserved. If printed, please recycle this document after use. -
Page 56: Green Formatter Fan (#4)
2. To remove the light engine security cover, loosen the two screws. Cinema 4K-RGB Service Guide–CP4315-RGB, CP4320-RGB, CP4325-RGB, CP4330-RGB 020-102713-06 Rev. 1 (08-2022) Copyright © 2022 Christie Digital Systems USA, Inc. All rights reserved. If printed, please recycle this document after use. -
Page 57: Red Formatter Fan (#5)
3. Loosen the two screws securing the light engine security cover. Cinema 4K-RGB Service Guide–CP4315-RGB, CP4320-RGB, CP4325-RGB, CP4330-RGB 020-102713-06 Rev. 1 (08-2022) Copyright © 2022 Christie Digital Systems USA, Inc. All rights reserved. If printed, please recycle this document after use. -
Page 58: Card Cage Exhaust Fan (#4)
2. Disconnect HUB 4 fan harness P29. 3. Remove the seven screws securing the exhaust fan. Cinema 4K-RGB Service Guide–CP4315-RGB, CP4320-RGB, CP4325-RGB, CP4330-RGB 020-102713-06 Rev. 1 (08-2022) Copyright © 2022 Christie Digital Systems USA, Inc. All rights reserved. If printed, please recycle this document after use. -
Page 59: Radiator Intake Fans (#6-17)
1. Remove the laser driver card cage (on page 51). Cinema 4K-RGB Service Guide–CP4315-RGB, CP4320-RGB, CP4325-RGB, CP4330-RGB 020-102713-06 Rev. 1 (08-2022) Copyright © 2022 Christie Digital Systems USA, Inc. All rights reserved. If printed, please recycle this document after use. -
Page 60: Light Engine Intake Fans (#25-30)
These instructions detail accessing the air filter from the top of the projector. The filter can also be removed from the side of the projector. Contact Christie Technical Support for more details. 1. Remove the top cover (on page 38). - Page 61 8. Remove the four screws securing the affected fan and remove it, along with any P-clips between the fan grill and fan chassis. Cinema 4K-RGB Service Guide–CP4315-RGB, CP4320-RGB, CP4325-RGB, CP4330-RGB 020-102713-06 Rev. 1 (08-2022) Copyright © 2022 Christie Digital Systems USA, Inc. All rights reserved. If printed, please recycle this document after use.
-
Page 62: Coolant Reservoir
5. To remove the hose bracket securing the hoses, loosen the screw. Cinema 4K-RGB Service Guide–CP4315-RGB, CP4320-RGB, CP4325-RGB, CP4330-RGB 020-102713-06 Rev. 1 (08-2022) Copyright © 2022 Christie Digital Systems USA, Inc. All rights reserved. If printed, please recycle this document after use. - Page 63 9. Remove the radiator. a) Loosen the eight screws. Cinema 4K-RGB Service Guide–CP4315-RGB, CP4320-RGB, CP4325-RGB, CP4330-RGB 020-102713-06 Rev. 1 (08-2022) Copyright © 2022 Christie Digital Systems USA, Inc. All rights reserved. If printed, please recycle this document after use.
-
Page 64: Pump Module
9. From the optical access door, disconnect all electrical connections. 10. Loosen the four screws securing the pump module. Cinema 4K-RGB Service Guide–CP4315-RGB, CP4320-RGB, CP4325-RGB, CP4330-RGB 020-102713-06 Rev. 1 (08-2022) Copyright © 2022 Christie Digital Systems USA, Inc. All rights reserved. If printed, please recycle this document after use. -
Page 65: Relief Tank
• If using a Christie Heat Extractor kit (P/N: 38-814008-XX), disconnect it using a 5 mm hex driver, removing the M6 screws, and the two inserts on the metal sleeve. 2. Loosen the seven screws, including the five screws on the projector frame and the two screws on the AC receptacle. - Page 66 4. Replace the exhaust duct, if required. 5. To re-install, follow these steps in reverse order. Cinema 4K-RGB Service Guide–CP4315-RGB, CP4320-RGB, CP4325-RGB, CP4330-RGB 020-102713-06 Rev. 1 (08-2022) Copyright © 2022 Christie Digital Systems USA, Inc. All rights reserved. If printed, please recycle this document after use.
-
Page 67: Optics
4. If required, release the diffuser harness (J135) from the rear card cage security bracket clips. Cinema 4K-RGB Service Guide–CP4315-RGB, CP4320-RGB, CP4325-RGB, CP4330-RGB 020-102713-06 Rev. 1 (08-2022) Copyright © 2022 Christie Digital Systems USA, Inc. All rights reserved. If printed, please recycle this document after use. - Page 68 7. Disconnect the diffuser harness (J135) from the diffuser interface board (DIB). Cinema 4K-RGB Service Guide–CP4315-RGB, CP4320-RGB, CP4325-RGB, CP4330-RGB 020-102713-06 Rev. 1 (08-2022) Copyright © 2022 Christie Digital Systems USA, Inc. All rights reserved. If printed, please recycle this document after use.
- Page 69 10. Pull out the integrator assembly through the back of the projector and place it on a clean, flat surface. Cinema 4K-RGB Service Guide–CP4315-RGB, CP4320-RGB, CP4325-RGB, CP4330-RGB 020-102713-06 Rev. 1 (08-2022) Copyright © 2022 Christie Digital Systems USA, Inc. All rights reserved. If printed, please recycle this document after use.
-
Page 70: Fold Mirror Adjustment Assembly
Optics To keep out dust and other contaminant, Christie recommends covering the LOS opening with a lint-free cloth. 11. To re-install, follow these steps in reverse order. 12. After replacing the integrator assembly, perform the following tasks as described in the Cinema 4K-RGB User Guide (P/N: 020-102712-XX). -
Page 71: Rotating Diffuser Assembly
7. Disconnect the diffuser harness (J135) from the diffuser interface board (DIB). 8. Remove the harness from the diffuser harness clip. Cinema 4K-RGB Service Guide–CP4315-RGB, CP4320-RGB, CP4325-RGB, CP4330-RGB 020-102713-06 Rev. 1 (08-2022) Copyright © 2022 Christie Digital Systems USA, Inc. All rights reserved. If printed, please recycle this document after use. -
Page 72: Light Dump
Optics 9. Vertically, pull out the integrator assembly and place on a flat surface. Christie recommends covering the LOS opening with a lint-free cloth to keep dust and other contaminants out. 10. Remove the four screws securing the coupling elbow. -
Page 73: Light Engine
Always wear an electrostatic discharge (ESD) strap and use insulated tools when replacing the light engine. 1. Remove the lens (on page 34). Cinema 4K-RGB Service Guide–CP4315-RGB, CP4320-RGB, CP4325-RGB, CP4330-RGB 020-102713-06 Rev. 1 (08-2022) Copyright © 2022 Christie Digital Systems USA, Inc. All rights reserved. If printed, please recycle this document after use. - Page 74 9. Loosen the three screws securing the light engine to the projector base. Cinema 4K-RGB Service Guide–CP4315-RGB, CP4320-RGB, CP4325-RGB, CP4330-RGB 020-102713-06 Rev. 1 (08-2022) Copyright © 2022 Christie Digital Systems USA, Inc. All rights reserved. If printed, please recycle this document after use.
-
Page 75: Packing The Existing Light Engine
2. Tighten the three screws and attach the light engine to the base plate. Cinema 4K-RGB Service Guide–CP4315-RGB, CP4320-RGB, CP4325-RGB, CP4330-RGB 020-102713-06 Rev. 1 (08-2022) Copyright © 2022 Christie Digital Systems USA, Inc. All rights reserved. If printed, please recycle this document after use. - Page 76 Cinema 4K-RGB Service Guide–CP4315-RGB, CP4320-RGB, CP4325-RGB, CP4330-RGB 020-102713-06 Rev. 1 (08-2022) Copyright © 2022 Christie Digital Systems USA, Inc. All rights reserved. If printed, please recycle this document after use.
- Page 77 12. Place the sealed light engine into the packaging insert tray. Cinema 4K-RGB Service Guide–CP4315-RGB, CP4320-RGB, CP4325-RGB, CP4330-RGB 020-102713-06 Rev. 1 (08-2022) Copyright © 2022 Christie Digital Systems USA, Inc. All rights reserved. If printed, please recycle this document after use.
- Page 78 15. Seal the box for shipment. 16. Return the packaged light engine to Christie. Cinema 4K-RGB Service Guide–CP4315-RGB, CP4320-RGB, CP4325-RGB, CP4330-RGB 020-102713-06 Rev. 1 (08-2022) Copyright © 2022 Christie Digital Systems USA, Inc. All rights reserved. If printed, please recycle this document after use.
-
Page 79: Light Engine Adapter Kit
Connect the QD-M connector to the input on the DMD side of the light engine. Make sure the connector is held by the holder. Cinema 4K-RGB Service Guide–CP4315-RGB, CP4320-RGB, CP4325-RGB, CP4330-RGB 020-102713-06 Rev. 1 (08-2022) Copyright © 2022 Christie Digital Systems USA, Inc. All rights reserved. If printed, please recycle this document after use. - Page 80 Connect the QD-F connector to the output on the DMD of the light engine. Make sure the connector fits into the plastic holder. Cinema 4K-RGB Service Guide–CP4315-RGB, CP4320-RGB, CP4325-RGB, CP4330-RGB 020-102713-06 Rev. 1 (08-2022) Copyright © 2022 Christie Digital Systems USA, Inc. All rights reserved. If printed, please recycle this document after use.
-
Page 81: Los Coupling Elbow
Ensure the card cage and top cover locking pins are engaged when re-installing. c) Perform a LiteLOC calibration. Cinema 4K-RGB Service Guide–CP4315-RGB, CP4320-RGB, CP4325-RGB, CP4330-RGB 020-102713-06 Rev. 1 (08-2022) Copyright © 2022 Christie Digital Systems USA, Inc. All rights reserved. If printed, please recycle this document after use. -
Page 82: Coupling Elbow Mirror
J150, J151, J152, and J153 from the red board and J155, J156, J157, J158, and J159 from the green board. Cinema 4K-RGB Service Guide–CP4315-RGB, CP4320-RGB, CP4325-RGB, CP4330-RGB 020-102713-06 Rev. 1 (08-2022) Copyright © 2022 Christie Digital Systems USA, Inc. All rights reserved. If printed, please recycle this document after use. -
Page 83: Shutter
3. Disconnect the two inline harnesses cables on the shutter. 4. Loosen the screw securing the shutter. Christie recommends using a short, right-angle 3 mm Allen key. If a right-angle Allen key is unavailable, the engine can be removed for front access using the provided straight 3 mm ball driver. - Page 84 6. Replace the shutter. 7. To re-install, follow these steps in reverse order. Cinema 4K-RGB Service Guide–CP4315-RGB, CP4320-RGB, CP4325-RGB, CP4330-RGB 020-102713-06 Rev. 1 (08-2022) Copyright © 2022 Christie Digital Systems USA, Inc. All rights reserved. If printed, please recycle this document after use.
-
Page 85: Printed Circuit Boards And Sensors
3. To remove the F-Main electronics card, press the two red locking tabs and pull the card out. Cinema 4K-RGB Service Guide–CP4315-RGB, CP4320-RGB, CP4325-RGB, CP4330-RGB 020-102713-06 Rev. 1 (08-2022) Copyright © 2022 Christie Digital Systems USA, Inc. All rights reserved. If printed, please recycle this document after use. -
Page 86: Imb
3. To remove the IMB, press the two red locking tabs and pull the IMB out. Cinema 4K-RGB Service Guide–CP4315-RGB, CP4320-RGB, CP4325-RGB, CP4330-RGB 020-102713-06 Rev. 1 (08-2022) Copyright © 2022 Christie Digital Systems USA, Inc. All rights reserved. If printed, please recycle this document after use. -
Page 87: Housekeeping Board (Hkbb)
5. Remove the 13 screws securing the housekeeping board. 6. Pull back the harnesses and remove the board. Cinema 4K-RGB Service Guide–CP4315-RGB, CP4320-RGB, CP4325-RGB, CP4330-RGB 020-102713-06 Rev. 1 (08-2022) Copyright © 2022 Christie Digital Systems USA, Inc. All rights reserved. If printed, please recycle this document after use. -
Page 88: System Compatibility Board (Sccb)
5. Replace the SCCB. 6. To re-install, follow these steps in reverse order. Cinema 4K-RGB Service Guide–CP4315-RGB, CP4320-RGB, CP4325-RGB, CP4330-RGB 020-102713-06 Rev. 1 (08-2022) Copyright © 2022 Christie Digital Systems USA, Inc. All rights reserved. If printed, please recycle this document after use. -
Page 89: Hub-Nx
9. Remove the two screws securing the HUB-NX to the card cage, located at the top of the card cage. Cinema 4K-RGB Service Guide–CP4315-RGB, CP4320-RGB, CP4325-RGB, CP4330-RGB 020-102713-06 Rev. 1 (08-2022) Copyright © 2022 Christie Digital Systems USA, Inc. All rights reserved. If printed, please recycle this document after use. -
Page 90: Dual Temperature Sensor Module (Dtsm)
4. Replace the DTSM. 5. To re-install, follow these steps in reverse order. Cinema 4K-RGB Service Guide–CP4315-RGB, CP4320-RGB, CP4325-RGB, CP4330-RGB 020-102713-06 Rev. 1 (08-2022) Copyright © 2022 Christie Digital Systems USA, Inc. All rights reserved. If printed, please recycle this document after use. -
Page 91: Status Led Board (Slb)
4. Release the locking tab to slide the LVCS out of the cage and remove it. Cinema 4K-RGB Service Guide–CP4315-RGB, CP4320-RGB, CP4325-RGB, CP4330-RGB 020-102713-06 Rev. 1 (08-2022) Copyright © 2022 Christie Digital Systems USA, Inc. All rights reserved. If printed, please recycle this document after use. -
Page 92: High Voltage Current Source Boards
4. Slide the HVCS board out of the cage and remove it. Cinema 4K-RGB Service Guide–CP4315-RGB, CP4320-RGB, CP4325-RGB, CP4330-RGB 020-102713-06 Rev. 1 (08-2022) Copyright © 2022 Christie Digital Systems USA, Inc. All rights reserved. If printed, please recycle this document after use. -
Page 93: Laser Backplane (Lbp7) Board
The locking tabs are located on the bottom end of the LDCC. Cinema 4K-RGB Service Guide–CP4315-RGB, CP4320-RGB, CP4325-RGB, CP4330-RGB 020-102713-06 Rev. 1 (08-2022) Copyright © 2022 Christie Digital Systems USA, Inc. All rights reserved. If printed, please recycle this document after use. -
Page 94: Diffuser Control Board (Dib Pcb)
4. Replace the board. 5. To re-install, follow these steps in reverse order. Cinema 4K-RGB Service Guide–CP4315-RGB, CP4320-RGB, CP4325-RGB, CP4330-RGB 020-102713-06 Rev. 1 (08-2022) Copyright © 2022 Christie Digital Systems USA, Inc. All rights reserved. If printed, please recycle this document after use. -
Page 95: Color Sensor Board
6. Locate and loosen the four fasteners on the color sensor housing (B in the image below). Cinema 4K-RGB Service Guide–CP4315-RGB, CP4320-RGB, CP4325-RGB, CP4330-RGB 020-102713-06 Rev. 1 (08-2022) Copyright © 2022 Christie Digital Systems USA, Inc. All rights reserved. If printed, please recycle this document after use. - Page 96 12. Remove the two screws securing the board to the housing and discard the screws. 13. Connect the harness to the new board. Cinema 4K-RGB Service Guide–CP4315-RGB, CP4320-RGB, CP4325-RGB, CP4330-RGB 020-102713-06 Rev. 1 (08-2022) Copyright © 2022 Christie Digital Systems USA, Inc. All rights reserved. If printed, please recycle this document after use.
-
Page 97: Color Sensor Board Harness
Light engine fan intake module (on page 60) e. Housekeeping board cover (A) Cinema 4K-RGB Service Guide–CP4315-RGB, CP4320-RGB, CP4325-RGB, CP4330-RGB 020-102713-06 Rev. 1 (08-2022) Copyright © 2022 Christie Digital Systems USA, Inc. All rights reserved. If printed, please recycle this document after use. - Page 98 Take care when removing the hose as a square hole is on the underside of the unit which may have sharp edges. Cinema 4K-RGB Service Guide–CP4315-RGB, CP4320-RGB, CP4325-RGB, CP4330-RGB 020-102713-06 Rev. 1 (08-2022) Copyright © 2022 Christie Digital Systems USA, Inc. All rights reserved. If printed, please recycle this document after use.
-
Page 99: Performing The Dac Calibration
2. Enable direct communication to photon controller. Cinema 4K-RGB Service Guide–CP4315-RGB, CP4320-RGB, CP4325-RGB, CP4330-RGB 020-102713-06 Rev. 1 (08-2022) Copyright © 2022 Christie Digital Systems USA, Inc. All rights reserved. If printed, please recycle this document after use. -
Page 100: Performing The Liteloc Version 1 Calibration
Due to the manufacturing tolerance of the color sensor board and the LOS system, calibrate the LiteLOC version 1 response to the light intensity as the temperature of the laser devices changes. 1. Contact Christie Technical Support for a copy of the Horizon Factory Calibration Procedure spreadsheet. - Page 101 "(CAL+FANS 25 45 )" ) proj.sendstring( "(CAL+FANS 26 45 )" ) Cinema 4K-RGB Service Guide–CP4315-RGB, CP4320-RGB, CP4325-RGB, CP4330-RGB 020-102713-06 Rev. 1 (08-2022) Copyright © 2022 Christie Digital Systems USA, Inc. All rights reserved. If printed, please recycle this document after use.
- Page 102 If a response is returned, the port is open and must be closed. Cinema 4K-RGB Service Guide–CP4315-RGB, CP4320-RGB, CP4325-RGB, CP4330-RGB 020-102713-06 Rev. 1 (08-2022) Copyright © 2022 Christie Digital Systems USA, Inc. All rights reserved. If printed, please recycle this document after use.
-
Page 103: Liteloc ™ Calibration For Cinema Projectors
After replacing these components, check the accuracy of the color point and if unsatisfactory, re-do this calibration. Cinema 4K-RGB Service Guide–CP4315-RGB, CP4320-RGB, CP4325-RGB, CP4330-RGB 020-102713-06 Rev. 1 (08-2022) Copyright © 2022 Christie Digital Systems USA, Inc. All rights reserved. If printed, please recycle this document after use.
Need help?
Do you have a question about the Cinema 4K-RGB and is the answer not in the manual?
Questions and answers