Christie CP4325-RGB Instruction Sheet
Replacing the coupling elbow
Hide thumbs
Also See for CP4325-RGB:
- Service manual (104 pages) ,
- User manual (101 pages) ,
- Installation and setup manual (52 pages)
Table of Contents
Advertisement
Quick Links
Replacing the CP4325-
RGB coupling elbow
These instructions provide details for properly replacing the CP4325-RGB LOS coupling elbow.
Affected products
The following products are affected.
•
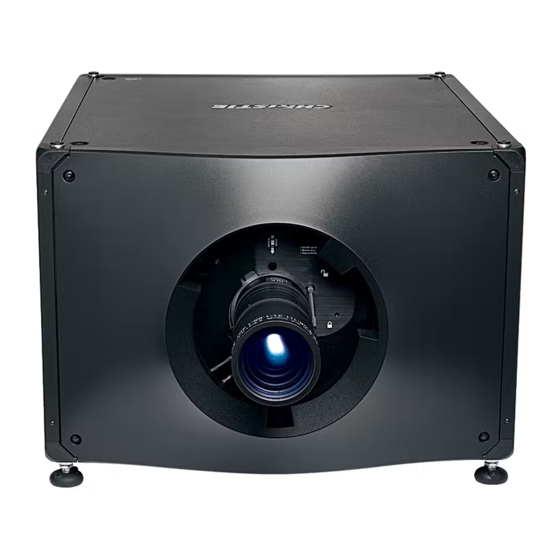
Christie CP4325-RGB (P/N: 163-001102-XX)
Required components
The following components are required to replace the LOS coupling elbow.
•
Coupling Elbow with Depolarizer service kit (P/N: 003-006597-XX)
Replacing the CP4325-RGB Coupling Elbow Instruction Sheet
020-102890-01 Rev. 1 (07-2018)
Copyright
2018 Christie Digital Systems USA, Inc. All rights reserved.
©
1
Advertisement
Table of Contents

Subscribe to Our Youtube Channel
Related Manuals for Christie CP4325-RGB


Summary of Contents for Christie CP4325-RGB
- Page 1 Replacing the CP4325- RGB coupling elbow These instructions provide details for properly replacing the CP4325-RGB LOS coupling elbow. Affected products The following products are affected. • Christie CP4325-RGB (P/N: 163-001102-XX) Required components The following components are required to replace the LOS coupling elbow.
-
Page 2: Important Safeguards
Caution! If not avoided, the following could result in minor or moderate injury. • Only Christie qualified technicians are permitted to open product enclosures. Laser safety precautions Read all safety and warning guidelines before operating the projector laser. -
Page 3: Ac/Power Precautions
• SHOCK HAZARD! A dedicated, protected ground or earth wire must be installed on the product by Christie qualified technicians or electricians before it can be connected to power. • SHOCK HAZARD! Disconnect the product from AC before installing, moving, servicing, cleaning, removing components, or opening any enclosure. -
Page 4: Removing The Touch Panel
1. Disconnect the three harnesses from the card cage input panel. 2. Loosen the clamp knob. 3. Remove the touch panel from the projector. Replacing the CP4325-RGB Coupling Elbow Instruction Sheet 020-102890-01 Rev. 1 (07-2018) Copyright 2018 Christie Digital Systems USA, Inc. All rights reserved. ©... -
Page 5: Removing The Rear Cover
The electronics-side cover provides access to the card cage. 1. Loosen the four captive screws securing the electronics-side cover. Replacing the CP4325-RGB Coupling Elbow Instruction Sheet 020-102890-01 Rev. 1 (07-2018) Copyright 2018 Christie Digital Systems USA, Inc. All rights reserved. ©... -
Page 6: Removing The Card Cage
3. Remove the electronics-side cover (on page 5). 4. Remove the two screws securing the electronics bracket and remove bracket. Replacing the CP4325-RGB Coupling Elbow Instruction Sheet 020-102890-01 Rev. 1 (07-2018) Copyright 2018 Christie Digital Systems USA, Inc. All rights reserved. ©... - Page 7 7. Disconnect the two harnesses (J17, J18) from the backplane board. 8. Loosen the four captive screws securing the card cage. Replacing the CP4325-RGB Coupling Elbow Instruction Sheet 020-102890-01 Rev. 1 (07-2018) Copyright 2018 Christie Digital Systems USA, Inc. All rights reserved. ©...
- Page 8 1. Release the diffuser harness (J135) from the rear card cage security bracket clips. 2. Remove the five screws securing the rear card cage security bracket. Replacing the CP4325-RGB Coupling Elbow Instruction Sheet 020-102890-01 Rev. 1 (07-2018) Copyright 2018 Christie Digital Systems USA, Inc. All rights reserved. ©...
- Page 9 5. Remove the harness from the two diffuser harness clips. 6. Remove the six screws securing the integrator assembly. Replacing the CP4325-RGB Coupling Elbow Instruction Sheet 020-102890-01 Rev. 1 (07-2018) Copyright 2018 Christie Digital Systems USA, Inc. All rights reserved. ©...
- Page 10 Replacing the CP4325-RGB coupling elbow 7. Vertically, pull out the integrator assembly and place on a flat surface. Christie recommends covering the LOS opening to keep dust and other contaminants out. 8. Remove the four screws securing the coupling elbow.
- Page 11 Extreme misalignment of projection optics can cause permanent damage to critical optical components. Only Christie qualified technicians can perform internal optical adjustments. The integrator rod and fold mirror adjustments are set by Christie. Make adjustments only if screen shadows are visible.
- Page 12 4. To use the integrator rod optical controls, open the access door for the Zoom and Focus paddles. 5. Loosen the lock screw for the Zoom and Focus paddles. Replacing the CP4325-RGB Coupling Elbow Instruction Sheet 020-102890-01 Rev. 1 (07-2018) Copyright 2018 Christie Digital Systems USA, Inc. All rights reserved. ©...
- Page 13 8. To make horizontal adjustments on the fold mirror, use the orange adjustment knob. To make vertical adjustments on the fold mirror, use the purple adjustment knob. Replacing the CP4325-RGB Coupling Elbow Instruction Sheet 020-102890-01 Rev. 1 (07-2018) Copyright 2018 Christie Digital Systems USA, Inc. All rights reserved. ©...
-
Page 14: Technical Support
Europe, Middle East, and Africa: +44 (0) 1189 778111 or Support.EMEA@christiedigital.com • Asia Pacific: +65 6877-8737 or Support.APAC@christiedigital.com • Christie Managed Services: +1-800-550-3061 or NOC@christiedigital.com Replacing the CP4325-RGB Coupling Elbow Instruction Sheet 020-102890-01 Rev. 1 (07-2018) Copyright 2018 Christie Digital Systems USA, Inc. All rights reserved. ©...
Need help?
Do you have a question about the CP4325-RGB and is the answer not in the manual?
Questions and answers