Christie Cinema 4K-RGB CP4315-RGB Service Manual
Hide thumbs
Also See for Cinema 4K-RGB CP4315-RGB:
- User manual (101 pages) ,
- Installation and setup manual (52 pages) ,
- Replacing (7 pages)

Related Manuals for Christie Cinema 4K-RGB CP4315-RGB


Summary of Contents for Christie Cinema 4K-RGB CP4315-RGB
- Page 1 Service Guide 020-102713-03 Cinema 4K-RGB CP4315-RGB, CP4320-RGB, CP4325-RGB, CP4330-...
- Page 2 The warranty does not apply to any product where the serial number has been removed or obliterated. The warranty also does not apply to any product sold by a reseller to an end user outside of the country where the reseller is located unless (i) Christie has an office in the country where the end user is located or (ii) the required international warranty fee has been paid.
-
Page 3: Table Of Contents
Tools required for service..........30 Cinema 4K-RGB Service Guide–CP4315-RGB, CP4320-RGB, CP4325-RGB, CP4330-RGB 020-102713-03 Rev. 1 (11-2019) Copyright 2019 Christie Digital Systems USA, Inc. All rights reserved. ©... - Page 4 Removing the pump module..........62 Cinema 4K-RGB Service Guide–CP4315-RGB, CP4320-RGB, CP4325-RGB, CP4330-RGB 020-102713-03 Rev. 1 (11-2019) Copyright 2019 Christie Digital Systems USA, Inc. All rights reserved. ©...
- Page 5 Performing the LiteLOC v1 calibration........93 Cinema 4K-RGB Service Guide–CP4315-RGB, CP4320-RGB, CP4325-RGB, CP4330-RGB 020-102713-03 Rev. 1 (11-2019) Copyright 2019 Christie Digital Systems USA, Inc. All rights reserved. ©...
-
Page 6: Introduction
Cinema 4K-RGB projector. Every effort has been made to make sure the information in this document is accurate and complete. However, due to continuing research all information is subject to change without notice. Christie assumes no responsibility for omissions or inaccuracies. -
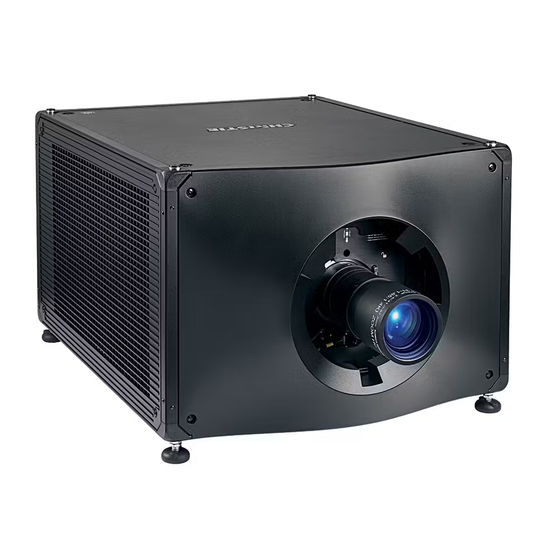
Page 7: Projector Components (Front)
Turn the adjustable feet to increase or decrease the projector height. Service access door Communications panel External devices are connected here. Cinema 4K-RGB Service Guide–CP4315-RGB, CP4320-RGB, CP4325-RGB, CP4330-RGB 020-102713-03 Rev. 1 (11-2019) Copyright 2019 Christie Digital Systems USA, Inc. All rights reserved. ©... -
Page 8: Projector Components (Rear)
Power cord and AC receptacle Air intake Security roles Only Christie authorized service technicians should perform field repair, marriage setup, and service to the unit. Theater personnel should only perform diagnostic functions, such as running the projector interrogator. After performing a procedure that mandates use of the high security key, theater personnel must ensure the security of the system is reestablished. -
Page 9: Product Documentation
Introduction Product documentation For installation, setup, and user information, see the product documentation available on the Christie website. Read all instructions before using or servicing this product. 1. Access the documentation from the Christie website: CP4315-RGB • Go to http://bit.ly/30mhBGx or https://www.christiedigital.com/en-us/cinema/cinema- products/digital-cinema-projectors/christie-cp4315-rgb •... -
Page 10: Related Documentation
Cinema 4K-RGB Product Safety Guide (P/N: 020-102711-XX) • CineLife Serial Commands Guide (P/N: 020-102714-XX) • Cinema 4K-RGB Specifications Guide (P/N: 020-102729-XX) Cinema 4K-RGB Service Guide–CP4315-RGB, CP4320-RGB, CP4325-RGB, CP4330-RGB 020-102713-03 Rev. 1 (11-2019) Copyright 2019 Christie Digital Systems USA, Inc. All rights reserved. ©... -
Page 11: Service Guidelines
To ensure you have the correct module and the projector module is replaced correctly, check module markings, parts lists, and the relevant disassembly and replacement procedures. Components must be replaced with exact equivalents or Christie approved replacement parts. Failure to do so may result in unsafe operation. -
Page 12: Safety Precautions
(electrically insulated) footwear, safety glasses, and gloves rated for the working voltage of the equipment you are servicing. Safety precautions Learn about the safety precautions related to the Christie Cinema 4K-RGB projector. This projector is intended for use in a cinema environment. General safety precautions Read all safety and warning guidelines before installing or operating the projector. -
Page 13: Laser Safety Precautions
• SHOCK HAZARD! A dedicated, protected ground or earth wire must be installed on the product by Christie qualified technicians or electricians before it can be connected to power. • SHOCK HAZARD! Disconnect the product from AC before installing, moving, servicing, cleaning, removing components, or opening any enclosure. -
Page 14: Light Intensity Hazard Distance
2.0 meters (global installations) above any surface upon which any persons are permitted to stand. • E—Represents the top view of the projector. Cinema 4K-RGB Service Guide–CP4315-RGB, CP4320-RGB, CP4325-RGB, CP4330-RGB 020-102713-03 Rev. 1 (11-2019) Copyright 2019 Christie Digital Systems USA, Inc. All rights reserved. ©... - Page 15 1.45-2.17:1 DLPCine HB zoom lens 108-336103-XX 1.63-2.71:1 DLPCine HB zoom lens 108-337104-XX 1.95-3.26:1 DLPCine HB zoom lens 108-338105-XX Cinema 4K-RGB Service Guide–CP4315-RGB, CP4320-RGB, CP4325-RGB, CP4330-RGB 020-102713-03 Rev. 1 (11-2019) Copyright 2019 Christie Digital Systems USA, Inc. All rights reserved. ©...
- Page 16 The projection room sign must display the warning "No direct exposure to beam shall be permitted". Cinema 4K-RGB Service Guide–CP4315-RGB, CP4320-RGB, CP4325-RGB, CP4330-RGB 020-102713-03 Rev. 1 (11-2019) Copyright 2019 Christie Digital Systems USA, Inc. All rights reserved. ©...
-
Page 17: Product Labels
Learn about the labels that may be used on the product. Labels on your product may be yellow or black and white. General hazards Hazard warnings also apply to accessories once they are installed in a Christie product that is connected to power. Fire and Shock Hazard To prevent fire or shock hazards, do not expose this product to rain or moisture. -
Page 18: Mandatory Action
CLASS 1 LASER PRODUCT IEC 60825-1:2014 CP4325-RGB FDA laser variance (US projectors only) Cinema 4K-RGB Service Guide–CP4315-RGB, CP4320-RGB, CP4325-RGB, CP4330-RGB 020-102713-03 Rev. 1 (11-2019) Copyright 2019 Christie Digital Systems USA, Inc. All rights reserved. ©... - Page 19 Indicates a light hazard. Do not look directly into the lens. The extreme high brightness can cause permanent eye damage. Cinema 4K-RGB Service Guide–CP4315-RGB, CP4320-RGB, CP4325-RGB, CP4330-RGB 020-102713-03 Rev. 1 (11-2019) Copyright 2019 Christie Digital Systems USA, Inc. All rights reserved. ©...
-
Page 20: Service Setups
Caution! If not avoided, the following could result in minor or moderate injury. • This procedure must be performed by Christie qualified technicians. Cinema 4K-RGB Service Guide–CP4315-RGB, CP4320-RGB, CP4325-RGB, CP4330-RGB 020-102713-03 Rev. 1 (11-2019) Copyright 2019 Christie Digital Systems USA, Inc. - Page 21 4. In the right toolbar, tap Test Patterns. 5. Select the RGB-4K-Boresight pattern and display it full screen. Cinema 4K-RGB Service Guide–CP4315-RGB, CP4320-RGB, CP4325-RGB, CP4330-RGB 020-102713-03 Rev. 1 (11-2019) Copyright 2019 Christie Digital Systems USA, Inc. All rights reserved. ©...
- Page 22 When stabilizing image vibration, Lock B may be left locked or unlocked at the discretion of the installer. Cinema 4K-RGB Service Guide–CP4315-RGB, CP4320-RGB, CP4325-RGB, CP4330-RGB 020-102713-03 Rev. 1 (11-2019) Copyright 2019 Christie Digital Systems USA, Inc. All rights reserved. ©...
-
Page 23: Adjusting The Integrator Rod And Fold Mirror
Extreme misalignment of projection optics can cause permanent damage to critical optical components. Only Christie qualified technicians can perform internal optical adjustments. The integrator rod and fold mirror adjustments are set by Christie. Make adjustments only if screen shadows are visible. - Page 24 6. Set the integrator rod Zoom paddle to the minimum. 7. Loosen the fold mirror screws to unlock the fold mirror adjustment knobs. Cinema 4K-RGB Service Guide–CP4315-RGB, CP4320-RGB, CP4325-RGB, CP4330-RGB 020-102713-03 Rev. 1 (11-2019) Copyright 2019 Christie Digital Systems USA, Inc. All rights reserved. ©...
- Page 25 8. To make horizontal adjustments on the fold mirror, use the orange adjustment knob. To make vertical adjustments on the fold mirror, use the purple adjustment knob. Cinema 4K-RGB Service Guide–CP4315-RGB, CP4320-RGB, CP4325-RGB, CP4330-RGB 020-102713-03 Rev. 1 (11-2019) Copyright 2019 Christie Digital Systems USA, Inc. All rights reserved. ©...
-
Page 26: Adjusting Dmd Convergence
2. In the right toolbar, tap Test Patterns. 3. Select the RGB-4K-Convergence test pattern and display it full screen. Cinema 4K-RGB Service Guide–CP4315-RGB, CP4320-RGB, CP4325-RGB, CP4330-RGB 020-102713-03 Rev. 1 (11-2019) Copyright 2019 Christie Digital Systems USA, Inc. All rights reserved. ©... - Page 27 If adjusting by hand without using the tool, pull out the convergence adjustment knobs to engage them. 6. Use the Convergence test pattern to assist with adjusting the horizontal and vertical lines. Cinema 4K-RGB Service Guide–CP4315-RGB, CP4320-RGB, CP4325-RGB, CP4330-RGB 020-102713-03 Rev. 1 (11-2019) Copyright 2019 Christie Digital Systems USA, Inc. All rights reserved. ©...
-
Page 28: Adjusting The Los Coupling Mirror
For the best stability, Christie recommends setting convergence while rotating the knobs in a clockwise direction. This may require first adjusting convergence by turning the knobs counter- clockwise, and finalizing the convergence with a clockwise approach. - Page 29 7. Use a soft cloth to wipe away any coolant that drips outside the reservoir. 8. Reinstall the coolant reservoir in the projector. Cinema 4K-RGB Service Guide–CP4315-RGB, CP4320-RGB, CP4325-RGB, CP4330-RGB 020-102713-03 Rev. 1 (11-2019) Copyright 2019 Christie Digital Systems USA, Inc. All rights reserved. ©...
-
Page 30: Parts And Module Replacement
• Always power down and disengage all power sources (on page 20) to the projector prior to servicing. Cinema 4K-RGB Service Guide–CP4315-RGB, CP4320-RGB, CP4325-RGB, CP4330-RGB 020-102713-03 Rev. 1 (11-2019) Copyright 2019 Christie Digital Systems USA, Inc. All rights reserved. ©... -
Page 31: Index Of Parts And Modules
Radiator filter (6PK) 003-006463-XX Relief tank module 003-107545-XX Pump module CP4325-RGB 003-106875-XX Pump module CP4330-RGB 003-108521-XX Radiator handle 003-107183-XX Cinema 4K-RGB Service Guide–CP4315-RGB, CP4320-RGB, CP4325-RGB, CP4330-RGB 020-102713-03 Rev. 1 (11-2019) Copyright 2019 Christie Digital Systems USA, Inc. All rights reserved. ©... - Page 32 Illumination optics system (IOS) Rear CP4325-RGB 003-107230-XX Illumination optics system (IOS) Rear CP4330-RGB 003-108603-XX Coupling elbow with depolarizer 003-006597-XX Lenses Cinema 4K-RGB Service Guide–CP4315-RGB, CP4320-RGB, CP4325-RGB, CP4330-RGB 020-102713-03 Rev. 1 (11-2019) Copyright 2019 Christie Digital Systems USA, Inc. All rights reserved. ©...
- Page 33 CFast Card 8G-FMain 003-006303-XX Miscellaneous Touch screen monitor 003-121059-XX Touch panel hardware 003-003326-XX Leveling feet 003-005359-XX High security lock 003-006472-XX Cinema 4K-RGB Service Guide–CP4315-RGB, CP4320-RGB, CP4325-RGB, CP4330-RGB 020-102713-03 Rev. 1 (11-2019) Copyright 2019 Christie Digital Systems USA, Inc. All rights reserved. ©...
-
Page 34: Lens Mount Components
1. Remove the front cover (on page 42). 2. Remove the projection lens (on page 34). Cinema 4K-RGB Service Guide–CP4315-RGB, CP4320-RGB, CP4325-RGB, CP4330-RGB 020-102713-03 Rev. 1 (11-2019) Copyright 2019 Christie Digital Systems USA, Inc. All rights reserved. ©... - Page 35 7. Using a 5 mm hex driver, loosen the pivot screw in the center of the lens mount. Cinema 4K-RGB Service Guide–CP4315-RGB, CP4320-RGB, CP4325-RGB, CP4330-RGB 020-102713-03 Rev. 1 (11-2019) Copyright 2019 Christie Digital Systems USA, Inc. All rights reserved. ©...
- Page 36 The new lens mount includes three post screws that set the required distance of the lens mount from the projector head. To avoid damaging the lens mount, do not adjust the post screws. Cinema 4K-RGB Service Guide–CP4315-RGB, CP4320-RGB, CP4325-RGB, CP4330-RGB 020-102713-03 Rev. 1 (11-2019) Copyright 2019 Christie Digital Systems USA, Inc. All rights reserved. ©...
-
Page 37: Filtration
4. Replace the used air filter with a new one. The airflow indicator on the new filter must point towards the fan pack. Cinema 4K-RGB Service Guide–CP4315-RGB, CP4320-RGB, CP4325-RGB, CP4330-RGB 020-102713-03 Rev. 1 (11-2019) Copyright 2019 Christie Digital Systems USA, Inc. All rights reserved. ©... -
Page 38: Replacing The Main Intake Air Filter
2. Pull out the air filter from the projector. 3. Replace the used air filter with a new one. 4. Re-install the side cover. Cinema 4K-RGB Service Guide–CP4315-RGB, CP4320-RGB, CP4325-RGB, CP4330-RGB 020-102713-03 Rev. 1 (11-2019) Copyright 2019 Christie Digital Systems USA, Inc. All rights reserved. ©... -
Page 39: Projector Covers And Feet
4. If required, replace the top cover. 5. To install the top cover, repeat these steps in reverse order. Cinema 4K-RGB Service Guide–CP4315-RGB, CP4320-RGB, CP4325-RGB, CP4330-RGB 020-102713-03 Rev. 1 (11-2019) Copyright 2019 Christie Digital Systems USA, Inc. All rights reserved. ©... -
Page 40: Removing The Touch Panel
1. Loosen the six captive screws securing the rear cover. 2. Remove the rear cover. Cinema 4K-RGB Service Guide–CP4315-RGB, CP4320-RGB, CP4325-RGB, CP4330-RGB 020-102713-03 Rev. 1 (11-2019) Copyright 2019 Christie Digital Systems USA, Inc. All rights reserved. ©... -
Page 41: Removing The Electronics-Side Cover
3. If required, replace the electronics-side cover. 4. To install the electronics-side cover, repeat these steps in reverse order. Cinema 4K-RGB Service Guide–CP4315-RGB, CP4320-RGB, CP4325-RGB, CP4330-RGB 020-102713-03 Rev. 1 (11-2019) Copyright 2019 Christie Digital Systems USA, Inc. All rights reserved. ©... -
Page 42: Removing The Front Cover
The side-intake cover provides access to the radiator, filter, and fans. 1. Loosen the four captive screws securing the side-intake cover. Cinema 4K-RGB Service Guide–CP4315-RGB, CP4320-RGB, CP4325-RGB, CP4330-RGB 020-102713-03 Rev. 1 (11-2019) Copyright 2019 Christie Digital Systems USA, Inc. All rights reserved. ©... -
Page 43: Removing The Bottom Cover
1. Loosen the six captive screws securing the bottom cover. 2. Lower the cover from the projector and slide it out. Cinema 4K-RGB Service Guide–CP4315-RGB, CP4320-RGB, CP4325-RGB, CP4330-RGB 020-102713-03 Rev. 1 (11-2019) Copyright 2019 Christie Digital Systems USA, Inc. All rights reserved. ©... - Page 44 3. If required, replace the bottom cover. 4. To install the bottom cover, repeat these steps in reverse order. Cinema 4K-RGB Service Guide–CP4315-RGB, CP4320-RGB, CP4325-RGB, CP4330-RGB 020-102713-03 Rev. 1 (11-2019) Copyright 2019 Christie Digital Systems USA, Inc. All rights reserved. ©...
-
Page 45: Electronics
6. Disconnect the three harnesses (J5, J7, J87) from the SSCB on top of the card cage. 7. Disconnect the two harnesses (J17, J18) from the backplane board. Cinema 4K-RGB Service Guide–CP4315-RGB, CP4320-RGB, CP4325-RGB, CP4330-RGB 020-102713-03 Rev. 1 (11-2019) Copyright 2019 Christie Digital Systems USA, Inc. All rights reserved. ©... -
Page 46: Removing The Ac Breaker
2. Using an 8 mm deep socket nut driver, uninstall the ground harness ends. 3. Remove the four screws. Cinema 4K-RGB Service Guide–CP4315-RGB, CP4320-RGB, CP4325-RGB, CP4330-RGB 020-102713-03 Rev. 1 (11-2019) Copyright 2019 Christie Digital Systems USA, Inc. All rights reserved. ©... -
Page 47: Replacing The Power Supplies
3. Unplug the 12V connector from the 12V power supply module. 4. Unplug the 48V connector from the 48V power supply module. Cinema 4K-RGB Service Guide–CP4315-RGB, CP4320-RGB, CP4325-RGB, CP4330-RGB 020-102713-03 Rev. 1 (11-2019) Copyright 2019 Christie Digital Systems USA, Inc. All rights reserved. ©... - Page 48 6. Loosen the three captive fasteners securing the power supply module to the projector system. Cinema 4K-RGB Service Guide–CP4315-RGB, CP4320-RGB, CP4325-RGB, CP4330-RGB 020-102713-03 Rev. 1 (11-2019) Copyright 2019 Christie Digital Systems USA, Inc. All rights reserved. ©...
- Page 49 30 in-lb. Hardware on the positive and negative DC terminals must be re-installed as follows: 12V DC Output Terminals Cinema 4K-RGB Service Guide–CP4315-RGB, CP4320-RGB, CP4325-RGB, CP4330-RGB 020-102713-03 Rev. 1 (11-2019) Copyright 2019 Christie Digital Systems USA, Inc. All rights reserved. ©...
- Page 50 When correctly oriented in the projector, the 12V power supply is located at the top of the assembly, with the handle and support brackets fitting over the three locating pins. Cinema 4K-RGB Service Guide–CP4315-RGB, CP4320-RGB, CP4325-RGB, CP4330-RGB 020-102713-03 Rev. 1 (11-2019) Copyright 2019 Christie Digital Systems USA, Inc. All rights reserved. ©...
-
Page 51: Removing The Laser Driver Card Cage
2. Disconnect the harness connectors J113, J111, J71, J70, J88, J128, and E panel harness (fan #21-24). 3. Disconnect the four panel harness connectors A, B, C, and D. Cinema 4K-RGB Service Guide–CP4315-RGB, CP4320-RGB, CP4325-RGB, CP4330-RGB 020-102713-03 Rev. 1 (11-2019) Copyright 2019 Christie Digital Systems USA, Inc. All rights reserved. ©... - Page 52 5. Using the metal flanges provided, pull the laser driver card cage out of the projector. 6. Replace the laser driver card cage. 7. To re-install, follow these steps in reverse order. Cinema 4K-RGB Service Guide–CP4315-RGB, CP4320-RGB, CP4325-RGB, CP4330-RGB 020-102713-03 Rev. 1 (11-2019) Copyright 2019 Christie Digital Systems USA, Inc. All rights reserved. ©...
-
Page 53: Replacing The Temperature Sensor
7. Remove the SID harness. 8. Replace the SID harness. 9. To re-install, repeat these steps in reverse order. Cinema 4K-RGB Service Guide–CP4315-RGB, CP4320-RGB, CP4325-RGB, CP4330-RGB 020-102713-03 Rev. 1 (11-2019) Copyright 2019 Christie Digital Systems USA, Inc. All rights reserved. ©... -
Page 54: Replacing The Mini-Sas Cables
Make sure the access and bends are identical to what was installed or the harnesses do not route properly. 5. Replace the light engine. 6. Reconnect the mini-SAS harnesses to the card cage. Cinema 4K-RGB Service Guide–CP4315-RGB, CP4320-RGB, CP4325-RGB, CP4330-RGB 020-102713-03 Rev. 1 (11-2019) Copyright 2019 Christie Digital Systems USA, Inc. All rights reserved. ©... -
Page 55: Ventilation And Cooling
2. To remove the light engine security cover, loosen the two captive screws using a 3 mm driver. Cinema 4K-RGB Service Guide–CP4315-RGB, CP4320-RGB, CP4325-RGB, CP4330-RGB 020-102713-03 Rev. 1 (11-2019) Copyright 2019 Christie Digital Systems USA, Inc. All rights reserved. ©... -
Page 56: Replacing The Green Formatter Fan (#4)
2. To remove the light engine security cover, loosen the two captive screws using a 3 mm driver. Cinema 4K-RGB Service Guide–CP4315-RGB, CP4320-RGB, CP4325-RGB, CP4330-RGB 020-102713-03 Rev. 1 (11-2019) Copyright 2019 Christie Digital Systems USA, Inc. All rights reserved. ©... -
Page 57: Replacing The Red Formatter Fan (#5)
3. To remove the light engine security cover, loosen the two captive screws using a 3 mm driver. Cinema 4K-RGB Service Guide–CP4315-RGB, CP4320-RGB, CP4325-RGB, CP4330-RGB 020-102713-03 Rev. 1 (11-2019) Copyright 2019 Christie Digital Systems USA, Inc. All rights reserved. ©... -
Page 58: Replacing The Card Cage Exhaust Fan (#4)
1. Remove the card cage (on page 45). 2. Disconnect HUB 4 fan harness P29. 3. Remove the seven screws using a 2.5 mm driver. Cinema 4K-RGB Service Guide–CP4315-RGB, CP4320-RGB, CP4325-RGB, CP4330-RGB 020-102713-03 Rev. 1 (11-2019) Copyright 2019 Christie Digital Systems USA, Inc. All rights reserved. ©... -
Page 59: Replacing The Radiator Intake Fans (#6-17)
Replacing the laser driver card cage fans (#21-24) 1. Remove the laser driver card cage (on page 51). Cinema 4K-RGB Service Guide–CP4315-RGB, CP4320-RGB, CP4325-RGB, CP4330-RGB 020-102713-03 Rev. 1 (11-2019) Copyright 2019 Christie Digital Systems USA, Inc. All rights reserved. ©... -
Page 60: Replacing The Light Engine Intake Fans (#25-30)
These instructions detail accessing the air filter from the top of the projector. The filter can also be removed from the side of the projector. Contact Christie Technical Support for more details. 1. Remove the top cover (on page 39). - Page 61 Ensure the airflow direction label on top of the fan pack matches the airflow indicator on the replacement fan. 10. To re-install, follow these steps in reverse order. Cinema 4K-RGB Service Guide–CP4315-RGB, CP4320-RGB, CP4325-RGB, CP4330-RGB 020-102713-03 Rev. 1 (11-2019) Copyright 2019 Christie Digital Systems USA, Inc. All rights reserved. ©...
-
Page 62: Removing The Coolant Reservoir
9. From the optical access door, disconnect all electrical connections. 10. Loosen the four captive screws securing the pump module. Cinema 4K-RGB Service Guide–CP4315-RGB, CP4320-RGB, CP4325-RGB, CP4330-RGB 020-102713-03 Rev. 1 (11-2019) Copyright 2019 Christie Digital Systems USA, Inc. All rights reserved. ©... -
Page 63: Replacing The Radiator
12. Replace the pump module. 13. To re-install, repeat these steps in reverse order. Christie recommends fully securing the pump module before starting to reroute and connect the hoses. To avoid damage when re-routing the hoses, ensure care is taken to not kink the hoses. - Page 64 8. Remove the two radiator handles from the back of the projector and attach them to the radiator. 9. Remove the radiator. a) Loosen the eight captive screws. Cinema 4K-RGB Service Guide–CP4315-RGB, CP4320-RGB, CP4325-RGB, CP4330-RGB 020-102713-03 Rev. 1 (11-2019) Copyright 2019 Christie Digital Systems USA, Inc. All rights reserved. ©...
-
Page 65: Replacing The Relief Tank
1. If using an alternate heat extractor, disconnect a standard Ø8” HVAC duct from the exhaust duct flange. 2. If using a Christie Heat Extractor kit (P/N: 38-814008-XX), disconnect it using a 5 mm hex driver, removing the M6 screws, and the two inserts on the metal sleeve. - Page 66 4. Remove the exhaust duct from around the touch panel mount and AC receptacle. 5. To replace the exhaust duct, follow these steps in reverse order. Cinema 4K-RGB Service Guide–CP4315-RGB, CP4320-RGB, CP4325-RGB, CP4330-RGB 020-102713-03 Rev. 1 (11-2019) Copyright 2019 Christie Digital Systems USA, Inc. All rights reserved. ©...
-
Page 67: Optics
3. Remove the coolant reservoir (on page 62). 4. If required, release the diffuser harness (J135) from the rear card cage security bracket clips. Cinema 4K-RGB Service Guide–CP4315-RGB, CP4320-RGB, CP4325-RGB, CP4330-RGB 020-102713-03 Rev. 1 (11-2019) Copyright 2019 Christie Digital Systems USA, Inc. All rights reserved. ©... - Page 68 8. Remove the diffuser harness from the clip. 9. Using a 3 mm driver, remove the six screws securing the integrator assembly. Cinema 4K-RGB Service Guide–CP4315-RGB, CP4320-RGB, CP4325-RGB, CP4330-RGB 020-102713-03 Rev. 1 (11-2019) Copyright 2019 Christie Digital Systems USA, Inc. All rights reserved. ©...
-
Page 69: Replacing The Fold Mirror Adjust
Optics 10. Vertically, pull out the integrator assembly and place it on a clean, flat surface. To keep out dust and other contaminant, Christie recommends covering the LOS opening with a lint free cloth. 11. To re-install, follow these steps in reverse order. -
Page 70: Replacing The Light Dump
3. To remove the light engine security cover, loosen the two captive screws using a 3 mm driver. 4. Loosen the captive screw securing the light dump and remove. Cinema 4K-RGB Service Guide–CP4315-RGB, CP4320-RGB, CP4325-RGB, CP4330-RGB 020-102713-03 Rev. 1 (11-2019) Copyright 2019 Christie Digital Systems USA, Inc. All rights reserved. ©... -
Page 71: Replacing The Light Engine
6. Disconnect the J89 shutter harness from the housekeeping board (HKBB). 7. Loosen the three captive screws securing the light engine to the projector base. Cinema 4K-RGB Service Guide–CP4315-RGB, CP4320-RGB, CP4325-RGB, CP4330-RGB 020-102713-03 Rev. 1 (11-2019) Copyright 2019 Christie Digital Systems USA, Inc. All rights reserved. ©... -
Page 72: Packing The Existing Light Engine
2. Using a 3 mm hex driver, tighten the three captive M4 screws and attach the light engine to the base plate. Cinema 4K-RGB Service Guide–CP4315-RGB, CP4320-RGB, CP4325-RGB, CP4330-RGB 020-102713-03 Rev. 1 (11-2019) Copyright 2019 Christie Digital Systems USA, Inc. All rights reserved. ©... - Page 73 9. Attach a zip tie to secure the light engine coolant hose and Mini SAS cables, ensuring that the hose and cables are not pinched against any part of the light engine or convergence plate. Cinema 4K-RGB Service Guide–CP4315-RGB, CP4320-RGB, CP4325-RGB, CP4330-RGB 020-102713-03 Rev. 1 (11-2019) Copyright 2019 Christie Digital Systems USA, Inc. All rights reserved. ©...
- Page 74 11. Tape the ESD bag to seal it. 12. Place the sealed light engine into the packaging insert tray. Cinema 4K-RGB Service Guide–CP4315-RGB, CP4320-RGB, CP4325-RGB, CP4330-RGB 020-102713-03 Rev. 1 (11-2019) Copyright 2019 Christie Digital Systems USA, Inc. All rights reserved. ©...
-
Page 75: Replacing The Los Coupling Elbow
1. Remove the integrator assembly (on page 67). 2. Using a 3 mm driver, remove the four screws securing the coupling elbow. Cinema 4K-RGB Service Guide–CP4315-RGB, CP4320-RGB, CP4325-RGB, CP4330-RGB 020-102713-03 Rev. 1 (11-2019) Copyright 2019 Christie Digital Systems USA, Inc. All rights reserved. ©... -
Page 76: Removing The Coupling Elbow Mirror Assembly
5. To re-install, follow these steps in reverse order. 6. After re-installing the assembly, perform optical adjustments and software calibration. Cinema 4K-RGB Service Guide–CP4315-RGB, CP4320-RGB, CP4325-RGB, CP4330-RGB 020-102713-03 Rev. 1 (11-2019) Copyright 2019 Christie Digital Systems USA, Inc. All rights reserved. ©... -
Page 77: Replacing The Shutter
3. Disconnect the two inline harnesses cables on the shutter. 4. Loosen the one captive screw securing the shutter. Christie recommends using a short, right angle 3 mm allen key. If a right angle allen key is unavailable, the engine can be removed for front access using the provided straight 3 mm ball driver. -
Page 78: Printed Circuit Boards And Sensors
3. To remove the F-Main electronics card, press the two red locking tabs and pull the card out. Cinema 4K-RGB Service Guide–CP4315-RGB, CP4320-RGB, CP4325-RGB, CP4330-RGB 020-102713-03 Rev. 1 (11-2019) Copyright 2019 Christie Digital Systems USA, Inc. All rights reserved. ©... -
Page 79: Replacing The Imb
3. To remove the IMB, press the two red locking tabs and pull the IMB out. Cinema 4K-RGB Service Guide–CP4315-RGB, CP4320-RGB, CP4325-RGB, CP4330-RGB 020-102713-03 Rev. 1 (11-2019) Copyright 2019 Christie Digital Systems USA, Inc. All rights reserved. ©... -
Page 80: Replacing The Housekeeping Board (Hkbb)
5. Remove the 13 screws securing the HKBB board. 6. Pull back the harnesses and remove the board. Cinema 4K-RGB Service Guide–CP4315-RGB, CP4320-RGB, CP4325-RGB, CP4330-RGB 020-102713-03 Rev. 1 (11-2019) Copyright 2019 Christie Digital Systems USA, Inc. All rights reserved. ©... -
Page 81: Replacing The Sccb
4. To disconnect the SCCB from the HUB-NX, slide the SCCB back and remove. 5. Replace the SCCB. 6. To re-install, follow these steps in reverse order. Cinema 4K-RGB Service Guide–CP4315-RGB, CP4320-RGB, CP4325-RGB, CP4330-RGB 020-102713-03 Rev. 1 (11-2019) Copyright 2019 Christie Digital Systems USA, Inc. All rights reserved. ©... -
Page 82: Replacing The Hub-Nx
9. Using a 2.5 mm driver, remove the two screws securing the HUB-NX to the card cage, located at the top of the card cage. Cinema 4K-RGB Service Guide–CP4315-RGB, CP4320-RGB, CP4325-RGB, CP4330-RGB 020-102713-03 Rev. 1 (11-2019) Copyright 2019 Christie Digital Systems USA, Inc. All rights reserved. ©... -
Page 83: Replacing The Dual Temperature Sensor Module (Dtsm)
2. Disconnect the DTSM inline harness connector F and connector J82. 3. Using a 2.5 mm driver, remove the screw securing the DTSM. Cinema 4K-RGB Service Guide–CP4315-RGB, CP4320-RGB, CP4325-RGB, CP4330-RGB 020-102713-03 Rev. 1 (11-2019) Copyright 2019 Christie Digital Systems USA, Inc. All rights reserved. ©... -
Page 84: Replacing The Status Led Board (Slb)
3. Remove the two screws securing the SLB and remove the board. 4. Replace the SLB assembly. 5. To re-install, follow these steps in reverse order. Cinema 4K-RGB Service Guide–CP4315-RGB, CP4320-RGB, CP4325-RGB, CP4330-RGB 020-102713-03 Rev. 1 (11-2019) Copyright 2019 Christie Digital Systems USA, Inc. All rights reserved. ©... -
Page 85: Replacing The Low Voltage Current Source (Lvcs) Board
4. Release the locking tab to slide the LVCS out of the cage and remove it. 5. Replace the LVCS. 6. To re-install, follow these steps in reverse order. Cinema 4K-RGB Service Guide–CP4315-RGB, CP4320-RGB, CP4325-RGB, CP4330-RGB 020-102713-03 Rev. 1 (11-2019) Copyright 2019 Christie Digital Systems USA, Inc. All rights reserved. ©... -
Page 86: Replacing The High Voltage Current Source Boards
4. Slide the HVCS board out of the cage and remove it. 5. Replace the HVCS board. 6. To re-install, follow these steps in reverse order. Cinema 4K-RGB Service Guide–CP4315-RGB, CP4320-RGB, CP4325-RGB, CP4330-RGB 020-102713-03 Rev. 1 (11-2019) Copyright 2019 Christie Digital Systems USA, Inc. All rights reserved. ©... -
Page 87: Replacing The Laser Backplane (Lbp7) Board
7. Remove the LBP7 from the bracket and move the bracket to the new LBP7. 8. Replace the LBP7. 9. To re-install, follow these steps in reverse order. Cinema 4K-RGB Service Guide–CP4315-RGB, CP4320-RGB, CP4325-RGB, CP4330-RGB 020-102713-03 Rev. 1 (11-2019) Copyright 2019 Christie Digital Systems USA, Inc. All rights reserved. ©... -
Page 88: Replacing The Diffuser Control Board (Dib Pcb)
3. Remove the bottom cover. 4. Loosen the two captive fasteners from the installed cover (A). Cinema 4K-RGB Service Guide–CP4315-RGB, CP4320-RGB, CP4325-RGB, CP4330-RGB 020-102713-03 Rev. 1 (11-2019) Copyright 2019 Christie Digital Systems USA, Inc. All rights reserved. ©... - Page 89 10. On the new housing, locate and loosen the captive faster holding the metal guard to the housing. Cinema 4K-RGB Service Guide–CP4315-RGB, CP4320-RGB, CP4325-RGB, CP4330-RGB 020-102713-03 Rev. 1 (11-2019) Copyright 2019 Christie Digital Systems USA, Inc. All rights reserved. ©...
-
Page 90: Replacing The Color Sensor Board Harness
If the color sensor board harness becomes damaged during installation, replace it with the enhanced harness included with the kit. 1. Remove the following system components: Cinema 4K-RGB Service Guide–CP4315-RGB, CP4320-RGB, CP4325-RGB, CP4330-RGB 020-102713-03 Rev. 1 (11-2019) Copyright 2019 Christie Digital Systems USA, Inc. All rights reserved. ©... - Page 91 Take care when removing the hose as there is a square hole on the underside of the unit which may have sharp edges. Cinema 4K-RGB Service Guide–CP4315-RGB, CP4320-RGB, CP4325-RGB, CP4330-RGB 020-102713-03 Rev. 1 (11-2019) Copyright 2019 Christie Digital Systems USA, Inc. All rights reserved. ©...
-
Page 92: Performing The Dac Calibration
The lens cap minimizes any stray light entering through the lens and maximizes darkness around the sensor during the calibration. Cinema 4K-RGB Service Guide–CP4315-RGB, CP4320-RGB, CP4325-RGB, CP4330-RGB 020-102713-03 Rev. 1 (11-2019) Copyright 2019 Christie Digital Systems USA, Inc. All rights reserved. ©... -
Page 93: Performing The Liteloc V1 Calibration
Due to the manufacturing tolerance of the color sensor board and the LOS system, calibrate the LiteLOC v1 response to the light intensity as the temperature of the laser devices changes. 1. Contact Christie Technical Support for a copy of the Horizon Factory Calibration Procedure spreadsheet. - Page 94 "(CAL+FANS 24 45 )" ) proj.sendstring( "(CAL+FANS 25 45 )" ) proj.sendstring( "(CAL+FANS 26 45 )" ) Cinema 4K-RGB Service Guide–CP4315-RGB, CP4320-RGB, CP4325-RGB, CP4330-RGB 020-102713-03 Rev. 1 (11-2019) Copyright 2019 Christie Digital Systems USA, Inc. All rights reserved. ©...
- Page 95 If a response is returned, the port is open and must be closed. 28. To reset all fans to the normal operating speed, reboot the projector. Cinema 4K-RGB Service Guide–CP4315-RGB, CP4320-RGB, CP4325-RGB, CP4330-RGB 020-102713-03 Rev. 1 (11-2019) Copyright 2019 Christie Digital Systems USA, Inc. All rights reserved. ©...
- Page 96 Corporate offi ces Worldwide offi ces Christie Digital Systems USA, Inc. Africa United Kingdom Columbia Korea (Seoul) ph: 714 236 8610 ph: +27 (0)11 510 0094 ph: +44 (0) 118 977 8000 ph: +57 (318) 447 3179 ph: +82 2 702 1601 Christie Digital Systems Canada Inc.
Need help?
Do you have a question about the Cinema 4K-RGB CP4315-RGB and is the answer not in the manual?
Questions and answers