Sign In
Upload
Download
Table of Contents
Contents
Add to my manuals
Delete from my manuals
Share
URL of this page:
HTML Link:
Bookmark this page
Add
Manual will be automatically added to "My Manuals"
Print this page
×
Bookmark added
×
Added to my manuals
Manuals
Brands
Tektronix Manuals
Portable Generator
AWG7000B Series
Service manual
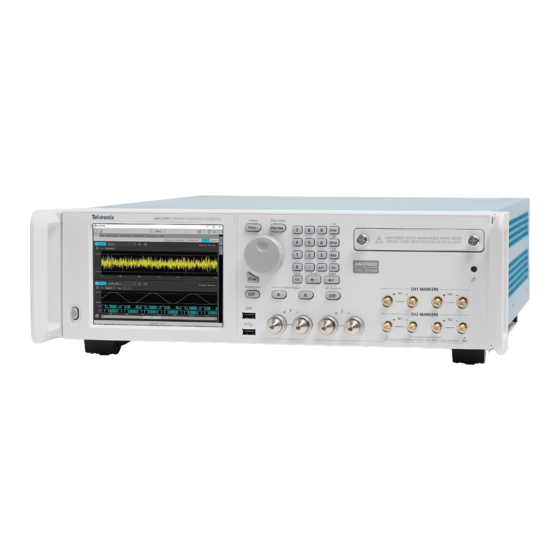
Tektronix AWG7000B Series Service Manual
Arbitrary waveform generators
Hide thumbs
Also See for AWG7000B Series
:
Quick start manual
(104 pages)
1
2
3
4
5
6
Table Of Contents
7
8
9
10
11
12
13
14
15
16
17
18
19
20
21
22
23
24
25
26
27
28
29
30
31
32
33
34
35
36
37
38
39
40
41
42
43
44
45
46
47
48
49
50
51
52
53
54
55
56
57
58
59
60
61
62
63
64
65
66
67
68
69
70
71
72
73
74
75
76
77
78
79
80
81
82
83
84
85
86
87
88
89
90
91
92
93
94
95
96
97
98
99
100
101
102
103
104
105
106
107
108
109
110
111
112
113
114
115
116
117
118
119
120
121
122
123
124
125
126
127
128
129
130
131
132
133
134
135
136
137
138
139
140
141
142
143
144
145
146
147
148
149
150
151
152
153
154
155
156
157
158
159
160
161
162
163
164
165
166
167
168
169
170
171
172
173
174
page
of
174
Go
/
174
Contents
Table of Contents
Troubleshooting
Bookmarks
Table of Contents
Table of Contents
General Safety Summary
Service Safety Summary
Environmental Considerations
Preface
Manual Conventions
Operating Information
Theory of Operation
Overview
Figure 2-1: AWG7000C Series Block Diagram
Figure 2-2: AWG7000B Series Block Diagram
Module Overviews
Adjustment Procedures
Adjustment Interval
Adjustment after Repair
Table 3-1: Adjustments Required for Module Replaced
Required Equipment
Adjustment Overview
Table 3-2: Test Equipment
Figure 3-1: Awgservice UI Window
Calibration Procedure
Figure 3-2: 10 Mhz Reference Calibration Initial Test Hookup
Figure 3-3: 10 Mhz Reference Calibration Setup Window
Figure 3-4: Inter-Channel Skew Calibration Initial Hookup
Figure 3-5: Inter-Channel Skew Calibration Setup Window
Figure 3-6: Interleave Calibration Initial Hookup
Figure 3-7: Interleave Calibration Window
Figure 3-8: Magic Timing Margin Check Hookup
Figure 3-9: Magic Timing Check Dialog Box
Figure 3-10: Example of Good Margin and Proper Timing
Figure 3-11: Example of Bad Waveform in Magic Timing Margin Check
Maintenance
Preparation
Preventing ESD
Inspection and Cleaning
Table 4-1: External Inspection Checklist
Table 4-2: Internal Inspection Checklist
Removal and Installation Procedures
Preparation
Summary of Procedures
Figure 4-1: Disassembly Procedures for External Modules and Internal Modules (Top)
Required Equipment
Figure 4-2: Disassembly Procedures for Internal Modules (Bottom)
Table 4-3: Tools Required for Module Removal and Reinstall
Disconnecting and Connecting the SMP Cable
Figure 4-3: Disconnecting and Connecting the SMP Cable
Procedures for External Modules
Figure 4-4: Handle, Snaps, Cosmetic Covers, and Front-Trim Unit Removal
Figure 4-5: EMI Cover Removal
Figure 4-6: Fan Tray Unit Removal
Figure 4-7: Disassembly of Front-Panel Assembly (AWG7000C Series)
Figure 4-8: Disassembly of Front-Panel Assembly (AWG7000B Series)
Procedures for Internal Modules (Upper) (AWG7000C Series)
Figure 4-9: Drive Module Removal (AWG7000C Series)
Figure 4-10: Multi-Input/Output Board Removal (AWG7000C Series)
Figure 4-11: Processor Module Removal (AWG7000C Series)
Figure 4-12: Power Supply and RFI Filter Removal (AWG7000C Series)
Figure 4-13: Power Board Removal (AWG7000C Series)
Procedures for Internal Modules (Upper) (AWG7000B Series)
Figure 4-14: Drive Module Removal (AWG7000B Series)
Figure 4-15: Multi-Input/Output and Display Adapter Board Removal (AWG7000B Series)
Figure 4-16: Processor Module Removal (AWG7000B Series)
Figure 4-17: Power Supply and RFI Filter Removal (AWG7000B Series)
Figure 4-18: Power Board Removal (AWG7000B Series)
Procedures for Internal Modules (Lower)
Figure 4-19: Front Connector Board, CLK12G Module, Relay Unit, and AWG12G Board Removal
Figure 4-20: Disassembly of the CLK12G Module
Figure 4-21: Relay Unit Cable Connection for Option 02
Figure 4-22: Relay Unit Cable Connection for Option 06
Figure 4-23: Cable Ties
Figure 4-24: Tie Mount Clip
Troubleshooting
Required Equipment
Fault Isolation Procedure
Figure 4-25: Primary Troubleshooting Tree (1)
Figure 4-26: Primary Troubleshooting Tree (2)
Table 4-4: Power Supply Voltages
Table 4-5: PWR Board Voltages
Instrument Diagnostics
Table 4-6: Diagnostics Error Codes
Calibration Error
Table 4-7: Calibration Error Codes
Hardware Error
Table 4-8: Hardware Error Codes
After Repair
Returning the Instrument for Service
Replaceable Parts
Parts Ordering Information
Using the Replaceable Parts List
Table 5-1: Replaceable Parts List - Cosmetics
Table 5-2: Replaceable Parts List - EMI Covers
Table 5-3: Replaceable Parts List - AWG7000C Series Chassis Assembly
Table 5-4: Replaceable Parts List - AWG7000B Series Chassis Assembly
Table 5-5: Replaceable Parts List - AWG7000C Series Front-Panel Assembly
Table 5-6: Replaceable Parts List - AWG7000B Series Front-Panel Assembly
Table 5-7: Replaceable Parts List - AWG7000C Series Drive Modules
Table 5-8: Replaceable Parts List - AWG7000B Series Drive Module
Table 5-9: Replaceable Parts List - AWG7000C Series Processor Module
Table 5-10: Replaceable Parts List - AWG7000B Series Processor Module
Table 5-11: Replaceable Parts List - AWG7000C Series Power Supply Assembly
Table 5-12: Replaceable Parts List - AWG7000B Series Power Supply Assembly
Table 5-13: Replaceable Parts List - AWG7000C Series Pci/Power Interface Module
Table 5-14: Replaceable Parts List - AWG7000B Series Pci/Power Interface Module
Table 5-15: Replaceable Parts List - Fan Tray Assembly
Table 5-16: Replaceable Parts List - USB Module
Table 5-17: Replaceable Parts List - AWG12G/CLK12G/OUT10G Modules
Table 5-18: Replaceable Parts List - CLK12G Module
Table 5-19: Replaceable Parts List - AWG12G Module
Table 5-20: Replaceable Parts List - SMA Bracket
Table 5-21: Replaceable Parts List - Relay Unit
Table 5-22: Replaceable Parts List - Rear Connectors
Advertisement
Quick Links
1
Table of Contents
2
Theory of Operation
Download this manual
xx
AWG7000B and AWG7000C Series
Arbitrary Waveform Generators
ZZZ
Service Manual
*P077030501*
077-0305-01
Table of
Contents
Previous
Page
Next
Page
1
2
3
4
5
Advertisement
Table of Contents
Troubleshooting
Troubleshooting
106
Figure 4-25: Primary troubleshooting tree (1)
107
Figure 4-26: Primary troubleshooting tree (2)
108
Need help?
Do you have a question about the AWG7000B Series and is the answer not in the manual?
Ask a question
Questions and answers
Related Manuals for Tektronix AWG7000B Series
Portable Generator Tektronix AWG7082C Quick Start Manual
Awg5000 series and awg7000 series arbitrary waveform generators (104 pages)
Portable Generator Tektronix AWG7000 Series Technical Reference
Arbitrary waveform generators (76 pages)
Portable Generator Tektronix AWG7000 Series Quick Start User Manual
Arbitrary waveform generators (90 pages)
Portable Generator Tektronix AWG7000 Series Service Manual
Arbitrary waveform generators (140 pages)
Portable Generator Tektronix AWG7101 Instructions Manual
Awg7000 series arbitrary waveform generators declassification and security (12 pages)
Portable Generator Tektronix AWG70001A Technical Reference
Arbitrary waveform generators and synchronization hub specifications and performance verification (81 pages)
Portable Generator Tektronix AWG5000 Series Manual
Arbitrary waveform generators (9 pages)
Portable Generator Tektronix AWG7122B Service Manual
Arbitrary waveform generators (174 pages)
Portable Generator Tektronix AWG510 Service Manual
Arbitrary waveform generator (273 pages)
Portable Generator Tektronix AWG2020 Service Manual
Arbitrary waveform generator (242 pages)
Portable Generator Tektronix AWG2021 User Manual
Arbitrary waveform generator (575 pages)
Portable Generator Tektronix AWG5012 Instructions Manual
Arbitrary waveform generators (12 pages)
Portable Generator Tektronix AWG5200 Series Technical Reference
Arbitrary waveform generators, specifications and performance verification (99 pages)
Portable Generator Tektronix AWG5200 Series Service Manual
Arbitrary waveform generators (22 pages)
Portable Generator Tektronix AWG5014 Instructions Manual
Arbitrary waveform generators (12 pages)
Portable Generator Tektronix AWG2005 Service Manual
Arbitrary waveform generator (231 pages)
This manual is also suitable for:
Awg7000c series
Awg7 1b series
Awg7 2c series
Awg7 2b series
Awg7121b
Awg7122c
...
Show all
Awg7122b
Table of Contents
Print
Rename the bookmark
Delete bookmark?
Delete from my manuals?
Login
Sign In
OR
Sign in with Facebook
Sign in with Google
Upload manual
Upload from disk
Upload from URL


Need help?
Do you have a question about the AWG7000B Series and is the answer not in the manual?
Questions and answers