Table of Contents
Advertisement
Quick Links
A l l t e s t I n s t r u me n t s , I n c .
5 0 0 C e n t r a l A v e .
F a r mi n g d a l e , N J 0 7 7 2 7
P : ( 7 3 2 ) 9 1 9 - 3 3 3 9
F : ( 7 3 2 ) 9 1 9 - 3 3 3 2
a l l t e s t . n e t
s s a l e s @ a l l t e s t . n e t
T h e t e s t & me a s u r e me n t
e q u i p me n t y o u n e e d a t
t h e p r i c e y o u w a n t .
A l l t e s t c a r r i e s t h e w o r l d ' s l a r g e s t s e l e c t i o n o f
u s e d / r e f u r b i s h e d b e n c h t o p t e s t & me a s u r e me n t
e q u i p me n t a t 5 0 % t h e p r i c e o f n e w .
O O u r e q u i p me n t i s g u a r a n t e e d w o r k i n g , w a r r a n t i e d , a n d
a v a i l a b l e w i t h c e r t i f i e d c a l i b r a t i o n f r o m o u r i n - h o u s e s t a f f
o f t e c h n i c i a n s a n d e n g i n e e r s .
• 1 0 + f u l l t i me t e c h n i c i a n s w i t h o v e r 1 5 0 y e a r s o f
s p e c i a l i z a t i o n
• 9 0 d a y w a r r a n t y & 5 d a y r i g h t o f r e t u r n o n a l l
e q u i p me n t
• • 1 - 3 y e a r w a r r a n t i e s f o r n e w a n d
p r e mi u m- r e f u r b i s h e d e q u i p me n t
• E v e r y u n i t t e s t e d t o O E M s p e c i f i c a t i o n s
• S a t i s f a c t i o n g u a r a n t e e d
Y o u h a v e p l a n s , w e w i l l h e l p y o u a c h i e v e t h e m.
A n y p r o j e c t . A n y b u d g e t .
t
G e t a q u o t e t o d a y !
C C a l l ( 7 3 2 ) 9 1 9 - 3 3 3 9 o r e ma i l s a l e s @a l l t e s t . n e t .
Advertisement
Chapters
Table of Contents
Troubleshooting

Related Manuals for Tektronix AWG2005


Summary of Contents for Tektronix AWG2005
- Page 1 T h e t e s t & me a s u r e me n t e q u i p me n t y o u n e e d a t t h e p r i c e y o u w a n t . A l l t e s t I n s t r u me n t s , I n c .
- Page 2 Service Manual AWG2005 Arbitrary Waveform Generator 070-8962-50 Warning The servicing instructions are for use by qualified personnel only. To avoid personal injury, do not perform any servicing unless you are qualified to do so. Refer to all safety summaries prior to performing service.
- Page 3 Copyright © Tektronix Japan, Ltd. All rights reserved. Copyright © Tektronix, Inc. All rights reserved. Tektronix products are covered by U.S. and foreign patents, issued and pending. Information in this publication supercedes that in all previously published material. Specifications and price change privileges reserved.
- Page 4 Tektronix, with shipping charges prepaid. Tektronix shall pay for the return of the product to Customer if the shipment is to a location within the country in which the Tektronix service center is located. Customer shall be responsible for paying all shipping charges, duties, taxes, and any other charges for products returned to any other locations.
- Page 6 Preface This is the service manual for the AWG2005 Arbitrary Waveform Generator. The manual contains information needed to service the AWG2005 to the module level. Manual Structure This manual is divided into sections, such as Specifications and Theory of Operation. Further, some sections are divided into subsections, such as Product Description and Removal and Installation Procedures.
- Page 7 Modules Throughout this manual, any replaceable component, assembly, or part of the AWG2005 is referred to generically as a module. In general, a module is an assembly (like a circuit board), rather than a component (like a resistor or an integrated circuit). Sometimes a single component is a module; for example, the chassis of the AWG2005 is a module.
-
Page 8: Table Of Contents
Instructions for Operation ........AWG2005 Service Manual... - Page 9 Table of Contents How to Power On ........Internal Diagnostics Routines .
- Page 10 ........Cleaning Procedure Exterior ......AWG2005 Service Manual...
- Page 11 ........6 10 AWG2005 Orientation ........
- Page 12 ....... 10 1 Using the Replaceable Mechanical Parts List ....10 2 AWG2005 Service Manual...
- Page 13 Table of Contents Contents...
-
Page 14: List Of Figures
....4 47 Figure 4 22: Output Pins on the Digital Data Out Cable ... 4 48 AWG2005 Service Manual... - Page 15 List of Figures Figure 6 1: AWG2005 Orientation ......6 12 Figure 6 2: Guide to Removal Procedures .
- Page 16 ........10 18 AWG2005 Service Manual...
- Page 17 List of Figures Contents...
-
Page 18: List Of Tables
7 10 Table 7 5: Maintenance Kit Contents ......7 11 AWG2005 Service Manual... - Page 19 List of Tables Contents...
-
Page 20: General Safety Summary
To avoid electric shock, do not operate this product in wet or damp conditions. Wet/Damp Conditions Do Not Operate To avoid injury or fire hazard, do not operate this product in an explosive in Explosive atmosphere. Atmosphere xiii AWG2005 Service Manual... - Page 21 These terms may appear on the product: DANGER indicates an injury hazard immediately accessible as you read the marking. WARNING indicates an injury hazard not immediately accessible as you read the marking. CAUTION indicates a hazard to property including the product. AWG2005 User Manual...
- Page 22 Manual Certifications and Compliances CSA Certified Power CSA Certification includes the products and power cords appropriate for use in Cords the North America power network. All other power cords supplied are approved for the country of use. AWG2005 Service Manual...
- Page 23 General Safety Summary AWG2005 User Manual...
-
Page 24: Service Safety Summary
To avoid electric shock, do not touch exposed connections. X Radiation To avoid x radiation exposure, do not modify or otherwise alter the high voltage circuitry or the CRT enclosure. X ray emissions generated within this product have been sufficiently shielded. xvii AWG2005 Service Manual... - Page 25 Service Safety Summary xviii AWG2005 User Manual...
-
Page 26: Introduction
Arbitrary Waveform Generator, as well as general information critical to safe and effective servicing. To prevent personal injury or damage to the AWG2005, consider the follow ing before attempting service: The procedures in this manual should be performed only by a qualified... -
Page 27: Warranty Repair Service
Whether providing warranty repair service or any of the other services listed below, Tektronix service technicians are well equipped to service the AWG2005. Tektronix technicians train on Tektronix products; they have access to the latest information on improvements to the AWG2005 as well as the latest new options. Warranty Repair Service Tektronix warrants this product for one year from date of purchase. -
Page 28: Product Description
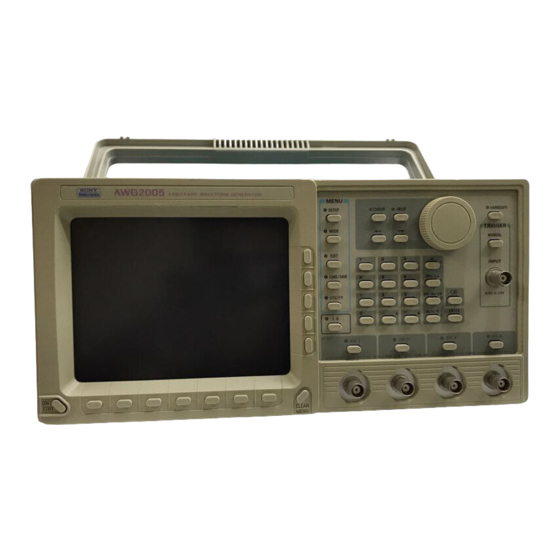
Product Description The AWG2005 is a portable arbitrary waveform generator capable of gener ating both arbitrary waveforms and standard function waveforms. Key fea tures include: Arbitrary waveform generation from waveform data files that you: Create using the graphical waveform editor... - Page 29 Product Description Specifications...
-
Page 30: Nominal Traits
Nominal Traits This section contains tables that list the various nominal traits that describe the AWG2005 Arbitrary Waveform Generator. Electrical and mechanical traits are included. Nominal traits are described not by equipment performance, but by parame ters like memory capacity. - Page 31 Characteristics Electrical Characteristics Characteristics Description Clock Generator (Option 05) Frequency Range 0.01 Hz to 20 MHz Resolution Up to 7 digits Sweep Type Linear, Log, Arbitrary Mode Continuous, Triggered, Gated Update Rate 1 ms to 65.535 ms Points per sweep 8 Kwords Frequency Resolution 0.0298 Hz...
- Page 32 Sequence file and the output parameters (Amplitude, Offset, etc.) are changed. Master Provide the Clock and the Trigger to the Slave AWG2005 for the parallel operation. Slave Receive the Clock and the Trigger from the Master AWG2005 for the parallel operation.
- Page 33 Characteristics Electrical Characteristics Characteristics Description Filters Type Low Pass (-24 dB/Oct) 5MHz 2MHz 1MHz 500kHz Auxiliary Output MARKER Amplitude >2V into 50W Impedance Period Jitter Refer to Table 1 1 (Measured by TDS694C-1MHD with TDSJIT1) Cycle to Cycle Jitter Refer to Table 1 2 (Measured by TDS694C-1MHD with TDSJIT1) CLOCK Amplitude >2V into 50W...
-
Page 34: Table 1 1: Period Jitter (Ch1 Marker Out)
Clock=10MS/s StdDev Pk-Pk StdDev Pk-Pk 24.0 ps 140.0 ps 24.0 ps 120.0 ps Table 1 4 : Cycle to Cycle Jitter (Clock Out) Clock=20MS/s Clock=10MS/s StdDev Pk-Pk StdDev Pk-Pk 40.0 ps 220.0 ps 40.0 ps 200.0 ps AWG2005 Service Manual... - Page 35 Characteristics Electrical Characteristics Characteristics Description Auxiliary Input TRIGGER Threshold Level -5 V to 5V Resolution 0.1V Impedance 10kW Range 2 Vp p (-1V to 1V) for 100% modulation Impedance 10kW Range 10 Vp p (-5 V to 5V) Impedance CONTROL SIG Threshold Level 0.8 V to 2.0 V Impedance...
- Page 36 Li3 V, 650 mAH Mechanical Characteristics Characteristics Description Net Weight Standard 10.7 kg Size Height 16cm (6.4 inches) with feet Width 36cm (14.3 inches) with handle Length 49cm (19.25 inches) with front cover 56cm (22.2 inches) with handle extended AWG2005 Service Manual...
- Page 37 Characteristics 1 10 Specifications...
-
Page 38: Warranted Characteristics
Warranted Characteristics This section will describe the warranted characteristics of the AWG2005. These can be divided into two main categories: electrical characteristics and environmental characteristics. Performance The electrical characteristics are valid under the following conditions: Conditions 1) The instrument must have been calibrated at an ambient temperature between +20_ C to +30_ C. - Page 39 Characteristics Electrical Characteristics Characteristics Description Performance Test Main Output Amplitude Except multiply(AM) and add(Add) operation Check Gain Accuracy, Clock 1 MHz, Waveform data; 000 and FFF, Norm, No Filter, No page 4 30. Offset DC Accuracy 0.050 V to 0.999 V "...
- Page 40 Amplitude Accuracy Add 5% to the Amplitude Specification eration, page 4 25. *CH1 Out = CH1 + Ext Signal Frequency Response DC to 10 MHz (-3 dB) *Note: Output Amplitude can't exceed 10 Vp-p (into 50W) 1 13 AWG2005 Service Manual...
- Page 41 Characteristics Electrical Characteristics Characteristics Description Performance Test Filter Aberration within "7% Rise Time 5MHz 70ns " 20% 2MHz 175ns "20% 1MHz 350ns " 20% 500kHz 700ns " 20% Auxiliary Output MARKER MARKER OUT Ampli t d Ch tude Check, Amplitude >2 V into 50W page 4 36.
- Page 42 Threshold Level TTL Level (0.8V to 2.0 V) Check, page 4 42. Rise/Fall Time within 1 ms Pulse Width 20 ns minimum Input Volts 0 V to 5 V Frequency Range 1 Hz to 20 MHz 1 15 AWG2005 Service Manual...
- Page 43 Characteristics Electrical Characteristics Characteristics Description Voltage AC Power Source Rating Voltage 100 VAC to 240 VAC Continuous range, CAT II Range 90 VAC to 250 VAC 48 Hz to 63 Hz 90 VAC to 127 VAC 48 Hz to 440 Hz Maximum Power Consumption 300W Maximum Current Grounding Impedance...
- Page 44 30 A peak for < 5 line cycles, after product has been off for at least 30 s. Cooling Clearance Top Clearance 7.6cm (3 inches) Side Clearance 15cm (6 inches) Rear Clearance 7.6cm (3 inches) 1 17 AWG2005 Service Manual...
- Page 45 Characteristics 1 18 Specifications...
-
Page 46: Typical Characteristics
Typical Characteristics This section will describe the typical characteristics for the AWG2005. These values represent typical or average performance and are not absolutely guaranteed. Characteristics Description Main Output DA Converter Integral Non Linearity 1LSB Differential Non Linearity 1LSB Skew between channels... - Page 47 Characteristics Certifications and compliances Category Standards or description EC Declaration of Conformity - Meets intent of Directive 89/336/EEC for Electromagnetic Compatibility. Compliance was demonstrated to the following specifications as listed in the Official Journal of the European Communities: EMC Directive 89/336/EEC: EN 55022 Class B Radiated and Conducted Emissions EN 50081 1...
- Page 48 IEC Characteristics Equipment type: Test and Measuring Installation Category II (as defined in IEC 61010-1, Annex J) Pollution Degree 2 (as defined in IEC 61010-1) Safety Class I (as defined in IEC 61010-1, Annex H) 1 21 AWG2005 Service Manual...
- Page 49 Characteristics 1 22 Specifications...
-
Page 50: Preparation For Use
Left and right 15 cm (6 in.) The feet on the bottom of the AWG2005 cabinet provide the required clear ance when it is set on a flat surface. The top of the AWG2005 does not require ventilation clearance. CAUTION To prevent temporary shutdown of the AWG2005, do not restrict air flow through the chassis. -
Page 51: Supplying Power
AWG2005 input or output terminals. Power Cord The AWG2005 ships with the required power cord as ordered by the cus tomer. Table 2 1 gives the color coding of the conductors in the power cord. Information Figure 2 1 shows information on the available power cords. -
Page 52: Rear Panel Controls
North American power network Figure 2 1: Optional Power Cords Rear Panel Controls Section 1, Specifications, lists the line voltage and frequency ranges over which the AWG2005 operates. Figure 2 2 shows the rear panel controls for the AWG2005. AWG2005 Service Manual... -
Page 53: Fuse Type And Rating
Figure 2 2: Rear Panel Controls Fuse Type and Rating The AWG2005 uses the same fuse for all operating line voltage range. There are two types of fuses provided. Here is the fuse type and rating. Table 2 2: Fuse Type and Rating... -
Page 54: Applying And Interrupting Power
Wait for the AWG2005 to finish the operation when doing internal calibration or saving waveform or sequence files. Improper power off or unexpected loss of power to the AWG2005 can result in the corruption of data stored in nonvolatile memory. -
Page 55: Memory Backup Power
Memory Backup Power A lithium battery maintains internal nonvolatile memory, allowing the AWG2005 to retain waveform and sequence files if AC power is lost. This battery has a shelf life of about three years. Partial or total loss of stored information at power on may indicate that the battery needs to be replaced. -
Page 56: Instructions For Operation
2. Then, press the ON/STBY (standby) switch on the front (lower left cor ner) of the AWG2005. This switch applies power to the remaining circuits of the AWG2005. Allow at least 20 minutes for the AWG2005 to warm up. WARNING To avoid personal shock hazard, turn off both the ON/STBY switch and the PRINCIPAL POWER SWITCH before servicing. -
Page 57: User Interface
User Interface The AWG2005 uses a combination of front panel buttons, keys, a knob, and on screen menus to control generator functions. Some front panel controls select menus and manipulate menu items. Others enter values and units, allow manual triggering, and turn on/off AWG2005 output. - Page 58 Bottom Menu Pushing any button of the MENU column or the F.G button displays the corresponding bottom menu in the lower part of the screen. To select an item from a bottom menu, push the corresponding soft button. AWG2005 Service Manual...
-
Page 59: Figure 2 3: Display Features
Instructions for Operation Date & Status Area Time Display Error Display Side Area Menu Label Side Menu Button Operation Knob Icon Message Area Bottom Menu Figure 2 3: Display Features 2 10 Operating Information... -
Page 60: Menus
GPIB or RS 232 C, to set AWG2005 date and time, to change display bright ness, to set the catalog order, to set the system configure, to set the hardcopy port and format, to check interface status, and to execute internal diagnosis and calibration routines. -
Page 61: Waveform Storage And I
Only nonvolatile memory retains files at power off. The AWG2005 also has a floppy disk drive for loading files from floppy disk into internal memory or internal nonvolatile memory and for saving files from either memory to floppy disk. -
Page 62: Setting Output Parameters
(that is already loaded into memory) as the active file. When you select a file, the AWG2005 changes to the output parameters associated with the file and displays these parameters on the SETUP menu. If you modify the displayed output parameters and later save the file, the modified output parameters are saved with the file. -
Page 63: Figure 2 5: Setup Menu
3. Turn the general purpose knob to highlight a file in the displayed list of files; these are the files currently in internal memory. Then, push ENTER to select the file; the AWG2005 changes to the output parameters associated with the file you selected. -
Page 64: Operation Mode Settings
TRIGGER INPUT connector or can be generated by pushing the front panel TRIGGER MANUAL button. The following text describes the individual modes. Cont Mode When you push the Cont button, the AWG2005 immediately outputs the specified waveform or sequence waveform continuously. 2 15... -
Page 65: Figure 2 6: Mode Menu
As long as the front panel MANUAL button is pushed, (or the gating signal is high) the AWG2005 outputs the specified waveform or sequence. When the MANUAL button is released (or the gating signal goes low), the waveform output stops. When the MANUAL button is pushed again, the output resumes from the level at which the waveform or sequence output stopped. - Page 66 Step:1 waveform. 2 17 AWG2005 Service Manual...
- Page 67 This item sets the slope for external trigger signals. To select a positive or negative slope, push the side menu Slope but ton. For a positive slope, the AWG2005 applies the trigger at the rising edge of the external trigger signal; for a negative slope, the trigger is applied at the falling edge of the external trigger signal.
-
Page 68: Theory Of Operation
For each channel, the AWG2005 reads the digital wave form data loaded into its waveform memory. The point rate clock determines the rate at which the data is read. The AWG2005 converts the data from digital to analog format and outputs the resulting arbitrary waveform. -
Page 69: Digital To Analog Converter (Dac) (A11 D/A Board)
To avoid losing waveform data files stored in NVRam, save the files to a floppy disk before removing the A6 CPU board or A5 Back plane board. Then restore the files from floppy disk to AWG2005 NVRam after reinstalling the board(s). -
Page 70: Display Monitor
The fan prevents heat build up inside the cabinet; it pulls air into the right (floppy disk) side of the AWG2005 and exhausts it out the left side. AWG2005 Service Manual... -
Page 71: Options
The Clock board for the AWG2005 standard type is replaced by the Clock Sweep board. Option 09: Floating Point Processor This option is a card dedicated to floating point processing. -
Page 72: Before Verification
Advantages: These procedures are short, require no external equip ment, and perform extensive functional and accuracy testing. Use them to quickly determine if the AWG2005 is suitable for putting into service, such as when it is first received. For a more extensive confirmation of performance, do the Performance Tests, beginning on page 4 7 after doing the Self Tests. - Page 73 Before Verification Each procedure consists of as many steps, substeps, and subparts as required to do the test. Steps, substeps, and subparts are sequenced as follows: 1. First Step a. First Substep First Subpart Second Subpart b. Second Substep 2. Second Step Instructions for menu selection follow this format: FRONT PANEL BUT TON!Main Menu Button!Side Menu Button.
-
Page 74: Self Tests
Self Tests This subsection describes how to use AWG2005 internal self test routines. No equipment is required to do these procedures. The self tests include these internal routines: Diagnostics This self test procedure uses internal routines to verify that the AWG2005 functions, and passes the internal circuit tests. -
Page 75: Figure 4 1: Diagnostics Menu
Run the diagnostics: Select Execute from the side menu. This executes all the AWG2005 diagnostics automatically. c. Wait: The internal diagnostics do an extensive verification of AWG2005 functions. While this verification progresses, the screen displays the clock icon. When finished, the resulting status appears on the screen. -
Page 76: Calibration
Procedure NOTE If the AWG2005 is powered off while the calibration is executed the calibration data in the memory may be loss. 1. Verify that internal adjustments pass: Do the following substeps to verify internal adjustments have passed. -
Page 77: Figure 4 2: Calibrations Menu
This executes the AWG2005 calibration routines automatically. c. Wait: The internal calibration does an exhaustive verification of proper AWG2005 function. While this verification progresses, the clock icon appears on screen. When finished, the resulting status will appear on the screen. -
Page 78: Performance Tests
Self Tests, the previous subsection. NOTE For operation to specified accuracy, allow the AWG2005 to warm up at least 20 minutes before doing the performance tests. Load all the files from the Performance Check disk (063 1706 XX) that comes with this manual into AWG2005 internal memory. -
Page 79: Related Information
Performance Tests Related Information Read Preparation and Conventions on page 4 1. Also, if you are not familiar with operating the AWG2005, read the subsection, Instructions for Opera tion, in section 2 before doing any of these procedures. Equipment Required The following equipment is required to check the performance of the AWG2005. -
Page 80: Performance Check Files
Performance Check Table 4 3 lists the waveform files on the Performance Check disk (063 1706 XX) that are used in these performance tests, the AWG2005 Files front panel settings that each file sets up, and the performance test that uses each file. -
Page 81: Table 4 3: File List For Performance Check Disk
Performance Tests Table 4 3: File List for Performance Check Disk EDIT Menu SETUP Menu No. File Name Usage Clock Operation Filter Ampl Offset Shape Point MODE.WFM Cont Mode, 1000 10 MHz Normal Through Triggered Mode, Gated Mode MODE_ADV.SEQ 1200 Waveform ADV 1.WFM 1000... - Page 82 Through OUT Ampli tude CNTRL.WFM CONTROL 1 MHz Normal Through SIG OUT Am plitude TRG_IN.WFM External Trig 1000 20 MHz Normal Through ger Level Ac curacy EXT_CLK.WFM External External 1000 Clock Normal Through CLOCK IN 4 11 AWG2005 Service Manual...
-
Page 83: Operating Mode Checks
Procedure: 1. Install the test hookup and set test equipment controls: a. Hook up the oscilloscope: Connect the AWG2005 CH1 output connector through the coaxial cable to the CH1 vertical input con nector on the oscilloscope (see Figure 4 3). - Page 84 Select the MODE.WFM file for CH2 same as CH1. 3. Turn on the AWG2005 CH1 output: Push the CH1 button so that the LED above the CH1 output connector is on. 4. Check against limits: Check that the amplitude of the sine wave dis played on the oscilloscope is 5 vertical divisions and that 5 cycles of the waveform are displayed.
-
Page 85: Check Triggered Mode
Two 50 Ω coaxial cables, a function generator, and an oscilloscope. Prerequisites: The AWG2005 meets the prerequisites listed on page 4 7. Procedure: 1. Install the test hookup and set test equipment controls: a. Hook up the oscilloscope: Connect the AWG2005 CH1 output connector through the coaxial cable to the CH1 vertical input con nector on the oscilloscope. - Page 86 Highlight the MODE.WFM file using the general purpose knob. Push ENTER to select the file. 3. Turn on the AWG2005 CH1 output: Push the CH1 button so that the LED above the CH1 output connector is on. 4. Check triggered mode with manual triggering: Push the AWG2005 MANUAL TRIGGER button and check that when the button is pushed, the oscilloscope displays a one cycle sine wave.
-
Page 87: Check Gated Mode
Three 50 Ω coaxial cables, a 50 Ω precision ter mination, a function generator, and an oscilloscope. Prerequisites: The AWG2005 meets the prerequisites listed on page 4 7. Procedure: 1. Install test hookup and set test equipment controls: a. Hook up the oscilloscope: Connect the AWG2005 CH1 output connector through the coaxial cable to the CH1 vertical input con nector on the oscilloscope. - Page 88 Highlight the MODE.WFM file, using the general purpose knob. Push ENTER to select the file. 3. Turn on the AWG2005 CH1 output: Push the CH1 button so that the LED above the CH1 output connector is on. 4. Check gated mode with manual trigger: Push and hold the AWG2005...
-
Page 89: Check Waveform Advance Mode
Figure 4 6: Relationship between 1 Volt or Greater Gate Signal and Waveform Output Signal d. Change the AWG2005 trigger polarity to negative: Push MODE!Po larity to change the polarity to Negative. e. Check gated mode with a negative gate signal: Check that the oscilloscope displays a sine wave while the function generator gate signal level is in the lower portion of the display. -
Page 90: Figure 4 7: Waveform Advance Mode Initial Test Hookup
Coupling Slope Positive Level Mode Auto 2. Set the AWG2005 controls and select the waveform file: a. Initialize AWG2005 controls: Push UTILITY!Misc!Config...!Re set to Factory!O.K. b. Set AWG2005 controls: Push MODE!Waveform Advance!Slope to highlight Posi tive. Select Level from the side menu, and turn the general purpose knob to select a 1.0 V level. -
Page 91: Check Autostep Mode
Highlight the MODE_ADV.SEQ file using the general purpose knob. Push ENTER to select the file. 3. Turn on the AWG2005 CH1 output: Push the CH1 button so that the LED above the CH1 output connector is on. 4. Check waveform advance: Repeatedly push the AWG2005 MANUAL... -
Page 92: Figure 4 8: Autostep Mode Initial Test Hookup
Positive Level 100 mV Mode Auto 2. Set the AWG2005 controls and select the waveform file: a. Initialize AWG2005 controls: Push UTILITY!Misc!Config...!Re set to Factory!O.K. b. Modify AWG2005 default settings: Push MODE!Autostep!Slope to highlight Positive. Push Run from the side menu to highlight Continuous. -
Page 93: Arithmetic Operation Checks
The AWG2005 meets the prerequisites listed on page 4 7. Procedure: 1. Install test hookup and set test equipment controls: a. Hook up DMM: Connect the AWG2005 CH1 output through a coaxial cable, the 50 Ω terminator, and BNC to dual banana connector to the DMM INPUT connector. -
Page 94: Figure 4 9: External Am Operation Initial Test Hookup
Parameter Frequency 1 kHz Amplitude Offset Output 2. Set the AWG2005 controls and select the waveform file: a. Initialize AWG2005 controls: Push UTILITY!Misc!Config...!Re set to Factory!O.K. b. Modify AWG2005 default settings: Push MODE!Autostep. c. Select waveform file: Select Select Autostep File from the side menu. -
Page 95: Figure 4 10: Mode Menu Autostep Setting
4. Check external AM operation: Check that the step number displayed on the AWG2005 MODE menu is Step: 1 (see Figure 4 10). If it is not, push MANUAL TRIG GER to step though the autostep file steps until Step 1 is displayed. -
Page 96: Check Internal Am Operation
Two 50 Ω coaxial cables, a function generator, and a digital multimeter (DMM). Prerequisites: The AWG2005 meets the prerequisites listed on page 4 7. Procedure: 1. Use test hookup and control settings from previous check. 2. Check internal AM operation: a. -
Page 97: Check Internal Add Operation
Two 50 Ω coaxial cables, a function generator, and a digital multimeter (DMM). Prerequisites: The AWG2005 meets the prerequisites listed on page 4 7. Procedure: 1. Use test hookup and control settings from previous check. 2. Check internal ADD operation: a. -
Page 98: Clock Frequency And Amplitude Checks
Performance Tests 3. End procedure: Remove equipment: Disconnect connections to the test equipment. Clock Frequency and These procedures check the accuracy of the AWG2005 clock frequency and the waveform output amplitude. Amplitude Checks Check Clock Frequency Accuracy Electrical Characteristic Checked: Clock Generator, Accuracy, on page 1 11. - Page 99 Slope Negative Attenuation Coupling FREQ A 2. Set AWG2005 controls and select the waveform: a. Initialize AWG2005 controls: Push UTILITY!Misc!Config...!Re set to Factory!O.K. b. Select the waveform file: Push SETUP!Waveform Sequence, if necessary, to select a waveform file for CH1. Waveform Sequence toggles between the CH1 files (upper list) and the CH2 files (lower list).
-
Page 100: Check Clock Amplitude
Equipment Required: A 50 Ω coaxial cable and an oscilloscope. Prerequisites: The AWG2005 meets the prerequisites listed on page 4 7. Procedure: 1. Install test hookup and set test equipment controls: a. Hook up oscilloscope: Connect the AWG2005 rear panel CLOCK OUT connector through a coaxial cable to the oscilloscope CH1 vertical input (see Figure 4 12). -
Page 101: Gain Accuracy Check
Push ENTER to select the file. 3. Turn on the AWG2005 CH1 output: Push the CH1 button so that the LED above the CH1 output connector is on. 4. Check clock amplitude accuracy: Check that the pulse amplitude of the displayed waveform is 2 V or greater. -
Page 102: Figure 4 13: Gain Accuracy Initial Test Hookup
Procedure: 1. Install test hookup and set controls: a. Hook up DMM: Connect the AWG2005 CH1 output through a 50 Ω coaxial cable, a 50 Ω termination, and a dual banana connector to the DMM INPUT connector (see Figure 4 13). -
Page 103: Offset Accuracy Check
Procedure: 1. Install test hookup and set controls: a. Hook up DMM: Connect the AWG2005 CH1 output through a 50 Ω coaxial cable, a 50 Ω termination, and a dual banana connector to the DMM INPUT connector (see Figure 4 14). -
Page 104: Figure 4 14: Offset Accuracy Initial Test Hookup
Step 3. Check that the DMM voltage reading is in the range from -5.060 to -4.940 V. 4. Move the connection for the coaxial cable from the AWG2005 CH1 output to AWG2005 CH2 output connector. 5. Repeat procedure 3. -
Page 105: Pulse Response Check
Performance Tests 7. End procedure: Disconnect the DMM. Pulse Response This procedure checks the pulse response characteristics of the AWG2005 output waveforms at amplitudes of 0.5 and 1 V. Check Electrical Characteristic Checked: Main Output, Pulse Response, on page 1 12. - Page 106 Push ENTER to select the file. Select the PULSE.WFM file for CH2 same as CH1. 3. Turn on the AWG2005 CH1 output: Push the CH1 button so that the LED above the CH1 output connector is on. 4. Check pulse response at 0.5 V amplitude: a.
-
Page 107: Marker Out Amplitude Check
6. Move the connection for the coaxial cable from the AWG2005 CH1 output to AWG2005 CH2 output connector. 7. Turn on the AWG2005 CH2 output: Push the CH2 button so that the LED above the CH2 output connector is on. - Page 108 Check that the pulse amplitude of the displayed waveform is 2 V or greater. 5. Check Option 02: If the AWG2005 has CH3 and CH4, repeat this entire test, selecting the AWG2005 waveform and setting controls for CH3 and CH4 and checking:...
-
Page 109: Control Sig Out Amplitude Check
Procedure: 1. Install test hookup and set test equipment controls: a. Hook up the oscilloscope: Connect the AWG2005 rear panel CON TROL SIG OUT connector through the coaxial cable to the CH1 vertical input connector on the oscilloscope (see Figure 4 17). -
Page 110: External Trigger Level Accuracy Check
Check that the pulse lower level of the displayed waveform is 0.8 V or less. 4. End procedure: Disconnect the oscilloscope. External Trigger Level This procedure checks the external trigger level accuracy of the AWG2005. Accuracy Check Electrical Characteristic Checked: Auxiliary Input, TRIGGER, Accuracy, on page 1 15. -
Page 111: Figure 4 18: External Trigger Level Accuracy Initial Test Hookup
Frequency 1 kHz Amplitude Offset 0.6 V Output 2. Select the AWG2005 waveform file and set AWG2005 controls: a. Initialize AWG2005 controls: Push UTILITY!Misc!Config...!Re set to Factory!O.K. b. Modify AWG2005 default settings: Push MODE!Gated!Polarity to highlight Positive. 4 40 Performance Verification... - Page 112 Turn the general purpose knob to highlight the TRG_IN.WFM file. Push ENTER to select the file. 3. Turn on the AWG2005 CH1 output: Push the CH1 button so that the LED above the CH1 output connector is on. 4. Check external trigger high level: a.
-
Page 113: External Clock In Check
Performance Tests 6. End procedure: Turn off the function generator output and disconnect the function generator. External CLOCK IN This procedure checks the AWG2005 response to an external CLOCK IN signal. Check Electrical Characteristic Checked: Auxiliary Input, CLOCK, Threshold level, on page 1 15. - Page 114 Turn the general purpose knob to highlight the EXT_CLK.WFM file. Push ENTER to select the file. 3. Turn on the AWG2005 CH1 output: Push the CH1 button so that the LED above the CH1 output connector is on. 4. Check the external CLOCK IN threshold level: a.
-
Page 115: Optional Check - Master Slave Operation Check
AWG2005 CONTROL SIG OUT and CLOCK OUT connectors using the two coaxial cables. b. Hook up oscilloscope: Connect the master AWG2005 CH1 output and slave AWG2005 CH1 output to the oscilloscope CH1 and CH2 vertical inputs using the two coaxial cables (see Figure 4 20). CLOCK... - Page 116 SLAVE.WFM file. Push ENTER to select the file. Push MODE!Triggered. Press the bottom Configure button to select Master. 3. Select the slave AWG2005 waveform file and set slave AWG2005 con trols: a. Initialize slave AWG2005 controls: Push UTILITY!Misc!Con fig...!Reset to Factory!O.K.
-
Page 117: Digital Data Out Check (Option 04)
Performance Tests Press the bottom Configure button to select Slave. 4. Turn on CH1 output on both AWG2005 instruments : Push the CH1 button so that the LED above the CH1 output connector is on. 5. Check the slave operation: a. -
Page 118: Figure 4 21: Digital Data Out Initial Test Hookup
Sweep Adjust as needed Trigger Mode Auto 2. Create the AWG2005 waveform file, select waveform file, and set AWG2005 controls: a. Initialize AWG2005 controls: Push UTILITY!Misc!Config...!Re set to Factory!O.K. b. Select waveform file: Push SETUP!Waveform Sequence, if necessary, to select a waveform file for CH1. -
Page 119: Figure 4 22: Output Pins On The Digital Data Out Cable
Repeat the step 2 and 3 to check the CH2 digital data output sig nals. 5. Turn off equipment output and disconnect test hookup: a. Disable power supply output: Turn off power supply output. b. Remove connections: Disconnect all connections to the AWG2005. 4 48 Performance Verification... -
Page 120: Floating Point Processor Check (Option 09)
1. Check that floating point processor test in internal diagnostics passes: a. Run the AWG2005 internal diagnostics: Push the AWG2005 ON/ STBY switch two times so that the AWG2005 runs the power on diagnostics. b. Check the FPP test results: When the AWG2005 finishes the FPP test, check that the test result is Pass. - Page 121 Performance Tests 4 50 Performance Verification...
-
Page 122: Adjustments
Adjustments The AWG2005 doesn't need manual adjustment since it is equipped with a self calibration system.. This internal calibration enables the instrument to automatically adjust the gain and offset of the pre-amp, the gain error of filter, the attenuation rate of attenuator, as well as several other parameters. - Page 123 Before Adjustments Adjustment Procedures...
-
Page 124: Before Maintenance
Inspection and Cleaning Information and procedures for inspecting the AWG2005 and cleaning its external and internal modules. Removal and Installation Procedures How to remove defective mod ules and replace new or repaired modules. -
Page 125: Preventing Esd
Only service static sensitive modules at a static free work station. 4. Do not remove the AWG2005 cabinet unless you have met precaution number 3, above. Consider all internal modules static sensitive. 5. Do not allow anything capable of generating or holding a static charge on the work station surface. -
Page 126: Table 6 1: Relative Susceptibility To Static Discharge Damage
6 = 600 to 800 V 2 = 200 to 500 V 7 = 400 to 1000 V (est.) 3 = 250 V 8 = 900 V 4 = 500 V 9 = 1200 V 5 = 400 to 600 V AWG2005 Service Manual... - Page 127 Before Maintenance Maintenance...
-
Page 128: Inspection And Cleaning
AWG2005 operates. General Care The cabinet helps keep dust out of the AWG2005 and is a major component of the instrument cooling system. The cabinet should normally be in place when operating the AWG2005. The AWG2005 front cover (optional accesso ry) protects the front panel and display from dust and damage. -
Page 129: Inspection Exterior
Exterior Inspect the outside of the AWG2005 for damage, wear, and missing parts, using Table 6 2 as a guide. If the AWG2005 appears to have been dropped or otherwise abused, check it thoroughly to verify correct operation and performance. Repair any defects that may cause personal injury or lead to further damage to the AWG2005. -
Page 130: Cleaning Procedure Exterior
1. Remove loose dust on the outside of the AWG2005 with a lint free cloth. 2. Remove remaining dirt with a lint free cloth dampened in a general purpose detergent and water solution. -
Page 131: Cleaning Procedure Interior
3. If steps 1 and 2 do not remove all the dust or dirt, the AWG2005 may be spray washed using a solution of ethyl alcohol by doing step 4 through 4. -
Page 132: Removal And Installation Procedures
To avoid possible personal injury or death, disconnect the power cord from the line voltage source before doing any procedures in this section. List of Mechanical Parts Section 10, Mechanical Parts List, lists all mechanical parts in the AWG2005. AWG2005 Service Manual... -
Page 133: General Instructions
AWG2005. Equipment Required The removal of most modules in the AWG2005 requires only a screwdriver handle mounted with a size T 15, Torx screwdriver tip. Use this tool when ever a procedure step instructs you to remove or install a screw, unless a different size screwdriver is specified in that step. -
Page 134: Table 6 4: Equipment Required
Needle nose pliers Standard tool Nut driver, inch Standard tool Nut driver, inch Standard tool Nut driver, inch Standard tool Nut driver, 5 mm Standard tool Open end wrench inch Standard tool Soldering iron Standard tool 6 11 AWG2005 Service Manual... -
Page 135: Awg2005 Orientation
Removal and Installation Procedures AWG2005 Orientation In this manual, procedures refer to front," back," top," etc. of the AWG2005. Figure 6 1 shows how the sides are referenced. Figure 6 1: AWG2005 Orientation 6 12 Maintenance... -
Page 136: Access Procedure
A31 Clock Sweep board (Option 05) 6 45 A7 Floating Point Processor board (Option 09) 6 45 A5 Backplane board 6 49 Lithium battery 6 51 Floppy disk Drive Module 6 53 Figure 6 2: Guide to Removal Procedures 6 13 AWG2005 Service Manual... -
Page 137: Figure 6 3: External Modules
Removal and Installation Procedures Fuse Cap Line Fuse Rear Cover Line Cord Cabinet CRT Filter Front panel Module Menu Buttons Floppy disk Drive Bezel Front panel Knob EMI Gasket Trim Ring Front Cover (Optional) Figure 6 3: External Modules 6 14 Maintenance... -
Page 138: Figure 6 4: Internal Modules
Floppy Disk Drive Cover Floppy Disk Bracket Front Panel Floppy Disk Drive Board Board Support Support Connector Module A5 Backplane Board A23 Analog Board (2CH) or A3 Analog Board (Option 02,4CH) Figure 6 4: Internal Modules 6 15 AWG2005 Service Manual... -
Page 139: Procedures For External Modules
Removal and Installation Procedures Procedures for Do the Access Procedure (page 6 13) before doing any procedure in this group. External Modules This group contains the following procedures: Front panel Knob Line Fuse and Line Cord Rear Cover and Cabinet EMI Gaskets Front Cover, Trim Ring, and Menu Buttons Front panel Module... -
Page 140: Front Panel Knob
Find the front panel knob on the front panel in the locator diagram, External Modules, Figure 6 3. 2. Orient instrument: Set the AWG2005 with the bottom down on the work surface and the front facing you (see Figure 6 5). -
Page 141: Line Fuse And Line Cord
Locate the line fuse and line cord in the locator diagram, External Modules, Figure 6 3. 2. Orient instrument: Set the AWG2005 with the bottom down on the work surface and the back facing you. If you are servicing the line fuse, do the next step;... -
Page 142: Figure 6 6: Line Fuse And Line Cord Removal
Removal and Installation Procedures (2) Rotate (1) Unplug (3) Pull Line Fuse Fuse Cap Figure 6 6: Line Fuse and Line Cord Removal 6 19 AWG2005 Service Manual... -
Page 143: Rear Cover And Cabinet
Locate the rear cover and cabinet in the locator diagram, External Modules, Figure 6 3. 2. Orient instrument: Set the AWG2005 face down, with the front cover on the work surface and the instrument bottom facing you (see Figure 6 7). -
Page 144: Figure 6 7: Rear Cover And Cabinet Removal
When reinstalling the four screws at the rear panel, tighten them to a torque of 16 kg/cm (6 in/lbs). e. See the procedure, Line Fuse and Line Cord, on page 6 18 to rein stall the line cord. This completes the AWG2005 reassembly. Screws (T 15) Rear Cover... -
Page 145: Emi Gaskets
Locate the modules to be removed in the locator diagram, External Modules, in Figure 6 3. 2. Orient instrument: Set the AWG2005 with the back down on the work surface and bottom facing you (see Figure 6 8). 3. Remove front cover: If the optional front cover is installed, grasp the front cover by the left and right edges and snap it off of the trim ring. -
Page 146: Figure 6 8: Front Cover, Trim Ring, And Menu Button Removal (Front Cover Not Shown)
Figure 6 8: Front Cover, Trim Ring, and Menu Button Removal (Front Cover not Shown) CAUTION To prevent contaminating AWG2005 parts, do not touch the carbon contact points on the menu buttons installed in the trim ring. Also, do not touch the contacts on the flex circuit exposed when you remove the trim ring. -
Page 147: Front Panel Module
Trim Ring, and Menu Buttons procedure on page 6 22 removing only the module(s) you want to service. 4. Orient instrument: Set the AWG2005 with the bottom down on the work surface and the front facing you. 5. Remove front panel module: a. -
Page 148: Figure 6 9: Front Panel Module Removal
0.05 inch hex wrench, and then remove the extension from the shaft of the rotary switch. c. As shown in Figure 6 10, release the four hooks, and then remove the A12 Keyboard from the chassis. 6 25 AWG2005 Service Manual... -
Page 149: Figure 6 10: A12 Keyboard Removal
Removal and Installation Procedures Hooks A12 Keyboard Hooks Figure 6 10: A12 Keyboard Removal d. Now hand disassemble the front panel module components using Figure 6 11 as a guide. Reverse the procedure to reassemble. 6 26 Maintenance... -
Page 150: Figure 6 11: Disassembly Of Front Panel Module
Then do the substeps in step 3 in reverse order, reversing the order of the items in each substep. Last, reinstall the trim ring and, if desired, the front cover, referring to the procedure, Front Cover, Trim Ring, and Menu Buttons (page 6 22). 6 27 AWG2005 Service Manual... -
Page 151: Procedures For Internal Modules
Removal and Installation Procedures Procedures for Do the Access Procedure (on page 6 13) before doing any procedure in this group. Internal Modules This part contains the following removal and installation procedures; the procedures are presented in the order listed: A23 Analog Board or A3 Analog Board (Option 02) Connector Module Fan and Fan Frame... -
Page 152: A23 Analog Board Or A3 Analog Board (Option 02)
Locate the modules to be removed in the locator diagram, Internal Modules, Figure 6 4. 2. Orient instrument: Set the AWG2005 with the top down on the work surface and the right side facing you. 3. Remove A23 Analog board: a. -
Page 153: Figure 6 12: A23/A3 Analog Board Removal
J498 Figure 6 12: A23/A3 Analog Board Removal 5. Reinstallation: If the AWG2005 includes Option 02, do substeps 4a-4c in reverse order to reinstall the A3 Analog board. Do substeps 3a-3c in reverse order to reinstall the A23 Analog board. -
Page 154: Connector Module
3. Remove front cover, trim ring, and menu buttons: Do the Front Cover, Trim Ring, and Menu Buttons procedure on page 6 22. 4. Orient instrument: Set the AWG2005 with the top down on the work surface and the right side facing you. -
Page 155: Figure 6 13: Connector Module Removal
Removal and Installation Procedures Connector Module Nuts Screws (T 9) Figure 6 13: Connector Module Removal 6 32 Maintenance... -
Page 156: Fan And Fan Frame
Locate the modules to be removed in the locator diagram, Internal Modules, in Figure 6 4. 2. Orient instrument: Set the AWG2005 with the bottom down on the work surface and the left side facing you. 3. Remove fan and fan frame: a. -
Page 157: Figure 6 14: Fan And Fan Frame Removal
Removal and Installation Procedures Fan Frame To Power Supply (J3) (1) Push (2) Slide (1) Push Figure 6 14: Fan and Fan Frame Removal 4. Reinstallation: a. Secure the fan to the fan frame. b. Connect the cable (J3) to power supply module. c. -
Page 158: Rear Shield Cover
Locate the modules to be removed in the locator diagram, Internal Modules, Figure 6 4. 2. Orient instrument: Set the AWG2005 with the bottom down on the work surface and the back facing you (see Figure 6 15). 3. Remove rear shield cover: a. -
Page 159: Figure 6 15: Rear Shield Cover Removal
Removal and Installation Procedures Rear Shield Cover A6 Cpu Board RS-232-C Interface Connector Screws (T-15) Rear Panel IEEE STD 488 PORT Cover Screws (T-15) Figure 6 15: Rear Shield Cover Removal 6 36 Maintenance... -
Page 160: Rear Bnc Connectors
Modules, in Figure 6 4. (An instrument with Option 05 has an addi tional BNC connector.) 2. Orient instrument: Set the AWG2005 with the top down on the work surface and the left side facing you (see Figure 6 16). -
Page 161: Power Supply Module
T 15 Torx tip to do this procedure. Locate the modules to be removed in the locator diagram, Internal Modules, in Figure 6 4. 2. Orient instrument: Set the AWG2005 with the bottom down on the work surface and the left side facing you. 3. Remove power supply module: a. -
Page 162: Aux Power Board And Ac Inlet
You will need a screwdriver with a size T 15 Torx tip, a inch nut driver and a soldering iron to do this procedure. b. Locate the modules to be removed in the locator diagram, Internal Modules, in Figure 6 4. 6 39 AWG2005 Service Manual... - Page 163 2. Remove fan and fan frame: Do the Fan and Fan Frame procedure on page 6 33. 3. Orient instrument: Set the AWG2005 with the bottom down on the work surface and the back facing you (see Figure 6 18).
-
Page 164: Figure 6 18: Aux Power Board And Ac Inlet Removal
Figure 6 18: AUX Power Board and AC Inlet Removal 7. Reinstallation: a. Install the AUX Power board by doing substeps 6a and 6c in reverse order. b. Install the AC Inlet by doing substeps 5a-5e in reverse order. 6 41 AWG2005 Service Manual... -
Page 165: Monitor Module And Crt Frame
2. Remove front cover, trim ring, and menu buttons: Do the Front Cover, Trim Ring, and Menu Buttons procedure on page 6 22. 3. Orient instrument: Set the AWG2005 with the bottom down on the work surface and the left side facing you. -
Page 166: Figure 6 19: Monitor Module Removal
J901 Screw (T 15) Screws (T 15) Figure 6 19: Monitor Module Removal 5. Remove CRT frame: Grasp the upper part of the CRT frame and take it out as shown in Figure 6 20. 6 43 AWG2005 Service Manual... -
Page 167: Figure 6 20: Crt Frame Removal
Removal and Installation Procedures CRT Frame Figure 6 20: CRT Frame Removal 6. Reinstallation: a. Grasp the upper part of the CRT frame, align the notch of the chas sis with the protrusion of the CRT frame, and place the CRT frame in the chassis. -
Page 168: Circuit Boards
2. Remove the rear shield cover: Do the procedure, Rear Shield Cover, on page 6 35. 3. Orient instrument: Set the AWG2005 with the left side down on the work surface and the bottom facing you. 4. Remove board support: Remove the board support upward while push ing its hook to the inside. -
Page 169: Figure 6 21: Board Removal
Removal and Installation Procedures Board Support Hook J210 (Option 04) J210 J110 (Option 04) J210 A7 Floating Point (2) Pull (1) Up Processor (Option 09) A25 Digital Data Out Board (Option 04) A6 CPU Board (Second Slot) J300 J110 J110 A2 AWG and A11 D/A Board (Option 02) - Page 170 Disconnect the interconnect cables at J300, J360, J400, J410, J420 and J430 on the A31 Clock board (see Figure 6 21). b. Grasp the upper part of the A31 Clock board and pull upward to remove it. 6 47 AWG2005 Service Manual...
- Page 171 Removal and Installation Procedures 11. Remove A7 Floating Point Processor board (Option 09): The option adds the A7 Floating Point Processor board in the first slot from the top. a. Grasp the upper part of the A7 Floating Point Processor board and pull it upward to remove it (see Figure 6 21).
-
Page 172: A5 Backplane Board
Locate the modules to be removed in the locator diagram, Internal Modules, in Figure 6 4. 2. Orient instrument: Set the AWG2005 with the left side down on the work surface and the top facing you. 3. Remove A23 Analog board or A3 Analog board (Option 02): Do the procedure, A23 Analog board or A3 Analog board, on page 6 29. -
Page 173: Figure 6 22: A5 Backplane Board Removal
Removal and Installation Procedures b. Install the other boards: Do the procedure, Circuit Boards, on page 6 45, in reverse order, reversing the items in each step. Screws (T-15) Screws (T-15) A5 Backplane Board Figure 6 22: A5 Backplane Board Removal 6 50 Maintenance... -
Page 174: Lithium Battery
Grasp the battery, and lift it away from the board. 5. Install new battery: a. Place the new battery on the board with the negative tab of the battery closest to the board edge connector. b. Solder the tabs to the board. 6 51 AWG2005 Service Manual... -
Page 175: Figure 6 23: Battery Location On The A5 Backplane Board
Removal and Installation Procedures Lithium Battery Figure 6 23: Battery Location on the A5 Backplane Board 6 52 Maintenance... -
Page 176: Floppy Disk Drive Module
Analog board or A3 Analog board procedure on page 6 29, removing the A23 Analog board or A3 Analog board. 4. Orient instrument: Set the AWG2005 with the left side down on the work surface and the bottom facing you. -
Page 177: Figure 6 24: Floppy Disk Drive Module Removal
Removal and Installation Procedures Floppy disk Drive Cover Screws (#1) Flat Cable Floppy disk Drive Bracket Screws (#1) Floppy disk Drive Screws (T 10) Screws (#1) Spacer Screws (#1) Screws (T 10) Figure 6 24: Floppy disk Drive Module Removal 6 54 Maintenance... -
Page 178: Repackaging
Instructions than the AWG2005 dimensions. (If available, use the original shipping car ton, which meets these requirements.) If the AWG2005 is shipped to a Tektronix Service Center, enclose the follow ing information: The owner's address Name and phone number of a contact person... - Page 179 Repackaging 6 56 Maintenance...
-
Page 180: Troubleshooting
Figure 6 36: Troubleshooting Procedure 4 Module Isolation To use these procedures, begin with the Primary Troubleshooting Proce dure. It prompts you to check various indications of AWG2005 functionality and directs you to the other troubleshooting procedures. 6 57 AWG2005 Service Manual... -
Page 181: Awg2005 Diagnostics
Troubleshooting AWG2005 The AWG2005 has internal diagnostics that verify circuit functionality. The AWG2005 automatically executes the internal diagnostics at power on. You Diagnostics can also run the internal diagnostics by using the UTILITY menu. See Checking Diagnostics Tests below. The difference between the two methods of running the internal diagnostics routine is that the power on method does not do as much memory checking. - Page 182 Troubleshooting Press the PRINCIPAL POWER SWITCH on the rear panel of the AWG2005. Power off and remove the cover using the Rear Cover and Cabinet removal Perform the power procedure. Check all the Can you Push the ON/STBY supply module...
-
Page 183: Figure 6 26: Cpu Board
Troubleshooting Red LED Green LED Figure 6 26: CPU Board 6 60 Maintenance... - Page 184 (see Fig. 6 29)? Replace the AC Inlet (page 6 39). Replace the AUX Power board (page 6 39). Replace the power supply module (page 6 38). Figure 6 27: Troubleshooting Procedure 1 Power Supply Module 6 61 AWG2005 Service Manual...
-
Page 185: Figure 6 28: Aux Power Board
Troubleshooting Fuse PRINCIPAL POWER Switch Figure 6 28: AUX Power Board Figure 6 29: Power Supply Module 6 62 Maintenance... - Page 186 The front panel module is ok. Replace the A6 CPU board (page 6 45). Figure 6 30: Troubleshooting Procedure 2 A6 CPU Board or Front panel Module 6 63 AWG2005 Service Manual...
-
Page 187: Figure 6 31: Key Board
Troubleshooting TP101 (GND) TP100 (5V) Figure 6 31: Key Board 6 64 Maintenance... - Page 188 (page 6 42). Do the horizontal and /or vertical sync lock ok? Power the AWG2005 off and disconnect the cable from J901 on the monitor module (see Figure 6 33) then power back on. Do pins Power the AWG2005 off and...
-
Page 189: Figure 6 33: Monitor Module
Troubleshooting J901 Figure 6 33: Monitor Module J901 pin 4 (Horizontal Sync) 31.75 kHz Rate J901 pin 6 (Vertical Sync) 60 Hz Rate 2.00V 2.00V M 20.0us 1.60V Figure 6 34: Horizontal and Vertical Sync Signals 6 66 Maintenance... -
Page 190: Figure 6 35: A Video Signal With White And Black Levels
Troubleshooting White Level J901 pin 9 (Video) Black Level 316mV M 10.0us 200mV Figure 6 35: A Video Signal with White and Black Levels 6 67 AWG2005 Service Manual... -
Page 191: Figure 6 36: Troubleshooting Procedure 4 Module Isolation
Troubleshooting This procedure assumes that the AWG2005 is running and you can read the display. Select the diagnostics menu Does in the UTILITY menu and run the display any failures The AWG2005 is ok. all the tests (see the report any... -
Page 192: Options And Accessories
Options and Accessories This section describes the various options as well as the standard and optional accessories that are available for the AWG2005 Arbitrary Waveform Generator. List of Options Options include: Option 02 adds CH3 and CH4 output. Option 04 makes digital waveform data available at the rear panel. -
Page 193: Table 7 1: International Power Cords
Options and Accessories Options A1-A5 In place of the standard North American, 110 V, 60 Hz power cord, Tektronix ships any of five alternate power cord configurations with the waveform generator, as ordered by the customer. Table 7 1: International Power Cords... -
Page 194: Figure 7 1: Option 04 Block Diagram
Figure 7 2 shows the shape of the output connector and its pin locations. Table 7 2 lists the output signal for each pin. CH2 DIGITAL DATA OUT CH1 DIGITAL DATA OUT Figure 7 2: Option 04 Output Connector AWG2005 Service Manual... -
Page 195: Table 7 2: Option 04 Digital Output Signals
Operation Basically, operations are in correspondence with analog output for the AWG2005 arbitrary waveform generator. When a waveform is not being output, the waveform's initial data may be output to the connector. At this time, the clock is not generated. -
Page 196: Figure 7 3: Generation Of Excess Output
Figure 7 4 shows a diagram of the output circuit. After first passing through an output resistance of 50 Ω, the buffer output proceeds to the output con nectors. The AWG2005 can be used without terminating the receiving (user) side with a resistance of 50 Ω, but when waveform distortion is greater the 50 Ω... -
Page 197: Figure 7 5: Output Waveform
Options and Accessories The skew of the data output is held to "15 ns. The rising and falling times will depend on the buffer ICs, but neither is greater than 4 ns. See Figure 7 5. This figure shows the specifications for the waveform at the output connector when a cable is not being used. -
Page 198: Figure 7 7: Digital Data Out Cable
Cable Option 04 comes with a digital data out cable. The cable connecting the AWG2005 rear panel output connectors and the user circuit is extremely critical for operation at the maximum clock frequency. Figure 7 7 shows the digital data out cable provided as a standard accessory and the receiving connector. -
Page 199: Figure 7 8: Waveform Reproduction Circuit Example
Ï Ï Ï Figure 7 8: Waveform Reproduction Circuit Example NOTE Tektronix cannot be responsible for the infringement of any third party industrial proprietary rights, copyrights, or other rights arising from the use of these circuits. NOTE The ECB is a multi layer board. One layer is used as ground and the other as the power supply. - Page 200 WaveWriter gives you interactive control of the waveform generating process. WaveWriter operates within the Microsoft Windows environment. Option 95 A test result report will be provided with the AWG2005 when this option is specified. AWG2005 Service Manual...
-
Page 201: Table 7 3: Standard Accessories List
Options and Accessories Accessories Standard Accessories The following standard accessories are provided with each instrument: Table 7 3: Standard Accessories List Description Part Number User manual 070 8958 50 Programmer manual 070 8657 XX GPIB Programming Examples Disk, 3.5 inch 063 1708 XX media Sample Waveform Library Disk, 3.5 inch... -
Page 202: Table 7 5: Maintenance Kit Contents
Extender A board (for slot 1, 2, 3, 4) 671 2331 XX Extender B board (for slot 5) 671 2487 XX Cable kit 198 5802 XX Ejector 003 1315 XX Header 131 5537 XX Connector (PELTOLA to BNC) 131 1315 XX 7 11 AWG2005 Service Manual... -
Page 203: Options
Options and Accessories 7 12 Options... - Page 204 The modules that make up this instrument are often a combination of me chanical and electrical subparts. Therefore, all replaceable modules are listed in section 10, Mechanical Parts List. Refer to that section for part numbers when using this manual. AWG2005 Service Manual...
- Page 205 Electrical Parts List Electrical Parts List...
- Page 206 Diagrams This section contains a block diagram and an interconnect diagram. The block diagram shows the modules and functional blocks in an AWG2005 with Option 02, the CH3 and CH4, and Option 04, Digital Data Out, and Option 05, Clock Sweep, and Option 09, Floating Point Processor. The interconnect diagram shows how the modules in the AWG2005 connect.
- Page 207 Diagrams Diagrams...
-
Page 208: Option 02
12 V 15 V GPIB -15 V DISPLAY LOW VOLTAGE CONTROL POWER SUPPLY RS232C MEMORY -5 V FDD CONTROL POWER MODULE DISPLAY MONITOR VIDEO FLOATING POINT PROCESSOR OPTION 09 FLOPPY DISK DRIVE Figure 9 1: Block Diagram AWG2005 Service Manual... - Page 209 AWG2005 Service Manual...
-
Page 210: Figure 9 2: Interconnect Diagram
(CH1, CH2, CH3, CH4) (CH1 & CH2) ANALOG J498 J398 J550 J500 J298 J198 W498 W398 W550 W500 W298 W198 CH4 OUT CH3 OUT ADD IN AM IN CH2 OUT CH1 OUT Figure 9 2: Interconnect Diagram AWG2005 Service Manual... - Page 211 AWG2005 Service Manual...
- Page 212 670 7918 03 670 7918 XX When you order parts, Tektronix will provide you with the most current part for your product type, serial number, and modification (if applicable). At the time of your order, Tektronix will determine the part number revision level needed for your product, based on the information you provide.
- Page 213 Items in this section are referenced by figure and index numbers to the exploded view illustrations that follow. Tektronix Part Number Use this part number when ordering replacement parts from Tektronix. 3 and 4 Serial Number Column three indicates the serial number at which the part was first effective. Column four indicates the serial number at which the part was discontinued.
- Page 214 ILLINOIS TOOL WORKS INC ST CHARLES ROAD ELGIN IL 60120 SHAKEPROOF DIV 80009 TEKTRONIX INC 14150 SW KARL BRAUN DR BEAVERTON OR 97077-0001 PO BOX 500 86928 SEASTROM MFG CO INC 701 SONORA AVE GLENDALE CA 91201-2431 AWG2005 Service Manual 10 3...
- Page 215 SWITCH,SET:;ELASTOMERIC BEZEL TK1918 260-2539-XX 366-2164-XX PUSH BUTTON:SMOKE TAN 80009 3662164XX 354-0709-XX RING,TRIM:LEXAN 940 80009 3540709XX 334-8696-XX MARKER,IDENT:MKD AWG2005,POLYCARBONATE TK0191 334-8696-XX 378-0404-XX FILTER,LT,CRT:BULE SMOKE,112MM X 145MM X1MM THK 80009 3780404XX 348-1289-XX SHLD GSKT,ELEK:MESH TYPE,3.2MM X 4.7MM 80009 3481289XX 211-0722-XX SCREW,MACHINE:6-32 X 0.250,PNH,STL,T-15...
-
Page 216: Figure 10 1: Cabinet
Mechanical Parts List Figure 10 1: Cabinet AWG2005 Service Manual 10 5... - Page 217 Mechanical Parts List Fig. & Tektronix Part Serial No. Serial No. Mfr. Index Number Effective Discont'd Code Name & Description Mfr. Part Number Number 10-2-1 213-0882-XX SCREW,TPG,TR:6-32 X 0.437,PNH,T-15 0KB01 ORDER BY DESC 119-4322-XX FAN,TUBAXIAL:12VDC,2.4M/M,5.8MM HZO,6W 80009 1194322XX (B100) 252-0571-XX PLASTIC SHEET:EXTR CHAN,5MM X 3.3MM,NYLON...
-
Page 218: Figure 10 2: Main Chassis And Crt
Mechanical Parts List See Figure 10 5 for Detailed View Figure 10 2: Main Chassis and CRT AWG2005 Service Manual 10 7... - Page 219 Mechanical Parts List Fig. & Tektronix Part Serial No. Serial No. Mfr. Index Number Effective Discont'd Name & Description Code Mfr. Part Number Number 10-3-1 134-0218-XX BUTTON,PLUG:0.625 DIA,PLASTIC,TAN 80009 1340218XX 131-1315-XX CONN,RF JACK:BNC/PNL,;50 OHM,FEMALE 24931 28JR306-1 (J500,J550) 348-1314-XX GASKET,SHIELD:FINGER RYPE,BE-CU,609.6MM L...
-
Page 220: Figure 10 3: Main Chassis And Circuit Boards
Mechanical Parts List Figure 10 3: Main Chassis and Circuit Boards AWG2005 Service Manual 10 9... - Page 221 Mechanical Parts List Fig. & Tektronix Part Serial No. Serial No. Mfr. Index Number Effective Discont'd Name & Description Code Mfr. Part Number Number 10-4-1 671-3089-XX J300101 J310100 CIRCUIT BD ASSY:A06 CPU TK0191 671-3089-XX 671-4000-XX J310101 CIRCUIT BD ASSY:A06 CPU...
-
Page 222: Figure 10 4: Circuit Boards
Mechanical Parts List Figure 10 4: Circuit Boards AWG2005 Service Manual 10 11... - Page 223 Mechanical Parts List Fig. & Tektronix Part Serial No. Serial No. Mfr. Index Number Effective Discont'd Name & Description Code Mfr. Part Number Number 10-5-1 671-2520-XX CIRCUIT BD ASSY:KEYBOARD TK0191 671-2520-XX (A12) 213-0048-XX SETSCREW:4-40 X 0.125,STL TK0392 ORDER BY DESC...
-
Page 224: Figure 10 5: Front Panel Assembly
Mechanical Parts List Figure 10 5: Front Panel Assembly AWG2005 Service Manual 10 13... - Page 225 Mechanical Parts List Fig. & Tektronix Part Serial No. Serial No. Mfr. Index Number Effective Discont'd Name & Description Code Mfr. Part Number Number OPTION 02 10-6-1 131-1315-XX CONN,RF JACK:BNC/PNL,;50 OHM,FEMALE 24931 28JR306-1 (J230,J240) 210-0978-XX J300313 WASHER,FLAT:0.375 ID X 0.5 OD X 0.024,STL...
-
Page 226: Figure 10 6: Option 02
Mechanical Parts List Figure 10 6: Option 02 AWG2005 Service Manual 10 15... -
Page 227: Figure 10 7: Option 04
Mechanical Parts List Fig. & Tektronix Part Serial No. Serial No. Mfr. Index Number Effective Discont'd Name & Description Code Mfr. Part Number Number OPTION 04 10-7-1 337-3965-XX SHIELD,ELEC:REAR,DDO,BRASS TK0191 337-3965-XX 334-8699-XX MARKER,IDENT:MKD DDO,POLYCARBONATE TK0191 334-8699-XX 131-5778-XX CONN,HDR:PCB,;MALE,RTANG,2 X 13,0.1 CTR... -
Page 228: Figure 10 8: Option 05
Index Number Effective Discont'd Name & Description Code Mfr. Part Number Number OPTION 05 10-8-1 131-1315-XX CONN,RF JACK:BNC/PNL,;50 OHM,FEMALE 24931 28JR306-1 (J360) 671-3067-XX CIRCUIT BD ASSY:CLOCK SWEEP 80009 6713067XX (A31) Figure 10 8: Option 05 AWG2005 Service Manual 10 17... -
Page 229: Figure 10 9: Option 09
Mechanical Parts List Fig. & Tektronix Part Serial No. Serial No. Mfr. Index Number Effective Discont'd Name & Description Code Mfr. Part Number Number OPTION 09 10-9-1 671-3179-XX CIRCUIT BD ASSY:FLOATING PROCESSOR TK0191 671-3179-XX (A7) Figure 10 9: Option 09... - Page 230 CA ASSY,SP,ELEC:26,350MM L,FLAT FLEX 80009 1742775XX W900 174-2770-XX CA ASSY,SP,ELEC:10,26 AWG,390MM L,RIBBON 80009 1742770XX W1110 174-3239-XX CA ASSY,SP:30,30 AWG,80CM L,FLAT TK0191 174-3239-XX (OPTION 04 ONLY) W1210 174-3239-XX CA ASSY,SP:30,30 AWG,80CM L,FLAT TK0191 174-3239-XX (OPTION 04 ONLY) AWG2005 Service Manual 10 19...
- Page 231 Mfr. Index Number Effective Discont'd Name & Description Code Mfr. Part Number Number STANDARD ACCESSORIES 063-1704-XX SOFTWARE PKG:3.5 DISK,AWG2005 WAVEFORM LIBRARY TK0191 063-1704-XX 063-1706-XX J310248 SOFTWARE PKG:3.5 DISK,AWG2005 PERF CHECK/ADJ TK0191 063-1706-XX 063-1708-XX SOFTWARE PKG:3.5 DISK,AWG2000 SERIES SAMPLE TK0191 063-1708-XX...
Need help?
Do you have a question about the AWG2005 and is the answer not in the manual?
Questions and answers