
Related Manuals for Tektronix AWG70001A


Summary of Contents for Tektronix AWG70001A
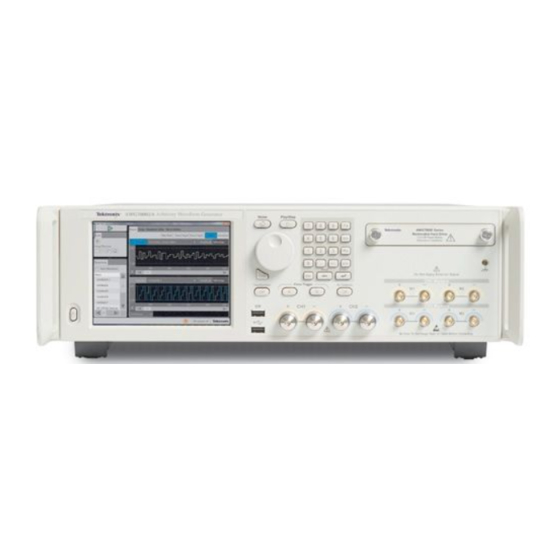
- Page 1 AWG70001A and AWG70002A Arbitrary Waveform Generators AWGSYNC01 Synchronization Hub Specifications and Performance Verification Technical Reference *P077078003* 077-0780-03...
- Page 3 AWG70001A and AWG70002A Arbitrary Waveform Generators AWGSYNC01 Synchronization Hub Specifications and Performance Verification Technical Reference Warning The servicing instructions are for use by qualified personnel only. To avoid personal injury, do not perform any servicing unless you are qualified to do so. Refer to all safety summaries before performing service.
- Page 4 Copyright © Tektronix. All rights reserved. Licensed software products are owned by Tektronix or its subsidiaries or suppliers, and are protected by national copyright laws and international treaty provisions. Tektronix products are covered by U.S. and foreign patents, issued and pending. Information in this publication supersedes that in all previously published material.
-
Page 5: Table Of Contents
Table of Contents General safety summary ................... Service safety summary..................Preface ......................Related documents.................... Specifications Specifications ..................... Performance conditions ..................Electrical specifications ..................Mechanical characteristics ................1-19 Environmental characteristics ................1-21 AWGSYNC01 ....................1-22 Electrical specifications ................... 1-22 Mechanical characteristics ................1-25 Performance verification Performance verification procedures ................ - Page 6 Table of Contents List of Figures Figure 1-1: Dimensions and minimum cooling clearances ..........1-20 Figure 2-1: Peripheral connections ................Figure 2-2: Diagnostics dialog box................Figure 2-3: Calibration dialog box ................Figure 2-4: Equipment connections for checking the analog and marker outputs ...... 2-10 Figure 2-5: Output waveform from the channel, marker 1, and marker 2 connectors ....
- Page 7 Table 1-9: Phase noise with jitter reduction, AWG70001A operating at 50 GS/s......Table 1-10: Phase noise with jitter reduction, AWG70001A & AWG70002A operating at 25 GS/s ... Table 1-11: Phase noise with jitter reduction, AWG70002A operating at 8 GS/s ......
- Page 8 Table of Contents Table 2-3: Required equipment for performance tests ............. 2-21 Table 2-4: Performance test waveforms ..............2-22 Table 2-5: Analog amplitude accuracy............... 2-26 Table 2-6: AC analog amplitude accuracy..............2-29 Table 2-7: Marker high level accuracy............... 2-32 Table 2-8: Marker low level accuracy................ 2-33 AWG70000A Series and AWGSYNC01 Technical Reference...
-
Page 9: General Safety Summary
General safety summary General safety summary Review the following safety precautions to avoid injury and prevent damage to this product or any products connected to it. To avoid potential hazards, use this product only as specified. Only qualified personnel should perform service procedures. To avoid fire or personal Use proper power cord. - Page 10 General safety summary Terms in this manual These terms may appear in this manual: WARNING. Warning statements identify conditions or practices that could result in injury or loss of life. CAUTION. Caution statements identify conditions or practices that could result in damage to this product or other property.
-
Page 11: Service Safety Summary
Service safety summary Service safety summary Only qualified personnel should perform service procedures. Read this Service safety summary and the General safety summary before performing any service procedures. Do not service alone. Do not perform internal service or adjustments of this product unless another person capable of rendering first aid and resuscitation is present. - Page 12 Service safety summary viii AWG70000A Series and AWGSYNC01 Technical Reference...
-
Page 13: Preface
AWGSYNC01 Safety and Installation Manual. This document provides safety information and how to install the instrument. AWG70000A Series Arbitrary Waveform Generators Service Manual. This is a PDF-only manual that provides module-level service information. It can be downloaded from the Tektronix Web site. AWG70000A Series and AWGSYNC01 Technical Reference... - Page 14 Preface AWG70000A Series and AWGSYNC01 Technical Reference...
-
Page 15: Specifications
Specifications... -
Page 17: Performance Conditions
Specifications This section contains the specifications for the AWG70000A series Arbitrary Waveform Generators and the AWGSYNC01 Synchronization Hub. The generators are covered together in the first part, followed by the separate AWGSYNC01 information. All specifications are typical unless noted as warranted. Warranted specifications that are marked with the symbol are checked in this manual. -
Page 18: Electrical Specifications
Triggered continuous mode An arbitrary waveform is output continuously after a trigger signal is applied. Table 1-2: Arbitrary waveform Characteristics Description Waveform memory AWG70001A Standard 2,000,000,000 points With Option 01 8,000,000,000 points when ≤25 GS/s 16,000,000,000 points when >25 GS/s... -
Page 19: Table 1-3: Sample Clock Generator
Specifications Table 1-3: Sample clock generator Characteristics Description Instrument / Option Sampling rate control range AWG70001A Option 150 1.49 kS/s to 50 GS/s AWG70002A Option 225 1.49 kS/s to 25 GS/s AWG70002A Option 216 1.49 kS/s to 16 GS/s AWG70002A Option 208 1.49 kS/s to 8 GS/s... - Page 20 For non-interleaved waveforms: x = π * fout ÷ fsample fsample = sample rate fout = sin(x)/x bandwidth AWG70001A ≤ 25 GS/s (non-interleaved): 11.1 GHz * fsample ÷ 25 GS/s > 25 GS/s (interleaved): 11.1 GHz * fsample ÷ 50 GS/s AWG70002A 11.1 GHz * fsample ÷...
- Page 21 Specifications Table 1-4: Analog output (cont.) Characteristics Description Harmonic distortion Measured with a balun. AWG70001A and AWG70002A Operating at 25 GS/s Output Frequency 2nd harmonic <2 GHz < –60 dBc < –50 dBc 2 GHz – 6 GHz >6 GHz <...
-
Page 22: Table 1-5: Sfdr, Awg70001A & Awg70002A Operating At 25 Gs/S
Inter-channel skew control (AWG70002A only) Range –100 ps to +100 ps Resolution 1 ps Accuracy ±5 ps Table 1-5: SFDR, AWG70001A & AWG70002A operating at 25 GS/s Adjacent band Analog channel In band performance performance output frequency measured across Specification measured across Specification... -
Page 23: Table 1-6: Sfdr, Awg70001A Operating At 50 Gs/S
Specifications Table 1-5: SFDR, AWG70001A & AWG70002A operating at 25 GS/s (cont.) Adjacent band Analog channel In band performance performance output frequency measured across Specification measured across Specification 7 – 8 GHz 7 – 8 GHz –55 dBc 6 – 12.5 GHz –50 dBc... -
Page 24: Table 1-8: Sfdr, Awg70002A Operating At 16 Gs/S
–112 dBc/Hz –108 dBc/Hz 10 MHz –156 dBc/Hz –157 dBc/Hz –138 dBc/Hz –130 dBc/Hz Table 1-10: Phase noise with jitter reduction, AWG70001A & AWG70002A operating at 25 GS/s Analog output frequency Offset 100 MHz 1 GHz 10 GHz 100 Hz –115 dBc/Hz... -
Page 25: Table 1-11: Phase Noise With Jitter Reduction, Awg70002A Operating At 8 Gs/S
–104 dBc/Hz –100 dBc/Hz 10 MHz –145 dBc/Hz –128 dBc/Hz –111 dBc/Hz –106 dBc/Hz Table 1-14: Phase noise without jitter reduction, AWG70001A & AWG70002A operating at 24.998998 GS/s Analog output frequency Offset 100 MHz 1 GHz 10 GHz 100 Hz –104 dBc/Hz... -
Page 26: Table 1-15: Phase Noise Without Jitter Reduction, Awg70002A Operating At 7.998997998 Gs/S
10 MHz –141 dBc/Hz –121 dBc/Hz –115 dBc/Hz –112 dBc/Hz –109 dBc/Hz Table 1-17: AC analog output (AWG70001A, Option AC) Characteristics Description Connector type Aeroflex/Weinschel Planar Crown Universal Connector System with SMA female adapter Number of outputs Type of output... - Page 27 Specifications Table 1-17: AC analog output (AWG70001A, Option AC) (cont.) Characteristics Description Amplitude Range For a CW signal at specified frequencies in each path. Each path is calibrated at a single frequency (see Amplitude Accuracy). For signals at different frequencies, the range is shifted and the actual output power will be offset from the requested power.
-
Page 28: Table 1-18: Marker Output
Specifications Table 1-17: AC analog output (AWG70001A, Option AC) (cont.) Characteristics Description Band Pass ± 3.5 dB 10 GHz to 14.5 GHz 13 GHz to 18 GHz ± 4.5 dB Harmonic distortion Measured with a balun. Operating at 50 GS/s... -
Page 29: Table 1-19: Clock Output
Output current ±28 mA maximum, assuming 1.4 V into 50 Ω load. Delay from analog AWG70001A: 180 ps ±25 ps AWG70001A Option AC: –380 ps ±25 ps AWG70002A: 755 ps ±25 ps Variable delay control Independent control for each marker... -
Page 30: Table 1-20: Clock Input
Specifications Table 1-19: Clock output (cont.) Characteristics Description Frequency resolution With jitter reduction: 50 MHz Internal and fixed reference clock operation Without jitter reduction: 100 MHz ÷ 2 External variable reference With jitter reduction: Fref ÷ R clock operation: Without jitter reduction: Fref ÷ R ÷ 2 Fref = reference clock frequency R = 4 when 140 MHz <... -
Page 31: Table 1-22: Reference Clock Input
Specifications Table 1-21: Trigger input (cont.) Characteristics Description Minimum pulse width 20 ns 1 kΩ selected 50 Ω selected 20 ns Trigger delay to analog output Asynchronous trigger mode: 32,480 / (2 * fclk) ±20 ns Synchronous trigger mode: 30,880 / (2 * fclk) ±20 ns fclk is the frequency of the DAC sampling clock The DAC sampling clock frequency is displayed on the clock settings tab when the external clock output is enabled. -
Page 32: Table 1-24: Sequencer
Specifications Table 1-23: Sync clock output (cont.) Characteristics Description Output amplitude 1.0 ± 0.15 V into 50 Ω Frequency Clock output ÷ 80 Table 1-24: Sequencer Characteristics Description Maximum number of steps 16,383 Waveform repeat Selectable: Infinity Variable from 1 to 1,048,576 Table 1-25: Pattern Jump In connector Characteristics Description... -
Page 33: Table 1-26: Flag Out Connectors
Table 1-26: Flag out connectors Characteristics Description Connector type SMB on rear panel Number of Outputs AWG70001A: 4 AWG70002A: 8 Output Impedance 50 Ω Output Amplitude High: 3.3 V into 50 Ω to GND Low: 0 V Maximum Toggle Frequency <11 MHz... -
Page 34: Table 1-28: Cpu Module And Peripheral Devices
Specifications Table 1-28: CPU module and peripheral devices Characteristics Description SN B020000 and above: Intel core I7-4700EQ, 4 core, 2.4 GHz, 6M cache SN B019999 and below: Intel core 2 duo processor Memory SN B020000 and above: 16 GB (2 x 8 GB), DDR3-1600 or faster SODIMM SN B019999 and below: 4 GB (2 x 2 GB), DDR2-800 or faster SODIMM Hard disk drive Solid state, ≥500 GB, removable... -
Page 35: Mechanical Characteristics
Net weight AWG70001A and AWG70002A Without package 37.0 lb (16.8 kg) With package 49.4 lb (22.4 kg) AWG70001A with option AC Without package 38.56 lb (17.49 kg) With package 50.96 lb (23.12 kg) Dimensions, overall Height 153.6 mm (6.05 in) Width 460.5 mm (18.13 in) -
Page 36: Figure 1-1: Dimensions And Minimum Cooling Clearances
Specifications Figure 1-1: Dimensions and minimum cooling clearances 1–20 AWG70000A Series and AWGSYNC01 Technical Reference... -
Page 37: Environmental Characteristics
Specifications Environmental characteristics Table 1-32: Environmental characteristics Characteristics Description Temperature Operating 0 °C to +50 °C (+32 °F to 122 °F) Nonoperating –20 °C to +60 °C (-4 °F to 140 °F) with 30 °C/hour (86 °F/hour) maximum gradient, with no media installed in disc drives Relative humidity Operating... -
Page 38: Awgsync01
AWGSYNC01 AWGSYNC01 Electrical specifications Table 1-33: Electrical specifications Characteristic Description System Number of AWG70001A or AWG70002A instruments All instruments must be the same model supported Output to Output Skew ±10 ps (typical) Repeatability ≤5 ps (typical) Random Jitter on Clock Pattern 0.315 ps rms... - Page 39 AWGSYNC01 Table 1-33: Electrical specifications (cont.) Characteristic Description +5 dBm to +10 dBm Input Amplitude (typical) Frequency Range (typical) 6.25 GHz to 12.5 GHz Sync Clock Output Connector SMA on rear-panel Output Impedance 50 Ω AC coupled Output Amplitude (typical) 1.0 ±0.15 V into 50 Ω...
- Page 40 AWGSYNC01 Table 1-33: Electrical specifications (cont.) Characteristic Description Pattern Jump Input Connector 15-pin DSUB on rear-panel Pin Assignments Pin, Signal 1 GND 2 Jump Bit 0 Input 3 Jump Bit 1 Input 4 Jump Bit 2 Input 5 Jump Bit 3 Input 6 GND 7 Strobe Input 8 GND...
-
Page 41: Mechanical Characteristics
AWGSYNC01 Table 1-34: Power supply Characteristic Description Power Power Supply AC Line Input 100 – 240 VAC, 50 / 60 Hz Power Consumption 110 W U.S. Nationally Recognized Testing Laboratory (NRTL) Listing UL61010-1 Standard for Electrical Safety Measuring and Test Equipment or ANSI/ISA S82.02.01 Safety Standard for Electrical and Electronic Test, Measuring, Controlling, and Related Equipment Canadian Certification CAN/CSA C22.2 No. - Page 42 AWGSYNC01 1–26 AWG70000A Series and AWGSYNC01 Technical Reference...
-
Page 43: Performance Verification
Performance verification... -
Page 45: Performance Verification Procedures
Performance verification procedures Two types of performance verification procedures can be performed on the instrument: Brief Procedures and Performance Tests. You may not need to perform all of these procedures, depending on what you want to accomplish. To rapidly confirm that the instrument functions and was adjusted properly, perform Diagnostics and Calibration. -
Page 46: Input And Output Options
Performance verification procedures Input and output options The instrument has two USB ports on the front panel, and four USB ports on the rear panel. (See Figure 2-1.) These ports can be used for an external mouse and/or keyboard. Additionally, an external video display can be connected to the VGA display port on the rear panel. -
Page 47: Instrument Interface Overview
Performance verification procedures Instrument interface overview The instrument interface is briefly described on the following pages to help you perform the tests and to navigate to the files needed to complete the procedures. AWG70000A Series and AWGSYNC01 Technical Reference 2–3... - Page 48 Performance verification procedures Screen element Description Play/Stop button Starts and stops waveform play out. The Play button icon changes to indicate the waveform play out status. Work space tabs The work space tabs provides access to all of the instrument functions. Home returns the work space area to the channel plot display.
- Page 49 Performance verification procedures Screen element Description Waveforms and sequences Contains all waveforms and sequences available for playout. Touch and hold (or right-mouse click) a waveform or sequence name to display menu selections to manage the lists. Sequencing requires Option 03. 10.
- Page 50 Performance verification procedures Typical output control The screen shot below shows the controls that display when you are setting up a typical output waveform. In this example, the Channel 1 Analog output screen parameters are displayed. 2–6 AWG70000A Series and AWGSYNC01 Technical Reference...
-
Page 51: Brief Procedures
Brief procedures Brief procedures There are three procedures in this section that provide a quick way to confirm basic functionality and proper adjustment: Diagnostics Calibration Functional Test Diagnostics The following steps run the internal routines that confirm basic functionality and proper adjustment. Equipment Prerequisites None... -
Page 52: Calibration
Brief procedures 5. Click the Start button to execute the diagnostics. The internal diagnostics perform an exhaustive verification of proper instrument function. This verification may take several minutes. When the verification is completed, the resulting status will appear in the dialog box. 6. -
Page 53: Functional Test
Tensolite 1-3636-465-5236 50 Ω SMA termination 3 ea. DC to 18 GHz Tektronix part number 015-1022-01 (one is supplied with the AWG70001A, two with the AWG70002A). 50 Ω BNC cable 1 ea. Male connectors both ends Tektronix part number 012-0057-01 SMA-BNC adapter 3 ea. -
Page 54: Figure 2-4: Equipment Connections For Checking The Analog And Marker Outputs
Brief procedures 1. Press the All Outputs On/Off button on the instrument to turn off all the outputs. 2. Use a 50 Ω SMA cable and a TCA-SMA adapter to connect the CH 1 + connector on the instrument to channel 1 of the oscilloscope. 3. - Page 55 11. On the instrument, load the PV_Square.wfmx waveform as an output waveform. Follow the steps below: a. In the Waveform List window, click Open Waveform and navigate to C:\Program Files\Tektronix\AWG70000\Samples\PV. b. Select Open File. c. In the Waveform List window, select (drag and drop) the PV_Square.wfmx waveform on to the work space.
-
Page 56: Figure 2-5: Output Waveform From The Channel, Marker 1, And Marker 2 Connectors
Brief procedures Figure 2-5: Output waveform from the channel, marker 1, and marker 2 connectors 17. Press the All Outputs button again to disable the channel 1 output. 18. If you are testing an AWG70002A, repeat the test for the Channel 2, Marker 1, and Marker 2 outputs. -
Page 57: Figure 2-6: Equipment Connections For Checking The Ac Output
Brief procedures Checking the AC output Required equipment Prerequisites (AWG70001A with option Signal analyzer None One Planar Crown RF Input Connector – 7005A-1 SMA Female One 50 Ω SMA cable Two 50 Ω SMA terminations 1. Press the All Outputs button on the instrument to turn off all the outputs. - Page 58 Brief procedures 4. Create three test waveforms. a. Set the instrument to its default settings. b. Click the Waveform tab on the display. c. Set the Function to Sine d. Check the Advanced Options box NOTE. Checking Advanced Options prevents the instrument from changing the Sampling Rate while adjusting the Frequency of the generated waveform.
-
Page 59: Figure 2-7: 1 Ghz Output Waveform - No Filter
Brief procedures 9. In the Waveform List window, select (drag and drop) the Waveform_1 GHz waveform on to the work space. 10. Press the Play button, or click Play on the display. 11. Press the All outputs off button to enable the outputs. 12. -
Page 60: Figure 2-8: 1 Ghz Output Waveform - Filter Set To Low Pass
Brief procedures 16. Check that the Channel 1 waveform is properly displayed on the signal analyzer screen. (See Figure 2-8.) Figure 2-8: 1 GHz output waveform – Filter set to Low Pass 17. Press the All Outputs button to disable the outputs. 18. -
Page 61: Figure 2-9: 11 Ghz Output Waveform
Brief procedures Figure 2-9: 11 GHz output waveform 23. Press the All Outputs button to disable the outputs. 24. Click the Setup tab on the display. a. Set Range to 13–18GHz 25. Press the Home button, or click the Home tab on the display. 26. -
Page 62: Figure 2-10: 14 Ghz Output Waveform
Brief procedures Figure 2-10: 14 GHz output waveform 29. Press the All Outputs button to disable the outputs. 30. Disconnect the test setup. 2–18 AWG70000A Series and AWGSYNC01 Technical Reference... -
Page 63: Figure 2-11: Equipment Connection For Checking The Triggered Outputs
Brief procedures Checking the triggered Required equipment Prerequisites outputs Oscilloscope None Function Generator (AFG3021C or equivalent) One TCA-SMA adapter Two 50 Ω SMA cables One SMA female to BNC male adapter 1. Press the All Outputs On/Off button on the instrument to turn off all the outputs. - Page 64 11. On the instrument, load the PV_Square.wfmx waveform as an output waveform. Follow the steps below: a. In the Waveform List window, click Open Waveform and navigate to C:\Program Files\Tektronix\AWG70000\Samples\PV. b. Select Open File. c. In the Waveform List window, select (drag and drop) the PV_Square.wfmx waveform on the work space area.
-
Page 65: Performance Tests
Tensolite 1-3636-465-5236 50 Ω SMA termination 3 ea. DC to 18 GHz Tektronix part number 015-1022-01 (one is supplied with the AWG70001A, two with the AWG70002A.) 50 Ω BNC termination 1 ea. DC to 1 GHz, feedthrough Tektronix part number 011-0049-02 AWG70000A Series and AWGSYNC01 Technical Reference 2–21... -
Page 66: Table 2-4: Performance Test Waveforms
Item Qty. Minimum requirements Recommended equipment 50 Ω BNC cable 1 ea. Male connectors both ends Tektronix part number 012-0057-01 SMA-BNC adapter 3 ea. SMA female to BNC male connector Tektronix part number 015-0572-00 SMA-BNC adapter 1 ea. SMA male to BNC female connector Tektronix part number 015-0554-00 1 ea. -
Page 67: 10 Mhz Reference Frequency Accuracy
Performance tests 10 MHz reference frequency accuracy Required equipment Prerequisites Frequency counter (See page 2-21, Prerequisites.) SMA female-to-BNC male adapter 50 Ω SMA cable 1. Connect the 10 MHz Reference Output on the back of the instrument to the A input of the frequency counter, using the 50 Ω SMA cable and SMA-BNC adapter. -
Page 68: Analog Amplitude Accuracy
Performance tests Analog amplitude accuracy NOTE. If checking an AWG70001A instrument with Option AC, ensure that Channel 1 is set to Direct Mode in the Setup tab to enable the analog + and – complimentary outputs. Required equipment Prerequisites Digital multimeter (See page 2-21, Prerequisites.) -
Page 69: Figure 2-14: Equipment Connection For Checking The Analog Amplitude Accuracy
Select Open Waveform. b. In the dialog box, navigate to the C:\Program Files\Tektronix\AWG70000\Samples\PV folder, and then select the PV_DC_Plus.wfmx file. The Waveform List window appears. c. In the window, drag and drop the PV_DC_Plus.wfmx waveform on the work space. -
Page 70: Table 2-5: Analog Amplitude Accuracy
Performance tests Table 2-5: Analog amplitude accuracy Model Amplitude settings Accuracy limits AWG70000A Series 250 mV 244 mV to 256 mV 375 mV 367 mV to 383 mV 500 mV 489 mV to 511 mV 10. Press the Ch 1 Enable button on the instrument to enable the channel 1 output. 11. - Page 71 Performance tests 23. Press the All Outputs On/Off button to turn off all the outputs. 24. Disconnect the test setup. AWG70000A Series and AWGSYNC01 Technical Reference 2–27...
-
Page 72: Analog Ac Amplitude Accuracy (Option Ac Only)
Performance tests Analog AC amplitude accuracy (Option AC only) This procedure is only for AWG70001A instruments with Option AC. Required equipment Prerequisites Digital multimeter (See page 2-21, Prerequisites.) BNC-dual banana adapter 50 Ω BNC termination SMA female-BNC male adapter 50 Ω SMA termination Measure the termination resistance. -
Page 73: Figure 2-16: Equipment Connection For Checking The Analog Amplitude Accuracy
Select Open Waveform. b. In the dialog box, navigate to the C:\Program Files\Tektronix\AWG70000\Samples\PV folder, and then select the PV_DC_Plus.wfmx file. The Waveform List window appears. c. In the window, drag and drop the PV_DC_Plus.wfmx waveform on the work space. - Page 74 Performance tests 11. Press the All Outputs On/Off button on the instrument to output the waveform. 12. Measure the output voltage on the digital multimeter and note the value as Measured_voltage_1. 13. Use the following formula to compensate the voltage for the 50 Ω BNC termination: V_high = [(Term_R + 50) / (2 Term_R)] Measured_voltage_1 Where Term_R is the resistance of the 50 Ω...
-
Page 75: Marker High And Low Level Accuracy
Performance tests Marker high and low level accuracy Required equipment Prerequisites Digital multimeter (See page 2-21, Prerequisites.) BNC-dual banana adapter 50 Ω BNC cable 50 Ω BNC termination SMA male-BNC female adapter 50 Ω SMA termination + Marker high level 1. -
Page 76: Table 2-7: Marker High Level Accuracy
Performance tests NOTE. This test uses the .wfmx files that are used in the previous test (Analog Amplitude Accuracy). If you did not perform that test, use step 7 in the procedure to load the files, and then proceed with the following steps to activate the 8+2 markers. -
Page 77: Table 2-8: Marker Low Level Accuracy
Performance tests + Marker low level accuracy 14. In the Waveform List window, select (drag and drop) the PV_DC_Minus.wfmx waveform to the work space. 15. Click the Ch 1 Enable button on the instrument to enable the channel 1 output. 16. - Page 78 Performance tests – Marker low level accuracy The marker low level accuracy is tested using the PV_DC_Plus.wfmx file. 25. In the Waveform List window, select (drag and drop) the PV_DC_Plus.wfmx waveform to the work space. 26. Repeat steps 15 through 20 to complete the low level accuracy test for the M1 –...
-
Page 79: Test Record
Technician: Performance Test Minimum Incoming Outgoing Maximum 10 MHz Reference Frequency Accuracy 9.99999 MHz 10.00001 MHz Analog Amplitude Accuracy AWG70001A, AWG70002A Ch 1 + Amplitude 250 mV 244 mV 256 mV 375 mV 367 mV 383 mV 500 mV 489 mV 511 mV Ch 1 –... - Page 80 Performance tests Performance Test Minimum Incoming Outgoing Maximum Ch 1 Marker M1 + High level 1.185 V 1.615 V –75 mV +75 mV –1.065 V –0.735 V Low level 0.735 V 1.065 V –75 mV +75 mV –1.615 V –1.185 V M1 –...
- Page 81 Performance tests Performance Test Minimum Incoming Outgoing Maximum Ch 2 Markers M1 + High level 1.185 V 1.615 V –75 mV +75 mV –1.065 V –0.735 V Low level 0.735 V 1.065 V –75 mV +75 mV –1.615 V –1.185 V M1 –...
Need help?
Do you have a question about the AWG70001A and is the answer not in the manual?
Questions and answers