Table of Contents
Advertisement
Quick Links
Advertisement
Table of Contents

Related Manuals for Omron TJ2-MC02


Summary of Contents for Omron TJ2-MC02
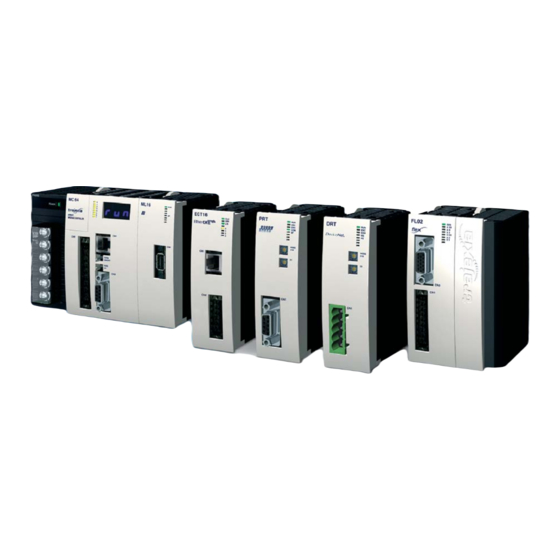
- Page 1 Cat. No. I57E-EN-05 Trajexia machine control system TJ2-MC64, TJ2-MC02, TJ1-ML04, TJ1-ML16, TJ1-PRT, TJ1-DRT, TJ1-CORT, TJ1-FL02, TJ2-KS02, GRT1-ML2 TJ2-ECT04, TJ2-ECT16, TJ2-ECT64, GRT1-ECT, 3G3AX-MX2-MRT, 3G3AX-RX-MRT HARDWARE REFERENCE MANUAL...
- Page 2 Every precaution tioned herein are trademarks of their respective owners. has been taken in the preparation of this manual. Nevertheless, OMRON assumes no responsibility for errors or omissions. Neither is any liability assumed for damages resulting from the use of the information contained in this publication.
- Page 3 Omron Smartslice W455-E1 Describes the installation and operation GRT1-Series, slice I/ of Omron slice I/O units Sigma-II Servo Drive SIEP S800000 15 Describes the installation and operation O units, Operation manual of Sigma-II Servo Drives...
- Page 4 Provides information regarding func- FZM1-ECT tions, performance and operating meth- Support for GX-JC03/JC06, V2.0170 ods that are required for using the FQ- FQ-M Support for TJ2-MC02, TJ2- V2.0192 Accurax G5 servo I571-E2 This manual contains the information KS02 and RX-ECT system Users’s man- you need to know to correctly use the Accurax G5 and peripheral equipment.
-
Page 5: Table Of Contents
Contents Safety warnings and precautions................1 Intended audience . -
Page 6: Safety Warnings And Precautions
WARNING on lives and property if used improperly, consult your OMRON Emergency stop circuits, interlock circuits, limit circuits, and similar representative. -
Page 7: Operating Environment Precautions
Safety warnings and precautions WARNING Caution The TJ2 will turn off the WDOG when its self-diagnosis function Tighten the screws on the terminal block of the Power Supply Unit detects any error.As a countermeasure for such errors, external to the torque specified in this manual. safety measures must be provided to ensure safety in the system. -
Page 8: Application Precautions
Safety warnings and precautions Caution WARNING The operating environment of the TJ2 System can have a large Always connect the EtherCAT master port to the IN port of the first effect on the longevity and reliability of the system. slave. Not doing so can result in unreliable communication and Improper operating environments can lead to malfunction, failure, changes to address and axes assignment of EtherCAT slaves. - Page 9 Safety warnings and precautions Caution Caution Do not apply voltage to the Input Units in excess of the rated input Be sure that all mounting screws, terminal screws, and cable con- voltage. nector screws are tightened to the torque specified in this manual. Excess voltage may result in burning.
- Page 10 Safety warnings and precautions Caution Caution Be sure that the terminal blocks, expansion cables, and other UTP cables are not shielded. In environments that are subject to items with locking devices are properly locked into place. noise use a system with shielded twisted-pair (STP) cable and Improper locking may result in malfunction.
-
Page 11: Unit Assembly Precautions
The concepts for the directives EMC and Low Voltage are as follows: unexpected operation. EMC Directives OMRON devices that comply with EC Directives also conform to the related Caution EMC standards so that they can be more easily built into other devices or Although the TJ2-MC__ in most cases is backwards compatible machines. - Page 12 Safety warnings and precautions 1.7.2 Conformance to EC Directives The Trajexia Motion Controllers comply with EC Directives. To ensure that the machine or device in which a system is used complies with EC directives, the system must be installed as follows: 1.
-
Page 13: System Philosophy
System philosophy System philosophy Introduction The system philosophy is centred around the relationship between: fig. 1 • System architecture TJ2-MC64 MOTION SEQUENCE • Cycle time AXIS TYPE AXIS TYPE AXIS TYPE Buffer & • Program control and multi-tasking Position Position profile Program Buffer Loop... -
Page 14: Motion Control Concepts
System philosophy CPU slots The operations executed in each CPU slot are: CPU slot Operation First CPU slot BASIC and/or PLC execution Motion Network update (if SERVO_PERIOD=0.25ms) Second CPU slot BASIC and/or PLC execution Motion Network update (if SERVO_PERIOD=0.25ms or 0.5ms) Third CPU slot Internal houskeeping Motion Network update (if SERVO_PERIOD=0.25ms) - Page 15 System philosophy Coordinate system Positioning operations performed by the TJ2-MC__ are based on an axis coordinate system. The TJ2-MC__ converts the position data from either the connected Servo Drive or the connected encoder into an internal absolute coordinate system. The engineering unit that specifies the distances of travelling can be freely defined for each axis separately.
- Page 16 System philosophy Relative and absolute moves To move a single axis either the command MOVE for a relative move or the fig. 3 command MOVEABS for an absolute move is used. Each axis has its own move characteristics, which are defined by the axis parameters. MOVEABS(100) AXIS(0) MOVEABS(50) AXIS(1) Suppose a control program is executed to move from the origin to an axis...
- Page 17 System philosophy The two speed profiles in these figures show the same movement with an fig. 5 acceleration time respectively a deceleration time of 2 seconds. Again, Axis A is the time, axis B is the speed. ACCEL=5 DECEL=10 SPEED=10 MOVE(40) fig.
- Page 18 System philosophy Acceleration time Acceleration distance Deceleration time Deceleration distance Constant speed distance Total time Continuous moves The FORWARD and REVERSE commands can be used to start a continuous movement with constant speed on a certain axis. The FORWARD command moves the axis in positive direction and the REVERSE command in negative direction.
- Page 19 System philosophy 2.2.2 CP control Continuous Path control enables to control a specified path between the start and end position of a movement for one or multiple axes. The TJ2- MC__ supports the following operations: • Linear interpolation • Circular interpolation •...
- Page 20 System philosophy Circular interpolation It may be required that a tool travels from the starting point to the end point fig. 8 in an arc of a circle. In this instance the motion of two axes is related via a circular interpolated move using the MOVECIRC command.
- Page 21 System philosophy 2.2.3 EG control Electronic Gearing control allows you to create a direct gearbox link or a linked move between two axes. The MC Unit supports the following operations. • Electronic gearbox • Linked CAM • Linked move • Adding axes Electronic gearbox The TJ2-MC__ is able to have a gearbox link from one axis to another as if...
- Page 22 System philosophy Linked CAM control Next to the standard CAM profiling tool the TJ2-MC__ also provides a tool to fig. 11 link the CAM profile to another axis. The command to create the link is called CAMBOX. The travelling speed through the profile is not determined by the axis parameters of the axis but by the position of the linked axis.
- Page 23 System philosophy Adding axes It is very useful to be able to add all movements of one axis to another. One fig. 13 possible application is for instance changing the offset between two axes linked by an electronic gearbox. The TJ2-MC__ provides this possibility by BASE(0) ADDAX(2) using the ADDAX command.
- Page 24 System philosophy 2.2.4 Other operations Cancelling moves In normal operation or in case of emergency it can be necessary to cancel the current movement from the buffers. When the CANCEL or RAPIDSTOP commands are given, the selected axis respectively all axes will cancel their current move.
- Page 25 System philosophy Merging moves If the MERGE axis parameter is set to 1, a movement is always followed by fig. 14 a subsequent movement without stopping. The figures show the transitions of two moves with MERGE value 0 and value 1. MERGE=0 In the figure, A is the time axis and B is the speed axis.
-
Page 26: Servo System Principles
System philosophy Servo system principles The servo system used by and the internal operation of the TJ2-MC__ are briefly described in this section. 2.3.1 Semi-closed loop system The servo system of the TJ2-MC__ uses a semi-closed or inferred closed loop system. This system detects actual machine movements by the rotation of the motor in relation to a target value. - Page 27 System philosophy F. Speed control. G. Motor. H. Encoder. Measured speed. J. Measured position. 2.3.3 Position loop algorithm in the CPU The servo system controls the motor by continuously adjusting the speed reference to the Servo Drive. The speed reference is calculated by the motion control algorithm of the TJ2-MC__, which is explained in this section.
- Page 28 System philosophy · ÄE Derivative gain may create a smoother response. High values may lead to oscillation. The derivative gain axis parameter is called D_GAIN. • Output speed gain The output speed gain K produces an output O that is proportional to the change in the measured position P and increases system damping.
-
Page 29: Trajexia System Architecture
System philosophy Trajexia system architecture The system architecture of the Trajexia is dependant upon these concepts: • Program control • Motion Sequence • Motion buffers • Communication • Peripherals These concepts depend upon the value set in the SERVO_PERIOD parameter. The relationship between the value of SERVO_PERIOD and the different concepts of the system architecture are describes as follows. -
Page 30: Cycle Time
System philosophy 2.4.3 Motion buffers Motion buffers are the link between the BASIC commands and the Axis control loop. When a BASIC motion command is executed, the command is stored in one of the buffers. During the next motion sequence, the profile generator executes the movement according to the information in the buffer. - Page 31 System philosophy The operations executed in each CPU slot are: fig. 18 CPU slot Operation 500 μs CPU slot 1 Execute whichever comes first in the list: • Low priority BASIC Program, or • High priority BASIC Program, or • Cycle time = 2 ms CPU slot 2 Execute whichever comes first in the list:...
- Page 32 System philosophy Note The Motion sequence execution depends on setting of the SERVO_PERIOD parameter. 2.5.1 Servo period The SERVO_PERIOD can be set at 0.25, 0.5, 1 or 2ms. The processes that take place within the cycle time depend on the setting of the SERVO_PERIOD parameter.
- Page 33 The most restrictive rules are given in the tables below. For each unit the table lists the maximum number of devices the unit can control at the given SERVO_PERIOD setting. SERVO_PERIOD TJ2-MC64 TJ2-MC02 TJ1-ML16 TJ1-ML04 0.25 ms 16 axes 3 axes 0.5 ms...
- Page 34 System philosophy SERVO_PERIOD TJ2-MC64 TJ2-MC02 TJ2-ECT04 TJ2-ECT16 TJ2-ECT64 0.25 ms 16 axes 3 axes 0.5 ms 32 axes 3 axes 4 axes 10 axes 10 axes 1.0 ms 64 axes 3 axes 4 axes 16 axes 26 axes 2.0 ms...
- Page 35 System philosophy Configuration examples Example 1 • 1x TJ2-MC__ fig. 19 • 1x TJ1-ML04 Servo Driver • 3x G-Series Servo Drive • SERVO_PERIOD = 1ms TJ2-MC__ Supports 0.25ms SERVO_PERIOD with 3 axes. TJ1-ML04 Supports 0.5ms SERVO_PERIOD with 3 devices. G-Series supports 1ms SERVO_PERIOD. This is the limiting factor. Address Address Address...
- Page 36 System philosophy Example 2 • 1x TJ2-MC__ fig. 20 • 2x TJ1-ML16 Servo Drive • 16x G-Series Servo Drive • SERVO_PERIOD = 1ms TJ2-MC__ supports 0.25ms SERVO_PERIOD with 16 axes. TJ1-ML16 supports 1ms SERVO_PERIOD with 8 devices. G-Series supports 1ms SERVO_PERIOD. Address Address Address...
- Page 37 System philosophy Example 3 • 1x TJ2-MC__ fig. 21 • 1x TJ1-ML16 • 8x G-Series Servo Drive • 1x F7Z Inverter with SI-T interface • 3x MECHATROLINK-II I/Os • SERVO_PERIOD = 2.0ms TJ1-ML16 supports 2.0ms SERVO_PERIOD with 12 devices. This is the Address Address Address...
- Page 38 System philosophy Example 5 • 1x TJ2-MC__ fig. 23 • 1x TJ2-ECT04 Servo Driver • 3x Accurax G5 Servo Drive • SERVO_PERIOD = 0.5ms TJ2-MC__ Supports 0.25ms SERVO_PERIOD with 3 axes. TJ2-ECT04 Supports 0.5ms SERVO_PERIOD with 3 devices. Accurax G5 supports 0.5ms SERVO_PERIOD. Address Address Address...
-
Page 39: Program Control And Multi-Tasking Using Basic Programs Only
System philosophy Program control and multi-tasking using BASIC programs only The Trajexia system has programs, processes and multi tasking control. 2.6.1 Program control The Trajexia system can control 22 processes that are written as BASIC programs. When the program is set to run, the program is executed. Processes 0 to 19 are low priority, 20 and 21 are high priority. - Page 40 System philosophy CPU slot Operation CPU slot 4 Execute whichever comes first in the list: • High priority BASIC Program, or • PLC, or • Low priority BASIC Program In each of the three CPU slots (1, 2 and 4) the type (High or Low priority BASIC programs or PLC) is executed which comes first in the list.
-
Page 41: Motion Sequence And Axes
System philosophy Motion sequence and axes Motion sequence is the part of the TJ2-MC__ that controls the axes. The fig. 26 actual way that the motion sequence operates depends on the axis type. • block The axis type can be set and read by the parameter ATYPE. At start-up the Trajexia system automatically detects the configuration of the axes. - Page 42 System philosophy 2.7.1 Profile generator The profile generator is the algorithm that calculates the demanded position fig. 27 for each axis. The calculation is made every motion sequence. Profile generator Basic Program The profile is generated according to the motion instructions from the BASIC ..
- Page 43 System philosophy 2.7.4 Type of axis ATYPE Applicable to Name Description All axes Virtual axis Internal axis with no physical output. It is the only valid setting for non-allocated axes. That is, those that are not MECHATROLINK-II servos or a flexible axis. MECHA- MECHA- Position loop in the Servo Drive.
- Page 44 System philosophy ATYPE Applicable to Name Description TJ1-ML__ Inverter as Inverters (with built-in encoder interface) are axis controlled on the MECHATROLINK-II bus as servo axes. External Drive Stepper input Feedback through pulse and direction inputs. connected to a TJ1-FL02 EtherCAT Servo EtherCAT Position loop in the Servo Drive.
- Page 45 System philosophy Virtual axis ATYPE=0 The main use cases of a virtual axis are: fig. 28 • As perfect master axis of the machine. All the other axes follow this virtual master axis. Profile generator • As auxiliary axis to split a complex profile into two or more simple movements, each assigned to a virtual axis.
- Page 46 System philosophy MECHATROLINK-II speed ATYPE=41 With SERVO = ON, the speed loop is closed in the TJ2-MC__. fig. 30 Speed reference is sent to the Servo Drive. This setting is not TJ2-KS02 TJ2-ECT__ recommended, since there is one cycle delay in the loop (DPOS(n) is TJ2-MC__ TJ1-ML__ SERVO...
- Page 47 System philosophy Stepper output ATYPE=43 The position profile is generated and the output from the system is a pulse train and direction signal. This is useful to control a motor via pulses or as a position reference for another motion controller. Servo axis ATYPE=44 With SERVO = ON this is an axis with an analogue speed reference output fig.
- Page 48 System philosophy Encoder output ATYPE=45 The position profile is generated and the output from the system is an fig. 34 incremental encoder pulse. This is useful to control a motor via pulses or as TJ2-KS02 a position reference for another motion controller. TJ1-FL02 Profile generator AXIS 1...
- Page 49 System philosophy Absolute SSI encoder ATYPE=48 With SERVO = ON, this is an axis with analogue speed reference output and absolute SSI encoder feedback. The position loop is closed in the TJ2-MC__ and the resulting speed reference is sent to the axis. With SERVO = OFF, the position of the external absolute SSI encoder is read.
- Page 50 System philosophy EtherCAT Cyclic Synchronous Position (CSP) ATYPE=65 With SERVO = ON, the position loop is closed in the Servo Drive. Gain fig. 36 settings in the TJ2-MC__ have no effect. The position reference is sent to TJ2-KS02 TJ2-ECT__ the Servo Drive. TJ2-MC__ TJ1-ML__ SERVO...
- Page 51 System philosophy EtherCAT Cyclic Synchronous Torque (CST) ATYPE=67 With SERVO = ON, the torque loop is closed in the TJ2-MC__. The torque fig. 38 reference in the Servo Drive depends on the FE and the gain. TJ2-KS02 TJ2-ECT__ With SERVO = OFF, the torque reference is sent directly via the T_REF TJ2-MC__ TJ1-ML__ SERVO...
- Page 52 System philosophy EtherCAT Encoder ATYPE=69 With SERVO = OFF, the position of the external EtherCAT incremental encoder is read. Accurax G5-A/P position ATYPE=80 With SERVO = ON, the position loop is closed in the Servo Drive. Gain fig. 40 settings in the TJ2-MC__ have no effect. The position reference is sent to TJ2-KS02 TJ2-ECT__ the Servo Drive.
- Page 53 System philosophy Accurax G5-A/P position ATYPE=81 With SERVO = ON, the speed loop is closed in the TJ2-MC__. fig. 41 Speed reference is sent to the Servo Drive. This setting is not TJ2-KS02 TJ2-ECT__ recommended, since there is one cycle delay in the loop (DPOS(n) is TJ2-MC__ TJ1-ML__ SERVO...
- Page 54 System philosophy Summary of axis types and control modes The following table lists the axis types and their recommended modes for speed control, position control and torque control. ATYPE SERVO Mode Comment Position The position loop is closed in the Servo Drive. (MECHATROLINK-II) No new motion command is allowed.
- Page 55 System philosophy ATYPE SERVO Mode Comment Position The position loop is closed in the Servo Drive. (EtherCAT) No new motion command is allowed. Position Recommended mode for position control with (EtherCAT) EtherCAT Servo axes. Speed Recommended mode for speed control with (EtherCAT) EtherCAT Servo axes.
- Page 56 System philosophy ATYPE SERVO Mode Comment Position via torque The position loop is closed in Trajexia. The out- (Accurax G5) put of the position loop is sent as the torque ref- erence to the Servo Drive. HARDWARE REFERENCE MANUAL...
-
Page 57: Motion Buffers
System philosophy Motion buffers The motion buffer is a temporary store of the motion instruction from the fig. 43 BASIC program or PLC task to the profile generator. The BASIC program continues while the instruction waits in the buffer. There are three types of buffer: •... - Page 58 System philosophy Example of buffered instructions: fig. 45 EXAMPLE: BASIC PROGRAM ..MOVE(-500) BUFFER ..MOVE(1000) ..DATUM(3) --------------------------------- ..1. All buffers are empty and a NTYPE IDLE MOVE(200) --------------------------------- MOVE -500 movement is loaded. The movement ..MTYPE MOVE(-500) - - - - starts to execute.
-
Page 59: Mechanical System
System philosophy Mechanical system 2.9.1 Inertia ratio The inertia ratio is a stability criterion. The higher the inertia of the load in relation to the inertia of the motor, the lower the gains you can set in your system before you reach oscillation, and the lower the performance you can reach. -
Page 60: Hardware Reference
Hardware reference Hardware reference Introduction Trajexia is OMRON's motion platform that offers you the performance and fig. 1 the ease of use of a dedicated motion system. CJ-series PLC CX-one Trajexia Studio NS-series HMI Trajexia is a stand-alone modular system that allows maximum flexibility and... - Page 61 Serial Port and Local I/Os A serial connector provides direct connectivity with any OMRON PLC, HMIs or any other field device. 16 Inputs and 8 outputs are freely configurable embedded I/Os in the controller to enable you to tailor Trajexia to your machine design.
- Page 62 Hardware reference TJ2-KS02 (G5 Serial Interface Unit) The TJ2-KS02 allows full control of up to two Accurax G5-A/P Servo Drives through a serial interface. In addition the module supports incremental and absolute encoders allowing the connection of an external encoder to the system.
- Page 63 Hardware reference 3.1.2 Trajexia Studio and CX-Motion Pro One software fig. 2 Trajexia's intuitive and easy programming tool, based on the Motion BASIC instruction set, includes dedicated commands for linking axes, e-cams, e- gearboxes, etc. Multi-tasking provides flexibility in application design. The motion commands are "buffered"...
-
Page 64: All Units
Hardware reference All units 3.2.1 System installation A Trajexia system consists of these units: fig. 3 • A Power Supply Unit. • A TJ2-MC__ (Machine Controller Unit). • Up to 7 expansion units. • A TJ1-TER (Terminator Unit). The expansion units (unit numbers 0-6) can be arranged in any order. The TJ2-MC__ autodetects all units. - Page 65 Hardware reference The figure is an example of a simple configuration. fig. 4 A. Power supply B. TJ2-MC__. C. TJ1-ML__. D. G-Series Servo Drive E. G-Series Servo motor OM RO MO TIO N CO NTR OLL ML 16 F. TJ1-TER. CN 3 CN 1 TE RM...
- Page 66 Hardware reference 1. Remove all the units from the packaging. Make sure all units are fig. 5 complete. 2. Do not remove the protection labels from the units. 3. To disconnect the TJ2-MC__ and the TJ1-TER, push the clips (A) on top and bottom of the TJ1-TER to the front.
- Page 67 Hardware reference 6. Attach the TJ2-MC__ (C) to the Power Supply Unit (B). fig. 7 OM RO MO TIO N CO NT RO LL ER CN 3 CN 1 TE RM ON /O W IR 2/ 4 CN 2 7. Push the clips (A) on top and bottom to the rear. fig.
- Page 68 Hardware reference 8. Repeat the previous two steps for all other units. fig. 9 9. Make sure the last unit is the TJ1-TER. OM RO MO TIO N CO NTR OL ML 16 CN 3 CN 1 TE RM ON /OF CN 1 WI RE CN 2...
- Page 69 Hardware reference 14. Do not install the Trajexia units in one of these positions: fig. 11 • Upside down. • With the top side forward. • With the bottom forward. • Vertically. HARDWARE REFERENCE MANUAL...
- Page 70 Hardware reference 15. When you design a cabinet for the units, make sure that the cabinet fig. 12 allows at least 20 mm of space around the units to provide sufficient airflow. We advise to allow at least 100 mm of space around the units. Duct 20 mm min.
- Page 71 Hardware reference 3.2.3 Unit dimensions The dimensions for the units of the Trajexia system are as follows: Trajexia machine controller All measurements are in mm. fig. 13 70.3 HARDWARE REFERENCE MANUAL...
- Page 72 Hardware reference Trajexia units All measurements are in mm. fig. 14 70.3 39.9 HARDWARE REFERENCE MANUAL...
- Page 73 Hardware reference Trajexia system All measurements are in mm. fig. 15 PA202 29.7 The installation depth of the Trajexia system is up to 90 mm, depending on fig. 16 the modules that are mounted. Allow sufficient depth in the control cabinet. 70.30 81.60 to 89.0 mm 3.2.4...
- Page 74 Hardware reference 1. Strip the wires. fig. 17 2. To make it easier to insert the wires, twist them. 3. If necessary, crimp the plain (top) ferrules or the collared (bottom) ferrules. 4. Insert the screwdriver into the inner (square) hole. Push firmly. 5.
-
Page 75: Power Supply Unit (Psu)
Hardware reference Power Supply Unit (PSU) 3.3.1 Introduction The PSU supplies power to the other units in the Trajexia system. You can use three different types of Power Supply Unit with the Trajexia system: • CJ1W-PA202 • CJ1W-PA205R • CJ1W-PD025. 3.3.2 PSU Connections Each Power Supply Unit has six terminals:... - Page 76 Hardware reference Caution A ground of 100Ω or less must be installed when shorting the GR and LG terminals on the Power Supply Unit. Not connecting a ground of 100Ω or less may result in electric shock. Each Power Supply Unit has one green LED (G). This LED comes on when you connect the Power Supply Unit to the power source.
- Page 77 Hardware reference 3.3.4 PSU box contents • Safety sheet. • Power Supply Unit. • Protection label attached to the top surface of the unit. HARDWARE REFERENCE MANUAL...
-
Page 78: Tj2-Mc
Hardware reference TJ2-MC__ 3.4.1 Introduction The TJ2-MC__ is the heart of the Trajexia system. You can program the TJ2-MC__ with the BASIC programming language to control the expansion units and the Servo motors attached to the expansion units. Refer to the Programming Manual. - Page 79 Hardware reference 3.4.2 LED Display The LED display shows the following information: fig. 20 Information When IP address and sub- Shows 3 times when you connect the Trajexia system to the power net mask supply. IP address Shows 4 times when you connect an Ethernet cable to the Ethernet connector of the TJ2-MC__ and to a PC.
- Page 80 Hardware reference 3.4.3 TJ2-MC__ Connections The TJ2-MC__ comes with these connectors: fig. 21 • One Ethernet connector, to connect to a PC or Ethernet network (D) • One serial connector (G). • One 28-pin I/O connector (H). The parts for the serial connector and the 28-pin connector are supplied. Ethernet connector The Ethernet connector is used to connect the TJ2-MC__ to a PC or Ethernet network.
- Page 81 Hardware reference Serial connector The serial connector allows for three communication standards: fig. 22 • RS232. • RS422. • RS485. Communication Connection RS422/RS485 RS232 RS232 RS422/RS485 RS422/RS485 RS422/RS485 RS232 TERM ON/OFF Switch Sets the termination on/off of the RS422 / 485 serial connection. The setting of the TERM ON/OFF switch depends on the communication standard of the serial connection and the position of the TJ2-MC__ in the network: Communication...
- Page 82 Hardware reference WIRE 2/4 Switch The WIRE 2/4 switch sets the communication standard for the RS422/485 fig. 23 serial connection. To use one of the communication standards, do this: Communication standard How to select it RS422 Set the WIRE 2/4 switch right RS485 Set the WIRE 2/4 switch left Note...
- Page 83 Hardware reference 28-Pin I/O connector The 28 pin connector is a Weidmuller connector designation: B2L 3.5/28 LH. fig. 24 Connection Connection 0 V input common 0 V input common Input 0 Input 1 Input 2 Input 3 Input 4 Input 5 Input 6 Input 7 Input 8...
- Page 84 Hardware reference LEDs 0 - 7 The I/O LEDs reflect the activity of the input and outputs. You can use the BASIC DISPLAY=n command to set the LEDs. The table below lists the configuration for LEDs 0 - 7 and the DISPLAY=n command where n ranges from 0 to 7.
- Page 85 Hardware reference Digital inputs The following table and illustration details the digital input (Input 0 to fig. 25 Input 15) specifications for the I/O: TJ 1-MC 16 Item Specification Input Type PNP/NPN Maximum voltage 24 VDC + 10% External power supply 24V Input current 5 mA at 24 VDC...
- Page 86 Hardware reference Maximum response times of 250 μs on and 350 μs off (for servo periods of 0.5 ms or 1.0 ms) or 500 μs on and 600 μs off (for a servo period of 2.0 ms) are achieved between a change in the OP parameter and a corresponding change in the digital output circuit.
- Page 87 Hardware reference 3.4.5 TJ2-MC__ Specification Item Specification TJ2-MC64 TJ2-MC02 Power supply 5 VDC and 24 VDC (supplied by a Power Supply Unit) Total power consumption 3.1 W Current consumption 620 mA at 5 VDC Approximate weight 230 g Number of real axes...
- Page 88 Hardware reference Item Specification TJ2-MC64 TJ2-MC02 Ethernet supported protocols • TELNET • FINS server and client • ModbusTCP slave • EtherNet/IP slave Ethernet connector RJ45 Serial connectors 1 and 2 Item Specification Electrical characteristics • PORT1: RS232C, non-isolated • PORT2: RS485/RS422A, isolated...
- Page 89 Hardware reference 3.4.6 TJ1-TER The TJ1-TER makes sure that the internal data bus of the Trajexia system fig. 28 functions correctly. A Trajexia system must always contain a TJ1-TER as the last unit. 3.4.7 TJ2-MC__ box contents • Safety sheet. •...
-
Page 90: Tj1-Ml
Hardware reference TJ1-ML__ 3.5.1 Introduction The TJ1-ML__ controls MECHATROLINK-II devices in a cyclic and deterministic way. MECHATROLINK-II slaves can be: • Servo Drives. fig. 29 • Inverters. ML16 • I/Os. The TJ1-ML__ has these visible parts: Part Description LED indicators CN1 MECHATROLINK-II bus connector Together the TJ1-ML__ and its devices form a serial network. - Page 91 Hardware reference 3.5.3 TJ1-ML__ connection The MECHATROLINK-II bus connector (A) fits a MECHATROLINK-II fig. 30 connector. Use this connector to connect the TJ1-ML__ to a MECHATROLINK-II network. ML16 The MECHATROLINK-II network must always be closed by the MECHATROLINK-II terminator. HARDWARE REFERENCE MANUAL...
- Page 92 Hardware reference Example connections Example 1 fig. 31 • 1 x TJ2-MC64 Servo Driver • 1 x TJ1-ML__ • 3 x G-Series Servo Drive • 1 x MECHATROLINK-II terminator Address Address Address Terminator Axis 2 Axis 3 Axis 4 HARDWARE REFERENCE MANUAL...
- Page 93 Hardware reference Example 2 fig. 32 • 1 x TJ2-MC64 Servo Drive • 2 x TJ1-ML16 • 16 x G-Series Servo Drive • 2 x MECHATROLINK-II terminator Address Address Address Address Address Address Address Address Terminator Axis 0 Axis 1 Axis 2 Axis 3 Axis 4...
- Page 94 Hardware reference The MECHATROLINK-II Units can control different combinations of axes, fig. 33 Inverters and I/O units. Example 3 • 1 x TJ2-MC__ • 1 x TJ1-ML16 • 1 x G-Series Servo Drive • 1 x Inverter • 3 x I/O units •...
- Page 95 Hardware reference 3.5.4 TJ1-ML__ specifications Item Specification TJ1-ML04 TJ1-ML16 Power supply 5 VDC (supplied by the TJ2-MC__) Total power consumption 1.0 W Current consumption 200 mA at 5 VDC Approximate weight 75 g Number of controlled devices Controlled devices • G-Series and Accurax G5 Servo Drives •...
- Page 96 39 or later) For Varispeed V7 Inverter (For the sup- SI-T/V7 ported version details of the Inverter, con- tact your OMRON sales office). For Varispeed F7, G7 Inverter (For the SI-T supported version details of the Inverter, contact your OMRON sales office).
- Page 97 Hardware reference 3.5.5 TJ1-ML__ box contents MECHATROLINK-II Interface Unit box: • Safety sheet. • TJ1-ML__. • Protection label attached to the top surface of the unit. 3.5.6 Related BASIC commands The following BASIC commands are related to the TJ1-ML__: • ATYPE •...
- Page 98 Hardware reference 3.5.8 MECHATROLINK-II G-series Servo Drives You can also connect a G-series Servo Drive to a Trajexia system. fig. 34 Label Terminal/LED Description SP, IM, G Analog monitor check pins L1, L2, L3 Main-circuit power terminals AC SERVO DRIVE L1C, L2C Control-circuit power terminals B1, B2, B3...
- Page 99 Hardware reference Address settings (SW1) Set the address selector of the G-series Servo Drive to the required node fig. 35 address by using the X1 (right) and X10 (left) rotary switches. Rotary switches for setting a node The setting range for the node address setting rotary switch is 1 to 31. The address actual station address used on the network will be the sum of the rotary 7-segment LED (2 digits)
- Page 100 Hardware reference 7-segment LED The display of the 7-segment LED on the front panel is shown below. fig. 36 Turn ON Control Power Supply When the power is turned ON, the node address set with the rotary switch is displayed, followed by the display content set by the Default Display (Pn001) All OFF parameter.
- Page 101 Hardware reference CN1 I/O Signal connector The table below shows the pin layout for the I/O signal connector (CN1). fig. 37 12 to 24-VDC Forward Drive +24VIN Power Supply Prohibit Input Input Code Signal name Emergency Reverse Drive STOP Stop Input Prohibit Input External Latch Origin Proximity...
- Page 102 Hardware reference Code Signal name Output /ALM Alarm Output Output ALMCOM Output OUTM2 General-purpose Output 2 (READY) Output OUTM2COM Output OUTM3 General-purpose Output 3 (CLIM) Output OUTM3COM Output OUTM1 General-purpose Output 1 (BKIR) Output OUTM1COM Shell MECHATROLINK-II connectors (CN6A & CN6B) Connect the G-series Servo Drive to the MECHATROLINK-II network using fig.
- Page 103 Hardware reference CN2 encoder input connector The table below shows the pin layout for the encoder connector. Signal Name Encoder power supply +5 V Encoder power supply GND BAT+ Battery + BAT- Battery - Encoder +phase S input Encoder -phase S input Shell Shield ground CNA power supply connector...
- Page 104 Hardware reference CNB servo motor connector The table below shows the pin layout for the CNB servo motor connector. Signal Name External Regeneration Resistor connection terminals Servomotor connection terminals Related BASIC commands The following BASIC commands are related to the MECHATROLINK-II G-series Servo Drives: •...
- Page 105 Hardware reference 3.5.9 MECHATROLINK-II Accurax G5 Servo Drives You can also connect an Accurax G5 Servo Drive to a Trajexia system. fig. 39 Label Terminal/LED Description Display area Analog monitor check pins L1, L2, L3 Main-circuit power terminals L1C, L2C Control-circuit power terminals CHARGE Charge lamp...
- Page 106 Hardware reference MECHATROLINK-II Communications Status LED Indicator The table below shows the LED indication status and the corresponding conditions of the communications. LED status Communications status Not lit No communication is established. Green Flash Asynchronous communications is established. Green Light Synchronous communications is established.
- Page 107 Hardware reference Address settings (SW1) Set the address selector of the Accurax G5 Servo Drive to the required node fig. 40 address by using the X1 (right) and X10 (left) rotary switches. MECHATROLINK-II communications status LED indicator (COMM) The setting range for the node address setting rotary switch is 1 to 31. The Rotary switches for actual station address used on the network will be the sum of the rotary node address setting...
- Page 108 Hardware reference Note The settable range for a node address is between 1 and 31. The node address used over the network is the value obtained by add- ing the offset 40h to the rotary switch set value. If any value over or under the range is set, the Node address setting error (Err82.0) occurs.
- Page 109 Hardware reference 7-segment LED The 7-segment LED indicator is on the front panel. fig. 41 When the power is turned on, it shows the node address that is set by the Control power on rotary switches. Then the indication changes in accordance with the setting on the Default Display (Pn700).
- Page 110 Hardware reference CN1 I/O Signal connector The table below shows the pin layout for the I/O signal connector (CN1). fig. 42 Absolute General-purpose encoder backup OUTM1 Output 1 Absolute battery input General-purpose Code Signal name encoder backup OUTM1COM BATGND Output 1 Common battery input Input +24 VIN...
- Page 111 Hardware reference MECHATROLINK-II connectors (CN6A & CN6B) Connect the Accurax G5 Servo Drive to the MECHATROLINK-II network fig. 43 using the CN6A and CN6B connectors. Use one of the MECHATROLINK-II MC Unit connectors to connect to the previous MECHATROLINK-II device or the TJ1-ML__.
- Page 112 Hardware reference CN2 Encoder input connector The table below shows the pin layout for the encoder connector. Signal Name Encoder power supply +5 V Encoder power supply GND BAT+ Battery + BAT- Battery - Encoder +phase S input Encoder -phase S input Shell Shield ground CN4 External encoder connector...
- Page 113 Hardware reference CN5 Monitor connector The table below shows the pin layout for the CN5 monitor connector. Signal Name Analog monitor output 1 Analog monitor output 2 Analog monitor ground Reserved: do not connect. Reserved: do not connect. Reserved: do not connect. CN7 USB Connector The table below shows the pin layout for the CN7 USB connector.
- Page 114 Hardware reference CN8 Safety connector The table below shows the pin layout for the CN8 safety connector. Signal Name Reserved: do not connect. Reserved: do not connect. SF1- Safety input 1 SF1+ SF2- Safety input 2 SF2+ EDM- EDM output EDM+ Shell Shield ground...
- Page 115 Hardware reference CNB Servo motor connector The table below shows the pin layout for the CNB servo motor connector. Signal Name External Regeneration Resistor connection terminals Servomotor connection terminals Related BASIC commands The following BASIC commands are related to the MECHATROLINK-II Accurax G5 Servo Drives: •...
- Page 116 Hardware reference 3.5.10 Yaskawa MECHATROLINK-II Servo Drives You can also connect the following Yaskawa Servo Drives: • Sigma-II series Servo Drive with a JUSP-NS115 MECHATROLINK-II interface unit • Sigma-V series Servo Drive • Junma series Servo Drive For details please refer to the manuals of these Drives. 3.5.11 MECHATROLINK-II Inverter MX2 The 3G3AX-MX2-MRT-E allows controlling, monitoring and fig.
- Page 117 @@@@ If these characters are absent, your Inverter does not support the 3G3AX-MX2-MRT-E, so please contact your local OMRON representative. @@@@ HARDWARE REFERENCE MANUAL...
- Page 118 Hardware reference Option Board Mounting WARNING Always Switch OFF the mains power supply to the Inverter before removing any covers. Wait for the time specified on the Inverter front cover for the capacitors to discharge. Not doing so may result in electrical shock.
- Page 119 Hardware reference Step 2 fig. 47 For Inverters up to 4.0 kW only: loosen the screws of the terminal block cover and remove the cover to enable access to the chassis ground terminal screws. Step 3 fig. 48 Secure the Option Board grounding cable to the MX2 Inverter with a 1-phase 200 V 0.1 - 2.2 kW 3-phase 200 V 5.5 - 15 kW mounting screw.
- Page 120 Hardware reference Step 4 fig. 49 If removed in Step 2, mount the terminal cover again and tighten the screw(s). Step 5 fig. 50 Push the Option Board into the previous location of the option board cover until it clicks into place HARDWARE REFERENCE MANUAL...
- Page 121 Hardware reference Step 6 fig. 51 Press down on the indicated corner of the Option Board housing to ensure proper connection of the Option Board connector Step 7 fig. 52 Check that there is no gap between the top edges of the Option Board and the Inverter casing.
- Page 122 Hardware reference Step 8 fig. 53 Secure the Option Board in place with the mounting screw (do not overtighten). Step 9 Select the right warning language from the warning label sheet and replace the English warning if appropriate. Note Refer to section 2-1-3 in the MX2 user’s manual (Cat.-No. I570) for operations related to assembly and disassembly of the MX2 Inverter Note...
- Page 123 Hardware reference WARNING Provide emergency stop circuits, interlock circuits, limit circuits and similar safety measures in external circuits (NOT in the Option Board). This ensures safety in the system if an abnormality occurs due to malfunction of the Option Board or another external factor affecting the Option Board operation.
- Page 124 Hardware reference Option Board Dimensions fig. 54 Item Dimension Item Dimension Item Dimension 63.6 mm 16.3 mm 31.3 mm 57.9 mm 52.6 mm 44.8 mm 67.6 mm 26.4 mm 28.4 mm Dimension d1 gives the increase in MX2 Inverter dimension D when the Option Board is fitted (Refer to section 2-3 of the Inverter user's manual).
- Page 125 Hardware reference Option Board Specifications Item Specification Unit type MX2 Series Option Card Model 3G3AX-MX2-MRT-E Dimensions (W × H × D) 68 x 58 x 45 mm Weight 170g (typical) Ambient operating tem- −10 to 55°C (no icing or condensation) perature Ambient operating 20 to 90%RH...
- Page 126 Hardware reference Configuring the Option Board All Option Board parameters are stored in the MX2 Inverter. This allows for easy replacement of the Option Board without the need to re-configure. After connecting the Option Board to an MX2 Inverter for the first time however, proceed with the following steps: Step 1 It is recommended to set C102 = 3 to prevent the Inverter reset input and...
- Page 127 Hardware reference Param Description Setting A001 Frequency Refer- 02 (Digital Operator, default) ence Selection 1 04 (Option board) A002 RUN Command 02 (Digital Operator, default) Selection 1 04 (Option board) Step 4 Restart the MX2 Inverter for the changes to take effect. Note When restarting the MX2 Inverter, wait for the Inverter power indi- cator to go out before switching on again.
- Page 128 Hardware reference When an error occurs Step 1 For the MX2 Inverter, an error code is displayed on the Digital Operator Display. Step 2 Use the error code to help troubleshoot the error. In the following sections typical LED indicator and four-digit Inverter display patterns are provided to assist in troubleshooting.
- Page 129 Hardware reference Option board or inverter errors During the Initialization process the RUN indicator will remain OFF. Once the initialization has been completed correctly, the RUN indicator will be ON and the ERR indicator OFF. The table below shows the indicator and display patterns caused by Option Board or Inverter Errors.
- Page 130 Reset the Inverter to factory defaults. If been properly verified with this the problem persists, contact your local version of the Option Board (The OMRON representative for assistance. MECHATROLINK node address in the Inverter is invalid or absent). Your Inverter version has not Reset the Inverter to factory defaults.
- Page 131 Hardware reference MECHATROLINK Errors If the master is correctly configured and there are no wiring errors, the RX and TX indicators will be ON. The table below shows the indicator patterns caused by MECHATROLINK configuration errors. Display & Possible Cause(s) Corrective Action Indicators The MECHATROLINK wiring is...
- Page 132 Hardware reference Related BASIC commands The following BASIC commands are related to the MECHATROLINK-II MX2 Inverters: • INVERTER_COMMAND • INVERTER_READ • INVERTER_WRITE For more information, refer to the Trajexia Programming Manual. HARDWARE REFERENCE MANUAL...
- Page 133 Hardware reference 3.5.12 MECHATROLINK-II Inverter RX The 3G3AX-RX-MRT-E allows controlling, monitoring and parameterization fig. 55 of an RX Inverter via a MECHATROLINK-II network. The 3G3AX-RX-MRT-E serves as a gateway that passes communicated register values from the MECHATROLINK-II network to the RX Inverter and vice versa. The illustration shows the external appearance of the 3G3AX-RX2-MRT-E Unit.
- Page 134 Hardware reference LED indicators The LED indicators on the front indicate the operational mode and status of the Option Board and the network. Indicator Colour Status Meaning Green No power or not yet ready for operation Flashing Operating in commissioning mode Normal operation Fatal error Flashing...
- Page 135 Hardware reference Option Board Mounting WARNING Always Switch OFF the mains power supply to the Inverter before removing any covers. Wait for the time specified on the Inverter front cover for the capacitors to discharge. Not doing so may result in electrical shock.
- Page 136 Hardware reference Step 3 fig. 58 Cut out the 2 plastic break-outs from the Front Cover. Make sure no sharp edges remain. Step 4 fig. 59 Remount the Front Cover and tighten the screws HARDWARE REFERENCE MANUAL...
- Page 137 Hardware reference Step 5 fig. 60 Mount the Inverter Connector (no.1) of the Option Board onto the interface connector (no.5) of the RX Inverter. First align the small hole of the Inverter connector (no.2) with the guide-post (no.4) in the Inverter. Step 6 fig.
- Page 138 Hardware reference Step 7 fig. 62 Move the Option Board Cable (no.2) to the left with your finger, so the Option Board Cable is not pinched between the Option Board and the Inverter Front Cover. Note Prevent a pinched Option Board Cable, as shown in position A. Do not pull on the Option Board Cable.
- Page 139 Hardware reference Step 8 fig. 63 Insert the Option Board approximately 1 cm above the down-position into the Front cover of the Inverter. See drawing 1 on the left. Slide the Option Board down. See drawing 2 on the left. ±...
- Page 140 Hardware reference Step 10 fig. 65 Press down carefully the two locking pins (no. 1) of the Option Board. Press carefully the top of the Option Board in the Inverter. Check the Option Board is being locked by the locking pins (no.1). Step 11 fig.
- Page 141 Hardware reference Step 12 fig. 67 Fix the Option Board grounding cable to the chassis ground of the RX Inverter under an already fixed chassis grounding bolt. See the bolt with the grounding figure. The position of the chassis ground vary from inverter type. Illustrations are only provided for one Inverter size.
- Page 142 Hardware reference Step 13 fig. 68 Unscrew the mounting screws of the Terminal cover nearly completely from the plastic rings (no.1). Remount the Terminal cover under the Option Board onto the Inverter (no.2). Tighten the two screws (no.1). Step 14 fig.
- Page 143 Hardware reference Step 15 fig. 70 If the desired parameters of the Inverter have been set successfully, disconnect the 3G3AX CAJOP300-EE cable or straight EtherNet cable from the Inverter. Push the blind cover (no.1) into place. Note Refer to section 2 in the RX User's Manual (Cat. No. I560) for operations related to assembly and disassembly of the RX Inverter.
- Page 144 Hardware reference Caution Be sure that all cable connector screws are tightened to the torque specified in the relevant manuals. Incorrect tightening torque may result in malfunction. Installation Environment Clearance Please refer to the RX Inverter manual (Cat. No. I560) section 2-1 Installation Environment.
- Page 145 Hardware reference Option Board Specifications Item Specification Unit type RX Series Option Card Model 3G3AX-RX-MRT-E Dimensions (W × H × D) 68 x 58 x 45 mm Weight 170g (typical) −10 to 55°C (no icing or condensation) Ambient operating tem- perature Ambient operating 20 to 90%RH...
- Page 146 Hardware reference Configuring the Option Board All Option Board parameters are stored in the RX Inverter. This allows for easy replacement of the Option Board without the need to re-configure. After connecting the Option Board to an RX Inverter for the first time however, proceed with the following steps: Step 1 It is recommended to set C102 = 3 to prevent the Inverter reset input and...
- Page 147 Hardware reference Step 3 Registers A001 and A002 are used by the Inverter to adjust the frequency source and control source. Param Description Setting A001 Frequency Refer- 02 (Digital Operator, default) ence Selection 1 05 (Option board 2) A002 RUN Command 02 (Digital Operator, default) Selection 1 05 (Option board 2)
- Page 148 Hardware reference When an error occurs Step 1 For the RX Inverter, you need to connect the Digital Operator Display to the Inverter with an Ethernet cable. Then you can see the error code on the display. Note: if despite the problem it is still possible to communicate with the unit, the latest error code can also be read in parameter d081.
- Page 149 Hardware reference Display & Possible Cause(s) Corrective Action Indicators The Inverter does not power up. Follow the instruction provided in the RX-Inverter user's manual section 6-1 to troubleshoot. The Option Board is not mounted Check that the Option Board is mounted properly.
- Page 150 Reset the Inverter to factory defaults. If been properly verified with this the problem persists, contact your local version of the Option Board (The OMRON representative for assistance. MECHATROLINK node address in the Inverter is invalid or absent). Your Inverter version has not Reset the Inverter to factory defaults.
- Page 151 Hardware reference MECHATROLINK Errors If the master is correctly configured and there are no wiring errors, the RX and TX indicators will be ON. The table below shows the indicator patterns caused by MECHATROLINK-II configuration errors. Display & Possible Cause(s) Corrective Action Indicators The MECHATROLINK wiring is...
- Page 152 Hardware reference Related BASIC commands The following BASIC commands are related to the MECHATROLINK-II RX Inverters: • INVERTER_COMMAND • INVERTER_READ • INVERTER_WRITE For more information, refer to the Trajexia Programming Manual. 3.5.13 Yaskawa MECHATROLINK-II Inverters You can also connect the following Yaskawa Inverters: •...
- Page 153 Hardware reference 3.5.14 MECHATROLINK-II repeater The FNY-REP2000 is a MECHATROLINK-II repeater. It extends the range and the maximum number of MECHATROLINK-II devices in the MECHATROLINK-II network. fig. 72 Terminal/LED Label Description CN1 communication indicator CN2 communication indicator POWER Power indicator Dipswitch CN1 &...
- Page 154 Hardware reference Power supply connector Connect an external 24 VDC power supply to the power supply connector (CN3). The table below gives the pin layout for the power supply connector. fig. 73 Signal Description Frame ground 0 VDC input +24 V 24 VDC input Dipswitch settings (SW) The dipswitch is for future use.
-
Page 155: Grt1-Ml2
MECHATROLINK-II network. For more information on SmartSlice I/O Units, refer to the GRT1 Series SmartSlice I/O Units Operation Manual (W455). fig. 75 Label Description LED indicators GRT1-ML2 OMRON UNIT PWR ALARM Unit dipswitches ML COM I/O PWR Unit power supply terminals... - Page 156 Hardware reference Unit dipswitches fig. 76 Dipswitch Function Setting Description REGS REGS Create/enable Registered table is enabled registration table Registered table is disabled BACK OFF to ON Register I/O unit table ON to OFF Clear registered I/O unit table Not used, always set to OFF Automatic OFF to ON When the SmartSlice I/O Units are...
- Page 157 Hardware reference LED indicators fig. 78 Description Color Status Meaning Unit status Green Not lit • Startup test failed, unit not opera- tional UNIT PWR • Operation stopped due to a fatal ALARM error ML COM I/O PWR Initialization successful, unit is in nor- mal operation ALARM Unit error...
- Page 158 Hardware reference Description Color Status Meaning SmartSlice I/O Not Lit • No power supply system com- • Communication with SmartSlice I/ munication O Unit has not started status • Overcurrent detected Green Flashing SmartSlice I/O Unit added to the sys- (every second) Flashing...
- Page 159 Hardware reference Note • When the power of the Trajexia system is turned on, the TJ2-MC__ executes its startup sequence before it initializes the MECHATROLINK-II bus. During this startup sequence, the ML COM LED is off. • When the TJ2-MC__ initializes the MECHATROLINK-II bus with the command MECHATROLINK(unit,0), the ML COM LED goes on.
- Page 160 Hardware reference Rotary switch The rotary switch (SW1) sets the MECHATROLINK-II address that identifies the GRT1-ML2 in the MECHATROLINK-II network. The settings range is from 0 hex to F hex. To set the MECHATROLINK-II address of the GRT1-ML2, do these steps: 1.
- Page 161 Hardware reference Note Make sure that the address is unique in the MECHATROLINK-II network. If two or more units have the same MECHATROLINK-II address, they cannot be initialized properly. 3. Turn the power on. Note To make the MECHATROLINK-II address of the unit valid, do one of these steps: •...
- Page 162 Hardware reference 3.6.2 Specifications Item Specification Unit type SmartSlice GRT1 series Model GRT1-ML2 Installation position On a DIN rail Power supply 24 VDC +10% −15% (20.4 to 26.4 VDC) Current consumption 110 mA typical at 24 VDC Dimensions (W × H × D) 58 × 80 × 70 mm Weight 130 g −10 to 55°C (no icing or condensation)
- Page 163 Hardware reference Item Specification Number of connectable 64 Units max. SmartSlice I/O Units Connected directly to the GRT1-ML2 or via Turnback exten- sion units Baud rate 3 Mbps Communication signal RS485 level Communication dis- SmartSlice I/O Units: 64 Units coupled (about 2 m max.) tance Turnback cable: 2 m max.
- Page 164 Hardware reference Supported SmartSlice I/O Units The GRT1-ML2, in combination with the Trajexia system, supports these SmartSlice I/O Units. Function Specification Model 4 NPN inputs 24 VDC, 6 mA, 3-wire connection GRT1-ID4 4 PNP inputs 24 VDC, 6 mA, 3-wire connection GRT1-ID4-1 8 NPN inputs 24 VDC, 4 mA, 1-wire connection + 4xG...
- Page 165 Hardware reference Function Specification Model Two-point Temperature Resistance thermometer input, Input type: GRT1-TS2PK Input Unit PT1000 (−200 to 850°C) or PT1000 (−200 to 200°C) Two-point Temperature Thermocouple input, Input type: R, S, K J, GRT1-TS2T Input Unit T, E, B, N, L, U, W, or PL2 Function Model I/O power feed unit, separates power supply between groups of I/O...
- Page 166 Hardware reference Dimensions The external dimensions are in mm. fig. 80 GRT1-ML2 OMRON UNIT PWR ALARM ML COM I/O PWR REGS BACK UNIT -V -V -V -V DC24V DC24V INPU INPUT 26.3 28.8 17.1 61.2 36.8 69.7 HARDWARE REFERENCE MANUAL...
- Page 167 Hardware reference 3.6.3 Installation Follow these rules when installing the GRT1-ML2: • Before installing the GRT1-ML2 or connect or disconnect cables, switch off the power of the Trajexia system, the SmartSlice I/O Units and the external I/Os. • Make sure that the power supplies of the GRT1-ML2, the SmartSlice I/O Units and the external I/Os are correctly connected.
- Page 168 Hardware reference The maximum power consumption for SmartSlice I/O Units is 80 W per block. 1. Calculate the power consumption of all SmartSlice I/O Units connected to the GRT1-ML2. Refer to the GRT1 Series SmartSlice I/O Units Operation Manual (W455) for the power value for each SmartSlice I/O Unit.
- Page 169 I/O, an output voltage of 30 V rms and a 42.4 V peak or maximum of 60 VDC. Recommended power supplies are: • S82K-01524 (OMRON) • S8TS-06024 (OMRON). Release button It is recommended to use wires with a gauge of 20 AWG to 16 AWG (0.5 to 1.25 mm...
- Page 170 Remove any lint or threads left from the cloth. Install the unit again. • When returning a damaged unit to the OMRON dealer, include a detailed damage report with the unit. • Before reconnecting the new unit, do these steps: Set the MECHATROLINK-II station address to the same address as the old unit.
- Page 171 Hardware reference 3. Remove the main block of the unit. Replace it with a new SmartSlice I/O Unit of the same type. 4. Attach the new unit to the system. Close the locks on the front of the unit. 5. Turn on the power supplies to the unit. When replacing a SmartSlice I/O Unit online, note the following things: •...
-
Page 172: Tj1-Prt
Hardware reference TJ1-PRT 3.7.1 Introduction The TJ1-PRT is an interface between the Trajexia system and a PROFIBUS fig. 84 network. The TJ1-PRT has these visible parts. Part Description LEDs B and C Node number selectors PROFIBUS connector HARDWARE REFERENCE MANUAL... - Page 173 Hardware reference 3.7.2 LEDs description Label Status Description Start-up test failed. Unit not operational Operation stopped. Fatal error Start-up test successful. Normal operation Normal operation flashing Start-up error Fatal error in program Error occurred while Reading or Writing error log Normal operation flashing I/O-size not configured...
- Page 174 Hardware reference 3.7.4 TJ1-PRT Connections fig. 85 Signal Description Shield Connected to the metal shell B-line Data signal Direction control signal for repeaters DGND Data 0 Volts Power output for the termination, 5 V, 10 mA A-line Data signal 3.7.5 TJ1-PRT Specifications Item Specification...
- Page 175 Hardware reference 3.7.6 TJ1-PRT unit box contents TJ1-PRT box: • Safety sheet. • TJ1-PRT. • Protection label attached to the top surface of the unit. 3.7.7 Applicable BASIC commands The following BASIC commands are applicable for the TJ1-PRT: • PROFIBUS For more information, refer to the Trajexia Programming Manual.
-
Page 176: Tj1-Drt
Hardware reference TJ1-DRT 3.8.1 Introduction The TJ1-DRT is an interface between the Trajexia system and a DeviceNet fig. 86 network. Part Description LEDs B and C Node number selectors DeviceNet connector 3.8.2 LEDs description CAN L DRAIN Label Status Description CAN H Start-up test failed. - Page 177 Hardware reference Label Status Description No network error detected. flashing Connection time-out detected for I/O connection with the Device- Net master. Other device detected with the same node number or severe net- work error detected. 3.8.3 Node number selectors You can use the node number selectors to assign a node number to the TJ1-DRT.
- Page 178 Hardware reference 3.8.4 TJ1-DRT Connections fig. 87 Signal Description Power supply input, negative voltage CAN L Communication line, low DRAIN Shield CAN H Communication line, high Power supply input, positive voltage HARDWARE REFERENCE MANUAL...
- Page 179 Hardware reference 3.8.5 TJ1-DRT Specifications Item Specification Power supply 5 VDC (supplied by the TJ2-MC__) Power consumption 120 mA at 5 VDC Network power supply 24 VDC Network current consump- 15 mA at 24 VDC tion Power dissipation 0.6 W Approximate weight 100 g Electrical characteristics...
-
Page 180: Tj1-Cort
Hardware reference TJ1-CORT 3.9.1 Introduction The CANopen Master Unit (TJ1-CORT) is an interface between the Trajexia system and a CANopen network. fig. 88 Part Description CORT LED indicators NWST B and C Node number selectors CANopen port CAN L DRAIN CAN H HARDWARE REFERENCE MANUAL... - Page 181 Hardware reference 3.9.2 LEDs description Label Status Description Start-up test failed. Unit not operational. Operation stopped. Fatal error. Start-up test successful. Normal operation. Normal operation flashing Start-up error Fatal error in program. Error occurred while Reading or Writing error log. Normal operation.
- Page 182 Hardware reference 3.9.3 Node number selectors You can use the node number selectors to assign a node number to the TJ1-CORT. This node number identifies the TJ1-CORT in the CANopen network. The upper node number selector sets the tens of the node number. The lower node number selector sets the units of the node number.
- Page 183 Hardware reference 3.9.5 TJ1-CORT specifications Item Specification Power supply 5 VDC (supplied by the TJ2-MC__) Power consumption 120 mA at 5 VDC Network power supply 24 VDC Network current con- 15 mA at 24 VDC sumption Power dissipation 0.6 W Approximate weight 100 g Electrical characteris-...
- Page 184 Hardware reference 3.9.7 Applicable BASIC commands The following BASIC commands are applicable for the TJ1-CORT: • CAN_CORT For more information, refer to the Trajexia Programming Manual. HARDWARE REFERENCE MANUAL...
-
Page 185: Tj1-Fl02
Hardware reference 3.10 TJ1-FL02 3.10.1 Introduction WARNING Do not start the system until you check that the axes are present and of the correct type. The numbers of the Flexible axes will change if MECHATROLINK-II network errors occur during start-up or if the MECHATROLINK-II network configuration changes. - Page 186 Hardware reference 3.10.2 LED description The function of the LEDs is defined by the BASIC command AXIS_DISPLAY. For more information, refer to the Programming Manual. Axis Label Status AXIS_DISPLAY parameter The TJ2-MC__ recognises the TJ1-FL02 A EN Axis enabled. flashing Axis error Axis disabled REG 0...
- Page 187 Hardware reference 3.10.3 TJ1-FL02 connections The signals of the 15-pin connector depend on the type of interface selected: 15-pin connector fig. 91 Axis Encoder Stepper Encoder Stepper SSI/EnDat Tamagawa input input output output Step+ Step+ Clock+ Step- Step- Clock- Dir+ Dir+ Dir- Dir-...
- Page 188 Hardware reference 18-pin connector The 18 pin connector is a Weidmuller connector designation: B2L 3.5/18 LH. fig. 92 Axis Signal Axis Signal Description Vout Vout Analog output 0V Reference for Vout Wdog- Wdog+ Enable relay contacts Reg 0 Reg 0 24V registration inputs Reg 1 Reg 1...
- Page 189 Hardware reference Note In the case of an incorrect registration due to slow edges or noise, a digital noise filter can be enabled with the REGIST command. Refer to the BASIC Commands in the Programming Manual. Note A maximum of 4 inputs on is allowed simultaneously. Digital outputs The following table and illustration details the digital output specifications: fig.
- Page 190 Hardware reference Analog outputs The following table and illustration details the analog output specifications: fig. 95 Item Specification TJ1-FL02 Output voltage -10 to +10 V +15V Vout 0 Resolution 16 bit -15V 100 Ω Output impedance Isolated 0V Load impedance 10 k Ω...
- Page 191 Hardware reference Encoder interface The following table and illustration details the encoder interface: fig. 97 TJ1-FL02 Item Specification A0+ / Type Phase differential incremental encoder STEP0+ / Signal level EIA RS-422-A Standards (line-Drive) A0- / STEP0- / Input impedance 48 kΩ min Load impedance 220 Ω...
- Page 192 Hardware reference Connection example The example shows the connections for the TJ1-FL02 to a F7 Inverter for fig. 98 position control. The encoder from the motor must be connected to the encoder interface (PG-X2) in the Inverter (connector TA1). The encoder signal is forwarded in the connector TA2 of the (PG-X2).
- Page 193 Hardware reference 3.10.4 TJ1-FL02 specifications Item Specification Power supply 5 VDC and 24 VDC (supplied by the TJ2-MC__) Total power consumption 3.35 W Current consumption 190 mA at 5 VDC and 100 mA at 24 VDC Approximate weight 110 g Galvanic isolation •...
- Page 194 Hardware reference Item Specification Auxiliary I/Os • Two fast registration inputs per axis • Two definable inputs • Two hardware position switch outputs • One enable output • Two definable outputs Note The 5 VDC power supply can only be used when both axes are in SERVO_AXIS mode (ATYPE=44).
- Page 195 When you use an encoder from other manufacturers, check the encoder specification for the phase advancement carefully. If the phase definition is different from the phase definition of the standard OMRON equipment, reverse the B-phase wiring between the TJ2-MC__ and the encoder.
- Page 196 Hardware reference Encoder TJ1-FL02 Signal Wire color Signal Black Black/red White White/red Orange Orange/red 0 V (COM) Blue 5 VDC Brown + 5V Encoder output The TJ1-FL02 can generate encoder type pulses. For each internal fig. 101 count (C), the TJ1-FL02 produces one encoder edge for phase A (A) or phase B (B).
- Page 197 Hardware reference 3.10.7 Absolute encoder SSI (Synchronous Serial Interface) is a digital system for transferring data in serial form. SSI is the most widely used serial interface between absolute sensors and controllers. SSI uses a pulse train from the controller to clock out the data from the sensor.
- Page 198 Hardware reference The connections for SSI are: Encoder signal Axis A Axis B DATA+ DATA- CLOCK+ CLOCK- 5 / 15 5 / 15 Note The TJ1-FL02 does not have a termination inside. In case of long distances or disturbed communication, add an external termina- tion to the TJ1-FL02.
- Page 199 Hardware reference EnDat You can configure the TJ1-FL02 to interface directly to EnDat absolute encoders. EnDat absolute encoders respond on a dedicated Clock and Data 1 MHz RS485 serial interface when their position is requested by the controller. When you set the encoder to the relevant encoder mode, the axis transmits an information request to the encoder on a fixed 250 μs cycle.
- Page 200 Hardware reference Related BASIC commands The following BASIC commands are related to EnDat absolute encoders: • ATYPE (ATYPE=47) • ENCODER_BITS • ENCODER_CONTROL • ENCODER_READ • ENCODER_TURNS • ENCODER_WRITE For more information, refer to the Trajexia Programming Manual. Tamagawa The TJ1-FL02 can interface directly to Tamagawa “SmartAbs” absolute encoders.
- Page 201 Hardware reference The table below and the figure give an example of how to connect the fig. 106 Tamagawa TS5667N420 encoder to the TJ1-FL02. TJ1-FL02 Encoder TJ1-FL02 Signal Wire color Signal Blue Blue/Black Black Use an external power supply 5 VDC Power Supply Related BASIC commands The following BASIC commands are related to Tamagawa absolute encoders:...
- Page 202 Hardware reference 3.10.9 Registration The TJ1-FL02 can capture the position of an axis in a register when an event occurs. The event is called the print registration input. On the rising or falling edge of an input signal (either the Z marker or an input), the TJ1-FL02 captures the position of an axis in hardware.
-
Page 203: Tj2-Ect
Hardware reference 3.11 TJ2-ECT__ 3.11.1 Introduction EtherCAT is an open high-speed industrial network system that conforms to Ethernet (IEEE 802.3). Each node achieves a short cycle time by transmitting Ethernet frames at high speed. A mechanism that allows sharing clock information enables high-precision synchronization control with low communications jitter. - Page 204 Hardware reference 3.11.2 LEDs description Label Status Description Start-up test failed. Unit not operational Operation stopped. Fatal error Start-up test successful. Normal operation Normal operation blinking EtherCAT network error Unit failure No link Link blinking Link and activity Reserved 0...3 Assigned input off Assigned input on HARDWARE REFERENCE MANUAL...
- Page 205 Hardware reference 3.11.3 TJ2-ECT__ connections To communicate with the EtherCAT network a RJ45 8-pin modular fig. 109 connector is provided. A 12-pin connector is supplied to perform registration on EtherCAT axes. ECT04 EtherCAT Communications Connector This connector is used to connect the EtherCAT twisted-pair cable. Signal name Abbreviation Signal direction...
- Page 206 Hardware reference WARNING Do not swap connections between the IN and OUT port of Ether- CAT slaves. This can result in changes of address and axes assignment of EtherCAT slaves. WARNING Do not connect or disconnect EtherCAT slaves while the system is operational.
- Page 207 Hardware reference Digital inputs The digital inputs can both be used as registration inputs (through the fig. 111 R_REGIST command) and as general purpose inputs. The inputs are available in the IN array, starting after the TJ2-MC__ build-in IO. TJ2-ECT__ The following table and illustration details the digital input specifications: Reg 0 1 External power...
- Page 208 Hardware reference 3.11.4 TJ2-ECT__ specifications Item Specification TJ2-ECT04 TJ2-ECT16 TJ2-ECT64 Power supply 5 VDC (supplied by the TJ2-MC__) Total power consumption 1.1 W Current consumption 250 mA at 5 VDC Approximate weight 80 g Communications protocol EtherCAT Baud rate 100 Mbps Physical layer 100Base-TX Communications control functions...
- Page 209 Hardware reference 3.11.5 TJ2-ECT__ box contents EtherCAT Master Unit box: • Safety sheet. • TJ2-ECT__. • Parts for an I/O connector. • Protection label attached to the top surface of the unit. 3.11.6 Related BASIC commands The following BASIC commands are related to the TJ2-ECT__: •...
- Page 210 Hardware reference 3.11.7 EtherCAT Accurax G5 Servo Drives You can also connect an Accurax G5 Servo Drive to a Trajexia system. fig. 112 Label Terminal/LED Description Display area Analog monitor check pins L1, L2, L3 Main-circuit power terminals L1C, L2C Control-circuit power terminals CHARGE Charge lamp...
- Page 211 Hardware reference EtherCAT Communications Status Indicators The table below shows the LED indication status and the corresponding conditions of the communications. Name Colour Status Description Green Init state Blinking Pre-Operational state Single flash Safe-Operational state Operational state No error Blinking Communications setting error Single flash Synchronization error or communica-...
- Page 212 Hardware reference Node Address settings Set the address selector of the Accurax G5 Servo Drive to the required node fig. 113 address by using the X1 (right) and X10 (left) rotary switches. The setting range for the node address setting rotary switch is 00 to 99. Status indicators @ RUN Rotary switches for...
- Page 213 Hardware reference 7-segment LED The 7-segment display is on the front panel. When the power is turned ON, it fig. 114 shows the node address that is set by the rotary switches. Then the display Control power ON changes according to the setting of the LED Display Selection (3700 hex). An error code is displayed if an error occurs.
- Page 214 Hardware reference CN1 I/O Signal connector The table below shows the pin layout for the I/O signal connector (CN1). fig. 115 Absolute General-purpose encoder backup OUTM1 Output 1 Absolute battery input General-purpose Code Signal name encoder backup OUTM1COM BATGND Output 1 Common battery input Input +24 VIN...
- Page 215 Hardware reference EtherCAT connectors (ECAT IN & OUT) Connect the EtherCAT master to the ECAT IN connector on the first Servo fig. 116 Drive. Connect the ECAT OUT connector on the first Servo Drive to the ECAT IN connector on the next Servo Drive. Do not connect the ECAT OUT connector on the last Servo Drive.
- Page 216 Hardware reference CN2 Encoder input connector The table below shows the pin layout for the encoder connector. Signal Name Encoder power supply +5 V Encoder power supply GND BAT+ Battery + BAT- Battery - Encoder +phase S input Encoder -phase S input Shell Shield ground CN4 External encoder connector...
- Page 217 Hardware reference CN5 Monitor connector The table below shows the pin layout for the CN5 monitor connector. Signal# Name Analog monitor output 1 Analog monitor output 2 Analog monitor ground Reserved: do not connect. Reserved: do not connect. Reserved: do not connect. CN7 USB Connector The table below shows the pin layout for the CN7 USB connector.
- Page 218 Hardware reference CNA Power supply connector The table below shows the pin layout for the CNA power supply connector. Signal Name Main circuit power supply input Control circuit power supply input CNB Servo motor connector The table below shows the pin layout for the CNB servo motor connector. Signal Name External Regeneration Resistor...
- Page 219 Hardware reference Related BASIC commands The following BASIC commands are related to the EtherCAT Accurax G5 Servo Drives: • ATYPE • AXIS • AXIS_ENABLE • AXISSTATUS • DRIVE_ALARM • DRIVE_CLEAR • DRIVE_CONTROL • DRIVE_INPUTS • DRIVE_MONITOR • DRIVE_READ • DRIVE_RESET •...
- Page 220 Hardware reference 3.11.8 GX-series EtherCAT Slave Units The TJ2-MC__ supports the following GX-series EtherCAT Slave Units: Digital I/O Slave Units Type Appearance I/O points Model Models with 16 inputs (NPN) GX-ID1611 2-tier terminal 16 inputs (PNP) GX-ID1621 block 16 outputs (NPN) GX-OD1611 16 outputs (PNP) GX-OD1621...
- Page 221 Hardware reference Type Appearance I/O points Model e-CON 16 inputs (NPN) GX-ID1618 Connectors 16 inputs (PNP) GX-ID1628 16 outputs (NPN) GX-OD1618 16 outputs (PNP) GX-OD1628 8 inputs and 8 outputs (NPN) GX-MD1618 8 inputs and 8 outputs (PNP) GX-MD1628 32 inputs (NPN) GX-ID3218 32 inputs (PNP) GX-ID3228...
- Page 222 Hardware reference Analog I/O Slave Units Type Appearance I/O points Model Models with 4 inputs GX-AD0471 screw terminal blocks 2 outputs GX-DA0271 Encoder Input Slave Units Type Appearance I/O points Model Models with 2 inputs (5 V and 24 V voltage GX-EC0211 screw terminal input)
- Page 223 Hardware reference Rotary switches Set the address selector of the slave units to the required node address by fig. 117 using the X1 (right) and X10 (left) rotary switches. The setting range for the node address switches is 00 to 99. When the rotary switches are set to 00, the node address will be assigned automatically, depending on the position in the network.
- Page 224 Hardware reference Axes assignment The GX-EC0211 and GX-EC0241 encoder input slaves will introduce 2 axes (ATYPE=69) to the Trajexia system. The axis numbers assigned depend on the node address setting and the AXIS_OFFSET parameter, using the following rule: Axis No. 1 = (Node Address -1) + AXIS_OFFSET Axis No.
- Page 225 Hardware reference Registration The GX-EC0211 and GX-EC0241 encoder input slaves support 2 registration inputs per axis. These can be enabled and configured using the REGIST command. Function (EtherCAT encoder) 1, 0 Primary registration occurs for: • 00: Latch A Set this bit to use primary registration event Not used 5, 4 Secondary registration occurs for:...
- Page 226 Hardware reference 3.11.9 FZM1 Vision Sensor The OMRON Vision Sensor FZM1 can also be connected through EtherCAT fig. 118 to detect at high speed and high accuracy the position and orientation of any object inside a machine. The following types are supported:...
- Page 227 Hardware reference Rotary switches Set the address selector of the slave unit to the required node address by fig. 119 using the rotary switch (11). The setting range for the node address switch is 1 to 9 and will result in node (10) address 1001 to 1009.
- Page 228 Hardware reference Arguments • function $66 to configure the mapping • unit_number Unit number of the EtherCAT master to which the slave is attached. • address Configured address of the EtherCAT slave • VR_start_RxPDO The starting address in VR memory of the controller where the data to the device (RxPDO) is mapped (default = 0) •...
- Page 229 Hardware reference Response area (FZM1 to controller) Item 31 - 17 14 - 5 Control GATE ERR RUN OR READY BUSY FLG Reserved Reserved Command UDINT (32 bits) Response code UDINT (32 bits) Response data DINT (32 bits) Output area (FZM1 to controller) Item 31 - 0 Data 1...
- Page 230 Hardware reference Note Please refer to the FZM1 EtherCAT Communication manual (Q179-E1) to configure the Fieldbus Data Output. Please set the output format of the data to Fixed point: Integer portion of the value 1,000 times the data (decimal number) is output.
- Page 231 Hardware reference Example The following example sends the “Switch scene” command to the FZM1. VR(101)=$00301000 ‘Command VR(102)=3 ‘Scene number SET_BIT(0,100) ‘Execute command: bit 0 of VR(100) WAIT UNTIL READ_BIT(0,200)=ON ‘Wait for FLG bit to be set CLEAR_BIT(0,100) WAIT UNTIL READ_BIT(0,200)=OFF ‘Wait for FLG bit to be cleared If successful VR(202) (Response code) contains 0.
- Page 232 Hardware reference 3.11.10 3G3AX-MX2-ECT The EtherCAT Communication Unit is an interface unit. When installed to a fig. 120 SYSDRIVE MX2-series multi-function compact inverter, it provides support Rotary switches Status indicator for 100-Mbps EtherCAT. for node address (L/A IN, L/A OUT, For detailed information about installation and operation, please refer to the setting (×...
- Page 233 Hardware reference EtherCAT Communications Status Indicators The table below shows the LED indication status and the corresponding fig. 121 conditions of the communications. Name Colour Status Description L/A IN Green Link not established in physical layer Link established in physical layer Flickering In operation after establishing link L/A OUT...
- Page 234 Hardware reference Node Address settings Set the address selector of the 3G3AX-MX2-ECT to the required node fig. 122 address by using the X1 (right) and X10 (left) rotary switches. The setting range for the node address setting rotary switch is 00 to 99. When the rotary switches are set to 00, the node address will be assigned automatically, depending on the position in the network, starting from 1 sequentially.
- Page 235 Hardware reference Note When node address are assigned automatically (rotary switch set to 00), make sure the resulting axis numbers do not conflict with axes already assigned to other drives. This will result in a configu- ration error. Configuring the Option Board All Option Board parameters are stored in the MX2 Inverter.
- Page 236 Hardware reference Step 3 Restart the MX2 Inverter for the changes to take effect. Note When restarting the MX2 Inverter, wait for the Inverter power indi- cator to go out before switching on again. Related BASIC commands The following BASIC commands are related to the MX2 Inverter with EtherCAT option: •...
- Page 237 Hardware reference 3.11.11 GX-JC03/JC06 EtherCAT Junction Slave This is a special unit for branching EtherCAT network wiring. fig. 123 Each Junction Slave has one input port and two or five output ports. The GX-JC03 GX-JC06 output ports on each Junction Slave can be connected to another Junction Slave or other EtherCAT slaves.
- Page 238 Hardware reference 3.11.12 FQ-M-series Vision Sensors The FQ-M Series is a series of Vision Sensors that are designed to be fig. 125 integrated with high-speed positioning equipment. (10) (11) The following types are supported: Item Type Model FQ-M-series Monochrome FQ-MS@@@-M-ECT Vision Sensors Color FQ-MS@@@-ECT...
- Page 239 Hardware reference Label Terminal/LED Description OR: this indicator lights orange when the OR output signal turns ON. Measurement (10) process operation ETN: this indicator lights orange when Ethernet indicators communications are performed. ERROR: this indicator lights red when an error occurs. EtherCAT Displays the current EtherCAT network communication (11)
- Page 240 Hardware reference Type System command Syntax ETHERCAT(function, unit_number, address, VR_start_RxPDO, VR_length_RxPDO, VR_start_TxPDO, VR_length_TxPDO) Description Command to control and access the EtherCAT network and its functions. Notes: • This command waits for the response of the device so, its execution is slow and the time variable.
- Page 241 Hardware reference The FQ-M PDO contains the following areas: Command area (controller to FQ-M) Item 31 - 17 14 - 2 Control Reserved ERCLR Reserved TRIG Command UDINT (32 bits) Parameter 1 DINT (32 bits) Parameter 2 DINT (32 bits) Parameter 3 DINT (32 bits) Response area (FQ-M to controller)
- Page 242 Hardware reference Example The following example maps the FQ-M (address 1002) Command area to VR locations 100 to 104 and the Response and Output area to VR locations 200 to 212: ETHERCAT($66,0,1002,100,5,200,13) As a result the Control word is mapped to VR(100), the Command word to VR(101), etc..
- Page 243 Hardware reference The required command code must be written to the VR location mapped to the Command word in the Command area. The command is executed by setting the EXE flag in the Control word in the Command area. Example The following example sends the “Switch scene”...
-
Page 244: Grt1-Ect
Hardware reference 3.12 GRT1-ECT 3.12.1 Introduction The GRT1-ECT SmartSlice Communication Unit controls data exchange between a TJ2-MC__ Machine Controller Unit (via a connected TJ2-ECT__ EtherCAT Master Unit) and SmartSlice I/O Units over an EtherCAT network. For more information on SmartSlice I/O Units, refer to the GRT1 Series SmartSlice I/O Units Operation Manual (W455). - Page 245 Hardware reference Unit dipswitches fig. 128 Dipswitch Function Setting Description REGS REGS Create/enable Registered table is enabled registration table Registered table is disabled BACK OFF to ON Register I/O unit table ON to OFF Clear registered I/O unit table Not used, always set to OFF Automatic OFF to ON When the SmartSlice I/O Units are...
- Page 246 Hardware reference LED indicators fig. 130 Description Color Status Meaning Unit status Green Init state Blinking Pre-Operational state Single Safe-Operational state UNIT PWR flash Operational state IO PWR Unit error No error Double An application watchdog timeout has flash occurred Single Unit has changed its state autono- flash...
- Page 247 Hardware reference Description Color Status Meaning SmartSlice I/O Not Lit • No power supply system com- • Communication with SmartSlice I/ munication O Unit has not started status • Overcurrent detected Green Flashing SmartSlice I/O Unit added to the sys- (every second) Flashing...
- Page 248 Hardware reference Rotary switches Set the address selector of the GRT1-ECT to the required node address by using the X1 (right) and X10 (left) rotary switches. The setting range for the node address switches is 00 to 99. When the rotary switches are set to 00, the node address will be assigned automatically, depending on the position in the network, starting from 1000.
- Page 249 Hardware reference EtherCAT connectors (IN & OUT) Connect the EtherCAT master to the IN connector of the first slave. Connect fig. 131 the OUT connector on the first slave to the IN connector on the next slave. Do not connect the OUT connector on the last slave. Note Always turn OFF the power supply to the Machine Control Unit and slaves before connecting or disconnecting the EtherCAT...
- Page 250 Hardware reference Power supply connector fig. 132 The GRT1-ECT has 2 24 VDC power supply terminals: UNIT 24 VDC Label Power supply terminal Description 24 VDC Unit power supply Power supply to the internal circuits of the GRT1-ECT DC24V terminal and to the internal circuits of the connected INPUT SmartSlice I/O Units (through the SmartSlice bus)
- Page 251 Hardware reference 3.12.2 Specifications Item Specification Unit type SmartSlice GRT1 series Model GRT1-ECT Installation position On a DIN rail Power supply 24 VDC +10% −15% (20.4 to 26.4 VDC) Current consumption 130 mA typical at 24 VDC Dimensions (W × H × D) 58 × 80 × 70 mm Weight 130 g −10 to 55°C (no icing or condensation)
- Page 252 Hardware reference Item Specification Number of connectable 64 Units max. SmartSlice I/O Units Connected directly to the GRT1-ECT or via Turnback exten- sion units Baud rate 3 Mbps Communication signal RS485 level Communication dis- SmartSlice I/O Units: 64 Units coupled (about 2 m max.) tance Turnback cable: 2 m max.
- Page 253 Hardware reference Supported SmartSlice I/O Units The GRT1-ECT supports the following SmartSlice I/O Units. Function Specification Model 4 NPN inputs 24 VDC, 6 mA, 3-wire connection GRT1-ID4 4 PNP inputs 24 VDC, 6 mA, 3-wire connection GRT1-ID4-1 8 NPN inputs 24 VDC, 4 mA, 1-wire connection + 4xG GRT1-ID8 8 PNP inputs...
- Page 254 Hardware reference Function Specification Model Two-point Temperature Resistance thermometer input, Input type: GRT1-TS2PK Input Unit PT1000 (−200 to 850°C) or PT1000 (−200 to 200°C) Two-point Temperature Thermocouple input, Input type: R, S, K J, GRT1-TS2T Input Unit T, E, B, N, L, U, W, or PL2 Function Model I/O power feed unit, separates power supply between groups of I/O...
- Page 255 Hardware reference Dimensions The external dimensions are in mm. fig. 133 27.6 13.8 61.2 36.8 69.7 3.12.3 Installation Follow these rules when installing the GRT1-ECT: • Before installing the GRT1-ECT or connect or disconnect cables, switch off the power of the Trajexia system, the SmartSlice I/O Units and the external I/Os.
- Page 256 Hardware reference • Install the GRT1-ECT and the SmartSlice I/O Units on a DIN rail. To install a GRT1-ECT on the DIN rail, press it onto the DIN track from the front, and press the unit firmly until it clicks. Check that all DIN rail sliders of the unit are locked onto the DIN rail.
- Page 257 Hardware reference The maximum I/O current consumption is 4 A. 1. Calculate the total current consumption used by all external I/Os of the connected SmartSlice I/O Units (including other units like Turnback Units). Refer to the GRT1 Series SmartSlice I/O Units Operation Manual (W455) for the current value for each SmartSlice I/O Unit.
- Page 258 I/O, an output voltage of 30 V rms and a 42.4 V peak or maximum of 60 VDC. Recommended power supplies are: • S82K-01524 (OMRON) • S8TS-06024 (OMRON). Release button It is recommended to use wires with a gauge of 20 AWG to 16 AWG (0.5 to 1.25 mm...
- Page 259 Remove any lint or threads left from the cloth. Install the unit again. • When returning a damaged unit to the OMRON dealer, include a detailed damage report with the unit. • Before reconnecting the new unit, do these steps: Set the EtherCAT node address to the same address as the old unit.
- Page 260 Hardware reference 3.12.4 Online replacement It is possible to replace SmartSlice I/O Units connected to a GRT1-ECT when the power is on. The I/O communication continues while a SmartSlice I/O Unit is removed and replaced. To replace a SmartSlice I/O Unit online, do these steps: 1.
- Page 261 Hardware reference 1. Execute IO_STATUSMASK(unit, address, 1, 0). This masks all bits, including errors, in the GRT1-ECT status word. 2. Replace the I/O Unit. 3. Execute IO_STATUSMASK(unit, address, 1, $4000). This sets the error mask to its default value. 3.12.5 Related BASIC commands The following BASIC commands are related to the GRT1-ECT module: •...
-
Page 262: Tj2-Ks02
Hardware reference 3.13 TJ2-KS02 3.13.1 Introduction The TJ2-KS02 can control up to two Accurax G5-A/P Servo Drives and is fig. 137 also equipped with an encoder interface. The Servo Drives can be controlled in position, speed and torque mode. The encoder interface supports KS02 A EN incremental (phase differential or stepper) and absolute (SSI and EnDat) - Page 263 Hardware reference 3.13.2 LED description Label Status Description Start-up test failed. Unit not operational Operation stopped. Fatal error Start-up test successful. Normal operation A EN Axis enabled. flashing Axis error Axis disabled B EN Axis enabled flashing Axis error Axis disabled C EN Axis enabled flashing...
- Page 264 Hardware reference 3.13.3 TJ2-KS02 connections CN1, CN2 Accurax G5-A/P connectors These connectors are used to connect to one or two Accurax G5-A/P Servo Drives to the TJ2-KS02. Disconnection To disconnect, push the lock on the connector towards the TJ2-KS02 or fig.
- Page 265 Hardware reference CN2 Registration inputs The 4 pin connector is a Weidmuller connector designation: B2L 3.5/4 LH. fig. 139 Signal Signal Description REG 0 REG 1 24V registration inputs 0V Reference for inputs The registration inputs can be used to capture the position of the encoder interface for both incremental and absolute encoders.
- Page 266 Hardware reference CN3 Encoder connector The signals of the 9-pin connector depend on the type of interface selected: fig. 141 Encoder Encoder Stepper input Stepper out- SSI/EnDat input output Step+ Clock+ Step- Clock- Dir+ Dir- 5V power supply output Enable+ Enable+ Data+ Enable-...
- Page 267 Hardware reference Encoder interface specifications The following table and illustration details the encoder interface: fig. 142 Item Specification TJ2-KS02 A+ / Type Phase differential incremental encoder STEP+ / Signal level EIA RS-422-A Standards (line-Drive) A- / STEP- / Input impedance 48 kΩ...
- Page 268 Hardware reference 3.13.4 Initial setup To be able to control the Accurax G5-A/P through its serial interface, please follow the following steps: A. Make sure the Servo Drive has the correct software version. The software version can be checked on the front panel or with the CX-Drive.
- Page 269 Hardware reference 3.13.5 TJ2-KS02 specifications Item Specification Power supply 5 VDC and 24 VDC (supplied by the TJ2-MC__) Total power consumption 1.5 W to 3.7 W (Output PS maximum load) Current consumption 5 VDC: 110 mA 24 VDC: 20 mA to 110 mA (Output PS maxi- mum load) Approximate weight 83 g...
- Page 270 Hardware reference Item Specification Encoder/pulse output maximum frequency 2 MHz Maximum cable length: • Accurax G5 interface, 3 m • SSI, 100 m • EnDat, 40 m • Encoder/stepper input, 100 m • Encoder/stepper output, 100 m Auxiliary I/Os • Two fast registration inputs Accessories fig.
- Page 271 Hardware reference 3.13.6 Applicable BASIC commands The following BASIC commands are applicable for the TJ2-KS02: • ATYPE • AXIS_OFFSET • UNIT_INIT • DRIVE_READ • DRIVE_WRITE • DRIVE_CONTROL • DRIVE_MONITOR • DRIVE_STATUS • DRIVE_ALARM • REGIST BASIC commands applicable for specific encoder types, are listed with the corresponding explanations in the next chapters.
- Page 272 When you use an encoder from other manufacturers, check the encoder specification for the phase advancement carefully. If the phase definition is different from the phase definition of the standard OMRON equipment, reverse the B-phase wiring between the TJ2-MC__ and the encoder.
- Page 273 Hardware reference The table below and the figure give an example of how to connect the fig. 145 OMRON E6B2-CWZ1Z encoder to the TJ2-KS02. TJ2-KS02 Encoder TJ2-KS02 Signal Wire color Signal Black Black/red White 0 V (COM) 5 VDC White/red...
- Page 274 Hardware reference 3.13.9 Absolute encoder SSI (Synchronous Serial Interface) is a digital system for transferring data in serial form. SSI is the most widely used serial interface between absolute sensors and controllers. SSI uses a pulse train from the controller to clock out the data from the sensor.
- Page 275 Hardware reference The connections for SSI are: Encoder signal DATA+ DATA- CLOCK+ CLOCK- Note The TJ2-KS02 does not have a termination inside. In case of long distances or disturbed communication, add an external termina- tion to the TJ2-KS02. The table below and the figure give an example of how to connect the fig.
- Page 276 Hardware reference Related BASIC commands The following BASIC commands are related to SSI absolute encoders: • ATYPE (ATYPE=48) • ENCODER_BITS For more information, refer to the Trajexia Programming Manual. EnDat You can configure the TJ2-KS02 to interface directly to EnDat absolute encoders.
- Page 277 Hardware reference The table below and the figure give an example of how to connect the fig. 149 Heidenhain ROC 425 2048 5XS08-C4 encoder to the TJ2-KS02. Encoder TJ2-KS02 TJ2-KS02 Signal Wire color Signal DATA Grey DATA /DATA Pink /DATA CLOCK Violet CLOCK...
- Page 278 Hardware reference 3.13.10 Stepper The TJ2-KS02 can generate pulses to drive an external stepper motor fig. 150 amplifier. You can use single step, half step and micro-stepping Drives with this interface. Applicable signals: • Enable ENABLE • Step • Direction. STEP Related BASIC commands The following BASIC commands are related to stepper outputs:...
- Page 279 Hardware reference 3.13.11 Registration The TJ2-KS02 can capture the position of an axis in a register when an event occurs. The event is called the print registration input. On the rising or falling edge of an input signal (either the Z marker or one of the inputs), the TJ2-KS02 captures the position of the encoder axis in hardware.
- Page 280 Hardware reference 3.13.13 Accurax G5-A/P Servo Drives An Accurax G5-A/P Servo Drive can be connected to a Trajexia system fig. 151 through the TJ2-KS02. Label Terminal/LED Description Analog monitor check pins L1, L2, L3 Main-circuit power terminals L1C, L2C Control-circuit power terminals CHARGE Charge lamp B1, B2, B3...
- Page 281 Hardware reference CN1 I/O Signal connector The table below shows the pin layout for the I/O signal connector (CN1). fig. 152 24-V General-purpose open-collector PCOM input for input 3 24-V Code Signal name General-purpose command pulse open-collector PCOM input 4 input for Reverse pulses, (GSEL)
- Page 282 Hardware reference CN2 Encoder input connector The table below shows the pin layout for the encoder connector. Signal Name Encoder power supply +5 V Encoder power supply GND BAT+ Battery + BAT- Battery - Encoder +phase S input Encoder -phase S input Shell Shield ground CN3 Expansion connector...
- Page 283 Hardware reference CN5 Monitor connector The table below shows the pin layout for the CN5 monitor connector. Signal Name Analog monitor output 1 Analog monitor output 2 Analog monitor ground Reserved: do not connect. Reserved: do not connect. Reserved: do not connect. CN7 USB Connector The table below shows the pin layout for the CN7 USB connector.
- Page 284 Hardware reference CNA Power supply connector The table below shows the pin layout for the CNA power supply connector. Signal Name Main circuit power supply input Control circuit power supply input CNB Servo motor connector The table below shows the pin layout for the CNB servo motor connector. Signal Name External Regeneration Resistor...
- Page 285 Hardware reference Restrictions When using the G5-A/P Servo Drive with the serial interface enabled, the following limitations apply: • Block programming operation is disabled • Electric gear function is disabled • Analog/pulse interface can only be used for monitoring • Test run and FFT function via USB communication and Jog function via front panel cannot be used.
- Page 286 Hardware reference Initial Drive configuration To be able to connect the Servo Drive through CN3 to the TJ2-KS02, this interface has to be enabled. To do so, parameters Pn628 and Pn629 need to be changed. Parameter Description Default Unit Setting Power supply number...
- Page 287 Hardware reference 3.13.14 Output Signals When the option unit interface is enabled, two additional outputs are fig. 153 available: Parameter Description Default Unit Setting Power Maximum supply number name setting range service SO1COM OFFto voltage : 30 VDC Maximum Output Signal Set the output signal 5 460551 0 to...
- Page 288 Hardware reference Warning list When the option unit interface is enabled, the following additional warnings can occur: Warning Warning name Latch*1 Warning condition Warning Output Selection Countermeasure number (Pn440, Pn441) Serial bus commu- Always Communication Error occurred 1 time. Not available •...
- Page 289 Hardware reference Alarm Error detection function Detection details and probable cause Countermeasure Attribute number Main History Can be Immediate cleared stop Counter overflow error The value of position deviation in the unit of pulse has • Check whether the motor rotates in accordance √...
- Page 290 Hardware reference Alarm Error detection function Detection details and probable cause Countermeasure Attribute number Main History Can be Immediate cleared stop Encoder data recovery Initialization of internal position information was unsuc- • Check if the power supply voltage of encoder is √...
- Page 291 Hardware reference Parameter list Pn number Parameter name Size Below is the list of all parameters with their sizes in bytes. These sizes are Speed Loop Integration Time Constant 2 necessary when accessing these parameters through DRIVE_READ and Speed Feedback Filter Time Constant 2 DRIVE_WRITE.
- Page 292 Hardware reference Pn number Parameter name Size Pn number Parameter name Size Notch 4 Frequency Setting Torque Command/Speed Limit Selection Notch 4 Width Setting Torque Command Direction Selection Notch 4 Depth Setting Torque Command Scale Damping Filter Selection Analog Torque Command Rotation Direction Switching Damping Frequency 1 Speed Limit Value Setting Damping Filter 1 Setting...
- Page 293 Hardware reference Pn number Parameter name Size Pn number Parameter name Size Analog Monitor 2 Selection Stop Selection with Main Power Supply OFF Analog Monitor 2 Scale Setting Undervoltage Alarm Selection Analog Monitor Output Setting Momentary Hold Time Analog Input 1 Offset Stop Selection for Alarm Detection Analog Input 1 Filter Time Constant Immediate Stop Torque...
- Page 294 Hardware reference Pn number Parameter name Size Torque Command Value Offset Forward Direction Torque Offset Reverse Direction Torque Offset Function Expansion Setting Electric Current Response Setting Inertia Ratio 2 Alarm Detection Allowable Time Setting Overspeed Detection Level Setting at Immediate Stop Absolute Interface Function Selection Front Panel Parameter Write Selection Power Supply ON Initialization Time...
- Page 295 Hardware reference Related BASIC commands The following BASIC commands are related to the Accurax G5-A/P Servo Drives: • ATYPE • AXIS • AXIS_ENABLE • AXISSTATUS • DRIVE_ALARM • DRIVE_CLEAR • DRIVE_CONTROL • DRIVE_MONITOR • DRIVE_INPUTS • DRIVE_OUTPUTS • DRIVE_READ • DRIVE_STATUS •...
-
Page 296: Revision History
First version January 2011 TJ2-ECT__ EtherCAT master added GRT1-ECT EtherCAT SmartSlice coupler added July 2011 GX-series and FZM1-ECT added February 2012 GX-JC03 and -JC06 added FQ-M-series Vision Sensors added RX-MRT added June 2012 TJ2-MC02 and TJ2-KS02 added HARDWARE REFERENCE MANUAL... - Page 297 In a jurisdiction where the exclusion of implied warranties is not valid, the exclusion shall be deemed to be replaced by such valid exclusion, which most closely matches the intent and purpose of the original exclusion. Omron Europe BV and/or its subsidiary and affiliated companies reserve the right to make any changes to the products, their specifications, data at its sole discretion at any time without prior notice.
Need help?
Do you have a question about the TJ2-MC02 and is the answer not in the manual?
Questions and answers