
Subscribe to Our Youtube Channel
Related Manuals for Philips IntelliVue CL SpO2


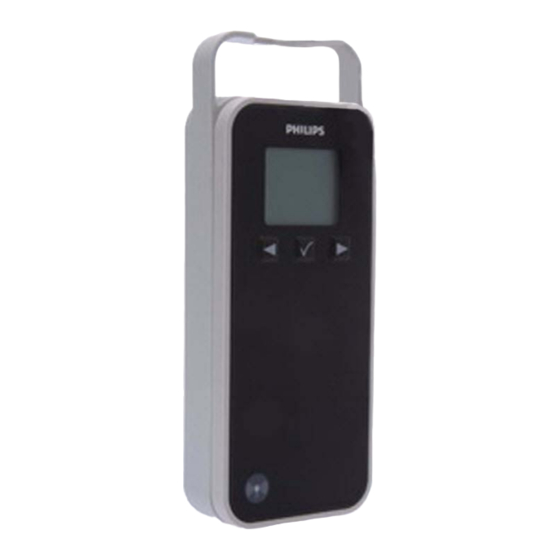
Summary of Contents for Philips IntelliVue CL SpO2
- Page 1 In stru ctio ns fo r Use IntelliVue Cableless Measurements IntelliVue CL SpO2 Pod and CL NBP Pod Rel ease A.3 Patient Monitori ng...
-
Page 3: Table Of Contents
Table of Contents 1 Introduction and Basic Operation Introducing the IntelliVue Cableless Measurements Operating and Navigating Operating Modes Using the Patient Menu Using Profiles Setting the Date and Time Introducing the Cableless Measurement Auxiliary Devices Charging IntelliVue Cableless Measurement Devices 2 Monitoring or Collecting Vital Signs IntelliVue Cableless Measurements Use Models Trending... - Page 4 Disposing of the IntelliVue Cableless Measurement Devices 8 Integrated Battery Handling Battery Care Handling Precautions Storage Battery Lifetime Management 9 Accessories IntelliVue CL SpO2 Pod Accessories IntelliVue CL NBP Pod Accessories IntelliVue CL Transmitter Accessories 10 Specifications Intended Use Compatible Medical Devices Manufacturer's Information...
- Page 5 IntelliVue CL Charging Station Specifications IntelliVue CL Transmitter Specifications IntelliVue CL Transmitter Base Station Specifications IntelliVue CL Hotspot Specifications 11 Default Settings Appendix SpO2 Default Settings NBP Default Settings Index...
-
Page 7: Introduction And Basic Operation
Introduction and Basic Operation These Instructions for Use are for clinical professionals using the IntelliVue Cableless Measurements and their respective accessories for monitoring and recording arterial oxygen saturation, pulse rate and non-invasive blood pressure of adult and pediatric patients together with: •... -
Page 8: Introducing The Intellivue Cableless Measurements
Specialized single-patient SpO sensors are available for use with the IntelliVue CL SpO Pod. For details regarding the complete set of single-patient supplies, cradle, wristband and sensors, refer to the chapter “IntelliVue CL SpO2 Pod Accessories” on page 61. - Page 9 1 Introduction and Basic Operation IntelliVue CL NBP Pod The IntelliVue CL NBP Pod is a battery powered, cableless, non-invasive blood pressure (NBP) measuring device. To measure NBP, you need a Mobile CL NBP Cradle and Mobile CL Cuffs. The cradle is used to attach the Pod to the cuffs and to allow easy removal of the Pod.
-
Page 10: Operating And Navigating
1 Introduction and Basic Operation Measurement Device Main Parts and Keys All IntelliVue Cableless Measurement devices have a display and 3 keys: Integrated monochrome LCD display Hardkeys Measurement identifier Operating and Navigating The following sections describe operation on the IntelliVue Cableless Measurement device itself. For operation from a patient monitor, see “Controls Available with a Patient Monitor”... - Page 11 1 Introduction and Basic Operation Screen Layout There are three variations of the Main Screen layout depending on the INOP status and the general activity level. Standard Layout When assigned to a monitor, telemetry device or a patient in GuardianSoftware: Connection status indicator Indicator that alarming capability has been transferred to the host (to the monitor or, for the telemetry...
- Page 12 1 Introduction and Basic Operation Low-Activity Screen If the measurement device has not been operated for a while, the screen lighting will switch itself off and a little later the screen will switch to a pre-configured "low-activity" screen. When a Cableless Measurement Device Cannot be Activated If you cannot activate a device by pressing a key, the battery in the device may have been empty for an extended period of time.
- Page 13 1 Introduction and Basic Operation List of Available SmartKeys SmartKey Text Labels Main Setup - start/stop manual NBP measurement - start auto series - stop current automatic measurement within series stop any NBP measurement and measurement series start NBP STAT measurement start venipuncture (inflate cuff to subdiastolic pressure) set the NBP repetition time start an SpO...
-
Page 14: Operating Modes
1 Introduction and Basic Operation Using the Main Setup Menu Main Setup In addition to the hardkeys and SmartKeys for the most needed functions, the menu gets Main Setup you to all settings that can be adjusted for the respective device. Select the SmartKey to get Main Setup to the... -
Page 15: Using The Patient Menu
1 Introduction and Basic Operation Measurement Device is configured for use in your environment. This configuration defines the default settings you work with when you switch on. • Service Mode: Passcode protected, this is for trained service personnel. When you switch the device on, it starts up in monitoring mode. To change to a different mode: Main Setup Main Setup Use the... -
Page 16: Using Profiles
1 Introduction and Basic Operation Using Profiles A profile is a set of measurement and general settings which have been customized for a particular purpose. The Cableless Measurement Devices can have four different profiles configured to your requirements. The default profile is marked with a symbol. To select a different profile, Profiles Main Setup Profiles... -
Page 17: Introducing The Cableless Measurement Auxiliary Devices
1 Introduction and Basic Operation Introducing the Cableless Measurement Auxiliary Devices IntelliVue CL Transmitter and IntelliVue CL Hotspot IntelliVue CL Transmitter IntelliVue CL Hotspot The IntelliVue CL Transmitter and the IntelliVue CL Hotspot are auxiliary network devices that convert the SRR radio technology from the IntelliVue CL SpO Pod and the CL NBP Pod into WLAN or LAN technology. - Page 18 1 Introduction and Basic Operation Screen Layout The CL Transmitter and CL Hotspots have the same hardkeys and display as the Cableless Measurement Devices. However, there is no user interaction required during normal operation. This is the standard screen of a CL Transmitter or CL Hotspot: Screen of a CL Transmitter / CL Hotspot: Equipment label Number of GuardianSoftware Servers connected...
- Page 19 1 Introduction and Basic Operation IntelliVue CL Transmitter Base Station (shown here with the transmitter inserted) The IntelliVue CL Transmitter Base Station is used with the IntelliVue CL Transmitter. When the patient is in their room, the Transmitter can be inserted into the Base Station where it is powered and recharged and also remains connected to the WLAN to communicate vital signs data.
-
Page 20: Charging Intellivue Cableless Measurement Devices
1 Introduction and Basic Operation If a Cableless Measurement Device is placed on the charging station, the INOP tone is switched off automatically. To indicate this, the following symbol is displayed on the right icon tray of the Cableless Measurement Device screen: If the ambient temperature is high, the built-in fan will switch on automatically to cool the charging station. - Page 21 1 Introduction and Basic Operation Charging IntelliVue Cableless Measurement Devices All IntelliVue Cableless Measurement Devices and Auxiliary Devices except the CL Hotspot are battery powered and need to be recharged using the IntelliVue CL Charging Station. The batteries are built in and can only be exchanged by trained service personnel. To charge a battery, place the device onto a charger slot on the charging station.
- Page 22 1 Introduction and Basic Operation Charging Station LEDs The nine charger slot LEDs show the battery status of the device in their slot, and are switched off if no device is inserted. If an IntelliVue Cableless Measurement Device is put on a charging station slot, the corresponding LED will flash yellow until the device and its current state have been identified.
-
Page 23: Monitoring Or Collecting Vital Signs
Monitoring or Collecting Vital Signs IntelliVue Cableless Measurements Use Models With these patient-worn measurement devices you can measure and transmit a patient's vitals regularly or on an intermittent data collection basis. There are three typical use models: With a Patient Monitor The SpO and the NBP Pods can be used together with an MP5/MP5SC/MP5T, MP2 or X2 patient monitor (with an SRR interface). -
Page 24: Trending
2 Monitoring or Collecting Vital Signs When a cableless measurement device is assigned to a telemetry device, it is not possible for the telemetry device to be wirelessly assigned or directly connected to a patient monitor. If the connection between the telemetry device and the NBP Pod or SpO Pod is lost, an INOP will cl SpO₂... -
Page 25: Assigning An Intellivue Cableless Measurement Device To A Patient Monitor Or Telemetry Device
2 Monitoring or Collecting Vital Signs Assigning an IntelliVue Cableless Measurement Device to a Patient Monitor or Telemetry Device When an IntelliVue Cableless Measurement Device is used with a host system (patient monitor, telemetry device or GuardianSoftware), the Cableless Measurement Device must be assigned to that host system. - Page 26 2 Monitoring or Collecting Vital Signs approximately 20-25 seconds. Once a channel is identified, the first LED will light up and blink once per second to indicate that the telemetry device is ready for assignment. Add To Mon 1 Mon 2 Tele 33 Tele 44 Select a patient monitor or telemetry system using the ◄...
-
Page 27: Controls Available With A Patient Monitor
2 Monitoring or Collecting Vital Signs Assignment with GuardianSoftware To assign a Cableless Measurement Device to a patient in GuardianSoftware: Chalkboard Select the patient on the Equipment List Available On the tab, select the Cableless Measurement Device on the Equipment list. -
Page 28: Controls Available With A Telemetry Device
2 Monitoring or Collecting Vital Signs tone. No alarms will be available for the measurements when the devices are out of range, as alarms are only available on the patient monitor. Keep the patient monitor with the patient during transport. Controls Available With a Telemetry Device The controls available when the Cableless Measurement Device is assigned to a TRx4841/TRx4851A Transceiver or MX40 wearable patient monitor with a short range radio adapter (SRRA) are described... -
Page 29: Controls Available With Guardiansoftware
2 Monitoring or Collecting Vital Signs NOTE The SpO measurement sourced from the telemetry device (label: SpO T) has priority over the IntelliVue CL SpO measurement. The SpO T measurement is sent to the Information Center as long as it is available and the IntelliVue CL SpO measurement is available on the measurement device only. - Page 30 2 Monitoring or Collecting Vital Signs...
-
Page 31: Monitoring Spo2
Monitoring SpO2 Philips pulse oximetry uses a motion-tolerant signal processing algorithm, based on Fourier artifact suppression technology (FAST). A sensor is used that transmits light of two different wavelengths through the tissue of the patient. The measurement principle of pulse oximetry is based on the specific absorption characteristics of oxyhemoglobin and deoxyhemoglobin and the pulsating arteriolar vascular bed at the measurement site. -
Page 32: Connecting Spo2 Sensors
3 Monitoring SpO2 Connecting SpO2 Sensors Connect the sensor to the single patient Mobile CL SpO Cradle (if not already connected). Insert the SpO Pod into the Mobile CL SpO Cradle. The correct orientation is indicated by a matching blue dot inside the cradle. CAUTION Make sure that the contacts of the SpO Pod and the sensor are dry and free of residues. -
Page 33: Applying The Sensor
3 Monitoring SpO2 Removing the Pod from the Cradle To remove the SpO Pod from the cradle, pull on the Pod at the opening in the cradle, while holding the cradle in place on the patient's arm. Applying the Sensor Choose a finger of the patient that matches the sensor dimension in a way that the sensor optical components are properly aligned and the sensor is neither too loose nor applies too much pressure to the finger. -
Page 34: Measuring Spo2
3 Monitoring SpO2 Extremities to Avoid: Avoid placing the sensor on extremities with an arterial catheter, an NBP cuff or an intravascular venous infusion line. Measuring SpO2 During measurement, ensure that the application site: – has a pulsatile flow, ideally with a perfusion indicator value above 1.0 or, if the perfusion indicator is not available, with signal quality indicator of at least medium. -
Page 35: Understanding Spo2 Numerics And Symbols
3 Monitoring SpO2 Start SpO₂ Start • Manual mode - a single SpO measurement is made when the SmartKey or the SpO₂ menu item is selected. One set of values is then displayed with the time the measurement was made. •... -
Page 36: Assessing A Suspicious Spo2 Reading
3 Monitoring SpO2 Assessing a Suspicious SpO2 Reading Traditionally, pulse rate from SpO was compared with heart rate from ECG to confirm the validity of the SpO reading. With newer algorithms, such as FAST-SpO , this is no longer a valid criteria because the correct calculation of SpO is not directly linked to the correct detection of each pulse. -
Page 37: Perfusion Numeric (Only Available On The Patient Monitor)
3 Monitoring SpO2 Perfusion Numeric (only available on the Patient Monitor) Perf The perfusion numeric ( ) gives a value for the pulsatile portion of the measured signal caused by the pulsating arterial blood flow. You can also use the perfusion numeric as a quality indicator for the SpO measurement. - Page 38 3 Monitoring SpO2...
-
Page 39: Monitoring Nbp
Monitoring NBP The IntelliVue CL NBP Pod uses the oscillometric method for measuring NBP. The blood pressure measurements determined with this device comply with the American National Standard for Electronic or Automated Sphygmomanometers (ANSI/AAMI SP10:2002/(R)2008 + A1:2003/ (R)2008) in relation to mean error and standard deviation, when compared to auscultatory measurements (depending on the configuration) in a representative patient population. - Page 40 4 Monitoring NBP Unattended measurement: Use clinical judgement to decide whether to perform frequent unattended blood pressure measurements in cases of severe blood clotting disorders because of the risk of hematoma in the limb fitted with the cuff. CAUTION If you spill liquid onto the equipment or accessories, particularly if there is a chance that it can get inside the tubing or the measurement device, contact your service personnel.
-
Page 41: Preparing To Measure Nbp
Avoid compression or restriction of pressure tubes. Air must pass unrestricted through the tubing. Make sure that you are using a Philips-approved correct sized cuff and that the bladder inside the cover is not folded or twisted. - Page 42 4 Monitoring NBP Insert the NBP Pod into the cradle. CAUTION Make sure that the air vent, located next to the air tubing connector on the NBP Pod, is not covered during operation. If air cannot enter the air vent, the pump may be damaged. Inspect the application site regularly to ensure skin quality and inspect the extremity of the cuffed limb for normal color, warmth and sensitivity.
-
Page 43: Starting And Stopping Measurements
4 Monitoring NBP Starting and Stopping Measurements Use the setup menu or SmartKeys to start and stop measurements. Action to be Performed NBP Setup menu SmartKeys Start/Stop Start manual measurement Start Auto series Start/Stop Start NBP Stat Start STAT measurement Start NBP STAT Start/Stop Stop Manual measurements... -
Page 44: Understanding The Nbp Numerics And Symbols
4 Monitoring NBP Setup Sequence Setup Sequence Select to open the menu. Up to four measurement phases can be setup which will run consecutively. For each phase you can set the number of measurements and the interval between them. If you want to run less than four phases in a sequence, you can set the number of measurements for one or more phases to Select each phase in turn (A, B, C and D) and select the number of measurements and the time interval between the measurements. -
Page 45: Correcting The Measurement If Limb Is Not At Heart Level
4 Monitoring NBP Correcting the Measurement if Limb is not at Heart Level To correct the measurement if the limb is not at heart level, to the displayed value Add 0.75 mmHg (0.10 kPa) for each centimeter Deduct 0.75 mmHg (0.10 kPa) for each higher or centimeter lower or Add 1.9 mmHg (0.25 kPa) for each inch higher. - Page 46 4 Monitoring NBP...
-
Page 47: Technical Alarms (Inops)
Technical Alarms (INOPs) Technical alarms, also known as INOPs, indicate that the measuring device cannot measure reliably. If NBP Interrupted an INOP interrupts monitoring (for example, ), there will be a question mark in place of the measurement numeric. An INOP tone sounds at the Cableless Measurement Device only when there is no SRR connection to a host. -
Page 48: Displaying A List Of Current Inops
5 Technical Alarms (INOPs) This will silence the INOP tone and clear the INOP message. If the condition which caused the INOP is still present, the INOP symbol will be displayed on the right hand side of the screen. Full length INOP message INOP indicator When using a Cableless Measurement Pod with an IntelliVue Information Center iX Release A, make sure to remove the pod at the telemetry device and only when in SRR range of the telemetry device. -
Page 49: Reference List Of All Inops
5 Technical Alarms (INOPs) Reference List of all INOPs INOP Message, Indication Source What to do Batt Incompatible Battery Battery cannot be used with this Cableless Measurement INOP tone Device. Replace battery with one that has been approved for use with this Cableless Measurement Device. Contact your service personnel. - Page 50 5 Technical Alarms (INOPs) INOP Message, Indication Source What to do Cuff Not Deflated The NBP cuff pressure has exceeded 15 mmHg (2 kPa) Numeric is replaced by -?- for more than 3 minutes. INOP tone Remove the cuff from the patient. Make sure that the During this INOP, alarms cannot tubing is not kinked or twisted and that the correct be paused or switched off.
- Page 51 5 Technical Alarms (INOPs) INOP Message, Indication Source What to do No Cradle The NBP Pod is not in the cradle. You can silence this Numeric is replaced by -?- INOP, but the INOP message remains visible until the INOP tone NBP Pod is inserted into the cradle and the next Stop All measurement is started or the...
- Page 52 5 Technical Alarms (INOPs) INOP Message, Indication Source What to do <SpO₂ Label> No Sensor Make sure the SpO sensor is connected. If the INOP Numeric is replaced by -?- persists, try another sensor. If you acknowledge this INOP tone INOP, the measurement will be switched off.
-
Page 53: Care And Cleaning
Warranty does not cover damage caused by using unapproved substances or methods. Philips makes no claims regarding the efficacy of the listed chemicals or methods as a means for controlling infection. Consult your hospital’s Infection Control Officer or Epidemiologist. For comprehensive details on cleaning agents and their efficacy refer to “Guideline for Disinfection and... -
Page 54: Cleaning And Disinfecting The Intellivue Cableless Measurements
6 Care and Cleaning Cleaning and Disinfecting the IntelliVue Cableless Measurements The following instructions apply to the IntelliVue CL SpO Pod, the IntelliVue CL NBP Pod, the corresponding single patient Mobile CL Cradles and the auxiliary devices: IntelliVue CL Charging Station, IntelliVue CL Transmitter, IntelliVue CL Transmitter Base Station and IntelliVue CL Hotspot. - Page 55 6 Care and Cleaning Product Name Product Type Ingredients ® Oxivir Tb Wipes wipes 0.5% accelerated hydrogen peroxide TM/MC Carpe Diem spray 0.5% accelerated hydrogen peroxide Ready-to-Use General Virucide, Bactericide, Tuberculocide, Fungicide, Sanitizer TM/MC Carpe Diem Tb Wipes wipes 0.5% accelerated hydrogen peroxide Super Sani-Cloth wipes isopropanol 55%...
- Page 56 6 Care and Cleaning...
-
Page 57: Maintenance And Troubleshooting
Contact: If you discover a problem with any of the equipment, contact your service personnel, Philips, or your authorized supplier. Inspecting the Equipment and Accessories You should perform a visual inspection before every use, and in accordance with your hospital's policy. -
Page 58: Troubleshooting
Ensure that these tasks are carried out as indicated by the device's maintenance schedule, or as specified by local laws. Contact a Philips-qualified service provider if your device needs a safety or performance test. Clean and disinfect equipment to decontaminate it before testing or maintaining it. -
Page 59: Integrated Battery Handling
Integrated Battery Handling Battery Care Battery care begins when you receive a new IntelliVue Cableless Measurement Device with built-in battery and continues throughout the life of the device. The table below lists battery care activities and when they should be performed. Activity When to perform Perform a visual inspection... -
Page 60: Storage
8 Integrated Battery Handling Storage If unused IntelliVue Cableless Measurement Devices are stored for an extended period of time: • they should be powered off for storage • they should be stored in a cool place, ideally between 15°C and 25°C (60°F and 77°F) •... -
Page 61: Accessories
Accessories You can order parts and accessories from Philips supplies at www.medical.philips.com or consult your local Philips representative for details. WARNING Reuse: Never reuse single-patient sensors, accessories and so forth that are intended for single use, or single patient use only. Reuse may compromise device functionality and system performance and cause a potential hazard, in particular with regard to cross-contamination. -
Page 62: Intellivue Cl Nbp Pod Accessories
9 Accessories Order Number Description Contents 989803165931 Mobile CL reusable SpO sensor and Cradles 1 Reusable Mobile CL RSpO -1A Sensor for use on pediatric and adult patients > 15 kg 20 Single-Patient Cradles with pre-attached Wristbands 989803165951 Mobile CL 20 SpO Cradles (single patient) 20 Single-Patient Cradles with pre-attached Wristbands 989803165961... -
Page 63: Intellivue Cl Transmitter Accessories
9 Accessories IntelliVue CL Transmitter Accessories Order Number Description Contents 989803168881 Mobile CL 20 Transmitter Cradle Kit 20 Single-Patient cradles and straps 989803168871 Mobile CL Transmitter Battery Kit 1 Battery 1 disassembly tool 1 front housing... - Page 64 9 Accessories...
-
Page 65: Specifications
IntelliVue Cableless Measurement Devices and sensors from the patient. Induced currents could cause burns. Intended Use IntelliVue CL SpO2 Pod: The IntelliVue CL SpO Pod is indicated for use by health care professionals whenever there is a need for acquisition or monitoring of physiological patient parameters SpO and pulse rate wirelessly. -
Page 66: Compatible Medical Devices
Clinical information management system: IntelliVue GuardianSoftware Manufacturer's Information You can write to Philips at this address Philips Medizin Systeme Boeblingen GmbH Hewlett-Packard-Str. 2 71034 Boeblingen Germany Visit our website at: www.healthcare.philips.com/us/. © Copyright 2012. Koninklijke Philips Electronics N.V. All Rights Reserved. -
Page 67: Symbols
10 Specifications Symbols These symbols can appear on the cableless measurement devices and associated equipment. Symbols Caution, consult Refer to accompanying Protective earth accompanying documents documents Equipotential grounding Alternating current Connector has special protection against electric shocks and is defibrillator proof Error LED Built-in wireless network... -
Page 68: Safety Specifications
EMC And Radio Regulatory Compliance FCC and Industry Canada Radio Compliance IntelliVue CL SpO2 Pod, CL NBP Pod, CL Charging Station, CL Transmitter: This ISM device complies with Canadian ICES-001. Cet appareil ISM est conforme à la norme NMB-001 du Canada. - Page 69 Available Interfaces (PAI) and used throughout the EEA. Individual countries may apply restrictions on putting this device into service or placing on the market. To obtain a copy of the original Declaration of Conformity, please contact Philips at the address as stated in the “Manufacturer's Information” section of these Instructions for Use.
-
Page 70: Safety And Performance Tests
10 Specifications • The IntelliVue CL Hotspot is a Class A product. In a domestic environment this product may cause radio interference, in which case the user may be required to take adequate measures. • This equipment generates, uses and radiates radiofrequency energy, and if it is not installed and used in accordance with its accompanying documentation, may cause interference to radio communications. -
Page 71: Accessories Compliant With Emc Standards
10 Specifications WARNING For paced patients: The radiated SRR power of the IntelliVue SpO and NBP Cableless Measurement Devices, the CL Transmitter, and other sources of radiofrequency energy, when used in very close proximity of a pacemaker, might be sufficient to interfere with pacemaker performance. Due to shielding effects of the body, internal pacemakers are somewhat less vulnerable than external pacemakers. -
Page 72: Intellivue Cl Spo2 Pod Specifications
10 Specifications IntelliVue CL SpO2 Pod Specifications Complies with ISO 9919:2005 / EN ISO 9919:2009. Physical Specifications Size (W X H X D) 53.5 mm x 27 mm x 65 mm ±5% 2.1 in x 1.1 in x 2.6 in ±5%... - Page 73 10 Specifications Performance Specifications Measurement Range 30 to 300 bpm Accuracy ±2% or 1 bpm, whichever is greater Resolution 1 bpm Sensors LED Power Dissipation Temperature rise at sensor skin interface in compliance with ISO 9919 Optical Output Power ≤15 mW Wavelength Range 500 to 1000 nm Information about the wavelength range...
-
Page 74: Intellivue Cl Nbp Pod Specifications
10 Specifications IntelliVue CL NBP Pod Specifications Complies with IEC 60601-2-30:1999/EN 60601-2-30:2000. NOTE The effectiveness of this sphygmomanometer has not been established in pregnant, including pre-eclamptic patients. Physical Specifications Size (W x H x D) 65 mm x 138 mm x 30.5 mm ±5% 2.6 in x 5.4 in x 1.2 in ±5% (without cradle and cuff) Weight... - Page 75 10 Specifications IntelliVue CL NBP Pod Performance Specifications Integrated rechargeable Li-Ion battery with battery gauge and cycle counter Battery Typical 4 days @ 2 measurements per hour Runtime (fully charged battery) Typical 5 days @ 1 measurement every 2 hours Maximum 2.5 hours Battery Recharge Time Short Range Radio Specifications...
-
Page 76: Alarm Specifications
10 Specifications IntelliVue CL NBP Pod Performance Specifications Adult: 165 ±15 mmHg Initial Cuff Inflation Pressure Pediatric: 130 ±15 mmHg Adult: 20 to 120 mmHg in steps of 5 mmHg Venipuncture Pressure Range Pediatric: 20 to 80 mmHg in steps of 5 mmHg ±10 mmHg Venipuncture Pressure Accuracy INOP, if neonatal cuff size is detected... - Page 77 10 Specifications requirements regarding electrical installation according to IEC 60364-7-710 "Requirements for special installations or locations - Medical locations", or corresponding local regulations. Physical Specifications Size (W X H X D) 343 mm x 117 mm x 172 mm ±5% 13.5 in x 4.6 in x 6.8 in ±5% Weight 2000 g ±10%...
- Page 78 10 Specifications Performance Specifications Short Range Radio Specifications Type built in interface with integrated antenna Technology IEEE 802.15.4 Frequency band 2.4 GHz ISM (2.400 - 2.483 GHz) Modulation DSSS (O-QPSK) Bandwidth 5 MHz Effective radiated power (ERP) max. 0 dBm (1 mW) IntelliVue CL Transmitter Specifications Physical Specifications Size (W X H X D)
- Page 79 10 Specifications Performance Specifications Display Specifications Type monochrome (4 grey scales), passive LCD (STN), positive/transflective Viewing Area 25.6 mm x 19.2 mm Dot Size 0.2 mm x 0.2 mm Resolution 128 x 96 pixel Backlight white LED 3 keys with tactile feedback: ◄, , ► Keys Integrated rechargeable Li-Ion battery with battery gauge and cycle counter Battery...
- Page 80 10 Specifications IntelliVue CL Transmitter Base Station Specifications Physical Specifications Size (W X H X D) 75 mm x 45 mm x 173 mm ±5% 3.0 in x 1.8 in x 6.8 in ±5% Weight 210 g ±10% 7.4 oz ±10% Robustness Operating within specification during exposure to random vibration according to IEC TR 60721-4-7 Class 7M1...
- Page 81 10 Specifications Performance Specifications External AC/DC 5V requirements (connection to USB) Output voltage 5V +/-5% Power output min. 8 W Isolation double according to IEC60950-1 Class II Classification Limited Power Source according to IEC60950-1 External AC/DC 48V requirements (connection to RJ45) Output Voltage 48V +/-10% Power output...
- Page 82 10 Specifications Performance Specifications Display Specifications Type monochrome (4 gray scales), passive LCD (STN), positive/transflective Viewing Area 25.6 mm x 19.2 mm Dot Size 0.2 mm x 0.2 mm Resolution 128 x 96 pixel Backlight white LED Short Range Radio Specifications Type built in interface with integrated antenna Technology...
- Page 83 10 Specifications Performance Specifications Standards IEEE 802.3 10-Base-T, IEEE 802.3af (PoE Class 3) Connector RJ45 (8 pin) External AC/DC 5V requirements (connection to USB) Output voltage 5V +/-5% Power output min. 8 W Isolation double according to IEC60950-1 Class II Classification Limited Power Source according to IEC60950-1 External AC/DC 48V requirements (connection to RJ45)
- Page 84 10 Specifications...
- Page 85 Default Settings Appendix This appendix documents the most important default settings of your IntelliVue Cableless Measurement Devices as they are delivered from the factory. For a comprehensive list and explanation of default settings, see the Configuration Guide supplied with your devices. The default settings can be permanently changed in Configuration Mode.
- Page 86 11 Default Settings Appendix NBP Setting Factory Defaults Done Tone Start Time Synchronized Aging Time 10 min Color...
- Page 87 IntelliVue CL hotspot specifications patient category default profile IntelliVue CL NBP Pod patient demographics default settings accessories patient menu demonstration mode specifications patient movement device compatibility IntelliVue CL SpO2 Pod perfusion indicator accessories disinfecting specifications perfusion numeric disinfecting agents...
- Page 88 pleth waveform specifications profiles telemetry pouch pulsatile flow test schedule pulse oximetry timestamp pulse rate timestamp SpO2 pulse rate numeric transceiver transmitter base station specifications trending R&TTE directive compliance troubleshooting radiofrequency radiation exposure information removing a patient from the device use models removing the pod from the cradle repetition time...
- Page 90 Part Number 453564327371 Published in Germany 09/12 *453564327371*...
Need help?
Do you have a question about the IntelliVue CL SpO2 and is the answer not in the manual?
Questions and answers