Table of Contents
Advertisement
Advertisement
Table of Contents

Related Manuals for Agilent Technologies Velocity11 VSpin


Summary of Contents for Agilent Technologies Velocity11 VSpin
- Page 1 Microplate Centrifuge User Guide Original Instructions...
- Page 2 Further, to the max- A WARNING or !!INJURY prior agreement and written consent from imum extent permitted by applicable Agilent Technologies, Inc. as governed by HAZARD!! notice denotes a hazard. It law, Agilent disclaims all warranties, United States and international copyright...
- Page 3 Centrifuge with Loader Quick Guide Centrifuge Diagnostics Version 8 Quick Reference Microplate Centrifuge ActiveX v8 User Guide Automated Centrifuge Loader ActiveX v9 User Guide These guides are available at: www.agilent.com/chem/askb Agilent Technologies, Inc., Automation Solutions, 5301 Stevens Creek Blvd., Santa Clara, CA 95051 USA...
-
Page 5: Table Of Contents
Contents Chapter 1. Introduction ........1 What This Guide Covers. - Page 6 Setting the Presented Bucket ........55 Balancing the Plates .
- Page 7 Introduction This chapter introduces the VSpin User Guide.
- Page 8 Chapter 1: Introduction VSpin User Guide What This Guide Covers Overview This guide is intended to be used by installers, integrators and lab workers. It covers how to: ™ ❑ Unpack the VSpin ❑ Mount the VSpin to a stable surface ❑...
-
Page 9: Getting Help From Velocity11
Chapter 1: Introduction VSpin User Guide Getting Help from Velocity11 Sending Us an Email Software Errors If you find an error in our software, or are unable to solve a technical problem after reading “Maintenance and Troubleshooting” on page 65, inform us by sending an email to service@velocity11.com. - Page 10 Agilent Technologies products must only be used in the manner described in the Agilent Technologies product user guides. Any other use may result in damage to the product or personal injury.
-
Page 11: Chapter 1. Introduction
Do not operate the VSpin if any VSpin components or accessories are damaged or have been modified in any manner not authorized by Agilent Technologies. Do not operate the VSpin if foreign objects or liquids are trapped within the chamber. Discontinue use if the VSpin vibrates or emits noise above normal levels. -
Page 12: What This Guide Covers
Failure to comply with these precautions violates safety standards of design and the intended use of the product. Agilent Technologies assumes no liability for the customer’s failure to comply with these requirements. The following table lists the common symbols. - Page 13 Consult your equipment dealer, Agilent Technologies, or an experienced • technician for assistance. Changes or modifications not expressly approved by Agilent Technologies could void the user's authority to operate the equipment. Sound emission declaration Sound pressure: Lp < 70 dB according to EN 27779:1991.
-
Page 14: Safety Information
Chapter 1: Introduction VSpin User Guide... -
Page 15: Chapter 2. Vspin Overview
VSpin Overview This chapter: ™ ❑ Introduces the VSpin hardware and software ❑ Lists the operating requirements and technical specifications of the VSpin... -
Page 16: Vspin Description
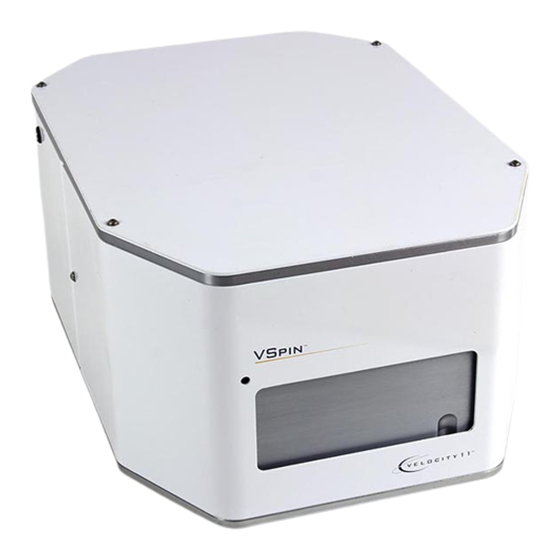
Chapter 2: VSpin Overview VSpin User Guide VSpin Description Introduction The VSpin is a microplate centrifuge that is intended to be integrated with a robotic lab automation system such as the Velocity11 ® BioCel ® . It is not designed for manual use, and using it in this manner is not recommended. -
Page 17: Hardware Overview
Chapter 2: VSpin Overview VSpin User Guide Hardware Overview Front Features The following diagram shows the front features of the VSpin, most notably the door and features for opening the door manually: VSpin Hole for opening the door manually VSpin door 00077 VSpin front... - Page 18 ANSI/SLAS 1-2004 (R2012) through ANSI/SLAS 4-2004 (R2012). Compatibility The overall labware dimensions, including lid, must be within the following values. Carefully evaluate any labware before use. If you have questions, contact your Agilent Technologies representative for evaluation. ❑ Width: 12.8 cm (5.03 in) ❑...
-
Page 19: Software Overview
Chapter 2: VSpin Overview VSpin User Guide Profile of centrifuge limits for labware height and depth Depth 7.8 cm 4.8 cm 4.0 cm Height 8.6 cm Software Overview Lab Automation The Centrifuge is designed to be used with a lab automation system such as the BioCel, that controls normal runs through its own software. - Page 20 Chapter 2: VSpin Overview VSpin User Guide Software Control The following diagram shows the options for controlling a VSpin from a computer (PC). ActiveX commands VWorks ActiveX, ActiveX Serial VSpin commands including Third-party firmware port VSpin protocol-running software Diagnostics ActiveX commands VSpin test container software...
- Page 21 Chapter 2: VSpin Overview VSpin User Guide Required Software To determine the type of software you need to run your VSpin, refer to this table: Summary To operate the VSpin... Use... With a BioCel ❑ VWorks for lab automation runs ❑...
-
Page 22: About Profiles
Chapter 2: VSpin Overview VSpin User Guide About Profiles What You Need to In general, a profile is a collection of settings saved as a group that are not lost when you close the software. In the case of the VSpin, the Know settings stored in a profile are: ❑... -
Page 23: About Teachpoints
Chapter 2: VSpin Overview VSpin User Guide About Teachpoints Teachpoint Defined A teachpoint is a point in space to which a device such as a robot or bucket can move and is defined with respect to reference positions built in to that device. For example, when you define a VSpin bucket position, the bucket position becomes a teachpoint where your robot can place a plate. -
Page 24: About The Control Page
Chapter 2: VSpin Overview VSpin User Guide About the Control Page Overview The Control page is the first page displayed when you open the VSpin Diagnostics software. It is intended for testing and troubleshooting of the VSpin, and not automated operation. The settings on this page are not permanently stored like the settings on the Profiles page, and therefore do not persist when you close the software. - Page 25 Chapter 2: VSpin Overview VSpin User Guide Control Page The following procedures are performed from the Control page: Procedures Function Procedure Configuring the velocity, acceleration and “Configuring Motion Settings” deceleration of the rotor on page 51 Checking the: “Monitoring the Progress of a Spin”...
-
Page 26: About The Profiles Page
Chapter 2: VSpin Overview VSpin User Guide About the Profiles Page Overview The Profiles page lets you set and save basic VSpin parameters. This is the only page that contains parameters that will be remembered after you close the software. For more information, see “About Profiles”... - Page 27 Chapter 2: VSpin Overview VSpin User Guide Profiles Page The following procedures are performed from the Profiles page. Procedures Function Profiles Configuring Motion settings: “Configuring Motion Settings” on page 51 ❑ Bucket tolerance ❑ Setting the maximum velocity of the rotor (default is 3000 RPM) Creating and managing profiles: “Creating and Managing Profiles”...
-
Page 28: About The Diagnostics Page
Chapter 2: VSpin Overview VSpin User Guide About the Diagnostics Page Overview The Diagnostics page helps you diagnose problems quickly by providing you with the controls and VSpin status information shown in the screen shot below. Diagnostics Page The following procedures are performed from the Diagnostics page. Procedures Function Procedure... - Page 29 Chapter 2: VSpin Overview VSpin User Guide Function Procedure Testing the VSpin actuators: “Testing the VSpin Actuators” on page 76 ❑ The bucket lock ❑ The door lock ❑ Opening or closing the door Checking Diagnostics error messages for the “Checking Error above actuators from the Messages group box Messages”...
- Page 30 Chapter 2: VSpin Overview VSpin User Guide...
-
Page 31: Chapter 3. Installation
Installation This chapter describes how to install and set up the VSpin ™ performing a spin, and is intended for personnel properly trained in the installation of such hardware. Read this chapter if you are installing the VSpin yourself or are integrating it into a third-party robotics system. -
Page 32: Installation Overview
Chapter 3: Installation VSpin User Guide Installation Overview Installation The procedures you need to perform to properly install your VSpin are listed in order in the following table. Procedures Step Procedure See... Verify that your lab meets the “Laboratory Requirements” on necessary requirements page 23 “Preparing the Mounting Surface”... -
Page 33: Laboratory Requirements
Chapter 3: Installation VSpin User Guide Laboratory Requirements What You Need For proper VSpin operation, make sure your laboratory meets the following requirements: Electrical Supply ❑ 100–240 VAC ❑ 50–60 Hz Environment ❑ For speeds above 1500 RPM, or when an immovable position is required, use a dedicated permanent mounting surface, such as an aluminum table at least 0.5 inch (1.3 cm) thick and at least 100 pounds (45.5 kg) in weight with the correct bolt hole pattern. -
Page 34: Unpacking The Vspin
Chapter 3: Installation VSpin User Guide Unpacking the VSpin Overview After you have received your VSpin, but before you continue with the setup process, inspect all the items for possible shipping damage. If anything is missing or appears to be damaged, contact the Velocity11 Service Center. - Page 35 Chapter 3: Installation VSpin User Guide Metric Fittings Kit The contents of the metric fittings kit varies depending on your installation package. Contact Velocity11 for an accurate list of contents. Contents See Getting Started for contact information.
-
Page 36: Preparing The Mounting Surface
Chapter 3: Installation VSpin User Guide Preparing the Mounting Surface Overview Before you install the VSpin, refer to this topic for the dimensions of the VSpin door and the position of the buckets so that you can set up your robot to access the buckets properly. - Page 37 Chapter 3: Installation VSpin User Guide 2. Reference the following diagram for the VSpin door dimensions. This is the front view, with the door open. VSpin 2.70 inches (6.86cm) 4.47 inches (11.4cm) 00074 Vspin door dimensions 6.50 inches (16.5cm) 3. Reference the following diagram for the VSpin plate entry dimensions.
- Page 38 Chapter 3: Installation VSpin User Guide 4. Reference the following diagram for the VSpin bucket position. This is a top-down view, with the bucket in the load/unload position. VSpin front 00071 Vspin Bucket position 3.41 inches (8.66 cm) 2.34 inches (5.94 cm)
-
Page 39: Mounting The Vspin
Chapter 3: Installation VSpin User Guide Mounting the VSpin Required This procedure assumes that you have already: Preparation ❑ Prepared your mounting surface ❑ Drilled the necessary holes ❑ Tapped the screw threads in your benchtop or mounting plate. About the Procedure Velocity11 provides four M6 X 30 flathead screws. - Page 40 Chapter 3: Installation VSpin User Guide 2. Pick up the VSpin and place it on the bench so that the screw holes in its base align with the screw holes in your benchtop. All holes accommodate M6 flat head cap screws. 3.
-
Page 41: Installing The Buckets
Chapter 3: Installation VSpin User Guide Installing the Buckets Overview After unpacking the VSpin, you need to install the buckets. The buckets are packaged in their own box to minimize damage to the VSpin during shipment. Procedure To install or replace a bucket: 1. -
Page 42: About The Connection Panel
Chapter 3: Installation VSpin User Guide 00108 VSpin Rotor assembly - bucket rotated Removing the To remove the buckets, see “Removing the Buckets” on page 71. Buckets About the Connection Panel Parts The following diagram shows the common features of the connection panel at the rear of the VSpin. -
Page 43: Connecting To Air And Power Sources
Chapter 3: Installation VSpin User Guide Connecting to Air and Power Sources Overview Before you can use the VSpin, you need to provide it with compressed air and electrical power. The air must be provided through the 0.25-inch (0.64 cm) tubing included with the VSpin. Use clean, dry air. !! DAMAGE HAZARD !! Make sure that air supply is properly filtered for moisture and aerosol impurities;... -
Page 44: About The Computer
Chapter 3: Installation VSpin User Guide Connect the Power To connect the power cable to the VSpin: Cable 1. Turn off the VSpin. 2. Verify that the voltage supplied to the VSpin meets the specifications in “Laboratory Requirements” on page 23. 3. -
Page 45: Connecting To The Computer
Chapter 3: Installation VSpin User Guide Connecting to the Computer Overview To operate your VSpin, you need to connect it to the computer that is running your lab automation software. For example, if you are using a Velocity11 BioCel, your VSpin needs to be connected to the computer that is running VWorks. -
Page 46: Installing The Software
Chapter 3: Installation VSpin User Guide Installing the Software Introduction After connecting the VSpin to the controlling computer, you need to install the software, which includes the VSpin Diagnostics software. Procedure To install the VSpin Software: 1. Place the VSpin CD into your CD ROM drive. 2. -
Page 47: Creating And Managing Profiles
Chapter 3: Installation VSpin User Guide Creating and Managing Profiles Overview Before you can begin using your VSpin, you must create a profile. After you have created several profiles, you can manage your profiles by editing, deleting, copying or renaming them. Creating a Profile New profiles are created from the Profiles page. - Page 48 Chapter 3: Installation VSpin User Guide 3. Change the settings on the profiles page to suit your application. For a list of settings on the Profiles page, see “About Profiles” on page 12. 4. To save the changes to the profile, click in the lower right Apply corner of the...
- Page 49 Chapter 3: Installation VSpin User Guide 4. Enter a unique name for the new profile and click A copy of your active profile is saved under the new name. Renaming a Profile This option gives you the freedom to change the name of a profile after you have created it.
-
Page 50: Aligning The Buckets
Chapter 3: Installation VSpin User Guide Aligning the Buckets When to Use After you have set up and turned on the VSpin, you need to align the buckets to the door so that your robot or the Access or Access2 gripper can place plates onto the buckets. - Page 51 Chapter 3: Installation VSpin User Guide 4. Click the tab. Profile page opens. Profile 5. Click Teach dialog box opens. Teach Bucket Position 6. Shut off air to the VSpin. After you shut off the air, the door falls closed. Teaching the Bucket After you have aligned the bucket to the door, you need to save this alignment in the profile you are using.
- Page 52 Chapter 3: Installation VSpin User Guide Bucket 00086 VSpin adjusting bucket 00086 The following illustration shows the bucket aligned with the top edge of the door. Bucket 00085 VSpin bucket alignment 4. Click Capture 1 5. Without changing the position of the buckets, click Capture 2 6.
- Page 53 Chapter 3: Installation VSpin User Guide 4. Manually turn the rotor slightly so that the left side of the bucket lightly touches the gripper. 5. Click Capture 1 6. Turn the rotor slightly so that the right side of the bucket lightly touches the gripper.
- Page 54 Chapter 3: Installation VSpin User Guide...
-
Page 55: Chapter 4. Performing A Spin
Performing a Spin This chapter describes how to use the VSpin ™ to perform a spin from the test container software for real-time testing and troubleshooting. Test container software is typically used by system integrators. For routine use, a spin is scheduled as part of a protocol run on your lab automation software. -
Page 56: Workflow Overview
Chapter 4: Performing a Spin VSpin User Guide Workflow Overview Workflow Steps The general workflow for performing a run is given in the following table: Step Topic “Turning on the VSpin” on page 47 “Starting the Software” on page 48 “Using Profiles”... -
Page 57: Turning On The Vspin
Chapter 4: Performing a Spin VSpin User Guide Turning on the VSpin Procedure To turn on the VSpin: 1. Verify that the air and power are connected to the VSpin and to their sources. 2. Verify that the serial communications cable is connected to the VSpin and to the computer. -
Page 58: Starting The Software
Chapter 4: Performing a Spin VSpin User Guide Starting the Software Overview This section explains how to start the VSpin test container software and open the VSpin Diagnostics software, with which you can directly control the VSpin. For use in a lab automation system, you would open the VSpin Diagnostics, create a profile, select the profile and control the spin, all through the lab automation software. -
Page 59: Using Profiles
Chapter 4: Performing a Spin VSpin User Guide Using Profiles When to Use Before you perform a spin you need to choose a profile. You have the following options: ❑ If there is a profile already selected, verify that the Profiles page has the settings you need for your particular application. - Page 60 Chapter 4: Performing a Spin VSpin User Guide 3. Check that the status lights start blinking on the Control and Diagnostics pages while the VSpin homes, and that the VSpin door opens when homing is complete. If these events do not occur, or you receive an error at this point, refer to the “VSpin Error Reference”...
-
Page 61: Configuring Motion Settings
Chapter 4: Performing a Spin VSpin User Guide Configuring Motion Settings Overview of Motion After selecting a profile, which sets the basic properties for the spin, configure the following motion settings before performing a spin. Settings Motion Parameters These settings are not stored in a profile, and are therefore not saved when the software is closed. - Page 62 Chapter 4: Performing a Spin VSpin User Guide Making Motion On the Control page, the Motion group box lets you adjust the following parameters, each controlled by a slider. Rotational velocity is measured Changes with the in rotations per minute (RPM). Motion Group Box Note: If you are using the Total time setting and a short spin time, the target velocity may not be reached.
- Page 63 Chapter 4: Performing a Spin VSpin User Guide Setting the Bucket Each unit of error represents approximately 0.05 degrees. Tolerance Consult a Velocity11 representative before changing this setting. To set the bucket tolerance: 1. Click the tab. Profiles page opens. Profiles 2.
-
Page 64: Configuring Time Settings
Chapter 4: Performing a Spin VSpin User Guide Configuring Time Settings The Time Group Box From the Time group box on the Control page you can set and monitor the duration of a spin. Changing the Timer Timer mode settings let you configure how the spin time is measured. Mode To change the timer mode settings: 1. -
Page 65: Setting The Presented Bucket
Chapter 4: Performing a Spin VSpin User Guide Setting the Presented Bucket About Bucket You can set bucket 1 or bucket 2 to be presented when the VSpin door opens. Positions This bucket position is an example of a teachpoint. For this reason, the process of setting a bucket position is called teaching. -
Page 66: Balancing The Plates
Chapter 4: Performing a Spin VSpin User Guide Where to Go Next Before you start a spin, refer to the “Workflow Overview” on page 46. Balancing the Plates Bucket Pairs Each VSpin is shipped with a pair of buckets that have been balanced to within one gram of each other. - Page 67 Chapter 4: Performing a Spin VSpin User Guide Choose the same plate as the type that you use for the sample plate. If you use something other than a plate, the object must have the same dimensions as a plate so that it can be properly constrained within the bucket.
-
Page 68: Starting A Spin
Chapter 4: Performing a Spin VSpin User Guide Starting a Spin Safety Information Never attempt to touch any of the !! INJURY HAZARD !! moving parts or remove plates while the VSpin is in operation. It is not possible to touch the rotor while it is in motion, if the door is functioning properly, but the door can cause possible pinching, piercing or bruising when it closes. - Page 69 Chapter 4: Performing a Spin VSpin User Guide Towards spindle center 00102 VSpin Bucket 00102 3. Make sure that the bucket is accurately aligned with the door. bucket 00085 VSpin bucket alignment If the bucket is not aligned correctly, see “Teaching the Bucket Position”...
- Page 70 Chapter 4: Performing a Spin VSpin User Guide Stopping a Spin You can stop a spin at any time. To stop a spin: 1. Select the bucket you want to present to the door from the Bucket to group box. Present 2.
-
Page 71: Monitoring The Progress Of A Spin
Chapter 4: Performing a Spin VSpin User Guide Monitoring the Progress of a Spin Overview You can monitor the progress of a spin by observing the change in parameters such as speed, duration, and error messages. Checking the You can see the rotational speed of the VSpin rotor in the Tachometer display in the Control page. - Page 72 Chapter 4: Performing a Spin VSpin User Guide Checking the Home To check the home position: Position 1. Check the box in the group box on the Home position Position page. Diagnostics Checking the Spin You can monitor the duration of a spin with the two time displays in the Time group box on the Control page.
- Page 73 Chapter 4: Performing a Spin VSpin User Guide Status light Color Illuminates when... Balanced Green The plates are balanced. The VSpin must be spinning to detect an imbalance. To balance the buckets, see “Starting a Spin” on page 58. In motion Green The rotor is spinning.
-
Page 74: Shutting Down The Vspin
Chapter 4: Performing a Spin VSpin User Guide Shutting Down the VSpin When to Use Shut down the VSpin if you intend to: ❑ Move it ❑ Perform maintenance Procedure To shut down the VSpin: 1. Close any open profiles See “Closing a Profile”... -
Page 75: Chapter 5. Maintenance And Troubleshooting
Maintenance and Troubleshooting This chapter tells you how to keep your VSpin ™ in good working order through cleaning, inspection and maintenance. It also explains what to do when you encounter a problem. -
Page 76: Routine Maintenance
Chapter 5: Maintenance and Troubleshooting VSpin User Guide Routine Maintenance VSpin Maintenance To keep your VSpin working properly, we recommend that you schedule with the Velocity11 Service Center at least one maintenance visit every two years. In general, practice good housekeeping by cleaning up spills and following the procedures described in this chapter. -
Page 77: Disconnecting The Air Supply
Chapter 5: Maintenance and Troubleshooting VSpin User Guide Disconnecting the Air Supply When to Use Disconnect the air supply before: ❑ Performing maintenance on the VSpin ❑ Cleaning the VSpin ❑ Cleaning up broken plates To disconnect the air supply: 1. -
Page 78: Preparing To Clean The Vspin
Chapter 5: Maintenance and Troubleshooting VSpin User Guide Preparing to Clean the VSpin Overview Perform the following procedures before cleaning the VSpin: Step Procedure Comments Disconnect the power supply. Pull out the power cord. Disconnect the air supply. See “Disconnecting the Air Supply” on page 67. -
Page 79: Unlocking And Opening The Door Manually
Chapter 5: Maintenance and Troubleshooting VSpin User Guide Unlocking and Opening the Door Manually Introduction Before cleaning or performing maintenance on your VSpin, you will need to unlock and open the door. Procedure To manually unlock and open the door manually: 1. - Page 80 Chapter 5: Maintenance and Troubleshooting VSpin User Guide 00111c VSpin cutaway 00111c Door column Lock pin 3. Remove the tool after the door begins to open, to continue opening the door. Otherwise, the tool will obstruct the door’s movement. VSpin 00078 VSpin manual door push open...
-
Page 81: Removing The Buckets
Chapter 5: Maintenance and Troubleshooting VSpin User Guide Removing the Buckets Overview You need to remove the buckets before cleaning or moving the VSpin. To access the buckets, you must open the door manually Removing a Bucket To remove a bucket: 1. - Page 82 Chapter 5: Maintenance and Troubleshooting VSpin User Guide 00113 VSpin bucket removal 00113 Replacing the To replace the buckets, see “Installing the Buckets” on page 31. Buckets...
-
Page 83: Cleaning The Vspin
Chapter 5: Maintenance and Troubleshooting VSpin User Guide Cleaning the VSpin Overview To clean the VSpin, use soap, a mild detergent or an organic solvent such as isopropyl alcohol (propan-2-ol) on a cloth. Wipe off the inner shield surfaces, rotor and buckets. The buckets can be removed for thorough cleaning and inspection. - Page 84 Chapter 5: Maintenance and Troubleshooting VSpin User Guide Lubrication Spindle Lubrication The VSpin requires no lubrication except for the spindle, which has been designed to remain lubricated for two years of operation. Do not attempt to lubricate the spindle yourself. If you hear squeaking noises, or notice that it takes longer for the VSpin to reach the set spin velocity, contact the Velocity11 Service Center.
-
Page 85: Cleaning Up Broken Plates
Chapter 5: Maintenance and Troubleshooting VSpin User Guide Cleaning Up Broken Plates Overview !! DAMAGE HAZARD !! Plates occasionally break apart inside the VSpin, and the plate fragments need to be removed so they do not interfere with moving parts and potentially damage the VSpin. -
Page 86: Testing The Vspin Actuators
Chapter 5: Maintenance and Troubleshooting VSpin User Guide Testing the VSpin Actuators Overview Diagnose problems with VSpin actuators from the Diagnostics page. The three actuators that you can test are the: ❑ Bucket Lock Actuator ❑ Door Lock Actuator ❑ Door Open Actuator The door cannot be opened until it is unlocked. - Page 87 Chapter 5: Maintenance and Troubleshooting VSpin User Guide To lock the door: 1. Click the tab at the top of the dialog box. Diagnostics VSpin Control page opens. Diagnostics 2. Click in the group box. Lock door Door Lock Actuator The door locks, and cannot be opened without sending an unlock command or unlocking it manually.
- Page 88 Chapter 5: Maintenance and Troubleshooting VSpin User Guide Checking Error If you have problems with the actuators, error messages are displayed in popup windows, and logged in the Messages group box. Messages The following types of error and status messages appear in the Messages group box of the Diagnostics page: ❑...
-
Page 89: Vspin Error Reference
Chapter 5: Maintenance and Troubleshooting VSpin User Guide VSpin Error Reference Startup Errors If you encounter problems during start up, it may be simply that the VSpin is protecting itself from improper operation. Consult Velocity11 for assistance in resolving start up problems. Common Error Table Refer to this table to resolve common errors. - Page 90 Chapter 5: Maintenance and Troubleshooting VSpin User Guide Error What this means What to do Bucket failed to align within the Occurs after a spin when the Follow the procedure for specified bucket tolerance bucket does not align with the “Creating and Managing door.
- Page 91 Chapter 5: Maintenance and Troubleshooting VSpin User Guide Error What this means What to do NmcNoOp() failed: The VSpin may have become Check to make sure that the: Communication likely failed disconnected during operation. ❑ Power cord is properly plugged in to the VSpin power entry and the wall outlet ❑...
- Page 92 Chapter 5: Maintenance and Troubleshooting VSpin User Guide Error What this means What to do Timed out waiting for bucket to Check to make sure that the: ❑ The action did not complete lock within the allotted time. ❑ Power cord is properly plugged in to the VSpin ❑...
-
Page 93: Packing The Vspin For Shipping
Chapter 5: Maintenance and Troubleshooting VSpin User Guide Packing the VSpin for Shipping Overview If you need to ship your VSpin, it is important that you follow the procedures outlined in this topic to prevent damage. !! DAMAGE HAZARD !! Do not ship your VSpin without the original packaging material. - Page 94 Chapter 5: Maintenance and Troubleshooting VSpin User Guide VS pi n 00146 VSpin door foam Foam insert 4. Place the VSpin into the pink anti-static bag. 5. Pack the buckets into the bucket box: a. Pack each of the buckets in their foam-wrap material, and place them into the bucket box.
- Page 95 Chapter 5: Maintenance and Troubleshooting VSpin User Guide Hinged piece of foam Accessories box VSpin shipping box 00147 VSpin packing and boxes 2 Bucket box 00147 8. Place the accessories box into the top piece of foam. 9. Close the VSpin shipping box, and seal it with packing tape.
- Page 96 Chapter 5: Maintenance and Troubleshooting VSpin User Guide...
-
Page 97: Chapter 6. Activex Controls
ActiveX Controls This chapter is needed by integrators who are integrating the VSpin into a third-party lab automation system. -
Page 98: About Activex Controls
Chapter 6: ActiveX Controls VSpin User Guide About ActiveX Controls Overview VSpin ActiveX controls allow you to integrate the VSpin into a third-party lab automation system. About ActiveX In the Visual Basic examples given in this chapter, assume that there is a VSpin control named VSpin1 on the current form. -
Page 99: Setting Up Properties
Chapter 6: ActiveX Controls VSpin User Guide Setting Up Properties Overview Properties are variables whose values can be set or retrieved by the container application. ControlPicture Description Retrieves a picture of the VSpin bitmap that can be used in the container application. -
Page 100: Setting Up Methods
Chapter 6: ActiveX Controls VSpin User Guide Setting Up Methods Overview Methods are functions that can be called by the container application. Initialize Description Initializes the VSpin. Initialize() should typically be the first method called in an application, and only needs to be called once for each VSpin in the system. After successful homing the InitializeComplete event is sent. - Page 101 Chapter 6: ActiveX Controls VSpin User Guide Visual Basic Visual C++ // Initialize to use “My Profile. ” VSpin1.Initialize “My Profile”, 1 m_VSpin.Initialize(“My Profile”,1); ‘Open control dialog // Show the main user dialog. VSpin1.ShowDiagsDialog 0 m_VSpin.ShowDiagsDialog(0); VSpin1.Close m_VSpin.Close(); // Close the profile. ShowDiagsDialog Description Displays the Diagnostics dialog.
- Page 102 Chapter 6: ActiveX Controls VSpin User Guide Argument Argument Range Description Type Name LONG time 1–2147483648 Number of seconds to spin. SHORT bucket_num 1–2 Which bucket to present after spin cycle finishes. Returns None Example Visual Basic Visual C++ VSpin1.Initialize “My // Initialize to use profile “My Profile.
- Page 103 Chapter 6: ActiveX Controls VSpin User Guide OpenDoor Description Opens the door to bucket_num. After successful opening, the OpenDoorComplete event is sent. Parameters Argument Argument Range Description Type Name SHORT bucket_num 1–2 Which bucket is presented. SHORT block Whether or not the function blocks. 0 = non-blocking 1 = blocking Returns...
-
Page 104: Setting Up Events
Chapter 6: ActiveX Controls VSpin User Guide Setting Up Events Overview Events are sent asynchronously by ActiveX controls to notify the container that a procedure has finished or an error has occurred. Consult Microsoft’s ActiveX documentation on how to handle events in your Visual C++ or Visual Basic code. -
Page 105: Index
Index VSpin User Guide Index You can also use the online help to search for information, which you can download from Note: www.velocity11.com connecting the serial communications cable connecting to acceleration, setting power source Access connecting to the computer Access and Access2 dimensions connection panel Access2 serial interface... - Page 106 Index VSpin User Guide hardware overview rear features home position rehoming after a spin rotational speed installation list of procedures safety features overview shipping the VSpin shutting down slider controls laboratory requirements software locking and unlocking the buckets control diagram locking and unlocking the door control page lubrication...
- Page 107 Index VSpin User Guide description of routine maintenance on dimensions shutting down disconnecting the air supply from turning on installing the buckets into unpacking mounting packing removing the buckets from workflow overview...
- Page 108 Index VSpin User Guide...
- Page 110 Agilent Technologies User Guide G5405-90001 Revision C, June 2013...