Table of Contents
Advertisement
Quick Links
Advertisement
Table of Contents

Related Manuals for Labconco SteamScrubber 4010010 Series

Summary of Contents for Labconco SteamScrubber 4010010 Series
- Page 1 Please read user’s manual before operating equipment Original Instructions LABCONCO CORPORATION 8811 Prospect Avenue Kansas City, MO 64132 (800) 821-5525 I +1 (816) 333-8811 User’s Manual ® ® SteamScrubber & FlaskScrubber Glassware Washers Register this product...
- Page 2 SteamScrubber Glassware Washers ® 2021—Present 4010010xx 4020010xx 4011010xx 4021010xx FlaskScrubber Glassware Washers ® 2021—Present 4110010xx 4120010xx 4111010xx 4121010xx...
- Page 3 Warranty Labconco Corporation provides a warranty to the original buyer for the repair or replacement of parts and reasonable labor as a result of normal and proper use of the equipment with compatible chemicals. Broken glassware and maintenance items, such as filters, gaskets, light bulbs, finishes and lubrication are not warranted.
-
Page 4: Table Of Contents
Table of Contents 1: INTRODUCTION About This Manual Contents Included 2: BEFORE YOU INSTALL Location Requirements Clearance Requirements Electrical Requirements Hot Water Requirements Purified Water Requirements Cold Water Requirements Drain Requirements 3: SAFETY PRECAUTIONS Typographical Conventions General Safety Precautions Safety Precautions for this Product 4: INSTALLATION ... - Page 5 Install the Leveling Feet: Hot Water Connection Pure Water Connection Drain Connection Electrical Connection Install the Washer Leveling the Washer Securing the Washer to the Countertop Testing Your Washer Running Diagnostics Verification High Elevation Installations 5: PERFORMANCE FEATURES FlaskScrubber SteamScrubber 6: CLEANWORKS™ OPERATING SYSTEM Control Panel Touch Screen Display ...
- Page 6 Start Program Program Progress Skip Segment Pause Cancel Chart Program Screen View a Program Edit a Program Create a new program Copy and Edit a Program Delete a Program Sorting Programs Log Data View Data File Chart Data File Export Data File Delete Data File Settings Language ...
- Page 7 Customize Data Logs Sensors Accessories Help About Software Update via USB Thumbdrive Diagnostics Resources Backup and Restore 7: USING YOUR GLASSWARE WASHER Washer Rack Configuration SteamScrubber Racks Removing or Adjusting the Upper Rack Remove the upper rack Replace the upper rack Raise the upper rack height Lower the upper rack height ...
- Page 8 Interrupting a Wash Cycle/Open Door Alarms Completing the Wash Cycle 8: MAINTAINING YOUR GLASSWARE WASHER Maintenance Safety Precautions Maintaining the Stainless Steel Interior Clean Washer Cycle Maintaining the Air Gap in Drain Maintaining the Water Fill Valve Cleaning the Sump Filter Screen Recommended Maintenance Schedule 9: ACCESSORIES & CONSUMABLES Rack Inserts for Labware Racks Rack Accessories Heater Cover Kit Liquid Detergent and Rinse Aid Dispensers ...
- Page 9 Consumables 10: TROUBLESHOOTING APPENDIX A: PARTS LIST APPENDIX B: DIMENSIONS Undercounter Exterior Dimensions Freestanding Exterior Dimensions SteamScrubber Interior Dimensions FlaskScrubber Interior Dimensions APPENDIX C: SPECIFICATIONS Programs Fill and Heat Specifications Environmental Conditions ...
-
Page 10: 1: Introduction
1: Introduction Congratulations on the purchase of a Labconco Laboratory Glassware Washer. The glassware washer is designed and manufactured to thoroughly clean your laboratory glassware. The washer offers many unique features. To take full advantage of them, please acquaint yourself with this manual and keep it handy for future reference. -
Page 11: 2: Before You Install
2: Before You Install Before you install the product, the installation site should be planned. Examine the location where you intend to install it. You must be certain that the area is level and of solid construction. In addition, a hot water source, a drain, a purified water source (if applicable), and an electrical supply must be located near the installation site. -
Page 12: Hot Water Requirements
An existing hot water supply may be used as the hot water source for your glassware washer. Labconco recommends the inlet water temperature to be greater than 120°F (49°C) to fully activate powdered detergents and raise the glassware temperature to achieve fast and complete drying. -
Page 13: Cold Water Requirements
0.9 gallon (3.4 liters) per minute to be delivered to the washer. Cold Water Requirements If the optional Cold Water Drain Kit (Labconco Catalog Number 4678400 for 115V or 4678401 for 230V) is installed, an existing cold water supply may be used to mix with the hot drain water. -
Page 14: Drain Requirements
Drain Requirements The drain hose, with a 0.57" (1.45 cm) ID is installed during manufacture. The drain hose provides a flexible coupling to the building drain piping and can be secured with a spring or band hose clamp. A band hose clamp is provided with the washer. Tubing or pipe, 5/8"... -
Page 15: 3: Safety Precautions
3: Safety Precautions Before unpacking, installing, operating, maintaining, or servicing this equipment, read the following safety warnings and precautions. Avant le déballage, l’installation, le fonctionnement, l’entretien ou la maintenance de cet équipement, lire les avertissements de sécurité et les précautions d’emploi. CAUTION –... - Page 16 BURN RISK (HIGH TEMPERATURE) – Air or components that will be very hot. Take care not to touch these defined areas. Failure to avoid these areas may result in moderate to severe injury. RISQUE DE BRÛLURE (TEMPÉRATURE ÉLEVÉE) – Air ambiant ou composant devenant très chaud.
- Page 17 LIFTING HAZARD – Do not lift or move this equipment without assistance. DANGER DE LEVAGE – Ne pas soulever ou déplacer cet équipement sans assistance. MAGNETIC FIELD IN USE – Magnets or magnetic field present. CHAMP MAGNETIQUE UTILISE – Présence d'aimants ou de champ magnétique.
-
Page 18: General Safety Precautions
General Safety Precautions Follow all the safety precautions described in this section. Before removing any panels which require a tool for removal, ALWAYS disconnect the main power cord or electrical supply. Failure to remove all electrical power before proceeding will result in moderate to serious injury, death, or damage to property. -
Page 19: Safety Precautions For This Product
Après le service, vérifiez l'état de sécurité d'utilisation avant d'utiliser le produit. Contactez le service après-vente des produits de Labconco pour toute question relative à la détermination de l'état de sécurité de ce produit. Verify protective earth ground continuity before using equipment. - Page 20 Pop-up should display on touch screen. Press yes. All functionality must stop. If the wash pump was running the door should unlock after 7 seconds. If this result is not achieved, do not use the product and contact Labconco’s Product Service Department immediately.
- Page 21 Labconco. Steam and surfaces within this washer and its contents may become hot enough to cause burns. La vap eur et les surfaces à ľintérieur de cette laveuse et son contenu peuvent devenir suffisamment chauds pour causer des brûlures.
-
Page 22: 4: Installation
4: Installation With the installation site properly prepared, you are ready to unpack and install the equipment. This section covers how to: Unpack and move the equipment Connect hot water supply Connect the pure water supply Connect the drain ... -
Page 23: Remove Racks
Note: United States Interstate Commerce Commission rules require that claims be filed with the freight carrier within fifteen (15) days of delivery. Do not return goods without the prior authorization of Labconco. Unauthorized returns will not be accepted. If the product was damaged in transit, you must file a claim directly with the freight carrier. -
Page 24: Check Shipment
Included). If you did not receive one or more of the components listed for your washer, or if any of the components are damaged, contact Labconco Corporation immediately for further instructions. After the washer components are verified, shut the door and move the washer near the installation site. -
Page 25: Hot Water Connection
Individual kit instructions are also included on the User’s Manual USB Thumb Drive (shipped with the washer) or online at Labconco.com. Hot Water Connection A hot water supply line must be connected to the Glassware Washer. -
Page 26: Pure Water Connection
Be careful not to kink the water supply tube when the washer is placed into its final location. If kinking occurs because of limited space between the back of the washer and the wall behind the counter, it may be necessary to use an elbow fitting at the washer’s valve connection. -
Page 27: Drain Connection
If you are not using purified water during the rinse cycles, you may disable the pure water system. Turning off the pure water system will not allow programing or operation of wash cycles with pure water. If your pure water supply is pressurized with sufficient flow, you may disable the purified water pump. - Page 28 Figure 4-4 DO NOT REMOVE DRAIN AIR GAP HOSE FROM HIGH LOOP HOSE CLAMPS DISHWASHER BRANCH TAILPIECE P-TRAP Figure 4-5 IF AN AIR GAP IS NOT USED, THE DRAIN LINE MUST BE DO NOT REMOVE DRAIN ELEVATED ABOVE THE WATER HOSE FROM HIGH LOOP LEVEL OF THE SINK.
-
Page 29: Electrical Connection
Electrical Connection Before continuing with this section, verify the power supply meets the requirements specified on the washer data plate (serial tag) and in Section 2: Electrical Requirements. Undercounter and Freestanding Washers should be hard-wired directly into a junction box. Verify compliance with all local electrical codes. - Page 30 Figure 4-6 ELECTRICAL JUNCTION BOX TOE KICK PANEL MOUNTING SCREWS CONNECT ELECTRICAL SUPPLY WIRES PER THE WIRING DIAGRAM MOUNTING SCREW ROUTE WIRING THROUGH BACK OF THE ELECTRICAL BOX AND SECURE WITH STRAIN RELIEF AS REQUIRED Connect the customer-supplied service wires to the appropriate wire nuts on the main wiring harness.
- Page 31 Figure 4-7 208/230v 3 PHASE SERVICE 120/208/230v 1 PHASE SERVICE CONNECT DIRECTLY TO TERMIAL BLOCK CONNECT TO WIRE NUTS 1 2 3 4 5 6 7 8 9 12 13 SERVICE L1 SERVICE L2 10 11 SERVICE PHASE 1 SERVICE PHASE 3 SERVICE SERVICE PHASE 2 SERVICE...
-
Page 32: Install The Washer
Carefully reinstall the electrical box making sure the slack from the cable does not interfere with the washer’s internal wiring, the pump fans or the drain valve linkage. Use cable ties to secure the wire as needed. Replace the toe kick panel. Install the Washer Once service lines are properly connected and the electrical service is off, the washer can be moved into to its final position. -
Page 33: Securing The Washer To The Countertop
Level the washer side-to-side by placing a short level on the inside top edge of the door. See the Fig. 4-8 for the placement of the level. Check the level front to back by placing a level on the lower rack rails. ... -
Page 34: Verification
The component selected will activate and test the low voltage components to verify their operation. Confirm that all tested components passed. Scroll up to Fill All The Way, select and confirm. The washer will fill to set point with hot water. -
Page 35: High Elevation Installations
If the washer passed all tests, continue to Section 5: Performance Features to become familiar with the features and controls of the glassware washer. Figure 4-9 HELP DIAGNOSTICS AUTO PASS/ TEST FAIL High Elevation Installations If the washer is installed at an elevation above 2000 meters (6561 feet), the maximum programmable temperature set point MUST be changed from 93 C to 88 C. -
Page 36: 5: Performance Features
5: Performance Features Labconco offers two distinct washer types for different glassware mixes, the FlaskScrubber for direct injection of water into narrow neck glassware and the SteamScrubber for standard wide mouth glassware, such as beakers. Each glassware washer is designed and manufactured to thoroughly clean your laboratory glassware and accessories. -
Page 37: Steamscrubber
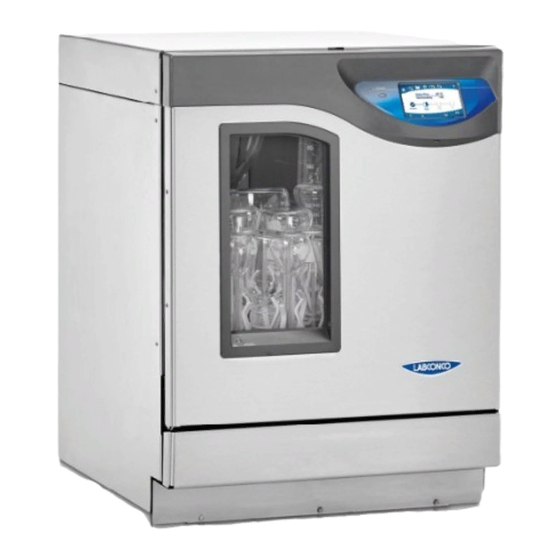
SteamScrubber Designed primarily to hold general glassware such as beakers, utensils, test tubes, Petri dishes. The SteamScrubber comes with an upper and lower standard open racks that accommodate a wide variety of baskets and inserts. The upper rack includes a third wash arm for increased coverage. -
Page 38: 6: Cleanworks™ Operating System
6: CleanWorks™ Operating System The Glassware Washer operating system provides clear status information on the touch screen and user control with the keypad (Fig. 6-1). Read this section along with Section 7: Using Your Glassware Washer to fully understand the features and controls of this product. -
Page 39: Initial Power Up
Initial Power Up When the glassware washer is initially connected to a power source, the On / Standby LED will begin flashing (1 flash per second). The display will remain OFF for the first 10 to 15 seconds, then animated graphics will appear. It will take approximately 90 seconds for the operating system to fully load. -
Page 40: Screen Indicator Bar
Screen Indicator Bar A thin blue indicator bar will appear under the icon of the menu screen that is currently being displayed. Program Selection Touch the Program Selection bar to display all programed cycles. If the list is long, swiping up/down will scroll the list. Touch to select the desired program. The Home Page will then display the Program Progress Indicator for the selected program. -
Page 41: Start Program
Start Program Touch the Start Program Icon (Fig. 6-2). A pop-up confirmation will display, which will show the selected program, the data acquisition rate, the printer format, and any programed time delay. Time delay settings can be modified from this screen by touching the time and selecting a new delay time. -
Page 42: Skip Segment
Skip Segment The Glassware washer has the ability to skip an active segment. Press and hold the Active Segment for 3 seconds to display the SKIP STEP? confirmation. Touch [OK] skip the active segment. If the skipped segment is a wash or rinse the glassware washer will perform a drain step and then continue with the next programed segment. -
Page 43: Program Screen
Program Screen The Program Screen allows the user to view the parameters of all programs. New user- defined programs can be created, edited or deleted from this screen. All factory programs are locked and cannot be edited, but any program can be copied, renamed and then modified. -
Page 44: View A Program
Figure 6-5 DOOR CUP / AUTO DOOR CUP / DETERGENT AUTO RINSE-AID SEGMENT TIME(min) TEMP (°C/°F) SOURCE (IF INSTALLED) (IF INSTALLED) Delay 0-720 Pre-Wash 0-40 25-93 / 77-200 Hot or Pure D-Cup* / 0-40 ml Steam 0-20 Wash 1 0-40 25-93 / 77-200 Hot or Pure D-Cup* / 0-40 ml... -
Page 45: Edit A Program
Edit a Program From the Program Screen touch the program you wish to edit; the line will be highlighted. If this is the correct program, press [Edit] (only allowed on an unlocked program). The program parameters will be displayed. See Fig. 6-7. Figure 6-7 Lock Add Segment... -
Page 46: Create A New Program
Create a new program 1. Touch [New]. A blank Program Screen will be displayed. 2. A default program name will be assigned. To change this name, touch the Program Name field and edit the name. Touch [OK] to save the new name. 3. -
Page 47: Copy And Edit A Program
Copy and Edit a Program 1. From the Program Screen highlight the program you wish to copy by touching the program line. 2. Touch [Copy]. An exact copy of the Program Screen will be displayed, except the Program Name field will default to a new name. 3. -
Page 48: Log Data
Log Data Depending on the model, the data log will collect up to 13 parameters for each program at a user-selected data rate. The Data Log Screen allows the user to sort and view up to six sets of the collected data. Although the Data Log Screen only allows viewing of up to six 6 parameters, all parameters are permanently stored with the Data Log, and will be viewable when the log file is downloaded and viewed on a computer. -
Page 49: View Data File
View Data File 1. From the Data Log Screen, highlight the Log to view by touching the Log name. 2. Touch [View]. 3. Six columns showing data from six user-defined data points will be displayed. 4. Swipe the screen up or down to scroll through the data. 5. -
Page 50: Chart Data File
Chart Data File 1. From the Data Log Screen, highlight the Log to chart by touching the Log name. 2. Touch [Chart]. 3. The chart will display the system temperature vs time. See Fig. 6-11. Conductivity is displayed, if a conductivity sensor is present (factory install) 4. -
Page 51: Export Data File
Multiple data logs can then be selected and exported at the same time. During multiple selection mode, the option to Select All will be available at the top of the Data Log Screen. Figure 6-12 Labconco Corporation Program: Intense FlaskScrubber Vantage Series Glassware Washer Elapsed Time Step... -
Page 52: Settings
Settings The Settings Screen allows the user to set or modify the systems settings. Figure 6-13 Language Choose from five languages: English, Spanish, French, German, Italian. Figure 6-14... -
Page 53: Security
Security A four-digit security code can be set that requires entry of a PIN to gain access to user- defined areas. The PIN will always be required to enter the Security screen. From the Settings Screen, touch the Security Icon, then enter the PIN (default is 1234) to gain access. -
Page 54: Calibration - Offsets
Calibration - Offsets Adjust the sensor readings to match a known standard(s). Current Reading (uncorrected) = raw sensor reading with no offset applied. Offset = Value that will be added to the Current Reading (uncorrected). The adjusted reading (uncorrected + offset) is the value reported on all screens outside of the Sensor Calibration screen. -
Page 55: Calibration - Setpoints
Calibration - Setpoints Adjust the maximum program segment temperature. Setpoint = maximum programmable temperature in any segment. 1. To adjust the Setpoint, touch Setpoint field of the desired value. Reference Fig. 6-17. A pop-up will display, which allows the maximum set point to be set. 2. -
Page 56: Time & Date
Time & Date Reference Fig. 6-18. Use the Time and Date screen to choose Clock Format (12 or 24 hour), and then either manually Set the Time and Date, or enable Auto Update, which (if washer is connected to a valid Ethernet port) will auto update the time and date. With Auto Update the following settings need to be entered: ... -
Page 57: Alerts
Alerts If a valid network connection has been established via the Ethernet accessory cable, and Network settings have been properly configured, (via the Network screen) alerts can be emailed to selected users, by entering the appropriate email address(es) and selecting the type of alerts to be sent to each email address. To enable e-mail alerts follow these instructions, and reference Fig. - Page 58 Once the SMTP Settings (for the washer’s e-mail address) have been correctly entered, and the notification e-mail address (e-mail address for who is getting notified) has been correctly entered and tested, the final step is to select the alerts to send the each e-mail address.
-
Page 59: Display
Display This screen provides settings for the display screen functionality. Reference Fig. 6-20. Brightness Slider – Adjust the display brightness by dragging the bar left/right. Touch Sounds – Touching the toggle between ON & OFF with enable or disable audible beeps when the screen is touched. Screen Timeout Function –... -
Page 60: Units
Units This screen allows the user to change the units of measure for various sensors. Touch the desired drop-down field, and make selection: Temperature – Select the desired units of measure: °C or °F Length (Depth) – Select the desired units of measure: millimeters or inches ... -
Page 61: Maintenance
Maintenance View the Lifetime hours for the Wash Pump and Dry Blower. Change the reminder frequency, or reset, the Sump Screen Cleaning interval. Reference Fig. 6-22. From the Settings Screen, touch the Maintenance Icon to view the Lifetime hours of the wash pump and dry blower. ... -
Page 62: Network
Network Modify Network connection specifications, if the optional Ethernet Connection Kit (Catalog Number 4678000) is installed. Refer to instruction sheet included with the Ethernet Connection Kit for additional information. The most common setting for network connectivity via an Ethernet port is DHCP Enabled. -
Page 63: Customize
Customize This screen allows the user to customize the washer’s name. The name is utilized on all Data Logs, and on any e-mail Alerts (if enabled and connected via Ethernet cable). If the optional Auto Detergent and/or Rinse Aid Dispense kits are installed, use the Customize Screen to customize the Auto Detergent and Rinse Aid names and abbreviations shown in the Program Screens. -
Page 64: Data Logs
Figure 6-24 Data Logs Modify the Data Acquisition Rate and the Log File Deletion settings. Touch the drop-down menu next to Data Acquisition Rate, and modify the rate among the intervals available: 10sec, 30sec, 60sec, 5min or 10min. Touch [OK]. ... -
Page 65: Sensors
Sensors This screen contains a list of all sensors currently installed on the Glassware Washer. The Sensors Screen displays the current sensor reading (including offsets) in the selected unit of measure. This screen is for viewing only (there are no selectable fields). Reference Fig. -
Page 66: Accessories
Accessories This screen contains the list of all accessories currently installed on the Glassware Washer. The screen displays the state (Enabled/Disabled) of each accessory. The Status can be switched ON or OFF to Enable or Disable the accessory. Accessories can be turned off, for instance if the washer is not connected to pure water, the Pure Water can be disabled. -
Page 67: Help
– Used to test washer operation/components after installation or should a problem occur. Resources – Provides QR codes for direct links to the Labconco Website for documentation or accessory/consumable information. Backup/Restore – Allows the user to export custom programs and/or data logs, as well as import custom programs. -
Page 68: About
Software Update via USB Thumbdrive To update the software via USB, you must first down-load the latest version, available at Labconco.com to a USB thumbdrive. From the About screen, touch [Update]. Insert the flash drive into the USB port located under the display screen. -
Page 69: Diagnostics
Diagnostics The Diagnostics Screen is used to test washer operation/components after installation or should a problem occur. Each electrical component can be turned on individually, or single operation can be tested, such as Fill or Drain. Reference Fig. 6-30. FILL ALL THE WAY: Fills to the set point level via the hot water supply ... -
Page 70: Resources
Figure 6-30 Resources The Resources Screen provides QR codes for a direct link to the Labconco website for documentation and/or accessory and consumable information. Reference Fig. 6-31. From the Help Screen, touch Resources. Using a smartphone with camera, scan the desired QR code and you will be directed to the appropriate information on labconco.com. -
Page 71: Backup And Restore
Backup and Restore Allows for the import/export of custom programs and/or data logs via USB thumbdrive. Either export user-created programs and/or data log files, or import user-created programs from another washer. Reference Fig. 6-32. Insert thumbdrive in the USB port below display. ... -
Page 72: 7: Using Your Glassware Washer
7: Using Your Glassware Washer This section details the functional features and proper techniques for safely and efficiently using the Glassware Washer. Washer Rack Configuration The FlaskScrubber and SteamScrubber are equipped with different rack configurations to accommodate the various types of laboratory glassware. In addition to the standard configuration of each model Glassware Washer, many optional racks and inserts are available to customize your washer to best suit your needs. -
Page 73: Removing Or Adjusting The Upper Rack
Removing or Adjusting the Upper Rack The upper rack is easily raised or lowered to accommodate different size glassware. The upper rack may also be removed from the Glassware Washer to facilitate loading the rack outside the washer or to allow very tall glassware to be loaded and washed on the lower rack. - Page 74 Figure 7-1 RACK BRACKET PIN SEATS RACK HANDLE SLIDE BRACKET DETAIL B UPPER RACK LOWER RACK...
-
Page 75: Flaskscrubber Spindle Rack
FlaskScrubber Spindle Rack The FlaskScrubber Glassware Washer is equipped with a lower spindle rack and glassware holders. The FlaskScrubber spindle rack is designed for narrow-necked glassware such as volumetric flasks, Erlenmeyer flasks, graduated cylinders, Kjeldahl flasks, test tubes, BOD bottles and digestion tubes. For versatility, two sizes of spindles are provided with the washer: (36) 0.25"... -
Page 76: Loading A Glassware Holder
Loading a Glassware Holder Press the glassware into the holder; the fingers should spring out and grip the glassware. It is normal for the clamps to deform if large glassware is inserted into the Holder and the washer is operated at high temperature. Do not use with glassware over 2.5 inches in diameter as damage to holder may occur. -
Page 77: Adding Detergent
Adding Detergent Low-foaming powder or liquid detergent formulated for labware washers, in conjunction with adequate hot water, is essential for clean glassware. Labconco LabSolutions Detergents are recommended. See Section 9: Accessories & Consumables ordering information. Use detergents sparingly, too much detergent, particularly with softened water may cause etching of the glassware. -
Page 78: Safety Reminders
replenished as needed. An alert will be displayed when Rinse Aid level is low and needs refilled. To fill the neutralizing acid dispenser, refer to the Fig. 7-3 above and follow the instructions below. 1. Raise the Rinse Aid Door on the Detergent Dispenser. 2. -
Page 79: Selecting And Starting A Wash Cycle
Selecting and Starting a Wash Cycle Before selecting a program, refer to Appendix C: Glassware Washer Specifications complete details on the factory programs and the options available for customizing programs. After you have loaded the washer, placed detergent and neutralizing acid or rinse aid in the dispenser, follow the instructions below to start the cycle. -
Page 80: Interrupting A Wash Cycle/Open Door
Interrupting a Wash Cycle/Open Door To temporarily pause a wash cycle, touch the Pause Icon and select [OK] to confirm. Reference Fig. 7-6. The wash cycle will stop. Press the Open button to open the door. When opening the door, if the internal temperature is greater than 50°C, a warning will display which requires confirmation before opening the door. -
Page 81: Alarms
Alarms Throughout a program cycle there are several abnormal events that could occur. The washer is programmed to monitor these occurrences and provide an alarm to alert the user. Information is displayed to identify the alarm situation, which may be Fatal or Non-Fatal to the running program. -
Page 82: 8: Maintaining Your Glassware Washer
8: Maintaining Your Glassware Washer This section details the maintenance required for optimal performance and operation of the Glassware Washer. Under normal operation, your Glassware Washer will require little routine maintenance to keep it functioning properly. Maintenance Safety Precautions The following safety precautions must be followed by all personnel maintaining the equipment. -
Page 83: Clean Washer Cycle
Use a sponge sprinkled with non-abrasive stainless steel cleaner to gently wipe the washer tank and door to remove surface discoloration caused by exposure to halogenated compounds or steel parts. In some cases, the finish may be slightly dulled by this action. If your water has a high mineral content, film or spots may develop on the washer interior. -
Page 84: Cleaning The Sump Filter Screen
5. Replace the screen and reassemble the valve connection. Verify the O-ring gasket is positioned in the groove in the fill valve body. Figure 8-1 WATER FILL VALVE SCREEN Cleaning the Sump Filter Screen If debris accumulates on the filter screen that is located in the washer sump the performance of the washer may be affected. - Page 85 6. When replacing the screen make sure the two tabs on the bottom of each side of the distribution tube slide under the metal plate in the back of the sump and the screen is seated in the sump emboss of the tank floor. 7.
-
Page 86: Recommended Maintenance Schedule
Recommended Maintenance Schedule Perform the maintenance operations described previously in this section in accordance with the frequency recommendations in Table 8-1. Failure to perform these maintenance operations may impair the performance of the Glassware Washer. Table 8-1 Maintenance Frequency Activity Weekly Monthly Annually... -
Page 87: 9: Accessories & Consumables
Rack Inserts for Labware All inserts can be used in all Labconco Glassware Washer models. Some require a Spindle Rack which are not included on the SteamScrubber models and must be purchased separately see Table 9-2. Catalog numbers are listed in Table 9-1 below. - Page 88 Catalog numbers of inserts that require a spindle rack are listed in Table 9-2. A lower spindle rack is included standard on FlaskScrubber models. Table 9-2 Insert Description Catalog Number Graduate Insert 4574600 Test Tube Insert, 10 – 13 mm tubes * 4574700 Test Tube Insert, 14 –...
-
Page 89: Racks
Racks Additional racks expand the capability of glassware washers and may be required when installing certain inserts in SteamScrubbers. Catalog numbers are listed in Table 9-3. Table 9-3 Rack Description Catalog Number Additional Information Upper Spindle Rack 4668500 36 Large Spindles, includes Slides Upper Spindle Rack 4668600 36 Large Spindles, excludes Slides... -
Page 90: Heater Cover Kit
Heater Cover Kit A heater cover provides a protective barrier between the washer chamber and the heater coils to prevent objects that may become dislodged during washing from contacting the heater coils. Catalog numbers are listed in Table 9-5 below. Table 9-5 Heater Cover Fits Catalog Number... -
Page 91: Mobile Washer Conversion Kit
Mobile Washer Conversion Kit This kit converts a freestanding glassware washer to a mobile model. It replaces permanent feet with casters and provides means to attach the water supply and drain to a sink. Catalog numbers are listed in Table 9-8 below. Table 9-8 Mobile Washer Conversion Kit Fits Catalog Number... -
Page 92: Printer Cable Kit
Printer Cable Kit This kit provides the capability to connect a printer to the glassware washer. The catalog number is listed in Table 9-11 below. Table 9-11 Printer Cable Kit Fits Catalog Number FlaskScrubber and SteamScrubber 4681300 Thermal Printer Paper 4683700 RO Storage Tank RO Storage Tanks provide additional storage of pressurized reverse osmosis water for... -
Page 93: Consumables
Consumables Consumables recommended for use in glassware washers are listed in Table 9-14. Table 9-14 Description Catalog Number LabSolutions Powder Detergent 10 lb. (4.5 kg) 4422000 LabSolutions Powder Detergent 27.5 lb. (12.5 kg) 4422100 LabSolutions Liquid Detergent 1 gal (3.8 L) 4522000 LabSolutions Neutralizing Acid Rinse 34 oz. -
Page 94: 10: Troubleshooting
This section details common troubleshooting for your Glassware Washer. Refer to the following table if your Glassware Washer fails to operate properly. If the suggested corrective actions do not solve your problem, contact Labconco Product Service for additional assistance. Possible... - Page 95 Fill level sensor Check Sensor should be 0 when Defective fill level Screen for empty and >75 full. sensor. readings Contact Labconco Product Service. Check output from Replace IOB. Defective controller. PCB to drain Contact Labconco valve and pump. Product Service.
- Page 96 Fail: Repair air leak. level sensor. when full. Pass: Recalibrate Check Sensor Defective fill level sensor. Contact Screen: <75mm sensor. Labconco Product when full. Service. Check output from Defective controller. IOB to both valves Fail: Replace IOB. and DI pump. Power Reset,...
- Page 97 Pass: Recalibrate or Check Sensor replace sensor. Defective fill sensor Screen: >125mm Contact Labconco when full. Product Service. Fail: If heaters are getting power and Heater failure. Heater/s Test: wires have Low Temp conductivity, replace heater/s Check resistance If open replace of heater for open heater.
- Page 98 Program will drain Segment Skipped by No action and begin next Step Skipped operator. required. programed segment. Check Sensor If no reading and Temperature Sensor Screen for temp wiring connected Temp Sensor failure. reading. replace sensor. Open buttons or display on control Microprocessor Perform "Factory panel inoperable or...
- Page 99 . Should be at least Check Wash 120°F (49°C). Poor washing Water is not hot water temperature Recommended results enough. setting temperature is 150°F (66°C). instructions in Check washer Improper loading Chapter 7 in this loading manual. Replace detergent Detergent too old or or change quantity amount wrong.
- Page 100 Tighten nuts or Check sump Tank sump gasket. replace o-ring. Do fasteners. not over tigten nut. Washer is not level. Check with level Adjust leveling feet. Loose connection at Tighten hose clamp. hose clamps. Check water Loose connection at Tighten or replace supply/ fill valve fill valve.
-
Page 102: Appendix A: Parts List
Appendix A: Parts List Table A-1 lists catalog numbers for service and replacement accessory components. Table A-1 Description Catalog Number LED Light Assembly * 4671400 Inlet Valve 12V 4670500 Drain Valve 115V 4586900P Drain Valve 230V 4586901P Drain Pump 115V 4663400P Drain Pump 230V 4663401P... -
Page 103: Appendix B: Dimensions
Appendix B: Dimensions The following figures provide product dimensions. All dimensions shown in inches (centimeters). Figure B-1 Undercounter Exterior Dimensions 24.1 50.2 (61.2) (127.5) 27.7 (70.4) 32.1 MIN (81.5) 36.0 MAX (91.4) Figure B-2 Freestanding Exterior Dimensions 50.2 24.3 (127.5) (61.7) 27.8 (70.6) -
Page 104: Steamscrubber Interior Dimensions
SteamScrubber Interior Dimensions Figure B-3 22.6 21.3 (54.1) (57.4) 8.8 OR 6.6 (22.4)or (16.8) 18.8 (47.7) 9.0 OR 11.2 (22.9) OR (28.4) FlaskScrubber Interior Dimensions Figure B-4 22.6 21.3 (67.6) (54.1) 18.1 (50.0) -
Page 105: Appendix C: Specifications
Appendix C: Specifications This Appendix contains specifications for the Glassware Washer, including estimated program times and water consumption. Programs Table C-1 FACTORY PROGRAMS: STEAMSCRUBBER, FLASKSCRUBBER Segment Pre-Wash Time Wash Time Temperature ( Tap Fill Pure Fill Det Disp Cup (Auto mL) Wash 1 Steam Time Wash Time... - Page 106 Segment Rinse Aid Cup ml (Auto mL) Rinse 3/8 Rinse Time Temperature ( Tap Fill Pure Fill Rinse Aid Cup ml (Auto mL) Rinse 4/8 Rinse Time Temperature ( Tap Fill Pure Fill Rinse Aid Cup ml (Auto mL) Rinse 5/8 Rinse Time Temperature ( Tap Fill...
- Page 107 Power Data Table C-2 Catalog Number Volts Phase Cycles Amps* 401x01000 401x01010 208/230 50/60 401x01013 208/230/400 50/60 21/19 402x01000 402x01010 208/230 50/60 402x01013 208/230/400 50/60 21/19 411x01000 411x01010 208/230 50/60 411x01013 208/230/400 50/60 21/19 412x01000 412x01010 208/230/400 50/60 412x01013 208/230/400 50/60 21/19 * Amperage values may vary depending upon supply voltage.
-
Page 108: Fill And Heat Specifications
Fill and Heat Specifications Minimum fill water temperature: 120°F (49°C) recommended Water consumption per fill: 3.4 gallons (13 L) Minimum tap feed water pressure: 20 psi (138 kPa) Maximum tap feed water pressure: 120 psi (827 kPa) ...
Need help?
Do you have a question about the SteamScrubber 4010010 Series and is the answer not in the manual?
Questions and answers
I have a washer that displays the diagnostics screen and will attempt to run the program but wont actually do anything. We cant even open the door.