Sign In
Upload
Manuals
Brands
Labconco Manuals
Dishwasher
SteamScrubber 4011010 Series
Labconco SteamScrubber 4011010 Series Manuals
Manuals and User Guides for Labconco SteamScrubber 4011010 Series. We have
2
Labconco SteamScrubber 4011010 Series manuals available for free PDF download: Technical Manual, User Manual
Labconco SteamScrubber 4011010 Series Technical Manual (139 pages)
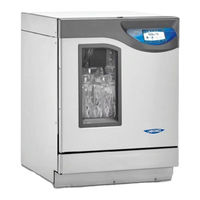
Glassware Washer
Brand:
Labconco
| Category:
Laboratory Equipment
| Size: 7 MB
Table of Contents
Table of Contents
4
1: Introduction
12
Contacting Labconco
12
About this Manual
12
Theory of Operation
13
2: Safety Precautions
14
Typographical Conventions
14
General Safety Precautions
17
Safety Precautions for this Product
18
3: Product Identification
21
Model and Serial Numbers
21
Serial Tag Location
21
Serial Tag Information
22
Primary Serial Tag
22
Secondary Serial Tag
22
About Screen
22
Configurator
23
4: Navigating the Glassware Washer
24
Control Panel
24
Touch Screen Display
24
Open Button
24
On / Standby LED Indicator
25
Initial Power up
25
Power Reset
25
Opening the Door with no Power
25
Control Panel Front Panel
25
Home Screen
26
Screen Indicator Bar
27
Program Selection
27
Start Program
27
Program Progress
28
Skip Segment
28
Pause
28
Cancel
28
Program Screen
29
Log Data
29
View Data File
30
Chart Data File
32
Export Data File
33
Delete Data File
33
Settings
34
Language
34
Security
35
Calibration - Offsets
36
Calibration - Setpoints
37
Time & Date
37
Alerts
38
Display
40
Units
41
Maintenance
42
Factory Maintenance
42
Factory Water Fill Level Calibration and Water Level Pressure Switch Test
43
Factory Auto Dispense Calibration
44
Reset Lifetime Counts to Zero
45
Factory Reset
45
Network
45
Customize
46
Data Logs
47
Sensors
48
Accessories
48
Help
49
About
50
Software Update Via USB Thumb Drive
50
Software Update Via Ethernet (Push)
50
Software Update Via the Ethernet (Pull)
51
Automatic Update Notification
51
Diagnostics
52
Resources
53
Backup and Restore
54
5: Maintenance
55
Maintenance Safety Precautions
55
Recommended Maintenance Schedule
56
Maintaining the Stainless-Steel Surfaces
56
Clean Washer Cycle
57
Maintaining the Air Gap in Drain
57
Maintaining the Water Fill Valve
57
Cleaning the Sump and Sump Filter Screen
58
Filter Screen
59
Thumb Screw
59
Replacing the HEPA Filter (PN4597300) (Flaskscrubber Vantage Only)
59
Maintaining the Conductivity Sensor (Flaskscrubber Vantage Only)
60
Cleaning the Conductivity Sensor
61
6: Modifications
62
Washer Rack Configuration
62
Installing the Upper Rack Slides
62
Remove the Upper Rack
63
Replace the Upper Rack
63
Raise the Upper Rack Height
64
Lower the Upper Rack Height
64
Flaskscrubber Spindle Rack
65
Liquid Detergent and Neutralizing Acid Rinse Dispense Systems
66
Installing the Liquid Detergent and Neutralizing Acid Rinse Dispense Systems
66
Using the Liquid Detergent and Neutralizing Acid Rinse Dispense Systems
69
Drain Water Cooling Kit
69
Installation of the Drain Water Cooling Kit
70
Printer Kit for Flaskscrubber and Steamscrubber
71
Installation of Printer Kit
71
Back Panel
71
Printer Connection
72
Installation of Vantage Printer Kit
72
Ethernet Connection
72
7: Diagnostics/Troubleshooting
73
Alarms
73
Running Diagnostics
74
Fill All-The-Way
75
Pure Fill All-The-Way
76
Drain All-The-Way
76
Wash Pump 1
77
Heater 1
77
Heater 2&3 (High Heat Models Only)
77
Drain Valve
77
Drain Pump
77
Manual/Auto Run Test
77
Fill Valve (Hot Tap)
78
DI Valve (Pure)
78
DI Pump (Pure)
78
Detergent Cup
78
Dry Blower
78
Electronic Cooling Fan
78
LED Light (if Equipped)
79
Printer (if Equipped)
79
Detergent Pump 1 (if Equipped)
79
Rinse Aid Pump 1 (if Equipped)
79
Door Latch
79
Diagnostic Report
79
Troubleshooting
80
8: Service Procedures
92
Maintenance Safety Precautions
92
Washer Layout and Landmarks
93
Removing the Toe Kick Panels, Service Panels and Door Assembly
94
Remove the Door Panels and Toe Kick Panels
95
Removing the Back and Side Service Panels (Undercounter Models)
96
Removing the Washer Top, Back, and Side Panels (Free-Standing Models)
96
Removing the Door Assembly
96
Replacing or Adjusting the Door Latch, Latch Striker, Hinge Pins
97
Adjusting the Striker
97
Replacing or Adjusting the Latch Assembly
97
Adjusting the Door Hinge Pins
98
Door Gasket Replacement
99
Replacing the Washer LED Light
100
Replacing the Detergent and Acid Rinse Dispenser
101
Replacing the Electronic Control Components
102
Replacing the Display Board Assembly
102
Cover Plate
103
Display Board Assembly
103
Ethernet Connector
104
Control Connectors
104
Replacing the Input/Output Board (IOB)
104
Replacing the Power Supply
105
Replacing Electronic Enclosure Components
106
Replacing Water Level Pressure Sensor
107
Replacing Water Level Pressure Switch
108
Replacing Heating Elements
109
Replacing Heater 1
109
Replacing Heater 2&3
110
Replacing Pumps
111
Replacing Wash Pump
111
Replacing the Wash Pump on a Flaskscrubber Vantage
113
Replacing the Pure Water Pump
113
Replacing the Drain Pump
114
Replacing the Vantage Detergent and Rinse Aid Pumps
114
Replacing Valves
115
Replacing Hot Tap or Pure Water Valves
115
Replacing Drain Valve
116
Replacing the Blower
116
Replacing the Dry Blower on a Steamscrubber
116
Replacing the Dry Blower on a Flaskscrubber
117
Replacing the Dry Blower on a Flaskscrubber Vantage
118
Cleaning or Replacing the Wash Arms
118
Replacing the Rack Valve Bushing
119
9: Accessories & Consumables
121
Rack Inserts for Labware
121
Racks
122
Rack Accessories
123
Heater Cover Kit
123
Liquid Detergent and Rinse Aid Dispensers
124
Cool Drain Water Kit
124
Base Stand
124
Printer Kit
125
RO Storage Tank
125
Scrubbermate Cart
125
Freestanding Conversion Kit
126
Consumables
126
Appendix A: Parts List
127
Parts List
128
Electrical Enclosure
130
Appendix B: Dimensions
131
Undercounter Exterior Dimensions
131
Freestanding Exterior Dimensions
131
Steamscrubber Interior Dimensions
132
Flaskscrubber Interior Dimensions
132
Flaskscrubber Vantage Exterior Dimensions
133
Flaskscrubber Vantage Interior Dimensions
133
Appendix C: Specifications
134
Programs
134
Power Data
136
Fill and Heat Specifications
136
Environmental Conditions
137
Appendix D: Wiring Diagrams
138
Advertisement
Labconco SteamScrubber 4011010 Series User Manual (108 pages)
Glassware Washers
Brand:
Labconco
| Category:
Dishwasher
| Size: 7 MB
Table of Contents
Table of Contents
4
1: Introduction
10
About this Manual
10
Contents Included
10
2: before You Install
11
Location Requirements
11
Clearance Requirements
11
Electrical Requirements
11
Hot Water Requirements
12
Purified Water Requirements
12
Cold Water Requirements
13
Drain Requirements
14
3: Safety Precautions
15
Typographical Conventions
15
General Safety Precautions
18
Safety Precautions for this Product
19
4: Installation
22
Unpacking
22
Remove Racks
23
Check Shipment
24
Remove the Shipping Skid
24
Install the Leveling Feet
24
Hot Water Connection
25
Pure Water Connection
26
Drain Connection
27
Electrical Connection
29
Install the Washer
32
Leveling the Washer
32
Securing the Washer to the Countertop
33
Testing Your Washer
33
Running Diagnostics
33
Verification
34
High Elevation Installations
35
5: Performance Features
36
Flaskscrubber
36
Steamscrubber
37
6: Cleanworks™ Operating System
38
Control Panel
38
Touch Screen Display
38
Open Button
38
On/Standby Led Indicator
38
Initial Power up
39
Home Screen
39
Menu Tabs
39
Screen Indicator Bar
40
Program Selection
40
Printer (Accessory)
40
Start Program
41
Program Progress
41
Skip Segment
42
Pause
42
Cancel
42
Chart
42
Program Screen
43
View a Program
44
Edit a Program
45
Create a New Program
46
Copy and Edit a Program
47
Delete a Program
47
Sorting Programs
47
Log Data
48
View Data File
49
Chart Data File
50
Export Data File
51
Delete Data File
51
Settings
52
Language
52
Security
53
Calibration - Offsets
54
Calibration - Setpoints
55
Time & Date
56
Alerts
57
Display
59
Units
60
Maintenance
61
Network
62
Customize
63
Data Logs
64
Sensors
65
Accessories
66
Help
67
About
68
Software Update Via USB Thumbdrive
68
Diagnostics
69
Resources
70
Backup and Restore
71
7: Using Your Glassware Washer
72
Washer Rack Configuration
72
Steamscrubber Racks
72
Removing or Adjusting the Upper Rack
73
Remove the Upper Rack
73
Replace the Upper Rack
73
Raise the Upper Rack Height
73
Lower the Upper Rack Height
73
Flaskscrubber Spindle Rack
75
Loading Glassware into the Flaskscrubber
75
Loading a Glassware Holder
76
Detergent Dispenser (Soap Cup)
76
Adding Detergent
77
Adding Neutralizing Acid
77
Safety Reminders
78
Selecting and Starting a Wash Cycle
79
Interrupting a Wash Cycle/Open Door
80
Alarms
81
Completing the Wash Cycle
81
8: Maintaining Your Glassware Washer
82
Maintenance Safety Precautions
82
Maintaining the Stainless Steel Interior
82
Clean Washer Cycle
83
Maintaining the Air Gap in Drain
83
Maintaining the Water Fill Valve
83
Cleaning the Sump Filter Screen
84
Recommended Maintenance Schedule
86
9: Accessories & Consumables
87
Rack Inserts for Labware
87
Racks
89
Rack Accessories
89
Heater Cover Kit
90
Liquid Detergent and Rinse Aid Dispensers
90
Cool Drain Water Kit
90
Mobile Washer Conversion Kit
91
Base Stand
91
Ethernet Kit
91
Printer Cable Kit
92
RO Storage Tank
92
Scrubbermate Cart
92
Consumables
93
10: Troubleshooting
94
Appendix A: Parts List
102
Appendix B: Dimensions
103
Undercounter Exterior Dimensions
103
Freestanding Exterior Dimensions
103
Steamscrubber Interior Dimensions
104
Flaskscrubber Interior Dimensions
104
Appendix C: Specifications
105
Programs
105
Fill and Heat Specifications
108
Environmental Conditions
108
Advertisement
Related Products
Labconco SteamScrubber 4010010 Series
Labconco SteamScrubber 4020010 Series
Labconco SteamScrubber 4021010 Series
Labconco FlaskScrubber 4110010 Series
Labconco FlaskScrubber 4120010 Series
Labconco FlaskScrubber 4111010 Series
Labconco FlaskScrubber 4121010 Series
Labconco FlaskScrubber Vantage 4540031
Labconco Protector 48640-01
Labconco Premier 4880000
Labconco Categories
Laboratory Equipment
Ventilation Hood
Dryer
Enclosure
Fan
More Labconco Manuals
Login
Sign In
OR
Sign in with Facebook
Sign in with Google
Upload manual
Upload from disk
Upload from URL