
Related Manuals for Dalsa Linea SWIR GigE Series


Summary of Contents for Dalsa Linea SWIR GigE Series
- Page 1 Linea SWIR GigE Camera User’s Manual InGaAs Line Scan Camera sensors | cameras | frame grabbers | processors | software | vision solutions June 12, 2020 P/N: 03-032-20280-02 www.teledynedalsa.com...
- Page 2 Notice © 2020 Teledyne Digital Imaging, Inc. Teledyne DALSA believes all information provided in this manual to be accurate and reliable. Teledyne DALSA assumes no responsibility for its use. We reserve the right to make changes to this information without notice. We prohibit the reproduction of this manual in whole or in part by any means without prior permission obtained from Teledyne DALSA.
-
Page 3: Contents
Contents LINEA SWIR GIGE SERIES OVERVIEW ESCRIPTION Linea SWIR GigE Application Advantages Linea SWIR GigE Firmware UMBERS AND OFTWARE EQUIREMENTS ISION APERA PPLICATION ESCRIPTION AMERA PECIFICATIONS ENSOR ERFORMANCE Sensor Specifications Spectral Responsivity PRNU Derating Curve CONNECTING THE LINEA SWIR GIGE CAMERA... - Page 4 GigE Vision Transport Layer Feature Descriptions Defaults for devicePacketResendBufferSize ISION ONTROL ATEGORY CCESS ONTROL ATEGORY File Access Control Feature Descriptions File Access via the CamExpert Tool (Quick Camera Firmware Upgrade) EVICE TREAMING EGISTERS • Contents Linea SWIR GigE Series Camera...
- Page 5 Lens Modeling Magnification and Resolution ENSOR ANDLING NSTRUCTIONS Electrostatic Discharge and the Sensor Protecting Against Dust, Oil and Scratches Cleaning the Sensor Window UGGEDIZED ABLE CCESSORIES Cable Manufactures Contact Information Cable Assembly G3-AIOC-BLUNT1M • Linea SWIR GigE Series Camera Contents...
- Page 6 Camera acquisition is good but acquisition rate is lower than expected Camera is functional, line rate is as expected, but image is black Other Problems or Issues Buffer Incomplete Error Message Issues with Cognex VisionPro CONTACT INFORMATION ALES NFORMATION ECHNICAL UPPORT • Contents Linea SWIR GigE Series Camera...
-
Page 7: Table Of Contents
Figure 48: Mechanical ....................92 Figure 49: Sensor Alignment Reference ..............93 Figure 50: I/O Connector 3D View ................94 Figure 51: I/O Connector ID ..................95 Figure 52: Samtec ISDF-05-D-M Mating Connector ............96 • Linea SWIR GigE Series Camera Contents... - Page 8 Figure 81: GigE Vision Device Status ................ 126 Figure 82: Network Configuration Tool ..............127 Figure 83: Network Configuration Tool – IP Configuration ..........128 Figure 84: Network Configuration Tool – Persistent IP ..........129 • Contents Linea SWIR GigE Series Camera...
-
Page 9: Figure 1: Camera Back View
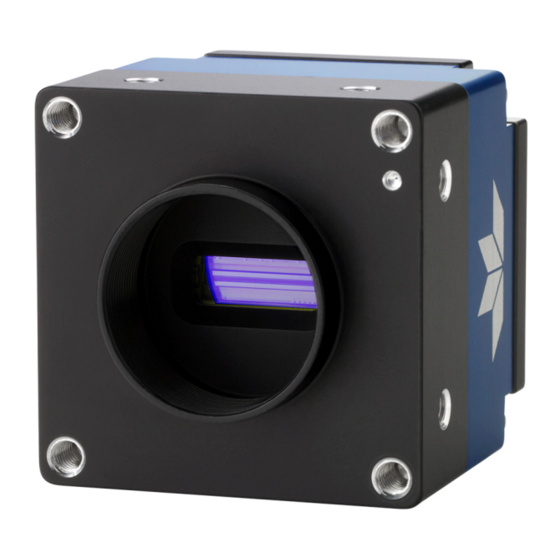
Teledyne DALSA’s SWIR GigE line scan camera features a cutting-edge InGaAs sensor in a compact package for a wide variety of machine vision applications. This high speed, high resolution camera is the first product in DALSA's SWIR family. The uncooled sensor delivers exceptional responsivity. The small pixels allow for a 512/1024 resolution sensor, which is capable of operating at 40 kHz. - Page 10 Teledyne DALSA’s Linea SWIR GigE camera firmware contains open source software. Information about these open source licenses and documentation are available at www.teledynedalsa.com. Firmware updates for Linea SWIR GigE are available for download from Teledyne DALSA’s web site [http://www.teledynedalsa.com/imaging/support/downloads/firmware/]. Choose Linea SWIR GigE...
-
Page 11: Figure 2: Sapera Application Diagram
GenApi module of the GenICam™ specification. For more information see: www.genicam.org. Teledyne DALSA’s GigE Vision Module provides a license free development platform for Teledyne DALSA GigE hardware or Sapera vision applications. Additionally supported are Sapera GigE Vision applications for third party hardware with the purchase of a GigE Vision Module license or Sapera processing SDK with a valid license. -
Page 12: Figure 48: Mechanical
Onboard Memory Minimum Reserved Data Buffer 6 MB Reserved Packet Resend Buffer 6 MB default (user defined feature) Total Memory 32 MB Back Focal Distance C-Mount 17.526 mm Mechanical Interface • Linea SWIR GigE Series Overview Linea SWIR GigE Series Camera... - Page 13 0 °C to 50 °C range at front plate Test Conditions Values measured using 12-bit, 1x Digital gain, Maximum sensor gain • Light source: 1050 nm • • Front plate temperature: 45 °C • Linea SWIR GigE Series Camera Linea SWIR GigE Series Overview...
-
Page 14: Figure 3: Spectral Responsivity
Wavelength [nm] EMVA1288 Release 3.1 compliant - 8nm bandwidth, 10nm steps, Savitzky-Golay filtering: 3rd EMVA1288 Release 3.1 compliant - 8nm bandwidth, 10nm steps, Savitzky-Golay filtering: 3rd Figure 3: Spectral Responsivity • Linea SWIR GigE Series Overview Linea SWIR GigE Series Camera... -
Page 15: Figure 4: Prnu Derating Curve
Pixel Response Non-Uniformity 2.00% Mean Change in Response 1.50% 1.00% 0.50% 0.00% -0.50% -1.00% 5000 10000 15000 20000 25000 30000 35000 40000 Line Rate (Lines/second) Figure 4: PRNU Derating Curve • Linea SWIR GigE Series Camera Linea SWIR GigE Series Overview... - Page 16 When installing a high performance Gigabit NIC adapter, review the NIC documentation concerning any specific driver required for your operating system. Note: Teledyne DALSA engineering has seen cases where a PCI Express bus Gigabit NIC has better overall performance than the same NIC hardware in PCI bus format.
-
Page 17: Figure 5: Rear View With Labels
A 10-pin I/O connector for camera power, plus trigger, strobe and general I/O signals. • Teledyne DALSA provides an optional breakout cable (see Cable Assembly G3-AIOC- BRKOUT2M). The following figure shows the 10-pin connector and LED location. See... -
Page 18: Figure 6: Status Led Colors
NIC. If the Linea SWIR GigE LED is blue but an application cannot see the camera, this indicates a network configuration problem. See the troubleshooting section in this manual. • Connecting the Linea SWIR GigE Camera Linea SWIR GigE Series Camera... -
Page 19: Figure 7: Status Led Color Sequence
SWIR GigE camera attempts to assign an IP address as follows. The IP configuration protocol sequence is: Persistent IP (if enabled) • DHCP (if a DHCP server is present such as the Teledyne DALSA Smart DHCP server) • • Link-Local Address (default enabled by factory) The factory defaults for the camera is Persistent IP disabled and DHCP enabled with LLA enabled as per the GigE Vision specification. - Page 20 Method 3: Mount the camera on a metallic platform with a good connection to earth ground. • Method 4: Avoid running the Ethernet cable near AC power lines. • • Connecting the Linea SWIR GigE Camera Linea SWIR GigE Series Camera...
- Page 21 Using Linea SWIR GigE with the Sapera API A Linea SWIR GigE camera installation with Teledyne DALSA’s Sapera API generally follows the sequence described below. Detailed installation instructions follow this overview. Network and Computer Overview The camera requires a computer with a GigE network adapter. See the previous section •...
-
Page 22: Figure 8: Gige Server Icon States
Refer to Sapera LT User’s Manual concerning application development with Sapera. Note: Teledyne DALSA’s Sapera CamExpert tool (used throughout this manual to describe Linea SWIR GigE Vision features) are installed with either the Sapera LT runtime or the Sapera LT development package. If Sapera application development is required, install Sapera (8.50 or later for all firmware support) as described... -
Page 23: Figure 9: Gige Server Tray Icon Menu
Adjust parameters of the Gigabit network interface controllers (NIC) during the installation to optimize its use with the Linea SWIR GigE. Note: Refer to Sapera LT user’s manual for optimization information. • Linea SWIR GigE Series Camera Using Linea SWIR GigE with the Sapera API... -
Page 24: Figure 11: Network Imaging Tool
Figure 11: Network Imaging Tool Run the tool from the Windows Start menu: Teledyne DALSA • Network Configuration Tool. Verify the camera appears as a child of the NIC card it is connected to. By default the camera is identified by its serial number if no user defined name has been assigned. - Page 25 GigE Vision Host Control feature “Image Timeout”. • Refer to Teledyne DALSA’s Network Imaging package manual if error messages are displayed in the Output Messages pane. Try increasing the value of the camera’s Interpacket Delay feature available from the GigE Vision Transport Layer Category group in CamExpert.
-
Page 26: Figure 12: Camexpert
Note: The factory programmed camera serial number and MAC address are not user changeable. When using CamExpert, multiple Linea SWIR GigE cameras on the network are seen as different "Linea-SWIR-GigE-xxx” devices. Non Teledyne DALSA cameras are labeled as “GigEVision Device”. Click on a device User Name to select it for control by CamExpert. - Page 27 CamExpert. Note: The examples shown may not entirely reflect the features and parameters available from the camera model and camera mode used in your application. • Linea SWIR GigE Series Camera Operational Reference...
-
Page 28: Figure 13: Camexpert Panes
• shown in an information bar above the image window. Control Buttons: The Display Pane includes CamExpert control buttons. • Output Pane: Displays messages from CamExpert or the GigE Vision driver. • • Operational Reference Linea SWIR GigE Series Camera... -
Page 29: Figure 14: Camexpert Control Buttons
View ∙ Parameters Options menu. Creating a Camera Configuration File in the Host When using Teledyne DALSA’s Sapera SDK – the CCF is created automatically via a save. • When using 3 party SDK application that supports GenAPI 2.4, the process is automatic. -
Page 30: Figure 15: Camera Information Features
Information is grouped specific to the individual GigE Vision camera. In this category, the number of features shown is identical whether the view is Beginner, Expert or Guru. Features listed in the description table but tagged as invisible are usually for Teledyne DALSA or third party software usage—not typically needed by end user applications. - Page 31 UserSet 4 UserSet4 Select the user defined Configuration space UserSet4 to save to or load from features settings previously saved by the user. • Linea SWIR GigE Series Camera Operational Reference...
- Page 32 UserSet1 Select UserSet1. UserSet2 UserSet2 Select UserSet2. DFNC Major Rev deviceDFNCVersionMajor Major revision of Dalsa Feature Naming Convention 1.00 which was used to create the device’s XML. (RO) DFNC Invisible DFNC Minor Rev deviceDFNCVersionMinor Minor revision of Dalsa Feature Naming Convention 1.00...
-
Page 33: Figure 16: Power Up Mode Menu
NOTE: To reset the camera to the factory configuration, select Factory Setting and click Load. To save a current camera configuration, select a User Set and click Save. Select a saved user set and click Load to restore a saved configuration. • Linea SWIR GigE Series Camera Operational Reference... -
Page 34: Figure 17: Sensor Control Features
Parameters in black are user set in CamExpert or programmable via an imaging application. Features listed in the description table but tagged as Invisible are usually for Teledyne DALSA or third party software usage—not typically needed by end user applications. - Page 35 Beginner Black Level Selector BlackLevelSelector Selects which tap is controlled by the Black Level 1.00 feature. Beginner Analog AnalogAll Black Level BlackLevel Black level (offset) in DN. 1.00 Expert • Linea SWIR GigE Series Camera Operational Reference...
- Page 36 • For External Trigger signals, the relationship between an external line trigger and the exposure period is only applicable while the external line trigger does not exceed the maximum allowable line rate. • Operational Reference Linea SWIR GigE Series Camera...
- Page 37 If the exposure trigger is edge rather than level, the delay should not exceed half the period. • If these parameters are violated, the camera ignores new transitions / pulses / triggers until • the specified delay has passed. • Linea SWIR GigE Series Camera Operational Reference...
-
Page 38: Figure 18: I/O Control Features
Parameters in black are user set in CamExpert or programmable via an imaging application. Features listed in the description table but tagged as Invisible are usually for Teledyne DALSA or third party software usage—not typically required by end user applications. - Page 39 The following table describes the features along with their view attribute and minimum camera firmware version required. Additionally the Device Version column will indicate which parameter is a member of the DALSA Features Naming Convention (indicated by DFNC), versus the GenICam Standard Features Naming Convention (SFNC not shown).
- Page 40 (phase A is ahead of phase B). Rotary Encoder Input A rotaryEncoderInputASource Rotary Encoder Input A Assignment 1.00 Source Expert DFNC Line 1 Line1 Line1 is assigned to the Rotary Encoder Input A. • Operational Reference Linea SWIR GigE Series Camera...
- Page 41 False / True False / True 1.00 Input Line Debouncing lineDebouncingPeriod Specifies the minimum delay before an input line Beginner Period voltage transition is recognized as a signal DFNC transition. • Linea SWIR GigE Series Camera Operational Reference...
- Page 42 Specifies that the trigger is considered valid on the rising edge of the source signal. Falling Edge FallingEdge Specifies that the trigger is considered valid on the falling edge of the source signal. • Operational Reference Linea SWIR GigE Series Camera...
- Page 43 Bit-0 is Line 3, Bit-1 is Line 4, This is applicable to OutputLineSource = Pulse On: where Software Cmd (for Pulse mode) or OutputLineSource = SoftwareControlled and OutputLineSoftwareLatchControl = Latch (for static states). • Linea SWIR GigE Series Camera Operational Reference...
-
Page 44: Figure 19: I/O Module Block Diagram
When running with virtual frames in continuous acquisition mode or in burst frame mode the extra trigger becomes the first trigger of the next frame, therefore an extra trigger is not required until the acquisition stops providing a seamless image without missed lines. • Operational Reference Linea SWIR GigE Series Camera... - Page 45 If the exposure trigger is edge rather than level, the delay should not exceed half the period. • In case these conditions are violated, the camera simply ignores any new transitions / pulses / • triggers until the specified delay has passed. • Linea SWIR GigE Series Camera Operational Reference...
-
Page 46: Figure 20: Counter And Timer Features
Parameters in black are user set in CamExpert or programmable via an imaging application. Features listed in the description table but tagged as Invisible are usually for Teledyne DALSA or third party software usage—not typically required by end user applications. - Page 47 The following Counter and Timer Block Diagram describes the parameters along with their view attributes and minimum camera firmware version required. The Device Version column indicates which parameter is a member of the DALSA Features Naming Convention (indicated by DFNC), versus the GenICam Standard Features Naming Convention (SFNC not shown).
- Page 48 Reset counter on rising edge of the selected signal. Falling Edge FallingEdge Reset counter on falling edge of the selected signal. Any Edge AnyEdge Reset counter on the falling or rising edge of the selected signal. • Operational Reference Linea SWIR GigE Series Camera...
- Page 49 DFNC Timer Duration timerDuration Sets the duration (in microseconds) of the timer 1.00 pulse. Expert DFNC Timer Value timerValue Reads the current value (in microseconds) of the 1.00 selected timer. Expert DFNC • Linea SWIR GigE Series Camera Operational Reference...
-
Page 50: Figure 21: Counter And Timer Block Diagram
CounterEnd Event Generated Counter Counter is CounterWait Counter is Counter Overflow IDLE Trigger Active Completed Counter is incrementing CounterStartSource=OFF CounterResetSource=OFF Counter Reset CMD CounterResetSource=Event CounterResetSource=CounterEnd Figure 22: Counter Start Source = OFF • Operational Reference Linea SWIR GigE Series Camera... -
Page 51: Figure 23: Counter Start Source = Counterend
CounterWait Counter is Counter Overflow IDLE Trigger Active Completed Counter is incrementing CounterResetSource=OFF CounterStartSource= EVENT or Signal (Edge Base ) Counter Reset CMD CounterResetSource=Event (Itself) CounterResetSource=Event CounterResetSource=CounterEnd(Itself) Figure 24: CounterStartSource = EVENT • Linea SWIR GigE Series Camera Operational Reference... -
Page 52: Figure 25: Counterstartsource = Signal
Note: Counters and events with trigger or exposure sources will, for each frame or multi-frame acquisition of Y lines, report Y+1 triggers. This is due to each trigger starting both a new acquisition and reading out the previous acquisition. See Trigger Overview for more details. • Operational Reference Linea SWIR GigE Series Camera... -
Page 53: Figure 27: Advanced Processing Features
Parameters in black are user controlled or programmable via an imaging application. Features listed in the description table but tagged as Invisible are required for Teledyne DALSA or third party software not by end user applications. Figure 27: Advanced Processing Features Advanced Processing Control Feature Descriptions The following table describes the features along with their view attribute and device version. - Page 54 (sensorPixelValue[x] - FFCOffset[x]) * FFCGain[x] Calibration Algorithm flatfieldCorrectionCalibrationAlgorith Specifies the Flat Field calibration algorithm to 1.00 use. Guru DFNC Basic Basic Direct calculation of coefficients based on average line values and target. • Operational Reference Linea SWIR GigE Series Camera...
- Page 55 Flat Field Algorithm flatfieldAlgorithmBufferFormat Flat Field Algorithm Buffer Format. 1.00 Buffer Format Invisible DFNC Mono 8 Mono8 Mono8. Flat Field Algorithm flatfieldAlgorithmBufferWidth Flat Field Algorithm Buffer Width. 1.00 Buffer Width Invisible DFNC • Linea SWIR GigE Series Camera Operational Reference...
- Page 56 Map 1”). The number of bad pixel entries is maximum 12. The following XML code sample forms the template for the user to build bad pixel maps. Note: Identifying bad pixels is the user’s discretion. Teledyne DALSA technical support can provide guidance.
- Page 57 (a shadow cast on the sensor by the focus helical or extension tubes) may also be present. The camera can compensate for edge roll-off and other optical non-uniformities by activating Flat Field Correction after the calibration procedure acquires correction coefficients. • Linea SWIR GigE Series Camera Operational Reference...
- Page 58 Flat Field Calibration due to higher gain values of the correction coefficients. Flat Field Calibration compensates up to an 8:1 variation. If the variation exceeds 8:1 the line profile after calibration will include pixels that are below un-calibrated peak level. • Operational Reference Linea SWIR GigE Series Camera...
- Page 59 Dirt or texture will generate variating in the image and incorporate it into the calibration • coefficients of the camera. Vertical stripes are visible while imaging after the target is removed. A moving target during calibration will average out any dirt or texture present. • • Linea SWIR GigE Series Camera Operational Reference...
-
Page 60: Figure 28: Black Acquisition Histogram
Figure 28: Black Acquisition Histogram Important: the average pixel value for the frame is close to black. Note: Sensors might show a much higher maximum pixel value due to one or more "hot pixels". • Operational Reference Linea SWIR GigE Series Camera... -
Page 61: Figure 29: Bright Acquisition Histogram
(pixels that do not react to light over the full dynamic range specified for that sensor). When the bright gray acquisition setup is complete, note the camera and lens iris position for repeatability in the future. • Linea SWIR GigE Series Camera Operational Reference... -
Page 62: Figure 30: Advanced Processing Features
Figure 30: Advanced Processing Features 1. Setting gain to 1x. Type or use the numeric up-down control to set the value to 1.0 as seen below. 2. Choose Off from Flat Field Correction Mode. • Operational Reference Linea SWIR GigE Series Camera... -
Page 63: Figure 31: Set Correction Mode Off
Figure 31: Set Correction Mode Off To evaluate a bare image use the line profile tool shown below. Line Profile Example Figure 32: Bare Image Line Profile of a White Uniform Object • Linea SWIR GigE Series Camera Operational Reference... -
Page 64: Figure 33: Sensor Control Category
If pixel outputs are zero, adjust the “Black level (in DN)” to increase Minimum value above zero. The Black Level adjustment is located in the Sensor Control category. Figure 33: Sensor Control category • Operational Reference Linea SWIR GigE Series Camera... -
Page 65: Figure 34 A Histogram Of A Black Image
Flat Field Calibration Sample Size. The 2048 option reduces calculating time; 4096 option returns result that is more accurate. Step 5: Press the Press… command in the Calibrate FPN menu • Linea SWIR GigE Series Camera Operational Reference... -
Page 66: Figure 36: Prnu Correction
Note: 200 DN is commonly used target in 8-bit output format. Step 4: Select 2048 4096 from Flat Field Calibration Sample Size drop-down menu. Step 5: Press the Press… command in Calibrate PRNU menu. Figure 36: PRNU Correction • Operational Reference Linea SWIR GigE Series Camera... -
Page 67: Figure 37: Line Profile Of A White Uniform Target After Prnu Calibration
Flat Field Correction Mode drop-down menu to apply the calibrated FPN and PRNU parameters. Refer to the figure below to verify the line profile. Figure 37: Line profile of a white uniform target after PRNU calibration. • Linea SWIR GigE Series Camera Operational Reference... -
Page 68: Figure 38: Cycling Preset
Parameters in black are user set in CamExpert or programmable via an imaging application Features listed in the description table but tagged as invisible are usually for Teledyne DALSA or third party software usage—not typically needed by end user applications. - Page 69 New features for a major device version release will be indicated by green text for easy identification. The Description column will indicate which feature is a member of DALSA’s Features Naming Convention (denoted by DFNC), versus the GenICam Standard Features Naming Convention (SFNC not shown). Display Name Feature &...
- Page 70 Active Active Sets the Output circuit to closed. Inactive Inactive Sets the Output circuit to open. V1.00 Exposure Delay cP_ExposureDelay Sets the exposure delay (in microseconds) for Expert the selected set. DFNC • Operational Reference Linea SWIR GigE Series Camera...
- Page 71 The CamExpert live display window will show a live grab where each virtual frame shows an • increase in exposure, and then returns to the first exposure cycling continuously until stopped by the user. • Linea SWIR GigE Series Camera Operational Reference...
-
Page 72: Figure 39: Image Format Features
Parameters in black are user set in CamExpert or programmable via an imaging application. Features listed in the description table but tagged as Invisible are usually for Teledyne DALSA or third party software usage — not typically required by end user applications. - Page 73 1.00 Test Image Selector TestPattern Selects the type of test image output by the Beginner camera. Image is from the camera sensor. • Linea SWIR GigE Series Camera Operational Reference...
-
Page 74: Figure 40: How Binning Works
Image data outside the AOI is discarded. First reduce the Width then adjust the offset (step size is 16 pixels). The step size may differ for different models. • Operational Reference Linea SWIR GigE Series Camera... -
Page 75: Figure 41: Acquisition And Transfer Features
Parameters in black are user set in CamExpert or programmable via an imaging application. Features listed in the description table but tagged as Invisible are usually for Teledyne DALSA or third party software usage — not typically required by end user applications. - Page 76 The following table describes the parameters along with the view attribute and minimum camera firmware version required. The Device Version column indicates which parameter is a member of DALSA’s Features Naming Convention (denoted by DFNC), versus the GenICam Standard Features Naming Convention (SFNC not shown).
- Page 77 Beginner configuration (Resolution, Pixel Format and the DFNC camera's internal bandwidth limitations). When TurboDrive is enabled, this value also takes the feature transferAverageBlockSize into account. • Linea SWIR GigE Series Camera Operational Reference...
- Page 78 Review the Troubleshooting section of this manual and then contact Technical Support for help in reviewing your camera setup. Note: The ImageLost event occurs when all buffer space is consumed. • Operational Reference Linea SWIR GigE Series Camera...
-
Page 79: Figure 42: Camera Circular Frame Buffer
Write FB 2 Index Host FB 3 Transfer Computer FB 4 Acquisition Transfer Read FB 5 Index Module FB 6 FB n Camera Transfer Module Camera Figure 42: Camera Circular Frame Buffer • Linea SWIR GigE Series Camera Operational Reference... - Page 80 IMAGE FORMAT CONTROL PixelFormat OffsetX OffsetY Width Height BinningHorizontal BinningVertical ACQUISITION AND TRANSFER CONTROL DeviceRegistersStreamingStart DeviceRegistersStreamingEnd EVENT CONTROL GIGE VISION TRANSPORT LAYER CONTROL GevSCPSPacketSize GIGE VISION HOST CONTROL InterPacketTimeout InterPacketTimeoutRaw ImageTimeout FILE ACCESS CONTROL • Operational Reference Linea SWIR GigE Series Camera...
-
Page 81: Figure 43: Gige Vision Transport Layer Features
Parameters in black are user set in CamExpert or programmable via an imaging application. Features listed in the description table but tagged as Invisible are usually for Teledyne DALSA or third party software usage—not typically required by end user applications. - Page 82 Primary Application IP GevPrimaryApplicationIPAddress Returns the IP address of the device Guru Address hosting the primary application. (RO) 1.00 Device Access Privilege deviceCCP Controls the device access privilege of an Guru Control application. • Operational Reference Linea SWIR GigE Series Camera...
- Page 83 Indicates the number of stream channels Invisible supported by this device (0 to 512). (RO) 1.00 Gev Supported Option GevSupportedOptionSelector Selects the GEV option to interrogate for Invisible Selector existing support. (RO) IPConfigurationLLA IPConfigurationDHCP IPConfigurationPersistentIP StreamChannelSourceSocket • Linea SWIR GigE Series Camera Operational Reference...
- Page 84 Windows itself does not provide a DHCP server function therefore a dedicated DHCP server is required. The DALSA Network Configuration Tool can be configured as a DHCP server on the NIC used for the GigE Vision network. (RO) 1.00...
- Page 85 Flag to indicate if features are locked Invisible during acquisition. Defaults for devicePacketResendBufferSize The default minimum for devicePacketResendBufferSize allows at least two maximum sized buffers. Resend buffers hold the last images transferred to host. • Linea SWIR GigE Series Camera Operational Reference...
- Page 86 The features allow optimizing the network configuration for maximum bandwidth. Settings for the parameters are highly dependent on the number of cameras connected to a NIC, the data rate of each camera and the trigger modes used. Teledyne DALSA’s Network Imaging Module User manual provides information on these features. • Operational Reference...
-
Page 87: Figure 44: File Access Features
Execute feature is called. Open Open Select the Open operation - executed by FileOperationExecute. Close Close Select the Close operation - executed by FileOperationExecute Read Read Select the Read operation - executed by FileOperationExecute. • Linea SWIR GigE Series Camera Operational Reference... - Page 88 Displays the file operation result. For Read or Write Guru operations, the number of successfully read/written bytes is returned. (RO) 1.00 File Size FileSize Represents the size of the selected file in bytes. Guru • Operational Reference Linea SWIR GigE Series Camera...
-
Page 89: Figure 45: File Access Menu
• Click the Browse button to open Windows Explorer. • Select the specific file to Upload. • Click the Upload (to Camera) button to execute the file transfer to the camera. • • Linea SWIR GigE Series Camera Operational Reference... - Page 90 1.00 Register Check DeviceRegistersCheck Performs an explicit register set validation for Invisible consistency. 1.00 Registers Valid DeviceRegistersValid States if the current register set is valid and Invisible consistent. • Operational Reference Linea SWIR GigE Series Camera...
- Page 91 DHCP server becomes available on the network, the NIC will get a DHCP assigned IP address for the connected device but connections on the LLA IP address will be lost. Teledyne DALSA’s Network Configuration Tool can enable Teledyne DALSA DHCP server on the NIC used for the GigE Vision network.
-
Page 92: Figure 46: Dhcp Network
The DHCP server is part of a managed network. Windows does not provide a DHCP server function therefore a dedicated DHCP server is required. Teledyne DALSA’s Network Configuration Tool can configure the Teledyne DALSA DHCP server on the NIC used for the GigE Vision network. -
Page 93: Figure 47: Persistent Ip Network
If the camera is connected to a network with a different subnet, it cannot be accessed. • Use Teledyne DALSA’s Network Configuration Tool to set a persistent IP address. Refer to Teledyne DALSA’s Network Imaging manual. An example of a Persistent IP address assignment on a class B network: •... - Page 94 Technical Specifications Camera Mechanical Specifications Figure 48: Mechanical • Technical Specifications Linea SWIR GigE Series Camera...
-
Page 95: Figure 49: Sensor Alignment Reference
Z variance not shown (+/-) X variance Figure 49: Sensor Alignment Reference Linea SWIR GigE ± 300 µm X variance ± 300 µm Y variance ± 500 µm Z variance ± 0.3° Theta variance • Linea SWIR GigE Series Camera Technical Specifications... -
Page 96: Figure 50: I/O Connector 3D View
See 10-Pin I/O Connector Pinout Details for the pinout number assignment (external view of the camera body connector). 3D View of the camera’s connector TFM-105-02-L-D-WT Figure 50: I/O Connector 3D View • Technical Specifications Linea SWIR GigE Series Camera... -
Page 97: Figure 51: I/O Connector Id
10-Pin I/O Connector Pinout Details Teledyne DALSA manufactures optional I/O cables as described in Optional Cable Accessories. Contact Sales for availability and pricing. Pin Number Linea SWIR Direction Definition PWR-GND Camera Power - Ground PWR-VCC Camera Power – DC +12 to +24 Volts... -
Page 98: Figure 52: Samtec Isdf-05-D-M Mating Connector
Samtec ISDF-05-D-S is not compatible with Linea SWIR GigE selected) 10way/dp/2308547?ost=ISDF-05-D-M Important: Samtec ISDF-05-D-M Mating Connector Used for customer built cables w/retention clips “.050” Tiger Eye™ Discrete Wire Socket Housing” Figure 52: Samtec ISDF-05-D-M Mating Connector • Technical Specifications Linea SWIR GigE Series Camera... - Page 99 Ground differences may cause camera faults or failure. Important: When using PoE, the camera’s I/O pin 1 (Camera Power – Ground) must not be • connected to I/O pin 3 (General Input Common Ground). • Linea SWIR GigE Series Camera Technical Specifications...
- Page 100 Input Current 7 mA 10.1 mA Input logic Low 0.8 Volts Input logic High 2.4 Volts Absolute Maximum Range before Possible Device Failure Absolute Ratings Minimum Maximum Input Voltage –36 Volts +36 Volts • Technical Specifications Linea SWIR GigE Series Camera...
- Page 101 ( Input 2 ) Imax = 10mA External Signal 2 ( Input 1 ) Imax = 10mA External Signal 1 (Common Ground) User IO Ground Figure 55: External Inputs with TTL Sources • Linea SWIR GigE Series Camera Technical Specifications...
- Page 102 Only one Input can be used ( Input 2 ) in this configuration. ( Input 1 ) ( Common Ground ) Imax = External Signal 10mA User IO Ground Figure 57: External Inputs with Common Emitter Sources • Technical Specifications Linea SWIR GigE Series Camera...
- Page 103 No output signal glitch on power-up or polarity reversal. • • Typical Operating Common Power Voltage Range: +3 V to 28 Vdc at 24 mA. Maximum Common Power Voltage Range: ±30 Vdc. • • Maximum Output Current: 36 mA • Linea SWIR GigE Series Camera Technical Specifications...
- Page 104 236 Ω 17.9 73 Ω 0.45 10.7 1.4 kΩ 0.62 18.1 24.9 677 Ω 0.54 19.9 316 Ω 11.5 2.88 kΩ 0.62 18.9 39.9 1.42 kΩ 0.63 10.9 27.1 810 Ω 0.79 17.4 • Technical Specifications Linea SWIR GigE Series Camera...
- Page 105 ( Output 1 ) = 30mA. Only one Output (1 or 2) can be used in this configuration. User IO Ground Figure 62: External Output with External Common Anode LED • Linea SWIR GigE Series Camera Technical Specifications...
- Page 106 ( Output 2 ) ( Output 1 ) ( User IO Power ) Set resistor (R) value to not exceed output current of = 30mA. User IO Ground Figure 63: External Outputs with External LEDs • Technical Specifications Linea SWIR GigE Series Camera...
- Page 107 (40 mi.) with SC, MT-RJ, or LC connector types. Important: The inclusion in this manual of GigE to fiber-optic converters does not guarantee they will meet specific application requirements or performance. The user must evaluate any supplemental Ethernet equipment. • Linea SWIR GigE Series Camera Technical Specifications...
- Page 108 EC & FCC Declarations of Conformity Figure 64: EC Declaration of Conformity • EC & FCC Declarations of Conformity Linea SWIR GigE Series Camera...
- Page 109 Figure 65: FCC Declaration of Conformity • Linea SWIR GigE Series Camera EC & FCC Declarations of Conformity...
- Page 110 This section provides an overview to selecting a lens for the Linea SWIR GigE camera. Mechanical drawings and Teledyne DALSA part numbers for available lens adapters is provided. Lens Mount and Lens Image Circle are important for correctly matching the lens to the sensor.
- Page 111 The wavelengths and intensity of light required to capture useful images vary per application. The image will be affected by speed, spectral characteristics, exposure time, light source characteristics, environmental and acquisition system specifics, etc. Teledyne DALSA’s Web Site introduces this potentially complicated issue. Click on Knowledge Center and select Application Notes and Technology Primers.
- Page 112 45 mm and requires that 100 mm in the object space correspond to each pixel in the image sensor. Using the preceding equation, the object distance must be 450 mm (0.450m). OD = • Additional Reference Information Linea SWIR GigE Series Camera...
- Page 113 When handling or storing the camera without a lens always install the protective cap. Note: When exposed to uniform illumination a scratched window will normally have brighter pixels adjacent to darker pixels. The location of these pixels will change with the angle of illumination. • Linea SWIR GigE Series Camera Additional Reference Information...
- Page 114 • contamination of the sensor window. DALSA recommends the use of an ionized air gun and compressor to blow off the sensor. • Use compressed air to blow off loose particles. This step alone is usually sufficient to clean the •...
- Page 115 Cable Assembly G3-AIOC-BLUNT1M Figure 68: Cable Assembly G3-AIOC-BLUNT1M • Linea SWIR GigE Series Camera Additional Reference Information...
- Page 116 Cable Assembly G3-AIOC-BLUNT2M Figure 69: Cable Assembly G3-AIOC-BLUNT2M • Additional Reference Information Linea SWIR GigE Series Camera...
- Page 117 Figure 70: Cable Assembly G3-AIOC-BLUNT2M Photo • Linea SWIR GigE Series Camera Additional Reference Information...
- Page 118 Cable Assembly G3-AIOC-BRKOUT2M Figure 71: Cable Assembly G3-AIOC-BRKOUT2M • Additional Reference Information Linea SWIR GigE Series Camera...
- Page 119 Figure 72: Cable Assembly G3-AIOC-BRKOUT2M Photo • Linea SWIR GigE Series Camera Additional Reference Information...
- Page 120 Linea Generic Power Supply with no I/O Figure 73: Linea Generic Power Supply • Additional Reference Information Linea SWIR GigE Series Camera...
- Page 121 These cable assemblies are available from our partner Components Express. Use the manufacturer’s part number shown on the cable assembly engineering drawing. Cable Assembly: Right-Angle I/O Bunt End Figure 74: Cable Assembly: Right-Angle I/O Bunt End • Linea SWIR GigE Series Camera Additional Reference Information...
- Page 122 Cable Assembly: Right-Angle I/O to Euro Block Figure 75: Cable Assembly: Right-Angle I/O to Euro Block • Additional Reference Information Linea SWIR GigE Series Camera...
- Page 123 IGE-25M (25meters) IGE-50M (50meters) IGE-100M (100meters) Components Express, Inc. (CEI) For Information 10330 Argonne Woods Drive, Suite 100 contact: Woodridge, IL 60517-4995 Phone: 630-257-0605 / 800.578.6695 (outside Illinois) Fax: 630-257-0603 http://www.componentsexpress.com/ • Linea SWIR GigE Series Camera Additional Reference Information...
- Page 124 Cable Assembly: Right-Angle Ethernet Figure 77: Cable Assembly: Right-Angle Ethernet • Additional Reference Information Linea SWIR GigE Series Camera...
- Page 125 Alysium-Tech has a cable series for constant movement applications such as cameras mounted on robotic arms or other locations where reliable interconnects are required. Contact Alysium-Tech directly for pricing. Figure 78: “Extreme Rating” HiFlex Ethernet Cable • Linea SWIR GigE Series Camera Additional Reference Information...
- Page 126 In multiple NIC systems where the NIC for the camera is using LLA mode, ensure that no other NIC is in or switches to LLA mode. It is preferable that the Teledyne DALSA DHCP server is enabled on the NIC used with the camera instead of using LLA mode, which prevents errors associated with multiple NIC ports.
- Page 127 When using multiple cameras connected to a VLAN Ethernet switch, confirm that all cameras • are on the same subnet setup on that switch. See Teledyne DALSA’s Network Imaging package manual for more information. If a camera installed with other GigE Vision cameras cannot connect properly with the NIC or •...
- Page 128 Carefully review the issues described in this Troubleshooting section. To aid Teledyne DALSA personnel when support is required the following should be included with the request for support. From the Start menu go to Programs • Dalsa • Sapera LT • Tools and run the Log Viewer •...
- Page 129 The camera is connected but a NIC IP is not assigned. The GigE server tray icon is displaying a warning. Open the Teledyne DALSA’s Network Configuration Tool from Window’s Start Menu. Figure 82: Network Configuration Tool Cameras displayed in red require a NIC IP. Click the camera name and Select ‘Device IP Configuration’...
- Page 130 Figure 83: Network Configuration Tool – IP Configuration Click ‘Automatic Recovery (Force IP)’ button. • Troubleshooting Linea SWIR GigE Series Camera...
- Page 131 It will automatically connect to the host PC if the IP address does not conflict with other network IP addresses. See Persistent IP section for more information. Note: Assigning two devices the same IP Address will cause conflicts. • Linea SWIR GigE Series Camera Troubleshooting...
- Page 132 Device Available with Operational Issues This section considers issues with cabling, Ethernet switches, multiple cameras and camera exposure. Information concerning the Teledyne DALSA Network Configuration Tool and other networking considerations are available in the Teledyne DALSA Network Imaging manual. Firmware Updates...
- Page 133 Use the Log Viewer tool (see point below) to check on packet resend conditions. • Run the Sapera Log Viewer: Start • Programs • Teledyne DALSA • Sapera LT • Tools • • Log Viewer. Start the camera acquisition program such as CamExpert. There should not be "packet resend"...
- Page 134 Verify Ethernet link speed. If the LAN connection is limited to 100 Mbps the line rate maximum • will be limited once the internal buffers are filled. Review the Teledyne DALSA Network Imaging manual for information on network optimizations. If using an external trigger, verify the trigger source rate and camera parameters such as •...
- Page 135 When the Cognex VisionPro package is uninstalled, the Linea SWIR GigE becomes unavailable within CamExpert due to the Cognex uninstaller removing GigE Vision components. This forces the user to reinstall Camera Expert until Cognex resolved this issue. • Linea SWIR GigE Series Camera Troubleshooting...
- Page 136 Submit any support question or request via our web site: Technical support form via our web page: Support requests for imaging product installations, Support requests for imaging applications http://www.teledynedalsa.com/mv/support Camera support information Product literature and driver updates • Contact Information Linea SWIR GigE Series Camera...
Need help?
Do you have a question about the Linea SWIR GigE Series and is the answer not in the manual?
Questions and answers