
Related Manuals for Dalsa Everywhereyoulook Linea Lite GigE


Summary of Contents for Dalsa Everywhereyoulook Linea Lite GigE
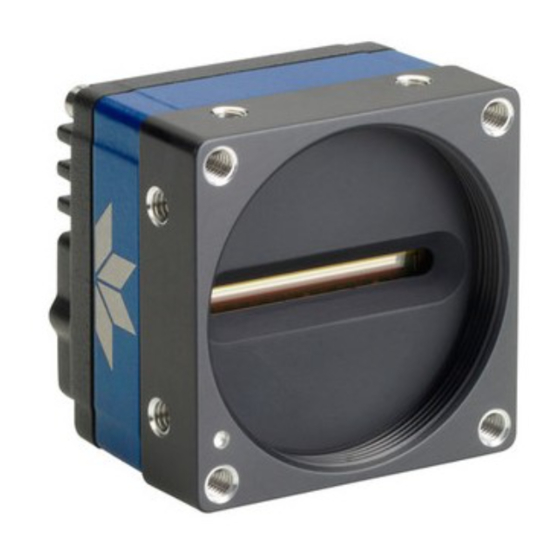
- Page 1 Linea Lite GigE Camera User’s Manual Monochrome CMOS Line Scan sensors | cameras | frame grabbers | processors | software | vision solutions P/N: 03-032-20294-01 www.teledynedalsa.com...
- Page 2 All information provided in this manual is believed to be accurate and reliable. No responsibility is assumed by Teledyne DALSA for its use. Teledyne DALSA reserves the right to make changes to this information without notice. Reproduction of this manual in whole or in part, by any means, is prohibited without prior permission having been obtained from Teledyne DALSA.
-
Page 3: Table Of Contents
Contents LINEA LITE GIGE SERIES OVERVIEW ............6 ....................6 ESCRIPTION GigE with TurboDrive ................6 Linea Lite GigE Application Advantages ............. 7 Linea Lite GigE Firmware ................. 7 ............8 UMBERS AND OFTWARE EQUIREMENTS ..............9 AMERA PECIFICATIONS VERVIEW Environmental Specifications .............. - Page 4 High Sensitivity Mode ................30 Enhance SNR Mode ................30 High Dynamic Range Mode ..............31 Multi-Row Sensor Output Mode .............. 31 Related GigE Vision Features ..............31 ............31 CQUIRING MAGES RIGGERING THE AMERA External Triggers .................. 32 Trigger Selector Details ................32 Trigger Source Types ...................
- Page 5 I/O C ................61 ONTROL ATEGORY I/O Control Feature Descriptions ............62 I/O Module Block Diagram ..............65 ............66 OUNTER AND IMER ONTROL ATEGORY Counter and Timer Control Feature Descriptions ........66 Counter and Timer Group Block Diagram ..........69 Example: Counter Start Source = OFF ............
- Page 6 Supported Network Configurations ............109 IP C ..............110 ONFIGURATION ETAILS Link-Local Address (LLA) ..............110 DHCP (Dynamic Host Configuration Protocol) ......... 111 Persistent IP ..................112 E ......113 PTIMIZING THE ETWORK DAPTER USED WITH INEA Running the Network Configuration Tool ..........113 PAUSE Frame Support ................
- Page 7 Camera acquisition is good but frame rate is lower than expected ....143 Camera is functional, line rate is as expected, but image is black ....143 Other Problems or Issues ..............144 Buffer Incomplete Error Message ..............144 Issues with Cognex VisionPro ..............144 CONTACT INFORMATION ................
-
Page 8: Linea Lite Gige Series Overview
If transfers are less than the camera maximum acquisition rate, camera memory will be used as a circular frame buffer. Refer to TurboDrive Primer on the Teledyne DALSA web site for more details. 6 • Linea Lite GigE Series Overview... -
Page 9: Linea Lite Gige Application Advantages
Teledyne DALSA website at www.teledynedalsa.com. Firmware updates for Linea Lite GigE are available for download from the Teledyne DALSA web site [http://www.teledynedalsa.com/imaging/support/downloads/firmware/]. Choose Linea Lite GigE Firmware from the available download sections, then choose the zip file download specific to your camera model. -
Page 10: Part Numbers And Software Requirements
Part Numbers and Software Requirements This manual covers the Linea Lite GigE models summarized below. New models are added to this manual as they are released by Teledyne DALSA. See Camera Specifications for details of each Linea Lite GigE model. -
Page 11: Camera Specifications Overview
Camera Specifications Overview Camera Controls Synchronization Modes Free running, External triggered, Software trigger through Ethernet Exposure Modes Programmable increments of 1 µs • minimum (in µs) is model specific • maximum is 3 ms Pulse controlled via Trigger pulse width Trigger Inputs RS422 (used as Line or Frame triggers) -
Page 12: Environmental Specifications
Environmental Specifications Environmental Specifications Performance Storage temperature range -20 °C to +80 °C Humidity (storage and operation) 15% to 85% relative, non-condensing MTBF (mean time between failures) > 100,000 hours, typical field operation Compliance, EMI Certifications Compliance Directives Standards ID Overview EN55032 (2012) Electromagnetic compatibility of multimedia... -
Page 13: Sensor Performance
Sensor Performance: The sensor description below provides a specification table and response graphics. The graph describes the sensor response to different wavelengths of light (excluding lens and light source characteristics). Visible light spans wavelengths between about 390 - 780 nm. Wavelengths below 390 nm are termed ultra-violet while those above 780 nm are termed infra-red. -
Page 14: Spectral Responsivity
Spectral Responsivity Effective Quantum Efficiency The quantum efficiency graph describes the fraction of photons at each wavelength that contribute charge to the pixel. 12 • Linea Lite GigE Series Overview Linea Lite GigE Series Camera... -
Page 15: Computer Requirements For Linea Lite Gige Cameras
Linea Lite GigE, especially when on battery power. Thorough testing is required with any laptop computer to determine the maximum frame rate possible (refer to the Teledyne DALSA Network Imaging Package for Sapera LT Optimization Guide, available through the Start menu under Teledyne DALSA). -
Page 16: Ethernet Switch Requirements
When using VLAN groups, the Linea Lite GigE and controlling computer must be in the same group (refer to the Teledyne DALSA Network Imaging Package for Sapera LT Optimization Guide, available through the Start menu under Teledyne DALSA. -
Page 17: Gige Network Adapter Overview
Linea Lite connects to a computer’s Gigabit Network Adapter (NIC). If the computer is already connected to a network, the computer requires a second network adapter. Refer to the Teledyne DALSA Network Imaging Package for Sapera LT Optimization Guide, available through the Start menu under Teledyne DALSA, for information general networking and Sapera LT specific configuration settings. -
Page 18: Power Over Ethernet (Poe) Support
Power over Ethernet (PoE) Support • The Linea Lite requires a PoE Class 0 or Class 2 (or greater) power source for the network if not using a separate external power source connected to pins 10 & 15 of the camera’s I/O Connector. -
Page 19: Gige Vision Sapera Application Description
GenICam™ specification. For more information see www.genicam.org. The Teledyne DALSA GigE Vision Module provides a license free development platform for Teledyne DALSA GigE hardware or Sapera vision applications. Additionally supported are Sapera GigE Vision applications for third party hardware with the purchase of a GigE Vision Module license, or the Sapera processing SDK with a valid license. -
Page 20: Linea Lite Gige Camera Quick Start
Refer to Sapera LT User’s Manual concerning application development with Sapera. Note: The Teledyne DALSA Sapera CamExpert tool (used throughout this manual to describe Linea Lite GigE Vision features) is installed with either the Sapera LT runtime or the Sapera LT development package. If Sapera application development is required, install Sapera (8.00 or later for all firmware support) as described in the previous... -
Page 21: Conecting The Linea Lite Gige Camera
Conecting the Linea Lite GigE Camera Connecting a Linea Lite GigE to a network system is independent of whether the Teledyne DALSA Sapera LT package or a third-party GigE Vision development package is used. Steps for Camera Startup • Apply power to the camera: see... -
Page 22: Connectors
RJ45 Ethernet Cables for secure cables. • A HD15 connector for camera power, trigger, strobe and general I/O signals. Teledyne DALSA provides an optional breakout cable; see Mating GPIO Cable Assembly. Refer to the HD15 type Connector Details section for pinout specifications. -
Page 23: Preventing Operational Faults Due To Esd
ESD events. • Method 2: Using Power over Ethernet (PoE), Teledyne DALSA strongly recommends a shielded Ethernet cable to provide a ground connection from the controlling computer / power supply to the Linea Lite. PoE requires a powered computer NIC, a powered Ethernet switch or an Ethernet power injector. -
Page 24: Gige Server Status
GigE Server Status Once the Linea Lite GigE is assigned an IP address (its Status LED is steady blue) the GigE server tray icon will not have a red X through it, indicating that the device was found. It might take a few seconds for the GigE Server to refresh its state after the camera has obtained an IP address. -
Page 25: Camera Status Led Indicator
Camera Status LED Indicator The camera is equipped with one multicolor LED to display the operational status of the camera. When more than one condition is active, the LED color indicates the condition with the highest priority (such as an acquisition in progress has more priority than a valid IP address assignment). Once the Linea Lite GigE is connected to a network, the Status LED will turn to steady blue when the IP address is assigned. -
Page 26: Quick Startup With Camexpert
Quick Startup with CamExpert If a Linea Lite GigE camera is connected to a Gigabit network adapter on a host computer it should automatically be detected. Refer to the steps below or section Using CamExpert with Linea Lite GigE Cameras for more details. •... -
Page 27: Camera Firmware Updates
Note: CamExpert cannot grab at high virtual frame rates since it generates an interrupt for each virtual video frame; the Sapera Grab Demo application is better suited for high frame rates. Camera Firmware Updates Firmware is uploaded using the File Access Control features in Sapera CamExpert;... -
Page 28: Using Camexpert With Linea Lite Gige Cameras
Using CamExpert with Linea Lite GigE Cameras The Sapera CamExpert tool is the interfacing tool for GigE Vision cameras supported by the Sapera library and hardware. CamExpert allows a user to test most features and operating modes. Additionally, CamExpert saves the Linea Lite GigE user settings configuration to the camera or saves multiple configurations as individual camera parameter files on the host system (*.ccf). -
Page 29: Camexpert Panes
CamExpert Panes The various areas of the CamExpert tool are described in the figure below. GigE Vision device Categories and Parameter features are displayed as per the device’s XML description file. The number of parameters shown is dependent on the View mode selected (Beginner, Expert, Guru – see description below). -
Page 30: Camexpert View Parameters Option
Visibility level from the View ∙ Parameters Options menu. Creating a Camera Configuration File in the Host • When using the Teledyne DALSA Sapera SDK – the CCF is created automatically via a save. • When using a 3 party SDK application, if that SDK supports GenAPI 2.4, then the process is... -
Page 31: Camera Performance And Features
Camera Performance and Features This section is intended to be an introduction to the features of the camera, including explanations of how to use them effectively. Overview of Time Delay Integration (TDI) A basic line scan sensor is a single row of pixels, used to build up an image of a moving object. An image is created by stacking these pixel rows on top of each other. -
Page 32: Single Row Mode
4095 Object Line 1 Charge Line 2 movement accumulation (7um) The effective integration time is: 1/Line rate * Number of TDI Stages (2 for Linea Lite) Light from the object is collected into the same charge packet, resulting in a higher-contrast picture. -
Page 33: High Dynamic Range Mode
High Dynamic Range Mode In High Dynamic Range Mode, the TDI Stages feature set to 2, each line uses a different exposure time; the short and long exposures are combined as 1 output 1 line, to see details in bright and dark areas at the same. -
Page 34: External Triggers
CamExpert. An increase from default may correct errors with NIC interfaces that do not have adequate performance. For more information, refer to the Teledyne DALSA Network Imaging Package for Sapera LT Optimization Guide, available through the Start menu under Teledyne DALSA. -
Page 35: Line Rate & Synchronization
With TDI Mode is TDI OFF and Line Input as the trigger source, the width of the trigger signal can be used to control the exposure time by setting the Exposure Mode feature, available in the Sensor Control category, to Trigger Width. Line Rate &... -
Page 36: Output Line Details
Output Line Details The general purpose output line signals either dedicated or shared with inputs. See HD15 type Connector Details for connector pinout and electrical information. • Feature Set: LineInverter (RW), outputLineSource (RW), outputLinePulseDelay (RW), outputLinePulseDuration (RW), outputLineValue (RW), outputLineSoftwareCmd (RW), LineSelector (RW), LineFormat... -
Page 37: Gain And Black Level Control Details
Gain and Black Level Control Details The Linea Lite GigE camera provides digital gain and Black Level adjustments. The gain and Black Level controls can make small compensations to the acquisition in situations where lighting varies and the lens iris cannot be easily adjusted. Optimal gain and Black Level adjustments maximizes the Linea Lite GigE dynamic range for individual imaging situations. -
Page 38: Binning
Binning Binning is the process where the charge on two (or more) adjacent pixels is combined. This results in increased light sensitivity since there is twice the sensor area to capture photons. The sensor spatial resolution is reduced but the improved low-light sensitivity plus lower signal-noise ratio may solve a difficult imaging situation. -
Page 39: Lookup Table (Lut)
Lookup Table (LUT) The Linea Lite cameras include a user programmable LUT table as a component of its embedded processing features. A LUT is used for operations such as gamma adjustments or luminance adjustments. The camera LUT tables are dependent on the sensor (per pixel – see feature LUT Size) and is illustrated in the following figure. -
Page 40: Gamma Correction Factor
Gamma Correction Factor The following graphic shows LUT output data as a function of the gamma correction factor programmed by the user. A 12-bit LUT is shown as an example and importantly the graphic is not to scale. • As Gamma Correction is reduced in value to the minimum allowed, the nonlinear output of acquisition data through the LUT effectively boosts low value data. -
Page 41: Flat Field Correction
Flat Field Correction The Flat Field Correction function (FFC) consists of using two coefficients per pixel which correct the gain and offset of the corresponding pixel. These corrections compensate for Photo-Response Non- Uniformity (PRNU) and Fixed Pattern Noise (FPN) unique to each camera sensor. With CMOS sensors, it is important to perform FFC calibration under the same operating conditions that the camera is to use, otherwise sensor variations (over temperature and exposure) will make the FFC calibration invalid. -
Page 42: Information On The Sapera Flat Field Coefficients File
Information on the Sapera Flat Field Coefficients File The Flat Field Coefficients File is a standard 16-bit TIFF file for both 8-bit and 12-bit acquisition modes. If the Flat Field calibration is made while using a 12-bit buffer, the user Flat Field Calibration coefficients file is applicable to both 12-bit and 8-bit acquisitions. -
Page 43: Performing An Ffc Setup Via Sapera Camexpert
Performing an FFC Setup via Sapera CamExpert The Sapera LT CamExpert tool provides an easy GUI based method for a user to perform a Flat Field Calibration. The process first requires the user to plan acquisitions in dark and bright conditions, followed by the FFC process itself. - Page 44 Verify a Bright Acquisition Point the camera at a diffused light source or evenly lit white wall with no shadows falling on it. Click the grab button, followed by ‘histogram’ in the drop-down menu. Use the lens iris to adjust for a bright gray approximately pixel value 200 (for 8-bit pixels).
-
Page 45: Flat Field Correction Calibration
Flat Field Correction Calibration (FFC) contains FPN (Fixed Pattern Noise) and PRNU (Photon Response non-uniformity) corrections. Note: Before performing a FFC, Teledyne DALSA recommends evaluating the “bare image” characteristics, which determine the quality of FFC, applied to the image. A bare image is without gain applied (that is, all gains are set to 1). - Page 46 To evaluate a bare image of a uniform white target scene use the line profile tool shown below. A line profile is mainly determined by two factors: Flatness and Height 1) Flatness: The Line profile represents a Flat Field measurement. Due to lens-shading effect, light falls-off near the edges and results in lower output.
-
Page 47: Fpn Correction
FPN Correction In general, factory FPN correction is sufficient for most applications. However, if a new FPN correction is required a user set FPN correction can be applied. To perform FPN Correction: Step 1. Cover the lens (place the sensor in dark). Step 2. -
Page 48: Prnu Correction
PRNU Correction Step 1: Apply illumination and place a white flat target in the location where the real object will be. Ideally, you would use a professional target. For convenience, you can use white paper as the target. The result of using paper may produce grain effect — where visible vertical lines show up in grabbed images. - Page 49 Step 8. To load this user set when resetting or powering on the camera, use the Power-up Configuration dialog. Click Setting… Power-up Configuration feature, in Camera Information category. Linea Lite GigE Series Camera Camera Performance and Features • 47...
- Page 50 In the Power-up Configuration dialog box select one of four UserSets for both Camera Power-up configuration and Load / Save configuration, and press the Save button. This ensures that the camera loads the saved parameters the next time the camera is turned on. 48 •...
-
Page 51: Camera Firmware Updates
Camera Firmware Updates In the File Access Control category, click Setting to open File Access Control dialog. • Type: select the file type to upload to the camera. • File selector: choose Firmware. • Click Browse… to open Windows Explorer. •... -
Page 52: Internal Test Image Generator
Internal Test Image Generator The camera includes a number of internal test patterns, which confirm Ethernet connection and driver installation without the need for a camera lens or proper lighting. The patterns are subject to camera processing and Binning functions. Use CamExpert to enable and select any test pattern from the Test Image Selector feature drop... -
Page 53: Grey Diagonal Ramp Moving
When using CamExpert, multiple Linea Lite GigE cameras on the network are seen as different "Linea2-2-GigE-4K-xxx” devices. Non-Teledyne DALSA cameras are labeled as “GigEVision Device”. Click on a device User Name to select it for control by CamExpert. An imaging application uses any one of these attributes to identify a camera: its IP address, MAC address, serial number or User Name. -
Page 54: Saving & Restoring Camera Setup Configurations
Saving & Restoring Camera Setup Configurations A user system may use multiple illumination, resolution, and responsivity configurations in order to cover the different types of imaging it performs. The camera includes 4 user sets where camera setup information can be saved to and restored from—either at power up, or dynamically during operation. -
Page 55: Operational Reference
Parameters in black are user set in CamExpert or programmable via an imaging application. Features listed in the description table but tagged as Invisible are usually for Teledyne DALSA or third party software usage—not typically needed by end user applications. -
Page 56: Camera Information Category
Camera Information Category Camera information can be retrieved via a controlling application. Parameters such as camera model, firmware version, etc. are read to uniquely identify the connected Linea Lite GigE device. These features are typically read-only. GigE Vision applications retrieve this information to identify the camera along with its characteristics. - Page 57 Device Built-In Self Test deviceBISTStatus Return the status of the device Built-In Self test. Possible Beginner Status return values are device-specific. DFNC Passed Passed No failure detected Firmware update failed FirmwareUpdateFailure Last firmware update operation failed. Sensor Initialization SensorFailure There was an error initializing the sensor; the camera may Failure not be able to capture images.
- Page 58 Select the user defined configuration as the Power-up Configuration. UserSet4 UserSet4 DFNC Major Rev deviceDFNCVersionMajor Major revision of Dalsa Feature Naming Convention which Invisible was used to create the device’s XML. (RO) DFNC DFNC Minor Rev deviceDFNCVersionMinor Minor revision of Dalsa Feature Naming Convention which Invisible was used to create the device’s XML.
-
Page 59: Sensor Control Category
Sensor Control Category The Linea Lite GigE sensor controls, as shown by CamExpert, groups sensor specific features. This group includes controls for line rate, exposure time, etc. Sensor Control Feature Descriptions Display Name Feature & Values Description Standard & View Device Scan Type DeviceScanType Scan type of the sensor. - Page 60 sensorTDIModeSelection Selects how to combine the rows for processing. Beginner Sensor TDI Mode DFNC Single Row Mode TdiOff A single sensor row is output per line trigger. Multiple sensor rows are synchronized and summed High Sensitivity Mode TdiSum together in the camera to increase the camera responsivity.
-
Page 61: Exposure Controls Details
Gain Gain Sets the selected gain as an amplification factor Beginner applied to the image. Valid range is 1 - 10, in increments of 0.0078125. Selects which tap is controlled by the Black Level Black Level Selector BlackLevelSelector Beginner feature. Digital DigitalAll Digital black level offset. -
Page 62: External Trigger Width Exposure
External Trigger Width Exposure An alternative external trigger mode allows the external signal width to control the exposure duration (feature ExposureMode = TriggerWidth), as illustrated in the following graphic. • Line readout time remains similar to programmable exposure modes. 60 • Operational Reference Linea Lite GigE Series Camera... -
Page 63: I/O Control Category
I/O Control Category The Linea Lite GigE I/O controls, as shown by CamExpert, group features used to configure external inputs and acquisition actions based on those inputs, plus camera output signals to other devices. Linea Lite GigE Series Camera Operational Reference • 61... -
Page 64: I/O Control Feature Descriptions
I/O Control Feature Descriptions Display Name Feature & Values Description Standard & View Beginner Trigger Selector TriggerSelector Selects which type of trigger to configure with the various Trigger features. Single Line Trigger (Start) LineStart Selects a trigger starting the capture of a single line. Single Frame Trigger(Start) FrameStart Selects a trigger starting the capture of a single frame. - Page 65 rotaryEncoderOutputMode Specifies the conditions for the Rotary Encoder interface to Expert Rotary Encoder Output generate a valid Encoder output signal. DFNC Mode Position Position On the camera, the "position" behaviour exists, but the number of counts is small (7-bits / 128 counts). The encoder can reverse for 256 ticks and then go forward and behave as expected for "position"...
- Page 66 Expert Line Format LineFormat Specify the current electrical format of the selected physical input or output. Applies to all physical lines. (RO) RS422 RS422 The line accepts or sends RS422 level signals. Single Ended SingleEnded The line is single ended input for 3.3V/5V/12V/24V or output for 3.3V LVTTL Expert Line Mode...
-
Page 67: I/O Module Block Diagram
Beginner Output Line Pulse Delay outputLinePulseDelay Sets the delay (in µs) before the output line pulse signal. DFNC Applicable for the OutputLineSource feature. Note, the LineMode feature must be set to output. Beginner Sets the width (duration) of the output line pulse in Output Line Pulse Duration outputLinePulseDuration DFNC... -
Page 68: Counter And Timer Control Category
Counter and Timer Control Category The Linea Lite GigE counter and timer controls, as shown by CamExpert, groups parameters used to configure acquisition counters, timers and signal edge detection. Counter and Timer Control Feature Descriptions Display Name Feature & Values Description Standard&... - Page 69 Counter Start Source counterStartSource Select the counter start source. Counter increments from Expert 0 to the value of the counterDuration feature. DFNC Counter is stopped. Acquisition Start AcquisitionStart Counter starts on the reception of the Acquisition Start event. Exposure Start ExposureStart Counter starts on the reception of the Exposure Start event.
- Page 70 Counter Reset Source counterResetSource Selects the signal source to reset the counter then waits Expert for the next countStartSource signal or event. DFNC Reset Cmd Reset on reception of the Reset Icommand. Acquisition Start AcquisitionStart Reset on reception of the Acquisition Start. Acquisition End AcquisitionEnd Reset on reception of the Acquisition End.
-
Page 71: Counter And Timer Group Block Diagram
Expert Timer Start Source timerStartSource Select the trigger source to start the timer. The Event DFNC Control section provides details and timing diagrams for the supported events. TimerReset Cmd Starts with the reception of the TimerReset Icommand. Acquisition Start AcquisitionStart Start Timer on Acquisition Start event. -
Page 72: Example: Counter Start Source = Off
Example: Counter Start Source = OFF CounterStartSource = OFF Countermode = Active Countermode = OFF CounterEnd Event Generated Counter Counter is Counter Counter is Counter Overflow IDLE Trigger Wait Active Completed Counter is incrementing CounterStartSource = OFF CounterResetSource = OFF Counter Reset CMD CounterResetSource = Event CounterResetSource = CounterEnd... -
Page 73: Example: Counterstartsource = Event And Signal (Edge Base)
Example: CounterStartSource = EVENT and Signal (Edge Base) CounterStartSource = EVENT and Signal (Edge Base ) Countermode = Active Countermode = OFF CounterEnd Event Generated Counter Counter is Counter Counter is Counter Overflow IDLE Trigger Wait Active Completed Counter is incrementing CounterResetSource = OFF CounterStartSource = EVENT Signal (Edge Base ) -
Page 74: Example: Counterstartsource = Line (Edge Base) Example 2
Example: CounterStartSource = Line (Edge Base) Example 2 CounterStartSource = Line (Edge Base ) Example 2 Countermode=Active Countermode=OFF CounterEnd Event Generated CounterResetSource = CounterEnd(Itself) Counter STATUS Counter is Counter Counter Active Active Active Active IDLE Trigger Wait Completed Counter Register CounterDuration = 12 CounterStartSource = Line 1... -
Page 75: Advanced Processing Control Category
Advanced Processing Control Category The Linea Lite GigE Advanced Processing controls, as shown by CamExpert, group parameters used to configure Flat Field calibration. Advanced Processing Control Feature Descriptions Display Name Feature & Values Description Standard & View Expert LUT Mode lutMode Sets the enable state of the selected LUT module DFNC... - Page 76 Guru LUT Value LUTValue Returns the value at specified LUT index entry of the LUT selected by the LUT Selector feature. Beginner Flat Field Correction flatfieldCorrectionMode Sets the mode for the Flat Field correction. DFNC Mode Flat Field Correction is disabled. Active Active Flat Field Correction is enabled.
- Page 77 Calibrate PRNU flatfieldCalibrationPRNU Performs Photo Response Non Uniformity (PRNU) Guru calibration to a targeted, user-defined value. PRNU DFNC calibration eliminates the difference in responsivity between the most and least sensitive pixel, creating a uniform response to light. Save Calibration flatfieldCalibrationSave Save the calibration performed by flatfieldCalibrationFPN Expert and flatfieldCalibrationPRNU to the active set.
-
Page 78: Image Format Control Category
Image Format Control Category The Linea Lite GigE Image Format controls, as shown by CamExpert, group parameters used to configure camera pixel format and image cropping. An internal test image function is used to qualify camera setup without a lens. Image Format Control Feature Descriptions Display Name Feature &... - Page 79 Expert ROI Selector multipleROISelector Select an ROI (Region of Interest) when Multiple ROI Mode is DFNC enabled. Selector range is from 1 to the Multiple ROI Count value. ROI (x1, y1) roi1_1 ROI (x1, y1) ROI (x2, y1) roi2_1 ROI (x2, y1) ROI (x3, y1) roi3_1 ROI (x3, y1)
-
Page 80: Metadata Controls Category
Selects the format of the chunk data (metadata) in the payload of the DFNC Compatibility image. Mode Sapera LT SaperaLT Metadata compatible with Teledyne DALSA Sapera LT 8.0. Gen API GenAPI Metadata compatible with GenICam GenAPI. 78 • Operational Reference Linea Lite GigE Series Camera... - Page 81 Expert Metadata ChunkSelector Selects the specific metadata to control, when enabled. Selector OffsetX Add the OffsetX value used during the image acquisition to the metadata attached to the image. OffsetY Add the OffsetY value used during the image acquisition to the metadata attached to the image.
-
Page 82: Extracting Metadata Stored In A Sapera Buffer
Extracting Metadata Stored in a Sapera Buffer For Sapera LT developers, the “SapMetadata” class (included with Sapera version 8.10 and higher) provides functions for manipulating image metadata. Metadata is appended to the end of virtual frame buffers; Sapera LT automatically adjusts the buffer size to accommodate the metadata. Sapera also provides two methods to view metadata. - Page 83 Linea Lite GigE Series Camera Operational Reference • 81...
-
Page 84: Acquisition And Transfer Control Category
Acquisition and Transfer Control Category The Linea Lite GigE Acquisition and Transfer controls, as shown by CamExpert, groups parameters used to configure the optional acquisition modes of the device. These features provide the mechanism to either have acquisitions coupled to transfers (basic mode) or to decouple acquisitions from both the camera transfer module and the host transfer module. - Page 85 Guru Acquisition Arm Cmd AcquisitionArm Arms the device before an AcquisitionStart command. This optional command validates all the current features for consistency and prepares the device for a fast start of the acquisition. If not used explicitly, this command is automatically executed at the first AcquisitionStart but will not be repeated for subsequent ones unless a data transfer related feature is changed in the device.
-
Page 86: Acquisition Buffering
Acquisition Buffering Acquisitions are internally buffered then transferred to the host system. This internal buffer allows uninterrupted acquisitions without transfer delays. When the internal buffer is full an Image Lost Event will be generated. The camera has 1 block of 256MB. A portion of the memory could be reserved for packet resends but at the loss of accumulating frames. -
Page 87: Features That Cannot Be Changed During A Sapera Transfer
Features that cannot be changed during a Sapera Transfer The following features cannot be changed during an acquisition or Sapera transfer. Feature Group Features Locked During a Sapera Transfer CAMERA INFORMATION UserSetLoad SENSOR CONTROL I/O CONTROL COUNTER AND TIMER CONTROL ADVANCED PROCESSING CONTROL flatfieldCorrectionMode IMAGE FORMAT CONTROL... -
Page 88: Event Control Category
Event Control Category The Linea Lite GigE Event control, as shown by CamExpert, groups parameters used to configure Camera Event related features. 86 • Operational Reference Linea Lite GigE Series Camera... -
Page 89: Event Control Feature Descriptions
Event Control Feature Descriptions Display Name Feature & Values Description Standard & View Expert Timestamp Latch Cmd timestampControlLatch Latch the current timestamp internal counter value in the DFNC timestampValue feature. Expert Timestamp Value timestampValue Returns the 64-bit value of the timestamp counter. (RO) DFNC Expert TimeStamp Source... - Page 90 Expert Event Notification EventNotification Enable Events for the event type selected by the EventSelector feature. The selected event is disabled. The selected event will generate a software event. GigEVisionEvent GigEVisionEvent The selected event will generate a software event for SFNC 1.x compatibility.
- Page 91 Expert PTP Status ptpStatus Specifies dynamically the current PTP state of the device. DFNC (ref: IEEE Std 1588-2008) Initializing Initializing The port initializes its data sets, hardware, and communication facilities. No port of the clock shall place any PTP messages on its communication path. If one port of a boundary clock is in the INITIALIZING state, then all ports shall be in the INITIALIZING state.
- Page 92 Expert PTP Port Last Event ptpPortLastEvent Logs the last PTP changed state event defining the last DFNC current status. None None None Power up Powerup Power up Initialize Initialize Initialize Designated Enabled DesignatedEnabled Designated Enabled Designated Disabled DesignatedDisabled Designated Disabled Fault Cleared FaultCleared Fault Cleared...
-
Page 93: Event Info Feature Descriptions
Event Info Feature Descriptions Display Name Feature & Values Description Standard & View Guru Frame Start Event ID EventFrameStart Represents the event ID to identify the EventFrameStart software Event. (RO) Guru Exposure Start Event ID EventExposureStart Represents the event ID to identify the EventExposureStart software Event. -
Page 94: Overview Of Precision Time Protocol Mode (Ieee 1588)
Overview of Precision Time Protocol Mode (IEEE 1588) PTP Mode = Precision Time Protocol • PTP synchronizes the Timestamp clocks of multiple devices connected via a switch on the same network, where the switch supports PTP. • For optimal clock synchronization the imaging network should use one Ethernet switch. Daisy- chaining multiple small switches will degrade camera clock syncs. -
Page 95: Ieee 1588 Reference Resources
IEEE 1588 Reference Resources For additional information: http://standards.ieee.org PTP Standard Reference: IEEE Std 1588-2008 — IEEE Standard for a Precision Clock Synchronization Protocol for Networked Measurement and Control Systems Examples using Timestamp Modulo Event for Acquisitions The Timestamp Modulo event is used to synchronize multiple camera acquisitions and automate repetitive acquisitions based on either the camera’s internal Timestamp counter or a system wide PTP counter. -
Page 96: Case 2: Potential Uncertainness To The Start Time
Case 2: Potential Uncertainness to the Start Time Conditions: • initial timestampControlReset resets Timestamp counter • timestampModuloStartTime at < 20 • timestampModulo = 10 • timestampModuloActualStartTime = first event (F1) Case 2 differs from case 1 by showing that the period of uncertainty if the start time is near the first modulo count that follows. -
Page 97: Case 3: Timer Reset Before The Actual Start Time
Case 3: Timer Reset before the Actual Start Time Conditions: • initial timestampControlReset resets Timestamp counter • timestampModuloStartTime at 20 • timestampModulo = 10 • second timestampControlReset at count 25 • timestampModuloActualStartTime = first event (F1) After the initial Timestamp Reset which starts the Timestamp counter, the Modulo start time is at 20. -
Page 98: Case 4: Timer Reset After The Actual Start Time
Case 4: Timer Reset after the Actual Start Time Conditions: • initial timestampControlReset resets Timestamp counter • timestampModuloStartTime at 20 • timestampModulo = 10 • timestampModuloActualStartTime = first event (F1) • second timestampControlReset at 35 This case describes the Modulo process if there is a Timestamp counter reset after a modulo controlled acquisition. -
Page 99: Case 5: Changing 'Timestampmodulo' During Acquisitions
Case 5: Changing ‘timestampModulo’ during Acquisitions Conditions: • initial timestampControlReset resets Timestamp counter • timestampModuloStartTime at 20 • timestampModulo = 10 • timestampModuloActualStartTime = first event (F1) • timestampModulo changes to 20 Case 5 shows that the Modulo value can be changed dynamically. Using the simple example of case 1, after the second acquisition (F2) the Modulo value is changed from 10 to 20. -
Page 100: Gige Vision Transport Layer Control Category
GigE Vision Transport Layer Control Category The Linea Lite GigE GigE Vision Transport Layer control, as shown by CamExpert, groups parameters used to configure features related to GigE Vision specification and the Ethernet Connection. GigE Vision Transport Layer Feature Descriptions Display Name Feature &... - Page 101 Guru IP Configuration Status GevIPConfigurationStatus Reports the current IP configuration status. (RO) None None Device IP Configuration is not defined. PersistentIP PersistentIP Device IP Address Configuration is set to Persistent IP (static). Device IP Address Configuration is set to DHCP DHCP DHCP (Dynamic Host Configuration Protocol).
- Page 102 Invisible Persistent Subnet Mask GevPersistentSubnetMask Persistent subnet mask for the selected interface. Invisible Persistent Default Gateway GevPersistentDefaultGateway Persistent default gateway for the selected interface. Invisible Primary Application Socket GevPrimaryApplicationSocket Returns the UDP (User Datagram Protocol) source port of the primary application. (RO) Invisible Device Access Privilege GevCCP...
- Page 103 The DHCP server is part of a managed network. Windows itself does not provide a DHCP server function therefore a dedicated DHCP server is required. The DALSA Network Configuration Tool can be configured as a DHCP server on the NIC used for the GigE Vision network.
- Page 104 Invisible XML SubMinor Version DeviceManifestXMLSubMinorVersion Indicates the SubMinor version number of the XML file of the selected manifest entry. (RO) Invisible Schema Major Version DeviceManifestSchemaMajorVersion Indicates the major version number of the Schema file of the selected manifest entry. (RO) Invisible Schema Minor Version DeviceManifestSchemaMinorVersion...
-
Page 105: Gige Vision Host Control Category
NIC, the data rate of each camera and the trigger modes used. Information on these features is found in the Teledyne DALSA Network Imaging Module User manual. -
Page 106: File Access Control Feature Descriptions
File Access Control Feature Descriptions Display Name Feature & Values Description Standard & View Guru File Selector FileSelector Selects the file to access. The file types which are accessible are device-dependent. Firmware Firmware1 Upload new firmware to the camera which will execute on the next camera reboot cycle. -
Page 107: File Access Via The Camexpert Tool
Device User Buffer deviceUserBuffer Unallocated memory available to the user for data storage. DFNC Invisible FTP File Access ftpFileAccessSupported Shows whether File Access is supported over FTP. DFNC Invisible File Access via the CamExpert Tool • Click Setting to open the File Access Control dialog. •... -
Page 108: Device Streaming Registers
Device Streaming Registers Start – End Command Requirements Important: Every start command must have a corresponding end command. If not, the camera can be in an unpredictable state. This pertains to DeviceRegistersStreamingStart, DeviceRegistersStreamingEnd, DeviceFeaturePersistenceStart, and DeviceFeaturePersistenceEnd. Invisible Device Registers DeviceRegistersStreamingStart Announces the start of registers streaming without Streaming Start immediate checking for consistency. -
Page 109: Implementing Trigger-To-Image Reliability
In a complex imaging system many points of possible failure exist – from acquisition to processing and transmission. Teledyne DALSA provides features, events and I/O signals that provide the system designer with the tools to qualify the system in real time. - Page 110 Events Event Selector EventSelector Event Notification EventNotification Event Statistic Selector eventStatisticSelector Event Statistic Count eventStatisticCount Events Overflow eventsOverflow Event Statistic Count Reset eventStatisticCountReset Acquisition and Triggers Valid Frame Trigger ValidFrameTrigger Invalid Frame Trigger InvalidFrameTrigger Image Lost ImageLost Output Lines Pulse on: Valid Frame Trigger PulseOnValidFrameTrigger Pulse on: Rejected Frame(s) Trigger PulseOnInvalidFrameTrigger...
-
Page 111: Network Overview & Tools
Preferably, a DHCP server is present on the network, where the Linea Lite GigE issues a DHCP request for an IP address. The DHCP server then provides the IP address. The Teledyne DALSA Network Configuration tool, installed with the Teledyne DALSA Network Imaging Package, provides a DHCP server which is easily enabled on the NIC used with the Linea Lite GigE (refer to the Teledyne DALSA Network Imaging Package user's manual). -
Page 112: Ip Configuration Mode Details
NIC will get a DHCP assigned IP address for the connected device but connections on the LLA IP address will be lost. The Teledyne DALSA Network Configuration Tool can enable the Teledyne DALSA DHCP server on the NIC used for the GigE Vision network. -
Page 113: Dhcp (Dynamic Host Configuration Protocol)
The DHCP server is part of a managed network. Windows itself does not provide a DHCP server function therefore a dedicated DHCP server is required. The Teledyne DALSA Network Configuration Tool can configure the Teledyne DALSA DHCP server on the NIC used for the GigE Vision network. -
Page 114: Persistent Ip
• If the camera is connected to a network with a different subnet, it cannot be accessed. • Use Teledyne DALSA’s Network Configuration Tool to set a persistent IP address. Refer to Teledyne DALSA’s Network Imaging manual. • An example of a Persistent IP address assignment on a class B network: •... -
Page 115: Optimizing The Network Adapter Used With Linea Lite Gige
Most Gigabit network interface controllers (NIC) allow user modifications to parameters such as Adapter Buffers and Jumbo Frames. The optimal settings will be system dependent. These should be optimized for use with the Linea Lite GigE during the installation. Refer to the Teledyne DALSA Network Imaging package manual for optimization information. -
Page 116: Pause Frame Support
Do not remove power from the camera for a minimum 10 seconds. Refer to the Teledyne DALSA Network Imaging Module manual for more detailed information on using this tool. As shown below, the Network Configuration tool can quickly verify and modify certain network configuration items of the imaging system. -
Page 117: Technical Specifications
Technical Specifications Mechanical Specifications Linea Lite GigE 4k Linea Lite GigE 4k with M42x1 Lens Mount Linea Lite GigE Series Camera Technical Specifications • 115... -
Page 118: Additional Notes On Linea Lite Gige Identification And Mechanical
Additional Notes on Linea Lite GigE Identification and Mechanical Identification Label Linea Lite GigE cameras have an identification label applied to the back side, with the following information: • Model Part number • Serial number • MAC ID • 2D Barcode •... -
Page 119: Sensor Alignment Specification
Sensor Alignment Specification The following figure specifies sensor alignment for Linea Lite GigE where all specifications define the absolute maximum tolerance allowed for production cameras. Dimensions "x, y, z", are in microns and referenced to the Linea Lite GigE mechanical body or the optical focal plane (for the z- axis dimension). -
Page 120: Connectors
Connectors • A single RJ45 Ethernet connector for control and video data to the host Gigabit NIC. For industrial environments, Linea GigE supports the use of screw lock Ethernet cables (see Ruggedized RJ45 Ethernet Cables). • A single HD15 female connector for all I/O and DC power source. HD15 type Connector Details Pin Number Linea 2 Lite GigE... -
Page 121: Mating Gpio Cable Assembly
Mating GPIO Cable Assembly Teledyne DALSA optionally provides for purchase a GPIO breakout cable (HD15 Male to 26-Pos Euro Block) as shown in the following drawing. Use accessory number #AC-CA-00002-00-R when placing your order. Linea Lite GigE Series Camera Technical Specifications • 119... -
Page 122: Input Signals Electrical Specifications
Input Signals Electrical Specifications External Inputs Block Diagrams Balanced RS422 Receive Mode INPUT (+) External Receive Input Signal INPUT (-) Signal Ground PIN 5 Termination Enable Single-Ended Logic Receive Mode 3.3V, 5V, 12V, 24V INPUT (+) External Receive Input Signal INPUT (-) not connected Signal Ground... - Page 123 External Input Electrical Characteristics RS422 Inputs Common Mode Input Voltage (V -25 V min. – 25 V max. Differential Input Signal Threshold 200 mV Differential Input Signal Hysteresis 150 mV (V = 0 V) Single-Ended Inputs Switching Voltage Low to High High to Low 3.3 V TTL 1.5 V...
-
Page 124: Output Signals Electrical Specifications
Output Signals Electrical Specifications External Outputs Block Diagrams Balanced RS422 Drive OUTPUT (+) Output Signal External Output Signal Output Enable OUTPUT (-) PIN 5 Signal Ground Single-Ended Logic Drive 3.3V TTL OUTPUT (+) Output Signal External Output Signal Output Enable OUTPUT (-) not connected PIN 5... - Page 125 External Output Details • The outputs signals can be used in programmable output mode such as strobe, event notification, etc. (see outputLineSource feature). • For the Single-Ended Open Drain outputs, the user supplied Pull-up resistor value should be between 1K and 10K depending on supply rail. Resistor Wattage should be calculated accordingly.
-
Page 126: Ec & Fcc Declarations Of Conformity
EC & FCC Declarations of Conformity Pending 124 • Technical Specifications Linea Lite GigE Series Camera... -
Page 127: Additional Reference Information
This section provides a general overview to selecting a lens for the Linea Lite GigE. Mechanical drawings and Teledyne DALSA part numbers for available lens adapters is provided. The first two lens parameters, Lens Mount and Lens Image Circle, are based on correctly matching the lens to the sensor. -
Page 128: M42X1 To Nikon F Bayonet Adapter (Ac La 00115 A1-R )
M42x1 to Nikon F Bayonet Adapter (AC LA 00115 A1-R ) Nikon F Bayonet to M42x1 Adapter, 12mm BFD, HEAVY DUTY w/clip 126 • Additional Reference Information Linea Lite GigE Series Camera... -
Page 129: M42X1 To C-Mount Adapter (Ac-Lc-00001-00-R)
M42x1 to C-Mount Adapter (AC-LC-00001-00-R) M42 to C-Mount Adapter, 12mm BFD Linea Lite GigE Series Camera Additional Reference Information • 127... -
Page 130: Lens Image Circle Illustration
Lens Image Circle Illustration The graphic below illustrates the Linea Lite GigE 4k active sensor relative to the lens image circle. It compares the Linea Lite GigE 4k relative to a Nikon FDX lens (using the optional F-mount adapter). Image Circle (approximate) Nikon FDX Lens Linea2 GigE 4k sensor 28.672 mm... -
Page 131: Additional Lens Parameters (Application Specific)
Additional Lens Parameters (application specific) There are other lens parameters that are chosen to meet the needs of the vision application. These parameters are independent of the Linea Lite GigE (assuming that the Lens Mount and Lens Sensor Size parameters are correct, as previously covered in this section). A vision system integrator or lens specialist should be consulted when choosing lenses since there is a trade off between the best lenses and cost. -
Page 132: Optical Considerations
The wavelengths and intensity of light required to capture useful images vary per application. The image will be affected by speed, spectral characteristics, exposure time, light source characteristics, environmental and acquisition system specifics, etc. Teledyne DALSA’s Web Site introduces this potentially complicated issue. Click on Knowledge Center and select Application Notes and Technology Primers. -
Page 133: Lens Modeling
Lens Modeling Any lens surrounded by air can be modeled for camera purposes using three primary points: the first and second principal points and the second focal point. The primary points for a lens should be available from the lens data sheet or from the lens manufacturer. Primed quantities denote characteristics of the image side of the lens. -
Page 134: Sensor Handling Instructions
Sensor Handling Instructions This section reviews procedures for handling, cleaning or storing the camera. The sensor must be kept clean and away from static discharge to maintain design performance. Electrostatic Discharge and the Sensor Camera sensors containing integrated electronics are susceptible to damage from electrostatic discharge (ESD). -
Page 135: Cleaning The Sensor Window
• DALSA recommends the use of an ionized air gun and compressor to blow off the sensor. • Use compressed air to blow off loose particles. This step alone is usually sufficient to clean the sensor window. -
Page 136: Ruggedized Rj45 Ethernet Cables
Ruggedized RJ45 Ethernet Cables Components Express Inc. supplies an industrial RJ45 CAT6 cable. One end has a molded shroud assembly with top / bottom thumbscrews while the other end has a standard RJ45. Note: Ruggedized RJ45 cable is recommended in a high vibration environment. CAT6 certified (tested for near end / far end crosstalk and return All cables made in loss). -
Page 137: Troubleshooting
In multiple NIC systems where the NIC for the Linea Lite GigE is using LLA mode, ensure that no other NIC is in or switches to LLA mode. It is preferable that the Teledyne DALSA DHCP server is enabled on the NIC used with the camera instead of using LLA mode, which prevents errors associated with multiple NIC ports. - Page 138 Network Imaging manual. • When using multiple cameras connected to an VLAN Ethernet switch, confirm that all cameras are on the same subnet setup on that switch. See the Teledyne DALSA Network Imaging package manual for more information. . •...
-
Page 139: Verifying Network Parameters
• From the Start menu, go to Programs • Dalsa • Sapera LT • Tools and run the Log Viewer program. From its File menu click on Save Messages to generate a log text file. - Page 140 The camera is connected but a NIC IP is not assigned. The GigE server tray icon is displaying a warning. Open the Teledyne DALSA’s Network Configuration Tool from Window’s Start Menu. Cameras displayed in red require a NIC IP. Click the camera name and Select ‘Device IP Configuration’...
- Page 141 Click Automatic Recovery (Force IP). Linea Lite GigE Series Camera Troubleshooting • 139...
- Page 142 Cameras displayed in blue have a proper NIC IP assigned. Note: The Network Configuration Tool assigns a dynamic IP address, which is lost on power down. To avoid this issue, assign a persistent IP address to the camera. Click the ‘Persistent IP Mode’ (shown above) and press the Apply button to assign the IP address. It will automatically connect to the host PC if the IP address does not conflict with other network IP addresses.
-
Page 143: Device Available With Operational Issues
Device Available with Operational Issues This section considers issues with cabling, Ethernet switches, multiple cameras, and camera exposure. Information concerning the Teledyne DALSA Network Configuration Tool and other networking considerations, is available in the Teledyne DALSA Network Imaging manual. Firmware Updates As a general rule any Linea Lite GigE installation must include the firmware update procedure (see File Access Control Category). -
Page 144: Cabling And Communication Issues
Use the Log Viewer tool (see point below) to check on packet resend conditions. • Run the Sapera Log Viewer: Start•Programs•Teledyne DALSA•Sapera LT•Tools•Log Viewer. Start the camera acquisition program, such as CamExpert. There should not be any "packet resend" messages, else this indicates a control or video transmission problem due to poor connections or extremely high EMI environments. -
Page 145: Acquisition Error Without Timeout Messages
Streaming video problems range from total loss of image data to occasional loss of random video data packets. The following section describes conditions identified by Teledyne DALSA engineering while working with GigE Vision cameras in various computers and setups. See the Teledyne DALSA Network Imaging manual for information on network optimizations. -
Page 146: Other Problems Or Issues
Other Problems or Issues This section describes problems that do not fit any of the categories above. Typically, these are issues found in the field under specific or unusual conditions. Buffer Incomplete Error Message Error Messages are generated when the logical acquisition frame buffer takes longer to fill (line rate x frame buffer height) than the time set for the GigE Vision Host Control. -
Page 147: Contact Information
Sales Information Visit our web site: www.teledynedalsa.com Email: info@teledynedalsa.com Canadian Sales Teledyne DALSA — Head office Teledyne DALSA — Montreal office 605 McMurray Road 880 Rue McCaffrey Waterloo, Ontario, Canada, N2V 2E9 Saint-Laurent, Quebec, Canada, H4T 2C7 Tel: 519 886 6000...
Need help?
Do you have a question about the Everywhereyoulook Linea Lite GigE and is the answer not in the manual?
Questions and answers