Advertisement
Quick Links
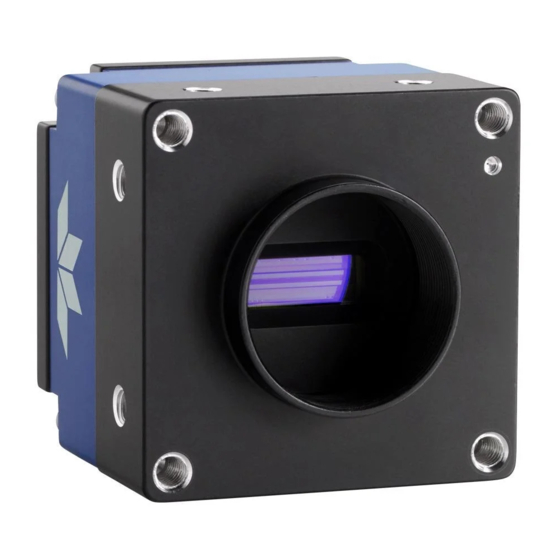
Linea SWIR GigE
Quick Start Guide
This Quick Start Guide helps you to set up your camera for basic operation. Refer to the Linea SWIR GigE
Camera User's Manual for specifications, networking, external signal connections and application
development. Note: screen images were made using the 1k model but instructions also apply to the 512
model.
Before you begin, ensure that you have:
•
Camera power cable or Power over Ethernet (PoE) setup using a PoE Ethernet Switch or PoE Injector.
•
Cat 5e or Cat 6 Ethernet cable. Note: cable should not be less than 1 meter (3 feet) long or more than
100 meters (328 feet) long.
A computer with a second or unused Gigabit Network Interface (NIC) and any necessary imaging
•
software (such as Sapera LT).
Other necessary components of your system, including: light sources, camera mounts, lenses, encoders,
•
etc. Please note that for best imaging performance it is recommended to use a lens designed for short
wave infrared wavelengths between 900 and 1700 nm. Standard lenses designed for visible light may
not transmit IR light fully nor perform to specification outside of their intended wavelength range. There
are several manufacturers that make C-mount SWIR lenses specifically for machine vision systems. For
assistance in selecting suitable optics for your application please contact one of our regional sales
offices.
Connect the Linea SWIR GigE Camera
Before connecting power to the camera, test the power supplies. The camera requires a single voltage input
(Min +12 V to Max +24 V) on Auxiliary connector or PoE Class 2 setup.
•
Connect power via PoE or the 10-pin connector, but not both. Although the camera has protection,
differences in ground levels may cause operational issues or electrical faults. The Auxiliary connector
pinout is outlined below. See the Camera User's Manual (document number 03-032-20280) for detailed
information and recommended cable solutions.
Face View of the 10-pin Auxiliary Connector and Pinout Description
Pin Number
Linea SWIR
1
PWR-GND
2
PWR-VCC
3
GPI-Common
4
GPO-Power
5
GPI 1
6
GPO 1
7
GPI 2
8
GPO 2
9
RESERVED
10
Chassis
Direction
Definition
-
Camera Power - Ground
-
Camera Power – DC +12 to +24Volts
-
General Input Common Ground
-
General Output Common Power
In
General External Input 1
Out
General External Output 1
In
General External Input 2
Out
General External Output 2
-
Reserved for Future Use
-
Camera Chassis
Advertisement

Subscribe to Our Youtube Channel
Related Manuals for Dalsa Linea SWIR GigE


Summary of Contents for Dalsa Linea SWIR GigE
- Page 1 Linea SWIR GigE Quick Start Guide This Quick Start Guide helps you to set up your camera for basic operation. Refer to the Linea SWIR GigE Camera User’s Manual for specifications, networking, external signal connections and application development. Note: screen images were made using the 1k model but instructions also apply to the 512 model.
- Page 2 Apply power to the camera. • Connect Linea SWIR GigE to the host computer GigE network adapter or to PoE Ethernet switch via a CAT5e or CAT6 Ethernet cable. Once communication with the host computer is started, the automatic IP configuration sequence will •...
-
Page 3: Flat Field Correction Overview
Linea SWIR GigE Camera Quick Start Guide You can now stop the grab, add a lens and adjust other camera parameters—such as Line Rate, Exposure • time, etc. to develop your imaging application. • Refer to the camera’s user’s manual for a description of all of the available camera commands. - Page 4 Linea SWIR GigE Camera Quick Start Guide Refer to the FFC section in the User Manual for a detailed description of the FFC process and for guidelines on how to optimize the image quality. Since the FFC is done on the entire sensor (1k model: 1024 x 1 pixels or 512 model: 512 x 1 pixels), verify in the Image Format Controls section that the Horizontal and Vertical binning are set to “1”...
- Page 5 Linea SWIR GigE Camera Quick Start Guide The camera is now ready to produce bare images. The line profile tool is best used to evaluate a bare image. The following line profile is an example of the bare image of a white uniform object: Make sure that the average output level is set close to your calibration target.
- Page 6 Linea SWIR GigE Camera Quick Start Guide How to do a FFC Setup The process requires images be snapped in black and bright conditions, followed by the FFC process. • If using a sheet as a white target, it must be completely free of blemishes and texture.
- Page 7 Linea SWIR GigE Camera Quick Start Guide Important: the average pixel value for the frame is close to black. Note: Sensors might show a much higher maximum pixel value due to one or more "hot pixels". Verify a Bright Acquisition Point the camera at a diffused light source or evenly lit white wall with no shadows falling on it.
- Page 8 Linea SWIR GigE Camera Quick Start Guide Flat Field Correction Calibration Flat Field Correction Calibration (FFC) contains FPN (Fixed Pattern Noise) and PRNU (Photon Response non- uniformity) corrections. NOTE: Before performing a FFC, we recommend you evaluate the “bare image” characteristics, which determine the quality of FFC, applied to the image.
- Page 9 Linea SWIR GigE Camera Quick Start Guide To evaluate a bare image use the line profile tool shown below. Line Profile Example Teledyne DALSA 03-032-20284-02...
- Page 10 Linea SWIR GigE Camera Quick Start Guide A line profile is mainly determined by two factors: Flatness and Height 1) Flatness: The Line profile represents a Flat Field measurement. Due to lens-shading effect, light falls-off near the edges and results in lower output. This produces higher noise levels near the edge. A smaller aperture opening and longer focal length can reduce lens - shading effect.
- Page 11 Linea SWIR GigE Camera Quick Start Guide Step 3: Select Calibration from Flat Field Correction Mode drop-down menu. Step 4: Select 2048 4096 option from Flat Field Calibration Sample Size. The 2048 option reduces calculating time; 4096 option returns result that is more accurate.
- Page 12 Linea SWIR GigE Camera Quick Start Guide PRNU Correction Step 1: Apply illumination and place a white flat target in the location where the real object will be. Ideally, you would use a professional target. For convenience, you can use white paper as the target. The result of using paper may produce grain effect —...
- Page 13 Linea SWIR GigE Camera Quick Start Guide Step 6: Select a User Flat field set from the Flat Field Correction Current Active Set. Press the Press… command in Save Calibration menu to Active the Set. If not saved, the FFC result will be lost when the Active Set or Calibration mode is changed.
Need help?
Do you have a question about the Linea SWIR GigE and is the answer not in the manual?
Questions and answers