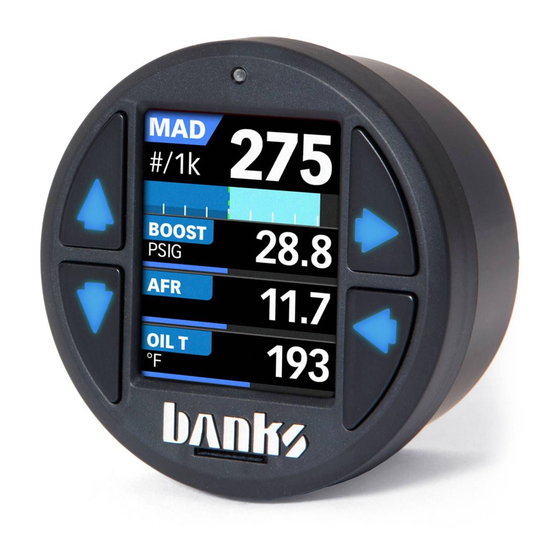
banks iDash 1.8 DataMonster Owner's Manual

banks iDash 1.8 DataMonster Owner's Manual

Hide thumbs Also See for iDash 1.8 DataMonster:
Table of Contents

Advertisement

Owner' s Manual
iDash
DataMonster
& Super Gauge
THIS MANUAL IS FOR USE WITH PART NUMBER(S): 66560, 66561, 66562,
66563, 61410
PROTECTED BY U.S. Patent 7,254,477 B1 U.S. Patent 7,593,808 B2
Gale Banks Engineering
546 Duggan Avenue • Azusa, CA 91702
(626) 969-9600 • Fax (626) 334-1743
Product Information & Sales: (888) 635-4565
Customer Support: (888) 839-5600
Installation Support: (888) 839-2700
bankspower.com
See link below for iDash video references
(overview, installation, features...etc.)
www.bankspower.com/iDash
©2019 Gale Banks Engineering
1.8
®
with Installation Instructions
12/13/19 PN 97654 V.7

Advertisement

Table of Contents
loading
Need help?

Need help?

Do you have a question about the iDash 1.8 DataMonster and is the answer not in the manual?

Questions and answers

Summary of Contents for banks iDash 1.8 DataMonster

  • Page 1 (626) 969-9600 • Fax (626) 334-1743 Product Information & Sales: (888) 635-4565 Customer Support: (888) 839-5600 Installation Support: (888) 839-2700 bankspower.com See link below for iDash video references (overview, installation, features...etc.) www.bankspower.com/iDash ©2019 Gale Banks Engineering 12/13/19 PN 97654 V.7...
  • Page 2: Introduction

    INTRODUCTION Welcome to the world of Banks iDash 1.8 Congratulations on your Banks iDash 1.8 (hereafter simply referred to as the iDash) purchase. You’re about to discover that the iDash is designed to help you get the most out of your entire driving experience.
  • Page 3 97654 v.7...
  • Page 4: Table Of Contents

    3.3 Sleep Mode/Wake up ..................21 Section: 4 LAYOUT ........................28 4.1 Layout Selection ....................28 4.2 Density Layout ....................28 4.3 Banks Module Specific Layouts ............... 29 Section: 5 GAUGE SELECTION ....................30 5.1 Parameter Selection ..................30 Section: 6 DATA LOGGING (IF EQUIPPED) ................
  • Page 5 11.1 Banks Ambient Air Density (AAD) Module ............ 43 11.2 Derringer Tuner ....................45 11.3 Six-Gun & EconoMind Tuner ................. 47 11.4 Banks SpeedBrake..................48 11.5 SpeedBrake & Tuner Auto Switching (iDash 1.8 Banks Bus 1 ONLY) ... 52 Section: 12 SETTINGS ......................... 53 12.1 Layout ......................53 12.2 Brightness ......................
  • Page 6: Disclaimer Of Liability & Warranty

    DISCLAIMER OF LIABILITY & WARRANTY Gale Banks Engineering Inc., and its in doubt, contact the manufacturer. distributors, employees, and dealers The BUYER is solely responsible for all (hereafter “SELLER”) shall in no way be warranty issues from the automotive responsible for the product’s proper manufacturer.
  • Page 7 DISCLAIMER OF LIABILITY & WARRANTY , CONTINUED PURCHASER’S EXCLUSIVE REMEDY (a) periodic maintenance and UNDER THIS WRITTEN WARRANTY repair or replacement of parts due to OR ANY IMPLIED WARRANTY SHALL normal wear and tear; (b) finishes; (c) BE LIMITED TO THE REPAIR OR installations or defects resulting from REPLACEMENT, AT GBE’S OPTION, installation;...
  • Page 8 Their use by Gale Banks Engineering is for the express purpose of identification or explanation for the owner’s benefit and is in no way meant to infringe.
  • Page 9: End User License Agreement (Eula)

    EULA to sell, loan, rent, lease, individual or a single entity) later referred to borrow, or transfer the use of copies of the as “LICENSEE” and Gale Banks Engineering SOFTWARE unless it is permitted by the terms and/or conditions of a separate agreement (hereinafter referred to as “Company”...
  • Page 10: Safety Precautions

    SECTION: 1 SAFETY PRECAUTIONS Always observe safety precautions! Lightning strikes create the risk of electric shock. Gale Banks Engineering urges you to IN-VEHICLE PRECAUTIONS always follow safety precautions. These pages include important information Use this unit in 12V DC negative ground intended to prevent personal injury to vehicles only.
  • Page 11 PRECAUTIONS FOR USE IN VEHICLE Use only the items that come with this unit and the Banks products it was designed to interface with. Use of non- specified items can damage the vehicle interior or result in a poor fit, creating the risk of accident, malfunction, or fire.
  • Page 12: Mounting And Connecting The Idash

    Unclip or remove factory screws/bolts to relocate the OBDII port and allow the Banks OBDII connector to plug into the vehicles OBDII connector without bending or putting stress on the Banks OBDII cable. Secure the OBDII port under the dash 97654 v.7...
  • Page 13: Obdii Connection To Six-Gun, Economind, Speedbrake

    4-pin port on the iDash 1.8 with SpeedBrake the locking tab up. The OBDII Cable for Banks Bus 1 If you have the standard iDash 1.8 refer products has one extra wire coming to Figure 2-3. If you have the iDash 1.8 from the OBDII to connect to Banks Banks Bus 1, refer to Figure 2-4.
  • Page 14 For the operation of the Six Gun, Economind, and Speed Brake refer to "11.3 Six-Gun & EconoMind Tuner" on page 47, "11.4 Banks SpeedBrake" on page 48, "11.5 SpeedBrake & Tuner Auto Switching (iDash 1.8 Banks Bus 1 ONLY)" on page 97654 v.7...
  • Page 15: No Obd Or Aftermarket Ecu Connection

    2.3 No OBD or Aftermarket If the mount applies too ECU Connection much of a press fit, the iDash 1.8 buttons may become unresponsive. Refer to iDash 1.8 Aftermarket ECU Untighten or sand the aftermarket mount Setup Owner's Manual 97670 for hole (Not the Mounting Sleeve) until you aftermarket ECU wiring instructions.
  • Page 16: Simple B-Bus Network - Single Idash 1.8

    1.8 SuperGauge CAN bus ..............62882 iDash 1.8 Banks Bus 1 CAN Bus ............... 62885 OBD-II Cable (Standard) CAN Bus ............61300-35 OBD-II Cable (Banks Bus 1) CAN Bus ..........Various P/N Aftermarket ECU Cable ..............61301-36 Aftermarket ECU Termination Cable ...........61301-27 Banks Bus In Cab Cables B-Bus Starter Cable ................61301-20...
  • Page 17: Advanced B-Bus Network - Multiple Idash 1.8

    (HW Rev 1 only) Step OBD-II CONNECTION DETERMINES PRIMARY iDASH. OBDII Cable Secondary Secondary Primary (Standard) OBDII Cable (Banks Bus 1) Aftermarket ECU Harness Step Y-Cable FIREWALL Step NOTICE: Only use one In-Cab Term. for iDash 1.8 Hardware Rev 1...
  • Page 18: Checking B-Bus Network Termination Type

    If you ONLY have HW Rev 1 Type iDash 1.8’s When using multiple iDash Gauges Connect the In-Cab and/or Banks Modules it is very Terminator to the iDash important that there be ONLY one 6-pin port. See Figure 2-11, (1) termination in-cab. Otherwise Step A.
  • Page 19 MOUNTING AND CONNECTING THE IDASH, CONTINUED Figure 2-12 HW Rev 1 HW Rev 2 Figure 2-13 97654 v.7...
  • Page 20: Software Introduction And Interface

    SECTION: 3 SOFTWARE INTRODUCTION AND INTERFACE 3.1 Button Navigation When data logging and viewing the Gauge Screen, you can set laps/ SELECT button (see Press the markers in a data log session by Figure 3-1) to enter menus or select pressing the BACK button.
  • Page 21: First Start-Up

    SOFTWARE INTRODUCTION AND INTERFACE, CONTINUED 3.2 First Start-Up Figure 3-2 – "5 Square Dark" Layout It is recommended that you periodically check for software updates for best performance of your iDash 1.8". Obtain software updates at: www.bankspower.com/update/ Register your iDash 1.8 at: www.bankspower.com/contact/ productregistration to receive important e-mail alerts...
  • Page 22 97654 v.7...
  • Page 23 97654 v.7...
  • Page 24 97654 v.7...
  • Page 25 97654 v.7...
  • Page 26 97654 v.7...
  • Page 27 97654 v.7...
  • Page 28: Layout

    See "12.1 Layout" on page 53. 4.1 Layout Selection 4.2 Density Layout To modify the number of gauges A detailed explanation of the Banks displayed: Density System is available in the glossary ("15.1 Banks Engine Air Go to "MENU" and select"Layout."...
  • Page 29: Banks Module Specific Layouts

    Selection" and select the "Density Dark" or "Density Light" layout. You will automatically be returned to the "Gauge Screen." 4.2.1 Field 1 Parameter 4.3 Banks Module Specific Selection Layouts In this layout, only "Field 2" through For the Derringer B-Bus Tuner, Six-Gun "Field 4"...
  • Page 30: Gauge Selection

    SECTION: 5 GAUGE SELECTION 5.1 Parameter Selection Figure 5-1 - Parameter Selection To change iDash 1.8's displayed parameters (See Figure 5-1): Go to "Menu"and select "Gauge Selection." See Step A, B. Select a “Field #” to change the parameter. See Step C. Select a “GROUP”...
  • Page 31: Data Logging (If Equipped)

    All data logging on iDash is referred to as Banks To set new vehicle parameters to parameter ID's or BID's record: 6.1 Change Parameters to...
  • Page 32: Start/Stop Data Log

    DATA LOGGING (IF EQUIPPED), CONTINUED Figure 6-4 Select "ADD BIDs." See Figure 6-2. Alternatively, you can select "ADD ALL BIDs" to record all available parameters. See Figure 6-2, A. Select a “GROUP” parameter. Select one or more “ITEM” 6.2.1 Data Logging (Shortcut) parameters to record.
  • Page 33: Data Play Back On Gauge(S)

    DATA LOGGING (IF EQUIPPED), CONTINUED displayed ("5.1 Parameter If the Micro SD card is plugged in after Selection" on page 30) to the vehicle is started, the iDash 1.8 will automatically start data logging once the show the parameters that were Micro SD card is recognized.
  • Page 34: Diagnostics

    SECTION: 7 DIAGNOSTICS 7.1 Vehicle Diagnostics freeze frame data associated with that code. Trouble Codes (DTC's) To clear all vehicle DTC's present: See the cause of your vehicle's Check-Engine Light! With the iDash In the vehicle diagnostics menu, select 1.8, you can read and clear vehicle "Clear Vehicle Codes"...
  • Page 35: Vehicle Emissions Readiness

    DIAGNOSTICS, CONTINUED Figure 7-4 7.2 Vehicle Emissions Readiness Check your vehicle's emissions readiness to test and see whether or not your vehicle's emission system is operating normally. Select "Diagnostics" from the main "MENU." Select "Vehicle" for vehicle diagnostics. See Figure 7-1. Select "Check Emission Readiness"...
  • Page 36: Manual Diesel Particulate Filter (Dpf) Regeneration (Only Available On Some Diesel Applications)

    DIAGNOSTICS, CONTINUED 7.3 Manual Diesel Regen to naturally occur. Particulate Filter (DPF) 7.3.2 Error List/Conditions Regeneration (Only for Manual Regeneration available on some Diesel Applications) The following list of conditions must be met for Manual Regeneration to occur, This diagnostic feature enables the user otherwise an error alert on the iDash 1.8 to manually clear the DPF from soot gauge will pop up.
  • Page 37 Check that coolant and oil levels pressing the right arrow button. This are at proper levels before and after will lead you to Gale Banks Engineering Regen liability disclaimer message. Must press the down arrow...
  • Page 38: Injector Balance Rates

    DIAGNOSTICS, CONTINUED 7.4 Injector Balance Rates important parameters to monitor during manual regeneration. (See Check your vehicle’s injector operating Figure 7-6) tolerances. If you’re experiencing a During Stationary Regen, if misfire, knock, excessive smoke, or you have multiple iDash's, the secondary rough running conditions with no DTCs gauges will display a message box this diagnostic feature will help identify...
  • Page 39: Min & Max Values

    SECTION: 8 MIN & MAX VALUES Each iDash 1.8 keeps an updated The parameter list in the record of key parameter minimum/ "Min/Max Log" is linked to the maximum values for you to view or "Background Alerts" and Displayed reset. "Alerts"...
  • Page 40: Alerts

    SECTION: 9 ALERTS See Figure 9-1, A. The iDash 1.8 allows users to configure alerts notifying the operator that a Select "Alert High Enable" and/or parameter has exceeded its set limit. "Alert Low Enable" to turn "On" or "Off" the alert. See Figure 9-1, B & C. All alerts can be disabled/enabled and can be set to go off for a maximum or Select "Alert High"...
  • Page 41: Background Alerts

    ALERTS, CONTINUED 9.2 Background Alerts Select the "Alert #:"of interest. See Figure 9-2, B Background alerts are for a list of user Select "Set Limit." See Figure selected parameters that are constantly 9-2, C. being monitored by the iDash (when Select "Alert High Enable"...
  • Page 42: Shift Light

    SECTION: 10 SHIFT LIGHT The iDash features a user configurable shift light. shift light for you to set to any desired Scroll UP or DOWN through the RPM and change to any of the 23 list and press "Yes" to select a color. colors available.
  • Page 43: Banks Modules (If Connected)

    • SAE J607 Correction Factor An engine's power potential is directly affected by ambient air conditions. • SAE J1349 Correction Factor The Banks AAD Module allows you to monitor the pressure, temperature, and humidity of the air entering your If your vehicle possesses OEM engine with extreme accuracy.
  • Page 44 BANKS MODULES (IF CONNECTED), CONTINUED Consider layout selected when choosing field to change. Select a “Group” Select an “Item” to display the parameters. Hold the BACK button to return to the gauge screen and your new parameter will be displayed.
  • Page 45: Derringer Tuner

    BANKS MODULES (IF CONNECTED), CONTINUED 11.2 Derringer Tuner vertical bar graph on the right hand side represents, in real-time, how much See Owner's Manual 97671 for more power the Derringer is adding (See Derringer information. Figure 11-2). In Stock Mode there will...
  • Page 46 Settings in the Menu Select "Banks Modules" from the main "MENU." See Figure 11-4, A. Select the module "Derringer" for the Derringer Banks Module. See Figure 11-4, B. Select "Power:" to change the Derringer power level ("STOCK" to "LEVEL 6"). See Figure 11-4, C.
  • Page 47: Six-Gun & Economind Tuner

    11.3.1 Banks Tuner Gauge Layout Once the Banks Six-Gun or EconoMind is connected to the iDash 1.8 (Banks Bus 1), a new gauge layout called "Tuner" will be available for selection. To access the menu selection, refer to "4.1 Layout Selection"...
  • Page 48: Banks Speedbrake

    If this occurs, maintain a pre-selected target speed. the Banks Speedbrake will shut off until Choosing the OFF mode allows the 30 seconds after traction is regained. vehicle to behave as if the SpeedBrake is not present.
  • Page 49 11.4.3 AUTO Mode AUTO Mode uses various functions Figure 11-6 of the Banks SpeedBrake to keep the vehicle at the driver’s set target speed. When AUTO Mode is active and the % Braking...
  • Page 50 ("HI", "MED", "LOW") and Brake feature: pressing the DOWN button will enable/ disable the Foot Brake feature, as shown Select "Banks Modules" from the in Figure 11-7. main "MENU." When in AUTO Mode, pressing the UP Select the module "SpeedBrake."...
  • Page 51 BANKS MODULES (IF CONNECTED), CONTINUED MANUAL MODE Figure 11-7 HOLD to change SpeedBrake Mode PRESS to change SpeedBrake Strength HIGH BK P PRESS to change SpeedBrake Strength AUTO MODE Figure 11-8 HOLD to change SpeedBrake Mode PRESS to adjust Speed Setting...
  • Page 52: Speedbrake & Tuner Auto Switching (Idash 1.8 Banks Bus 1 Only)

    25 mph (40 km/h) to 75 mph (121 km/h) For more information, refer to "12.12 SpeedBrake & Tuner Auto Switch LOW, MED, or HIGH (iDash 1.8 Banks Bus 1 ONLY)" on page 63. Not Active or Active 11.4.6 Changing SpeedBrake Settings in the Menu Select "Banks Modules"...
  • Page 53: Settings

    SECTION: 12 SETTINGS Figure 12-1 The iDash 1.8 features many customizable settings allowing for personalization. Most user configurable settings can be adjusted in the "Settings" menu. 12.1 Layout This menu allows you to set up the number of gauges to display. Go to "MENU"...
  • Page 54 SETTINGS, CONTINUED Select "Settings" from the main Select "Auto-Dimming" to toggle ON or OFF. See Figure 12-1, B & C. "MENU." Select "Brightness." The "Brightness" menu will See Figure 12-1, A. change depending on the status of "Auto-Dimming." Select "LCD Lower Limit." See Figure 12-1, B.
  • Page 55 SETTINGS, CONTINUED A. Scroll UP or DOWN to Return to the Gauge Screen when adjust the button brightness finished. for dark conditions (0-100%). 12.2.6 Button Lighting The buttons will display the brightness value shown. Only available when "Auto- Dimming" is "OFF." B.
  • Page 56: Bar Graph

    SETTINGS, CONTINUED 12.2.8 Button Color Figure 12-2 Only available for "Hardware Rev: 2" iDash 1.8. To adjust the button's LED color: Select "Settings" from the main "MENU." Select "Brightness." See Figure 12-1, A. Select "Button Color." See Figure 12-1, B or C. Scroll UP or DOWN through the color selection screen and press "Yes"...
  • Page 57 SETTINGS, CONTINUED 12.3.1 Enable/Disable Bar graph color. You will be returned to the previous screen. Graphs Return to the Gauge Screen When bar graphs are disabled, all when finished. graphs are removed from the display 12.3.3 Bar Graph Limits except for the bar graph in "Field 1" in the density layout.
  • Page 58: Text Color

    SETTINGS, CONTINUED 12.4 Text Color 12.5 Units Customize the look of your gauge Choose to display your preferred units display by selecting from one of 23 for parameter values. different text colors. All text in the Figure 12-4 menu and Gauge Screen will show the color selected.
  • Page 59: Tire Size Correction

    SETTINGS, CONTINUED 12.5.2 Pressure Units C. Select the desired value to save the setting. Depending on your preference, you D. Repeat steps 4-A to can display pressure values in either 4-C for "Aspect" ratio and Pounds per Square Inch (PSI), Bar, or "Wheel Diameter."...
  • Page 60: Engine Displacement

    SETTINGS, CONTINUED 12.8 Engine Displacement Select "Stock Final Drive" to input the vehicle's stock final drive Engine displacement is required to information. See Figure 12-5, B. calculate the volume of air being pumped through the engine (CFM). It A. Scroll UP or DOWN to is also necessary to calculate Cylinder adjust the value.
  • Page 61: Vehicle Selection

    SETTINGS, CONTINUED 12.9 Vehicle Selection to the Banks Bus 1 products must be set to "Vehicle Selection" "Banks Bus The iDash 1.8 has multiple vehicle 1 Product" in order to communicate selections to accommodate the with the vehicle and Banks Bus 1 hardware setup and/or take advantage Products.
  • Page 62: Wake-Up

    SETTINGS, CONTINUED 12.10 Wake-up B. Restart your vehicle and the iDash should start within Figure 12-8 10 seconds after startup. C. If it does not automatically wake-up, press any button to wake. Increase sensitivity level by one and repeat the process.
  • Page 63: Speedbrake & Tuner Auto Switch (Idash 1.8 Banks Bus 1 Only)

    Auto Switch (iDash 1.8 Banks Bus 1 ONLY) You must have a Banks Tuner and the Banks SpeedBrake connected to the iDash 1.8 Banks Bus 1 to use this feature. The "Tuner Auto Switch" feature allows you to have the "Tuner" layout and "SpeedBrake"...
  • Page 64: Reset

    SETTINGS, CONTINUED 12.13 Reset 5. The iDash 1.8 will reset and display the pre-programmed Gauge Screen The "Reset" settings allow you to layout. reset the iDash 1.8 to factory settings. If you have a vehicle specific When calibrating the ambient light gauge it will still reset to standard.
  • Page 65: System Information

    See Figure 13-1, A. The system information will be displayed as shown in Figure 13-1, B. This is the information that will need to be supplied to Banks Tech Support if requested. Return to the Gauge Screen when finished. To record parameters supported on your vehicle: Insert a Micro SD card.
  • Page 66: Firmware Updates

    SECTION: 14 FIRMWARE UPDATES To ensure that your Banks Bus MicroSD card included if data system is operating as designed, logging option purchased. You can we recommended checking for use any microSD card up to 32GB for firmware updates for your iDash firmware updates.
  • Page 67 See Figure 14-8, Figure 14-9. IF UPDATING BANKS MODULE(S), any iDash 1.8 connected could be used for updating the Banks Module(s). IF UPDATING THE iDASH 1.8, each iDash 1.8 must be updated one by one.
  • Page 68 FIRMWARE UPDATES, CONTINUED Go to the main "MENU," then Scroll down and select the latest select "Firmware Update." See firmware version you downloaded. See Figure 14-10. Figure 14-12. Figure 14-10 The update process will begin and show a progress bar. See Figure 14-13.
  • Page 69 Leave the microSD card inserted for this proces Figure 14-14 Repeat the process (Steps 9-16) for all iDash 1.8's or connected Banks Modules. If engine is off during iDash 1.8 update, you may need to press a button to wake up the iDash 1.8 to finish the update.
  • Page 70: Glossary

    SECTION: 15 GLOSSARY 15.1 Banks Engine Air Density System Overview Horsepower is directly dependent on the number of oxygen molecules available for combustion. Simply put, the more oxygen your engine has, the more fuel it can combust resulting in greater horsepower. Boost pressure has been the go to performance measurement to predict horsepower changes because it directly affects the amount of oxygen available to the engine.
  • Page 71: Definitions Of Common Parameters

    1 cylinder. When there are multiple sensors measuring the same type of data in a system (Ex: IAT1, IAT2, IAT3...) then the number 1 sensor is located furthest upstream in the path of airflow and the highest number sensor available is furthest downstream in the system. AIR DENSITY (Banks Patented) (Banks Exclusive) Abbreviation Parameter Name ....
  • Page 72 VT POS ....Turbo Vane Position - Actual Position of the turbocharger vanes. WG CMD ..... Wastegate Commanded - Commanded position of the wastegate. expressed as a %. Engine Performance Fuel (Banks Exclusive) Abbreviation Parameter Name AFR1/1 ....Air Fuel Ratio Bank1 Sensor1 - Measured Air Fuel Ratio.
  • Page 73 GLOSSARY, CONTINUED Pressure (Banks Exclusive) Abbreviation Parameter Name AAP ..... Ambient Air Pressure - Pressure of air surrounding vehicle. BSTCMD ....Boost Commanded - Target boost value set by the powertrain control unit. BOOST ....Boost Pressure - Pressure in intake manifold relative to barometric.
  • Page 74 SECTION 14: GLOSSARY, CONTINUED HPCALC ....Calc Engine Horsepower - Instantaneous engine horsepower indicated by the power control module (does not account for mods). TRQCAL ....Calc Engine Torque - Instantaneous engine torque indicated by the power control module (does not account for mods). LOAD ....
  • Page 75: Troubleshooting

    SECTION: 16 TROUBLESHOOTING If the iDash 1.8 does not power for further assistance. on when installed in the vehicle If the gauge powers on but all the with the engine running, please check the following items: values report "--" intermittently or consistently: 1.
  • Page 76 Gale Banks Engineering 546 Duggan Avenue • Azusa, CA 91702 (626) 969-9600 • Fax (626) 334-1743 Product Information & Sales: (888) 635-4565 Customer Support: (888) 839-5600 Installation Support: (888) 839-2700 bankspower.com 97654 v.7...

This manual is also suitable for:

Idash 1.8 super gauge6656066561665626656361410

Table of Contents

Save PDF