Advertisement
Quick Links
InstallationManual
Banks SpeedBrake
For use with Palm
Tungsten
E2
®
™
2006-2007 Chevy/GMC 6.6L (LBZ)
Turbo-Diesel Pickup
THIS MANUAL IS FOR USE WITH KITS 55424
Gale Banks Engineering
546 Duggan Avenue • Azusa, cA 91702
(626) 969-9600 • Fax (626) 334-1743
Product Information & Sales: (888) 635-4565
bankspower.com
©2012 Gale Banks Engineering
02/28/12 PN 97227 v.7.0
Advertisement

Related Manuals for banks SpeedBrake


Summary of Contents for banks SpeedBrake
- Page 1 Turbo-Diesel Pickup THIS MANUAL IS FOR USE WITH KITS 55424 Gale Banks Engineering 546 Duggan Avenue • Azusa, cA 91702 (626) 969-9600 • Fax (626) 334-1743 Product Information & Sales: (888) 635-4565 bankspower.com ©2012 Gale Banks Engineering 02/28/12 PN 97227 v.7.0...
- Page 2 BUYER agrees to indemnify the SELLER and to hold Disclaimer of Liability the SELLER harmless from any claim Gale Banks Engineering Inc., and its related to the item of the equipment distributors, employees, and dealers purchased. Under no circumstances (hereafter “SELLER”) shall in no way...
- Page 3 Practices of purchase receipt. All Warranty claims are subject to approval by Gale Banks Section 1 ..... . 6 Engineering Inc.
- Page 4 General Installation Practices Route and tie wires and hoses a Dear Customer, minimum of 6” away from exhaust Your new Banks SpeedBrake heat, moving parts and sharp is a uniquely designed braking edges. clearance of 8” or more is system with electronic controls, recommended where possible.
- Page 5 TooLS REQUIRED: • ⁄ ” and ⁄ ” drive ratchets with inch and metric sockets and ⁄ ” and ⁄ ” drive extension • Inch and metric combination or open-end wrenches • Standard & Phillips screwdriver • Clean shop towels or rags •...
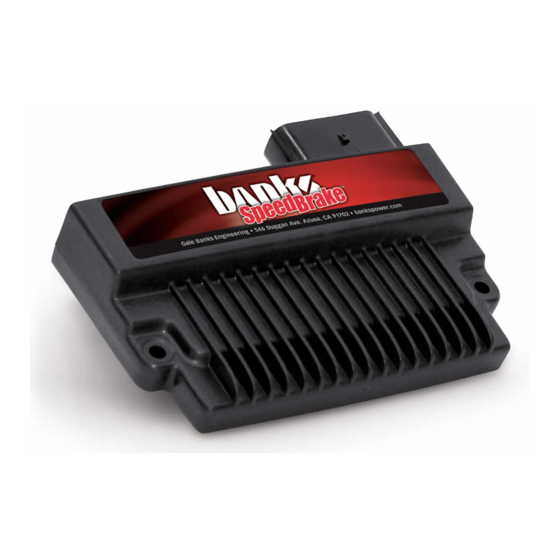
- Page 6 Section 1 INSTaLLaTIoN of BaNkS SPEEDBRakE WIRE HaRNESS Figure 1 Banks SpeedBrake and supplied wiring harness 97227 v.7.0...
- Page 7 (or batteries, if Insert the female connector on there are two) before beginning work. the SpeedBrake wire harness into the Secure the cables so that they do not transmission connector. Insert the come in contact with the battery posts factory main transmission connector during the installation.
- Page 8 Figure 3 Remove of Driver Side Cowl Support Brace Figure 4 97227 v.7.0...
- Page 9 Remove the fuse box assembly Insert the male c100 connector cover by expanding the fuse box out on the SpeedBrake wire harness to the towards the engine side and lifting up, female C100 factory connector. Insert exposing the fuse electrical center.
- Page 10 Locate the fuse connector wire sufficient room to lock the electrical on the SpeedBrake wiring harness and center back in place. Run the wire connect it to the mini-blade fuse tap. harness out to the firewall side of the Replace the fuse box assembly cover fuse brace.
- Page 11 Figure 7 electrical Center Fuse tap Location Figure 8 Fuse tap Installation 97227 v.7.0...
- Page 12 Figure 9 If a Banks Diesel Tuner has been Insert the male 24 pin connector previously installed, skip step 20. on the SpeedBrake harness into the female 24-pin connector on the factory Locate the rubber grommet on harness. Insert the female 24-pin the driver’s side of the vehicle firewall.
- Page 13 Figure 10 Driver Side Firewall, Rubber Grommet Figure 11 97227 v.7.0...
- Page 14 Figure 12 Placement of Banks tuner on top of the Fuse Box. Figure 13 Placement of Banks tuner on side of the Fuse Box. 97227 v.7.0...
- Page 15 Secure the tuner so that it stays in place. Use the supplied hook & loop interlocking fasteners to make the necessary adjustment to attach the SpeedBrake to the top of the fuse box cover and Banks tuner to the fuse box side or top. 97227 v.7.0...
- Page 16 Note: If the universal mount swivel an extended period of time. does not move or is tight after Gale Banks Engineering is not loosening the hold down knob, then responsible for damage to PDas remove the previously inserted resulting from exposure conditions.
- Page 17 Fuse Access Panel Figure 16 Find the Banks OBD II Interface Cable in your kit. Connect the Banks Interface Cable to the vehicle’s OBD II connector. Use a cable tie, as shown in figure 17, to secure the Banks Interface Cable to the vehicle’s OBD II connector.
- Page 18 Station against the lower support from the side of the dash. Route the bracket. RJ12 connector (phone like connector) on the Banks OBD II Interface cable Note: there may be a snug fit under the dash and out where the when installing the PowerPDA fuse access panel was.
- Page 19 Figure 18 optional tuner-to-SpeedBrake wire WaRNING: The charging cable on Route all wiring away from any the docking station is designed pedals or other moving components. to supply a constant low-voltage Using the cable ties supplied, secure power source (+5vdc) to the the wiring under the dash.
- Page 20 Section 3 BaNkS SPEEDBRakE PoWERPDa SofTWaRE & INSTaLLaTIoN Figure 19 Front view HOME KEY 5-WAY NAVIGATOR MENU KEY CENTER BUTTON The SpeedBrake PowerPDA software is Figure 20 supplied on a Secure Digital (SD) media card. The software should be installed on the Palm Tungsten E2 and run from main memory.
- Page 21 In the ‘Copy From’ drop down menu upper right hand corner of the screen. select “card”. See figure 21. The ‘Copy Touch the button labeled ‘All’. The Banks To’ selection will automatically change SpeedBrake PowerPDA software is now to “Device” (figure 22). Select on the installed.
- Page 22 Section 4 PLaCEMENT of THE BaNkS PoWER DECaLS 97227 v.7.0...
- Page 23 NoTES 97227 v.7.0...
- Page 24 Gale Banks Engineering 546 Duggan Avenue • Azusa, cA 91702 (626) 969-9600 • Fax (626) 334-1743 Product Information & Sales: (888) 635-4565 bankspower.com...
Need help?
Do you have a question about the SpeedBrake and is the answer not in the manual?
Questions and answers