Riso ComColor Series User Manual
Hide thumbs
Also See for ComColor Series:
- User manual ,
- Troubleshooting manual (58 pages) ,
- Administrator's manual (34 pages)

Subscribe to Our Youtube Channel
Related Manuals for Riso ComColor Series


Summary of Contents for Riso ComColor Series
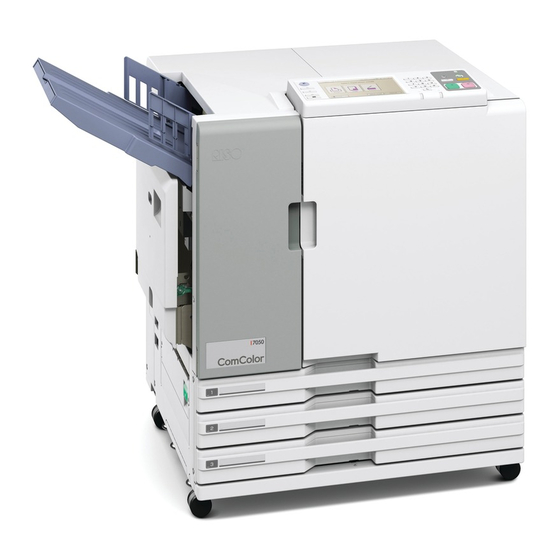
- Page 1 User's Guide User's Guide This guide describes total operation features and specifications. Applicable Printer models 9050/9050R 7050/7050R/7010/7010R 3050/3050R/3010/3010R 050-36300-002...
- Page 2 Regular size paper whose width exceeds 216 mm (8 1/2") is not displayed on the printer driver screen and the operation panel. CAUTION After reading this guide, keep it in handy for future reference. The "Safety Precautions" are provided in the supplemental Safety Information. Be sure to read through them prior to use. ComColor Series User's Guide 01...
-
Page 3: About This Guide
This guide describes safety precautions and specifications. About This Guide (1) No part of this guide may be reproduced in whole or in part without the permission of RISO KAGAKU CORPORATION. (2) The contents of this manual may undergo changes without prior notice to reflect improvements in the product. -
Page 4: Symbols, Notations, And Screenshots Used In This Guide
Wide stacking tray RISO auto-control stacking tray ■ Illustrations Used in This Guide The screenshots contained in this guide may vary from the actual screen display depending on the usage environment, including the connected optional equipment. ComColor Series User's Guide 01... -
Page 5: Table Of Contents
List of Settings ....................1-5 Basic Settings ..................1-7 [Basic] Tab ...................... 1-7 [Layout] Tab ....................1-12 [Image] Tab ....................1-15 [Finishing] Tab ....................1-17 [Advanced] Tab ..................... 1-23 [About] Tab ....................1-27 Environment Settings .................1-28 [Environment] Tab ..................1-28 ComColor Series User's Guide 01... - Page 6 Staple/Punch ....................2-43 Paper folding ....................2-45 Booklet ......................2-47 Output tray ....................2-49 Paper guide control ..................2-50 Jump wing control ..................2-51 Head cleaning ....................2-51 Front doors release ..................2-52 Interrupt copy ....................2-52 ComColor Series User's Guide 01...
- Page 7 Changing Finished Job and Folder Job Settings .......... 4-11 Printer Function Settings ..............4-14 Online ......................4-14 Feed tray ....................... 4-14 Head cleaning ....................4-15 Paper guide control ..................4-15 Jump wing control ..................4-15 Front doors release ..................4-15 ComColor Series User's Guide 01...
- Page 8 Chapter 5 RISO Console ....................5-1 Overview of the RISO Console ............5-2 Starting the RISO Console ................5-3 [Monitoring] Menu .................5-4 [General] Screen ..................... 5-4 [System] Screen ....................5-5 [User] Screen ....................5-5 [License Info.] Screen ..................5-6 [Meter display] Menu ................5-7 [Details] Screen ....................
-
Page 9: Part Names And Functions
Use to slide or fix the standard tray paper guide. Levers paper jams), this cannot be opened. When you are located on both sides of the standard tray paper want to open it, turn the [Front doors release] to guide, in two positions. ComColor Series User's Guide 01... -
Page 10: Stacking Tray (Optional)
Printouts are ejected face-up. • With the RISO auto-control stacking tray, the paper guides adjust automatically to fit the paper size. • With the wide stacking tray, move the paper guides (sides and end) to match the size of the paper for printing. -
Page 11: Finisher (Optional)
Open to remove the jammed paper from the paper feed Use this button to move the printouts in the booklet tray path between the printer and the finisher. to the position where you can easily retrieve them. ComColor Series User's Guide 01... -
Page 12: Operation Panel
Lights up when the START key is ready to be used. j Error Lamp Flashes when an error occurs. k Clear Key Press to clear letters or numbers that have been entered. l Data Receive Lamp Flashes when data is being received. ComColor Series User's Guide 01... -
Page 13: Touch Panel
Prepare a new ink cartridge of the color that flashes. e Mode Buttons Press these buttons to access screens for each mode. Lock icons in the upper left corner of a button indicate that you must log in to access that mode. ComColor Series User's Guide 01... - Page 14 Enables you to check the status of the consumables, Enables you to view information about the license of such as paper or ink. the system in the machine. ● System Screen Enables you to check the model of the machine and other information. ComColor Series User's Guide 01...
-
Page 15: Touch Panel Operations
Buttons that are not available under the current modes. conditions are grayed out. You can use these buttons when the required conditions are met. Lock icon ComColor Series User's Guide 01... - Page 16 The screen for the mode you have logged in is displayed. After finishing operations, be sure to press [Logout]. Ask your administrator if you cannot find your name, or if you have forgotten the password. ComColor Series User's Guide 01...
-
Page 17: Entering Text
[Clear]. The maximum number of characters to be entered is displayed above the text input field. Press [OK] when input is complete. To cancel information you have entered, press [Cancel]. ComColor Series User's Guide 01... -
Page 18: List Of Settings For Each Mode
1-18 finisher or face down offset tray) Add cover Specify this to add front and/or back cover. p. 1-18 Booklet binding Specify the type of booklet printing. (When using the optional p. 1-18 multifunction finisher) ComColor Series User's Guide 01... - Page 19 Assign a PIN code to a job to be printed or saved to a folder. p. 1-27 Save/Call setting Save and call frequently used settings. p. 1-27 1 This function is not available for ComColor 7010/7010R/3010/3010R. 2 This function is not available for ComColor 3050/3050R. ComColor Series User's Guide 01...
- Page 20 2-31 footer. Image quality Specify the resolution for scanning originals. p. 2-33 Gamma control Adjust the color balance (CMYK) of scanned data. p. 2-34 Image control Specify the image processing of the original. p. 2-35 ComColor Series User's Guide 01...
- Page 21 2-49 output settings. (When using the optional multifunction finisher or stacking tray) Paper guide control Adjust the position of the paper guides of the RISO p. 2-50 auto-control guide stacking tray. (When using the optional RISO auto-control stacking tray) Jump wing control Adjust the position of the jump wing.
- Page 22 Make the background color (base color) lighter so that p. 3-14 the text is easier to read. PIN code Assign PIN codes when saving scanned jobs on the p. 3-15 internal hard disk. Front doors release Release the front door lock. p. 3-15 ComColor Series User's Guide 01...
- Page 23 Head cleaning Clean the ink heads. p. 4-15 Paper guide control Adjust the paper guide position of the RISO auto-control p. 4-15 [Functions] stacking tray. (When using the optional RISO auto-control stacking tray) Jump wing control Adjust the position of the jump wing.
-
Page 24: Print Preparations
Before printing, load the paper, set the stacking tray (optional) so the machine is ready for use. ● When using the feed tray, you do not need to set the standard tray. ● With the RISO console, you can check the status of the machine on your computer. (p. 5-1 "RISO Console") -
Page 25: Loading Paper
Use the standard tray for the following types of paper. • Thick paper and other special paper • Preprinted paper • Postcards • Envelopes " For details, see Printing Paper" in the "Safety Information". ComColor Series User's Guide 01... - Page 26 On the operation panel, check the tray settings. When you have switched to a different type or size of paper, update the feed tray settings (p. 2-9 "Feed tray"). ComColor Series User's Guide 01...
- Page 27 ● Be sure to load an envelope with its flap open and its bottom side entering the machine first. The [Rotate] feature is convenient when printing on envelopes from a computer. ComColor Series User's Guide 01...
- Page 28 Hold the button down until the tray reaches the desired position. Make sure the machine is on. Close the standard tray. Load additional paper, or switch the loaded paper. Make sure the standard tray is all the way down before closing it. ComColor Series User's Guide 01...
-
Page 29: Preparing The Stacking Tray (Optional)
● The RISO auto-control stacking tray is shown in this illustration. ● When using the wide stacking tray, manually adjust the paper guides' (side and end) positions to fit the paper size. - Page 30 The wide stacking tray does not include a paper guides open button. Manually spread the paper guides apart. Lower the paper guide (end) toward the stacking tray to fold it Fold up the paper arranger. ComColor Series User's Guide 01...
-
Page 31: Chapter 1 Printer Driver
Printer Driver ComColor Series User's Guide 01... -
Page 32: Overview Of Print Operations
: Displays a preview image of the document to be printed. The color mode icon is displayed at the top left of the preview image. (The icon is not displayed when [Color mode] is set to "Auto".) • Output trays : Displays the output trays with orange arrows. ComColor Series User's Guide 01... -
Page 33: Procedure
[Printer configuration] has not been configured correctly, the required buttons are not displayed on the printer driver screen. (p. 1-28 "[Environment] Tab") Procedure The printing workflow is as follows. Display the printer driver screen Configure the settings as needed Click [OK] Click [Print] ComColor Series User's Guide 01... - Page 34 [Environment] tab have been configured correctly. (p. 1-28 "Environment Settings") ● The [Original image] and [Paper type] settings of the printer driver greatly affect the print quality. Change the settings according to use conditions. ComColor Series User's Guide 01...
-
Page 35: List Of Settings
1-17 Offset output Specify the timing to offset output. (When using the optional multifunction p. 1-18 finisher or face down offset tray) Add cover Specify this to add front and/or back cover. p. 1-18 ComColor Series User's Guide 01... - Page 36 Assign a PIN code to a job to be printed or saved to a folder. p. 1-27 Save/Call setting Save and call frequently used settings. p. 1-27 1 This function is not available for ComColor 7010/7010R/3010/3010R. 2 This function is not available for ComColor 3050/3050R. ComColor Series User's Guide 01...
-
Page 37: Basic Settings
Print in one color (cyan) regardless of the color of the original. [Magenta] Print in one color (magenta) regardless of the color of the original. "Auto" and "Full color" are not displayed when the administrator has restricted color printing. ComColor Series User's Guide 01... - Page 38 ■ Specifying a Custom Size left blank.) When the original is a non-standard size, select [custom]. Select [custom] for [Original size]. The dialog box for specifying the custom size is displayed. ComColor Series User's Guide 01...
- Page 39 The dialog box for specifying the custom size is printed. See "[Any]" (p. 1-10) in "Paper type". displayed. You can use the RISO Console to confirm the paper size and paper type loaded in the printer feed tray. (p. 5-4 "[General] Screen" in "RISO Console")
- Page 40 ● Data saved in folders can be printed from the [Card-IJ] [Folder] Screen in printer mode (p. 4-9) or the [Folder] Screen of the RISO Console (p. 5-11). ● The computer user name is added as the [owner] to the data saved to a folder.
- Page 41 Select the settings to save in [Status list]. Click [Entry]. Click [Save in file]. The settings are saved and displayed in [Status list]. The [Save As] dialog box is displayed. Click [Close]. Specify the destination folder and file name. 1-11 ComColor Series User's Guide 01...
-
Page 42: [Layout] Tab
Select the number of pages per sheet. [Booklet] Continuous multiple pages are imposed and printed to create a middle-binding booklet after duplex printing. You cannot use "Imposition" and "Mixed size" at the same time. (p. 1-8 "Mixed size") 1-12 ComColor Series User's Guide 01... - Page 43 ● To create a booklet (folded or with middle- binding staples), configure the [Finishing] tab. ■ Multi-up (Single) Setting ● Pages/sheet Select the number of pages per sheet. [2 pages], [4 pages], [8 pages] Example: When "Pages/sheet" is set to [4 pages] 1-13 ComColor Series User's Guide 01...
- Page 44 ● Save/Call setting finisher. The current settings on the printer driver screen can be saved and retrieved later as needed. See "Save/Call setting" (p. 1-11) in "[Basic] Tab" for details. 1-14 ComColor Series User's Guide 01...
-
Page 45: [Image] Tab
(line drawing) to make the outlines smoother. To enable this processing, select the [Line smoothing] check box. Image Printing will take longer if you have selected [Line smoothing]. 1-15 ComColor Series User's Guide 01... - Page 46 Specify the image resolution. [Standard (300 × 300dpi)] Suitable for documents and other originals with text. [Fine (300 × 600dpi)] Suitable for photos and similar originals. Printing will take longer if you select [Fine (300 × 600dpi)]. 1-16 ComColor Series User's Guide 01...
-
Page 47: [Finishing] Tab
Slip sheets cannot be inserted when the following settings are configured. • [Paper folding] or [Fold + Staple] in the "Booklet binding" (p. 1-18) • "Add cover" (p. 1-18) 1-17 ComColor Series User's Guide 01... - Page 48 Select the booklet binding method and click [Details] to display the [Details] dialog box. Configure the [Separate books], [Center margin], and [Booklet cover] settings. The optional multifunction finisher is required to use this setting. 1-18 ComColor Series User's Guide 01...
- Page 49 Select the tray with [Feed tray for cover]. Specify the tray in which you will load the printed covers before you start printing the main text in a later step. 1-19 ComColor Series User's Guide 01...
- Page 50 [Booklet cover] function Cover Binding margin Front Back Print surface is automatically reduced. Print surface Pages except the cover pages (the main text) Page 3-10 (4 pages on each sheet) Binding margin 1-20 ComColor Series User's Guide 01...
- Page 51 (7 3/16" - 17") • Paper weight: 52 g/m - 162 g/m (14-lb bond - 43-lb bond) When the paper weight exceeds 162 g/m (43-lb bond), only one sheet can be stapled for the cover. 1-21 ComColor Series User's Guide 01...
- Page 52 Fold the paper with the printed surface on the outside. the [Staple] setting. When both sides have been printed, the first page is the printed surface. 1-22 ComColor Series User's Guide 01...
-
Page 53: [Advanced] Tab
(p. 1-18 "Booklet (p. 4-6 "Changing Settings During Printing" in binding", p. 1-21 "Staple", p. 1-22 "Punch", p. 1-22 "Printer") "Paper folding") 1-23 ComColor Series User's Guide 01... - Page 54 Pages Slip sheets are inserted between sets. are printed even if they have only a header or [Between groups] footer but no main text. Slip sheets are inserted between groups. 1-24 ComColor Series User's Guide 01...
- Page 55 Select the character string to delete from the list, and click [Clear]. You cannot delete the factory preset character strings (Confidential, Classified, Draft, etc.). You need to have administrative authority for your computer to add or delete a watermark character string. 1-25 ComColor Series User's Guide 01...
- Page 56 ● Applied page images in the stamp area, and then stamp the page [All pages], [First page only] number in that white space. ● Start number Enter the stamp start number (1 to 9). 1-26 ComColor Series User's Guide 01...
-
Page 57: [About] Tab
● Save/Call setting The current settings on the printer driver screen can be saved and retrieved later as needed. See "Save/Call setting" (p. 1-11) in "[Basic] tab" for details. 1-27 ComColor Series User's Guide 01... -
Page 58: Environment Settings
The machine changes the color profile according to the paper type. (p. 1-10 "Paper type") Even if a paper type is not specified, you must select one of the color profiles. Make your selection based on the administrator's recommendation. 1-28 ComColor Series User's Guide 01... - Page 59 Click [Add] to register the paper Click [Get Printer Info]. size. The information of the paper size registered in the printer is displayed. Click [Close]. The paper size information is saved. Click [Close]. The paper size information is saved. 1-29 ComColor Series User's Guide 01...
- Page 60 The [Custom paper entry] dialog box is displayed. Click [Open file]. Select the file with the paper size setting on the computer. Click [Open]. The read paper sizes are displayed in the list on the [Custom paper entry] dialog box. 1-30 ComColor Series User's Guide 01...
- Page 61 Select the folder to add to [Registered folder] and click [Add]. Configure the personal folder. For personal folders, select the [Use Personal folder] check box. Click [OK]. • To cancel the settings, click [Cancel]. 1-31 ComColor Series User's Guide 01...
- Page 62 1 Printer Driver 1-32 ComColor Series User's Guide 01...
-
Page 63: Chapter 2 Copy
Copy ComColor Series User's Guide 01... -
Page 64: Overview Of Copy Operations
If you connect an optional multifunction finisher, you can create a booklet or fold, staple, or punch the printed paper. Procedure The copy workflow is as follows. Load the original Select copy mode Configure the functions Specify the number of copies Press the [START] key ComColor Series User's Guide 01... - Page 65 Open the original cover. Place the original. Place the original face down on the glass. Align the corner of the original with the upper-left corner of the glass. ComColor Series User's Guide 01...
- Page 66 4 Specify the Number of Copies You can specify up to 9,999 copies using the numeric keys. The specified number of copies is displayed at the top right of the screen. • To clear the fields, press the [Clear] key. ComColor Series User's Guide 01...
- Page 67 When changing [Image position] and other settings, see "Image Position" (p. 4-12) in "Printer". ■ Changing the Settings During Copying Åv Press the [STOP] key. The [Confirm] screen is displayed. Press [Setting chg.]. The [Suspending] screen is displayed. ComColor Series User's Guide 01...
-
Page 68: List Of Settings
Multi-up(Single) (arranges multiple copies of one page on one sheet) copying. Stamp Page/Date Stamp the page number and date on the header or p. 2-31 footer. Image quality Specify the resolution for scanning originals. p. 2-33 ComColor Series User's Guide 01... - Page 69 Specify the output tray for the copies and continuous p. 2-49 output settings. (When using the optional multifunction finisher or stacking tray) Paper guide control Adjust the position of the paper guides of the RISO p. 2-50 auto-control stacking tray. (When using the optional RISO auto-control stacking tray) Jump wing control Adjust the position of the jump wing.
-
Page 70: Basic Settings
Copy in one color (magenta) regardless of the color of Press [OK]. the original. The settings are confirmed and the previous screen is displayed. "Auto" and "Full color" cannot be selected when the administrator has restricted color copying. ComColor Series User's Guide 01... -
Page 71: Reproduction Size
Press [OK]. When (standard tray: ) is displayed, The settings are confirmed and the previous this indicates that there is no paper. Load screen is displayed. paper. ComColor Series User's Guide 01... - Page 72 For details, ask your administrator. When using a tray loaded with special paper, it is recommended that you set [Tray selection] to [Manual]. (p. 2-12 "Configuring the [Tray selection] Setting") Press [Feed tray]. Select the feed tray. 2-10 ComColor Series User's Guide 01...
- Page 73 Follow Steps 1 to 3 in "Changing the Feed Tray Setting". Press [Paper type]. The [Paper type] screen is displayed. Press [ON] for D-Feed Check. Press [OK]. The settings are confirmed and the previous screen is displayed. 2-11 ComColor Series User's Guide 01...
-
Page 74: Original
The [Original] screen is displayed. setting. The button switches between [Auto] and [Manual] each time it is pressed. Press [OK]. The settings are confirmed and the previous screen is displayed. Select the original type. 2-12 ComColor Series User's Guide 01... -
Page 75: Scanning Level
You can make the background color (base color) lighter so that the text is easier to read when copying text originals with a background color or colored paper. (p. 2-35 "Base color level") 2-13 ComColor Series User's Guide 01... -
Page 76: Duplex/Simplex
Top side left ■ Output Select the layout of the printout. [Simplex], [Duplex] ■ Output Paging Direction When copying both sides of the original, select how pages are turned. [Left / Right], [Top / Bottom] 2-14 ComColor Series User's Guide 01... - Page 77 Load the original in the ADF. Press [Duplex/Simplex]. In [Original], press [Duplex]. In [Original], select the [Paging Direction] setting. Select the original orientation. In [Output], press [Simplex]. Press [OK]. The settings are confirmed and the previous screen is displayed. 2-15 ComColor Series User's Guide 01...
-
Page 78: Direct Access/Selections Entry
"Image quality" (p. 2-33) "Gamma control" (p. 2-34) "Image control" (p. 2-35) "Base color level" (p. 2-35) "Program" (p. 2-36) "Add cover" (p. 2-40) "Collate/slip sheet" (p. 2-41) "Auto-Rotate" (p. 2-43) "Staple/Punch" (p. 2-43) 2-16 ComColor Series User's Guide 01... -
Page 79: Direct Access Entry
The settings are confirmed and the [Direct Access entry] screen is displayed. Press [Close]. Repeat Steps 2 to 4 to register The previous screen is displayed. additional functions as needed. 2-17 ComColor Series User's Guide 01... -
Page 80: Copying Functions
Confirm the settings and print the settings as a list. Press [Print this list]. Press [Functions] on the copy The copy mode settings are printed and the mode screen. [Check setting] screen is displayed. Press [OK]. The previous screen is displayed. 2-18 ComColor Series User's Guide 01... -
Page 81: Save/Call Setting
"Collate/slip sheet" (p. 2-41) Press [OK]. "Auto-Rotate" (p. 2-43) "Add cover" (p. 2-40) The settings are confirmed and the previous screen is displayed. "Staple/Punch" (p. 2-43) "Paper folding" (p. 2-45) "Booklet" (p. 2-47) "Output tray" (p. 2-49) 2-19 ComColor Series User's Guide 01... - Page 82 Press the button of the setting to The [Setting entry] screen is displayed. retrieve. The [Setting call] screen is displayed. Confirm the setting. Press [Retrieve]. The setting is retrieved and the copy mode screen is displayed. 2-20 ComColor Series User's Guide 01...
- Page 83 Follow Steps 2 and 3 in "Saving Settings". [Register] at this step. Press a button to rename. Press [Close]. The [Setting call] screen is displayed. The previous screen is displayed. Press [Rename]. The [Rename] screen is displayed. 2-21 ComColor Series User's Guide 01...
-
Page 84: Select Layout
Press [Yes]. Press [Functions] on the copy mode screen. Press [Close]. The previous screen is displayed. Press [Select layout]. The [Select layout] screen is displayed. Select the output image. The [Duplex/Simplex] screen is displayed. 2-22 ComColor Series User's Guide 01... -
Page 85: Copy And Pause
• To continue copying without changing the settings, press [Continue]. • To change the settings, press [Setting chg.], and then change the settings. (p. 4-6 "Changing Settings During Printing" in "Printer") • To cancel copying, press [Cancel]. 2-23 ComColor Series User's Guide 01... -
Page 86: Additional Copies
Printing of additional copies starts. ■ PIN code Select whether to assign a PIN code for data to save. [Not use] Do not specify a PIN code. [Use] Specify a PIN code (up to eight numbers). 2-24 ComColor Series User's Guide 01... - Page 87 Change the job name. To change the name, press [Job name] and type or edit the job name. • Enter a name up to 10 characters long on the text input screen. (p. 15 "Entering Text") 2-25 ComColor Series User's Guide 01...
-
Page 88: Save To Archive
Specify the owner of data to save. ■ Job name Type or edit the job name of data to save. Press [Functions] on the copy mode screen. Press [Save to archive]. The [Save to archive] screen is displayed. Press [Save]. 2-26 ComColor Series User's Guide 01... -
Page 89: Adf Scan & Pause
• When there are no additional originals, press [Print] to start copying of the scanned originals. Select the original size from the original size list. Press [OK]. The settings are confirmed and the previous screen is displayed. 2-27 ComColor Series User's Guide 01... -
Page 90: Mixed Size Original
• To clear the fields, press the [Clear] key. "Mixed size original" is set. Press [OK]. • Press again to cancel the setting. The settings are confirmed and the previous screen is displayed. Original orientation 2-28 ComColor Series User's Guide 01... -
Page 91: Book Shadow Erase
Press [ON]. Select the erasure width. Press [OK]. The settings are confirmed and the previous screen is displayed. ■ Center erase [ON], [OFF] ■ Erasure width [10mm](3/8"), [20mm](13/16"), [30mm](1 3/16"), [40mm](1 9/16"), [50mm](1 15/16") 2-29 ComColor Series User's Guide 01... -
Page 92: Multi-Up
[Right top to bottom] Select the number of pages per Press [Functions] on the copy sheet. mode screen. Select the layout order. Press [OK]. The settings are confirmed and the previous screen is displayed. 2-30 ComColor Series User's Guide 01... -
Page 93: Stamp Page/Date
Example: When the stamp start page has been set to [2] and the stamp start number has been set to [3] Select the number of pages per sheet. Press [OK]. The settings are confirmed and the previous screen is displayed. 2-31 ComColor Series User's Guide 01... - Page 94 To not stamp on the cover, set "Stamp start page" to "2" (For duplex printing, set this to "3" depending on the case). Press [OK]. The settings are confirmed and the previous screen is displayed. 2-32 ComColor Series User's Guide 01...
-
Page 95: Image Quality
• Press [OK] on the [Specified date] screen to Press [OK]. confirm the setting and display the [Date] screen. The settings are confirmed and the previous screen is displayed. Press [OK]. The settings are confirmed and the previous screen is displayed. 2-33 ComColor Series User's Guide 01... -
Page 96: Gamma Control
[K]. The gamma value cannot be adjusted between C and R, M and G, or Y and B. (p. 2-8 "Color mode") Press [Functions] on the copy mode screen. Press [Gamma control]. The [Gamma control] screen is displayed. 2-34 ComColor Series User's Guide 01... -
Page 97: Image Control
The [Image control] screen is displayed. Select the base color level. Press [OK]. The settings are confirmed and the previous screen is displayed. Select the image control. Press [OK]. The settings are confirmed and the previous screen is displayed. 2-35 ComColor Series User's Guide 01... - Page 98 Specify the type of collation ([Group] or [Sort]) for program printing. [Auto] Copies are collated in sets when loaded on the ADF and by page when loaded on the platen glass. [Group] Copy by page. [Sort] Copy in sets. 2-36 ComColor Series User's Guide 01...
-
Page 99: Program
The [Program list] screen is displayed. Press [Next]. The [Program (2)] screen is displayed. When 12 program settings have already been saved, delete one before saving a new program. ("Deleting a Program" (p. 2-40)) 2-37 ComColor Series User's Guide 01... - Page 100 You cannot use this function with "Collate/slip sheet" on the [Functions] screen. Press [OK]. The settings are confirmed and the copy mode screen is displayed. • To return to the [Program (1)] screen, press [Back]. 2-38 ComColor Series User's Guide 01...
- Page 101 [Program list] screen is displayed. • To only rename the program, press [Close], and then press [Cancel] on the [Program (1)] screen. • To copy, press [Close] and then press [Next] on the [Program (1)] screen. 2-39 ComColor Series User's Guide 01...
-
Page 102: Add Cover
You cannot use paper of a different size from that of the paper to be copied. Press [Cancel]. Press [Functions] on the copy mode screen. Press [Add cover]. The [Add cover] screen is displayed. Select the binding side. 2-40 ComColor Series User's Guide 01... -
Page 103: Collate/Slip Sheet
To configure [Slip sheet] or [Offset output], go to (p. 2-9 "Feed tray") Step 2 (p. 2-42) in the procedure for configuring that setting. Press [OK]. The settings are confirmed and the copy mode screen is displayed. 2-41 ComColor Series User's Guide 01... - Page 104 Select the feed tray that is loaded with slip sheets, and press [OK]. The slip sheet settings are confirmed and the [Collate/slip sheet] screen is displayed. Press [OK]. The settings are confirmed and the copy mode screen is displayed. 2-42 ComColor Series User's Guide 01...
-
Page 105: Auto-Rotate
When using plain paper and recycled paper (85 g/m (23- lb bond)) When printing jobs that exceed the maximum number of sheets that can be stapled, the sheets are outputted to the stacking tray without being stapled. 2-43 ComColor Series User's Guide 01... - Page 106 [Staple/Punch] settings. Select the binding side. Select the original orientation. Configure the punch setting. Select the binding side. Press [OK]. Configure the staple setting. The settings are confirmed and the previous screen is displayed. 2-44 ComColor Series User's Guide 01...
-
Page 107: Paper Folding
Select this when loading originals in an orientation from which they can be read normally. [Top side left] Select this when loading originals so that the top of the original is aligned with the left edge. 2-45 ComColor Series User's Guide 01... - Page 108 Duplex printing: Fold the paper with the first page on Select the fold direction or binding the outside. side. Press [OK]. The settings are confirmed and the previous screen is displayed. 2-46 ComColor Series User's Guide 01...
-
Page 109: Booklet
[Fold + Staple] p.1-20 Paper is folded in two and bound in the center with staples. ■ Binding side Specify the binding side of the paper. [Left to right], [Right to left], [Top / Bottom] 2-47 ComColor Series User's Guide 01... - Page 110 Select the booklet type. When you have selected [Fold] or [Fold + Staple], [Imposition] is set to [ON] automatically. To disable Imposition, press [Imposition] and select [OFF]. Select the binding side. Specify [Separate books]. 2-48 ComColor Series User's Guide 01...
-
Page 111: Output Tray
Select from the following. An optional multifunction finisher or stacking tray [ON], [OFF] is required to use this setting. ● An optional multifunction finisher or RISO auto- control stacking tray is required to use this ● Selecting the Output Tray setting. -
Page 112: Paper Guide Control
RISO auto-control stacking tray when manually removing paper from the tray. See "Stacking Tray (optional)" (p. 8) in "Part Names and Functions" for details on using the paper guide open button on the RISO auto-control stacking tray. Press [Functions] on the copy mode screen. -
Page 113: Jump Wing Control
Press [Jump wing control]. [Jump wing control] is set. Select the type of head cleaning. Press [OK]. The message "Cleaning in progress. Please wait a moment." appears. When head cleaning is completed, the previous screen is displayed. 2-51 ComColor Series User's Guide 01... -
Page 114: Front Doors Release
& pause], [Save to folder], [Save to archive], [PIN code] ● The following functions are not available when using interrupt copy to interrupt jobs being outputted to the multifunction finisher. [Staple], [Punch], [Paper folding], [Booklet], [Add cover], [Separate books], [Binding margin] 2-52 ComColor Series User's Guide 01... -
Page 115: Chapter 3 Scanner
Scanner ComColor Series User's Guide 01... -
Page 116: Overview Of Scan Operations
For information on [Printable in this machine (save to folder)], see "Save to folder" (p. 2-24) in "Copy". Procedure The scanning workflow is as follows. Load the original Select scanner mode Select the file format Select the directory Configure the functions Press the [START] key ComColor Series User's Guide 01... - Page 117 Load the original in the ADF. Align the originals and place them face up. Close the original cover. Open and close the original cover gently. Slide the original guides to match the width of the originals. ComColor Series User's Guide 01...
- Page 118 "Copy" for details. The [Confirm] screen may not be displayed, depending on how the administrator has configured the settings. In this case, configure [File format] on the scanner mode screen. See "File format" (p. 3-9) for details. ComColor Series User's Guide 01...
- Page 119 Insert the USB flash drive into the USB port of the machine. For information on the USB port, see "Part Names and Functions" (p. 7). ComColor Series User's Guide 01...
- Page 120 The administrator can register e-mail destinations. [Networked computer], ask your administrator. You may not be able to enter e-mail addresses directly, depending on how the administrator has configured the settings. Press [OK]. The scanner mode screen is displayed. ComColor Series User's Guide 01...
- Page 121 The [Scanning] screen is displayed, and scanning of the original starts. The current status, including the number of scanned pages, is displayed on the screen. When scanning and saving have finished, the scanner mode screen is displayed. ComColor Series User's Guide 01...
-
Page 122: List Of Settings
Make the background color (base color) lighter so that p. 3-14 the text is easier to read. PIN code Assign PIN codes when saving scanned jobs on the p. 3-15 internal hard disk. Front doors release Release the front door lock. p. 3-15 ComColor Series User's Guide 01... -
Page 123: Basic Settings
(toward [5]), the higher the compression and the lower the quality at which the scanned images are saved. Specify the resolution. Press [OK]. The settings are confirmed and the previous screen is displayed. ComColor Series User's Guide 01... -
Page 124: Reproduction Size
Registered custom sizes are also displayed. Press [Image size] on the scanner mode screen. The [Image size] screen is displayed. Select the image size. Press [OK]. The settings are confirmed and the previous screen is displayed. 3-10 ComColor Series User's Guide 01... -
Page 125: Color Mode
The settings are confirmed and the previous The [Color mode] screen is displayed. screen is displayed. Select the color mode. Press [OK]. The settings are confirmed and the previous screen is displayed. 3-11 ComColor Series User's Guide 01... -
Page 126: Scanning Level
ADF (so that the text of the original is on its side). Press [Duplex/Simplex] on the scanner mode screen. The [Duplex/Simplex] screen is displayed. 3-12 ComColor Series User's Guide 01... -
Page 127: Scanning Functions
"Mixed size original" (p. 3-14) "Gamma control" (p. 3-14) "Image control" (p. 3-14) "Base color level" (p. 3-14) Select the original type. Press [OK]. The settings are confirmed and the previous screen is displayed. 3-13 ComColor Series User's Guide 01... -
Page 128: Book Shadow Erase
When [Color mode] has been set to [Grayscale] or [Black], the gamma value can only be adjusted for K. The gamma value cannot be adjusted between C and R, M and G, or Y and B. (See "Color mode" on p. 3-11) 3-14 ComColor Series User's Guide 01... -
Page 129: Pin Code
The PIN code set here is machine. When the front cover needs to be required when using the RISO Console to opened, such as when a paper jam occurs or an ink download to a computer. - Page 130 3 Scanner 3-16 ComColor Series User's Guide 01...
-
Page 131: Chapter 4 Printer
Printer ComColor Series User's Guide 01... -
Page 132: Overview Of Printer Mode Operations
● You cannot use this screen to control the data of [Format for PC]. (See "Overview of Scan Operations" (p. 3-2) in "Scanner" for creating scanned data and "Downloading Scanned Jobs to a Computer" (p. 5-14) in "RISO Console" for downloading scanned data.) Procedure The job operation workflow is as follows. - Page 133 Displays a message and the hard disk usage. c Screen selection buttons Switch between the [Active], [Waiting], [Finished], [Folder] and [Functions] screens. d Job list Displays the job name, status, owner name, number of copies, and receiving time for jobs. ComColor Series User's Guide 01...
- Page 134 [Active], [Waiting], [Finished], and [Folder] screens vary. When a button is grayed out, you can confirm the current setting but cannot change it. Pressing [Print this list] prints a list of the settings (on A4/Letter paper). ComColor Series User's Guide 01...
-
Page 135: List Of Settings
Head cleaning Clean the ink heads. p. 4-15 Paper guide control Adjust the paper guide position of the RISO auto- p. 4-15 control stacking tray. (When using the optional RISO auto-control stacking tray) Jump wing control Adjust the position of the jump wings. -
Page 136: Managing Jobs
When copying is performed on the machine, the copy job has higher priority over jobs sent from the printer driver. Next, the job selected in the waiting list has priority. ComColor Series User's Guide 01... -
Page 137: [Waiting] Screen
"∗∗∗∗∗". • Jobs with the "Hide job name" check box selected on the printer driver (p. 1-27 "PIN code" in "Copy") • Jobs with a job name that is closed and requiring login ComColor Series User's Guide 01... -
Page 138: [Finished] Screen
Reprint the selected job. (The job will be listed in the active job list.) ● Copy jobs in the finished job list cannot be reprinted. ● Printing may be restricted by the administrator. (In this case, the list and [Print] button are grayed out.) ComColor Series User's Guide 01... -
Page 139: [Folder] Screen
Copy the selected job to another folder. [Sorting] [Select all] Change the display order of the currently displayed list. Select all jobs (except jobs with PIN codes) displayed in the list. [Delete] Delete the selected job from the list. ComColor Series User's Guide 01... - Page 140 The selected job is copied (saved). with the message "Input the PIN code.", use the numeric keys to enter the PIN code (a number up to eight digits) set for that job and press [OK]. 4-10 ComColor Series User's Guide 01...
-
Page 141: Changing Finished Job And Folder Job Settings
[Descend] below that parameter. • "Print density" (p. 4-13) Press [OK]. The displayed list is sorted by the selected parameter. On the [Details] screen of a folder job, you can rename the job and save it. 4-11 ComColor Series User's Guide 01... - Page 142 The [Image position] screen is displayed. Press [ ][ ] [ ] or [ ] to adjust the image position. Press [OK]. The settings are confirmed and the previous screen is displayed. 4-12 ComColor Series User's Guide 01...
- Page 143 [+2] Dark Select [Print density] on the [Details] (or [Suspending]) screen for the selected job. • The lower the setting, the lighter the print density. The higher the setting, the darker the print density. 4-13 ComColor Series User's Guide 01...
-
Page 144: Printer Function Settings
Feed tray See "Feed tray" (p. 2-9) in "Copy" for details. Specify the paper size, paper type, paper feed, and double feed check settings for each feed tray. Press [Functions] on the printer mode screen. 4-14 ComColor Series User's Guide 01... -
Page 145: Head Cleaning
To open the front doors in all other cases, press this button. The front cover is unlocked and can be opened. When the front cover is closed, it is locked when the machine starts operations. 4-15 ComColor Series User's Guide 01... - Page 146 4 Printer 4-16 ComColor Series User's Guide 01...
-
Page 147: Chapter 5 Riso Console
RISO Console ComColor Series User's Guide 01... -
Page 148: Overview Of The Riso Console
● Make sure the machine has been connected to the network. ● The Web browsers that support the RISO Console are Microsoft ® Internet Explorer 6.0 (SP 1 or later) and Windows ® Internet Explorer 7.0. -
Page 149: Starting The Riso Console
Overview of the RISO Console ● When Login is Necessary Starting the RISO Console Click [login] to display the login screen of the RISO Console. Start your Web browser. Enter the IP address of the printer in the address box of your Web browser. -
Page 150: [Monitoring] Menu
Cyan ink (1000 ml bottle)(10-bar scale): Icon Remaining Ink Icon Remaining Ink 51%-100% 90%-100% 1%-50% 80%-89% 70%-79% For the paper settings, see "Changing the Feed 60%-69% Tray Setting" (p. 2-10) in "Copy". 50%-59% 40%-49% 30%-39% 20%-29% 10%-19% (flashes) 0%-9% ComColor Series User's Guide 01... -
Page 151: [System] Screen
Click this to print a sample page so you can check the result of a printed image. Enter the new password in [New password]. Enter a password of between 0 and 16 alphanumeric characters long. The entered characters are displayed with asterisks (∗). ComColor Series User's Guide 01... -
Page 152: [License Info.] Screen
• To cancel the settings, click [Cancel]. • If an error message appears, enter the password again. [License Info.] Screen The [License Info.] screen displays information about the license of the system in the machine. ComColor Series User's Guide 01... -
Page 153: [Meter Display] Menu
Click this to save the latest information to a computer as a CSV file. When you click [Print this list] or [Download this list as CSV file], the latest information is obtained and may be different from the information displayed on the screen. ComColor Series User's Guide 01... -
Page 154: [Report] Screen
Click this to save the total count and details to a computer as a CSV file. When you click [Print this list] or [Download this list as CSV file], the latest information is obtained and may be different from the information displayed on the screen. ComColor Series User's Guide 01... -
Page 155: [Printer] Menu
[Printer] Menu You can click [Printer] on the side menu to display the job list on the RISO Console screen and check the status of jobs. You can also operate the printer and change the settings job. When an item on the side menu has the icon, this indicates that you must login before you can access that item. -
Page 156: [Active] Screen
The [Waiting] screen displays waiting jobs. printed and the jobs that are waiting to be printed automatically. Waiting jobs cannot be printed from the RISO • The job list displays the job name, processing status, Console. Use the operation panel of the machine owner name, number of copies, and receiving date/ to print these jobs. -
Page 157: [Finished] Screen
• You can sort jobs by clicking an item in the title bar ([Job name], [Status], [Owner], [Cps.], or [Received]). ● Print Select a job and click [Print] to print that job. The job remains on the [Folder] screen after printing. 5-11 ComColor Series User's Guide 01... -
Page 158: [Functions] Screen
"Settings have been sent." appears. ● Copy to • To cancel cleaning, click [Cancel]. To copy a job to another folder, select the job and then select the folder name in the [Copy to] pull- down menu. 5-12 ComColor Series User's Guide 01... -
Page 159: [Scanner] Menu
[Scanner] Menu You can click [Scanner] on the side menu to display the scanned job list on the RISO Console screen. You can download scanned data saved on the internal hard disk to a computer. When an item on the side menu has the icon, this indicates that you must login before you can access that item. - Page 160 The [Download file] dialog box is displayed. Click [Save]. The [Save As] dialog box is displayed. Specify the destination folder and file name, and then click [Save]. The scanned data is saved to the computer. 5-14 ComColor Series User's Guide 01...
-
Page 161: Chapter 6 Appendix
Appendix ComColor Series User's Guide 01... -
Page 162: Specifications
500 sheets × 3 trays (Height up to 50 mm (1 15/16")) Continuous Printing Capacity 9,999 sheets Standard 500 sheets (Height up to 60 mm (2 3/8")) Output Tray Capacity 1,000 sheets (when using the optional auto-control stacking tray or Option wide stacking tray) ComColor Series User's Guide 01... - Page 163 The guaranteed area when printing images is the area enclosed within 3 mm (1/8") of the edges of the paper. 4 When using plain paper and recycled paper (85 g/m (23-lb bond)) 5 When not printing 6 One gigabyte (GB) is calculated as 1 billion bytes. ComColor Series User's Guide 01...
- Page 164 Output Tray Capacity 1,000 sheets (when using the optional auto-control stacking tray or Option wide stacking tray) Page Description Language Original PDL TCP/IP, HTTP, HTTPs (SSL), DHCP, ftp, lpr, IPP, SNMP, Supported Protocols Port 9100 (RAW port) ComColor Series User's Guide 01...
- Page 165 For ComColor 3050/3050R, the guaranteed area when printing images is the area enclosed within 5 mm (3/16") of the edges of the paper. 4 When using plain paper and recycled paper (85 g/m (23-lb bond)) 5 When not printing 6 One gigabyte (GB) is calculated as 1 billion bytes. ComColor Series User's Guide 01...
- Page 166 2000 ® ® Microsoft Windows XP (32-bit version) ® Supported Operating Systems Microsoft Windows Server 2003 (32-bit version) ® Microsoft Windows 2000 Server ® ® Microsoft Windows Vista (32-bit version) Installed Fonts None Emulation None ComColor Series User's Guide 01...
- Page 167 The guaranteed area when printing images is the area enclosed within 5 mm (3/16") of the edges of the paper. 4 When using plain paper and recycled paper (85 g/m (23-lb bond)) 5 When not printing 6 One gigabyte (GB) is calculated as 1 billion bytes. ComColor Series User's Guide 01...
- Page 168 Duplex printing: 9 sheets/minute (18 ppm) or higher (A4-R/Letter-R) Scanning gray levels 10-bit input and 8-bit output for each RGB color Monochrome/Color: 40 ppm Original source scanning ∗ RISO KAGAKU standard original (A4-R/Letter-R), 200 dpi, when speed stored to main unit hard drive Scan functions Network Interface...
- Page 169 When using paper sizes other than A4 or B5-R, the capacity is 1,500 sheets (100 copies) 4 65 sheets for a paper size exceeding A4/Letter 5 Rear-side angle stapling is only available for A4-R and A3. 6 Includes an added cover. ComColor Series User's Guide 01...
- Page 170 Humidity: 40% to 70% RH (non-condensing) Dimensions (W × D × H) 92 mm × 64 mm × 16 mm (3 5/8" × 2 1/2" × 5/8") (excluding protruding parts) Weight 90 g (3 oz) 6-10 ComColor Series User's Guide 01...
-
Page 171: Consumables
Consumables It is recommended that you use consumables manufactured by RISO KAGAKU CORPORATION. Consumable specifications and types are subject to change without notice. For pricing information, contact your dealer (or authorized service representative). Ink Cartridges Type Color Quantity Unit ComColor Ink Cartridge 1000... - Page 172 6 Appendix 6-12 ComColor Series User's Guide 01...
-
Page 173: Index
Copies ..............1-23 General screen ..........12 Copy and pause ...........2-23 Grayscale ............3-11 Copy mode screen ..........11 Group ..............2-41 Copy, canceling .............2-5 Counter key ............10 Custom paper entry ..........1-29 Cyan ..............1-7 6-13 ComColor Series User's Guide 01... - Page 174 Matt coated ............1-10 Printer status button ..........11 Message area ............4-3 Mixed original size ..........2-28 Program .............1-24 2-36 Punch ............1-22 2-43 Mixed size ..............1-8 Mode buttons ............11 MODE key .............. 10 Mode screen ............11 6-14 ComColor Series User's Guide 01...
- Page 175 Resolution ..............3-9 Top side left ..........2-14 3-12 Right cover ..............9 Top side up ..........2-14 3-12 RISO auto-control stacking tray ........ 8 Top tray ..............9 RISO Console, starting ..........5-3 Touch panel ............. 10 Rotate ..............1-14 Tray selection ............2-12 Two-sided original, simplex copying ....2-15 Save to a computer on the Network ......3-6...
- Page 176 Please contact following for supplies and service: Copyright © 2009 RISO KAGAKU CORPORATION...
Need help?
Do you have a question about the ComColor Series and is the answer not in the manual?
Questions and answers