Table of Contents
Advertisement
Advertisement
Table of Contents

Related Manuals for Maple Systems Silver Series


Summary of Contents for Maple Systems Silver Series
- Page 1 1010-1001A Rev 02...
- Page 2 COPY RIGHT NO TICE This manual is a publication of Maple Systems, Inc., and is provided for use by its customers only. The contents of the manual are copyrighted by Maple Systems, Inc.; reproduction in whole or in part, for use other than in support of Maple Systems equipment, is prohibited without the specific written permission of Maple Systems.
-
Page 3: Table Of Contents
Ta ble of Con tents EZware Sup port ....1 EasyBuilder’s De fault Text Fonts ..37 OIT Mod els Sup ported ... 1 Us ing the EasyASCIIFontMaker. - Page 4 Sil ver Se ries In stal la tion & Operation Man ual Us ing a Pre de fined Bitmap ..131 Dis play ing Alarms us ing the Alarm Bar Graphics Li brar ies ....133 Ob ject .
-
Page 5: Ezware Sup Port
The Silver Series has several features not found in other graphic OITs. This manual explains the operation of the Silver Series OITs and how to implement the many available features using the EZware-500 Configuration Software. -
Page 6: What You Need
PLC. Please locate the sheet that corresponds to your PLC on our website. Communication Cable Refer to Maple Systems’ Tech Note 1061 for a list of available cables or build your own using the cable diagrams available on our web site (www. maple-systems.com). - Page 7 Each window can display graphics objects and there is no limit to the number of graphics objects that can be placed on each window. The Silver Series is capable of storing up to 1999 windows , but the actual limit is determined by the total amount of memory used for the application.
-
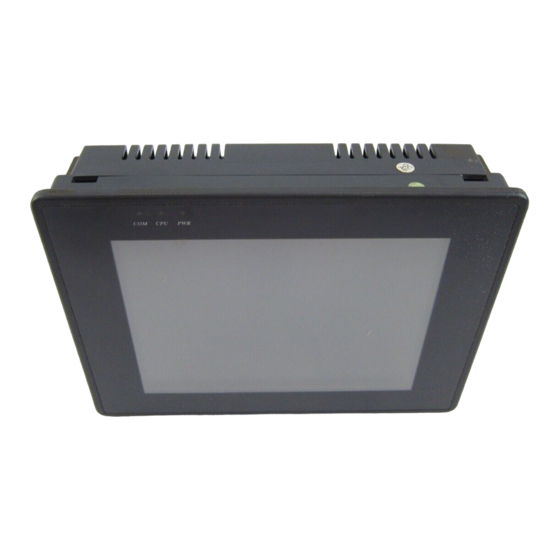
Page 8: What Is A Sil Ver Se Ries Oit
The touch screen uses the latest in touch screen technology enabling the OIT programmer to create switches that are very fine in resolution. Unlike many other touch screen OITs on the market, the Silver Series is not limited to a fixed number of cells in which switches can be created. -
Page 9: List Of Fea Tures
List of Fea tures The next chapter will guide you through the creation of your first project. Before you proceed, you may wish to read this brief list of some of the features offered in the Silver Series OIT. Icon... - Page 10 Sil ver Se ries In stal la tion & Operation Man ual Meter Displays Creates a scale meter Alarm Bar Displays alarms detected by the Alarm Scan Object on a single horizontal scrolling line. Transfers data to the specified PLC registers (Note: Recipes are not supported by the Recipe Transfer HMI504T).
-
Page 11: Chapter 1 - Installation Of Oits
NEMA Rat ing The Silver Series OITs are rated for NEMA 4/12 (indoor) or IP65 installations. This means that when the OIT is properly mounted to a panel or other enclosure, the front enclosure of the OIT will provide protection to the inside of the panel from splashing water, wind blown dust, rain, or hose-directed water. -
Page 12: Safety Precautions
Silver Series Installation & Operation Manual Safety Precautions Please observe the following precautions when installing the Silver Series OIT. Failure to comply with these restrictions could result in loss of life, serious personal injury, or equipment damage. Warning: Do not operate the OIT in areas subject to explosion due to flammable gases, vapors, or dusts. -
Page 13: Con Trol Panel Grounding
The control panel should be connected to a good, high-integrity earth ground both for safety considerations and shielding purposes. Maple Systems cannot overemphasize the importance of good grounding. If you fail to use good grounding procedures during installation, sporadic malfunction of the OIT may occur: Connect the OIT’s chassis ground terminal to a reliable earth ground with a low-resistance path. -
Page 14: Power Sup Ply Se Lec Tion
Sil ver Se ries In stal la tion & Op er a tion Man ual Power Sup ply Se lec tion The power supply used to power the OIT should provide an output of +24 VDC 5% measured at the OIT power terminal block. -
Page 15: In Stal La Tion
It is necessary to follow all installation procedures described in this chapter for electrical noise immunity and CE compliance. Your Maple Systems OIT is designed to connect easily to your PLC. External rear connectors provide quick connections for power, communications and programming wiring. -
Page 16: Connect The Oit To The Plc
Shield Case ground š The power connector on the Silver Series is a terminal block with wire clamps. Lugs are not required. Connect the OIT to the PLC Each PLC supported by Maple Systems has its own wiring requirements. Maple Systems offers OIT-to-PLC communication cables for most PLCs that are built to any length and tested for high reliability. -
Page 17: Panel Prep A Ra Tion
In stal la tion of OITs Shielded Power Cable, Control Output Maple P/N 6030-0009 Panel Power Supply Printer port DC Output +V (+24V) DC Output -V (Gnd) Port 2, PLC[RS-485]/ PC[RS-232], HMI530 has a shielded male DE9P connector Enhanced Enhanced models only models only Port 1, PLC[RS-232],... -
Page 18: Mount The Oit To The Panel
Sil ver Se ries In stal la tion & Op er a tion Man ual Clean and deburr the panel cutout before the OIT is installed. Mount the OIT to the Panel Ends of screws must not Tighten all screw clamps until protrude from the clamp they are uniformly snug Panel... -
Page 19: Con Nect The Oit To The Pc For Con Fig U Ra Tion
To calibrate the touch screen 1. Connect the OIT to your computer for programming. 2. From the Start menu, click Programs, then Maple Systems, then EZware-500, then the EasyManager program. 3. Click Jump To Touch Adjust. The OIT screen should change to calibration mode. - Page 20 Sil ver Se ries In stal la tion & Op er a tion Man ual OIT to PC Se rial Port Pin As sign ments 1010-1001a, Rev 02...
-
Page 21: Chapter 2 - Creating Your First Project
Cre ating Your First Project Chapter 2 - Creating Your First Project Often the best way to learn about new software is to just jump right in. This chapter will step you through the process of installing the EZware-500 configuration software and then using the software to create a sample project that can be downloaded to your OIT. -
Page 22: Starting Ezware-500
PLC. 4. Apply power to the PLC. The Silver Series OIT is programmed at the factory with a sample demo that shows some features of the OIT. The OIT should display a sample startup screen. -
Page 23: Creating A Sample Project
Creating Your First Project Standard toolbar The following illustration shows the various sections of EasyBuilder. Menu selections Manager toolbar Draw toolbar State toolbar Part1 toolbar Work area Part2 toolbar Creating a Sample Project This section walks you through the creation of an EasyBuilder project named EBPrj1. Once downloaded to the OIT, this basic configuration allows the OIT to connect to the PLC, display a startup screen, and display a screen containing one PLC register monitor when a switch on the startup screen is pressed. -
Page 24: Cre Ating A Startup Win Dow
The communications parameters selected above were selected at random. Please enter the PLC type and communications parameters that match your PLC. For more information, consult your PLC operations manual or Maple Systems Controller Information Sheets available on our website at www.maple-systems.com . - Page 25 Cre ating Your First Project 7. Click button1 in the Shape library box. 8. Scroll through the selections to selection 23. Click the shape, then click OK. The shape should appear in the Shape tab. 9. Click the Label tab. 10.
-
Page 26: Cre Ating A Popup Win Dow
Sil ver Se ries In stal la tion & Op er a tion Man ual You have finished configuring your first window. It should look something like the picture below: Cre ating a Popup Win dow We will configure Window #11 as a popup window. Up to six popup windows can be displayed on a full screen window. - Page 27 Cre ating Your First Project 12. On the main screen of EasyBuilder, you should see the rectangle that you just created move and/or change size. This rectangle is used as a backdrop to the scale meter. To create scale lines on Window#11 1.
- Page 28 Sil ver Se ries In stal la tion & Op er a tion Man ual 13. On the main screen of EasyBuilder, you should see the scaled meter display that you just created move and/or change size. The scaled meter display is now complete. To create a numeric register on Window#11 1.
- Page 29 Cre ating Your First Project 19. On the main screen of EasyBuilder, you should see the increment key that you just created move and/or change size. The increment key is now complete. To create a decrement key on Window#11 1. As with the second function key of Window #10, we are going to create the decrement key by copying the increment key and then making changes to the attributes.
-
Page 30: Fin Ishing Up
Sil ver Se ries In stal la tion & Op er a tion Man ual You have now done your part in creating this sample project. It is now time for EZware-500 to do its part. Fin ishing Up There are still a few steps, which must be completed before you can test your first project. In this section, you will: save the project onto your computer hard drive compile the project into a format that can be understood by the OIT download the project to the OIT... - Page 31 Cre ating Your First Project 3. The OIT should display the following screen. 4. Press the ON function key to display the popup window. 5. Press the increment and decrement keys on the OIT to see the value in the data register and scale meter change.
- Page 32 Sil ver Se ries In stal la tion & Op er a tion Man ual 1010-1001a, Rev 02...
-
Page 33: Chapter 3 - Simulator Mode
Sim u la tor Mode Chapter 3 - Simulator Mode As you saw from creating the sample project in the last chapter, downloading any changes you make to the OIT can take time. To decrease the amount of time required to download a project to the OIT you can make these changes in EasyManager: Select the 115200 baud rate. - Page 34 ‘Direct’ mode requires only that the PC be connected to the PLC. Please note the following: Maple Systems’ standard communication cables will not work in Direct mode. The ‘OIT’ end of the cable must be wired for the PC’s serial port.
-
Page 35: Trou Ble Shooting Tools Dur Ing Sim U La Tion
Sim u la tor Mode To use on-line simulation mode from EasyManager 1. Start the EasyManager software. 2. If using Direct Online Simulation, check the Direct Online-Simulator box. If using Normal Online Simulation, leave unchecked. 3. Click the Online-Simulator. The Open Project dialog box appears. 4. -
Page 36: Wir Ing For Nor Mal Sim U La Tion Mode
COM port on your PC. Plug the end marked “PLC” into the appropriate port on your PLC. See the figure below for serial port pin assignments and the following two figures on the next page for connecting the Silver Series to a PC and a PLC. - Page 37 Sim u la tor Mode be changed. Refer to the figures on the previous pages for information on power connections and OIT serial connector pinouts. PLC/Host OIT-PLC communication cable PLC/ Maple Systems OIT RS-485 Host programming cable, P/N 7431-0098 Earth RS-232 HMI520C &...
- Page 38 HMI530/550 Port 2 PLC [RS-485] PC [RS-232] Printer Power Com2 Com1 (If mouse is using Maple Systems OIT Com 1, use Com2) programming cable, P/N 7431-0098 PLC/Host RS-485 RS-232 OIT-PLC communication cable Con necting the HMI530/550 to a PC and a PLC Now that you are familiar with using simulation mode, the next chapter guides you through the fundamental operation of three primary segments of the EZware-500 configuration software.
-
Page 39: Chapter 4 - Using Ezware-500
Using EZware-500 Chapter 4 - Using EZware-500 Over view The EZware-500 software is composed of three separate applications which are accessible from the EZware-500 folder: EasyBuilder, EasyManager, and EasyASCIIFontMaker. EasyBuilder is the application software used to create a project file. EasyManager is a utility application that puts the OIT into different operating modes. Finally, the EasyASCIIFontMaker program allows you to modify the text fonts that are used in EasyBuilder. -
Page 40: Com Mu Ni Ca Tions Set Tings
Sil ver Se ries In stal la tion & Op er a tion Man ual Com mu ni ca tions Set tings Com Port Select COM1 – COM10 on the computer to download a project to the OIT. Baud Rate Select 38400 or 115200 bps to download or upload a project to the OIT. We recommend that you use 115200 unless your computer is unable to transmit at that speed. -
Page 41: The Easyasciifontmaker
The EasyASCIIFontMaker application allows you to modify the text font characters that are supplied with EZware-500. This feature of the Silver Series OITs enables you to create any special text characters that you may need. In fact, you can even create an entirely new font. -
Page 42: The Easybuilder Ap Pli Ca Tion
Sil ver Se ries In stal la tion & Op er a tion Man ual 7. Right-click to Copy, Paste, or Clear a character. 8. After you are satisfied with the changes made, click Save from the File menu. It is generally good practice to copy the font files to backup files before you make any changes so that you can restore them later, if necessary. -
Page 43: Man Ag Ing Pro Jects
Using EZware-500 The following illustration is used for reference to the following sections: Man ag ing Pro jects Like most Windows™ application software, EasyBuilder will open, save, close, and print files using the standard windows format. Open ing, Editing Pro jects To create a new project 1. - Page 44 Sil ver Se ries In stal la tion & Op er a tion Man ual 3. Select the Display Mode you intend to use with your project. 4. Landscape mode is the standard display mode for conventionally installed OITs. Portrait mode configures display on OITs installed at right angles.
-
Page 45: Print Ing Pro Jects
Using EZware-500 To open an existing project 1. On the File Menu, click Open or click the Open icon in the Standard toolbar. The Open dialog box appears. 2. Click on the project file you intend to open. 3. Click Open. The main screen of EasyBuilder appears with the initial screen of the project displayed. -
Page 46: Editing And Cre Ating Screen Ob Jects
Sil ver Se ries In stal la tion & Op er a tion Man ual Editing and Cre ating Screen Ob jects This section shows how to manipulate graphics objects that are placed onto the work area of EasyBuilder. We will use examples from sample projects that are included with the EasyBuilder software: HMI504T.EPJ, HMI520M.EPJ, HMI520T.EPJ, HMI530T.EPJ, and HMI550T.EPJ. - Page 47 Using EZware-500 all of the objects on each window. Using the 520CDEMO.EPJ project, the following should be seen : 2. Notice that the tree displays the title for each window next to the window number. This makes it easy to determine windows have been created for a project. The asterisk next to Window #10 indicates that this window is currently open.
- Page 48 Sil ver Se ries In stal la tion & Op er a tion Man ual Using the Window Treebar to change object attributes 1. On the Window Treebar, click + adjacent to any window number. The tree will expand to list the objects on that window, as shown: 2.
- Page 49 Using EZware-500 3. Click on the appropriate color box, then click OK. The color box should reflect what you have chosen. 4. Click OK. Another option is to display what are known as Object ID tags. Every time you create a new object in EasyBuilder, an Object ID tag is assigned to the new object.
- Page 50 Sil ver Se ries In stal la tion & Op er a tion Man ual 3. When a graphics object is selected, it can then be modified, copied, deleted, or moved to a new location. To select multiple graphics objects 1.
- Page 51 Using EZware-500 Using the Cut , Copy , and Paste commands 1. These commands are all selected from the Edit menu or by clicking the appropriate icon in the Standard toolbar. 2. Select the graphics object or objects you wish to cut or copy. 3.
- Page 52 Sil ver Se ries In stal la tion & Op er a tion Man ual 4. In the Desti. Window No.: box, enter the number of the window screen in the project you are currently editing that you wish to copy the contents of the source window to. 5.
- Page 53 Using EZware-500 4. From the Edit menu, click Change Attribute. The Object Attribute dialog box is displayed. 5. All of the objects that use PLC data registers or the internal memory of the OIT are listed in this dialog box according to their Object ID tag. Alongside each ID tag is the PLC or OIT memory identifier.
- Page 54 Sil ver Se ries In stal la tion & Op er a tion Man ual To ungroup objects 1. Select the objects to be ungrouped. 2. From the Edit menu, click UnGroup or click the UnGroup icon from the Manager toolbar. 3.
- Page 55 Using EZware-500 3. From the Edit menu, click Layer, then PreviousLayer or click the PreviousLayer icon from the Manager toolbar. Note that the rectangle covers the circle but not the arc. 4. From the Edit menu, click Layer, then NextLayer or click the NextLayer icon from the Manager toolbar.
- Page 56 Sil ver Se ries In stal la tion & Op er a tion Man ual 2. From the Edit menu, click Align, then Left or click the appropriate icon from the Manager toolbar. 3. From the Edit menu, click Undo to put the objects back in their original position. Using the align right command 1.
- Page 57 Using EZware-500 2. From the Edit menu, click Align, then Top or click the appropriate icon from the Manager toolbar. 3. From the Edit menu, click Undo to put the objects back in their original position. Using the align bottom command 1.
- Page 58 Sil ver Se ries In stal la tion & Op er a tion Man ual 2. From the Edit menu, click Align, then Horiz. Center or click the appropriate icon from the Manager toolbar. Centering is based on the horizontal center of the left-most object. 3.
- Page 59 Using EZware-500 you are trying to overlap objects that must be the same size. To better illustrate, refer to the left side of Window_12 of the sample project: The make same width command 1. Select the objects you wish to make the same width. For this example, select the left and center rectangle objects of Window_12 2.
- Page 60 Sil ver Se ries In stal la tion & Op er a tion Man ual The make same height command 1. Select the objects you wish to make the same height. For this example, select the left and center rectangle objects of Window_12 2.
- Page 61 Using EZware-500 finally the right rectangle. See what happens when the make same size command is applied to the center and right rectangles. Flip ping Ob jects These three commands allow you to quickly ‘flip’ or position an object in a new direction. To better illustrate, we will again refer to Window_12 of the sample project.
-
Page 62: Gen Eral Settings
Sil ver Se ries In stal la tion & Op er a tion Man ual To rotate 1. Select the object you wish to rotate. For this example, select the right triangle object of Window_12. 2. From the Edit menu, click Rotate 90 degrees or click the appropriate icon from the Manager toolbar. - Page 63 Using EZware-500 PLC Set tings Con fig u ra tion To configure PLC settings 1. Select the appropriate PLC driver from the PLC pull-down menu. You can “export” a project created for one PLC brand to a different PLC brand by loading the project file into EasyBuilder, then entering a different PLC type in this box.
- Page 64 RS485 2W: Forces RS485 2-wire configuration. Ethernet: Uses the RJ45 10BaseT connector. 4. Select baud rate, parity, data bits, and stop bits. Use Maple Systems’ Controller Information Sheets or the PLC manufacturer’s operations manual for information on the communications parameters required by the PLC. These parameters have to match the PLC settings.
- Page 65 Using EZware-500 Gen eral Set tings Con fig u ra tion 1. Task button attribute: Used to Disable or Enable the Task Bar window. The position field determines if the buttons on the window are located on the Left or Right on the OIT screen. When the Task Bar is enabled, it allows access to the Fast Selection window.
- Page 66 Sil ver Se ries In stal la tion & Op er a tion Man ual To Use Password Protection 1. Once the project is downloaded to the OIT, the password becomes active. 2. When you try to upload the project from the OIT to your computer, EasyManager will prompt you to enter a password.
- Page 67 Using EZware-500 In di ca tor Set tings Con fig u ra tion The indicator tab is used to configure different parameters associated with the task bar. The task bar contains three optional indicators; Touch, CPU and Alarm. The Touch Indicator Attribute: Enables or disables the touch indicator.
-
Page 68: Se Cu Rity Set Tings Con Fig U Ra Tion
Sil ver Se ries In stal la tion & Op er a tion Man ual The CPU Indicator Attribute: Enables or disables the CPU indicator. Color: Sets the color of the CPU indicator. The Alarm Indicator Attribute: Enables or disables the alarm indicator. Color: Sets the color of the alarm indicator. - Page 69 Us ing EZware-500 Security Control: Enables the OIT’s security features. The three password fields are not visible if the box is not checked. Password Level 0 is used to enter the numeric password for access to level 0 (the lowest) security. Level 0 is the default security level.
- Page 70 Sil ver Se ries In stal la tion & Op er a tion Man ual Beginning Window No: Indicates what window-0 number EasyBuilder will start using when numbering windows. When the project is first created in EasyBuilder, the software automatically creates a beginning window.
- Page 71 Us ing EZware-500 Hard ware Set tings Con fig u ra tion TFT PCD value: Used to adjust the refresh rate of the TFT display. (This option applies only to the OITs with TFT LCD display type.) This option allows you to select high or low refresh rate. We recommend using the high refresh setting.
- Page 72 Sil ver Se ries In stal la tion & Op er a tion Man ual Aux Set tings Con fig u ra tion The Aux tab is used to configure the Aux port. For more information on this feature, see Using the Aux Port at the end of this chapter. PLC Block Pack This feature allows the OIT programmer to enhance the update rate of data received from the PLC when the PLC registers displayed on a screen are ‘blocked’...
-
Page 73: Re Start The Oit Au To Matically Af Ter A Pro Ject Is Down Loaded
Us ing EZware-500 The “PLC block pack” feature allows you to take advantage of any groups or ‘blocks’ of registers that allow the OIT to send a smaller number of update commands to the PLC to get the information needed. The OIT will request data for up to 32 contiguous PLC registers depending upon the PLC block pack setting and the addresses of the PLC registers monitored on screen. -
Page 74: Con Nect Ing Mul Ti Ple Oits To One Plc
PLC, which can be very expensive. To address this need, the Silver Series has a built-in feature which allows multiple OITs to connect together in a daisy-chain fashion. One of the OITs is designated as the ‘master’ while the other OITs are defined as ‘slaves’. The master OIT is directly connected to the PLC communications port. -
Page 75: Soft Ware Con Nec Tion
Us ing EZware-500 one of the OITs loses power all other OITs further down the chain will be unable to communicate to the PLC. The OITs are wired together in the following fashion: Soft ware Con nec tion You must configure the OIT that connects to the PLC as the master. All other OITs should be configured as slave OITs. -
Page 76: Connecting Multiple Oits Using The Ethernet Port
Connecting Multiple OITs Using the Ethernet Port The Silver Series Enhanced OITs are equipped with Ethernet ports. One, or several OITs can be connected to a PLC that uses the Modbus TCP/IP protocol. A single OIT may be directly connected to the PLC Ethernet port via a crossover Ethernet cable, or multiple Master OITs may be connected to a PLC using an Ethernet switch and standard Ethernet cabling. - Page 77 Us ing EZware-500 disconnected without interrupting the other), then they can be connected as individual master devices using an Ethernet switch, as illustrated below: L:192.168.0.40 L:192.168.0.20 L:192.168.0.30 S:192.168.0.10 S:192.168.0.10 S:192.168.0.10 Sub:255.255.255.0 Sub:255.255.255.0 Sub:255.255.255.0 (Master) (Master) (Master) L:192.168.0.150 S:192.168.0.20 Sub:255.255.255.0 Standard Ethernet Cabling (Slave)
- Page 78 Sil ver Se ries In stal la tion & Op er a tion Man ual Soft ware Con fig u ra tion In the Edit-System Parameters -{PLC} tab, configure as follows: You must configure the OIT that connects to the PLC as the master. All other OITs should be configured as slave OITs, unless an Ethernet switch is used, in which case the OITs may all be masters with separate local IP addresses, and all have the same Server (PLC) address.
-
Page 79: Shar Ing Data Be Tween The Mas Ter Oit, Slave Oit And Plc
2. It may read/write directly to the PLC addresses (as though it were the only OIT connected to the PLC). Note: This method may result in inconsistent Master/Slave communications. Maple Systems recommends using method #1. Man ag ing Com mu ni ca tion Fail ures When communicating with multiple devices over a network, it is possible that one or more of the devices may fail without affecting other devices on the network. -
Page 80: Using The Aux Port
Sil ver Se ries In stal la tion & Op er a tion Man ual Using the Aux Port The RS-232 aux port can be used to communicate to a secondary PLC. The setup screen for the aux port can be found as a tab option under the Edit-System Parameters menu selection. - Page 81 Us ing EZware-500 In Edit-System Parameters-{Aux} tab dialog set the Aux port driver (Aux type) and communications parameter. To set up the Aux I/F port parameters 1. Select the Aux Port driver. 2. Select the hardware port to use for auxiliary communications. 3.
- Page 82 Sil ver Se ries In stal la tion & Op er a tion Man ual 2. Set Aux timeout constant. This setting determines how long (in seconds) the OIT will wait for a response from the Aux device. The range is from 0 to 127 seconds. 3.
-
Page 83: Chapter 5 - Creating Windows
The Silver Series has three basic types of windows available for use: Base windows, a Common window, and a Fast Selection window. Base windows are the windows that you will most often use. The common window and fast selection window are two windows reserved for special functions. -
Page 84: Cre Ating A New Win Dow
Sil ver Se ries In stal la tion & Op er a tion Man ual Let’s look at the Open Window dialog box again using the sample project. The Open Window dialog box lists all of the windows currently created for the project. You will notice that in the sample project, three windows have been created: 10, 11, and 12. - Page 85 Cre ating Win dows To create a new window 1. From the Window menu, select Open Window. The Open Window dialog box appears. 2. Click New Window. The Select Window Style dialog box appears. 3. Click Base Window. The Fast Selection and Common Window buttons appear grayed out because those windows have already been created.
- Page 86 Assigning the Window Number Although 1999 windows are available on the Silver Series, two are specifically reserved for the Common Window and the Fast Selection window and another eight are reserved for internal use. Therefore, you can assign #10-255 to any window you create.
- Page 87 Cre ating Win dows x 234) pixel display, so the ranges are X=0-319 and Y=0-239. The HMI530/550 has a 640 x 480 pixel display, so the ranges are X=0-639 and Y=0-479. Assigning Size of Window You can vary the size of a new window to create full screen or popup windows. Popup windows are most often used to display data that does not need to be on the OIT display all the time.
- Page 88 Sil ver Se ries In stal la tion & Op er a tion Man ual Then popup window #12 is displayed: We then use the function key on popup window #12 to display popup window #13. If window #13 has the tracking feature enabled, then moving window #12 (the parent) will cause window #13 (the child) to move as well.
- Page 89 Cre ating Win dows The tracking feature is often used in instances in which you want to make it very clear that the information on one window (the child) always pertains to another window (the parent). Mo nop oly Fea ture The monopoly feature is used to ‘monopolize’...
- Page 90 Sil ver Se ries In stal la tion & Op er a tion Man ual Window#21. If another popup window is displayed that does have the monopoly feature enabled, then Key1-3 on the full screen window will not respond when pressed. Please note that the monopoly feature only disables touch screen objects on the full screen window.
- Page 91 Cre ating Win dows Without clipping, if we move Window#13 so that a portion of the window is out of the area covered by Window#12, then the entire area of Window#13 is still shown on the OIT screen. With clipping enabled on Window#13, the same move would cut off part of Window#13. Like the tracking feature, clipping is most often used to reinforce the notion that one window is tied to the operation of another window.
- Page 92 Sil ver Se ries In stal la tion & Op er a tion Man ual For example, suppose that you have a full screen that calls up Popup Window #13. If the full screen calls a popup window (with coherence disabled), it displays on the OIT screen over any other popup windows that might occupy the same area.
-
Page 93: Set Ting The Win Dow Se Cu Rity Level
Cre ating Win dows However, if Popup Window #12 had the coherence feature enabled, a different picture would have occurred. Although Popup Window #12 was displayed after Popup Window#13, it appears behind it. Even if the OIT operator ‘activates’ Window #12 by touching some object on that window, it will remain behind all other popup windows displayed. -
Page 94: As Signing Un Der Lay Win Dows
Sil ver Se ries In stal la tion & Op er a tion Man ual 4. In the Window Setting form, select Lowest, Middle, or Highest level from the Security Level drop-down list box. Click OK to return to the Open Window dialog box. 5. - Page 95 Cre ating Win dows Only the objects of an underlay window are displayed on the base window. All background information about the underlay window (i.e. background color, frame color and size, etc.) are not displayed on the base window. Active objects can be ‘overlaid’ on top of each other over two or more underlay windows. For example, a Set Bit object that is configured to set an OIT local bit LB0 is located at X=20, Y=50 for Underlay Window #1.
-
Page 96: De Leting A Win Dow
Sil ver Se ries In stal la tion & Op er a tion Man ual 9. Once a pattern color is selected, click OK in the Color dialog box to go back to the Window Setting dialog box. 10. Click the pull-down arrow of the Pattern box. The Pattern Style dialog box appears. 11. - Page 97 Cre ating Win dows Calling a popup window If a function key object is created to call a popup window, the window that is displayed is generally overlaid over all other windows that are on display. Therefore, think of calling a popup window as opening another active window for display.
- Page 98 Sil ver Se ries In stal la tion & Op er a tion Man ual To call a full screen window using the PLC Control object 1. From the Parts menu, select PLC Control. The PLC Control Object dialog box appears. 2.
- Page 99 Cre ating Win dows The Direct and Indirect Window Objects If you want the PLC to call up a popup window that is to be overlaid on top of other windows already open, then there are two methods used to do this: Direct Window Object Indirect Window Object Unlike the PLC Control Object, the Direct and Indirect Window Objects are only active...
- Page 100 Sil ver Se ries In stal la tion & Op er a tion Man ual 6. You can resize the object after you have placed it or double-click on the object to display its attributes. 7. Click the Profile tab to change the position or the size of the Direct Window Object. Note that the size does not refer to the size of the popup window since the size of the popup window is determined in the Window Settings dialog box.
- Page 101 Cre ating Win dows To call a popup window using the Indirect Window Object 1. From the Parts menu, select Indirect Window. The Create Indirect Window Object dialog box appears. 2. In the General Tab, select the PLC address according to Device Type and Device Address. 3.
- Page 102 Sil ver Se ries In stal la tion & Op er a tion Man ual 7. You can resize the object after you have placed it or double-click on the object to display its attributes. 8. Click the Profile tab to change the position or the size of the Indirect Window Object. Note that the size does not refer to the size of the popup window since the size of the popup window is determined in the Window Settings dialog box.
- Page 103 Cre ating Win dows occurred, then try using the Direct Window object on the Common Window, (more about the common window later in this chapter). If you want to display one of many possible popup windows on any full screen window, then try using the Indirect Window object on the Common Window.
- Page 104 Sil ver Se ries In stal la tion & Op er a tion Man ual The Window Bar option in the Function Key Object allows the popup window to move about the OIT screen. When Window#13 is displayed, the OIT operator is able to move the popup window about the screen by touching the Window Bar on the top of Window#13 then touching another area of the OIT display where the Window should be relocated.
-
Page 105: Us Ing The Com Mon Win Dow
Cre ating Win dows To maximize the window, the OIT operator presses the icon. The popup window reappears in the last position that it was moved to. Re turning to a pre vi ous win dow You can configure a function key to display the full-sized base window that was on the OIT screen before the currently shown window. - Page 106 Sil ver Se ries In stal la tion & Op er a tion Man ual To Access the common window 1. From the Window menu, select Open Window. The Open Window dialog box appears. 1010-1001a, Rev 02...
-
Page 107: Op Tional Set Tings
Cre ating Win dows 2. Highlight the Common Window and click Settings. The Window Setting dialog box appears. 3. As you can see, most of the parameters for a common window are disabled and cannot be changed. Window #6 is always reserved for the common Window. Although the Style settings are active, none of these settings affects the operation of the common window. - Page 108 Sil ver Se ries In stal la tion & Op er a tion Man ual To set the popup window option for a common window 1. From the Edit menu, select System Parameters. The Set System Parameters dialog box appears. 2.
- Page 109 Cre ating Win dows Window #13 is now called from the base window, as before. Notice that although window #13 was called after window #21, it is window #21 that remains above. Even when window #13 is activated by pressing it, window #21 continues to be the dominant window- always displaying above window #13.
-
Page 110: Changing The Ac Tive Com Mon Win Dow
Sil ver Se ries In stal la tion & Op er a tion Man ual When above base screen is set, the result is: When below base screen is set, the result is: To set the above/below base screen option for a common window 1. - Page 111 Cre ating Win dows windows may require a common alarm message. By changing the common window with each series of windows, you can customize each common window to contain only the graphics objects that are needed. To change the active common window 1.
-
Page 112: Using The Fast Se Lec Tion Win Dow
Sil ver Se ries In stal la tion & Op er a tion Man ual When the OIT initializes, it displays the startup screen (Window #10) and the default common window. To change common windows, we press the CCW function key that we have configured to change the common window to Window#30. - Page 113 Cre ating Win dows To access a fast selection window: 1. From the Window menu, select Open Window. The Open Window dialog box appears. 2. Highlight the Fast Selection Window and click Settings. The Window Setting dialog box appears. 1010-1001a, Rev 02...
- Page 114 Sil ver Se ries In stal la tion & Op er a tion Man ual 3. Click Fast Selection. The Window Setting dialog box appears. 3. The Name: and Window No.: are reserved to identify the Fast Selection window. The other parameters can be modified, (see the Window Settings section earlier in this chapter for more information).
-
Page 115: Using The Fast Se Lec Tion Key
Cre ating Win dows Using the Fast Se lec tion Key The fast selection key is used to display the Fast Selection window. Pressing the key again causes the Fast Selection window to close. Changing screens us ing the Fast Se lec tion win dow One of the more useful purposes of the Fast Selection window is to use it as a ‘menu’... - Page 116 Sil ver Se ries In stal la tion & Op er a tion Man ual objects that change windows. Configure each Function Key object with the Change Window attribute and place the object into the Fast Selection window. Finally, the Task Bar must be enabled, (see the next section for instructions). After downloading the project file to the OIT, the following initial screen should be shown.
- Page 117 Cre ating Win dows Press the Fast Selection key on the Task Bar to activate the Fast Selection window. Press one of the Function Keys to switch to another full screen window. 1010-1001a, Rev 02...
-
Page 118: Changing The Fast Se Lec Tion Win Dow
Sil ver Se ries In stal la tion & Op er a tion Man ual Finally, pressing the Fast Selection Key will remove the Fast Selection Window until it is needed again. As you can see, the Fast Selection window, though not seen, is always readily available. The Fast Selection window can only call full screen windows not popup windows. - Page 119 Cre ating Win dows 12. For the label, enter CFS04 (meaning Change Fast Selection Window#04), which is the default Fast Selection window. 13. In the Edit-System Parameters menu under the General tab section, enable the task bar. 14. Save, compile, and download the project to your OIT. Below is an illustration of what the default fast selection window, Window#11 (alternate fast selection window), and Window#10 (startup window) might look like: Alternate Fast Selection...
- Page 120 Sil ver Se ries In stal la tion & Op er a tion Man ual Press the Fast Selection key on the task bar to view the default Fast Selection window. To change fast selection windows, press the CFS11 function key that has been configured to change the fast selection window to Window#11.
-
Page 121: Using The Task Bar
Cre at ing Win dows the CFS04 function key that we have configured to change the fast selection window back to the default fast selection window (Window #4). Using the Task Bar The Task Bar has three purposes: Allows you to minimize popup windows to an icon that is placed in the Window bar. Allows you to access the Fast Selection window that you create. -
Page 122: Using The Win Dow Bar
Sil ver Se ries In stal la tion & Op er a tion Man ual Using the Win dow Bar The window bar is where the minimized popup window icons reside. You can display a maximum of six popup windows at one time and every time a popup window is displayed on the OIT screen, an icon representing that window is displayed on the window bar of the task bar. -
Page 123: Gen Eral Set Tings
Cre ating Win dows The Alarm In di ca tor This optional feature reflects the status of alarms. The color indicator grows every time a new alarm condition becomes active. The color indicator is full when ten alarms are active. The Alarm indicator can be used as a rough indication of how many alarms are active. -
Page 124: Cre Ating A Mes Sage Board
Sil ver Se ries In stal la tion & Op er a tion Man ual Window menu, select Open Window. In the Open Window dialog box, click the Task button… dialog box. The Window Setting box appears: The only parameters that apply to the Task Bar are the Width and Height settings. The default setting for the Width parameter is 100 but you can select from a range of 10-200. -
Page 125: Op Tional Pa Ram E Ters
Cre ating Win dows 2. From the Edit menu, click System Parameters. The Set System Parameters dialog box is displayed. 3. Click the General tab to display the General form. 4. Enter the number of the base window just created in Message board window (0, 10-1999): which is located at the bottom of the General form. - Page 126 Sil ver Se ries In stal la tion & Op er a tion Man ual To create a Change Message Board Pen Color key 1. From the Parts menu, select Function Key. The Create Function Key Object dialog box appears. 2.
- Page 127 Cre ating Your First Project To write on the message board, we recommend that you use some dull pointed device (such as a retractable pen) that won’t mar or leave a permanent mark on the OIT’s touch screen. Then practice your penmanship! 1010-1001a, Rev 01...
- Page 128 Sil ver Se ries In stal la tion & Op er a tion Man ual 1010-1001a, Rev 01...
-
Page 129: Chapter 6 - Creating Graphic Objects
Cre ating Graphic Objects Chapter 6 - Creating Graphic Objects Draw ing Ob jects To display any graphics objects on the OIT screen you must either create them using the drawing tools included with EasyBuilder, import them from another applications program, or select from the many choices available in the graphics libraries included with EasyBuilder. - Page 130 Sil ver Se ries In stal la tion & Op er a tion Man ual then select from the available patterns, and click OK to exit the Pattern Style dialog box. In the Attributes dialog box, select the Pattern color. 4.
- Page 131 Cre ating Graphic Ob jects 4. Move the mouse cursor over to the work area of EasyBuilder onto the window that you are currently editing. The mouse cursor has changed from an arrow to a crosshair cursor. 5. Click to mark a corner of the arc. Move the mouse to where the opposite corner of the arc should be.
-
Page 132: Using Text
Sil ver Se ries In stal la tion & Op er a tion Man ual 5. In the Frame section of the Style tab, click the pull-down arrow of the Color box and select a color. Click OK in the Color dialog box to go back to the Scale Object’s Attribute dialog box. -
Page 133: Pre De Fined Shapes And Bitmaps
Cre ating Graphic Ob jects The following illustration shows the various font sizes available. To change the font size 1. By clicking onto a text box, you can easily change the font size by using the Font: box or the Enlarge or Reduce buttons on the Manager toolbar. -
Page 134: Using A Pre De Fined Shape
Sil ver Se ries In stal la tion & Op er a tion Man ual Shapes and bitmaps are used in both passive and active graphics objects. Each shape or bitmap can be resized or moved just like any drawing object. The following examples show how to place a pre-defined shape or a bitmap on the OIT screen as a passive object. -
Page 135: Using A Pre De Fined Bitmap
Cre ating Graphic Ob jects 2. Click the Shape library… button. The Shape Library dialog box appears. 3. Click the pull-down box of Shape library: and choose from one of the open libraries of shapes. 4. Use the scroll bar to view available shapes. Click on the shape that you want. 5. - Page 136 Sil ver Se ries In stal la tion & Op er a tion Man ual To use a bitmap 1. From the Draw menu, click Bitmap. Or click the Bitmap icon in the Draw toolbar. The Create Bitmap Object dialog box appears. 1010-1001a, Rev 02...
-
Page 137: Graphics Li Brar Ies
Cre ating Graphic Ob jects 2. Click the Bitmap library… button. The Bitmap Library dialog box appears. 3. Click the pull-down box of Bitmap library: and choose from one of the open libraries of bitmaps. 4. Use the scroll bar to view available bitmaps. Click on the bitmap that you want. 5. -
Page 138: What Are 'States
Sil ver Se ries In stal la tion & Op er a tion Man ual What are ‘states’? Many of the graphics objects (ex. Set Word Object or Moving Shape Object) use states to determine which picture to display. Shapes and bitmaps can be configured with up to 32 different states. Each shape can be configured to show a different picture depending upon a ‘state’. - Page 139 Cre ating Graphic Ob jects Let’s look at the Shape Library dialog box: The Shape Library provides several options which are discussed in the following sections. Ac cess ing and Cre at ing Shape Li brar ies You can open, close, or even create new shape libraries easily using the Shape Library dialog box. To open other shape libraries 1.
- Page 140 Sil ver Se ries In stal la tion & Op er a tion Man ual To create a new shape library 1. With the Shape Library dialog box displayed, click New Lib… The New Library dialog box appears. 2. Enter a name for the new library. Click OK. 3.
- Page 141 Cre ating Graphic Ob jects 3. From the Library menu click Shape, then Save to library. Or click the Save Objects to Shape Library icon in the Standard toolbar. The Save to Library dialog box appears. 4. Click the Shape library: box and select the library you wish to store the shape in, (for this example eggs).
- Page 142 Sil ver Se ries In stal la tion & Op er a tion Man ual 7. Click OK. The Shape Library dialog box appears with the shape stored in the library. 8. Click Close to return to the main screen of EasyBuilder. 9.
- Page 143 16. From the File menu, click Save to save the shape to the library. When adding new shapes to existing libraries that come with the EZware-500 software, remember that any future upgrade that you receive from Maple Systems may overwrite existing libraries during installation. This will delete any new shapes that you have entered! Therefore, we recommend that you create new libraries to store these shapes or make backup files of the libraries before installing new upgrades.
- Page 144 Sil ver Se ries In stal la tion & Op er a tion Man ual 4. Position the objects that compose the new shape inside the function key. 5. Select all objects, including the Function Key. 6. From the Library menu, click Shape, then Save to Library. In the dialog box, notice how the shape is positioned.
- Page 145 Cre ating Graphic Ob jects 6. Save the project file to permanently save changes made to the library. Caution – once project is saved, the shape is permanently deleted from the library and cannot be replaced. Finally, you may want to use all or parts of an existing shape to create a new one. To do this, you must first ‘place’ the shape onto the work area of EasyBuilder for editing.
-
Page 146: Using Bitmap Li Braries
Sil ver Se ries In stal la tion & Op er a tion Man ual Using Bitmap Li braries EasyBuilder includes six bitmap libraries that contain bitmaps you can select from: • switch1.blb(buttons, lamps) • bmp1.blb(miscellaneous) • icons.blb(miscellaneous) • pipline.blb(pipes) •... - Page 147 Cre ating Graphic Ob jects To close or ‘unattach’ an open bitmap library 1. With the Bitmap Library dialog box displayed, click the pull-down box of Bitmap library: and choose from one of the open libraries of bitmaps. 2. Select which library you would like to close, then click Unattach Lib. A dialog box appears asking if you really want to unattach the selected library.
- Page 148 Sil ver Se ries In stal la tion & Op er a tion Man ual 8. Click Next. The Get Bitmap Graphics dialog box appears. 9. Click Browse to search for the bitmap. The Open dialog box appears. Select the bitmap file and click Open.
- Page 149 Cre ating Graphic Ob jects 10. The Get Bitmap Graphics dialog box reappears with the bitmap displayed, along with information about the bitmap. 11. The Transparent checkbox is used to make any color selected on the bitmap ‘transparent’. If the color is configured as transparent, then when the bitmap is placed on a window, all areas of the bitmap with the transparent color will not be shown.
- Page 150 15. From the File menu, click Save to permanently save the bitmap to the library. When adding new bitmaps to existing libraries that come with the EZware-500 software, remember that any future upgrade that you receive from Maple Systems may overwrite existing libraries during installation. This will delete any new bitmaps that you have entered! Therefore, we recommend that you create new libraries to store these bitmaps or make backup files of the libraries before installing new upgrades.
-
Page 151: Using Group Li Braries
Cre ating Graphic Ob jects 6. Save the project file to permanently save changes made to the library. Caution – once the project is saved, the bitmap is permanently deleted from the library. Finally, you may want to export a bitmap located in one of the bitmap libraries so that it can be modified or used in other programs. - Page 152 Sil ver Se ries In stal la tion & Op er a tion Man ual Let’s look at the Group Library dialog box: The Group Library provides several options which are discussed in the following sections. Ac cessing and Cre ating Group Li brar ies Group libraries can be opened and closed easily using the Group Library dialog box.
- Page 153 Cre ating Graphic Ob jects Cre at ing, de let ing and plac ing groups Once a complex group object has been created, it must be stored permanently into a group library where it can be retrieved and used in multiple projects. At any time, it is possible to place a group object onto the work area of EasyBuilder for usage or editing.
- Page 154 Sil ver Se ries In stal la tion & Op er a tion Man ual 6. Click OK. The Group Library dialog box appears with the group stored in the library. 7. Notice that any shape or bitmap libraries used to create the group object are listed for your reference in the Including library box.
- Page 155 Cre at ing Graphic Objects This completes our discussion on creating shapes, bitmaps, and group objects with EasyBuilder. This chapter also provided some examples on how to use the drawing tools. The next several chapters describe the many parts or active graphics objects that can be placed onto windows.
- Page 156 Sil ver Se ries In stal la tion & Op er a tion Man ual 1010-1001a, Rev 02...
-
Page 157: Chapter 7 - Creating And Using Databases And Languages
Cre ating and Using Da ta bases and Languages Chapter 7 - Creating and Using Databases and Languages EZBuilder includes the ability to create and use both a Tag Database Library and a Label Database Library. The Tag Library is a database of PLC register addresses. Once created, the Tag Database allows individual object address assigning through Tag selection from the Tag Library. -
Page 158: Im Port Ing And Ex Port Ing The Tag Li Brary
Sil ver Se ries In stal la tion & Op er a tion Man ual 2. To create a new Tag listing, click the Add button to display the Tag dialog. 3. Enter the new Tag name. Tag names may be up to 100 characters, any character. 4. -
Page 159: Using The Tag Li Brary
Cre ating and Using Da ta bases and Lan guages To import the tag library from a .csv file: 1. Click Import CSV… The open dialog box appears. 2. Brows for the CSV file containing the tags. 3. Click Open. Using the Tag Li brary Once the Tag Database has been created, individual objects can use the Library to assign a Tag to the object, referenced to the PLC register address. - Page 160 Sil ver Se ries In stal la tion & Op er a tion Man ual To create a label text database library 1. From the Library menu, click Label..., or click the callup label library icon from the standard toolbar. The Label Library dialog box appears. 2.
- Page 161 Cre ating and Using Da ta bases and Lan guages 4. Click the OK button, and the new label is added to the database. The Name will appear in a selectable listing of available Labels for use with objects that support text field labeling. 5.
-
Page 162: Im Port Ing And Ex Port Ing The La Bel Library
Sil ver Se ries In stal la tion & Op er a tion Man ual Im port ing and Ex port ing the La bel Library This feature allows you to save the labels from the label library into a .lbl file format. Once saved, the file can be loaded into another project. - Page 163 Cre ating and Using Da ta bases and Lan guages 2. Select the applicable label from the list. The label will display on the object, representative for states and languages as entered in the Label Library dialog. 3. Once created with Labels assigned, objects can be viewed displaying the various text labeling in each of the states detailed, in each of the languages utilized.
-
Page 164: Using Lan Guages With The La Bel Li Brary
Using Lan guages with the La bel Li brary The Silver Series supports up to 4 languages for use with the Label Library text labeling. In order to use the Multi-Language features, a label configured in multiple languages must be created and stored in the Label Library, as detailed above. - Page 165 Cre at ing and Us ing Tags and Databases writing a 1 to LW9130 will enable text display in French. Continue for all Languages configured in the Label Library. 1010-1001a, Rev 02...
- Page 166 Sil ver Se ries In stal la tion & Op er a tion Man ual 1010-1001a, Rev 02...
-
Page 167: Chapter 8 - Representing Data With Graphics Objects
Using In ter nal Data Mem ory of OIT The Silver Series contains internal data memory, which can be used to store information that either must be sent to or received from the PLC. The OIT has two types of Internal Data Registers; Local and Recipe. When using local registers, Local Word and Local Bit, the OIT retains the data stored for as long as the OIT is operating. - Page 168 Sil ver Se ries In stal la tion & Op er a tion Man ual Reserved Local Bit (LB) Table Address Function Access Description These bits can be used for any object that needs to be initially set 9000-9009 On after OIT reset when OIT is initialized.
- Page 169 Rep re senting Data with Graph ics Ob jects PLC Control Object; Change Set this bit to prevent the OIT from clearing the PLC register used 9052 Window option – disable clearing for the Change Window option PLC register 9053,9054 Reserved for future use If OIT loses connection to the PLC while it is trying to write to a PLC register, set this bit to continue to send Write command after...
- Page 170 Sil ver Se ries In stal la tion & Op er a tion Man ual V 2.6.0 -- These bits are mapped to PLC Nodes 0-127. Bit 9100-9227 PLC Communication Status changes to 1 when the communication times out. Write 0 to resume the communication.
- Page 171 Rep re senting Data with Graph ics Ob jects When the local Word Option is selected for RTC source in the Edit System Parameters-General settings dialog box of 9015 Local year, (bcd, 0-9999) EasyBuilder, this is the location of the year parameter. Use the Data Transfer Object to copy the PLC RTC year value to this register.
- Page 172 Sil ver Se ries In stal la tion & Op er a tion Man ual 9057 Event Log Database Item Size RdOnly Management information: The size of every item. Management information: The size of the database, the size 9058-9059 Event Log Database Size RdOnly includes management information.
-
Page 173: Non-Vol A Tile Stor Age Of Sys Tem Pa Ram E Ters
Rep re senting Data with Graph ics Ob jects Real Time Clock (RTC); This register is used to store the month for the optional RTC; 60004 BCD code, valid values 0-11 Month Real Time Clock (RTC); This register is used to store the year for the optional RTC; BCD 60005 code, valid values 0-9999 Year... -
Page 174: Security Settings
Sil ver Se ries In stal la tion & Op er a tion Man ual 60066 Common window: Attribute 60067 Extra No. of Events 60068 RTC Source 60069 Printer:Printer 60070 Message board window No. Security Settings Address Function Access Description 0=Disables all security control passwords 60071 Security Control... - Page 175 Rep re senting Data with Graph ics Ob jects To create a Bit Lamp Object 1. From the Parts menu, click Bit Lamp. Or click the Bit Lamp icon in the Part1 toolbar. The Create Bit Lamp Object dialog box appears. 2.
- Page 176 Sil ver Se ries In stal la tion & Op er a tion Man ual 5. Click the Shape tab to display the Shape form 6. Select either a shape or bitmap to represent the Bit Lamp object. If you need more information on how to do this, consult Chapter 6 “Creating Graphics Objects”.
-
Page 177: The Set Bit Ob Ject
Rep re senting Data with Graph ics Ob jects 7. Click the Label tab to display the Label form. 8. Click the Use label checkbox if you want to use a label. Click the Duplicate this label to other states button if you want to use the same label for all states. 9. - Page 178 Sil ver Se ries In stal la tion & Op er a tion Man ual To create a Set Bit Object 1. From the Parts menu, click Set Bit. Or click the Set Bit icon in the Part1 toolbar. The Create Set Bit Object dialog box appears.
-
Page 179: The Tog Gle Switch Ob Ject
Rep re senting Data with Graph ics Ob jects Set ON at window Automatically sets a PLC coil when the window that the part is located in is minimized. minimized Set OFF at window Automatically clears a PLC coil when the window that the part is located in is minimized minimized. - Page 180 Sil ver Se ries In stal la tion & Op er a tion Man ual To create a Toggle Switch Object 1. From the Parts menu, click Toggle Switch. Or click the Toggle Switch icon in the Part1 toolbar. The Create Toggle Switch Object dialog box appears. 2.
-
Page 181: Rep Re Senting Plc Data Reg Is Ters
Rep re senting Data with Graph ics Ob jects part. Note: if you double-click (click twice rapidly) then you will not highlight the label but rather enter the Toggle Switch Object’s Attribute dialog box. Rep re senting PLC Data Reg is ters PLC registers and internal data registers of the OIT are represented using nine parts: •... - Page 182 Sil ver Se ries In stal la tion & Op er a tion Man ual 3. In the Read address frame, select the PLC register or OIT internal memory address. You can select BIN (binary) or BCD format. In the No. of words: box, select 1 for monitoring a 16-bit register.
-
Page 183: The Set Word Ob Ject
Rep re senting Data with Graph ics Ob jects 7. Click the Label tab to display the Label form. 8. Click the Use Label checkbox if you want to use a label. Click the Duplicate this label to other states button if you want to use the same label for all states. 9. - Page 184 Sil ver Se ries In stal la tion & Op er a tion Man ual To create a Set Word Object 1. From the Parts menu, click Set Word. Or click the Set Word icon in the Part1 toolbar. The Create Set Word Object dialog box appears.
- Page 185 Rep re senting Data with Graph ics Ob jects Decreases the value in a 16-bit PLC register by a step value each time it is pressed. If the key is held down, then it will continue to decrease by the step value at a predefined rate. Dec.
-
Page 186: The Multistate Switch Ob Ject
Sil ver Se ries In stal la tion & Op er a tion Man ual Automatically places a 16-bit constant value into a PLC register when the window that the Set at window part is located in is minimized. minimized Set value: Constant used. - Page 187 Rep re senting Data with Graph ics Ob jects To create a MultiState Switch Object 1. From the Parts menu, click MultiState Switch. Or click the MultiState Switch icon in the Part1 toolbar. The Create MultiState Switch Object dialog box appears. 2.
-
Page 188: The Nu Meric Data Ob Ject
Sil ver Se ries In stal la tion & Op er a tion Man ual label again. Now only the label is highlighted, allowing you to move it without moving the part. Note: if you double-click (click twice rapidly) then you will not highlight the label but rather enter the MultiState Switch Object’s Attribute dialog box. - Page 189 Rep re senting Data with Graph ics Ob jects 4. Click the Numeric tab to display the Numeric form. 5. In the Display attribute box, select the format type you wish to use. The options are: Format Range No. of words Description -32768 to +32767 signed 16 bit format...
- Page 190 Sil ver Se ries In stal la tion & Op er a tion Man ual 7. In the Numeric attribute box, select how you want the data to be represented. The Input low: and Input high: boxes don’t apply unless Decimal format with Do conversion is selected.
-
Page 191: The Nu Meric In Put Extend Ob Ject
Rep re senting Data with Graph ics Ob jects • Right Adjust - aligns the number to the right margin of the part. • Left Adjust - aligns the number to the left margin of the part. • Leading Zero - inserts leading zeroes 11. - Page 192 Sil ver Se ries In stal la tion & Op er a tion Man ual 5. Click the Numeric tab to display the Numeric form. 6. In the Display attribute box, select the format type you wish to use. The options are: Format Range No.
- Page 193 Rep re senting Data with Graph ics Ob jects Format Options Range Description specifies number of digits to display (for example, 2 digits displays -9 to 99); any number that cannot be No. above Dec.: 1-10 displayed with the specified number of digits is represented with asterisks.
- Page 194 Sil ver Se ries In stal la tion & Op er a tion Man ual No. above Dec.: 1-10 specifies number of digits to the left of the decimal point. specifies number of digits to the right of the decimal No.
-
Page 195: The Ascii Data Ob Ject
Rep re senting Data with Graph ics Ob jects 15. Once the part is placed onto the window, you can modify the attributes by double-clicking on the part to display the Numeric Input Object’s Attribute dialog box. You may also resize the object by single clicking on the object and pulling the border of the object to the appropriate size. -
Page 196: The Ascii In Put Extend Ob Ject
Sil ver Se ries In stal la tion & Op er a tion Man ual 4. Click the Font tab to display the Font form. 5. Enter the color that you want for the characters displayed in the Color: box. 6. - Page 197 Rep re senting Data with Graph ics Ob jects To create a ASCII Input Extend Object 1. From the Parts menu, click ASCII Input Extend. Or click the ASCII Input Extend icon in the Part1 toolbar. The Create ASCII Input Extend Object dialog box appears. 2.
-
Page 198: The Moving Shape Ob Ject
Sil ver Se ries In stal la tion & Op er a tion Man ual 7. Click the Font tab to display the Font form. 8. Enter the color that you want for the characters displayed in the Color: box. 9. - Page 199 Rep re senting Data with Graph ics Ob jects To create a Moving Shape Object 1. From the Parts menu, click Moving Shape. Or click the Moving Shape icon in the Part2 toolbar. The Create Moving Shape Object dialog box appears. 2.
- Page 200 Sil ver Se ries In stal la tion & Op er a tion Man ual Reads two 16-bit registers. Register #1 determines the state of the shape displayed. Register #2 determines the position of the shape along the Y axis. The OIT places the shape relative to the starting location. For example, if the shape is located on the window at Y=50, and Register #2 has a value of 10, the shape is placed at Y=60.
-
Page 201: The An I Ma Tion Ob Ject
Rep re senting Data with Graph ics Ob jects Reads two 16-bit registers. Register #1 determines the state of the shape displayed. Register #2 determines the position of the shape along the Y axis. The OIT places the shape relative to the starting location using scaling to calculate position. - Page 202 Sil ver Se ries In stal la tion & Op er a tion Man ual To create an Animation Object 1. From the Parts menu, click Animation. Or click the Animation icon in the Part2 toolbar. The mouse cursor changes from a pointer to a crosshair when placed over the work area of EasyBuilder.
- Page 203 Rep re senting Data with Graph ics Ob jects 3. Double click the part. The Animation Object’s Attribute dialog box appears. 4. Use the Description: box to enter a title for the Animation part. A description is not necessary but does help you identify the purpose of the part. 5.
- Page 204 Sil ver Se ries In stal la tion & Op er a tion Man ual 9. Click on the Profile tab. The Profile dialog box appears. 10. The Position settings refer to the overall location of the Animation Object on the window screen.
-
Page 205: Chapter 9 - Using And Creating Keypads
Using and Cre ating Keypads Chapter 9 - Using and Creating Keypads The OIT operator must have a keypad available to enter new data when using the Numeric Input Object or the ASCII Input Object. EasyBuilder includes three group libraries (keypad.glb, user-library-keypad.glb and user-library-keypad1.glb), which contain sample keypads that can be placed onto a window screen. - Page 206 Sil ver Se ries In stal la tion & Op er a tion Man ual Configures the Function Key as a Clear key. When pressed, it will clear the data displayed in [CLR] the Numeric Input Object or ASCII Input Object. Note: this key does not clear the actual target PLC register until the Enter key is pressed.
- Page 207 Using and Cre ating Key pads 8. Click the Label tab to display the Label form. 9. Click the Use Label checkbox to use a label. 10. You can have a different label for each state of the Bit Lamp. In the State: box, enter the state that you wish to edit, then enter the label for that state in the Content: box.
-
Page 208: Dis Playing And Using A Key Pad
Sil ver Se ries In stal la tion & Op er a tion Man ual Dis playing and Using a Key pad Let’s go through a sample project that uses one of the predefined keypads included in EasyBuilder to edit a Numeric Input Object and an ASCII Input Object. - Page 209 Using and Cre ating Key pads 6. From the Part menu, select Numeric Input Extend. The Create Numeric Extend Object dialog box appears. 7. Create a Numeric Input Object with the following parameters: Frame Parameter Value Description Numeric Input Register Device type: Device address: Read Address...
- Page 210 Sil ver Se ries In stal la tion & Op er a tion Man ual For more information on how to use the Numeric Input Extend Object, consult Chapter 8 “Representing Data with Graphics Objects”. 8. Create an ASCII Input Object Extend with the following parameters: Frame Parameter Value...
-
Page 211: Using The Built-In Numeric Keypad In Easybuilder
Us ing and Cre at ing Keypads 7. Press the Clear key. Notice that the entire register is cleared to 0. 8. Enter digits 5, 4, 3, 2, 1, and then press the Enter key. Notice that the last digit is still blinking and two short beeps occur. - Page 212 Sil ver Se ries In stal la tion & Op er a tion Man ual • In the Trigger Address: section… • De vice Type: — LB • Device Address: — 9000 3. Select the Numeric tab. 4. In the Display section, select the Decimal option button. 5.
- Page 213 Us ing and Cre at ing Keypads 7. Select Parts—Set Bit from the menu listings. This displays the Set Bit Object dialog box. 8. Enter the following settings: • In the Write Address: section… • De vice Type: — LB •...
- Page 214 Sil ver Se ries In stal la tion & Op er a tion Man ual Setup the Common Window: 1. Select Window—Open Window from the menu listings. This displays the Open Window dialog box. 2. Highlight “Common Window” and click Open 3.
- Page 215 Us ing and Cre at ing Keypads white outline of a square. Double click on the white outline to configure the settings. The Direct Window Object's Attributes dialog appears. 4. Verify the following sections: • In the Read Address: section… •...
- Page 216 Sil ver Se ries In stal la tion & Op er a tion Man ual 1010-1001a, Rev 01...
-
Page 217: Chapter 10 - Bar Graphs, Meters, And Trends
Chapter 10 - Bar Graphs, Meters, and Trends This chapter focuses on three special graphic objects, which can be used to display PLC data registers. You read in Chapter 6 how to use shapes and bitmaps to represent the data in PLC registers as states. You also read how to use alphanumeric data fields to display the contents of PLC registers as either numbers or ASCII characters. - Page 218 Sil ver Se ries In stal la tion & Op er a tion Man ual 2. Use the Description: box to enter a title for the Bar Graph part. A description is not necessary but does help you identify the purpose of the part. 3.
- Page 219 Bar Graphs, Me ters, and Trends 7. Click the Bar Graph tab to display the Bar Graph form. 8. In the Attribute frame, select what type of Bar Graph to use: Function Description Direction: Selects which direction the bar graph should move as it increases: Up, Down, Right, or Left. If the Variable alarm feature is selected, then the OIT continuously reads three 16-bit PLC registers Variable alarm: instead of 1.
-
Page 220: Cre Ating Dis Play Me Ters
Sil ver Se ries In stal la tion & Op er a tion Man ual Span: -32767 to 32767 Selects the number that represents the total span of the bar graph 11. Click OK to close the Create Bar Graph Object dialog box. The main screen of EasyBuilder appears with the cursor tied to a rectangular outline of the part you just created at the upper left corner of the screen. - Page 221 Bar Graphs, Me ters, and Trends 2. Use the Description: box to enter a title for the Display Meter part. A description is not necessary but does help you identify the purpose of the part. 3. In the Read address frame, select the PLC register or OIT internal memory address. You can select BIN (binary) or BCD format.
-
Page 222: Cre Ating Trend Dis Plays
Sil ver Se ries In stal la tion & Op er a tion Man ual Cre ating Trend Dis plays The Trend Display Object is used to sample the data in a single or multiple 16-bit PLC registers and plot this data on a time graph. - Page 223 Bar Graphs, Me ters, and Trends Device type: PLC or OIT internal memory address Device This is the starting address that is read from to get the data to address: trend. Read address: BIN or BCD Select binary (BIN) or BCD format For each channel, the OIT reads another contiguous 16-bit PLC No.
-
Page 224: Cre Ating Xy Plots
Sil ver Se ries In stal la tion & Op er a tion Man ual may want to create a Rectangle Object that is displayed behind the Trend Graph if the Trend Display is shown in a window screen with other objects. 7. - Page 225 Bar Graphs, Me ters, and Trends Plot point: 10 to 255 Number of times that a sampling occurs per page. Device type: PLC or OIT internal memory address Device Read address: This is the starting address that is read from to get the data to plot. address: BIN or BCD Select binary (BIN) or BCD format...
- Page 226 Sil ver Se ries In stal la tion & Op er a tion Man ual H. Span: 1 to 32767 The value at which the plot will reach the right side of the Horizontal Axis. V. Zero: 1 to 32767 The value at which the plot will reach the bottom of the Vertical Axis.
-
Page 227: Chapter 11 - Capturing Alarms And Events
Cap turing Alarms and Events Chapter 11 - Capturing Alarms and Events This chapter looks at how the Silver Series uses alarms and events. Using Alarms EasyBuilder has three parts that are used to perform alarm functions: the Alarm Scan object, the Alarm Display object, and the Alarm Bar object. -
Page 228: Dis Play Ing Alarms Us Ing The Alarm Dis Play Ob Ject
Sil ver Se ries In stal la tion & Op er a tion Man ual 2. Click the Add... button. The Alarm Scan Object’s Attributes dialog box appears. 3. In the Read address frame, select the PLC coil to monitor the alarm condition. 4. - Page 229 Cap turing Alarms and Events To create an Alarm Display Object 1. From the Parts menu, click Alarm Display. Or click the Alarm Display icon in the Part2 toolbar. The Create Alarm Display Object dialog box appears. 2. Use the Description: box to enter a title for the Alarm Display part. A description is not necessary but does help you identify the purpose of the part.
- Page 230 Sil ver Se ries In stal la tion & Op er a tion Man ual Using the scrollable win dow fea ture Let’s go through an example to illustrate how the Alarm Display Object is used with the scrollable window. First, use the Alarm Scan Object to create five alarms: Create five Set Bit objects with the Toggle attribute that can write to OIT coils LB0-4.
- Page 231 Cap turing Alarms and Events Now create an Alarm Display object with the following attributes: Place the Alarm Display object directly underneath the “Alarm Display” text string and to the right of the two Set Word objects. Save and compile the project, then simulate off-line. The startup screen should appear with the following displayed: 1010-1001a, Rev 02...
-
Page 232: Dis Play Ing Alarms Us Ing The Alarm Bar Ob Ject
Sil ver Se ries In stal la tion & Op er a tion Man ual Press the Alm#0, Alm#1, and Alm#2 keys to activate three alarms. As each alarm is activated it is immediately displayed in the Alarm Display scrollable window. The most recent alarm is always displayed at the top of the list. Notice that all three alarms can be seen in the scrollable window since we configured the Alarm Display object with a scrollable window of three lines. - Page 233 Cap turing Alarms and Events To create an Alarm Bar Object 1. From the Parts menu, click Alarm Bar. Or click the Alarm Bar icon in the Part2 toolbar. The Create Alarm Bar Object dialog box appears. 2. Use the Description: box to enter a title for the Alarm Bar part. A description is not necessary but does help you identify the purpose of the part.
-
Page 234: Using Events
Sil ver Se ries In stal la tion & Op er a tion Man ual 4. Click OK to close the Set System Parameters dialog box. The main screen of EasyBuilder reappears. Using Events EasyBuilder has two parts that are used to perform Event functions: the Event Log object and the Event Display object. - Page 235 Cap turing Alarms and Events 2. Click the Add... button. The Event Log Object’s Attributes dialog box appears. Address type = Bit Address type - Word 3. In the Address type: box, select Bit to trigger on the value of a PLC coil. Select Word to trigger on a value or range of values in a PLC 16-bit register.
-
Page 236: Dis Playing Events Using The Event Dis Play Ob Ject
Sil ver Se ries In stal la tion & Op er a tion Man ual 12. Click Close to close the Event Log Object dialog box. The Event Log Object is active no matter what windows are currently displayed on the OIT screen. Therefore, you do not have to place the object onto a window screen. - Page 237 Cap turing Alarms and Events 6. The No of words: box is set at 1 and cannot be changed. 7. Click the Event Display tab to display the Event Display form. 8. Select the type of options the Event Display uses: Function Range Description...
-
Page 238: Using Events For An Alarm His Tory
Sil ver Se ries In stal la tion & Op er a tion Man ual 10. In the Format frame, select the following attributes: Attribute Description Sequence No. If enabled, a sequence number will be displayed along with the event string whenever an event is triggered. Acknowledge time If enabled, this displays the time at which an event was acknowledged. - Page 239 Cap turing Alarms and Events Width Profile Height 3. Place the five objects on the top of the window: 4. These buttons will be used to simulate alarm conditions. Create a text box and two Set Word objects to scroll event window 1.
- Page 240 Sil ver Se ries In stal la tion & Op er a tion Man ual Place these objects onto the screen as shown: Create an Event Log object to monitor alarms 1. From the Parts menu, click Event Log. Or click the Event Log icon in the Draw toolbar. The Event Log Object dialog box appears.
-
Page 241: Using The Alarm His Tory
Cap turing Alarms and Events Create an Event Display object to display alarm history 1. From the Parts menu, click Event Display. Or click the Event Display icon in the Part2 toolbar. The Create Event Display Object dialog box appears. 2. - Page 242 Sil ver Se ries In stal la tion & Op er a tion Man ual Since we have configured the window to be three lines, only the last three alarms are seen. Use the scroll buttons on the left to see the two oldest alarms at the bottom of the list. Each item on the list will remain on the list permanently.
-
Page 243: Chapter 12 - Data And Recipe Transfer Objects
Data and Rec ipe Trans fer Objects Chapter 12 - Data and Recipe Transfer Objects Easybuilder includes a Data Transfer object and a Recipe Transfer object, which enable data to be copied from one or more registers located in the PLC or the OIT to other registers. The Data Transfer object is used to continuously transfer data at a predefined rate. -
Page 244: Using The Rec Ipe Trans Fer Ob Ject
Sil ver Se ries In stal la tion & Op er a tion Man ual 2. Click the Add... button. The Data Transfer Object dialog box appears. 3. Use the Description: box to enter a title for the Data Transfer part. A description is not necessary but does help you identify the purpose of the part. - Page 245 Data and Rec ipe Trans fer Ob jects To create a Recipe Transfer Object 1. From the Parts menu, click Recipe Transfer. Or click the Recipe Transfer icon in the Part2 toolbar. The Recipe Transfer Object dialog box appears. 2. Use the Description: box to enter a title for the Recipe Transfer part. A description is not necessary but does help you identify the purpose of the part.
- Page 246 Sil ver Se ries In stal la tion & Op er a tion Man ual 5. Click the Shape tab to display the Shape form. 6. Select either a shape or bitmap to represent the Recipe Transfer object. If you need more information on how to do this, refer to Chapter 6 “Creating Graphics Objects.”...
-
Page 247: Cre Ating A Rec Ipe
Data and Rec ipe Trans fer Ob jects 8. Click the Use Label checkbox if you want to use a label. 9. You can have a different label for each state of the Bit Lamp. In the State: box, enter the state that you wish to edit, then enter the label for that state in the Content: box. - Page 248 Sil ver Se ries In stal la tion & Op er a tion Man ual For an example of how to create recipes, please consult the EZware-500 online Help file. 1010-1001a, Rev 02...
-
Page 249: Chapter 13 - Macros
Macros Chapter 13 - Macros Using Macros The “macro” language in EasyBuilder allows the programmer to perform simple transfers of data and/or simple to complex conditional logic and transfers. Macros are high-level language programs that can run inside the OIT to perform various data transfers and can perform conditional logic. - Page 250 Sil ver Se ries In stal la tion & Op er a tion Man ual SetData(AllDone ,LB_Binplc ,1,1) // done with the macro, clear the bit that called it. (LB:1) End Macro_Command The macro was named “AddTwo” and the bit that executed this macro was LB:1. After the macro was written, a ‘PLC Control Object’...
- Page 251 Macros Pro ject Ex am ple of Add 2 Set Bit Ob jects At trib utes Dialog 1010-1001a, Rev 02...
-
Page 252: Vari Ables, Dec La Ra Tions And Mem Ory Us Age
Sil ver Se ries In stal la tion & Op er a tion Man ual In the example above, a set-bit object was placed on the screen as a ‘+’ button. When this button is pushed, it forces LB:1 to ON and the ‘AddTwo’ macro executes, storing the result in LW:2 and turning LB:1 to OFF and the macro stops. -
Page 253: Variable Initialization
Macros Character variable (8-bit unsigned) Bool Boolean variable (1-bit) Variables inside macros are initialized to all ‘1’s as a default (i.e. 0xFFFF), so don’t assume they are zero values when you enter the macro. It is good programming practice to initialize variables during declaration, or use assignment statements before they are used. -
Page 254: Operator
Sil ver Se ries In stal la tion & Op er a tion Man ual Operator Below is a list of the recognized operators. Group Name Assignment: Assignment operator: Addition: Subtraction: Multiplication: Division: Modulo: Comparison operators: Less than: < Less than or equal to: <= Greater than: >... -
Page 255: Local And Global Variables
Mac ros Macro_Command main( ) // The main macro code goes here End Macro_Command Any other sub functions must be declared before the main() function can use it, for example: Sub SQR(int MyVar ) // sub routine code goes here End Sub Macro_Command main( ) // The main macro code goes here... -
Page 256: Using 32-Bit Registers Within Macros
Sil ver Se ries In stal la tion & Op er a tion Man ual LW:9000 pointer and then use an RWI address 5 (RWI:5) to GetData() or SetData() {LW:9000 = 15 + RWI:5 RW:20}. The pointer has a maximum limitation of 32767, so LW:9000 can indirectly address from an offset of 0 to 32767. -
Page 257: Using Floating Point Registers Within Macros
Macros // This routine puts (2) 16-bit array variables into one 32-bit variable Int LVal short Data[2] LVal = (Data[1] < 16) + Data[0] Using Floating Point Registers Within Macros Reading and writing external floating point registers can only be used in a macro as a transfer function. The macro routine has no functionality to interpret an external floating point formatted (IEEE-754 format) register. - Page 258 Sil ver Se ries In stal la tion & Op er a tion Man ual Format Examples If x == 1 Then y = y * 5 z = z – 12 Else y = y * 2 If Condition Then z=y-1 [ Statements ] End If...
-
Page 259: Function Calls And Passing Parameters
Mac ros Format Examples For n = 100 Down 0 Step 3 n = n * 2 Next n For counter = start To/Down end [Step steps ] [Statements] For loop = 0 To 20 Step 2 Next [counter] loop = (loop + 1) *2 Next loop While –... -
Page 260: Reading & Writing External Registers In A Macro
Sil ver Se ries In stal la tion & Op er a tion Man ual End Sub Macro_Command main( ) // This main function calls the SQR() function. int I = 5 I = SQR(I) SetData(I, LW_Binplc, 1,1) // Write the result to a LW End Macro_Command The above example code defines a sub-function called SQR(). -
Page 261: Precautions, Tips & Tricks When Using Macros
Mac ros iAddr_Off The address offset in the PLC Number of words iDataCount Precautions, tips & tricks when using Macros The size of a macro in an eob file is limited by the memory of the OIT. The maximum storage space of local variables in a macro is 4K bytes. A maximum of 256 macros are allowed in an EasyBuilder project. - Page 262 Sil ver Se ries In stal la tion & Op er a tion Man ual The format of “If” statement is: If [logic expression]Then [ Else [If [logic expression] Then ] ] EndIf Any format other than this format will cause compile error.
- Page 263 Mac ros g[3] = 4 + XYZ <- illegal – XYZ is undefined Next g[2] End Macro_Command (28:)"Missing “Sub” “ ; (29:)"Missing “Macro_Command” “ ; The format of function declaration is: Sub(Macro_Command) [data type] function_name( … ) End Sub(Macro_Command) Any format other than this format will cause compile error. (30:)"Mismatch of the number of parameters “...
- Page 264 Sil ver Se ries In stal la tion & Op er a tion Man ual End Macro_Command 1010-1001a, Rev 02...
-
Page 265: Chapter 14 - Using A Printer With The Hmi530T/550T
Using a Printer with the HMI530/550 Chapter 14 - Using a Printer With the HMI530T/550T The HMI530/550 models support Epson ESC/P2, SP, and HP PCL/Simple Page Mode printers. The HMI530T/550T provides a standard 25-pin female connector for connection to the printer with the following pin configuration. -
Page 266: Print Ing A Win Dow
Sil ver Se ries In stal la tion & Op er a tion Man ual Print ing a Win dow There are two ways to print a window: • Using a function key • Using a PLC Control Object • Using Simulation Mode Using a Func tion Key You can place a Function Key Object on a screen that is configured to print the screen. -
Page 267: Using Simulation Mode
Using a Printer with the HMI530/550 Using Simulation Mode Printing a window can also be done during Simulation (Online & Offline). To Print a window: 1. Place the mouse anywhere on the simulation screen. 2. Right click the mouse to call up the menu. 3. - Page 268 Sil ver Se ries In stal la tion & Op er a tion Man ual 1010-1001a, Rev 01...
- Page 269 Index Index Alarm Bar Object, using ... . . 230 Cable Routing and Noise Immunity ..10 Alarm Display Object, using ... 226 CE Compliance .
- Page 270 Sil ver Se ries In stal la tion & Op er a tion Manual Displaying your project ....28 Grouping objects....51 Drawing tools, using .
- Page 271 Index meter display ....25 Popup Window, creating....24 Minimize windows feature .
- Page 272 Sil ver Se ries In stal la tion & Op er a tion Man ual Simulation Mode....31 Window, deleting ....94 Simulation Mode, wiring .
Need help?
Do you have a question about the Silver Series and is the answer not in the manual?
Questions and answers