Chapters
Table of Contents

Related Manuals for HunterLab EasyMatch


Summary of Contents for HunterLab EasyMatch
- Page 1 User’s Manual for Aeros and EasyMatch Essentials v 1.1 User’s Manual for Aeros ® and EasyMatch Essentials ® Hunter Associates Laboratory 11491 Sunset Hills Road Reston, Virginia 20190 USA www.hunterlab.com A60-1018-193 Version 1.1...
- Page 2 Windows is a registered trademark of Microsoft Corporation in the United States and other countries. Caution: If the equipment is used in a manner not specified by the HunterLab, the overall safety may be impaired. - The instrument is for indoor use only and not suitable for a wet location.
-
Page 3: Table Of Contents
User’s Manual for Aeros and EasyMatch Essentials v 1.1 Contents SETTING UP THE AEROS ..................7 Standard Accessories ..........................7 Power Jack ..............................7 Power Switch ............................8 Keyboard and Mouse ..........................8 Front and Rear USB Connectors ....................... 8 Ethernet Port ............................ - Page 4 User’s Manual for Aeros and EasyMatch Essentials v 1.1 Workspace: Color Scales ........................31 Workspace: Read Options ........................33 Read Options: Options ......................... 33 Read Options: Measurement Configuration ..................37 Workspace: Standard and Tolerances ....................39 AutoTolerances Setting........................41 Tolerances ............................42 Workspace: Views ..........................
- Page 5 User’s Manual for Aeros and EasyMatch Essentials v 1.1 Operating Conditions ..........................75 Physical Characteristics ........................... 75 Conditions of Illumination and Viewing ....................76 Instrument Performance ........................76 Measurement............................76 Regulatory Notice ........................... 77 FEATURES, ACCESSORIES & MAINTENANCE ............79 Aeros Maintenance &...
- Page 6 User’s Manual for Aeros and EasyMatch Essentials v 1.1...
-
Page 7: Setting Up The Aeros
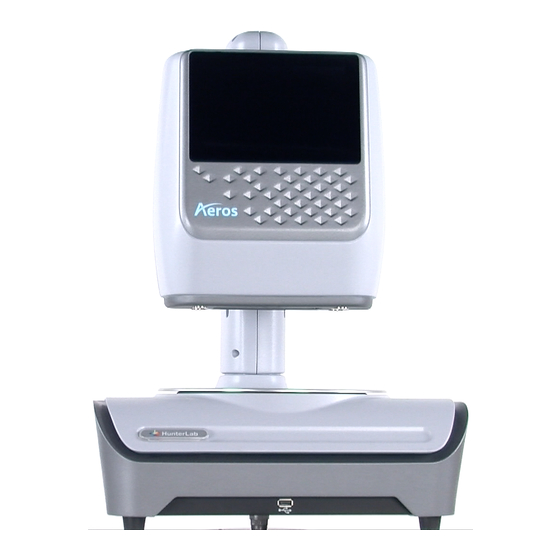
User’s Manual for Aeros and EasyMatch Essentials v 1.1 Setting Up the Aeros The Aeros system contains two major components – the sensor head and the turntable base. The sensor head contains the spectrophotometer with an LED light source, distance measuring components and a touch screen for Essentials. -
Page 8: Power Switch
User’s Manual for Aeros and EasyMatch Essentials v 1.1 CAUTION Note: Use only the power cord included with this instrument or a replacement obtained from HunterLab. Be certain that the power cord is in good condition before connecting it. Power Switch •... -
Page 9: Moving The Unit
User’s Manual for Aeros and EasyMatch Essentials v 1.1 Moving the Unit • Use care in moving the instrument which weighs 50 lbs. Training on lifting heaving objects is recommended. To lift from the box, a two person lift is suggested. When moving it from a table to another location, balance this instrument by lifting from behind and by the base. - Page 10 User’s Manual for Aeros and EasyMatch Essentials v 1.1...
-
Page 11: Taking A Simple Measurement
User’s Manual for Aeros and EasyMatch Essentials v 1.1 Taking a Simple Measurement What is HunterLab Aeros & EasyMatch Essentials? Aeros is a reflectance-only color measuring instrument capable of measuring the color of irregularly shaped/textured products. All samples are measured by placement in a tray or container under the sensor head. -
Page 12: Figure 5. Sensor Moves To Top
User’s Manual for Aeros and EasyMatch Essentials v 1.1 Figure 5. Sensor Moves to Top ▪ Read Black Glass: When the sensor stays at the top, attach the standardization box to the sensor. Then attach the black glass to standardization box and press Read. -
Page 13: Figure 8. Completed Standardization
User’s Manual for Aeros and EasyMatch Essentials v 1.1 Figure 8. Completed Standardization ▪ Standardization is updated and reported as Standardized on the bottom of the screen. Figure 9. Standardization Status Bar • Create a workspace for your product ▪... -
Page 14: Figure 11. Name New Workspace
User’s Manual for Aeros and EasyMatch Essentials v 1.1 Figure 11. Name New Workspace Note: The active workspace name is displayed in the lower right corner of the screen. ▪ Configure the New Workspace: With this new workspace open, you can start to change the settings in Color Scales, Read Options, Standard and Tolerances, Views and View Options. -
Page 15: Figure 12. Read Options: Measurement Configuration
User’s Manual for Aeros and EasyMatch Essentials v 1.1 Figure 12. Read Options: Measurement Configuration ▪ Now your instrument is ready to read your product under this new workspace. If you’d like to start a new job for this product, you can press New Job and load this configured workspace to continue. -
Page 16: Figure 14. Edit/Delete A Standard
User’s Manual for Aeros and EasyMatch Essentials v 1.1 • A long press on the Standard name will show a menu with the following options: ▪ Edit – to edit the standard. If Edit is selected, the Workspace > Standard and Tolerances dialog box is presented to allow for editing the name, assigning tolerances or changing the type of standard. -
Page 17: Navigating The Essentials Screen
User’s Manual for Aeros and EasyMatch Essentials v 1.1 Navigating the Essentials Screen The EasyMatch Essentials Tools and Status features are shown below. Workspace Moves & System Sensor Settings to Top View Jobs Options View Flippers Current Read Workspace &... -
Page 18: Tools: Information
User’s Manual for Aeros and EasyMatch Essentials v 1.1 Tools: Information • The sensor type and serial number is shown at the bottom left side of the System Bar when the i is pressed. When application security is enabled and the user logs into Essentials, the User Account will also be shown in the Information box. -
Page 19: Tools: Jobs
A job is a collection of all the sample measurements and a workspace used for a task, product, or customer. Jobs are the ‘readings’ of EasyMatch Essentials. Jobs can be created for many different reasons, such as to hold data for a certain customer or a specific product line. - Page 20 User’s Manual for Aeros and EasyMatch Essentials v 1.1...
-
Page 21: Tool Bar: Jobs Function
User’s Manual for Aeros and EasyMatch Essentials v 1.1 Tool Bar: Jobs Function Under the Job function, the following tasks can be accomplished: Figure 17. Job Menu Jobs Jobs vs. Workspace: A job consists of samples measured according to a specific workspace. A workspace is a template with measurement conditions such as standard &... -
Page 22: Jobs: Save & Save As
User’s Manual for Aeros and EasyMatch Essentials v 1.1 Figure 18. Open A Job Jobs: Save & Save As • Save the Job under the desired name: To save a job, Select the Folder, Name the Job and Save The Job contents into a file. These files have an ‘.ezm’ extension. There will be a default name filled in Filename box as date&time&instrument#&workspace. -
Page 23: Figure 21. Save As Pdf
User’s Manual for Aeros and EasyMatch Essentials v 1.1 • Drivers included in the Aeros are shown below. Additional printer drivers can be added under Workspace > Diagnostics > Advanced. Table 2: Printer Drivers Included Printer Driver Canon Canon Print Service 4.4+ HP Print Service Plugin 4.1+... -
Page 24: Jobs: Data Management
User’s Manual for Aeros and EasyMatch Essentials v 1.1 Figure 23. Download File Contents Jobs: Data Management Standard(s) and sample measurements are saved in Job files and database along with the sensor information. The saved measurements are also associated with a respective Workspace and Job. -
Page 25: Figure 25. Recall Measurements
User’s Manual for Aeros and EasyMatch Essentials v 1.1 • Jobs: Data Management: Recall Recall measurements that have been stored to a job. This feature enables the user to recall the Standard/Sample(s) stored in the Database into the current running Job. -
Page 26: Figure 26. Import Job
User’s Manual for Aeros and EasyMatch Essentials v 1.1 ▪ Import Job This option allows the user to browse and select a Job file(s) (.ezm) from the USB flash drive and import into the instrument. If a file name already exists, then the name will be incremented numerically. -
Page 27: Figure 28. Export Current Job
▪ Diagnostics ▪ Others (e.g all files in Hunterlab folder, and all pdf reports in Download folder) ▪ Export Job: This option allows the user to browse and select an existing Job(s) (.ezm) or the current active Job data and copy into a USB flash drive either in CSV or EZM file format. -
Page 28: Figure 30. Select Download Folder For Pdf File Export
All selected files for one email should be in the same file path location. You can email any file in HunterLab folder as well as in the downloads folder. Figure 31. Enter an Address to Email a Job ▪... -
Page 29: Jobs: Help
General. Jobs: About The About menu provides information about HunterLab and the current software version. Figure 33. Job > About the Software To update the software version from a USB flash drive, insert the USB flash drive into the port on the front of the instrument. -
Page 30: Figure 34. Instrument Info
User’s Manual for Aeros and EasyMatch Essentials v 1.1 For detailed information on firmware and more, please press the Info button on the screen. Figure 34. Instrument Info... -
Page 31: Tool Bar: Workspace & System Settings
User’s Manual for Aeros and EasyMatch Essentials v 1.1 Tool Bar: Workspace & System Settings Under the Workspace & Systems Settings, the following tasks can be accomplished: Figure 35. Workspace Parameters Workspace: Color Scales • Color Scales provide four tabs in which the Scales, Indices, Differences and Illuminant/Observer (Ill/Obs) can be configured. -
Page 32: Figure 37. Illuminant/Observer Configuration
User’s Manual for Aeros and EasyMatch Essentials v 1.1 • The Illuminant/Observer tab displays combination selections for these parameters. To see all of the choices, you can scroll through the selections by viewing the screen. Figure 37. Illuminant/Observer Configuration •... -
Page 33: Workspace: Read Options
User’s Manual for Aeros and EasyMatch Essentials v 1.1 Table 3. Overview of Color Measurement Parameters for EZ View, Color Data Table, Trend Plot & Color Plot Illuminant Observer Scales Differences Indices View Options 2/10 CIE Lab dL*a*b* 457nm Brightness... -
Page 34: Figure 40. Read Options
User’s Manual for Aeros and EasyMatch Essentials v 1.1 Figure 40. Read Options ▪ Average Select the number of readings to average to produce the final measurement. The total number of readings to be averaged can be no less than two. Press Apply to close the screen and press Read to initiate Readings. -
Page 35: Figure 42. Continuous Read
User’s Manual for Aeros and EasyMatch Essentials v 1.1 Figure 42. Continuous Read To stop the Continuous Read, press the Read button when the button is green.. ▪ Auto Save Job This selection will automatically save a job. Once this feature is selected, a dialog box will be displayed to name the job. -
Page 36: Figure 44. Slope & Bias Correction
User’s Manual for Aeros and EasyMatch Essentials v 1.1 Gain Correction= (Expected Value 1-Expected Value 2)/ (Measured Value 1- Measured Value 2) 3. Linear regression: Create a y=mx + b relationship comparing actual readings to target values, where target values is on the Y-axis and actual readings are on the x-axis. -
Page 37: Read Options: Measurement Configuration
User’s Manual for Aeros and EasyMatch Essentials v 1.1 ▪ Prompt for Sample/Standard Name Select this feature to input the Sample (or Standard) name manually during the measurement cycle so that the Sample measurement will be inserted with the specified name. If this option is not selected, the Samples will be inserted with the specified default sample name suffixed with the auto incremented index number. -
Page 38: Figure 48. Measurement Configuration
User’s Manual for Aeros and EasyMatch Essentials v 1.1 Figure 48. Measurement Configuration Select Turntable motion to enable rotation. When Auto Height is selected as a default, the sensor head will adjust its position to read samples automatically for each sample measurement. The Create Sample Profile button will allow the Aeros to look at the specimen and select the optimum fixed distance from the turntable. -
Page 39: Workspace: Standard And Tolerances
User’s Manual for Aeros and EasyMatch Essentials v 1.1 When profile is complete, press OK to continue. The sample height will be shown next to the Create Sample Profile button. The Measurement Time is the amount of time used to average the readings together. -
Page 40: Figure 54. Index Selection And Tolerances
User’s Manual for Aeros and EasyMatch Essentials v 1.1 Figure 54. Index Selection and Tolerances • Tolerances will be displayed on the measurement screen if enabled under the View Options for the Color Data and the Color Plot Screens. Figure 55. Indices & Tolerances on CDT •... -
Page 41: Autotolerances Setting
User’s Manual for Aeros and EasyMatch Essentials v 1.1 3. The Standard is displayed under As Read. Enter the target values. 4. Check the Apply Hitch box and press OK. Figure 56. Hitch Standardization Table 4. Hitch Standardization By Additive or Ratio Application... -
Page 42: Tolerances
User’s Manual for Aeros and EasyMatch Essentials v 1.1 Figure 57. AutoTolerance Configuration Note: If AutoTolerances are selected, the user cannot manually enter tolerances. Tolerances ▪ Tolerances can be entered for Scales, Indices and Differences. Figure 58. Difference Tolerance Configuration... -
Page 43: Workspace: Views
User’s Manual for Aeros and EasyMatch Essentials v 1.1 Workspace: Views • Views: This option can be used to select the views to be presented in the application. Simply check on the box of the screen needed. Press Apply to save one or all of the screens. -
Page 44: System Settings: Standardization
User’s Manual for Aeros and EasyMatch Essentials v 1.1 System Settings: Standardization ▪ From the Tools menu select Standardization. You can also press the Standardization key in the Status bar as a shortcut. The sensor will move to the top to begin. -
Page 45: System Settings: Diagnostics
User’s Manual for Aeros and EasyMatch Essentials v 1.1 ▪ Remove the calibration box when standardization is complete. The instrument is ready to Read Samples. Figure 66. Standardization is Complete System Settings: Diagnostics The performance diagnostics are Repeatability and a Green Tile Test. -
Page 46: Figure 69. Standardize The Instrument
User’s Manual for Aeros and EasyMatch Essentials v 1.1 Figure 69. Standardize the Instrument • Read the black glass and then the white tile. Figure 70. Read White Tile Figure 71. Begin Repeatability Readings on White Tile • Leave the white tile at the port and press OK to initiate the repeatability readings. -
Page 47: Reading The Green Tile
User’s Manual for Aeros and EasyMatch Essentials v 1.1 Figure 72. Repeatability Readings with Pass/Fail When all 30 readings have been made, the final test result is shown and saved automatically. To print the results, press the print button or click to Open the file and then Print. -
Page 48: Advanced Tests
Print. Figure 76. Green Tile Readings Advanced Tests Advanced Tests are primarily for use by HunterLab’s Service Department. However, this menu supports the upload of Printer Drivers, Parking of the sensor for Shipping, and remote support setting. -
Page 49: Figure 78. Insert Usb With Printer Driver
User’s Manual for Aeros and EasyMatch Essentials v 1.1 ▪ The Turntable can be tested next by pressing Start. Press again to stop the turntable. ▪ Enable Log: Once check enabled, this feature records the instrument actions for tracking purposes. When complete the user returns to this screen and exports the data to a thumb drive. -
Page 50: Figure 80. Updating Printer Drivers
User’s Manual for Aeros and EasyMatch Essentials v 1.1 Figure 80. Updating Printer Drivers • The Aeros will install the new printer driver and it will be then available to use. Figure 81. Printer Driver Installed... -
Page 51: Figure 82. Printer Page
User’s Manual for Aeros and EasyMatch Essentials v 1.1 Figure 82. Printer Page • Restart Comm can be used to reset the ethernet communications for EasyMatch • Support Region Note: Your instrument must be connected to the internet. a. Select Support Region. A dialog is displayed with three options for region selection. -
Page 52: System Settings: Preferences
User’s Manual for Aeros and EasyMatch Essentials v 1.1 Exit Arrow Figure 84. Remote Access Screen c. To ensure that your application is successfully restarted, make sure that you see the message Webconnect: ‘Hunterlabs’ Online. If this message does not appear, please contact our support team. -
Page 53: Figure 86. System Settings> Preferences> General Page
User’s Manual for Aeros and EasyMatch Essentials v 1.1 Figure 86. System Settings> Preferences> General Page ▪ To Load the Last Workspace at Startup check this box and press Apply. ▪ To Load the Last Job at Startup, check this box and press Apply. -
Page 54: Preferences: Print
User’s Manual for Aeros and EasyMatch Essentials v 1.1 ▪ Enable Application Security. This selection is available after the User Manager has been set up. Please refer to the System Settings: User Manager for more information. ▪ When this is selected, the application will require valid login credentials at startup. -
Page 55: System Settings: User Manager
User’s Manual for Aeros and EasyMatch Essentials v 1.1 System Settings: User Manager Security can be enabled on the Aeros to ensure that operators cannot modify/delete folders or files and limit their functionality. An administrator is identified to set up the users/groups with selected privileges. -
Page 56: Figure 93. User Privileges
User’s Manual for Aeros and EasyMatch Essentials v 1.1 Figure 93. User Privileges • If a printer is attached, you can Print a list of Privileges selected. • To complete enabling security, go to Workspace> Preferences and enable security on the right side. -
Page 57: Figure 96. Enable Last Login Credentials
User’s Manual for Aeros and EasyMatch Essentials v 1.1 Figure 96. Enable Last Login Credentials • If needed, the administrative user can delete groups / users and reset passwords of all Groups & Users. - Page 58 User’s Manual for Aeros and EasyMatch Essentials v 1.1...
-
Page 59: Toolbar: Options (Views)
User’s Manual for Aeros and EasyMatch Essentials v 1.1 Toolbar: Options (Views) Views are selected using a dialog box under Workspace. Simply check on the box of the screen needed. Press Apply to save one or all of the screens. The default screen is the Color Data Table. To navigate between screens once the selections have been applied, use the View Flippers on the left and right of the screen. -
Page 60: Views: Color Data Table
User’s Manual for Aeros and EasyMatch Essentials v 1.1 Figure 99. EZ View Options Views: Color Data Table • The Color Data Table view shows Color Scale, Color Difference, and Index data for the Standards and Samples in the job. -
Page 61: Figure 101. Color Data Screen: View Options
User’s Manual for Aeros and EasyMatch Essentials v 1.1 Figure 101. Color Data Screen: View Options • A long press on the Sample can enable the user to make the sample into a Standard, change the name or delete the reading. -
Page 62: Views: Spectral Data Table
User’s Manual for Aeros and EasyMatch Essentials v 1.1 Views: Spectral Data Table • The Spectral Data Table displays percent reflectance or absorbance values for each selected measurement at the wavelengths being measured. Figure 104. Spectral Data Table • Selections include Absolute or Difference, Reflectance or K/S. Enter the start and stop wavelength, the interval and the precision and press OK to continue. -
Page 63: Views: Spectral Plot
User’s Manual for Aeros and EasyMatch Essentials v 1.1 Views: Spectral Plot • This view provides a plot of wavelength vs. spectral measurement parameter. Figure 106. Spectral Plot View • Press Clear All to remove all the samples to display. Press Select All to enable display of all samples. -
Page 64: Views: Trend Plot
User’s Manual for Aeros and EasyMatch Essentials v 1.1 • Check Options: Auto Range to automatically scale the contents to fit. If Auto Range is not selected, then enter the Y- and X-axis range to display. Views: Trend Plot •... -
Page 65: Views: Color Plot
User’s Manual for Aeros and EasyMatch Essentials v 1.1 ▪ View Options:Traces set the ranges for the traces or allow selection of Auto Range. Trace 1 to 3 uses the current Color Measurement Scale and Trace 4 will allow for measurement of differences or an index. -
Page 66: Figure 112. Color Plot Options
User’s Manual for Aeros and EasyMatch Essentials v 1.1 Figure 112. Color Plot Options • The tolerance plot is available in rectangular and elliptical color space. The Pass/Fail sample points are shown in green and red when in difference mode, respectively. In Absolute... -
Page 67: Special Functions
User’s Manual for Aeros and EasyMatch Essentials v 1.1 Special Functions Auto-Exporting Data through a Network Connection Connect Aeros to a Network. You can connect Aeros to a network hub using the Ethernet cable or connect Aeros to a network hotspot through a WiFi connection. The computer must be connected to the same network as the Aeros. -
Page 68: Figure 115. Configure Ethernet
User’s Manual for Aeros and EasyMatch Essentials v 1.1 Figure 115. Configure Ethernet • Select Configure Ethernet Settings. • Check Use DHCP for Ethernet Config. Please write down the IP address showing in the Ethernet Setting dialog. You can also check the IP address of Aeros in Jobs >... -
Page 69: Optional B: Connect To A Hotspot Through The Wifi Connection
User’s Manual for Aeros and EasyMatch Essentials v 1.1 Figure 118. Network Data Export • Configure the computer with the following settings: ❖ Set computer as client. ❖ Enter the IP address of Aeros as recorded above. ❖ Set the port number as 11111. -
Page 70: Figure 121. Configure Wifi Settings
User’s Manual for Aeros and EasyMatch Essentials v 1.1 • Select Configure WiFi Settings and the WiFi configuration dialog will be prompted. Figure 121. Configure WIFI settings • Please search and connect to the available WiFi and write down the IP address showing in this dialog. -
Page 71: Auto-Exporting Data Via Direct Connection Between Aeros And A Computer
User’s Manual for Aeros and EasyMatch Essentials v 1.1 Figure 124. Network Data Export Config • Configure the computer with the following settings: ❖ Set computer as client ❖ Enter the IP address of Aeros which is recorded in step 1 above ❖... -
Page 72: Figure 127. Rear View Of Aeros
User’s Manual for Aeros and EasyMatch Essentials v 1.1 ❖ Plug Ethernet cable into RJ-45 Ethernet connection at rear of Aeros. Ethernet Port Figure 127. Rear View of Aeros ❖ Plug the other end into the Computer or into the Ethernet adapter •... -
Page 73: Figure 130. Read Options> Auto Export Measurements
User’s Manual for Aeros and EasyMatch Essentials v 1.1 ❖ Press Apply on the Ethernet Configuration and then Apply on the Preferences Page to complete. ❖ Turn the instrument off and then back on. ❖ Go to Preferences and select Auto Network Data Export. -
Page 74: Tips & Tricks: Recover Unsaved Measurement Data
User’s Manual for Aeros and EasyMatch Essentials v 1.1 • Send Data from the Aeros: ❖ Configure the Color Data Table with the color scale and parameters to be measured. Figure 132. Data Output Tips & Tricks: Recover Unsaved Measurement Data •... -
Page 75: Specifications
User’s Manual for Aeros and EasyMatch Essentials v 1.1 Specifications The specifications and characteristics of the instrument are given in this chapter. For best performance, the instrument should be placed where there is ample work space with medium or subdued illumination and no drafts. -
Page 76: Conditions Of Illumination And Viewing
User’s Manual for Aeros and EasyMatch Essentials v 1.1 Conditions of Illumination and Viewing Light Source Full spectrum balanced LED system array Dual Beam 256 element diode array and high Spectrophotometer resolution, concave holographic grating Dual-beam Non-Contact Reflectance Measurement Principle... -
Page 77: Regulatory Notice
User’s Manual for Aeros and EasyMatch Essentials v 1.1 Regulatory Notice... - Page 78 User’s Manual for Aeros and EasyMatch Essentials v 1.1...
-
Page 79: Features, Accessories & Maintenance
▪ Do not disassemble the instrument and attempt to clean the optical components. ▪ Do not open the instrument or remove any covers except using the instructions given in this User’s Manual or under the direction of HunterLab Technical Support. - Page 80 User’s Manual for Aeros and EasyMatch Essentials v 1.1...
-
Page 81: Instrument Replacement, Repair, Problems, And Questions
The HunterLab warranty does not cover consumable items such as lamps, fuses, batteries, etc. An instrument registration card is available online at https://www.hunterlab.com/ras-registration.html. It is important that the instrument owner fills this out on receipt of equipment. -
Page 82: Shortage
Hold incorrect items until return shipping instructions are received. Returns for Repair A service request order (SRO) number is required before any items can be returned to HunterLab. Contact HunterLab’s Order Processing Department to obtain an SRO for damaged or incorrect parts, or the HunterLab Service Department to obtain an SRO to return an instrument for service. - Page 83 Service for maintenance or repair instructions. Many times, this on-the-spot diagnosis is all that is required. If repair is required, the instrument may be returned to a HunterLab service facility. For schedule and terms for repairs, call HunterLab Service. Please read the next section, “When You Need Assistance,”...
-
Page 84: When You Need Assistance
The serial number of the instrument (found on the back of the unit). • The type of processor or software you are using to access the sensor output (such as EasyMatch QC), the version of the software, the operating system, and the brand and type of computer, if applicable. •... -
Page 85: Index
User’s Manual for Aeros and EasyMatch Essentials v 1.1 Index Auto Save Job, 35 New Workspace, 43 Average, 34 Operating Conditions, 75 Backup/Restore, 29 Read Options, 33 Color Data screen, 15 Recall, 25 Color Data Table, 11, 33, 43, 59, 60... - Page 86 User’s Manual for Aeros and EasyMatch Essentials v 1.1...
-
Page 87: Table Of Figures
User’s Manual for Aeros and EasyMatch Essentials v 1.1 Table of Figures Figure 1. Calibration Box Figure 2. Rear View with Connectors Figure 3. USB Port on Rear of Instrument Figure 4. Measurement Screen Figure 5. Sensor Moves to Top Figure 6. - Page 88 User’s Manual for Aeros and EasyMatch Essentials v 1.1 Figure 50. Place sample on Turntable Figure 51. Sample Profile Complete Figure 52. Tolerances Configuration Figure 53. Enter Tolerances Figure 54. Index Selection and Tolerances Figure 55. Indices & Tolerances on CDT Figure 56.
- Page 89 User’s Manual for Aeros and EasyMatch Essentials v 1.1 Figure 103. Delete the Sample Measurement Figure 104. Spectral Data Table Figure 105. Spectral Data Table Options Figure 106. Spectral Plot View Figure 107. Spectral Plot Options Figure 108. Trend Plot Figure 109.
Need help?
Do you have a question about the EasyMatch and is the answer not in the manual?
Questions and answers