
Related Manuals for HunterLab Agera EasyMatch QC


Summary of Contents for HunterLab Agera EasyMatch QC
- Page 1 Agera ® Supplemental Manual for EasyMatch ® Hunter Associates Laboratory 11491 Sunset Hills Road Reston, Virginia 20190 USA www.hunterlab.com A60-1019-083 Manual Version 1.2 For EasyMatch QC 4.95 and Above...
- Page 2 Teflon and Lucite are registered trademarks of DuPont Company. Caution: If the equipment is used in a manner not specified by the HunterLab, the overall safety may be impaired. The instrument is for indoor use only and not suitable for a wet location.
-
Page 3: Table Of Contents
Instrument Performance ......................36 Measurement ..........................36 Regulatory Notice ........................37 Agera Sample Accessories ......................37 HunterLab Flash Drive (A10-1013-423) ....................37 USB Flexible Keyboard (A13-1014-294) ..................... 37 USB Barcode Scanner (A13-1018-566) ....................37 USB Adapter Cable (A21-1014-375) ....................38... - Page 4 Agera Supplemental Manual for EasyMatch QC ver. 1.2 Ring and Disk Set (02-4579-00) ......................38 Sample Cup Opaque Cover (04-4000-00) ..................38 Ring Only (04-4230-00) ........................39 Glass Sample Cup (04-7209-00) ......................39 Sample Cup Set (Agera-SC-Assy) ......................39 Skein/Swatch Holder (02-7396-00) ....................39 Foot switch Assembly (D02-1010-327) ....................
-
Page 5: Setting Up The Agera
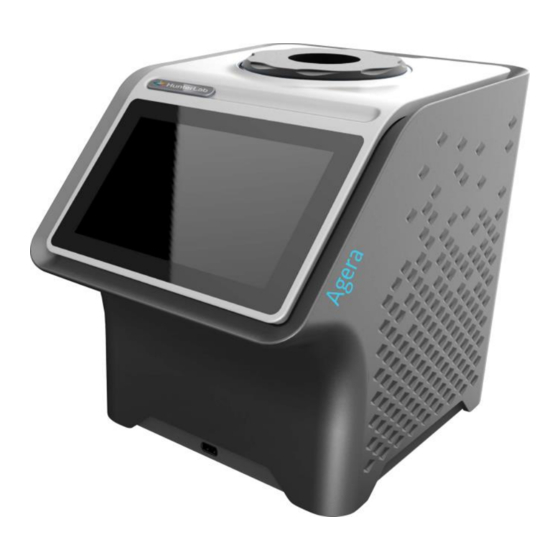
Agera Supplemental Manual for EasyMatch QC ver. 1.2 Setting Up the Agera The Agera system contains the spectrophotometer with an LED light source and a touch screen for Essentials. The Agera is a 0-degree illumination / 45-degree circumferential detection spectrophotometer. The optical delivery and collection system combined with port openings of nominally 2 in, 1 in, and 0.625 in delivers measurement of semi non-homogenous samples such as pellets, granules, and textured flat samples including textiles, plastics, paper. -
Page 6: Power Jack
Connection Figure 2. Rear View with Connectors CAUTION: Use only the power cord included with this instrument or a replacement obtained from HunterLab. Be certain that the power cord is in good condition before connecting it. Power Switch • To turn the instrument on, press the rocker switch on the back of the instrument. -
Page 7: Ethernet Port
Danger of electric shock if liquids are spilled and fire if volatile or flammable liquids are spilled. Use care when measuring liquid samples. Agera Options and Sample Devices For the latest information, please refer to support.hunterlab.com. - Page 8 Agera Supplemental Manual for EasyMatch QC ver. 1.2...
-
Page 9: Agera Installation
1. Unpack all cartons and remove wrappings and cable ties. Inspect for damage and notify the carrier and HunterLab immediately if any is discovered. Save the packing material in case it becomes necessary to return the instrument to the factory. - Page 10 Agera Supplemental Manual for EasyMatch QC ver. 1.2 Figure 4. EasyMatch QC Installation Select INSTALL EASYMATCH QC SOFTWARE and follow the screen prompts. Select SOFTKEY LICENSE as the type of key to use with the software. Figure 5. Software Key License When the EasyMatch QC installation is finished, select the OPTION BUTTON next to YES, I WANT TO RESTART MY COMPUTER NOW and then FINISH to restart the computer and log back in.
-
Page 11: Activate The Softkey License
Figure 7. No License Warning The SoftKey License is uniquely associated with the sensor serial number and is provided on a thumb drive supplied with EasyMatch QC or via email from HunterLab. Go to HELP > LICENSE REGISTRATION > ACTIVATION. - Page 12 Option #3: Sentinel Key iii. a. If the user has a HunterLab USB hardware key, then it can be used with a new sensor on the same computer. Return to Install the Software, Step 5 (Figure 6) and select the Sentinel Key to continue.
-
Page 13: Connect The Agera To A Computer
Agera Supplemental Manual for EasyMatch QC ver. 1.2 Figure 9. Request 30-day Trial Connect the Agera to a Computer See Appendix A Sensor > Install and Setup Open EasyMatch QC in the computer. From the SENSOR MENU, select ADD SENSOR. Figure 10. - Page 14 UV-excluded. UV-Nominal - This mode includes UV. The UV for this mode can only be calibrated/updated at HunterLab. UV-Excluded – This option allows the user to negate the effect of optically- brightened agents or when used in multi-mode with UV-nominal or UV- calibrated, determines the amount of optical brightening agents present.
-
Page 15: Sensor > Standardize
Agera Supplemental Manual for EasyMatch QC ver. 1.2 (i.e. the measurement is <0.5 from the calibration value), it will show port plate size, calibrate date and Whiteness index in this dialog as a stamp. If the measurement is >0.5, then the user will be asked to re-standardize and re- read the fluorescent standard. - Page 16 Agera Supplemental Manual for EasyMatch QC ver. 1.2 Figure 14. Read Top-of-Scale...
-
Page 17: Take Sample Or Standard Measurement
Agera Supplemental Manual for EasyMatch QC ver. 1.2 Take Sample or Standard Measurement Using Agera and Easymatch QC to Take Measurements Select a mode under SENSOR > SET MODES and APPLY. Click SAMPLE/STANDARD measurement. Make sure that the right port plate is attached for the current mode. -
Page 18: Agera Multiple Read Modes
Agera Supplemental Manual for EasyMatch QC ver. 1.2 Figure 17. Measurement Agera Multiple Read Modes EasyMatch QC supports multiple read mode for the Agera sensor. Multiple modes can be configured if using the the same area of view. A sample can be read by all modes at once by pressing the READ button. - Page 19 Agera Supplemental Manual for EasyMatch QC ver. 1.2 Figure 29. Setup Another Mode Figure 30. Completed Set Modes If UV calibrated mode is added, continue to calibrate under SENSOR > UV CALIBRATION for this mode. Here are the steps to do UV calibration: Once UV-Calibration is selected, the SENSOR >...
- Page 20 Agera Supplemental Manual for EasyMatch QC ver. 1.2 Figure 19. Press UV Calibrate When prompted, select the INDEX to be measured and enter the TARGET VALUE for the fluorescence standard. Press CALIBRATE UV to continue. Next, the user will be prompted to standardize and then read the fluorescent standard.
- Page 21 Agera Supplemental Manual for EasyMatch QC ver. 1.2 Figure 204. Black Glass Standardization Figure 215. White Tile Standardization Figure 36. Fluorescent Tile Standardization...
- Page 22 Agera Supplemental Manual for EasyMatch QC ver. 1.2 If the measured WI is about +/- 0.5 different from the target, the UV calibration is done. If the WI difference is out of +/- 0.5 range after three cycles (3 standardizations), then UV calibration has failed. I this case, the UV calibration process must be done again.
- Page 23 Agera Supplemental Manual for EasyMatch QC ver. 1.2 When all desired modes have been selected, press OK to continue. The user can select one, two or three modes as needed. Figure 24. Selected Modes Go to OPTIONS > READ METHOD and select MULTIPLE READ MODE. Press OK to continue. Figure 25.
-
Page 24: Gloss Measurements
Agera Supplemental Manual for EasyMatch QC ver. 1.2 Figure 26. Color Data Table Configuration for Measuring UV Take measurements of standards and/or samples. This screen shows measurements for Ganz Whiteness with UV-calibrated, UV-excluded and UV nominal. Just one or two or all methods can be used for measurements. - Page 25 Agera Supplemental Manual for EasyMatch QC ver. 1.2 Some optional port plates such as those with protective, or UV blocking glass or the sample cup port plate will cause the geometric measurement conditions for gloss to change. When the Agera determines that one of these optional ports is installed, the gloss measurement is disabled.
- Page 26 Agera Supplemental Manual for EasyMatch QC ver. 1.2...
-
Page 27: Agera Maintenance And Testing
Agera Supplemental Manual for EasyMatch QC ver. 1.2 Agera Maintenance and Testing The Agera is engineered to be virtually maintenance free. This section outlines the few parts of the sensor that are to be maintained for the instrument to function properly. Routine Maintenance The following schedule outlines recommended maintenance procedures for the Agera. -
Page 28: Diagnostics On The Agera
Significant scratches that result in a hazy appearance to the finish may cause standardization to be in error. If the black tile is scratched, call the HunterLab Order Processing Department or contact your local HunterLab representative to order a replacement. - Page 29 Agera Supplemental Manual for EasyMatch QC ver. 1.2 Figure 28. Enter Green Tile Values To standardize, read the bottom-of-scale and the top-of-scale. Figure 29. Read Bottom-of-Scale Figure 30. Read Top-of-Scale...
-
Page 30: Repeatability Test
Agera Supplemental Manual for EasyMatch QC ver. 1.2 Place the green tile at the port and press NEXT to continue. The test begins and the results displayed when complete. Figure 31. Screen Display for Test Results To close the green tile test, press YES or to return to the Green tile test menu, press NO. Figure 32. - Page 31 Agera Supplemental Manual for EasyMatch QC ver. 1.2 Figure 33. Read Bottom-of-Scale Figure 34. Read Top-of-Scale The test will begin automatically, and each reading will be shown. Figure 35. Repeatability Readings When the test is complete, results are shown and output as a report.
- Page 32 Agera Supplemental Manual for EasyMatch QC ver. 1.2 Figure 36. Repeatability Screen Results Figure 37. Repeatability Test Report...
-
Page 33: Gloss Test
Agera Supplemental Manual for EasyMatch QC ver. 1.2 Gloss Test Select GLOSS TEST from the DIAGNOSTICS MENU. Figure 38. Select Gloss Test Enter the GLOSS VALUES on the back of the tile. Figure 39. Enter Target Value Place the black glass standard at the port and press OK to continue. If the LAV 1”) port plate 25.4 mm ( is not installed, you are prompted to insert this port plate and then standardize. - Page 34 Agera Supplemental Manual for EasyMatch QC ver. 1.2 Figure 40. Display of Gloss Test Results Figure 41. Gloss Test Report...
-
Page 35: Agera Specifications
Agera Supplemental Manual for EasyMatch QC ver. 1.2 Agera Specifications The specifications and characteristics of the instrument are given in this chapter. For best performance, the instrument should be placed where there is ample workspace with medium or subdued illumination and no drafts. The operating conditions (temperature and humidity ranges) are given in the Operating Conditions section below. -
Page 36: Conditions Of Illumination And Viewing
Agera Supplemental Manual for EasyMatch QC ver. 1.2 Conditions of Illumination and Viewing Light Source Full spectrum balanced LED system array 256 element diode array and high resolution, concave Dual Beam Spectrophotometer holographic grating Measurement Principle Dual-beam Reflectance Spectrophotometer Geometry 0/45... -
Page 37: Regulatory Notice
Agera Supplemental Manual for EasyMatch QC ver. 1.2 Regulatory Notice Agera Sample Accessories HunterLab Flash Drive (A10-1013-423) 2 GB USB 2.0 flash drive formatted for customer use with customized code for Setup backup and CSV Datalog export. USB Flexible Keyboard (A13-1014-294) This 88-character keyboard allows the user to enter IDs directly into the instrument. -
Page 38: Usb Adapter Cable (A21-1014-375)
Agera Supplemental Manual for EasyMatch QC ver. 1.2 USB Adapter Cable (A21-1014-375) Standard A receptacle to Standard B plug, 1 meter long. This allows connection to the USB receptacle on the instrument to other peripherals such as a Personal Computer or the A13-1014-259 USB Printer. Disk Assembly (02-4522-00) From Ring and Disk set. -
Page 39: Ring Only (04-4230-00)
Agera Supplemental Manual for EasyMatch QC ver. 1.2 Ring Only (04-4230-00) From Ring and Disk set (92-4579-00) to hold light inside sample cup. Figure 45. Ring Only Glass Sample Cup (04-7209-00) Optically clear glass cup for sample presentation of liquids, powders, granules and pellets. The sample cup measures 64 mm (2.5 inch). -
Page 40: Foot Switch Assembly (D02-1010-327)
Agera Supplemental Manual for EasyMatch QC ver. 1.2 Foot switch Assembly (D02-1010-327) The footswitch is used to initiate sample measurement without the use of hands. Figure 49. Foot Switch Sample Clamp (D02-1018-462) Used to hold sample in place in standard and port-forward orientation. Figure 50. -
Page 41: Instrument Assistance, Service, Warranty, Shipping Claims
Customer Experience team. Often remote troubleshooting can resolve most issues. If repair is required, your instrument will need to be returned to HunterLab for service by a trained technician. HunterLab offers an on-site preventative maintenance program where in a HunterLab Service technician will come to your location to perform this maintenance. -
Page 42: Warranty
The HunterLab warranty does not cover consumable items such as lamps, fuses, batteries, etc. An instrument registration card is available online at https://www.hunterlab.com/ras-registration.html. It is important that the instrument owner fills this out on receipt of equipment. -
Page 43: Shortage
❖ Advise HunterLab regarding replacement. ▪ Parcel Post Shipment ❖ Notify HunterLab at once in writing, giving details of the loss or damage. This information is required for filing a claim. ❖ Hold the damaged goods with their container and packaging for possible inspection by postal authorities. -
Page 44: Incorrect Shipment
Agera Supplemental Manual for EasyMatch QC ver. 1.2 Incorrect Shipment Perform the following procedure if material received does not correspond with your order. ▪ Notify HunterLab immediately, referencing your order number and item. ▪ Hold incorrect items until return shipping instructions are received. -
Page 45: Connecting Agera To Easymatch® Qc
Agera Supplemental Manual for EasyMatch QC ver. 1.2 Appendix A Connecting Agera to EasyMatch® QC EZMQC Version 4.94 and above have ability to connect with current Agera Sensors. For Agera with serial number less than VTS00135 probably need to have some hardware added and the software updated (Agera Essentials 1.00.14 and above). - Page 46 Agera Supplemental Manual for EasyMatch QC ver. 1.2 Figure 53. Configure Ethernet Check USE DHCP FOR ETHERNET CONFIG and click APPLY. If you used the other network setting before, please restart Agera to apply the new network setting. Figure 54. Setup Sensor Agera is now ready to connect to EZMQC.
- Page 47 Agera Supplemental Manual for EasyMatch QC ver. 1.2 Option B: Connect to a hotspot through the WiFi connection Select CONFIGURE WIFI SETTINGS and the WiFi configuration dialog will be prompted. Please search and connect to the available WiFi and write down the IP address showing in this dialog.
-
Page 48: Connect Agera And Pc With An Ethernet Cable Directly
Agera Supplemental Manual for EasyMatch QC ver. 1.2 Open EZMQC in the PC. In SENSOR > ADD SENSOR and select Agera. Select ETHERNET and check the box DISCOVER AND SELECT A SENSOR IN THE NETWORK and then click SEARCH to do an automatically searching. There will be a drop-down list of all available Agera sensors. - Page 49 Agera Supplemental Manual for EasyMatch QC ver. 1.2 Open COMMAND PROMPT in the computer. Type in IPCONFIG. Under the Ethernet adapter information, review the AUTOCONFIGURATION IPV4 ADDRESS and SUBNET MASK. Figure 58. Configuration for EasyMatch QC Open Agera ESSENTIALS, go to PREFERENCES > CONFIGURE NETWORK SETTINGS. Uncheck USE DHCP FOR ETHERNET CONFIG.
- Page 50 Agera Supplemental Manual for EasyMatch QC ver. 1.2...
-
Page 51: Index
Agera Supplemental Manual for EasyMatch QC ver. 1.2 Index Add Sensor, 13 Multiple Modes, 18 Cleaning Operating Conditions, 35 Instrument Standard, 27 Repeatability Test, 30 Diagnostics, 28 Sample Measurement, 17 Ethernet Port, 7 Standardization, 15 Gloss Measurements, 24 Testing, 27 Green Tile Test, 28 USB Connectors, 6 Installation, 9...
Need help?
Do you have a question about the Agera EasyMatch QC and is the answer not in the manual?
Questions and answers