
Related Manuals for HunterLab UltraScan VIS


Summary of Contents for HunterLab UltraScan VIS
- Page 1 UltraScan ® Supplemental Manual for EasyMatch ® Hunter Associates Laboratory 11491 Sunset Hills Road Reston, Virginia 20190 USA www.hunterlab.com A60-1017-658 Manual Version 2.0...
- Page 2 Teflon is a registered trademark of Dupont. Caution: If the equipment is used in a manner not specified by the HunterLab, the overall safety may be impaired. The UltraScan VIS is for indoor use only and not suitable for a wet location.
-
Page 3: Table Of Contents
UltraScan VIS Supplemental Manual for EasyMatch QC ver 2.0 Contents ULTRASCAN VIS FEATURES ..................5 Reflectance Port ..........................6 Small Area View ..........................6 Retro-viewer ............................7 Sample Clamp ............................ 7 Transmittance Compartment ......................8 Specular Included/Excluded Port ....................... 8 Automated UV Control ........................ - Page 4 UltraScan VIS Supplemental Manual for EasyMatch QC ver2.0 Regulatory Notice ..........................43 UltraScan VIS Options and Sample Devices ..................44 4-mm Port Plate (A02-1011-184) ....................44 Installation ............................ 44 Sample Measurements ........................44 Compression Clamp Kit (L02-(D02-1011-131) ................45 Cylindrical Cell Holder (D02-1011-550) ..................47 Flow-Through Transmittance Cell Holder and Cells (D02-1009-960) ..........
-
Page 5: Ultrascan Vis Features
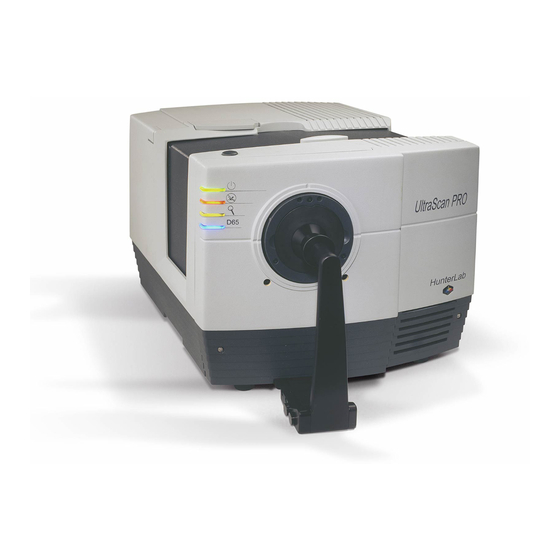
UltraScan VIS Supplemental Manual for EasyMatch QC ver 2.0 UltraScan VIS Features The UltraScan VIS is a dual beam xenon flash spectrophotometer with a wavelength range from 360 to 780 nanometers (nm). All tristimulus integrations are based on a triangular bandpass of ten nm and a wavelength interval of ten nanometers. -
Page 6: Reflectance Port
UltraScan VIS Supplemental Manual for EasyMatch QC ver2.0 Reflectance Port The reflectance port is located at the front of the sensor. The port is covered by a spring-loaded sample clamp which is used to hold the specimen in place during measurement. Two guidance holes are also present to aid in placement of the white tile and light trap at the reflectance port. -
Page 7: Retro-Viewer
Sample Clamp The UltraScan VIS includes a spring-loaded sample clamp that can be used to hold samples flat and secure at the reflectance port. The clamp has two buttons, one which raises and lowers the arm, and one that moves the clamp toward and away from the reflectance port. -
Page 8: Transmittance Compartment
Figure 6. Specular Exclusion Port Closed Closing the transmittance compartment door while making both reflectance and transmittance measurements is the best practice for this instrument. For more information, see the note in the UltraScan VIS Standardization section. -
Page 9: Automated Uv Control
Figure 7. Specular Exclusion Port Open Automated UV Control The UltraScan VIS can perform a Ganz-Griesser calibration, by using a 400-nm UV filter. This filter maintains the proper ratio of the electromagnetic energy in the UV region to that of the visible region. -
Page 10: Macro Button
UltraScan VIS Supplemental Manual for EasyMatch QC ver2.0 Power on Specular excluded Small area view UV excluded: UV cut-off filter is 100% inserted Figure 8. Indicator Lights Macro Button The macro button, also known as the “Sensor button,” activates a sample measurement. - Page 11 UltraScan VIS Supplemental Manual for EasyMatch QC ver 2.0 • Power cord. • Certificate of traceability for the standard tile. • Diagnostics software Standards care card and certificate of traceability Envelope containing spare fuses Didymium filter and Allen wrench Non-slip pad for...
- Page 12 UltraScan VIS Supplemental Manual for EasyMatch QC ver2.0...
-
Page 13: Ultrascan Vis Installation
UltraScan VIS Supplemental Manual for EasyMatch QC ver 2.0 UltraScan VIS Installation The UltraScan VIS is simple to set up and attach to your computer. The following instructions guide you through the initial installation of your UltraScan VIS system. Unpack all cartons and remove wrappings and cable ties. Inspect for damage and notify the carrier and HunterLab immediately if any is discovered. - Page 14 UltraScan VIS Supplemental Manual for EasyMatch QC ver2.0 OPEN. The following screen will be shown. Figure 10. EasyMatch Installation Select INSTALL EASYMATCH QC SOFTWARE and follow the screen prompts. Select SOFTKEY LICENSE as the type of key to use with the software.
-
Page 15: Activate The Softkey License
Figure 13. No License Warning The SoftKey License is uniquely associated with the sensor serial number and is provided on a thumb drive supplied with EasyMatch QC or via email from HunterLab. Go to HELP> LICENSE REGISTRATION > ACTIVATION. Select ACTIVATE LICENSE. -
Page 16: Add The Sensor
An acknowledgement will be displayed showing the activation status. 3. Option #3: Sentinel Key a. If the user has a HunterLab USB hardware key, then it can be used with a new sensor on the same computer. Return to INSTALL THE SOFTWARE, Step 5 (Figure 11) and select SENTINEL KEY to continue. - Page 17 UltraScan VIS Supplemental Manual for EasyMatch QC ver 2.0 Figure 16. Sensor Manager 3. Select ADD SENSOR to install a new sensor. The Setup Sensor screen allows selection of the instrument model and the communications port. Select NEXT when ready.
- Page 18 UltraScan VIS Supplemental Manual for EasyMatch QC ver2.0 Turn on the UltraScan VIS by switching the on/off switch on the back of the sensor to the on position. Allow the instrument to warm up for two hours prior to standardizing and making measurements.
-
Page 19: Ultrascan Vis Functions
For this, you simulate the case where all the light is absorbed by the sample. For UltraScan VIS, the bottom of the scale is set with the light trap for reflectance modes. The light blocker (a.k.a. -
Page 20: Sensor > Standardization Modes
UV filter, or with environmental, such as temperature, changes. Then you may proceed with sample measurement. Sensor > Standardization Modes Four modes of measurement are available when you standardize the UltraScan VIS: • RSIN: Reflectance - Specular Included •... -
Page 21: Sensor > Configure Multi Mode
Considering varying hardware configurations such as UV filter in/out and the different areas of view, there are many ways to standardize the UltraScan VIS. The instrument can be standardized at any time by selecting SENSOR > STANDARDIZE or by clicking the STANDARDIZE button on the default toolbar. - Page 22 UltraScan VIS Supplemental Manual for EasyMatch QC ver2.0 The following screen first appears that allows you to indicate how you would like the multimode readings to be performed. Figure 24. Configure Multi-Mode When this screen first opens, the standardization modes you have configured for your instrument (using SENSOR >...
-
Page 23: Sensor > Uv Filter Calibration
HunterLab-supplied fluorescent standard. Choose whether the value is for BRIGHTNESS 457, WHITENESS INDEX CIE (and the illuminant/observer combination), WHITENESS INDEX GANZ, or Z%. The scale used will be WI Ganz for a HunterLab standard. -
Page 24: Sensor > Setup Mode (Uv Filter)
UltraScan VIS Supplemental Manual for EasyMatch QC ver2.0 Select CALIBRATE UV to automatically adjust the UV filter to the appropriate position after several readings of the fluorescent standard. First you are prompted to place the fluorescent standard. Figure 29. Prompt for Calibration of UV Filter Place the fluorescent standard at the instrument port, centering spot 3 at the reflectance port. - Page 25 Enter the standard’s ASSIGNED VALUE into the appropriate box on the UV Calibration screen. This value has been assigned at the factory if you are using the HunterLab-supplied fluorescent standard. Also choose whether the value is for BRIGHTNESS 457, WHITENESS INDEX CIE (and the illuminant/observer combination), WHITENESS INDEX GANZ, or Z%.
-
Page 26: Haze Measurements (Options > Read Method > Haze)
A transmission haze measurement is a ratio of the diffuse light to the total light transmitted by a specimen. Useful measurements of haze can be made on the HunterLab instruments listed below, although the results do not conform exactly to ASTM method D1003 because of differences in instrument geometry. - Page 27 UltraScan VIS Supplemental Manual for EasyMatch QC ver 2.0 Figure 34. Read method: Haze Haze is automatically selected for display in your Color Data Table. CHECK THE BOXES next to Y TOTAL and/or Y DIFFUSE to also show these components of the haze calculation. Click the radio button next to the ILLUMINANT/OBSERVER combination you wish to use.
- Page 28 UltraScan VIS Supplemental Manual for EasyMatch QC ver2.0 Figure 36. Haze Standardization: White Tile Figure 37. Haze Standardization: Light Trap Read the standard or sample by choosing MEASUREMENTS > READ STANDARD OR MEASUREMENTS > READ SAMPLE, clicking the READ STANDARD or READ SAMPLE button on the toolbar, or pressing F2 or F3.
- Page 29 UltraScan VIS Supplemental Manual for EasyMatch QC ver 2.0 Figure 39. Read Sample with Light Trap When the instrument takes a reading, you may be prompted to ENTER AN ID for the measurement as usual. After you do so, Haze and the other parameters you chose to display will be shown in your Color Data Table.
- Page 30 UltraScan VIS Supplemental Manual for EasyMatch QC ver2.0...
-
Page 31: Ultrascan Vis Maintenance And Testing
You may test the repeatability of your instrument as follows: 1. Turn the UltraScan VIS on and allow it to warm it up for 2 hours. Meanwhile, clean the white tile in the User’s Manual for EasyMatch QC and allow the tile to return to room temperature. -
Page 32: Running The Didymium Filter Test
Support for assistance. Please read When You Need Assistance prior to contacting HunterLab. Running the Didymium Filter Test The didymium filter can be used to check the wavelength accuracy of your UltraScan VIS. This check should be done on a regular basis (i.e., weekly or bi-weekly) as part of your routine instrument performance check. - Page 33 UltraScan VIS Supplemental Manual for EasyMatch QC ver 2.0 To change the source lamp: 1. Disconnect the UltraScan VIS from its power source. 2. Wait two minutes for complete discharge of the capacitors. 3. Disengage and remove the sample clamp.
- Page 34 UltraScan VIS Supplemental Manual for EasyMatch QC ver2.0 Figure 45. Disconnect Indicator Lights Remove the screws and cover from the lamp housing using a Phillips-head screwdriver. Figure 46. Screws on Outside of Lamp Housing Unplug the white connector of the lamp assembly by squeezing the latches on the sides of the connector.
-
Page 35: Replacing The Fuses
UltraScan VIS Specifications section. 1. Disconnect the UltraScan VIS from its power source by unplugging the power cord. 2. Remove the fuse cartridge from the back panel of the instrument. You may want to use a... - Page 36 UltraScan VIS Supplemental Manual for EasyMatch QC ver2.0 Figure 49. Fuse Holder 3. Pull back the tab to release the fuse holder. Figure 50. Replace Fuses 4. Remove the fuses and replace with new ones. Note: Use only the fuse specified above for your instrument or one which is identical in type, voltage rating, and current rating.
-
Page 37: Replacing The Optional View Lamp
UltraScan VIS Supplemental Manual for EasyMatch QC ver 2.0 Replacing the Optional View Lamp The view lamp is used to illuminate the sample when using the retroviewer option. Note: Replace with a specified lamp, HL#A13-1004-022. Figure 52. View Lamp Assembly To change the view lamp: Disconnect the UltraScan VIS from its power source. - Page 38 UltraScan VIS Supplemental Manual for EasyMatch QC ver2.0 Figure 54. Inside Cover Screws Remove the front cover from the instrument by sliding it forward and unplug the harness which connects the indicator lights on the front cover to the instrument.
-
Page 39: Cleaning The Lens Surface And Didymium Filter
UltraScan VIS Supplemental Manual for EasyMatch QC ver 2.0 View lamp removed Figure 57. View Lamp Disconnected Plug the harness from the instrument into the indicator lights of the front panel. Line the cover up with the guides on the bottom of the instrument. - Page 40 UltraScan VIS Supplemental Manual for EasyMatch QC ver2.0 When shipping the UltraScan VIS, remove the sample clamp and tape a pad of foam rubber at the reflectance port. Failure to do so may cause severe damage to the instrument.
-
Page 41: Ultrascan Vis Specifications
If this happens, restandardize the instrument before making measurements. HunterLab recommends using a line conditioner with a minimum 600 VA rating and a battery back-up system. -
Page 42: Power Cord Wire Color Code
UltraScan VIS Supplemental Manual for EasyMatch QC ver2.0 Power Cord Wire Color Code: Color Definition 220V Cord Brown LINE Blue NEUTRAL Green/Yellow SAFETY 110V Cord Black LINE White NEUTRAL Green SAFETY Instrument-Computer Ground Potential Check: Perform this check if the power cord wiring is being changed, such as for replacement of the cord or if changing the plug. -
Page 43: Instrument Performance
UltraScan VIS Supplemental Manual for EasyMatch QC ver 2.0 Total Transmittance (TTRAN) for path lengths up to 80 mm Regular Transmittance (RTRAN) for path lengths up to 80 mm Instrument Performance Wavelength Range 360-780 nm Wavelength Resolution <2 nm Wavelength Bandpass... -
Page 44: Ultrascan Vis Options And Sample Devices
UltraScan VIS Options and Sample Devices There are many options and devices available for positioning samples at the measurement ports of the UltraScan VIS and for making the instrument easier to use. For the latest information, please refer to https://support.hunterlab.com/hc/en-us/articles/218375923-Accessories-for-HunterLab- Instruments. -
Page 45: Compression Clamp Kit (L02-(D02-1011-131)
UltraScan VIS Supplemental Manual for EasyMatch QC ver 2.0 Note: This port plate has an opening that is smaller than the usual 1-inch port plate. Performance specifications (i.e., factory-supplied color values, stability, accuracy) are based on the standard 1-inch round port plate. These specifications will not be met with the modified port plate. - Page 46 UltraScan VIS Supplemental Manual for EasyMatch QC ver2.0 Replace the original sample clamp with the modified sample clamp. Connect the air compressor to the lower input port of the modified sample clamp assembly using the 1/4” tubing. Also connect the compressor to a power source.
-
Page 47: Cylindrical Cell Holder (D02-1011-550)
This option provides a holder for 27-mm to 30-mm (OD) cylindrical sample tubes at the instrument transmittance port. This holder may be used for measurement of transparent liquids in cylindrical glass tubes with 20-mL, 40-mL, or 60-mL volumes (not sold by HunterLab). Figure 61. Cylindrical Cell Holder... -
Page 48: Flow-Through Transmittance Cell Holder And Cells (D02-1009-960)
Flexible plastic tubing with an inside diameter of 9 mm (not sold by HunterLab) is connected from the liquid source to the inlet (lower) tube of the cell and from the outlet (upper) tube to a drain. Using a pump (not sold by HunterLab), the liquid is pumped into the cell until the cell is filled. - Page 49 UltraScan VIS Supplemental Manual for EasyMatch QC ver 2.0 Path Length (mm) Minimum Diameter of Part Number Sample Volume Measurement Face (mm) Measurement (mL) C04-1001-958 C04-1001-959 C04-1001- Installation Place the instrument on a level surface. Open the instrument transmittance compartment door. If you have a transmittance sample holder installed, remove it.
-
Page 50: Foot Switch Assembly (D02-1010-327)
UltraScan VIS Supplemental Manual for EasyMatch QC ver2.0 Sample Measurements Standardize the instrument in a transmittance mode. The flow-through cell should be filled with distilled water or another clear solvent to set the top of scale. Inject the sample to be measured into the cell. -
Page 51: Glass Port Insert (A02-1011-124)
UltraScan VIS Supplemental Manual for EasyMatch QC ver 2.0 (A02-1011-124) Glass Port Insert This option provides a snap-in port plate with an opening one inch in diameter that is covered with glass. The glass insert protects the inside of the instrument from sample and airborne particles. -
Page 52: Reflectance Sample Shelf With Light Cover (B02-1005-172)
UltraScan VIS Supplemental Manual for EasyMatch QC ver2.0 Installation Lower the sample clamp as far as it will go. Insert the two finger clamps of the preform holder into the guidance holes located below the reflectance port on the front of the instrument. - Page 53 UltraScan VIS Supplemental Manual for EasyMatch QC ver 2.0 Figure 69. Insert Shelf Sample Measurement 1. Place your sample on the shelf and cover it with the light cover (if included). Figure 70. Sample Placed on Shelf Figure 71. Light Cover over Sample Container...
-
Page 54: Precision Cell Holder For Plastic Micro Cells
HunterLab sphere instruments. This assembly ensures repeatable transmission color measurements of very small volumes of clear liquids. Select one or more of the available precision cell holders by matching cell holder specifications with the desired glass or plastic analytical cells. - Page 55 UltraScan VIS Supplemental Manual for EasyMatch QC ver 2.0 3. There is a mark on the optional cell holders, place the cell so the mark is on the same side as the mark on the vertical wall. Figure 74. Cell Holder Installed 4.
- Page 56 UltraScan VIS Supplemental Manual for EasyMatch QC ver2.0 length) x 12.50mm (0.489 X 0.492 inches). A Starter kit of three PMMA Plastic cells is included with this cell holder. D02-1016-913 Precision Cell Holder for Macro Cells (Brand Plastic Cells). This precision cell holder positions macro analytical plastic cells in combination with the Cell Holder Base Assembly (D02‐1016-956, sold separately).
- Page 57 UltraScan VIS Supplemental Manual for EasyMatch QC ver 2.0 Cell Holder Description Cell Volumes Cell Outside Tested Cells Cell Type Dimensions (Purchased Separately) Brand D02-1016-912 Semi-Micro 12.42 x 12.50 mm (759086D) Plastic Cell Holder, Semi- 0.489 x 0.492 in (Min -0.6mL)
- Page 58 UltraScan VIS Supplemental Manual for EasyMatch QC ver2.0 D02-1017‐050 Semi‐Micro 12.47 x 12.50 Hellma Glass Cell Holder, (104-10-20) Semi‐Micro (For use (Min- 0.6mL) 0.491 x 0.492 Starna with 10 mm Glass (Max- 1.5mL) Cells) inches (9-SOG-10) Installation 1. Slide the precision cell holder into the transmittance compartment at the center, widest part of the transmittance compartment.
-
Page 59: Semi-Micro Powder Holder (D02-2012-313)
UltraScan VIS Supplemental Manual for EasyMatch QC ver 2.0 5. Remove the cell from the cell holder and rinse it with the sample to be measured. Fill the cell with the sample and measure it the same way you did the blank. -
Page 60: Skein Holder Option (02-7396-00)
4. Between measurements, remove the powder holder, unscrew the top, and clean the glass. The glass insert may be removed from the powder holder for cleaning or replacement. Replacement inserts may be purchased from HunterLab. No adhesive is required Skein Holder Option (02-7396-00) This is a device for measuring yarn skeins. -
Page 61: Holder & 10Mm Small Volume Transmittance Cells (D02-1011-886 & A13-1011-613)
UltraScan VIS Supplemental Manual for EasyMatch QC ver 2.0 Figure 81. Skein Holder Holder & 10mm Small Volume Transmittance Cells (D02-1011-886 & A13-1011-613) This option provides a holder for a cylindrical small volume transmittance cell. Each cell is shipped with two caps, one that is solid and screws on, and one that is threaded and covered with injectable Teflon . - Page 62 UltraScan VIS Supplemental Manual for EasyMatch QC ver2.0 Figure 82. Small Volume Transmittance Cell & Holder Installation To install the holder, position it so that the holes in its base are down toward the floor of the transmittance compartment and the cutout in the vertical section is at the transmittance port (hole in the sphere).
-
Page 63: Transmittance Cell Holder (C02-1005-481)
UltraScan VIS Supplemental Manual for EasyMatch QC ver 2.0 Transmittance Cell Holder (C02-1005-481) The optional Transmittance cell holder permits measurement of liquids in 10-mm, 20-mm, 33-mm, or 50-mm Transmittance cells. Installation To install it, slide the Transmittance cell holder into the Transmittance compartment at the center, widest part of the Transmittance compartment. -
Page 64: Transmittance Cells With Two Screw Tops
UltraScan VIS Supplemental Manual for EasyMatch QC ver2.0 Cell Type Path Length (mm) Minimum Sample Dimensions of Part Number Volume for Measurement Face (Width x Height in Measurement (mL) Open Top 55 x 57 13-8573-40 Open Top 55 x 57... -
Page 65: Transmittance Preform Holder (D02-1011-833)
UltraScan VIS Supplemental Manual for EasyMatch QC ver 2.0 Transmittance Preform Holder (D02-1011-833) This option provides an adjustable holder for measuring transparent preforms at the transmittance port. The holder is appropriate for preforms with a shaft diameter between 10 and 40 mm and a length of at least 50 mm. -
Page 66: Transmittance Clamp (C02-1005-444)
UltraScan VIS Supplemental Manual for EasyMatch QC ver2.0 Open the transmittance compartment door, rotate the preform, and measure it again. Repeat step 5 until the preform has been measured the desired number of times. Transmittance Clamp (C02-1005-444) The optional Transmittance clamp holds transparent film or sheets in position for Regular or Total Transmittance measurements. - Page 67 UltraScan VIS Supplemental Manual for EasyMatch QC ver 2.0 2. When properly aligned, the holes in the bottom of the clamp assembly will align with holes in the floor of the Transmittance compartment. Place a washer and one 1/4-20 7/8-inch screw in each of the holes and tighten by turning the screw clockwise.
-
Page 68: Transmittance Spill Tray (D02-1011-568)
UltraScan VIS Supplemental Manual for EasyMatch QC ver2.0 Transmittance Spill Tray (D02-1011-568) The Transmittance spill tray, when installed in the transmittance compartment, protects the compartment from spills of liquid samples. The tray can hold up to 600 mL of liquid. The top portion of the spill tray simulates the function of the transmittance cell holder. -
Page 69: When You Need Assistance
UltraScan VIS Supplemental Manual for EasyMatch QC ver 2.0 When You Need Assistance If you need for technical or sales assistance on applications, troubleshooting, , service, warranty, accessory pricing and more, please contact the office nearest you: For the Americas, Support@hunterlab.com... - Page 70 UltraScan VIS Supplemental Manual for EasyMatch QC ver2.0...
-
Page 71: Index
UltraScan VIS Supplemental Manual for EasyMatch QC ver 2.0 Index Accessories, 10 Power required, 41 Allen wrench, 10 Reflectance port, 6 Automated UV control, 9 Regulatory notice, 43 Black card, 10 Repeatability test, 31 Certificate of traceability, 11 Retro-viewer, 7...
Need help?
Do you have a question about the UltraScan VIS and is the answer not in the manual?
Questions and answers