
Subscribe to Our Youtube Channel
Related Manuals for Humminbird Trolling Motor 360 Imaging


Summary of Contents for Humminbird Trolling Motor 360 Imaging
- Page 1 ® ® Trolling Motor 360 Imaging Trolling Motor 360 Imaging Installation Guide Installation Guide...
- Page 2 Always operate the boat at very slow speeds if you suspect shallow water or submerged objects. WARNING! The electronic chart in your Humminbird unit is an aid to navigation designed to facilitate the use of authorized government charts, not to replace them.
- Page 3 ATTENTION INTERNATIONAL CUSTOMERS: Products sold in the U.S. are not intended for use in the international market. Humminbird international units provide international features and are designed to meet country and regional regulations. Languages, maps, time zones, units of measurement, and warranty are examples of features that are customized for Humminbird international units purchased through our authorized international distributors.
-
Page 4: Table Of Contents
Transducer Maintenance..........47 Trolling Motor 360 Imaging Maintenance....... . . 47... - Page 5 Finding the Cause of Noise..........50 Specifications Contact Humminbird...
-
Page 7: Introduction
Connecting to the Control Head and Power Testing the Installation Powering Off Before proceeding with this installation, the Humminbird control head and Minn Kota trolling motor should be installed. The 360 Imaging transducer can be connected directly to the control head or to a Humminbird Ethernet Switch (optional) for networking. - Page 8 Supplies In addition to the hardware included with your accessory, you will need the following supplies: • Drill with various drill bits • Phillips Head Screw Driver • Allen wrench • Hex socket wrench or nut driver • Electrical Tape •...
-
Page 9: Install The Gps Receiver/Heading Sensor
• Extension Cables: Test run the Sensor Cable from the chosen mounting location to the control head. 10 ft (3 m) extension cables may be purchased from Humminbird if your planned cable route exceeds 20 ft (6 m). Maximum cable length, including extension cables, should not exceed 50 ft (16 m). -
Page 10: Install The Sensor
| Install the Sensor There are three different options to mount the sensor. Proceed to the section that matches the type of mounting location you will be using, as follows: Stem Mount with 1" - 14 Thread The Sensor will be mounted on a stem or antenna pole. -
Page 11: Stem Mount With 1"-14 Thread
A. Stem Mount with 1"-14 Thread Use the following instructions to stem mount the Sensor. Stem Mount, Attaching the Sensor Base to the Stem WARNING! Do NOT mount the Sensor to a stem cover mount or antenna pole that contains ferrous metals. NOTE: It is important to review the mounting considerations and test run the cable route as indicated in Section 1 before proceeding with the... - Page 12 4. Route the Sensor cable through the stem and Positioning the Arrow on the Sensor through the planned cable route. To use extension cables, see the details in Section 1: Choose the Mounting Location. 5. Position the Sensor so the arrow on the cover is pointed straight toward the front of the boat in the direction of travel.
-
Page 13: Access Under The Mounting Location
B. Access Under the Mounting Location Use the following instructions to deck mount the Sensor and route the cable down through the mounting surface. NOTE: It is important to review the mounting considerations and test run the cable route as indicated in Section 1 before proceeding with the installation. 1. - Page 14 5. Make sure the Sensor is flush against the surface, and mark the two mounting holes with a pencil or awl. 6. Move the Sensor to the side and drill two pilot holes, using a 5/32" (4 mm) bit. NOTE: Apply marine-grade silicone caulk or sealant to both screw and drilled holes as needed to protect your boat from water damage.
-
Page 15: No Access Under The Mounting Location
C. No Access Under the Mounting Location Use the following instructions to deck mount the Sensor and route the cable to the side if there is not space for a cable underneath the mounting location. NOTE: It is important to review the mounting considerations and test run the cable route as indicated in Section 1 before proceeding with the installation. - Page 16 3. With the cable routed, position the Sensor so Positioning the Arrow on the Sensor the arrow on the cover is pointed straight toward the front of the boat in the direction of travel. The arrow should be parallel with the keel.
-
Page 17: Connect To The Control Head
| Connect to the Control Head Use the following instructions to connect the Sensor cable to the control head. 1. Insert the Sensor NMEA-COM connector into the control head COM port. The connectors are keyed to prevent reversed installation, so be careful not to force the connector into the port. - Page 18 2. Optional: You can connect an optional-purchase device, such as an autopilot, to the Sensor pigtail wires. GPS Receiver/Heading Sensor (Optional Accessory Wires) The pinouts are as follows: Black Wire (Ground) White Wire (Control Head NMEA Out): outputs the navigation calculations and commands from the control head as IN (Integrated Navigation) NMEA sentences.
-
Page 19: Install The Trolling Motor Bracket
Install the Trolling Motor Bracket Use the following instructions to install the Trolling Motor 360 Imaging. It is important to read the instructions completely and understand the mounting guidelines before you start the installation. | Prepare for Installation 1. Disconnect the motor from all sources of electrical power. -
Page 20: Install The Trolling Motor Bracket
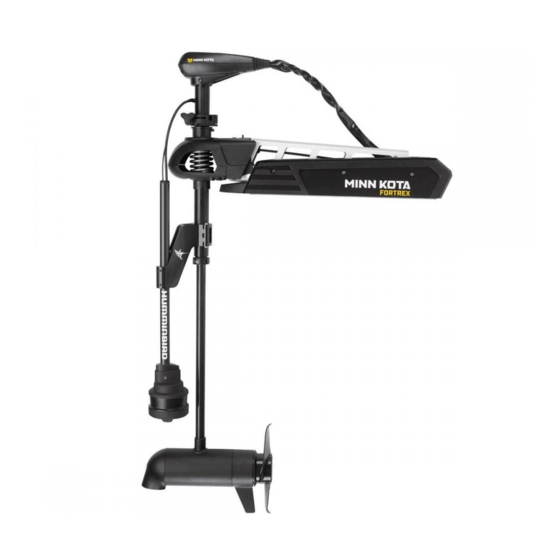
| Install the Trolling Motor Bracket Proceed to the installation section of the type of trolling motor bracket you purchased: A. Ultrex Trolling Motor Mount (AS 360 TM Ultrex) B. Fortrex/Maxxum Trolling Motor Mount (AS 360 TM) A. Ultrex Trolling Motor Mount (AS 360 TM Ultrex) WARNING! Disconnect the motor from all sources of electrical power before you start installation. - Page 21 Positioning the Bracket for Installation on the Left Side of Trolling Motor straight edge round edge on the left on the right pod route If the trolling motor deploys port side (left) on the bow, you will mount the bracket on the right side of the trolling motor. Position the bracket so the straight edge faces to the right as shown in the illustration.
- Page 22 5. Align the center hole of the plate over the left screw (left side installation) or right screw (right side installation). 6. Lower the plate onto the screw head, and slide the screw into the plate slot. Slide the other two screws into the outside slots on the plate. If the plate does not slide easily into place, flip it over.
- Page 23 Install the Bracket As determined in the Assemble the Bracket section, the bracket can be mounted on the left or right side of the trolling motor. 1. Align the plate below the BowGuard. Line up the holes on the plate with the threaded holes on the BowGuard.
- Page 24 3. Route the cables and pod shaft up through the trolling motor bracket. 4. Use an Allen wrench to install the (2) 10-32 x 9/16" socket bolts on the bracket where the pod shaft is installed. 5. Tighten the bolts so the pod shaft is fully secure and won’t drop when it is deployed in the next step.
- Page 25 Adjust the Pod Height 1. Deploy the Trolling Motor. 2. Loosen the socket bolts on the bracket where the pod shaft is installed. Adjust the pod shaft up or down, so it meets the following height requirements: • The pod must be mounted approximately 6" (152.4 mm) below the waterline.
- Page 26 WARNING! Do not install the pod too close to the propeller. If the pod is installed too close to the propeller, it will be damaged. Adjusting the Pod Height (at least 1" from the tip of the propeller) 1" (25.4 mm) minimum shaft length above bracket 1"...
- Page 27 3. Turn the pod shaft until the rounded end of the transducer points in the direction of travel. The centerline of the transducer should be parallel with the centerline of the boat. See the illustration Aligning the Transducer. Aligning the Transducer rounded part of transducer 4.
- Page 28 Install the Collar Clamp After you have established the pod height is no closer than 1 inch from the tip of the propeller, install the collar clamp to prevent the trolling motor from hitting the transducer pod. 1. Apply anti-seize to the end of each 1" socket bolt (1/4-20 x 1"). 2.
- Page 29 Details: Tighten the socket bolts and collar clamp hardware evenly on both sides of the clamp until you feel them start to compress and secure, and then tighten each bolt an additional 1/4 to 1/2 turn. WARNING! The socket bolts must be tightened completely to prevent the trolling motor from potentially damaging the pod.
- Page 30 5. Loosen the socket bolts on the bracket where Removing the Pod Screws the pod shaft is installed (see the illustration Reviewing the Pod Shaft Installation). Carefully remove the pod shaft from the trolling motor bracket. 6. At the top of the pod shaft, carefully remove the cable grommet.
- Page 31 Re-install the Pod Shaft (optional) If you shortened the pod shaft in the previous section, use the following instructions to re-install it. 1. Look inside the pod and confirm the hex nut is in place (in the center). If it has fallen out, insert it so the pointed part of the hex nut points up.
- Page 32 6. At the top of the pod shaft, confirm the Ethernet and power cables are routed completely through the shaft. Install the cable grommet. 7. Route the cables and pod shaft up through the trolling motor bracket. 8. Use an Allen wrench to install the (2) 10-32 x 9/16" socket bolts on the bracket where the pod shaft is installed.
-
Page 33: Fortrex/Maxxum Trolling Motor Mount (As 360 Tm)
B. Fortrex/Maxxum Trolling Motor Mount (AS 360 TM) WARNING! Disconnect the motor from all sources of electrical power before you start installation. WARNING! Confirm that the trolling motor is properly secured to the boat and will not shift during the installation. The trolling motor should be in the fully retracted (flat) position on the boat deck for this installation. - Page 34 3. Adjust the pod shaft up or down, so the pod is at least 1" (25.4 mm) off the tip of the propeller. WARNING! DO NOT INSTALL THE POD TOO CLOSE TO THE PROPELLER. If the pod is installed too close to the propeller, it will be damaged. Adjusting the Pod Height (at least 1"...
- Page 35 4. Pivot the bracket until the pod is at least 2" (50.8 mm) from the lift assist base and at least 1/2" (13 mm) from the trolling motor shaft. See the illustration Measuring the Safety Distance of the Pod and Positioning the Bracket.
- Page 36 6. Use an Allen wrench to install the (2) 10-32 x 5/8" hex socket bolts on the bracket where the pod shaft is installed (see the illustration Securing the Pod). Tighten the bolts so the pod shaft is fully secure and won’t drop when it is deployed in the next step.
- Page 37 8. Turn the pod shaft until the rounded end of the transducer points in the direction of travel. The centerline of the transducer should be parallel with the centerline of the boat. See the illustration Aligning the Transducer. NOTE: You might need to loosen the hex socket bolts to adjust the transducer alignment.
- Page 38 11. Install the large insert into the slotted side of the clamp. Use a Phillips screwdriver to install the #8-1/2" screw through the clamp and large insert (see the illustration Installing the Inserts). 12. Install the small insert into the solid side of the clamp. Hold it in place, and re-install the clamp and Depth Collar Knob.
-
Page 39: Route The Cables And Connect Power
| Route the Cables and Connect Power WARNING! The power source must be turned off before you proceed with this installation. 1. Connect the power cable to the power cable connector on the pod shaft, and connect the Ethernet cable to the Ethernet cable connector on the pod shaft. - Page 40 Humminbird does not recommend connecting to a battery without a fuse and a switch. NOTE: Humminbird is not responsible for over-voltage or over-current failures. The 360 Imaging transducer must have adequate protection through the proper selection and installation of a 1 Amp fuse.
- Page 41 WARNING! If you are unable to obtain a battery switch and are forced to connect the power cable directly to the battery, be aware that this will drain the battery. Humminbird does not recommend connecting to a battery without the appropriate fuse and a switch.
-
Page 42: Set Up The Control Head
Set up the Control Head (HELIX Series) Use the following instructions to power on the control head and confirm the 360 Imaging transducer and the GPS Receiver/Heading Sensor are detected by the unit. CAUTION! It is important to finish all installation connections before powering on the control head. - Page 43 Accessory Test 360 Imaging listed as Connected GPS & Heading Sensor listed as Connected GPS Diagnostic View External GPS detected, Fix Type should be 3D or Enhanced Control Head Setup...
-
Page 44: Set Up 360 Imaging On The Control Head
2. Set up 360 Imaging on the Control Head When the control head detects the 360 Imaging transducer, it will select it automatically as a source on the Ethernet network. The related views and menus will be added to the system. Use the following instructions to confirm AS 360 is selected. Select 360 Imaging on the Network Confirm that AS 360 is selected in the Network Source Setup dialog box. -
Page 45: Test 360 Imaging On The Control Head
3. Test 360 Imaging on the Control Head It is important to confirm that the 360 Imaging transducer is providing sonar returns to the display. The instructions in this section should be performed at trolling speeds in calm, open water, in a large area that is far from shallow water, boats, or other obstacles. -
Page 46: Confirm The Heading Sensor Operation
Reviewing the 360 View bottom return trolling motor shadow propeller shadow (dark lines) 5. Stop Pinging: When you are finished reviewing the operation, press the MENU key once. Select Stop 360 Ping, and press the RIGHT Cursor key. 4. Confirm the Heading Sensor Operation It is important to confirm that the Heading Sensor is installed correctly by reviewing the heading digital readout. - Page 47 NOTE: If the Select Readouts menu option does not appear under the Setup tab, change the User Mode to Advanced. Select Main Menu > Setup tab > User Mode > Advanced. 6. Select a Readout position and use the RIGHT or LEFT Cursor keys to select Heading.
-
Page 48: Add Offset Features To The 360 Imaging Display (Optional)
5. Add Offset Features to the 360 Imaging Display (optional) The menu settings in this section are helpful for interpreting the position of objects on the 360 View. Adjust the 360 Heading Offset If the positions of objects on the 360 Imaging display are slightly different than what you observe in the environment around you, use 360 Heading Offset to correct the alignment of the 360 Imaging display. - Page 49 4. Press the RIGHT or LEFT Cursor keys to set the distance between the 360 Imaging transducer and the GPS Receiver/Heading Sensor. NOTE: The Boat Icon must be set to On for the 360 Offset Icon to be displayed. 360 View with the 360 Offset Icon and Cursor Boat Icon represents the 360 Imaging transducer position Cursor Position: Located halfway between the 360 Imaging transducer and the GPS/Heading Sensor on the display, on the right side of the boat (allows you to...
-
Page 50: Turn On Nmea Output And Confirm The Baud Rate
6. Turn on NMEA 0183 Output and Confirm the Baud Rate (for devices connected to the Sensor pigtail only) If you connected a device to the Sensor pigtail wires, turn on NMEA 0183 Output to enable communication and output NMEA 0183 sentences from the control head. It is also important to note the following: •... -
Page 51: Power Off
Power Off WARNING! When the boat is stored or at dock, the 360 Imaging transducer must be turned off to prevent draining the battery. Power off the Control Head 1. Press and hold the POWER/LIGHT key. CAUTION! Turning off the control head will NOT power off the 360 Imaging transducer. -
Page 52: Maintenance
Maintenance Your Humminbird fishfinder is designed to provide years of trouble free operation with very little maintenance. Use the following procedures to ensure your Humminbird continues to deliver top performance. Control Head Maintenance It is important to consider the following precautions when using your Humminbird control head: •... -
Page 53: Transducer Maintenance
These bubbles dissipate with time, or you can wipe the face of the transducer with your fingers after the transducer is in the water. Trolling Motor 360 Imaging Maintenance Use the following information to maintain the installation of the 360 Imaging Transducer. -
Page 54: Troubleshooting
Troubleshooting Before contacting the Humminbird Customer Service, please read the following section. Taking the time to review these troubleshooting guidelines may allow you to solve a performance problem yourself, and therefore avoid sending your unit back for repair. Fishing System Doesn’t Power Up If your Fishing System doesn’t power up, use the installation guide that is included... -
Page 55: Fishing System Defaults To Simulator With A Transducer Attached
Fishing System Defaults to Simulator with a Transducer Attached In addition to the 360 Imaging accessory transducer, you will have a standard Humminbird transducer connected to the control head. A connected and functioning transducer with built-in temperature will cause the newly-started Fishing System to go into Normal operating mode automatically. -
Page 56: Finding The Cause Of Noise
Finding the Cause of Noise Electrical noise usually affects the display with streaks or repetitive patterns on the view. One or more of the following sources can cause noise or interference: Possible Source of Noise Isolation Other electronic devices Turn off any nearby electronic devices to see if the problem goes away, then turn them on one at a time to see if the noise re-appears. -
Page 57: Specifications
Storage Temperature..... . –40°F to 158°F (–40°C to 70°C) NOTE: Humminbird verifies maximum stated depth in saltwater conditions, but actual depth performance may vary due to transducer installation, water type, thermal layers, bottom composition and slope. - Page 58 ROHS STATEMENT: Product designed and intended as a fixed installation or part of a system in a vessel may be considered beyond the scope of Directive 2002/95/EC of the European Parliament and of the Council of 27 January 2003 on the restriction of the use of certain hazardous substances in electrical and electronic equipment.
Need help?
Do you have a question about the Trolling Motor 360 Imaging and is the answer not in the manual?
Questions and answers