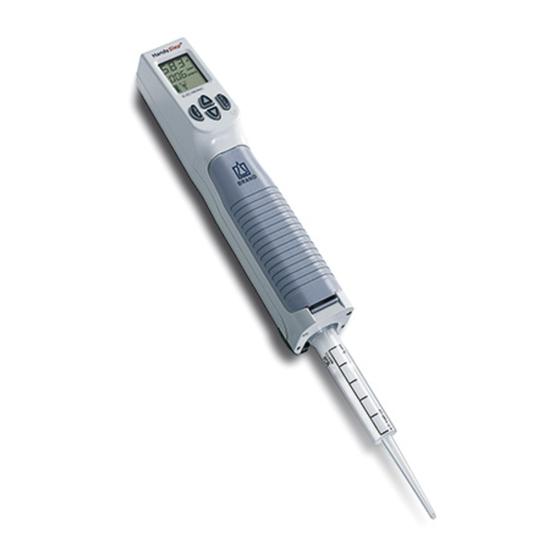
BRAND HandyStep electronic Operating Manual
Repetitive pipette
Hide thumbs
Also See for HandyStep electronic:
- Operating manual (20 pages) ,
- Operating manual (56 pages) ,
- Operating manual (56 pages)
Table of Contents
Advertisement
Quick Links
HandyStep
®
Istruzioni per l'uso
Leggere attentamente prima
dell'uso e rispettare tutte le prescri-
zioni relative all'uso e alla sicurezza!
Mode d'emploi
Veuillez lire attentivement avant
utilisation, et suivre toutes les ins-
tructions d'emploi et de sécurité.
您可在www.brand.de/cn/manuals
下载本产品的中文操作手册。
BRAND. For lab. For life.
electronic
Operating Manual
Please read carefully before use,
and follow all operating and safety
instructions!
Instrucciones de manejo
Por favor leer cuidadosamente antes
de la utilización y seguir todas las
normas de manejo y de seguridad.
Advertisement
Table of Contents

Related Manuals for BRAND HandyStep electronic


Summary of Contents for BRAND HandyStep electronic
- Page 1 Veuillez lire attentivement avant Por favor leer cuidadosamente antes utilisation, et suivre toutes les ins- de la utilización y seguir todas las tructions d’emploi et de sécurité. normas de manejo y de seguridad. 您可在www.brand.de/cn/manuals 下载本产品的中文操作手册。 BRAND. For lab. For life.
-
Page 3: Table Of Contents
Indice Contents Table des Matières Contenido Pagina Page Page Pág. Safety instructions Règles de sécurité Normas de seguridad Norme di sicurezza Scopo Purpose Utilisation Aplicación Limitazioni all'uso Limitations of use Limites d’emploi Limitaciones de uso Usi non previsti Operating exclusions Interdictions d’emploi Excepciones de uso Elementi funzionali... -
Page 4: Norme Di Sicurezza
- 4 - Norme di sicurezza Safety instructions Règles de sécurité Normas de seguridad This instrument may sometimes Cet appareil peut être utilisé avec Este instrumento puede utilizarse Questo strumento può essere utilizzato con materiali, procedure be used with hazardous materials, des matériaux dangereux ou en con materiales, procedimientos e operations, and equipment. - Page 5 5. Utilizzare lo strumento esclusiva- 5. Use the instrument only for dis- 5. N’utiliser l’appareil que pour 5. Utilizar el aparato únicamente mente per il dosaggio di liquidi pensing liquids, with strict regard doser des Liquides en respectant para dosificar líquidos observando e tenendo conto degli usi non to the defined Operating Exclu- strictement les interdictions et...
- Page 6 - 6 - Norme di sicurezza Règles de sécurité Normas de seguridad Safety considerations - Cont. - - suite - - continuación - - continued - 13. L'accumulatore originale non deve 13. The original battery must not be avant toute utilisation (pages 17 13.
-
Page 7: Scopo
L’appareil reconnaît El instrumento identifica automática- gono riconosciuti automaticamente new PD-Tips from BRAND, which are automatiquement toutes nouvelles mente nuevas puntas PD de BRAND dallo strumento in base al loro volume encoded for tip volume. This allows pointes DD-tips de BRAND à... -
Page 8: Usi Non Previsti
- 8 - Usi non previsti Operating exclusions Interdictions d’emploi Excepciones de uso Nell'uso corretto dello strumento il During proper operation, the dis- Quand l’appareil est utilisé correc- Durante un manejo correcto, la mues- liquido da dosare viene a contatto pensed sample only comes in contact tement, le milieu dosé... -
Page 9: Elementi Funzionali
Elementi funzionali Operating elements Eléments de commande Elementos de manejo Display Affichage Display Pantalla ∇∆-Tasti (+/-) ∇∆-Boutons (+/-) ∇∆ Keys (+/-) ∇∆ Botones (+/-) Tasto ENTER Bouton ENTER ENTER Key Botón ENTER Tasto MENU Bouton MENU MENU Key Botón MENU Couvercle du logement d’accu Coperchio del vano batteria Tapa del compartimento de la... -
Page 10: Messa In Funzione
- 10 - Messa in funzione Initial operation Mise en service initiale Puesta en servicio inicial Inserimento dell'accumulatore Insert battery pack Insérer l’unité d’accus. Colocar la unidad de baterías 1. Aprire il vano batteria e inserire 1. Open the battery compartment 1. -
Page 11: Ricarica Dell'accumulatore
Ricarica dell'accumulatore Charge battery pack Recharger l’unité d’accus. Cargar la unidad de baterías L'accumulatore può essere ricaricato The battery pack can be charged L’unité d’accumulateurs peut être La unidad de baterías se puede cargar nell'HandyStep electronic o anche either inside the HandyStep elec- chargée aussi bien à... - Page 12 - 12 - Ricarica nell' Charging inside Recharger à l’intérieur Cargar dentro HandyStep electronic the HandyStep electronic du HandyStep electronic del HandyStep electronic ® ® ® ® Attenzione: Attention: Attention: Atención: Prima di eseguire la ricarica, Before charging, make sure that Avant de procéder à...
- Page 13 Attenzione: Attention: Attention: Atención: Dopo ogni inserimento di un accu- Upon each battery pack insertion, Après chaque installation d’une unité Depués de colocar una unidad de mulatore il contorno dell'indicatore charge-indicator frame flashes d’accumulateurs, le cadre de l’indication baterías, el marco de la indicación di carica lampeggia finché...
-
Page 14: Sostituzione Dell'accumulatore
- 14 - Ricarica dell'accumulatore Charge battery pack Recharger l‘unité d‘accus. Cargar la unidad de baterías - continuazione - – continued – – suite – – continuación – LED verde Spento Acceso Lampeggiante Etat témoin Eteint Allumé Clignotant lumineux vert Green light status Flashing Estado de la luz... -
Page 15: Accensione E Spegnimento
Accensione Switching on/off Marche et arrêt Encendido y apagado e spegnimento - L'HandyStep electronic può essere - The HandyStep electronic can be - Le HandyStep electronic peut - El HandyStep electronic se puede ® ® ® ® acceso tramite l'inserimento di un switched on by inserting and locking être activé... -
Page 16: Inserimento Dei Puntali
4. If using encoded PD-Tips from codage de BRAND, le volume con codificación, aparece breve- 4. Se si usano i "PD-Tip BRAND" sul BRAND, the PD-Tip capacity and de la pointe DD-tip et l’indication mente en la pantalla el volumen de... - Page 17 - Se la leva di bloccaggio non è - If the locking lever is not fully en- - Si la touche à verrouillage n’est pas - Si la tecla de cierre no ha encajado bloccata correttamente sul display gaged, horizontal bars are shown tout à...
-
Page 18: Rimozione Dei Puntali
- 18 - Rimozione dei puntali Removing tips Enlèvement des pointes Extracción de las puntas 1. Tenere l'HandyStep electronic 1. Hold the HandyStep electronic 1. Tenir le HandyStep electronic sur 1. Mantener el HandyStep electronic ® ® ® ® sopra un contenitore adatto. over a suitable container. -
Page 19: Electronic
Funzioni dell' Functions of the Fonctions du Funciones del HandyStep electronic HandyStep electronic HandyStep electronic HandyStep electronic ® ® ® ® Lo strumento dispone delle seguenti The instrument performs the following L’appareil dispose des fonctions El instrumento ofrece las siguientes funzioni: functions: suivantes:... -
Page 20: Aspirazione Del Liquido
Recomendamos utilizar una punta Raccomandiamo sfiatare un PD-Tip Nous conseillons d’évacuer l’air has to be primed before use. For PD nueva, BRAND recomienda nuovo prima dell’uso. A tale scopo, des pointes DD-tip neuves avant this, fill the tip at a minimum with purgarla. - Page 21 Per interrompere il riempi- To interrupt the filling proce- Pour interrompre le remplis- Para interrumpir el proceso de mento e per sfiatare il PD-Tip: dure and to bleed the PD tip: sage ou pour évacuer l’air de llenado y para purgar la punta la pointe DD-tip : La procedura può...
-
Page 22: Modalità Disp
- 22 - Modalità DISP DISP-mode Mode DISP Modo DISP 1. La freccia sul display indica ∇ 1. The arrow on the display points 1. La flèche sur l’affichage est poin- 1. La flecha en la pantalla apunta downward ∇ ("Dispense"). tée vers le bas ∇... - Page 23 « Note: Nota: Nota: Remarque: Si può sempre vuotare completa- To empty the tip at any time, press Afin de vider la pointe à tout mo- Para vaciar la punta en cualquier the ∇ key and then hold down the instante, accionar el botón ∇...
-
Page 24: Modalità Auto-Disp
- 24 - Modalità AUTO-DISP AUTO-DISP-mode Mode AUTO-DISP Modo AUTO-DISP 1. Premendo brevemente due volte 1. To activate the AUTO-DISP-mode, 1. Afin d’activer le mode AUTO- 1. Para activar el modo AUTO-DISP, il tasto MENU si accede al menù briefly press the MENU key twice. DISP, appuyer deux fois briève- accionar el botón MENU breve- AUTO-DISP. - Page 25 - 25 -...
-
Page 26: Modalità Pip
- 26 - Modalità PIP PIP-mode Mode PIP Modo PIP (Pipettaggio inverso, principio (Reverse pipetting, (Pipetage inverse, (Pipeteado en modo inverso, prin- dello spostamento positivo) positive displacement principle) principe du déplacement positif) cipio del desplazamiento directo) 1. Si accede alla modalità PIP-Modus 1. -
Page 27: Regolazione Del Volume Delle Dosi
Regolazione del Adjusting STEP volume Réglage du volume de Ajuste del volumen volume delle dosi de paso Nota: Note: Remarque: Nota: Dopo il riconoscimento della After the tip size has been recog- Une fois la taille de la pointe Una vez identificado el tamaño de misura del puntale, sul display nized, the dispensing volume is identifiée, le volume de dosage... -
Page 28: Regolazione Della Velocità Di Aspirazione E Erogazione
- 28 - Regolazione della velocità di Adjusting aspiration Réglage de la vitesse Ajuste de la velocidad de aspirazione ed erogazione and dispensing speed d‘aspiration et de dosage aspiración y de dosifica- ción 1. Hold down the MENU key (> 3 s) 1. - Page 29 – 1 x (> 3 s) – - 29 -...
-
Page 30: Modifica Della Modalità Di Funzionamento
- 30 - Modifica della moda- Changing mode Changement de mode Cambio de modo lità di funzionamento 1. Tenendo premuto il tasto MENU (> 1. Hold down the MENU key (> 3 s) 1. Maintenir le bouton MENU enfoncé 1. Mantener apretado el botón MENU 3 s) e poi premendo di nuovo bre- and then press it again briefly. -
Page 31: Selezione Di Puntali Compatibili
Compatible dispenser tips which are Les pointes de dosage compatibles Las puntas de dosificación compa- BRAND, vengono riconosciuti come not manufactured by BRAND are not non originaires de BRAND seront tibles no fabricadas por BRAND las non codificati (vedere "Inserimento encoded for size. - Page 32 - PD-Tips - PD-Tips - Pointes DD-tips - Puntas PD (BRAND GMBH + CO KG, Germania) (BRAND GMBH + CO KG, Germany) (BRAND GMBH + CO KG, Allemagne) (BRAND GMBH + CO KG, Alemania) - Encode™ tips - Encode™...
-
Page 33: Corsa Residua
Corsa residua Residual stroke Surplus de course Sobreembolada Il sistema di bloccaggio impedisce A lock prevents the residual stroke Un arrêt empêche de doser le surplus Un bloqueo de la sobreembolada l'erogazione dell'ultima dose, incom- from being dispensed as a regular de course comme volume dosé... -
Page 34: Individuazione E Soluzione Dei Problemi
- 34 - Individuazione e soluzione dei problemi Problema Codice errore sul display Possibile causa Soluzione Il puntale gocciola Nessuna indicazione Il puntale perde Sostituire il puntale Visualizzazione sul display L'indicatore di carica della Accumulatore scarico Ricaricare l'accumulatore o inserire un accumulatore carico debole / Velocità... - Page 35 Individuazione e soluzione dei problemi - continuazione - Problema Codice errore sul display Possibile causa Soluzione Lo strumento non 3. Informazione sul display: out TIP e CLO alternati / risponde Rimuovere il puntale e chiudere la leva di bloccaggio senza puntale - continuazione - 4.
-
Page 36: Troubleshooting
- 36 - Troubleshooting Problem Error message displayed Possible cause Corrective action Tip dripping No message Leaking tip Replace tip Faint display; Battery symbol flashing Battery low Recharge battery pack reduced speed or replace with charged battery pack. Instrument not responding ERR 001 - Locking lever not engaged 1. - Page 37 Troubleshooting - continued - Problem Error message displayed Possible cause Corrective action Instrument not responding 3. Display alternating between out TIP and CLO. - continued - Remove tip and close locking lever (without tip). 4. HandyStep electronic automatically carries out a ®...
- Page 38 - 38 - Dérangement - que faire? Dérangement Message d’erreur sur l’affichage Cause possible Que faire? La pointe goutte Aucun message Pointe non étanche Remplacer la pointe. Affichage de faible intensité; Symbole de la batterie Energie de l’unité Recharger l’unité d’accumulateurs ou la remplacer par vitesse réduite clignote d’accumulateurs faible...
- Page 39 Dérangement - que faire? - suite - Dérangement Message d’erreur sur l’affichage Cause possible Que faire? L’appareil ne répond pas 3. Affichage alternant entre out TIP et CLO. - suite - Enlever la pointe et fermer la touche à verrouillage (sans pointe).
- Page 40 - 40 - ¿Qué hacer en caso de avería? Avería Aviso de fallo en la pantalla Causa probable Solución La punta gotea Ningún aviso Punta no hermética Reemplazar la punta. Indicación débil en la pantalla; El símbolo de la batería Carga baja de la unidad de Recargar la unidad de baterías o reemplazarla por una velocidad reducida...
- Page 41 ¿Qué hacer en caso de avería? - continuación - Avería Aviso de fallo en la pantalla Causa probable Solución El instrumento no responde 3. En la pantalla indicación alternando entre out TIP y CLO. - continuation - Retirar la punta y cerrar la tecla de cierre (sin punta). 4.
-
Page 42: Caratteristiche Tecniche
- 42 - Caratteristiche tecniche Technical data Données techniques Datos técnicos Batterie: Battery pack: Unité d’accumulateurs: Unidad de baterías: Batterie al nichel-metal-idruro: Rechargeable Nickel Metal Hydride unité d’accumulateurs de type hydrure unidad de baterías nickel-hidruro NiMH, 4 x pile AAA, battery pack: métallique de nickel, rechargeable metálico, recargable:... -
Page 43: Tabella Della Precisione
BRAND PD-Tips and distilled utilisant des pointes DD-tips d’origine utilizando puntas PD originales de liquido di prova è stata usata acqua water. de BRAND et de l’eau distillée. BRAND y agua destilada. distillata. 20 °C A* / A* / E* / E* _ CV* / CV* / CV* / CV* _ ±... -
Page 44: Dati Per L'ordinazione
Dati per l'ordinazione Ordering Data Données de commande Referencias HandyStep electronic HandyStep electronic HandyStep electronic HandyStep electronic ® ® ® ® inclusi accumulatore e caricabatteria incl. NiMH battery pack, charging avec unité d’accumulateurs NiMH et incl. unidad de baterías de NiMH, dock chargeur incl. - Page 45 Puntali di precisione per dosatori Positive Displacement Tips Pointes de precision pour dosage Puntas de desplazamiento directo – PD-Tip – con misura codificata – PD-Tips – with tip-size encoding – DD-tips – à codage indiquant le – Puntas PD – con codificación type de pointe indicando el tipo de punta Misura...
-
Page 46: Manutenzione E Pulizia
- 46 - Manutenzione e pulizia Maintenance and cleaning Entretien et nettoyage Mantenimiento y limpieza L’HandyStep electronic è tarato in The HandyStep electronic is Le HandyStep electronic a été cali- El HandyStep electronic ha sido cali- ® ® ® ® fabbrica e non richiede alcuna manu- calibrated at the factory and is bré... - Page 47 En los EE.UU. y Canadá: – Si invita a chiarire i requisiti per – Contact BrandTech Scientific, Inc. – Veuillez contacter BrandTech – Haga el favor de dirigirse a Brand- la restituzione con BrandTech and obtain authorization for the Scientific, Inc. pour demander les Tech Scientific, Inc.
-
Page 48: Indirizzi Di Contatto
- 48 - Indirizzi di contatto/Contact addresses/Adresses de contact/Direcciones de contacto BRAND GMBH + CO KG USA and Canada India: China: Otto-Schott-Straße 25 BrandTech BRAND (Shanghai) Trading Co., Ltd. ® Scientific, Inc. BRAND Scientific Equipment 97877 Wertheim (Germany) 11 Bokum Road Pvt. -
Page 49: Garanzia
Dopo pochi giorni service or the BRAND-owned DAkkS possibilité de faire calibrer vos instru- BRAND o por el laboratorio de cali- riceverete gli strumenti accompagnati calibration service. ments par notre service de calibration brado DAkkS. -
Page 50: Warranty
- 50 - Garanzia Warranty Garantie Garantía Non ci assumiamo alcuna responsa- We shall not be liable for the conse- Nous déclinons toute responsabilité No seremos responsables de las bilità per le conseguenze di manipo- quences of improper handling, use, en cas de conséquences d‘un traite- consecuencias derivadas del trato, lazione, uso, manutenzione e impiego... -
Page 51: Disposal
Smaltimento Disposal Elimination Eliminación Il simbolo accanto segnala che alla The adjoining symbol Le symbole ci-contre signifie qu’à El siguiente símbolo significa que al fine della loro vita utile le batterie/ means that storage batte- la fin de leur durée de vie, les final de su vida útil, las pilas / acu- accumulatori e le apparecchiature ries and electronic devices... - Page 52 - 52 - ² Premere brevemente il tasto MENU / Press MENU key briefly « Premere a lungo il tasto MENU (> 3 s) / Hold down MENU key (> 3 s) Livello 1 del menù / Menu level 1 Regolazione del volume delle / adjust STEP-volume Modalità...
- Page 53 Livello 2 del menù / Menu level 2 Modifica della velocità di aspirazione/ Modifica della velocità di erogazione/ adjust aspiration speed adjust dispensing speed Modalità standard/ Livello 2/ – Default mode Level 2 ² ² Selezione della modalità DISP-PIP/ select DISP-PIP mode «...
- Page 54 - 54 - ² Appuyer brievement sur le bouton MENU / Accionar el botón MENU « Maintenir enfoncé le bouton MENU (> 3 s) / Accionar el botón MENU continuamente (> 3 s) Niveau de Menu 1 / Nivel de selección (modo) 1 Modifier le volume de pas/ Modificación del volumen de paso Mode standard...
- Page 55 Niveau de Menu 2 / Nivel de selección (modo) 2 Modifier la vitesse d’aspiration/ Modifier la vitesse d’évacuation/ Modificación de la velocidad Modificación de la velocidad de aspiración de expulsión Mode standard Niveau 2 – Modo éstandar Nivel 2 ² ²...
- Page 56 DE 19915066, US 6740295, EP 1110612, US 6540964, EP 1177831 and US 6841129. The use of dispenser tips with a coding on the plunger head is subject to the above BRAND patents. 9974 62 · Printed in Germany · 21/0517/7...
Need help?
Do you have a question about the HandyStep electronic and is the answer not in the manual?
Questions and answers